Feb 21, 2017 | Blog Hop, Cards, Gallery, Sale-A-Bration, Techniques |
Welcome to the February edition of the Thailand Achievers’ Blog Hop! Today we’re featuring more products from the Occasions & Sale-a-bration (SAB) catalogs. I’m sharing two cards today (one made with the Custom Tee bundle and the Designer Tee stamp set, and one made with the Lift Me Up bundle and the Carried Away Designer Series Paper) that show how well the items in both catalogs go together.
I can’t wait to see what all the talented folks in this group have for us today!

Here’s what I made:
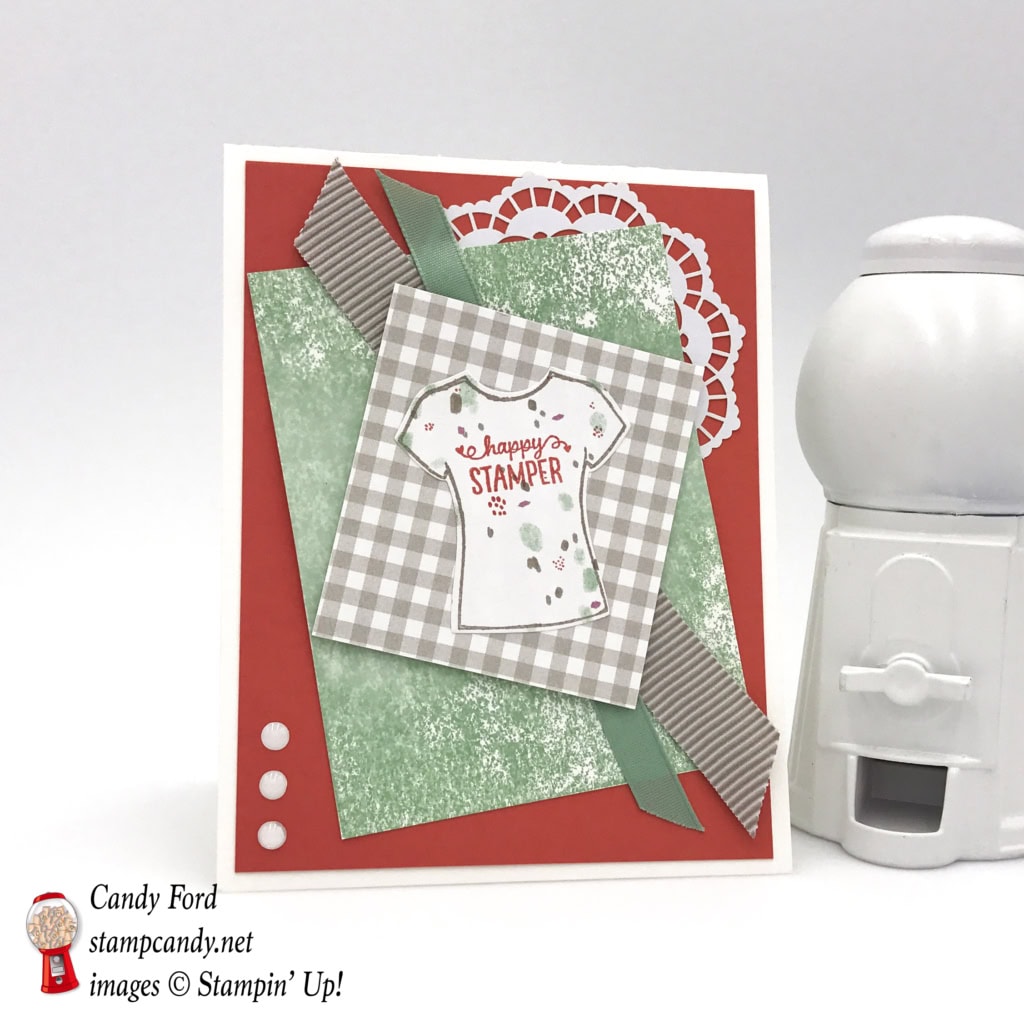
For this card, I used the Custom Tee bundle from the Occasions catalog with the Designer Tee stamp set from the SAB catalog:
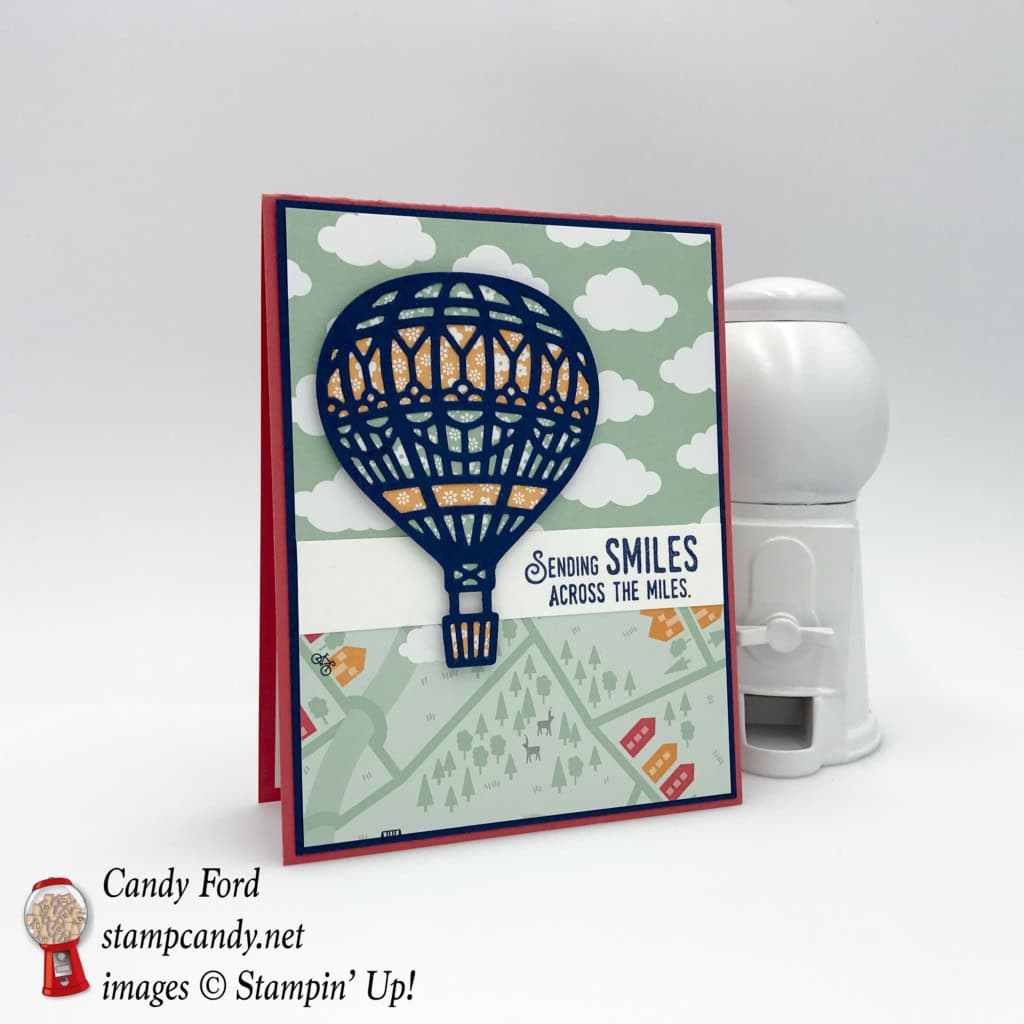
I used the Lift Me Up bundle from the Occasions catalog and the Carried Away Designer Series Paper (DSP) from the SAB catalog to create this fun card:
Scroll down to see how I made these two cards, and to purchase the products I used.
Here’s a guide for the hop:
Be sure to check out all the wonderful projects!
Here’s what I did:
Tee Shirt Card
The card base is Whisper White Thick card stock (CS) with a Calypso Coral CS layer glue to the front.
For the next layer, I got this mottled look by inking up a large clear block with my Mint Macaron ink pad, spritzing it just a tiny bit with water, then stamping it onto a piece of Whisper White CS. Pretty cool, eh? I glued this layer to the card front, tucking half a doily under one corner. (By halving the doily, I can use it on 2 cards.)
For the shirt, I stamped the outline in Tip Top Taupe ink onto another piece from the Succulent Garden DSP, then cut it out with the corresponding die in the T-Shirt Builder Framelits. I chose this particular paper design because I think it makes the shirt look like it has been splattered with ink; and since I’m a very messy crafter, it seemed appropriate. Next I stamped the sentiment from the Custom Tee stamp set in Calypso Coral ink. I glued the shirt to another piece of Succulent Garden DSP.
I adhered a couple pieces of ribbon to the card front with Fast Fuse, then adhered the shirt/DSP panel over the ribbons with Stampin’ Dimensionals.
The final touch was to add three White Perfect Accents in the bottom left corner
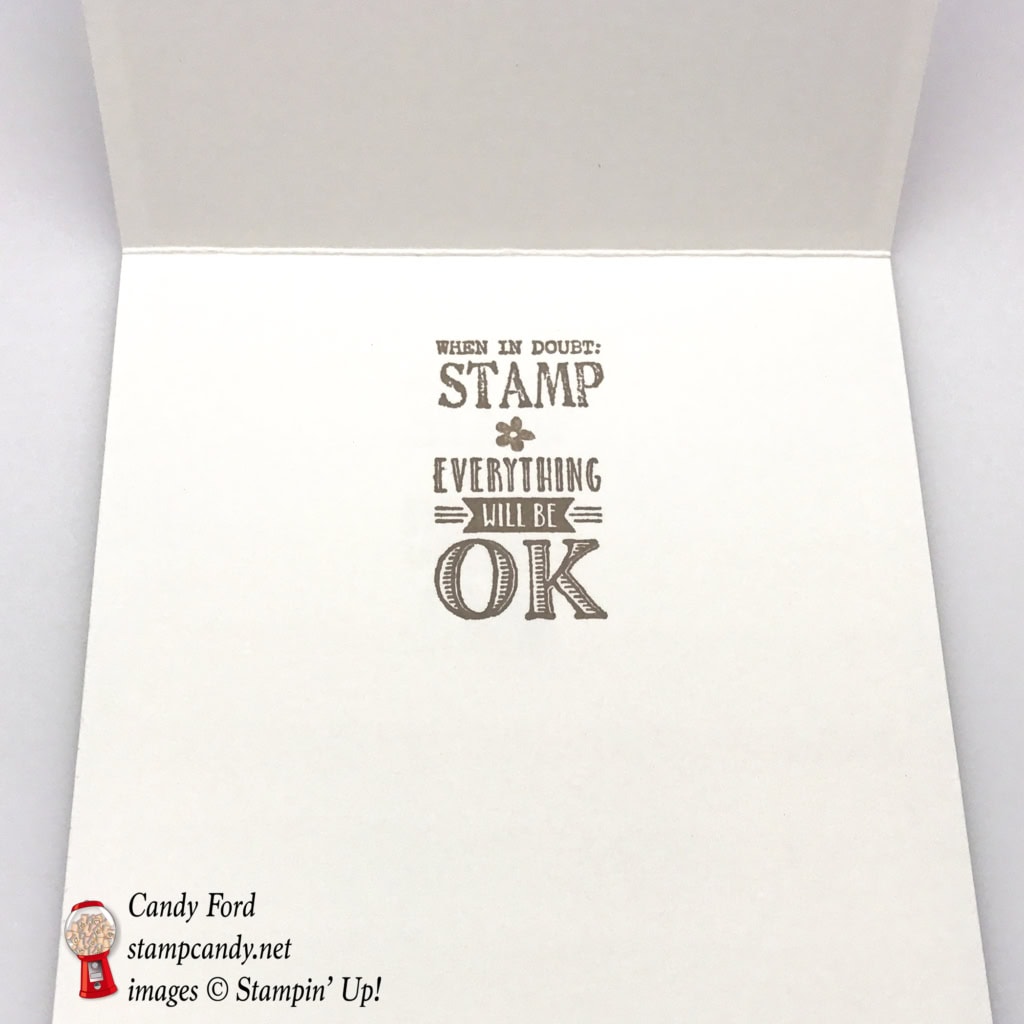
For the inside, I used Tip Top Taupe ink to stamp two sentiments from the Designer Tee stamp set. I wanted to stamp “and” or “&” between the two, to make it one sentiment, but I couldn’t find one I liked. So I stamped a tiny flower from the Custom Tee stamp set between them.
Balloon Card
The card base is Watermelon Wonder CS with a Night of Navy CS layer glued to the front.
I cut two different pieces of Carried Away DSP and glued them to the card front.
Then I stamped the sentiment in Night of Navy ink onto a strip of Whisper White CS and glued that over the line where the two pieces of DSP meet.
I used the Up & Away Thinlits to cut the balloon from Night of Navy CS, and the backing pieces from Peekaboo Peach and Mint Macaron paper from the In Color DSP Stacks. I glued all the pieces to the back of the balloon, then adhered that to the card with Stampin’ Dimensionals.
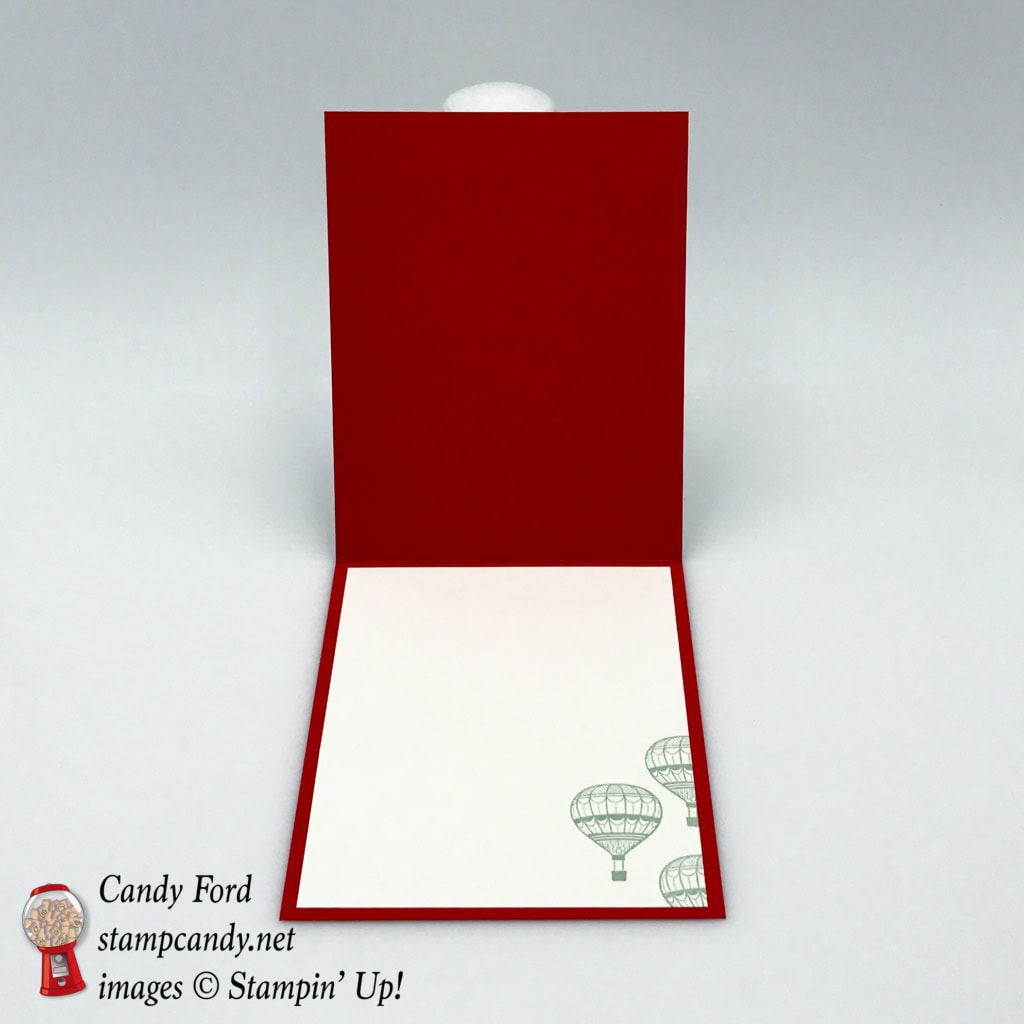
For the inside, I stamped the small balloons from the Lift Me Up stamp set in Mint Macaron onto a piece of Whisper White DSP, then glued that to the card’s interior.
Here’s what I used:
(The items with a price of $0.00 are SAB items that you can only earn by purchasing $50 in product.)


Now through March 31, you will earn a FREE item from the Sale-a-bration catalog for each $50 you spend on an order. See the items you can earn here.
 PLUS you will earn a Gum Ball for every $50 you spend on an order with me. Earn 10 Gum Balls and I’ll send you a free stamp set of your choice! See Gum Ball Rewards for details.
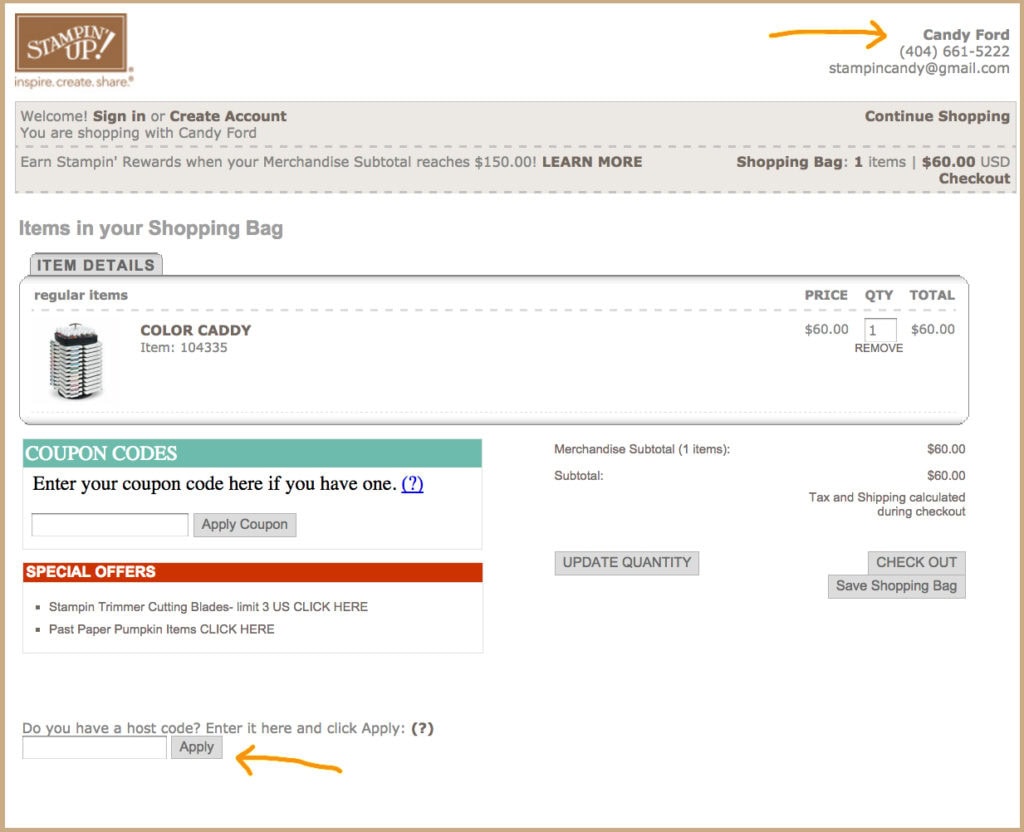
Click here to shop my online store.
February Host Code
C7RRWU4B
If you are placing an online order for less than $150, please add this Hostess Code when you place your order. I will send you a free gift.
If you are placing an order of $150 or more, you will receive Stampin’ Rewards on your order, so do not use the Hostess Code. You will automatically receive a free gift.
Click here for details on how to use the Hostess Code.
Click here to shop my online store.
How to use the Hostess Code:
- Go to my online store and create or sign in to your online account. Be sure that I am listed as your demonstrator.
- Shop! Add the items you want to your cart.
- Enter the Hostess Code before Checkout.
Click on image to enlarge.
Thanks for stopping by today, and Sweet Stamping!

Feb 15, 2017 | Blog Hop, Cards, Gallery, Guest Stamper, Occasions, Sale-A-Bration |
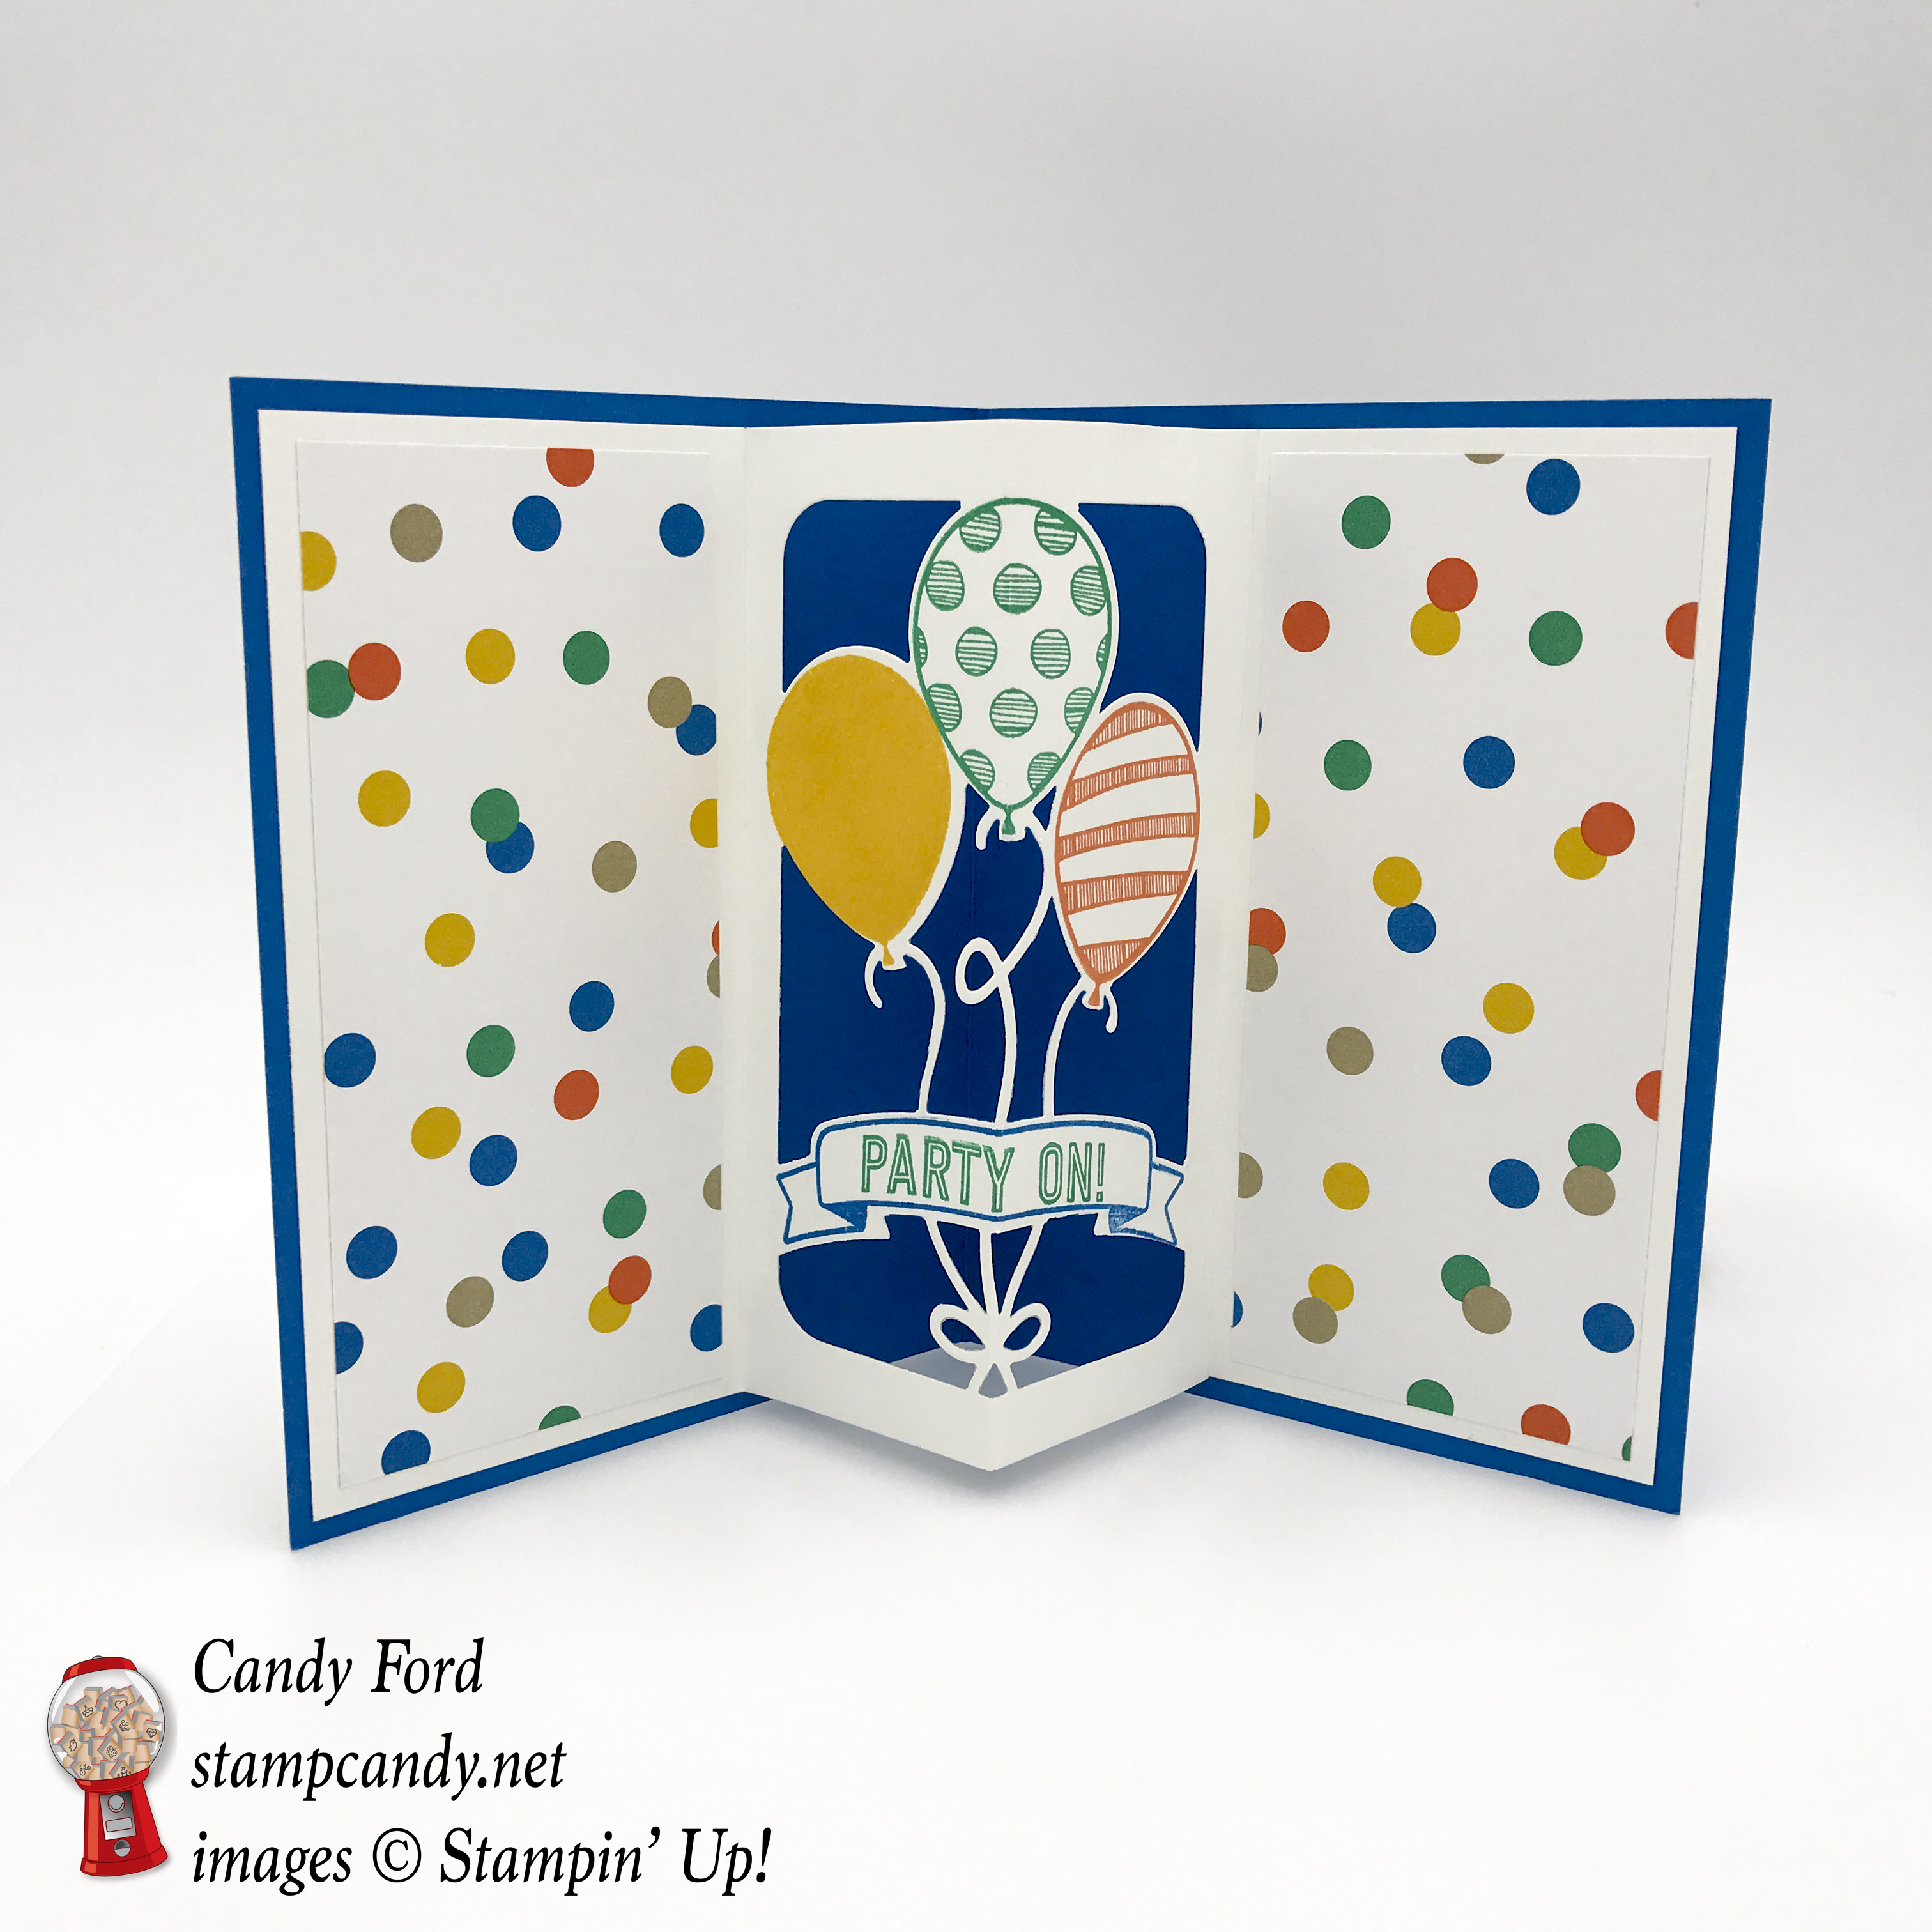
Welcome to InKing Royalty’s February Blog Hop! Today’s hop is filled with projects inspired by a Birthday Bliss theme. What fun! When I learned the hop’s theme, I knew I had to make a pop up card with the Balloon Adventures bundle and the Party Animal Designer Series Paper (DSP.)


Balloon Adventures bundle © Stampin’ Up!

Party Animal DSP © Stampin’ Up!
Stampin’ Up! catalogs are filled with fun, festive and beautiful ways to make birthdays special, and we are excited to share our creations with you today. We are also excited to welcome guest designer Michelle Last to our team hop this month. After you read my post, I hope you’ll hop over to the next person on the list at the base of this post.
Here’s what I made:


Scroll down for directions and the products I used.
I’m so glad you’re hopping with us today! I hope you’ll hop along to the next stop, Karen Browning at StampWithMeKZB. Thank you for hopping along with us. If you get stuck during the Blog Hop, please use this line-up as a guide:
- Brian King at Stamp with Brian
- Julie DiMatteo at The Paper Pixie
- Denise Hoepfner at The Mountain Magpie
- Candy Ford at Stamp Candy
- Karen Browning at StampWithMeKZB
- Katie Ferguson at Cottage Paper
- Imogene Thomas at MomoMakes.com
- Michelle Last at MichelleLast.co.uk
- Jennifer Spiller at Westside Paper Creations
- Lory Robinson at The Robins Nest Designs
- Shawn de Oliveira at ShawnStamps
- Pam Morris at Tap Tap Stamp
- Lisa Pretto at Ink Big Academy Stamps
Here’s what I did:
Cut and scored with my Stampin’ Trimmer:
- Pacific Point card stock (CS) cut to 5-1/2″ x 8-1/2″, and scored in half at 4-1/4″.
- Crushed Curry CS cut to 4″ x 5-1/4″.
- Whisper White CS cut to 3-3/4″ x 5″.
- Whisper White CS cut to 5-1/4″ x 8-1/4″ then scored in half at 4-1/8″.
- Party Animals DSP (front) to 3-3/4″ x 2-1/2″.
- 2 pieces of Party Animals DSP to __” x 5″.
Die cut with theBalloon Pop-Up Thinlits:
- I laid the largest die from the set on the larger (5-1/4″ x 8-1/4″) piece of Whisper White CS, lining up the center markers of the die with the score line on the paper, and ran it through my Big Shot. The die cuts out the balloons and scores the lines on either side.
Stamped with the Balloon Adventures stamp set:
Front:
- sentiment in Emerald Envy ink onto the top half of the smaller (3-3/4″ x 5″) piece of Whisper White CS.
Inside:
- balloons from the Balloon Adventures stamp set in Crushed Curry, Emerald Envy, and Tangerine Tango onto the die cut piece.
- banner in Pacific Point onto the die cut piece.
- banner sentiment in Emerald Envy onto the die cut piece.
Colored:
- filled in the letters on the front with a Tangerine Tango Stampin’ Write Marker.
Assembled card:
Front:
- glued a piece of Party Animal DSP to the bottom half of the smaller piece of Whisper White CS.
- wrapped a piece of Emerald Envy Taffeta Ribbon along the line and adhered the ends to the back. Adhere the first piece of ribbon only to the back and not to the front, so you can slide the second piece under it to tie the knot.
- slid a smaller piece of the ribbon under the first piece and tied a simple knot.
- glued card front to the Crushed Curry CS.
- glued the Crushed Curry CS to the front of the Pacific Point CS card base.
Inside:
- folded the die cut piece on the score lines and made sure it would fold flat inside the card base, then glued the panel at each end to the inside of the card base. Do not worry about folding the loop in the balloon string in the center. It will be hidden when the card is closed.
- glued the two remaining pieces of DSP to the white panels on each side.
Here’s what I used :
Click on the images for more details and to purchase.
Sale-a-brate good times, come on! It’s a
Now through March 31, you will earn a FREE item from the Sale-a-bration catalog for each $50 you spend on an order. See the items you can earn here.
PLUS you always earn a Gum Ball for every $50 you spend on an order from me. Earn 10 Gum Balls and I’ll send you a free stamp set of your choice! Click on Gum Ball Rewards at the top of this page for details.
If you haven’t already, be sure to read yesterday’s post for a chance to win some blog candy! You only have until midnight tonight.
Thanks for stopping by today, and Sweet Stamping!
Feb 1, 2017 | Blog Hop, Cards, Gallery, Holiday, Sale-A-Bration |

Greetings Stampin’ Friends! It’s the first Wednesday of the month and you know what that means, right? BLOG HOP TIME! I can’t wait to see what this talented group of stampers has made to share. Thanks for joining us this month, and feel free to leave us some love in the form of comments!
We wanted to share some love with you this month, so our theme is Happy Valentine’s Day!
Here’s what I made:
Here’s how I did it:
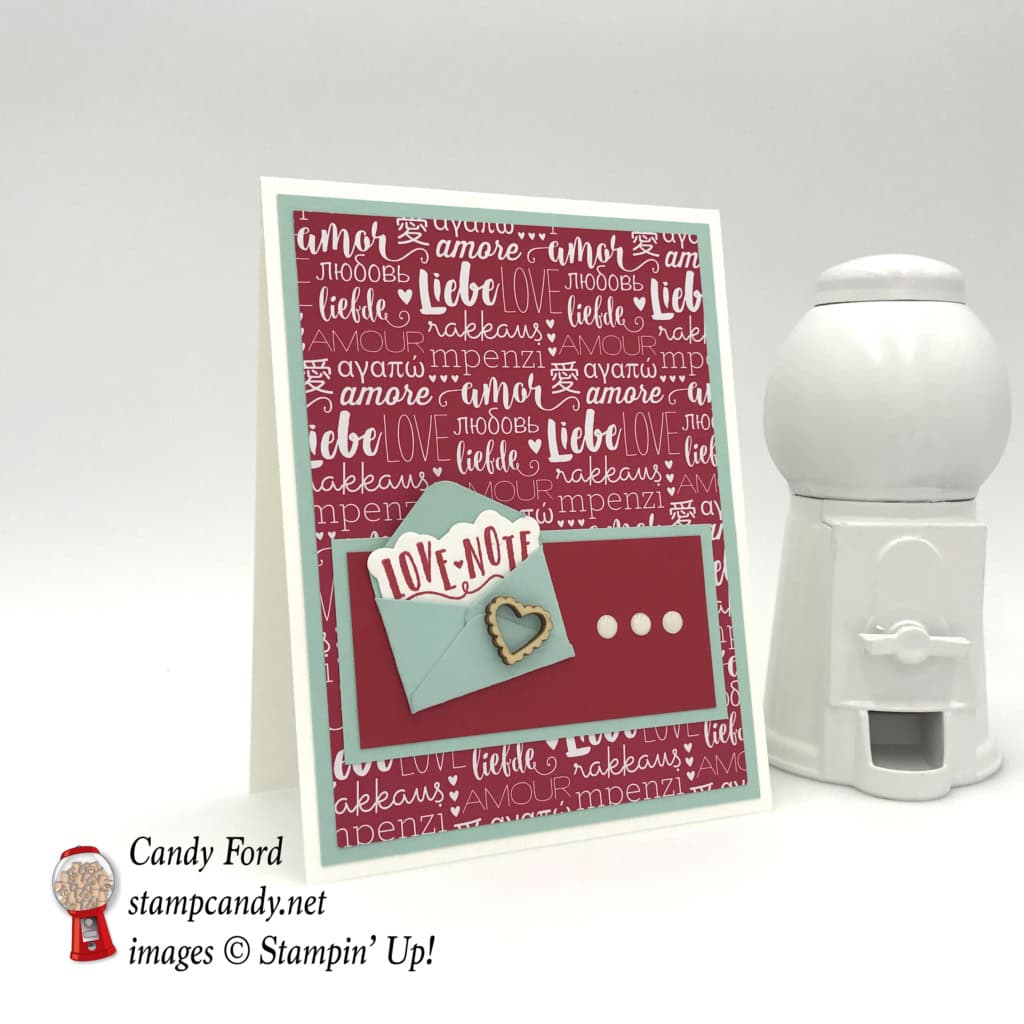
The card base is Thick Whisper White card stock (CS) and has a Pool Party CS layer, then a layer of Sending Love Designer Series Paper (DSP.)
The smaller panel is a piece of Real Red CS matted on a piece of Pool Party CS.
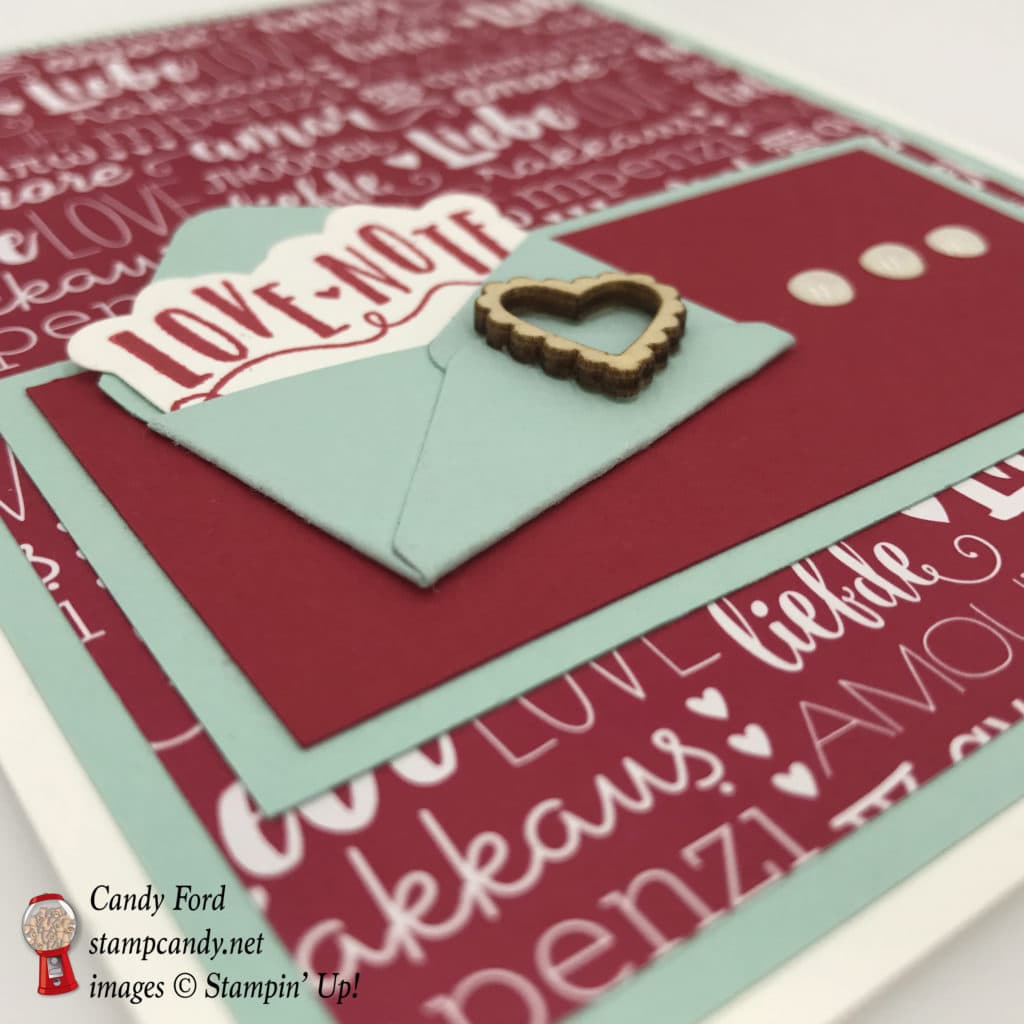
The love note image from the Sealed with Love stamp set is stamped in Real Red ink onto Whisper White CS. It and the Pool Party envelope are cut with the Love Notes Framelits Dies.
The heart is from the Sending Love Embellisnments. The white dots are White Perfect Accents.
I used glue for everything on this card, except the self adhesive white accents, of course.
And did I mention that the Sealed with Love stamp set and the Love Notes Framelits are available in a bundle? That saves you 10%!
Now hop on over to Jennifer Blomquist’s blog and see what she has to share this month:

Here’s what I used:
*********************
Sale-a-bration (SAB)
through March 31, 2017
This is the biggest promotion Stampin’ Up! offers each year! Here are 5 different ways to take advantage of SAB:
- SHOP – For every $50 you spend (before tax and shipping) on an order, you get one SAB item FREE!
- HOST – When you host a party/workshop with sales of $250, you get the regular Stampin’ Rewards PLUS $25 more in FREE product!
- JOIN – When you buy the Starter Kit for $99, you get FREE shipping, $125 of your choice of product, a FREE Paper Pumpkin kit, business supplies for you to use IF you want a business (hobby demos are welcome – just buy for yourself at a discount) PLUS 2 extra FREE stamp sets of any value (that’s up to $104 in extra FREE product!)
- SELL – As a demonstrator, as your sales/purchases rise during SAB, so do your rewards – more FREE products!
- SHARE – When you share the Starter Kit with others during SAB, you will receive amazing rewards! For the first person who joins under you, you get $25 in product. For the second one, you get 15,000 Flex points. You would have to sell/buy $11,000 to earn that many points! The points can be redeemed for all sorts of things: products, business supplies, even a trip!
*********************
Thanks for stopping by today, and Sweet Stamping!
Jan 4, 2017 | Blog Hop, Cards, Gallery, New Products, Occasions, Sale-A-Bration |
Today is a big day! The brand new 2017 Occasions Catalog is live AND it’s the first day of Sale-a-bration 2017!!! So for the Inspire, Create, Share January Blog Hop, we are highlighting products from the new Sale-a-bration brochure.
At the bottom of this post is the list of items from the 2016 Holiday Catalog that have been carried over to the Occasions Catalog.
Here’s what I made:
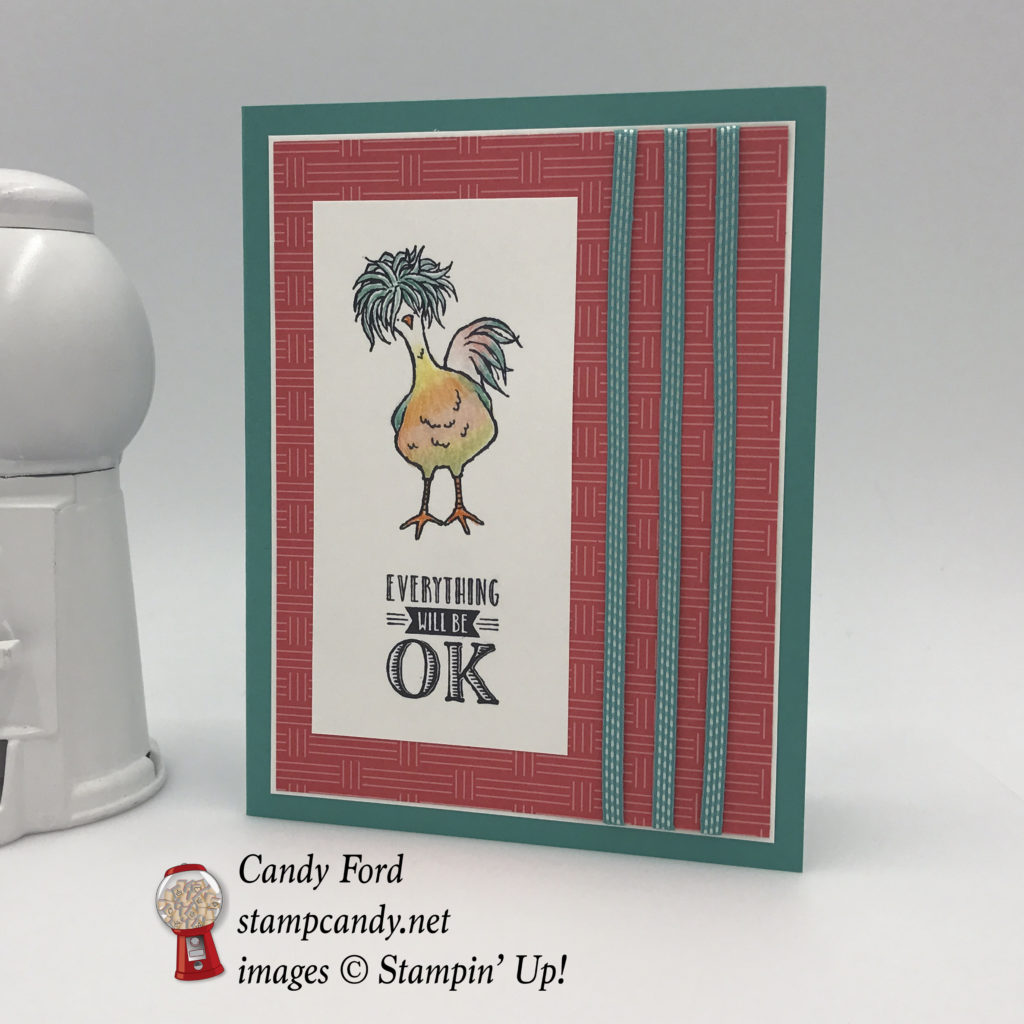
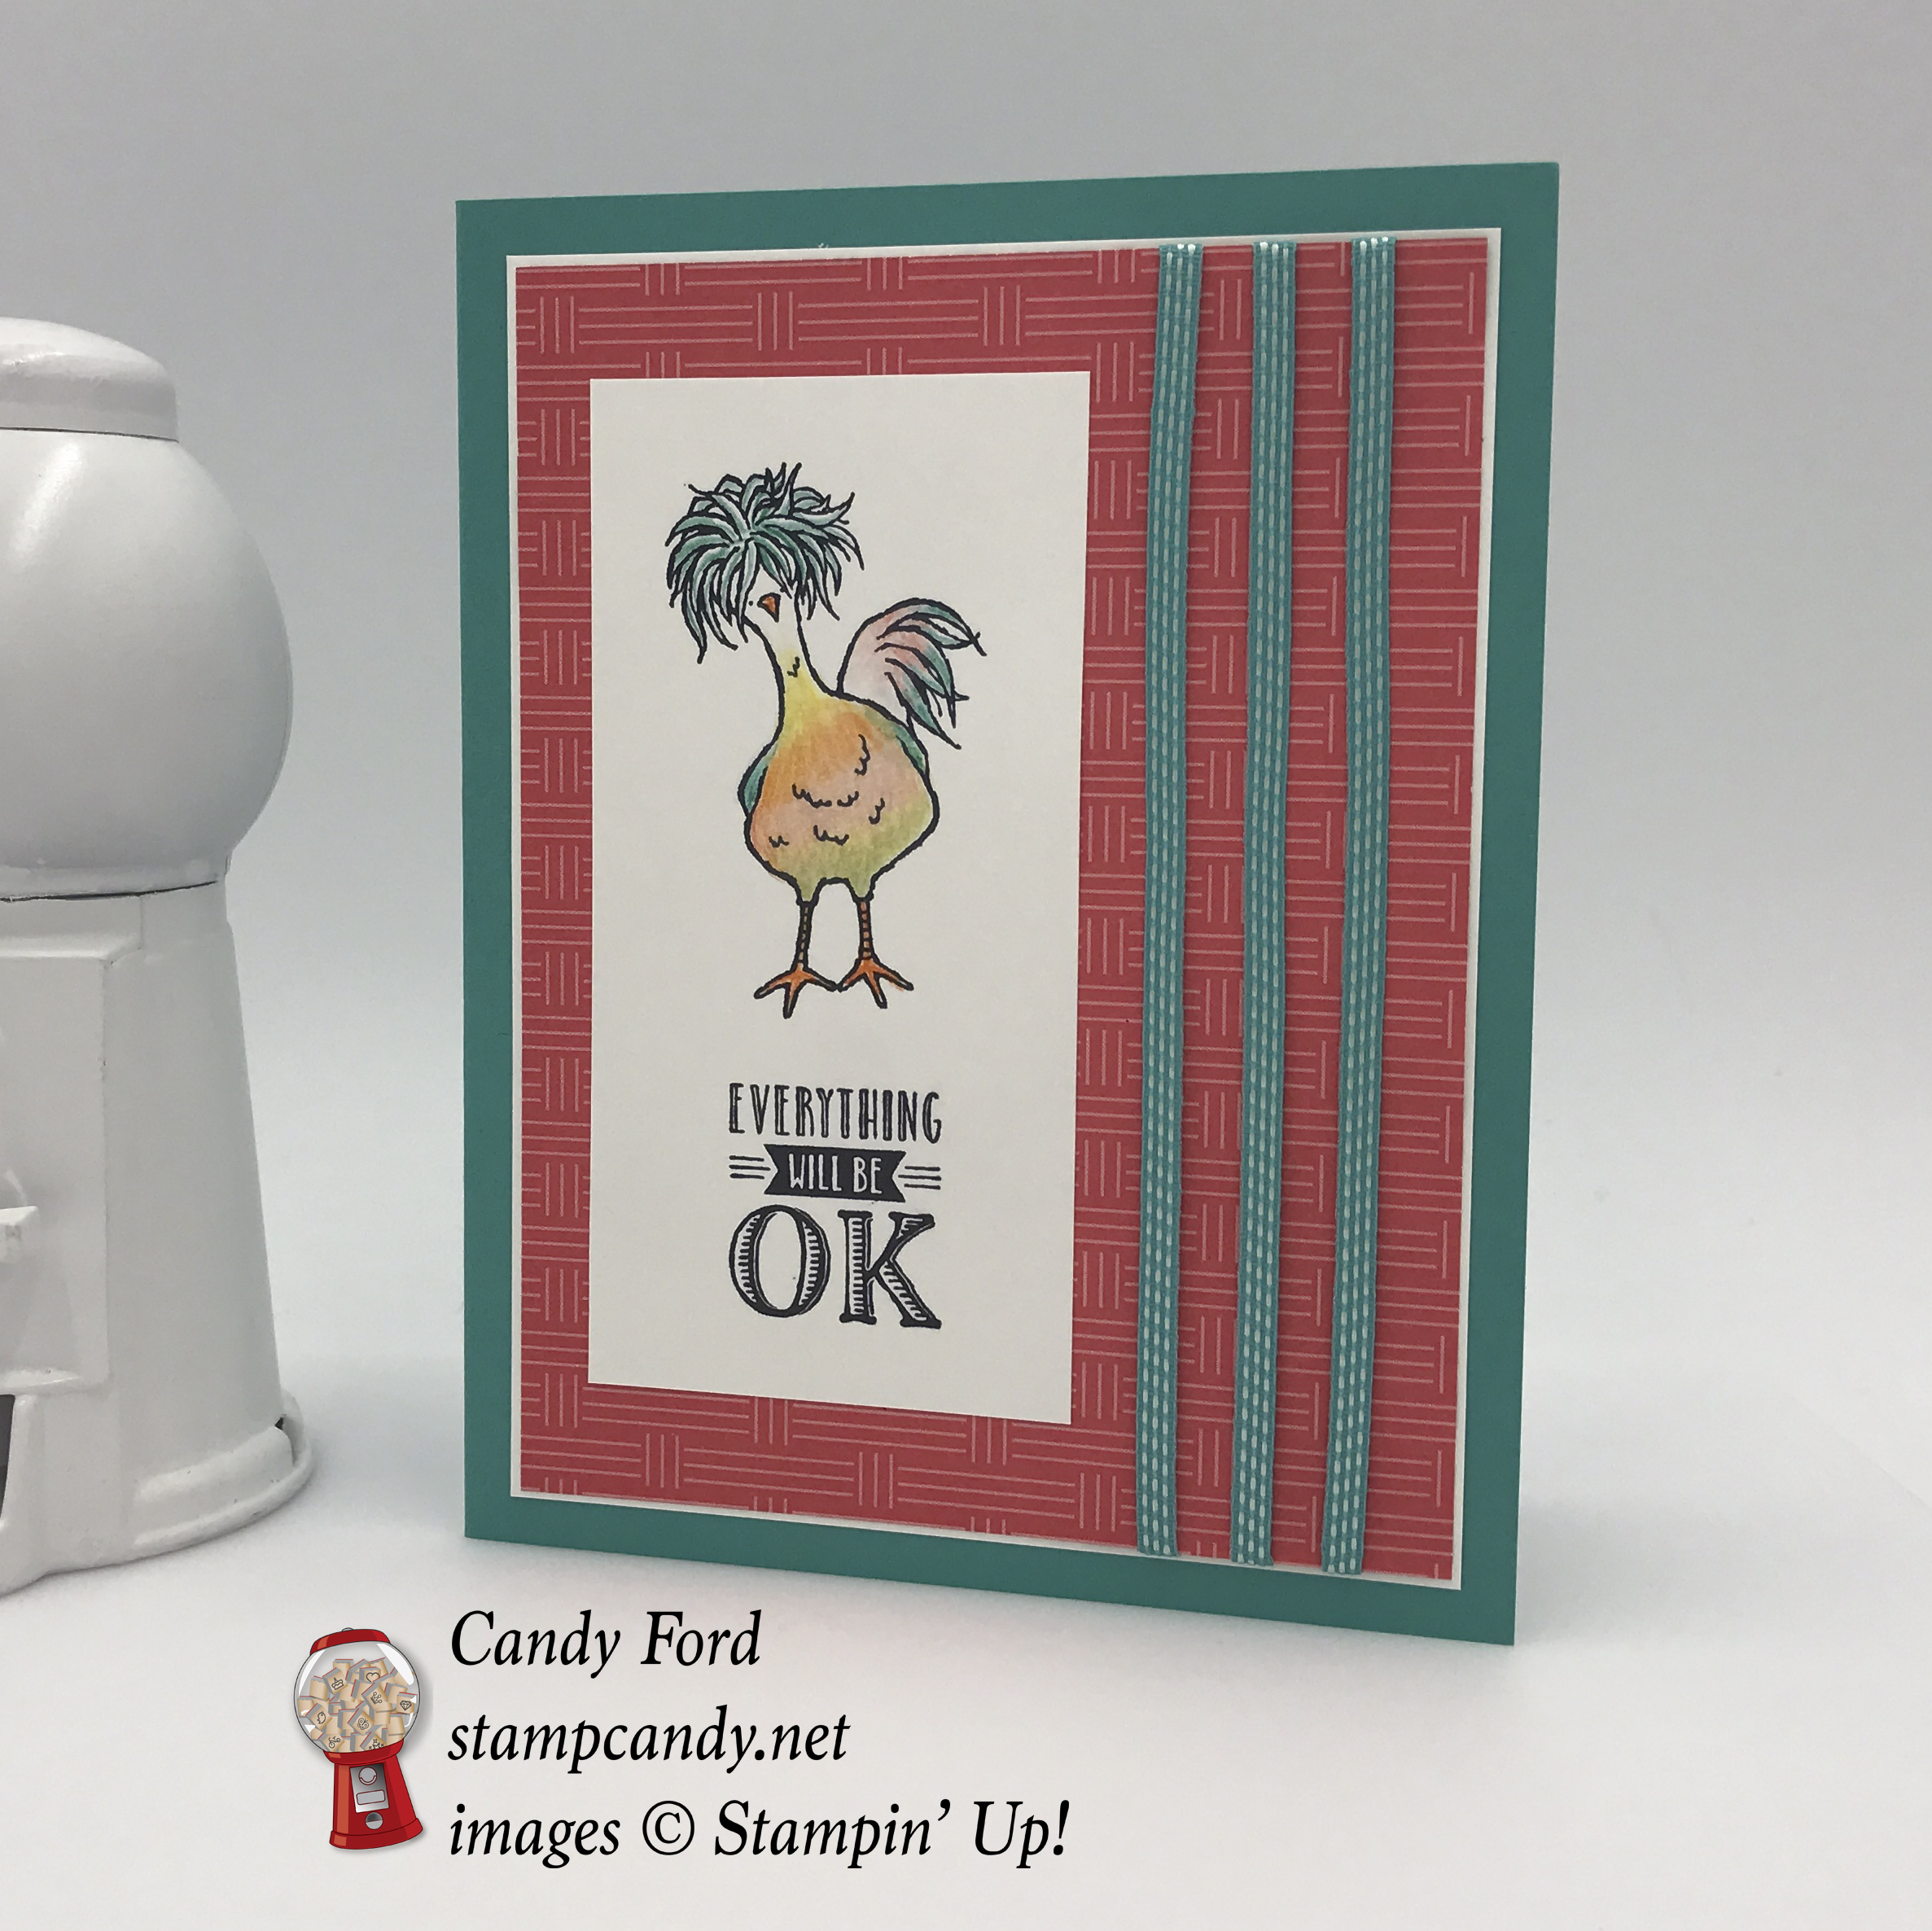
This funny chicken just makes my day. Talk about a bad hair day!
Here’s how I did it:
* Sale-a-bration item
I stamped the chicken from the *Hey, Chick stamp set, and the sentiment from the *Designer Tee stamp set, in Basic Black ink onto a piece of Whisper White card stock.
I colored the chicken with the new Watercolor Pencils in Bermuda Bay, Daffodil Delight, Calypso Coral, Melon Mambo, Old Olive, and Pumpkin Pie. I used an Aqua Painter to gently blend the colors. I probably should have used Shimmer White card stock, or a Blender Pen instead of an Aqua Painter, but I was very careful not to get it too wet.
I glued the stamped piece to a piece of *Carried Away Designer Series Paper. I also wrapped three pieces of Bermuda Bay ribbon around the DSP, adhering it on the back with Fast Fuse.
I glued the DSP to a piece of Whisper White card stock, and glued that to a Bermuda Bay card base. I also glued a piece of Whisper White CS to the inside of the card for a handwritten note. (Or you could write on the card base with a white pen.)
Click on the next button to go to the next blog on the hop, Deb Naylor of the Flying Stamper:

Here’s what I used:
Hey, Chick stamp set (#143328 wood, # 143331 clear mount) FREE with $50 purchase
Designer Tee stamp set (#143356 wood, #143359 clear mount)FREE with $50 purchase
Carried Away DSP (#143608)FREE with $50 purchase

| PAGE | ITEM | DESCRIPTION |
|---|
| Stamp Sets |
| 49 | 142200 | Basket of Wishes Photopolymer Stamp Set |
| 19 | 142887 | Sapins de Noël Photopolymer Stamp Set (French) |
| 19 | 142049 | Christmas Pines Photopolymer Stamp Set |
| 6 | 142043 | Cookie Cutter Christmas Photopolymer Stamp Set |
| 6 | 143018 | Emporte-pièce de Noël Photopolymer Stamp Set (French) |
| 22 | 142125 | Father Christmas Clear-Mount Stamp Set |
| 22 | 142122 | Father Christmas Wood-Mount Stamp Set |
| 42 | 142202 | Glamper Greetings Photopolymer Stamp Set |
| 15 | 143036 | Bas de Noël Photopolymer Stamp Set (French) |
| 15 | 142114 | Hang Your Stocking Photopolymer Stamp Set |
| 39 | 143040 | Saison Pétillante Clear-Mount Stamp Set (French) |
| 39 | 142101 | Here’s to Cheers Clear-Mount Stamp Set |
| 39 | 142098 | Here’s to Cheers Wood-Mount Stamp Set |
| 27 | 143046 | Houx Pour Noël Photopolymer Stamp Set (French) |
| 27 | 142061 | Holly Berry Happiness Photopolymer Stamp Set |
| 47 | 142196 | Paisleys & Posies Photopolymer Stamp Set |
| 24 | 143123 | Traîneau de Noël Photopolymer Stamp Set (French) |
| 24 | 142057 | Santa’s Sleigh Photopolymer Stamp Set |
| 26 | 143127 | Cloches de Circonstance Clear-Mount Stamp Set (French) |
| 26 | 142107 | Seasonal Bells Clear-Mount Stamp Set |
| 26 | 142104 | Seasonal Bells Wood-Mount Stamp Set |
| 9 | 143142 | Étoile Lumineuse Photopolymer Stamp Set (French) |
| 9 | 142110 | Star of Light Photopolymer Stamp Set |
| 40 | 143156 | Doux Foyer Photopolymer Stamp Set (French) |
| 40 | 140936 | Sweet Home Photopolymer Stamp Set |
| Accessories |
|---|
| 5 | 141982 | Real Red 12″ x 12″ Cardstock |
| 7 | 142635 | Real Red Glitter Stampin’ Emboss Powder |
| 7 | 142668 | Emerald Envy Glitter Stampin’ Emboss Powder |
| 7 | 142000 | White Gift Boxes |
| 31 | 142009 | Emerald Envy 6″ x 8″ Project Life Album |
| 31 | 142010 | Variety Pack 2 6″ x 8″ Project Life Photo Pocket Pages |
| 47 | 142020 | Copper Foil Sheets |
| 6 | 140396 | Cookie Cutter Builder Punch |
| 27 | 141843 | Holly Berry Builder Punch |
| 26 | 141846 | Bell Punch |
| 19 | 141851 | Pretty Pines Thinlits Dies |
| 9 | 141840 | Starlight Thinlits Dies |
| 46 | 141849 | Paisley Framelits Dies |
| 24 | 140278 | Santa’s Sleigh Thinlits Dies |
| 15 | 141841 | Christmas Stockings Thinlits Dies |
| 11 | 141836 | Detailed Santa Thinlits Dies |
| 40 | 141838 | Cheerful Tags Framelits Dies |
| 40 | 140279 | Home Sweet Home Thinlits Dies |
| 13 | 143537 | Cable Knit Dynamic Textured Impressions Embossing Folder |
| 39 | 142001 | 6″ x 17″ Gusseted Cellophane Bags |
Thanks for stopping by today, and Sweet Stamping!
Mar 19, 2016 | Bags, Boxes, Cards, Challenges, Occasions, Sale-A-Bration |

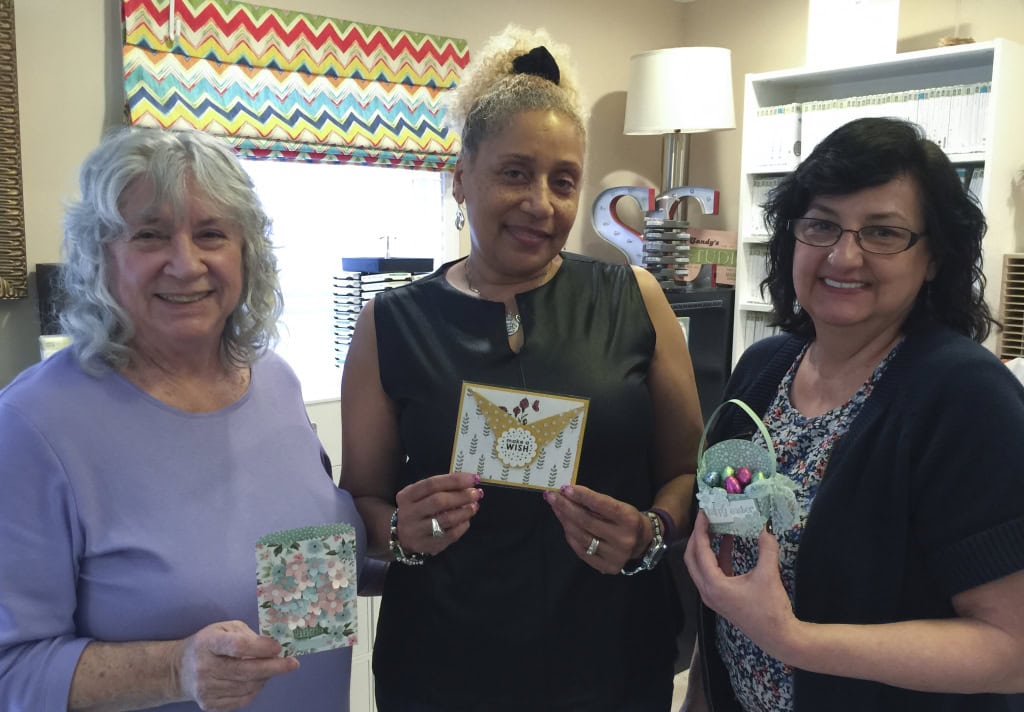
Yesterday I told you about our March Candy Hearts team meeting. You can see that post here. Today I’m sharing the Creative Challenge entries with you. March’s challenge was to create something with FLOWERS.
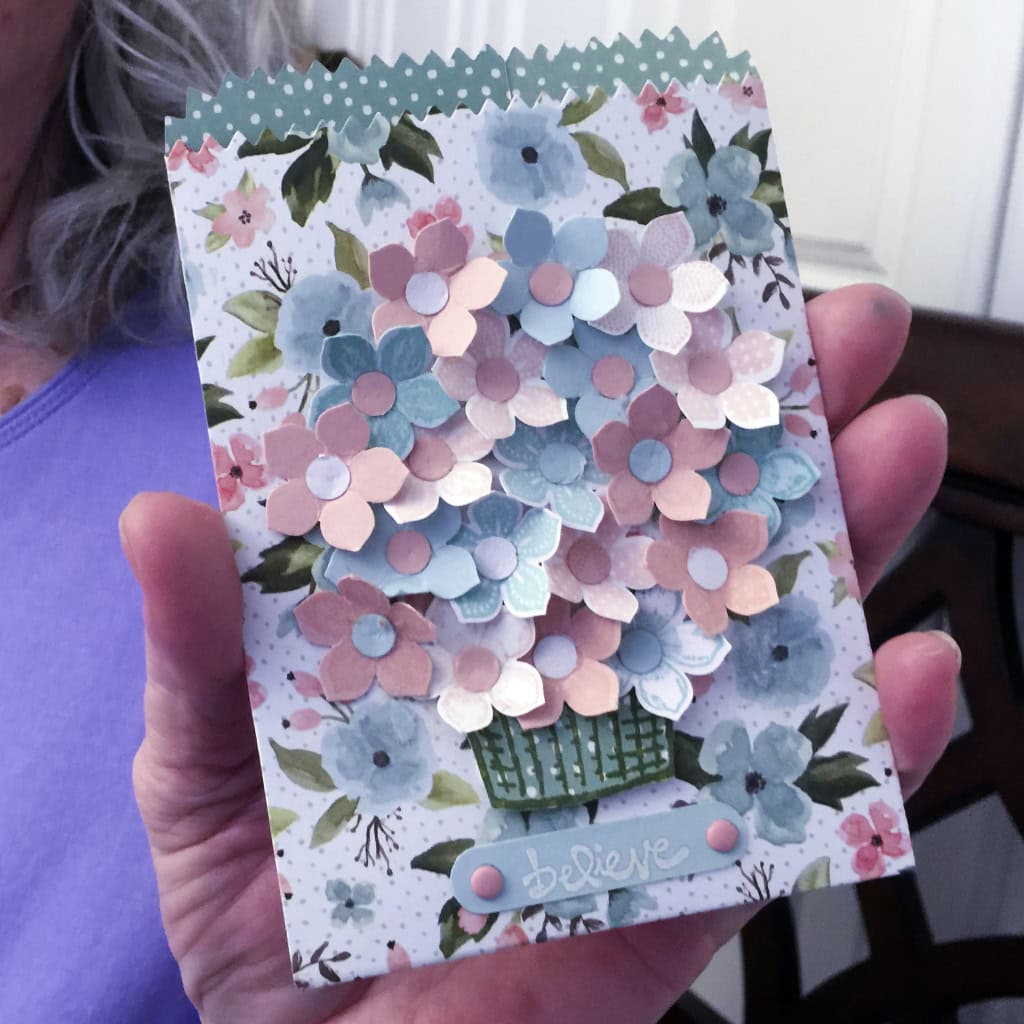
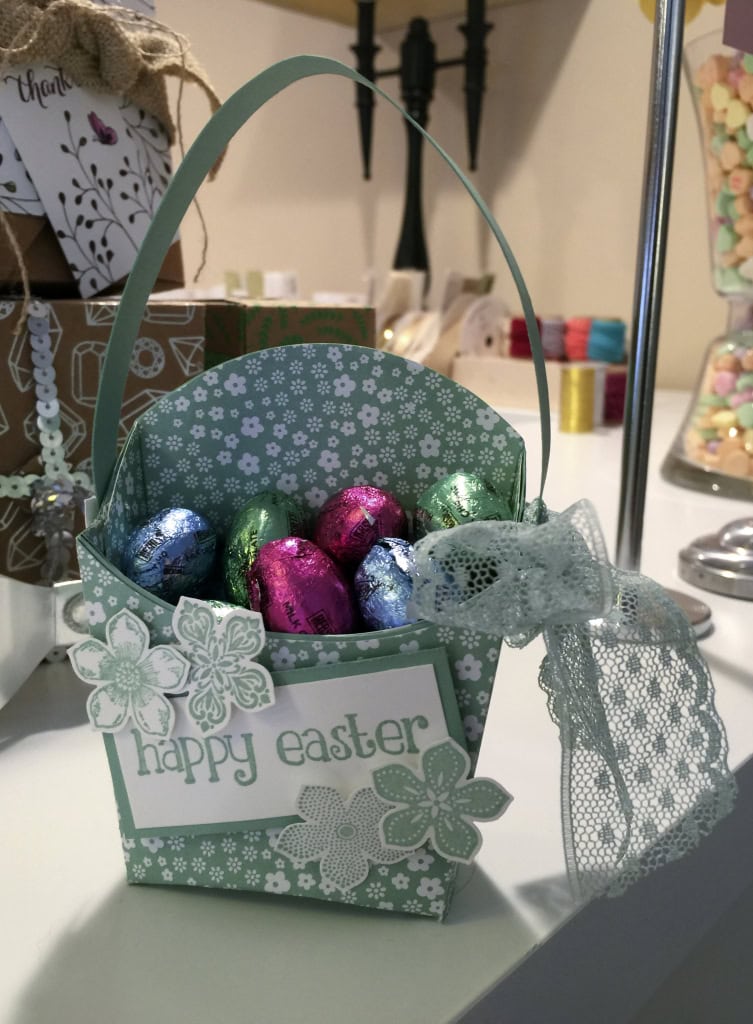
Debbie created an Easter Basket by attaching a long handle to a Fry Box that she covered with Designer Series Paper.The flowers are from Petite Petals.

Judy used the Mini Treat Bag Framelits Dies to cut Birthday Bouquet DSP. She covered the bag in Petite Petals flowers and a basket from the Sprinkles of Life stamp set. Her entry won her the Flower Patch stamp set.
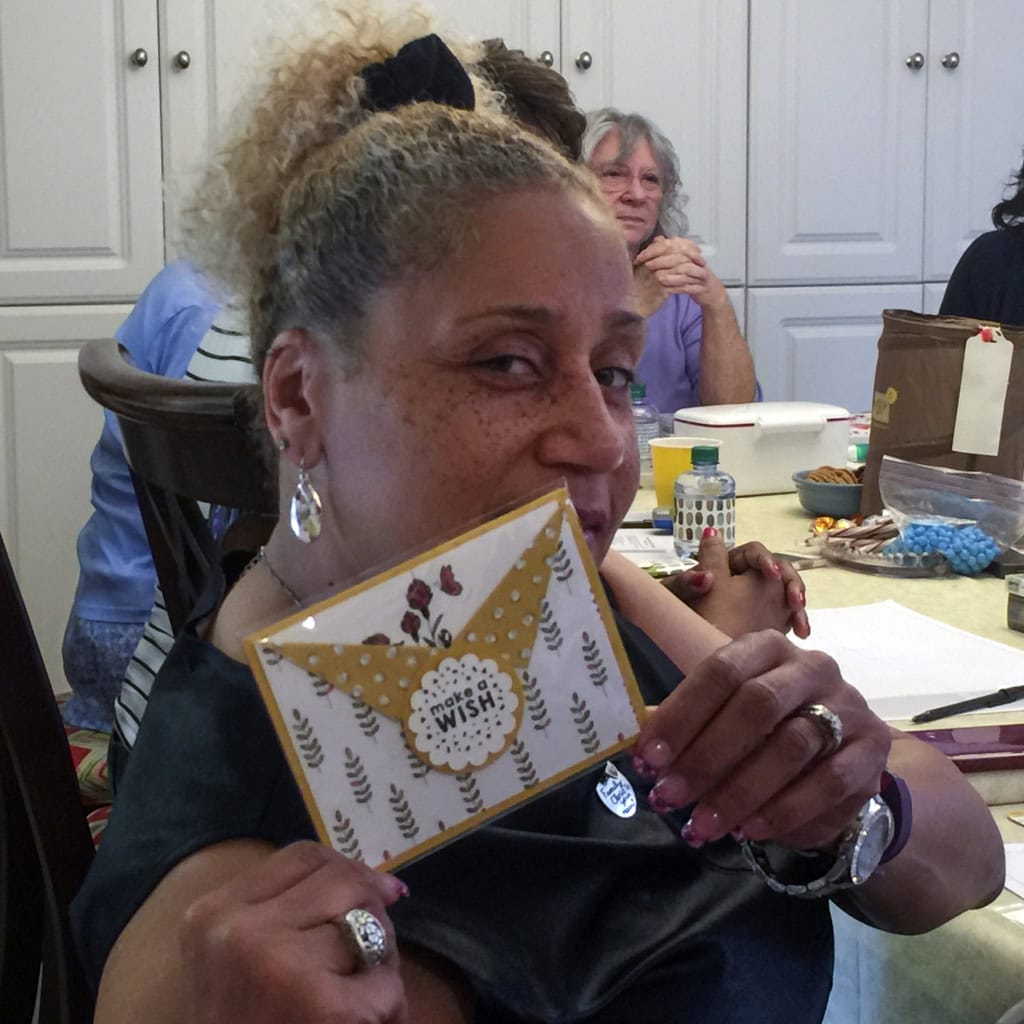
Tamara made a card with coordinating Sale-a-bration items: Wildflower Fields DSP and Flowering Fields stamp set.
I have such a talented team! Wouldn’t you like to come play with us? Just buy the Starter Kit! Until March 31 it’s just $99 and you get to choose $155 in product plus you get free shipping! After that you get at least a 20% discount on all your orders. Click here for more information and to join now!
Thanks for stopping by today, and Sweet Stamping!

Mar 17, 2016 | Holiday, Occasions, Sale-A-Bration |
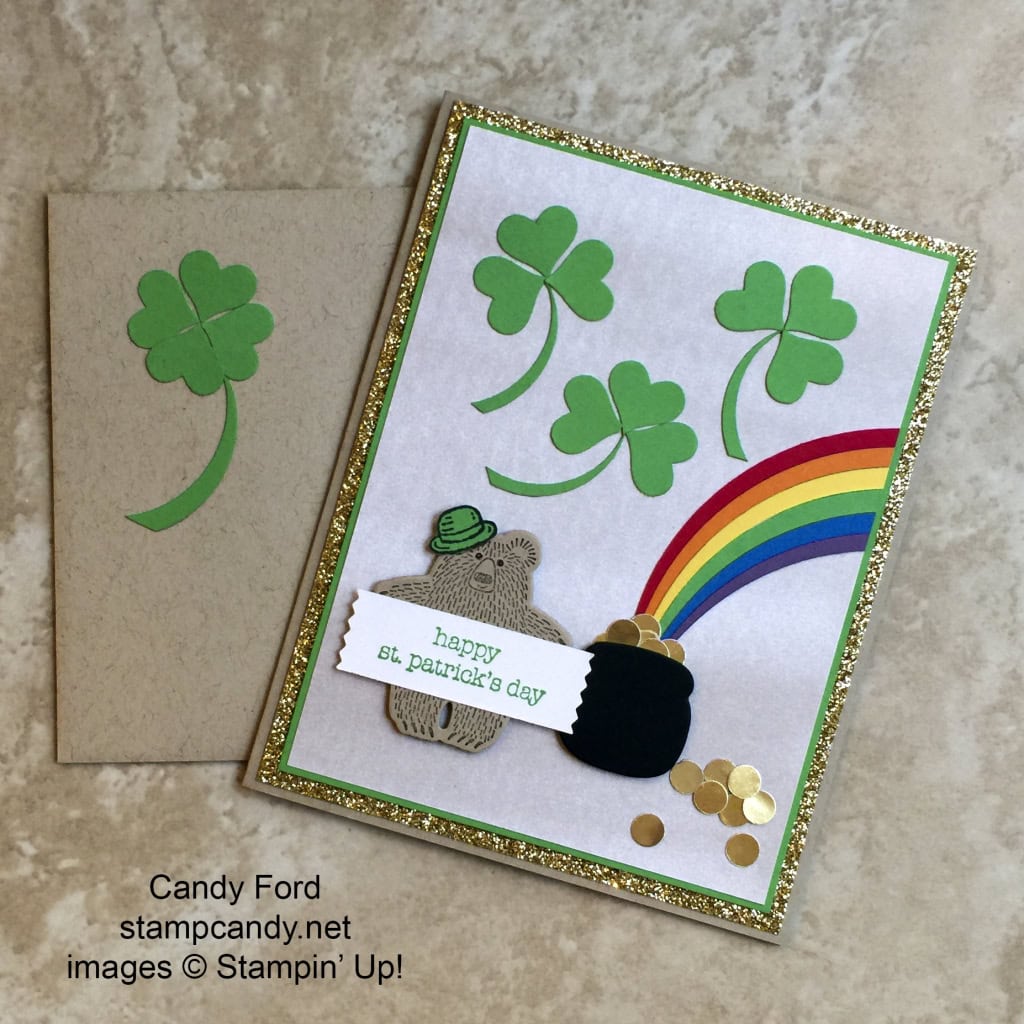
Top o’ the mornin’ to ye! And Happy St. Patrick’s Day!
My sister’s birthday is March 17. Every year I swear to myself I’ll make her a birthday card without a St. Patrick’s Day theme, but every year I make her, you guessed it, a birthday card with a St. Patrick’s Day theme. And 2016 is no exception. I just can’t help myself.
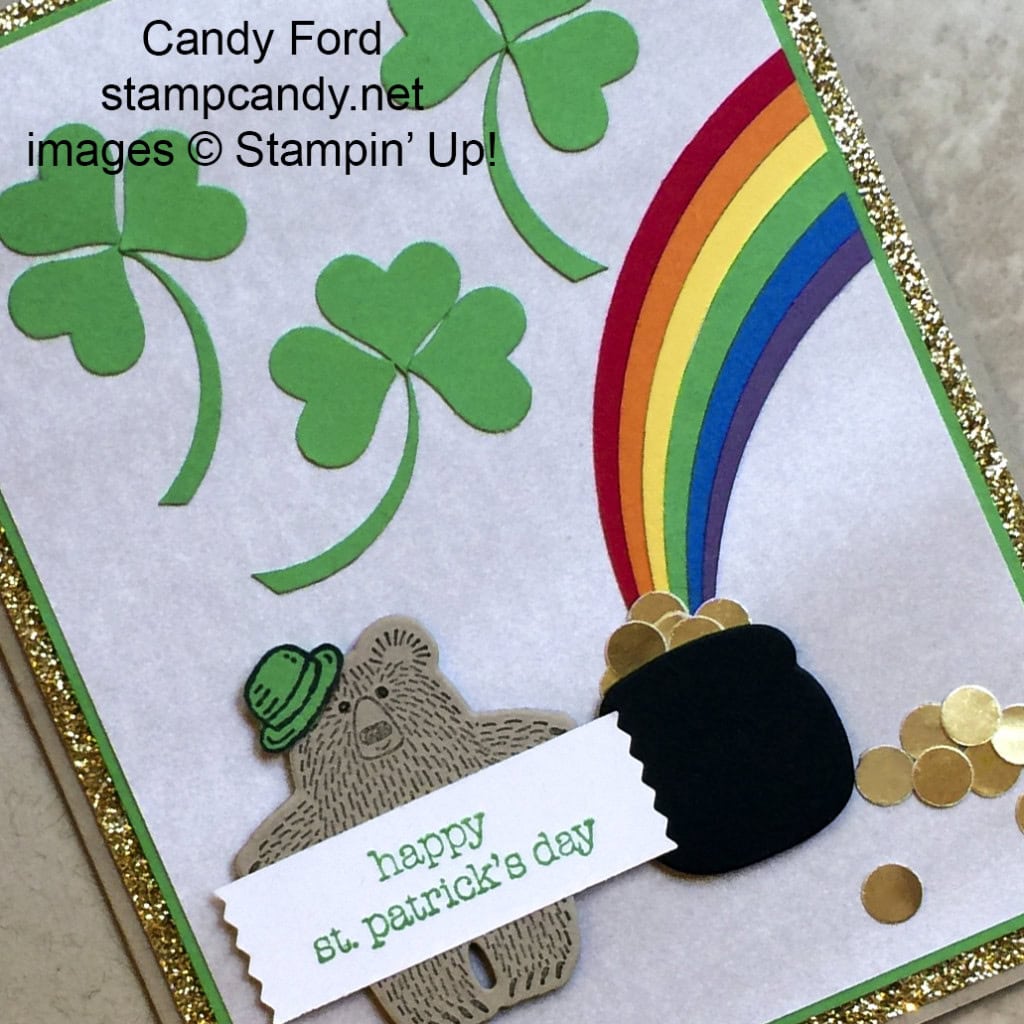
I’ve been playing with the Bear Hugs Bundle lately, and I decided to use it on her card. Isn’t he dapper in his little green derby? And his outstretched arms are perfect for holding a sign.
Here’s how I did it:
The card base is Crumb Cake card stock. On top of that is a layer of Gold Glimmer Paper, then a layer of Cucumber Crush CS, then a piece of Perfectly Artistic Designer Series Paper.
I created the shamrocks by cutting hearts with the Itty Bitty Punch Pack, then cutting the stems with the 1-3/8″ Circle Punch. I used my Paper Snips to angle the ends of the stems.
I used the largest of the Circles Collection Framelits Dies (without scallops) to cut arcs of CS in Real Red, Pumpkin Pie, Daffodil Delight, Cucumber Crush, Pacific Point, and Elegant Eggplant. I glued them next to each other onto the card front.
I used the Bear Hugs Framelits Dies to cut the pot from Basic Black CS. I used the 1/4″ Circle Punch to cut the coins from a Gold Foil Sheet. Then I glued the pot and coins over the end of the rainbow.
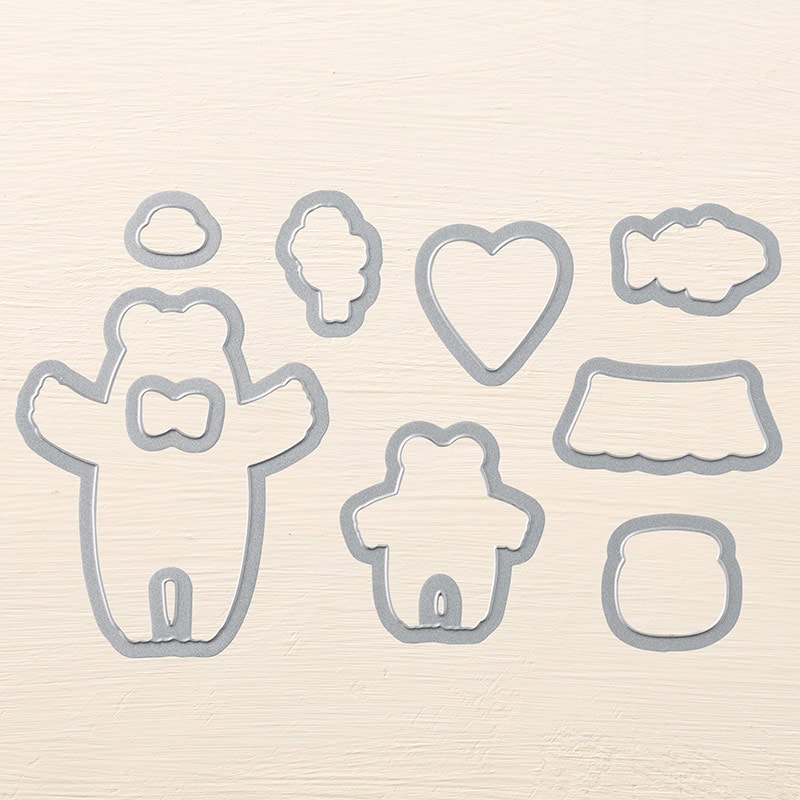
I stamped the smaller of the two bears from the Bear Hugs stamp set in Basic Black onto Crumb Cake CS, and I stamped his hat onto Cucumber Crush CS, then I cut them out with the Bear Hugs Framelits Dies.
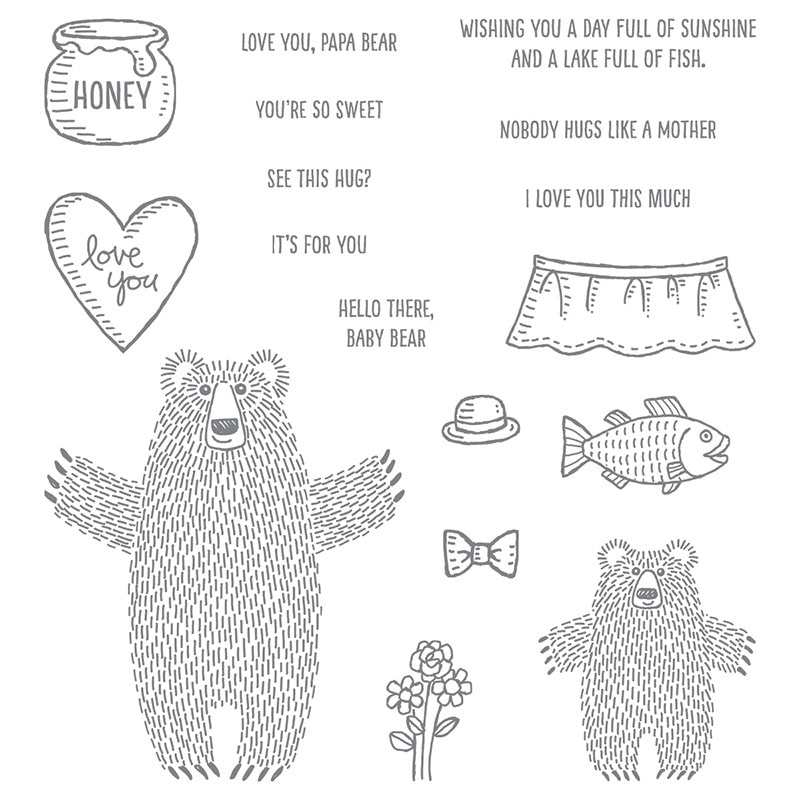
I stamped the sentiment from the Teeny Tiny Wishes stamp set in Cucumber Crush onto Whisper White CS and cut it with the Washi Label Punch. I glued it and the hat onto the bear, then attached him to the card front with Stampin’ Dimensionals.

The Crumb Cake Medium Envelope has a four leaf clover, made the same way as the shamrocks on the card.
Here’s what I used:
Thanks for stopping by today, and Sweet Stamping!


