May 23, 2015 | Cards, Techniques |
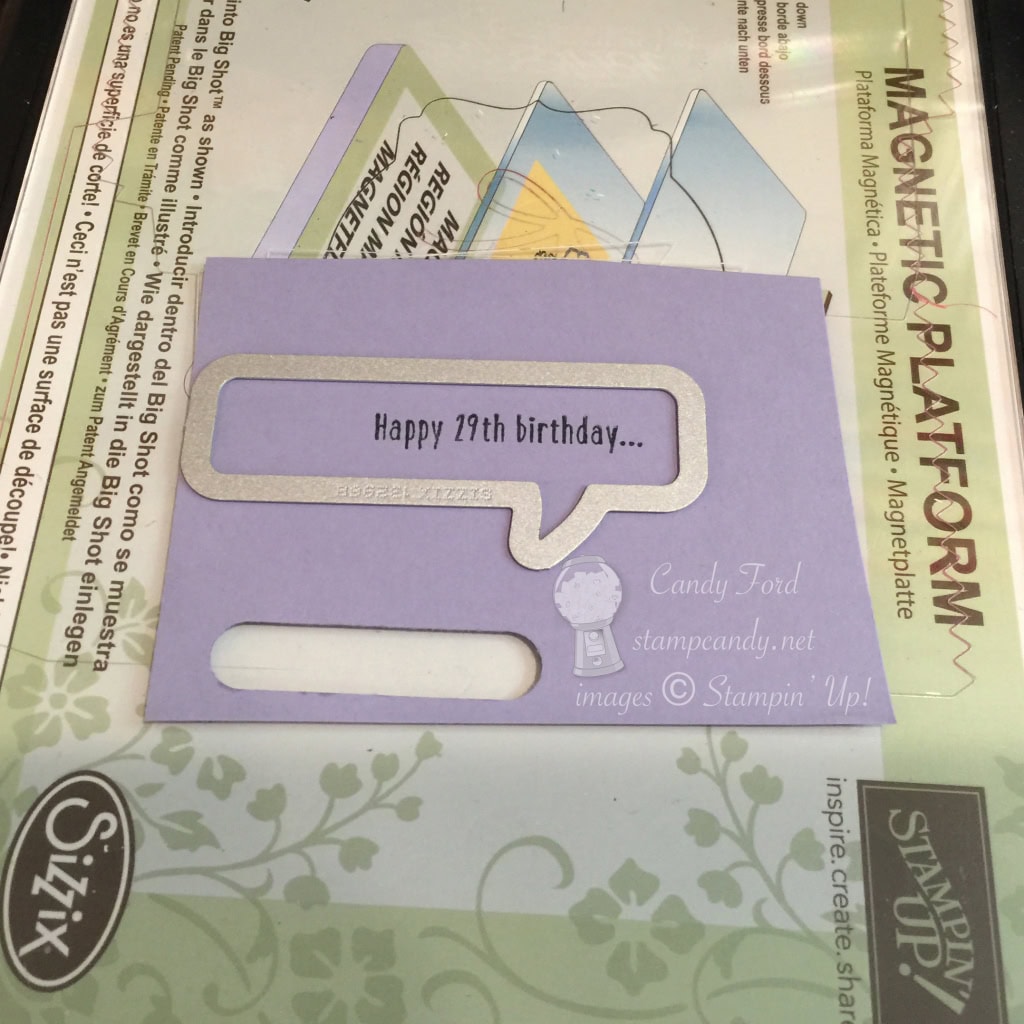
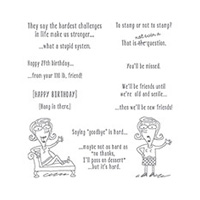
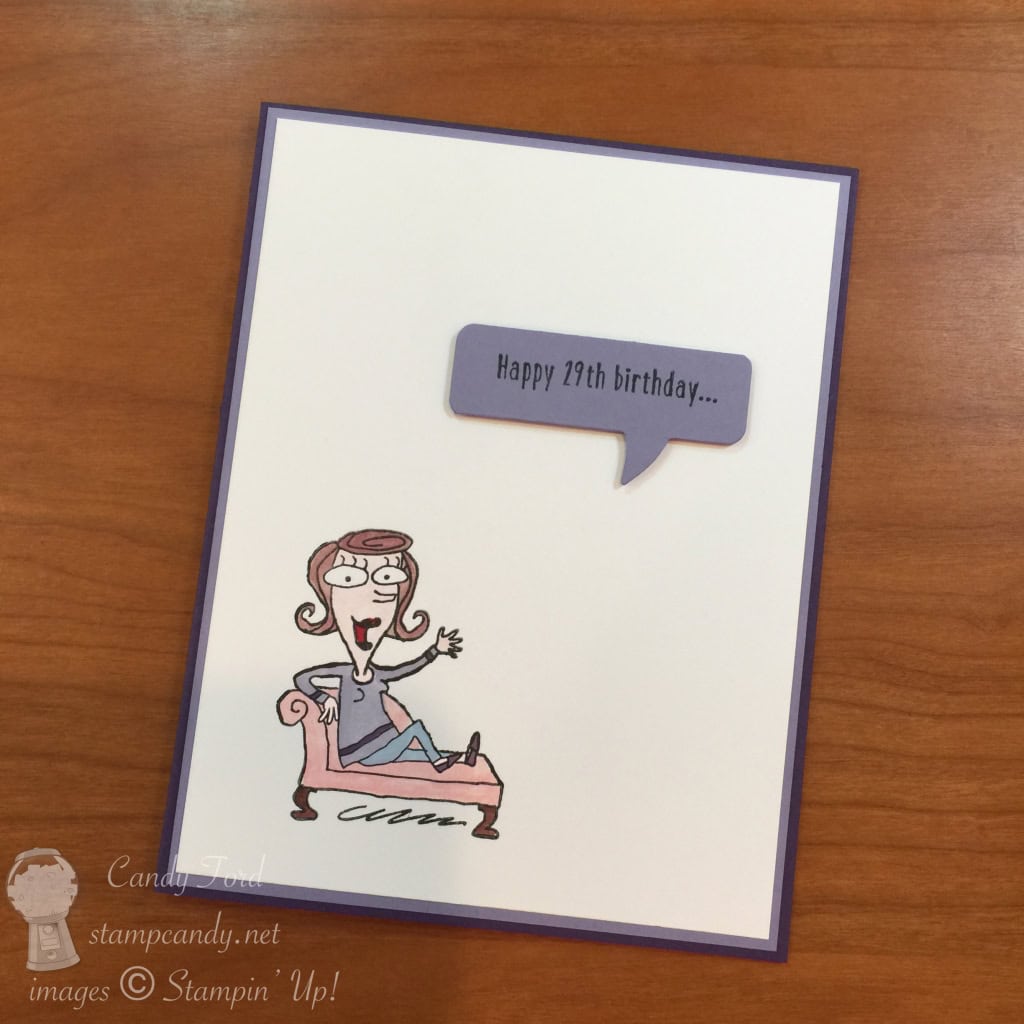
A few years ago I saw a birthday card in a store with a saying that I really liked, but I didn’t buy it. Who wants to spend $5 on a card when you can make one for a fraction of that? I was so happy to see the same saying in the Just Kidding stamp set. I think it’s a hoot and a half – at least for those of us who are more that 29 years old and weigh more than 110 pounds.
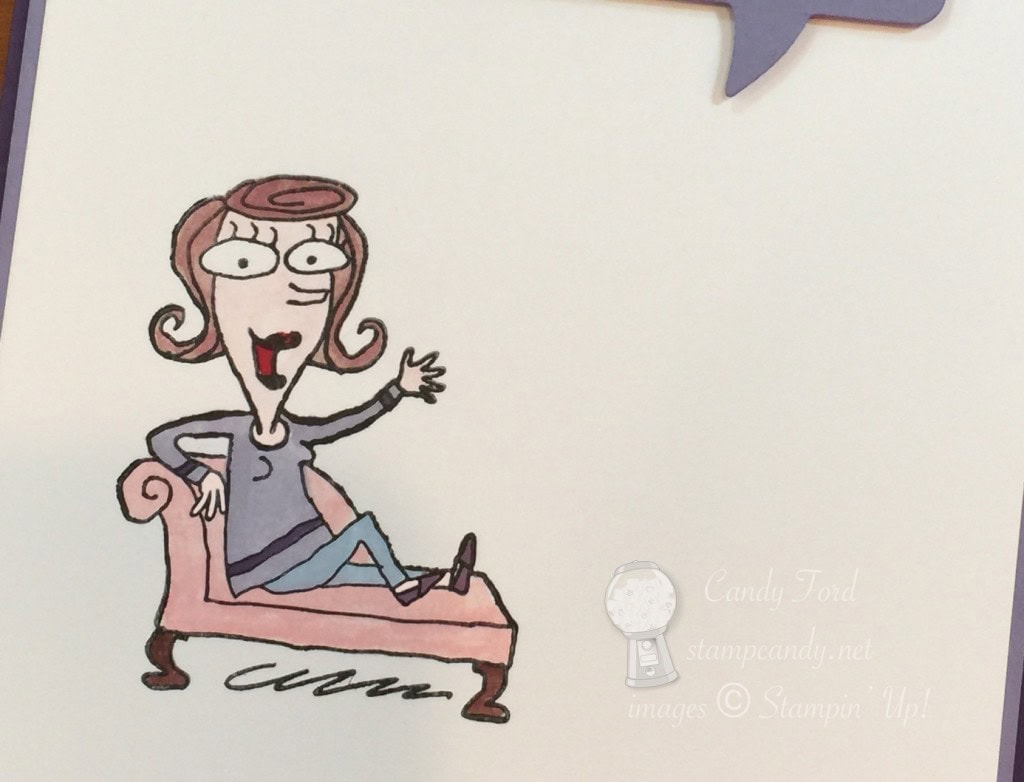
I just love this little lady lounging in her tunic, comfy jeans, and espadrilles. Don’t we all have such a sassy girlfriend or two?
I stamped the image in black Staz On ink, then used my Aqua Painter to color in the image: Blushing Bride for the chaise lounge and her skin, Chocolate Chip for her hair and the chaise legs, Marina Mist for her jeans, Wisteria Wonder for her tunic, Elegant Eggplant for her tunic trim and her espadrilles, and Cherry Cobbler for her mouth.
When using photopolymer stamps with Staz On ink, I try to work as quickly as I can, and clean it immediately with Staz On cleaner. The longer the ink is on the stamp, the more likely it is to stain. And be generous with the cleaner – this is not the time to be thrifty with it. I apply the cleaner directly to the stamp, then clean it on my Stampin’ Scrub.
Here’s the card front…
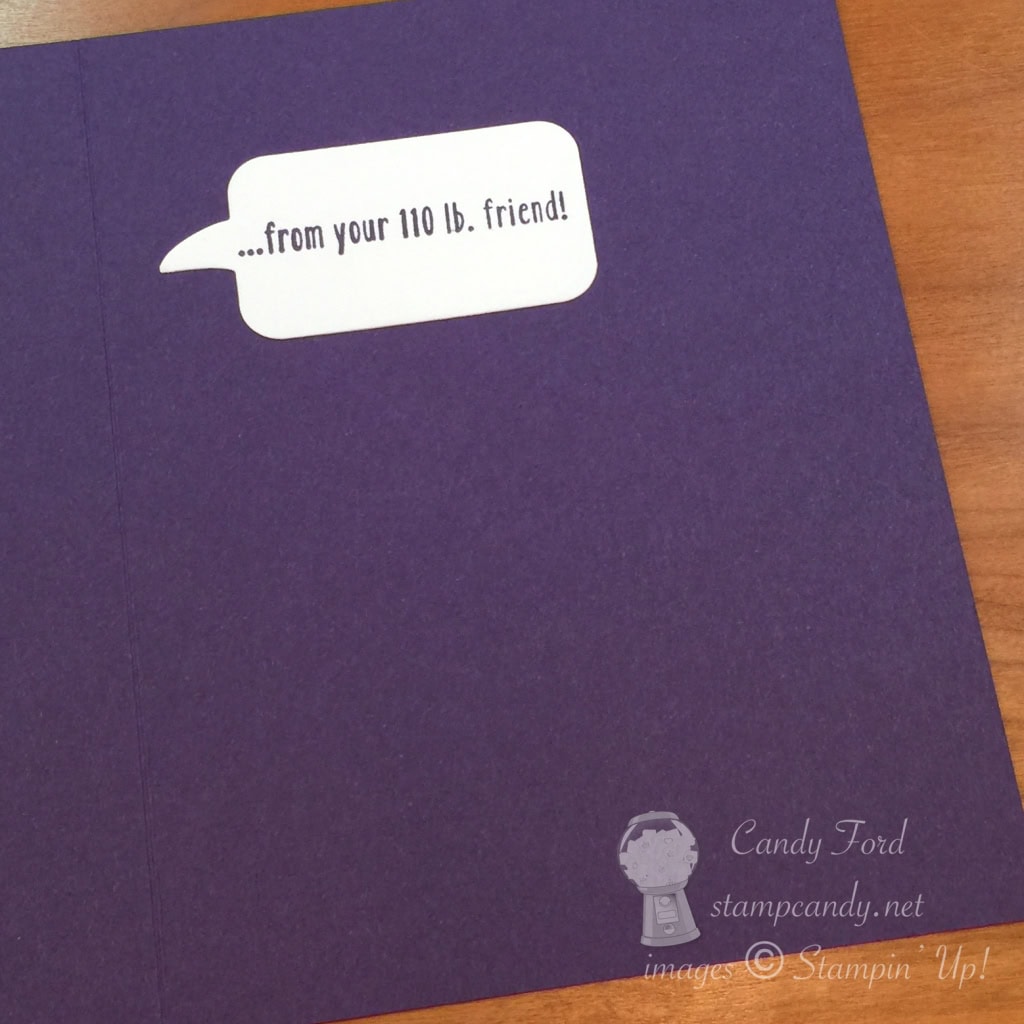
…and here’s the inside. (As you can see, I was in a purple mood.) I could put a piece of Whisper White card stock inside to write on, but I think I’ll use my Signo White Gel Pen instead.
TIP
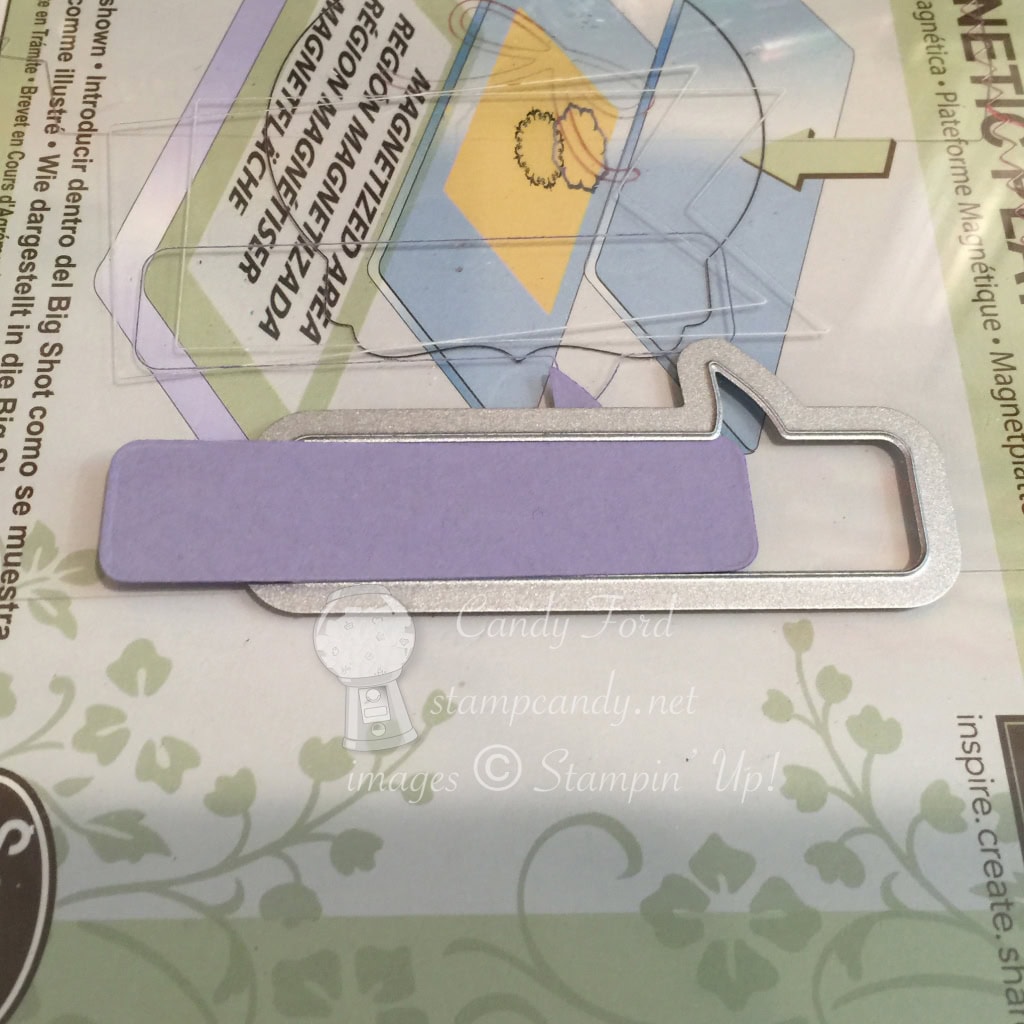
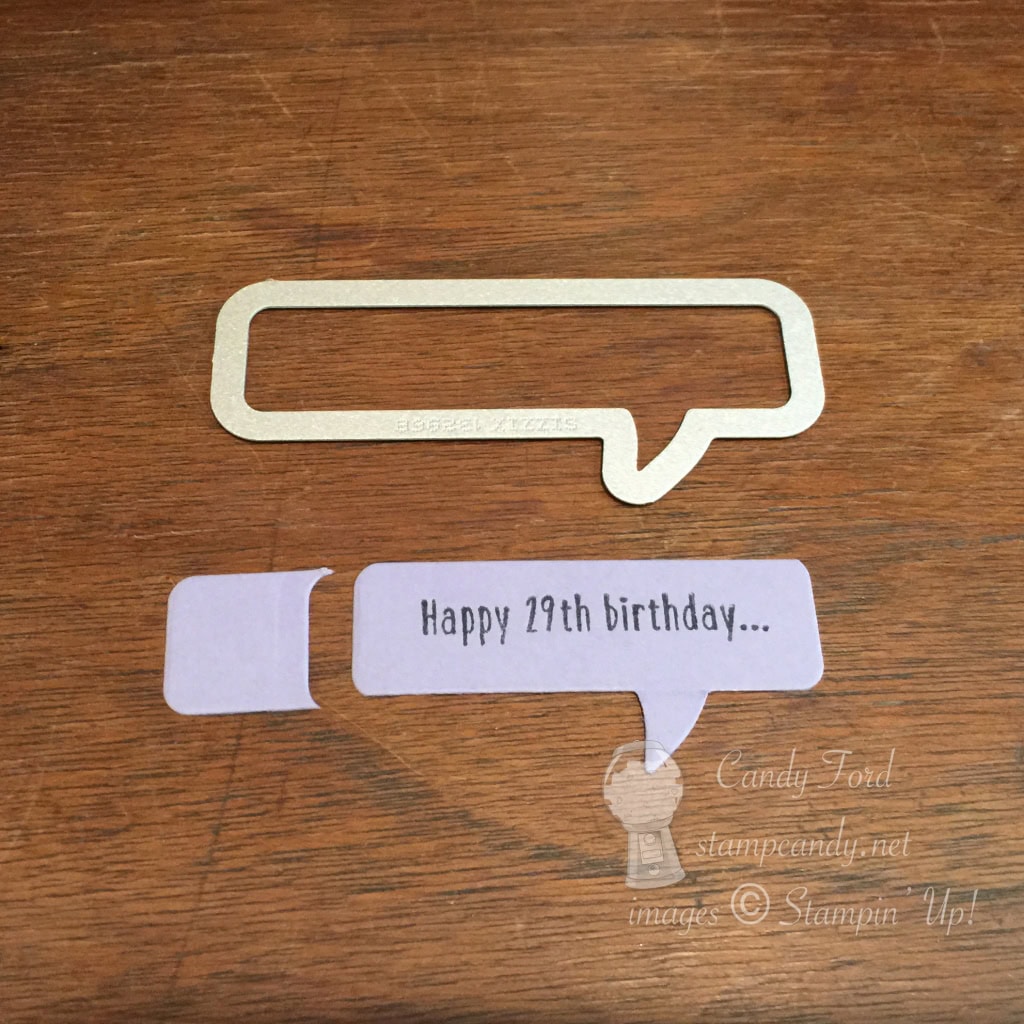
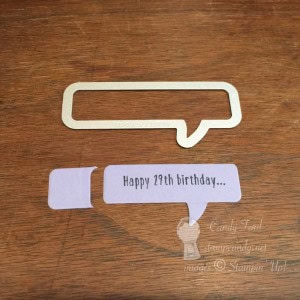
The Word Bubbles Framelits die that I used on the front of the card seemed too big for the stamped sentiment, so I shortened it. First I cut the sentiment out, lining up the die at one end of the sentiment.
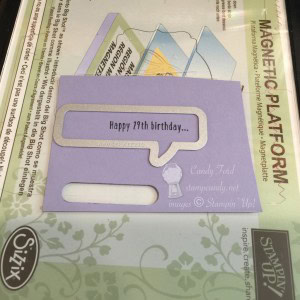
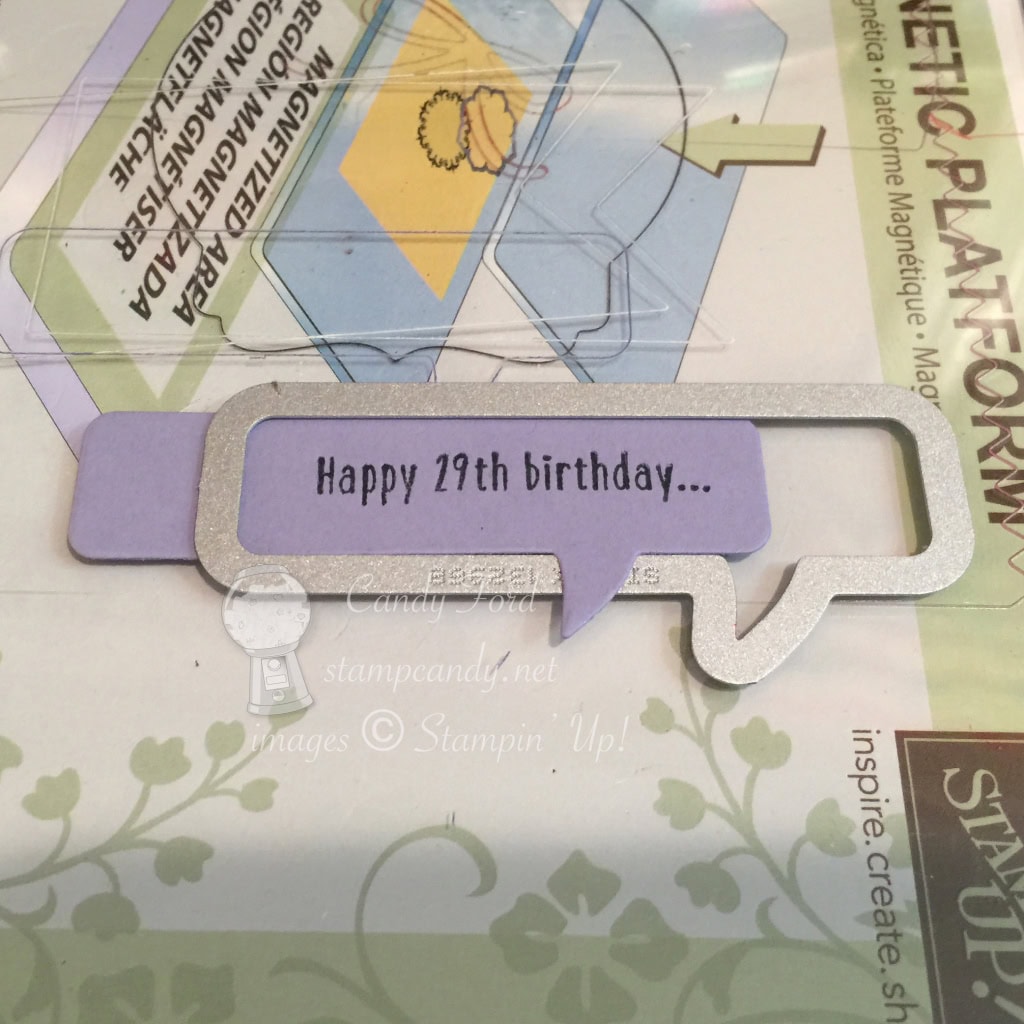
Then I moved the die over to where I wanted to cut off the end. Be sure the top and bottom edges are lined up with the die, and be sure the little arrow at the bottom is on top of the die so it doesn’t get cut off.


And now I have a word bubble that’s just the right size.
Here’s what I used:
Get a free pack of retiring DSP!
Place a $75 order through my online store here and I’ll send you a pack of the retiring Designer Series Paper for free!
$75.00 minimum order, before tax and shipping
Individual orders may not be combined.
Only while supplies last!
Once you place your order, email me at candy@stampcandy.net with the subject line Free DSP.
Thanks for stopping by today, and Sweet Stamping!
May 16, 2015 | Cards, Club, Techniques |
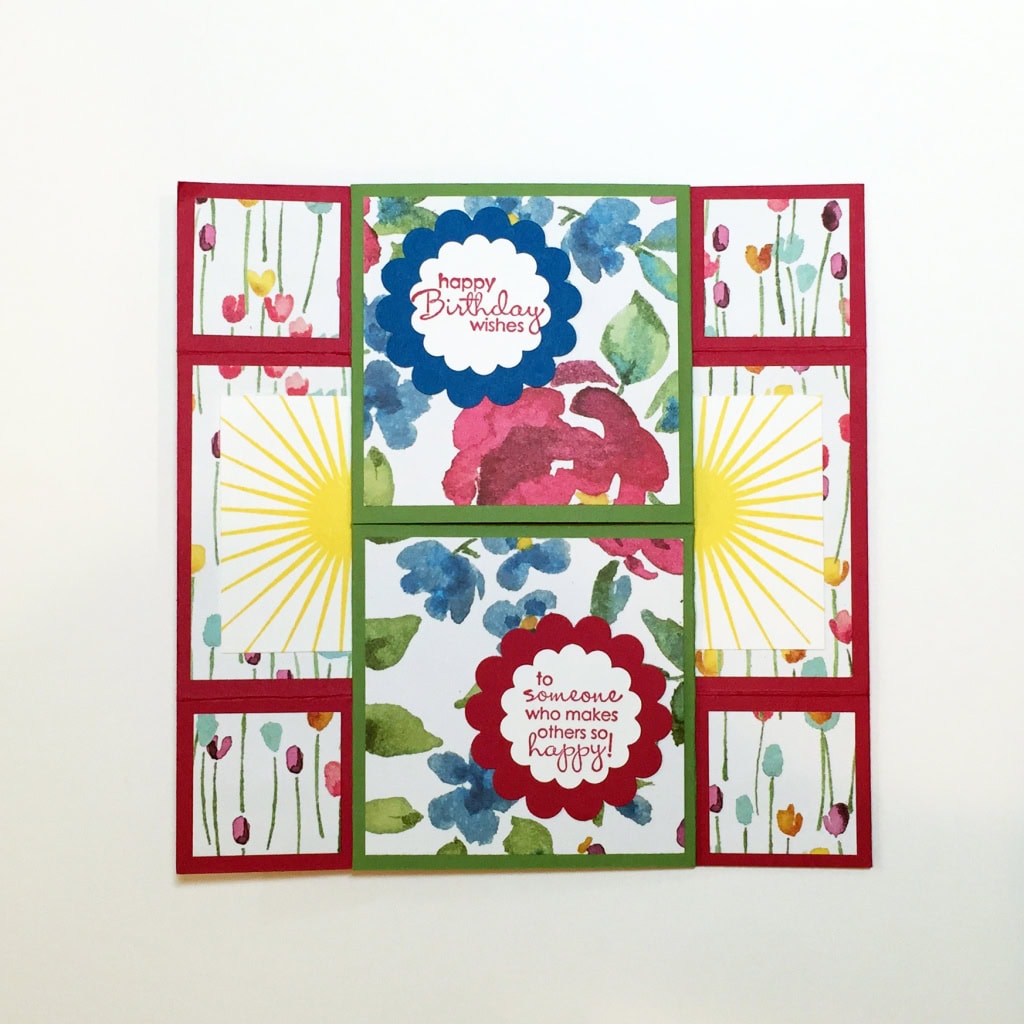
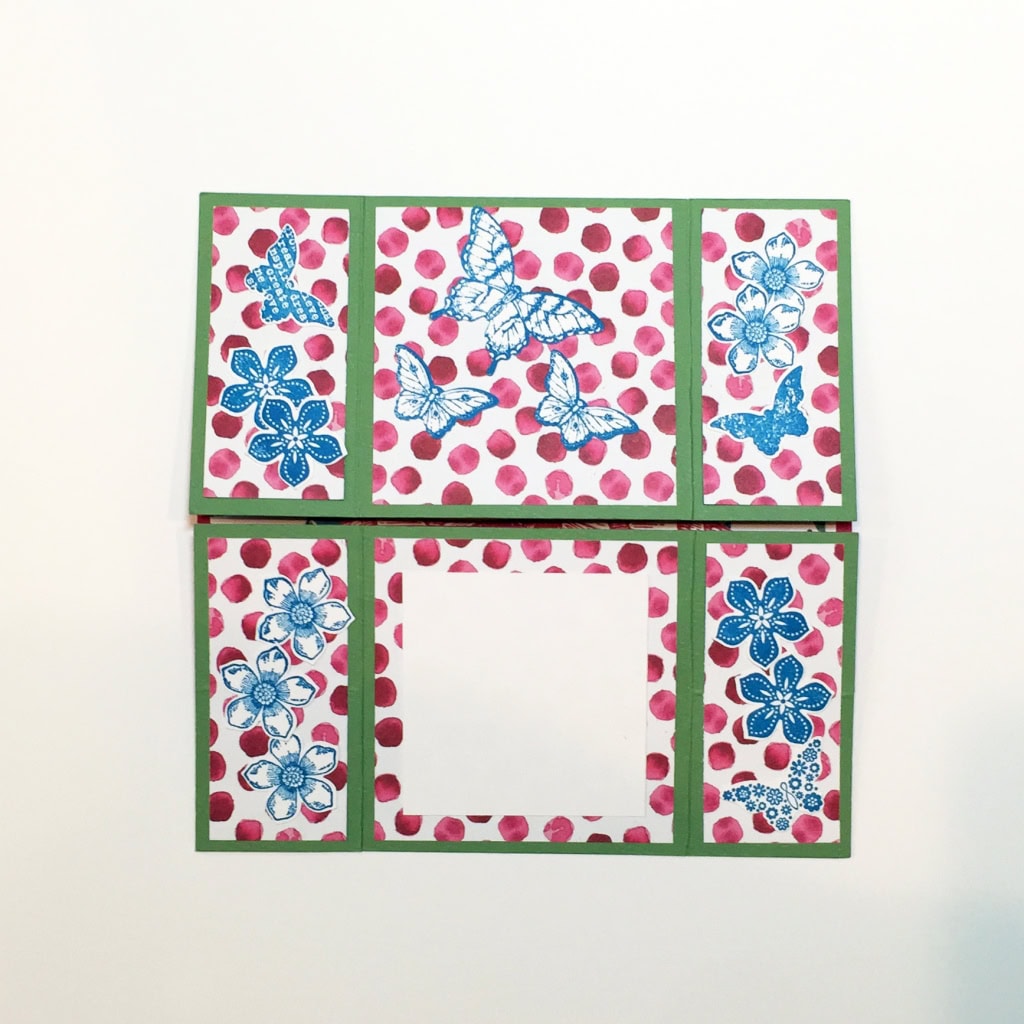
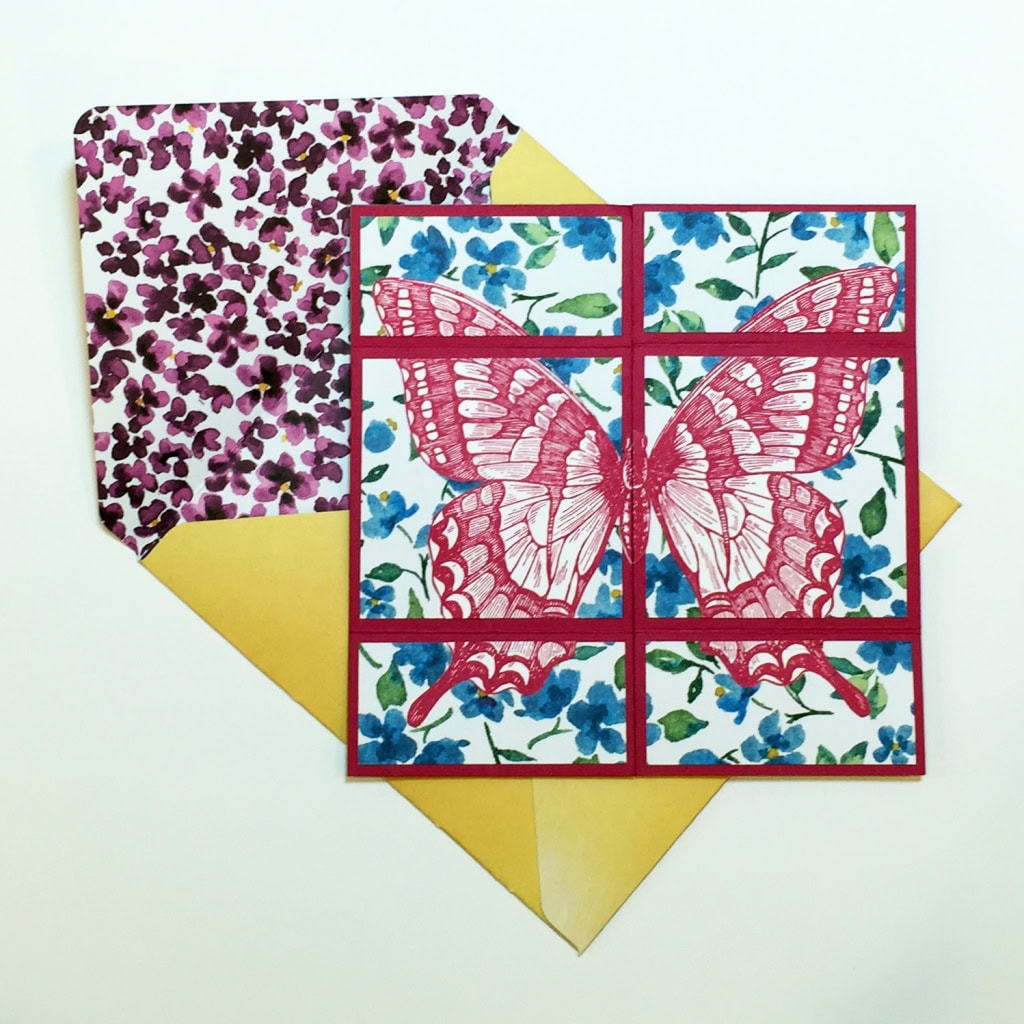
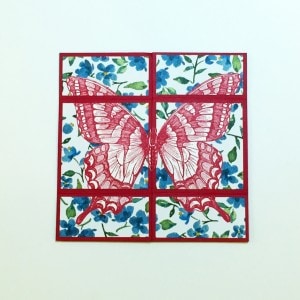
Okay, so there aren’t an infinite number of butterflies on this card, but it is an infinity card with butterflies, so I’m sticking with the title. This is the second project we made in Stamp Club this month.
I’ll admit that I’ve never really been a butterfly person. I mean, I think they’re lovely flitting around the yard, but I’ve never been one of those people with butterflies on their clothes, phone cases, etc. In fact, I think I’ve known so many “butterfly people” that I became a little turned off by butterflies in any context other than in nature. But that was before the Swallowtail and Papillon Potpourri stamp sets! Now I want to use these little suckers on everything I make! The Swallowtail is so big and so graceful, I just can’t resist it. The smaller butterfly stamps have coordinating punches, so I can stamp and punch as many as I want in no time.
The front of today’s card base is Rose Red card stock, with Painted Blooms DSP pieces cut 1/4″ smaller than the card stock sections. The Swallowtail is stamped in Rose Red on Whisper White card stock; then it’s cut out with Paper Snips, cut in half vertically through the body, and trimmed horizontally to fit the DSP sections.
Open the card once to reveal more Painted Blooms DSP. The sentiment, from the Petite Pairs stamp set, is stamped in Rose Red on Whisper White, then cut with the 1-1/4″ Scallop Circle Punch. Pacific Point and Rose Red card stock are cut with the 1-3/4″ Scallop Circle Punch to frame the sentiment.
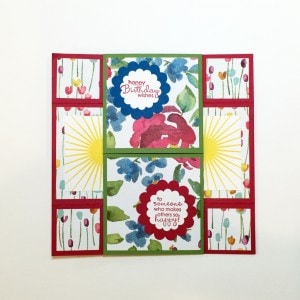
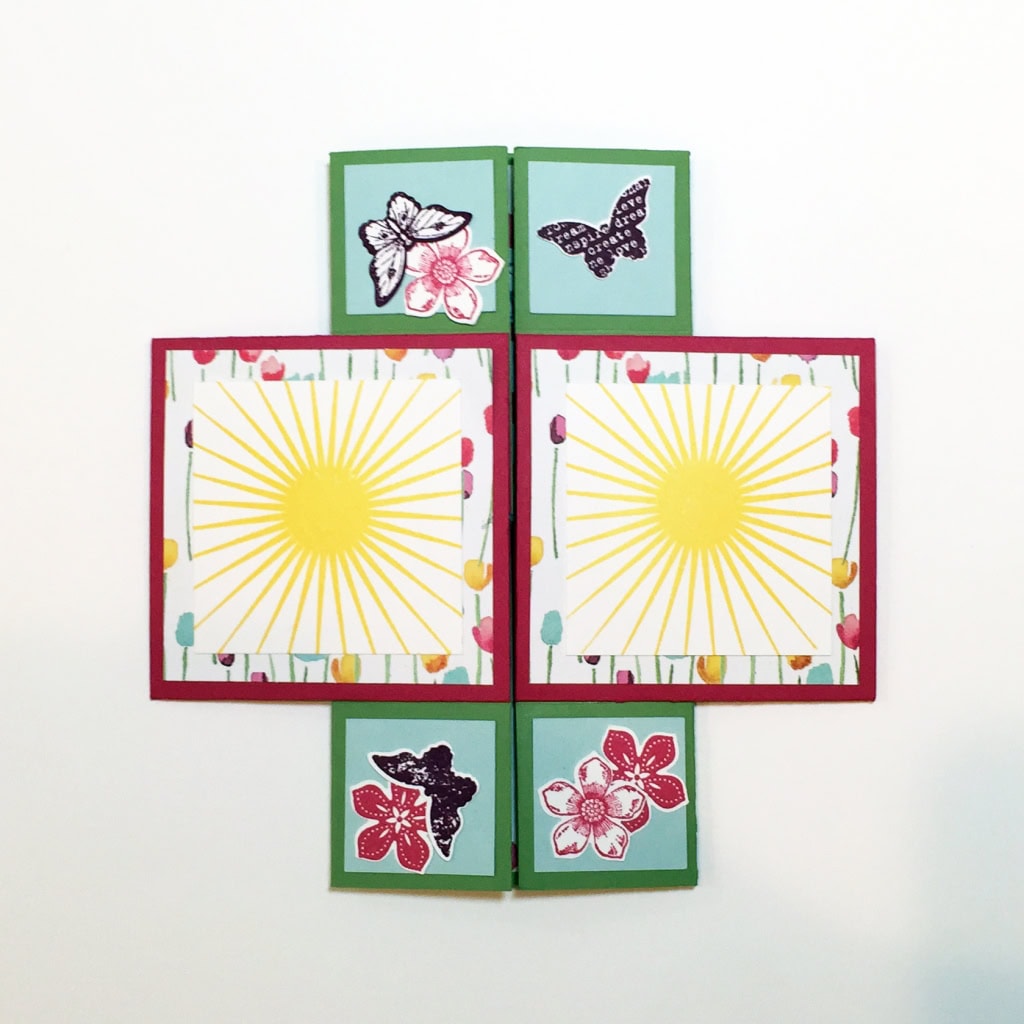
Open the card a second time to reveal two pieces of the DSP, and 4 small pieces of Soft Sky card stock. The sun from the Kinda Eclectic stamp set is Daffodil Delight on Whisper White. The flowers from the Petite Petals stamp set are stamped in Rose Red on Whisper White and cut with the Petite Petals Punch. The butterflies from the Papillon Potpourri, Butterfly Basics, and Kinda Eclectic stamp sets are stamped in BlackBerry Bliss on Whisper White and cut with the Bitty Butterfly Punch.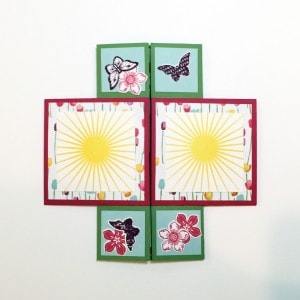
Open the card a third time to reveal the back of the card: a Wild Wasabi card stock base and Painted Blooms DSP covered with Pacific Blue butterflies and flowers. The plain white piece of Whisper White card stock is for your own handwritten sentiment.

The DSP envelope is made with the Envelope Punch Board. 
Infinity cards look terribly complicated, but are really quite simple when you break them down to their basics. I showed the steps of assembly in a previous post here. It was a 5″ x 7″card, but the steps are the same.
Please feel free to contact me if you have any questions about this or any other project.
Here’s what we used:
Thanks for stopping by today, and Sweet Stamping!
Apr 4, 2015 | Cards, Techniques |
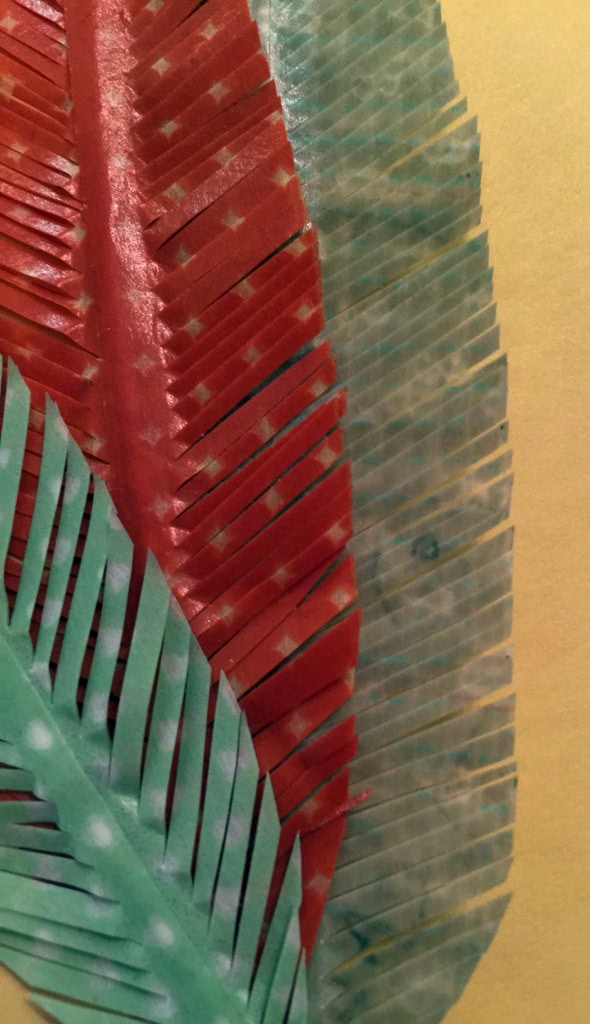
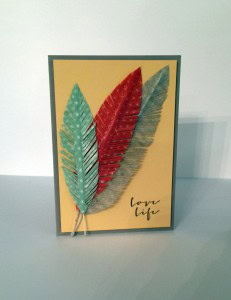
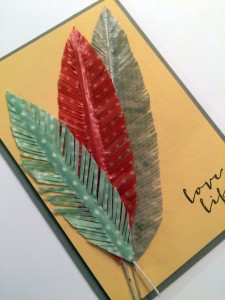
At Stampin’ Up’s recent Leadership gathering in Orlando, CEO Shelli Gardner demonstrated some great techniques. One was how to make feathers out of washi tape. They’re super easy and they look great.
 As soon as I got home, I started making them. After a while I thought I should start thinking of a way to use them. I mean, what am I gonna do with a big pile of washi feathers? That’s when I came up with this card. I wanted to keep it very simple, so the feathers would be the focal point.
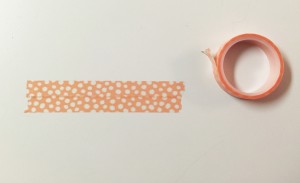
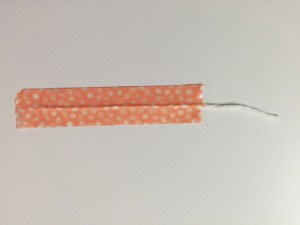
Here’s how to make a feather:
First lay down two pieces of washi tape, as long as you want your feather to be, overlapping the edges slightly. (Alternatively, you could use a piece of a Washi Sheet cut to the size of your feather. Or you could make a small, skinny feather with only one width of washi tape and the thinner baker’s twine for a spine. So many options!) I like to stick them to a slick surface, like my kitchen counter, so they will come up easily.
Now flip the whole thing over so it’s sticky side up.
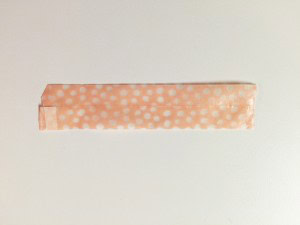
Lay a piece of thick twine along the center for the spine, leaving some extra for the quill.

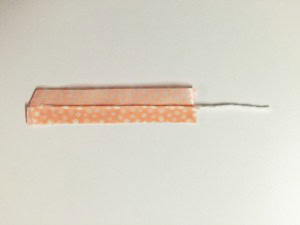
Use two more pieces of washi tape to cover the original, again overlapping slightly.
Now cut into a feather shape. It can be long, short, slender, fat, pointy, round – whatever you like.
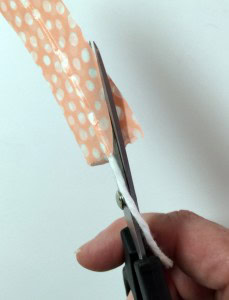

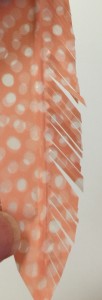
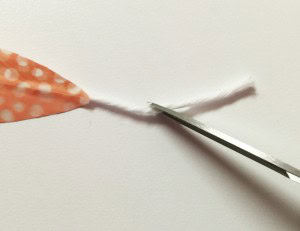
Now take your Paper Snips (good scissors are very important here) and snip, snip, snip along both sides, angling down toward the center (or up toward the center if you’re holding it upside down as I am in these photos.) The closer together the snips, the better.
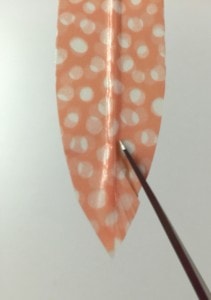
Now trim the quill to the desired length. I like to cut it at an angle to look more realistic.
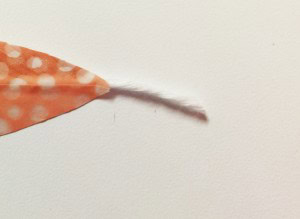
Dirty up the quill just a bit with a Sahara Sand Stampin’ Write Marker.
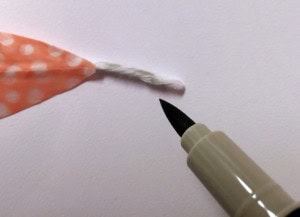
Apply a small amount of Crystal Effects to the quill, then twirl it between your fingers to work it in and make the twine nice and straight. When it dries it will be stiff.

Look at the difference between the green feather on the left and the brown feather on the right. You can see why I prefer the barbs snipped very close together.

I forgot to mark one of the quills with the Sahara Sand marker. You can see the difference it makes.

Once the feather is finished, I like to rub it with my fingers in the “wrong” direction to separate the individual barbs just a bit. I think it looks more realistic that way.
Here’s what I used:
Thanks for stopping by today, and Sweet Stamping!
Mar 13, 2015 | Cards, Club, Holiday, Occasions, Techniques, Tools |
A couple days ago I posted an Easter Bunny card for the Pals Blog Hop. You can see it here.
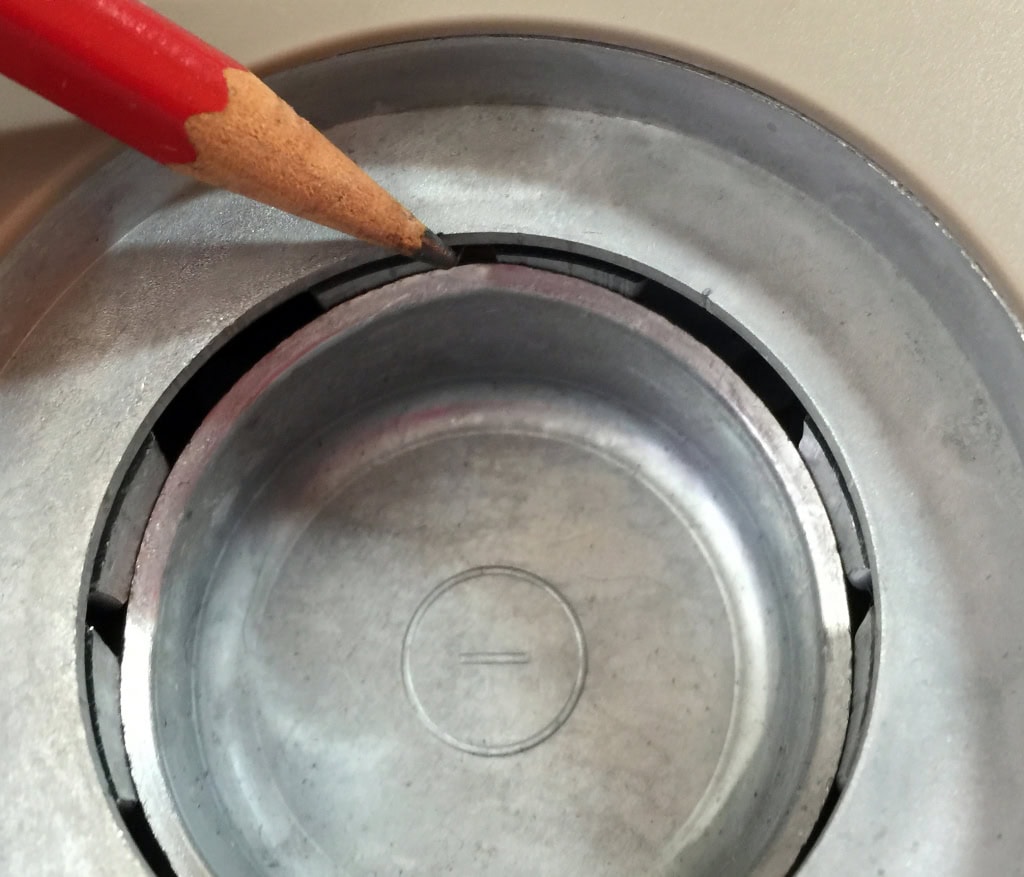
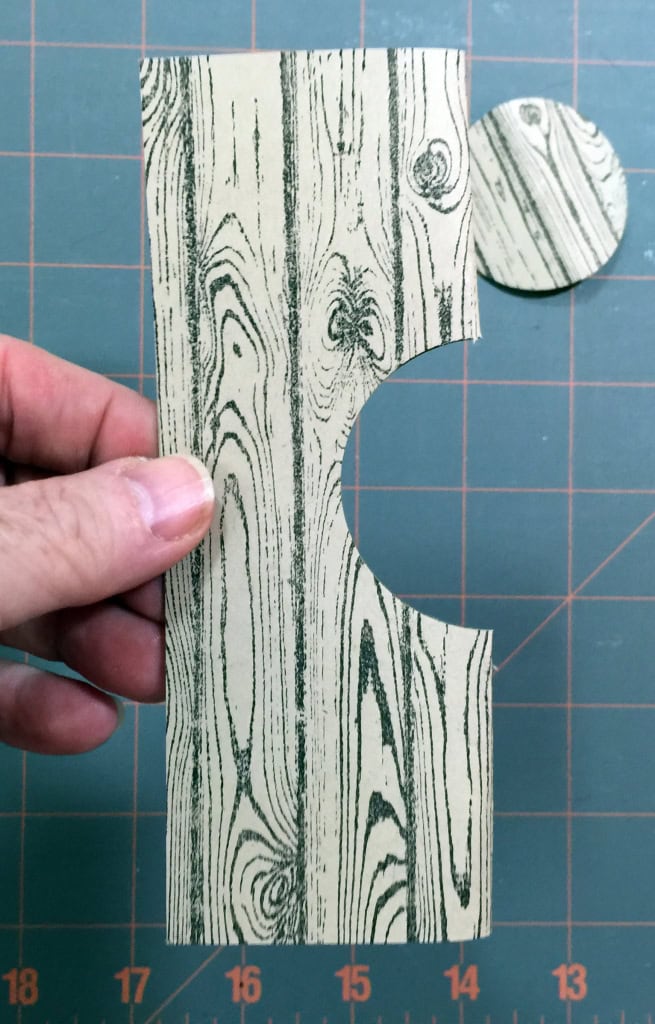
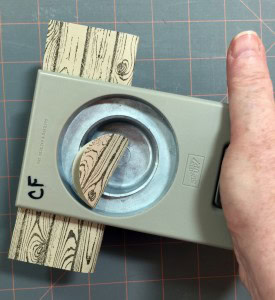
For the hole in the fence:
On the card front, the hole in the fence needs to be in the center of the card, but the 1-3/4″ Circle punch won’t reach that far from the edge of the paper.
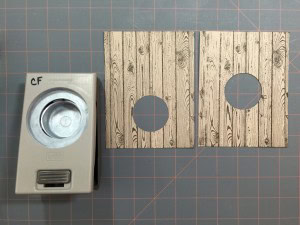
Here’s how to remedy that. Fold the paper in half but crease only in the center where the hole will be.
Insert the crease halfway into the punch.
There are little holes in the metal at the half way mark. Use those to line up the paper.
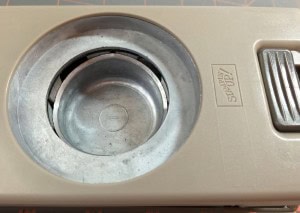

Now punch.

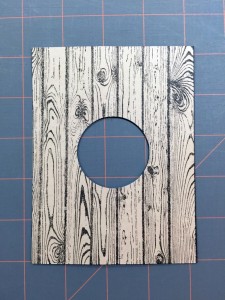
Flatten the paper back out and there’s your centered hole. The Hardwood stamp helps camouflage any creasing that may remain.
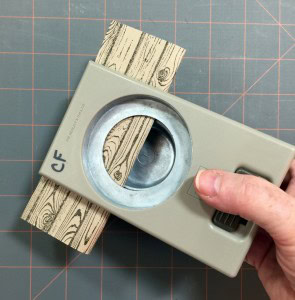
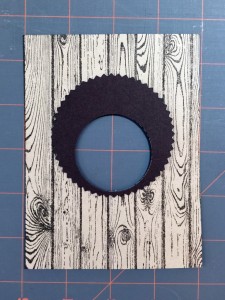
For the hole in the hole:
You must also punch a hole in the Early Espresso piece for the Circle Treat Cup to stick through. You can do it one of two ways, although I think the first is easier.
1) Punch the hole in the card stock, then line up the Starburst Framelit so the hole is at the edge.
2) Cut the card stock with the Framelit first, then maneuver it into the punch.
Now adhere the Early Espresso piece to the fence piece, lining up the punched holes.
I hope you found this helpful. Please let me know if you have any questions at all.
Thanks for stopping by today, and Sweet Stamping!
Mar 11, 2015 | Blog Hop, Cards, Club, Food, Occasions, Techniques |

Welcome to the March Pals Blog Hop where we are celebrating spring. This month we are featuring spring related projects for Mother’s Day, Easter or any other occasion that celebrates winter coming to an end.
You may just be starting the blog hop or may have come from Sue Becker at RnR Stamping on the Pals Hop. If you get off track at any time, the full lineup below will help you move along from blog to blog so you see all of the amazing creations.
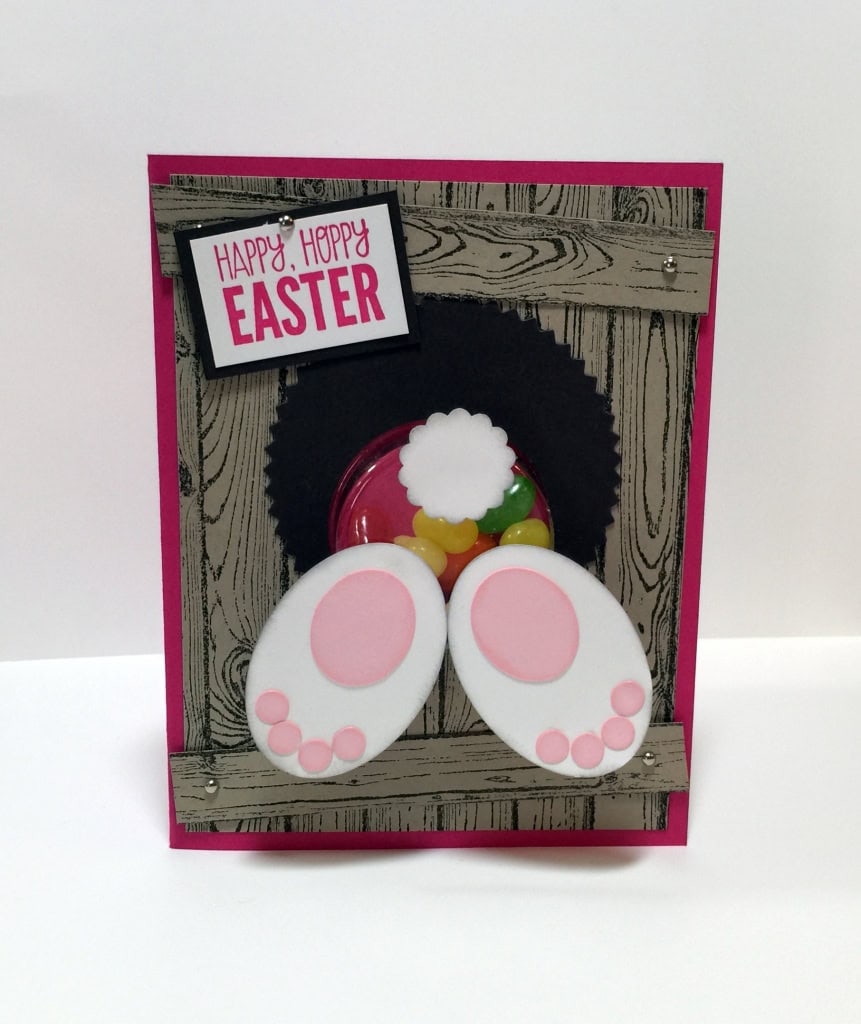
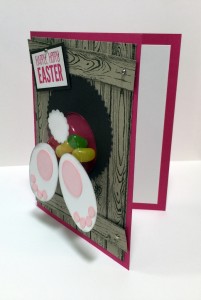
Today I’m excited to share one of the projects we made in Stamp Club this month. This little bunny with a belly full of jelly beans is trying to crawl through a hole in the fence, and all we see are his little backside and feet…

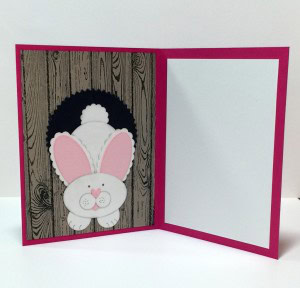
…until you open the card to see his adorable face.
I’ve always enjoyed Punch Art. Well, I’ve always enjoyed punches. They are such a quick and easy way to cut out a perfect shape, and they’re very portable. I knew I wanted to include a few specific things in our club projects this month: punch art, a rabbit for Easter, and the Circle Treat Cups that I’d had for a while but hadn’t used yet. So I set out to combine them into one card.
For the rabbit, I scoured the Internet for ideas. There are quite a few different ones out there, all very cute, but they all either used retired punches or just weren’t exactly what I was looking for. So I took some ideas from several of them and put them together, tweaking the design for this card. I think he turned out pretty cute, don’t you? Here’s how we did it:
Use the following punches:
7/8” Scallop Circle – 2 in Whisper White
1-3/4” Circle – 2 in Whisper White
3/4” Circle – 2 in Whisper White
½” Circle – 2 in Whisper White
¼” Handheld Circle – 9 in Pink Pirouette
Extra Large Oval – 3 in Whisper White
Scallop Oval -2 in Whisper White
Large Oval – 2 in Pink Pirouette
Small Oval – 2 in Pink Pirouette
Owl Builder Punch – 1 heart in Pink Pirouette
We used a sponge dauber to edge all white pieces with Smoky Slate ink and all pink pieces with Pink Pirouette. This gives the bunny more dimension and prevents the pieces from disappearing into one another.
For the front:
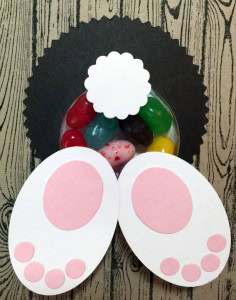
Assemble feet with 2 Extra Large Ovals in white, 2 Small Ovals in pink, and 8 ¼” circles in pink. Use 1 7/8” Scallop Circle in white for the tail.
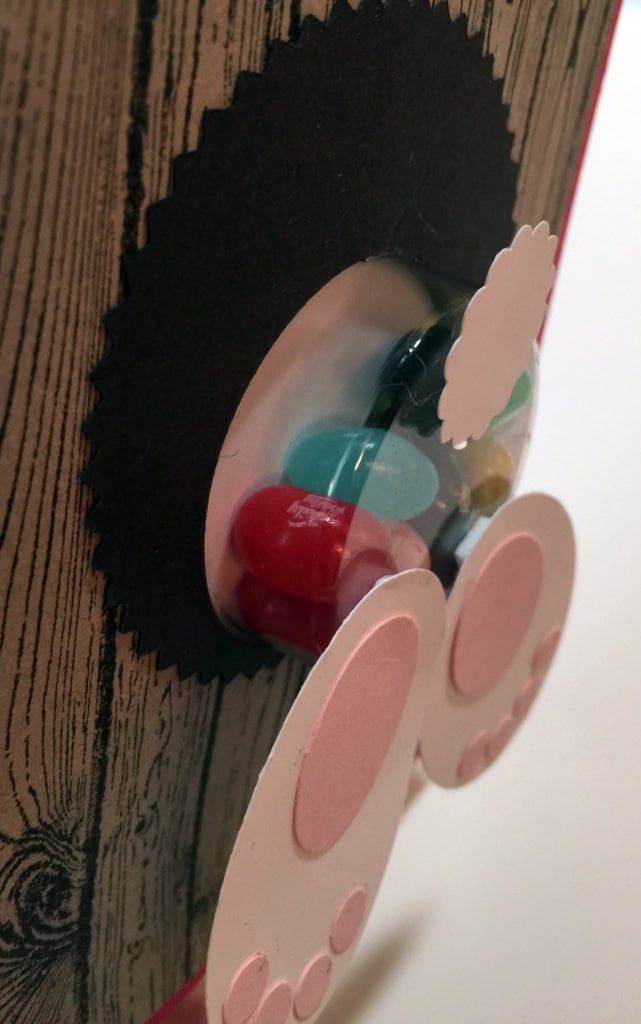
Place 10-12 jelly beans in the Treat Cup, peel the backing off, and adhere one 1-3/4” Circle in white to the back to contain the jelly beans. (If you don’t want to use the Treat Cup, simply replace it with the 1-3/4” Circle.) On this example, I forgot to back the treat cup with the white circle, so you see the Melon Mambo card base showing through behind the jelly beans. I prefer the white backing.
Here’s one I did with the white backing. It accidentally got stepped on, plus I didn’t ink the edges of all the punched pieces, so I didn’t use it for the main photo above, but you can see the difference in the color behind the jelly beans.
For the inside:
Assemble the face with 1 Extra Large Oval in white, two ½” circles in white for the cheeks, one ¼” Circle in pink for the mouth, and the heart from the Owl Builder Punch in pink for the nose. Use a Smoky Slate Stampin’ Write Marker to draw whiskers and eyes.
Adhere two ¾” Circles in white below face. Draw toes with Smoky Slate marker.
Adhere the 2 Large Ovals in pink to the 2 Scallop Ovals in white for the ears. Adhere these to the top of the face. Adhere all that on top of one 1-3/4” Circle for the body, and add one 7/8” Scallop Circle in white for the tail.
For the fence:
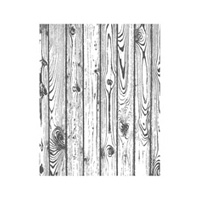
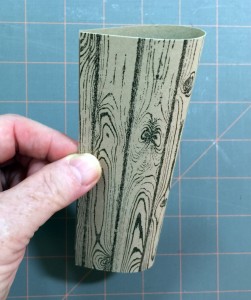
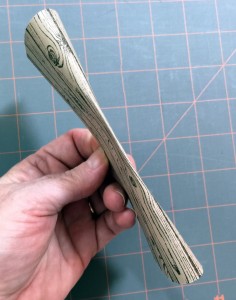
Use the Hardwood background stamp on Crumb Cake card stock with Early espresso ink. Create three, one for the front, one for the back, and one from which to cut the cross pieces.
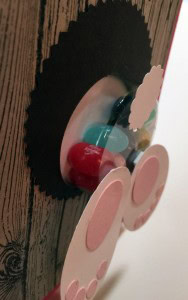
The hole is cut from Early Espresso card stock with the Starburst Framelits. Cut two and adhere one over each of the two stamped fence pieces.
Punch a 1-3/4″ hole in the front pieces (fence & hole) for the Treat Cup to stick through.
From the third stamped image, cut two “boards” for cross pieces. Attach each with two 1/8″ Mini Brads.
The sentiment is from the For Peeps’ Sake stamp set. It’s Melon Mambo ink on Whisper White card stock, then matted with Early Espresso card stock. It’s attached to the fence with another Mini Brad.
Finish it up:
Attach it all to your card base (we used Melon Mambo) and you’re done! I know it looks like a lot of steps, but it’s actually very easy.
Check back for a tip on punching the hole in the right place on the fence!
The next stop is Karen Hallam at Karen’s Blog on the Pals Blog Hop! Thanks for visiting and I hope to see you next month. And as always, Sweet Stamping!
Lisa Ann Bernard at Queen B Creations
These are the products we used for this card:
Feb 7, 2015 | Cards, Club, New Products, Occasions, Techniques |
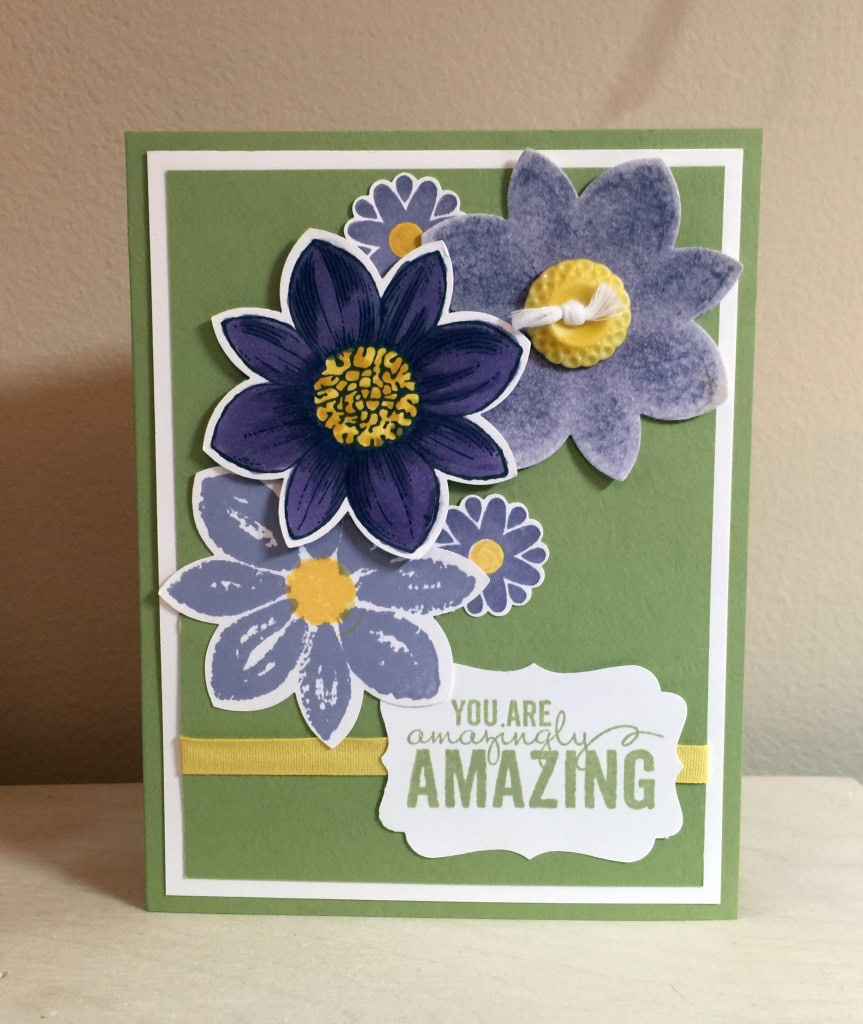
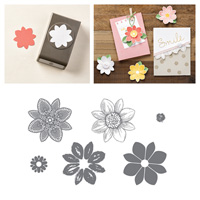
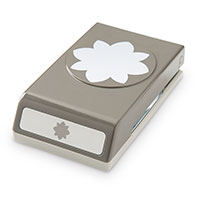
In February’s Stamp Club meeting, we used the Petal Potpourri stamp set and the Flower Medallion punch to create this card. You can buy both together in a Bundle and save 15%!

We used three different techniques to make the flowers on this card. Here’s how we made the large flowers, from bottom left to upper right:
1) We used the Stamp-a-ma-jig to stamp the Daffodil Delight directly in the center of the Wisteria Wonder flower.
2) We stamped this flower in black Memento ink, then colored it with Daffodil Delight and Wisteria Wonder Blendabilities markers.
3) We stamped this flower onto watercolor paper, then spritzed it with water. The button is colored with a Daffodil Delight Blendabilities Marker.
The sentiment is from the Painted Petals stamp set, which comes in wood, clear, AND photopolymer. The leaves are cut with the Bird Builder punch.
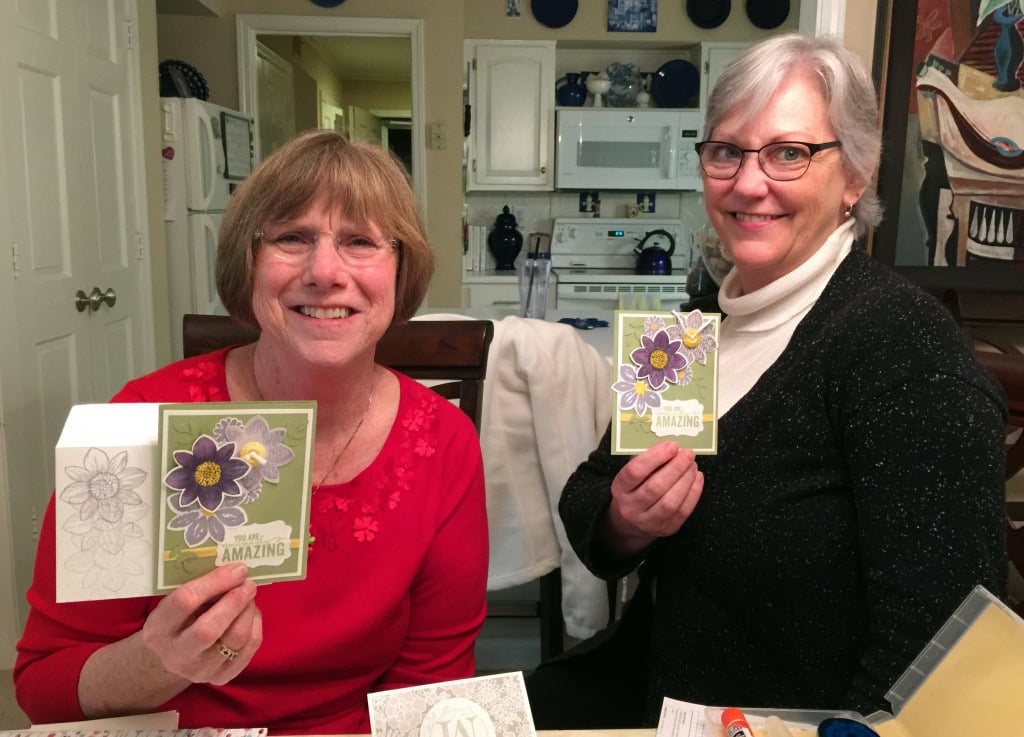
Stamp Club members Martha and Linda with their cards: 
Here’s what we used:
Thanks for stopping by today, and Sweet Stamping!