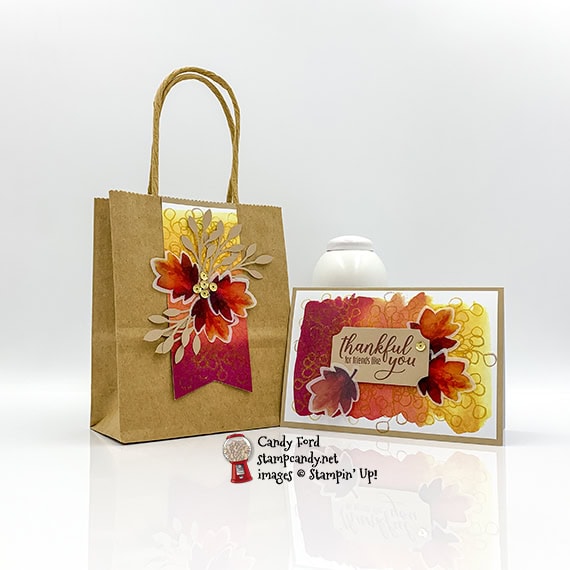
It’s time for the August 2019 PPPBH! This month’s Paper Pumpkin kit is called The Gift of Fall* and it’s a real beauty. There are so many colors, and so many pretty pieces to decorate the gift bags in the kit. There is also an add-on kit subscribers can purchase that has cards and envelopes. I used both to create my projects for today.
*What we in the US call Fall, folks in other English speaking parts of the world call Autumn.
S
Here’s the kit:
stamp set:
S
Here’s the add-on bundle:
S
Here’s what I made:
S
Here’s what I did:
Products in italics will be available beginning September 4, 2019.
Cut using Paper Snips:
tag from a note card front, using a white tag from the kit as a guide
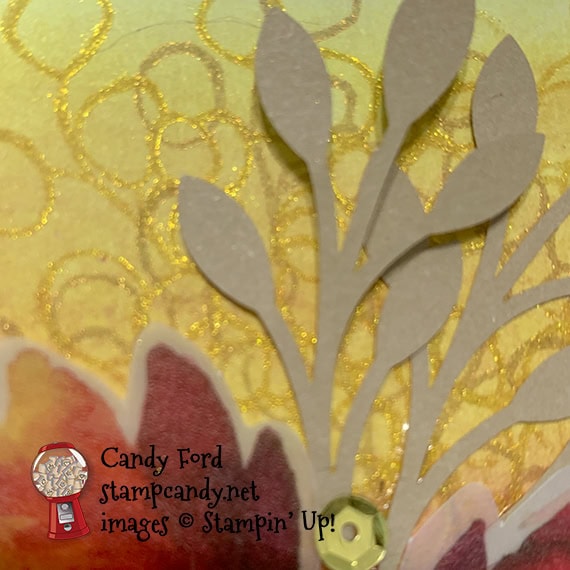
Stamped with the Gift of Fall stamp set:
berry sprigs in Golden Glitz and Celestial Copper Delicata Metallic inks onto the note card front and the tag front
sentiment in Merry Merlot ink onto the label
NOTE: The Delicata Metallic inks take longer to dry than the classic inks, so I heat set the stamped images with my heat tool. The shimmer of these inks doesn’t show well in the photos. They have a lovely glimmer to them which is subtler than heat embossing.
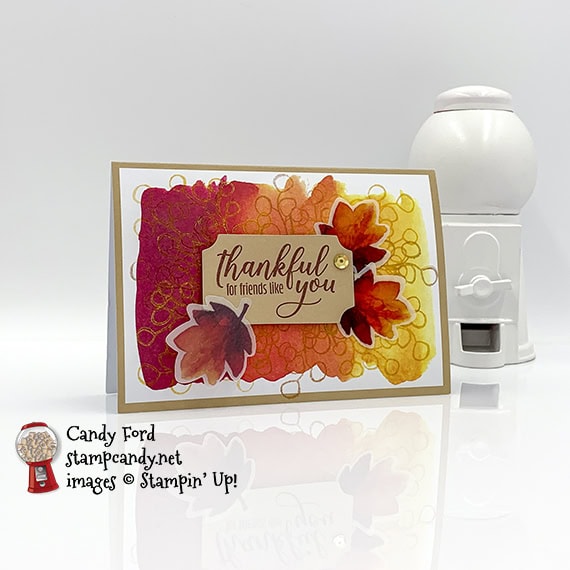
Assembled the card:
burnished the fold in the note card base with a Bone Folder
2 vellum leaves glued onto the front of the card base
1 vellum leaf glued onto the sentiment label
sentiment label adhered onto the front of the note card using Stampin’ Dimensionals
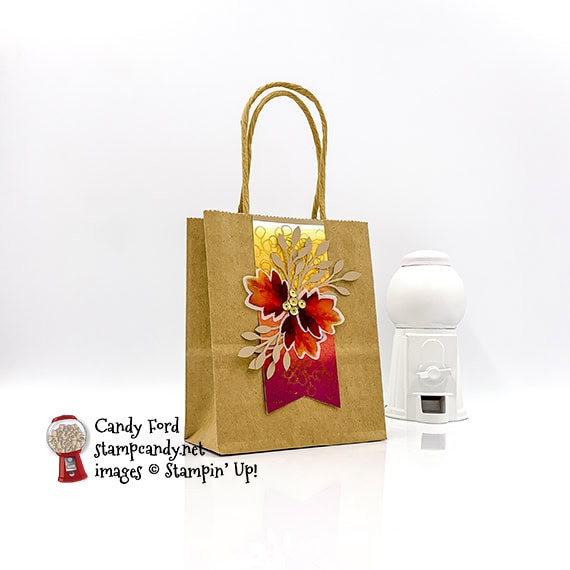
Assembled the bag:
3 vellum leaves and 5 Crumb Cake leaves glued onto the tag
5 gold sequins applied onto the center of the leaves
tag glued onto the front of the gift bag
S
Here’s the August 2019 PPPBH:
Click the pumpkin to hop to the next stop, Darla Watson of Scrap Happens Here with Darla.
Here are today’s colors:
You can click on each one to see all the products that come in that color!
Here’s the official Stampin’ Up! video for this kit:
S
Preorder the Pretty Petals Online Class by September 5:
Make 6 cards at home in your PJs!
2 each of 3 designs
Features the Pretty Petals Suite on pages 72-74 of the 2019-2020 Annual Catalog
I’ve done the trimming and scoring for you!
You’ll receive all you need to make the cards, including the stamp set, dies, embossing folder, pre-cut card kits, and 6 Very Vanilla envelopes.
Full detailed instructions
Limited spots available
Click on the image below for details and class options, or copy and paste this link into your browser: https://stampcandy.net/online-classes/pretty-petals-class-preorder/
Gift Certificates are available in any U.S. dollar amount from me. Contact mefor details.
Have you shopped from me within the past year? Join my private VIP Facebook groupfor exclusive project tutorials and more!
Join my team and enjoy a 20% discount (or more) on all your purchases! If you join by August 31 you’ll receive and extra $30 of free products in your Starter Kit! You choose $155 in products and pay only $99, and get free shipping! No obligation! No selling required!
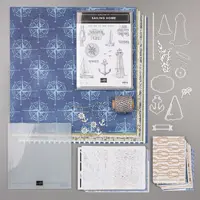
The theme for this month’s IRBH is Vacation. When I was trying to decide what to use for my project, I looked through all the great stamp sets I have. I could’ve made something about the beach, or any number of places like that. But when I thought about what I’ve really loved about my favorite vacations, I realized I love being someplace peaceful and quiet, with no everyday noise, where I can just relax and think. Then I came across the Peaceful Place stamp set and I knew that was it. I wanted to make a card that was peaceful and quiet and gentle, like a whisper. So I used Soft Sea Foam and Whisper White, two of the softest colors in the Stampin’ Up! line up. I hope you like what I’ve come up with.
Be sure to check out all the stops along the hop. You don’t want to miss any of the wonderful projects by this talented group!
S
Here’s what I made:
S
Here’s what I did:
Cut and scored with my paper trimmer:
Soft Sea Foam card stock (CS) cut to 4-1/4″ x 11″, then scored in half at 5-1/2″
Soft Sea Foam CS layer cut to 4″ x 5-1/4″
Whisper White CS cut to 4″ x 5-1/4″ for the inside of the card base
Stamped with the Peaceful Place stamp set:
image with river and trees in Soft Sea Foam ink onto a scrap of Whisper White CS
2 leaves in Soft Sea Foam ink onto the Whisper White CS for the inside of the card base
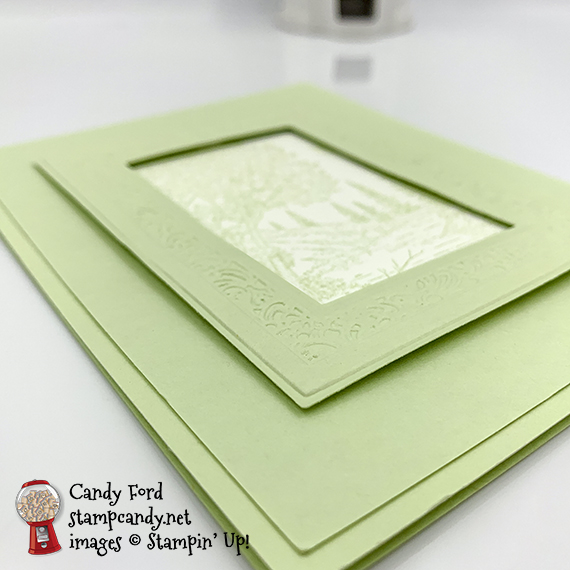
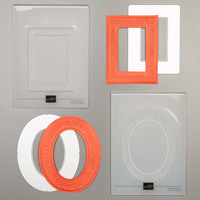
Cut using the Heirloom Frames Dies:
rectangular frame from a scrap of Soft Sea Foam CS
Embossed using the Heirloom Frames Embossing Folders:
the die cut frame
Assembled the card:
burnished the fold in the card base with a Bone Folder
Soft Sea Foam CS layer glued onto the front of the card base
stamped Whisper White CS layer, cut to fit behind the frame, glued onto the Soft Sea Foam CS layer
frame adhered over the stamped layer using Stampin’ Dimensionals
Whisper White CS with stamped leaves glued onto the inside of the card base
S
Here’s the Vacation blog hop:
Thank you for hopping along with us. I hope you’ll hop along to the next stop, Sheryl Sharp at Sharp Notes by Sheryl. There’s a lot of inspiration to be found in this group, and you don’t want to miss it! If you get stuck during the Blog Hop, please use this line-up as a guide:
Supply List <– Click here for a clickable and printable list!
S
TODAY IS THE LAST DAY to preorder the Mosaic Mood Online Class:
Make 6 cards at home in your PJs!
2 each of 3 designs
Features the Mosaic Mood Suite on pages 118-120 of the 2019-2020 Annual Catalog
I’ve done the trimming and scoring for you!
You’ll receive all you need to make the cards, including the stamp set, punch, embossing folder, Garden Green ink pad, pre-cut/pre-scored card kits, and 6 Whisper White envelopes.
Full detailed instructions
Limited spots available
Click on the image below for details and class options, or copy and paste this link into your browser: https://stampcandy.net/online-classes/mosaic-card-class-preorder/
Gift Certificates are available in any U.S. dollar amount from me. Contact mefor details.
Have you shopped from me within the past year? Join my private VIP Facebook groupfor exclusive project tutorials and more!
Join my team and enjoy a 20% discount (or more) on all your purchases! If you join by August 31 you’ll receive and extra $30 of free products in your Starter Kit! Plus and extra $10 coupon to use on your first order as a demonstrator! You choose $155 in products and pay only $99, and get free shipping! No obligation! No selling required!
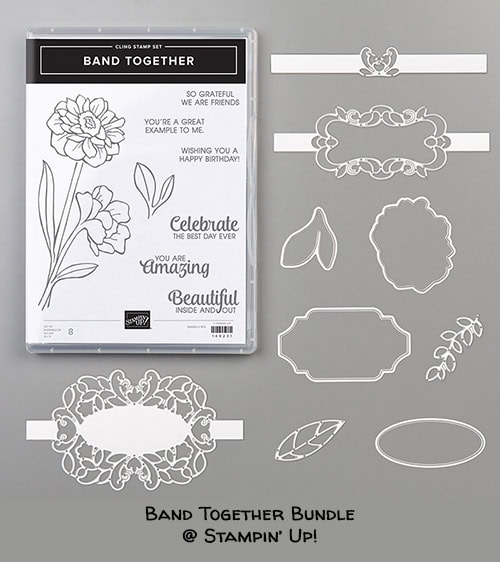
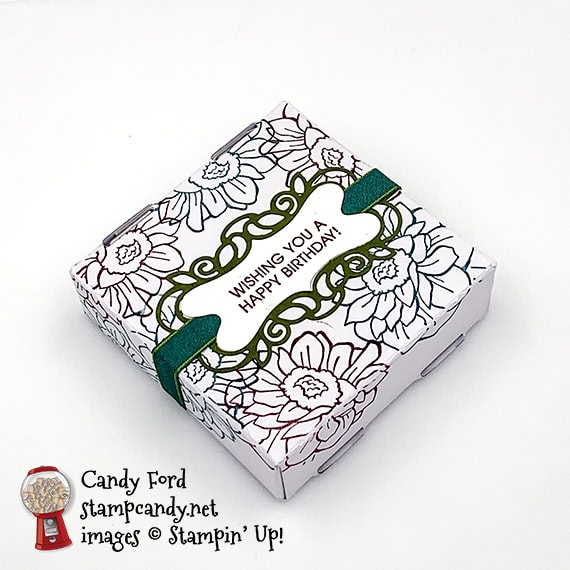
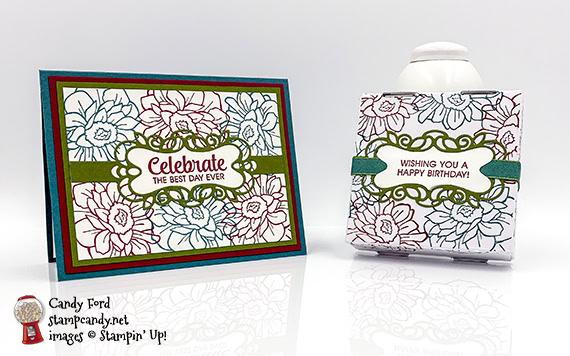
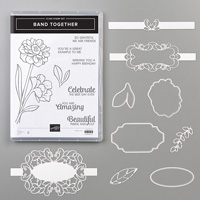
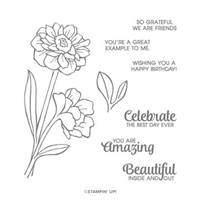
It’s time for the August 2019 ICS Blog Hop! This month’s theme is Beautiful Bundles. We are featuring those wonderful bundles from the Annual Catalog that save you 10% by bundling products together. I chose the lovely Band Together Bundle (Band Together stamp set and Detailed Bands Dies) to create a birthday card and Mini Pizza gift box.
S
Here’s the bundle:
S
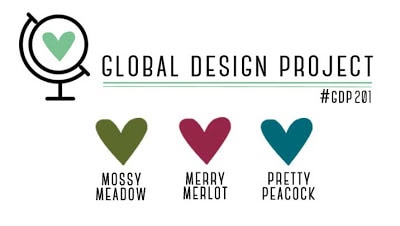
Today’s project was inspired by this week’s Global Design Project color challenge:
S
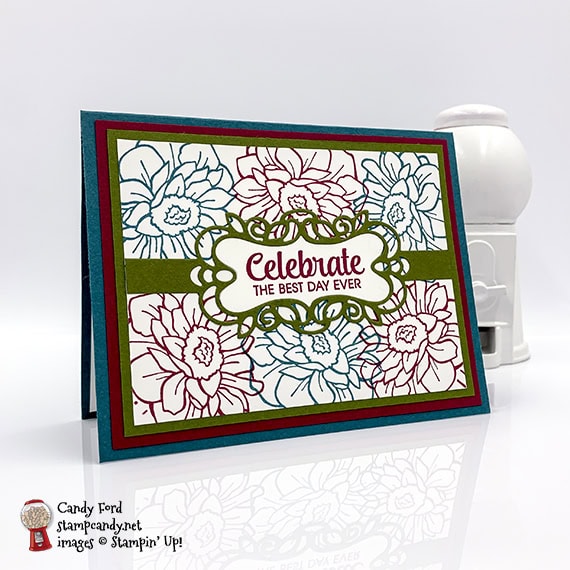
Here’s what I made:
S
Here’s what I did:
Cut and scored with my paper trimmer:
Pretty Peacock card stock (CS) cut to 5-1/2″ x 8-1/2″, then scored in half at 4-1/4″
Merry Merlot CS layer cut to 5-1/4″ x 4″
Mossy Meadow CS layer cut to 5″ x 3-3/4″
Whisper White CS layer cut to 4-3/4″ x 3-1/2″
Whisper White CS cut to 5-1/4″ x 4″ for the inside of the card base
Stamped with the Band Together stamp set:
card sentiment in Merry Merlot ink onto a scrap of Whisper White CS
box sentiment in Merry Merlot ink onto a scrap of Whisper White CS
large flower in Merry Merlot and Pretty Peacock inks onto the Whisper White CS layer and onto the top and sides of the pizza box (stamp the box while it’s still flat.)
Cut using the Detailed Bands Dies:
both sentiments and 2 pieces of Mossy Meadow CS using the same die
Assembled the card:
burnished the fold in the card base with a Bone Folder
Merry Merlot CS layer glued onto the front of the card base
Supply List <– Click here for a clickable and printable list!
S
Preorder the Mosaic Mood Online Class by August 21:
Make 6 cards at home in your PJs!
2 each of 3 designs
Features the Mosaic Mood Suite on pages 118-120 of the 2019-2020 Annual Catalog
I’ve done the trimming and scoring for you!
You’ll receive all you need to make the cards, including the stamp set, punch, embossing folder, Garden Green ink pad, pre-cut/pre-scored card kits, and 6 Whisper White envelopes.
Full detailed instructions
Limited spots available
Click on the image below for details and class options, or copy and paste this link into your browser: https://stampcandy.net/online-classes/mosaic-card-class-preorder/
Gift Certificates are available in any U.S. dollar amount from me. Contact mefor details.
Have you shopped from me within the past year? Join my private VIP Facebook groupfor exclusive project tutorials and more!
Join my team and enjoy a 20% discount (or more) on all your purchases! If you join by August 31 you’ll receive and extra $30 of free products in your Starter Kit! You choose $155 in products and pay only $99, and get free shipping! No obligation! No selling required!
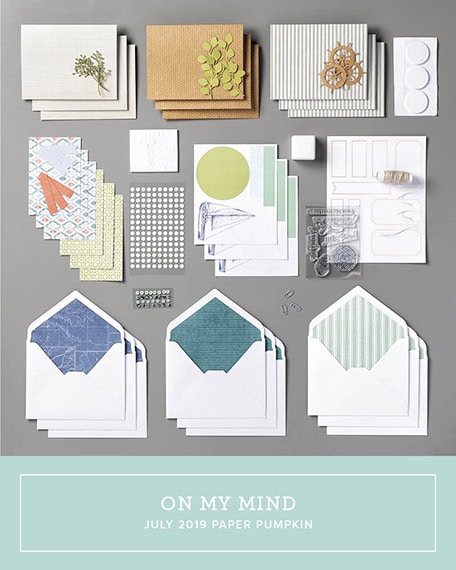
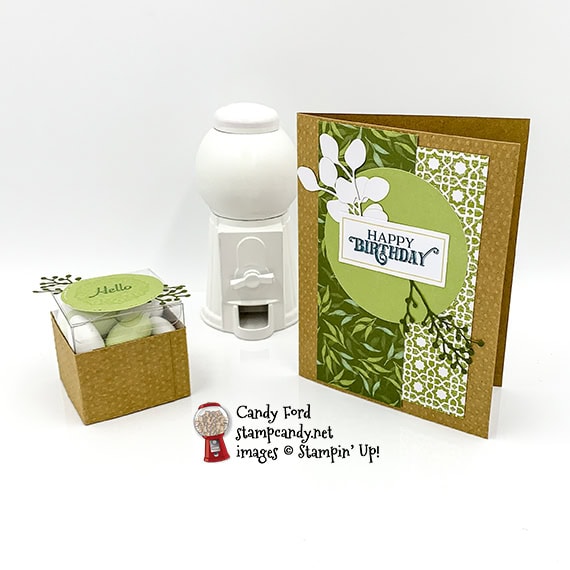
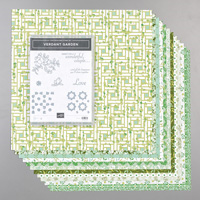
It’s time for the PPP July 2019 Blog Hop! This month’s kit is called On My Mind and it coordinates with three suites in the annual catalog. Three! There’s no end to the project possibilities with this kit.
S
Be sure to hop around to all the stops to see the great alternate projects this group has made using this month’s Paper Pumpkin kit!
S
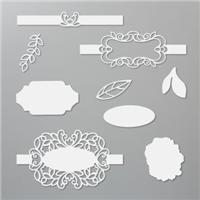
Here’s what comes in the kit:
S
Here’s what I made:
S
S
Here’s what I did:
Cut and scored with my paper trimmer:
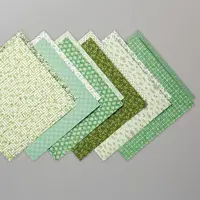
Garden Lane Designer Series Paper (DSP) layer to 2″ x 5-3/8″
front of a dotted card base cut to 1-1/2″ x 5-1/2″ (two of these)
Cut using the Stitched Shapes Dies:
a precut stitched circle down to a smaller stitched circle
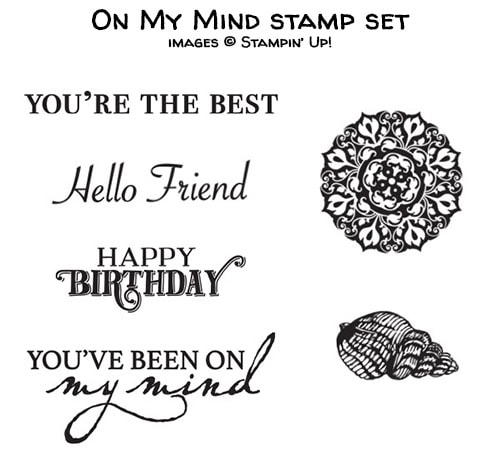
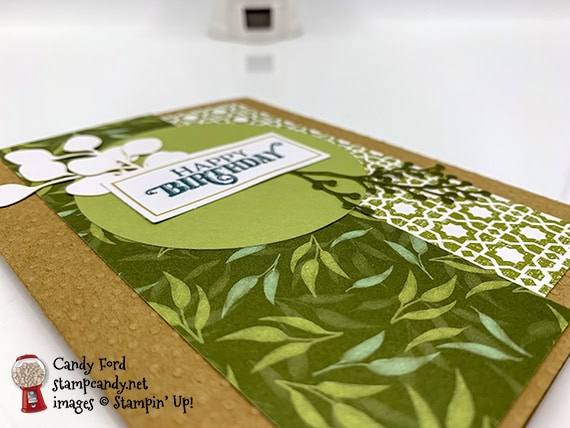
Stamped with the On My Mind stamp set:
card sentiment in Pretty Peacock ink onto a rectangular die cut label
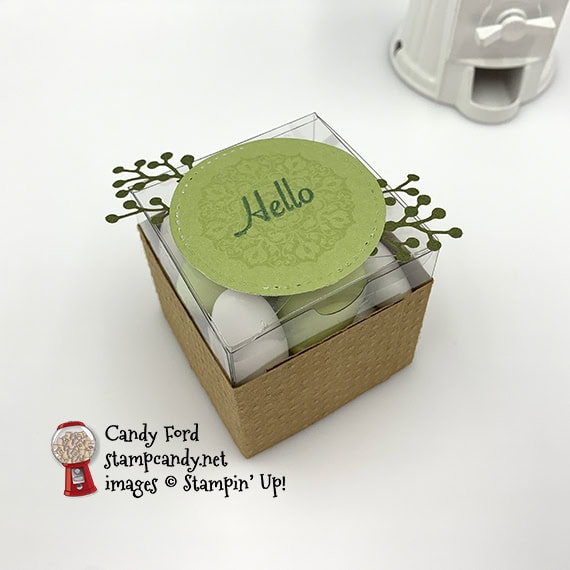
medallion in Soft Sea Foam ink onto the smaller die cut circle
Hello in Pretty Peacock ink onto the smaller die cut circle
Assembled the card:
burnished the fold in the card base with a Bone Folder
lattice design precut paper glued onto the front a a dotted card base, centered top to bottom, about 1/2″ from the right
DSP layer glued over the lattice design paper, centered top to bottom, about 1/2″ from the left
precut stitched circle glued over the layers
2 leaves and a sprig glued over the circle
sentiment glued over the leaves and sprig
Assembled the box:
folded and assembled a Clear Tiny Treat Box
2 pieces of dotted card base wrapped around a treat box and adhered using Tear & Tape
2 twigs adhered onto the back of the small die cut circle using Tear & Tape
circle adhered onto the top of the box using Tear & Tape
S
Here’s the PPP July 2019 blog hop:
Click on the pumpkin to hop to the next blog, Charmane Hopkins of Renee’s Paper Treasures.
S
Here’s the video for this month’s kit:
S
CLICK HERE to download the stamp case insert for this month’s kit.
S
Here are today’s colors:
You can click on each one to see all the products that come in that color!
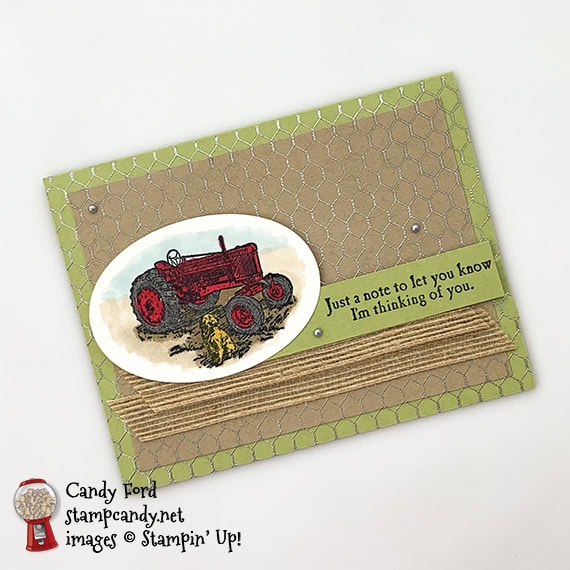
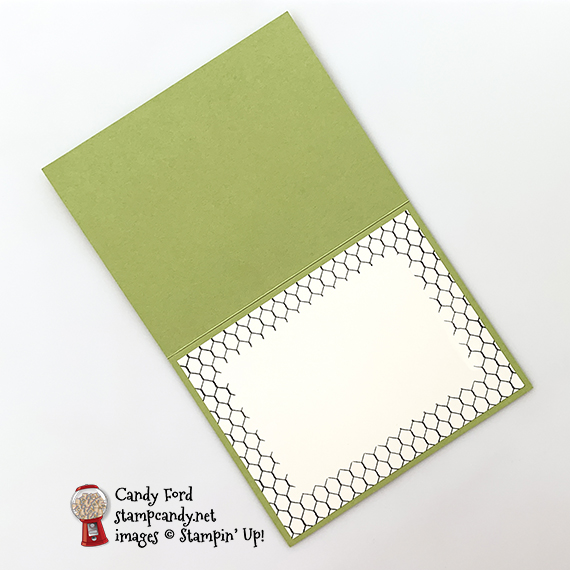
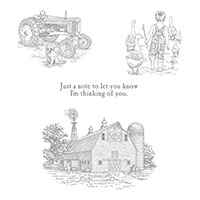
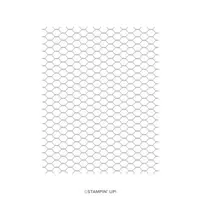
I used the Heartland and All Wired Up stamp sets, along with the Layering Ovals Dies, to create this “just a note” card. Silver embossing powder gives dimension to the chicken wire. And silver Metallic Pearls look like metal studs or nail heads. This tiny bit of silver “bling” balances the muted tones of this rural themed card.
S
Here’s what I made:
S
Here’s what I did:
Cut and scored with my paper trimmer:
Pear Pizzazz card stock (CS) cut to 5-1/2″ x 8-1/2″, then scored in half at 4-1/4″
Crumb Cake CS layer cut to 5″ x 3-3/4″
Pear Pizzazz CS strip cut to 4″ x 3/4″
Very Vanilla CS cut to 5-1/4″ x 4″ for the inside of the card base
scrap of CS (can be any color) cut to 4″ x 2-3/4″, for masking
Stamped with the All Wired Up background stamp:
first in Versamark ink onto the front of the card base, then heat embossed in silver
second in Versamark ink onto the Crumb Cake CS layer, then heat embossed in silver
third in black Stazon ink onto the Very Vanilla CS for the inside of the card base, after laying the 4″ x 2-3/4″ CS scrap on the center to mask it (discarded the CS scrap after stamping)
Stamped with the Heartland stamp set:
tractor scene in black Stazon ink onto a scrap of Very Vanilla CS
sentiment in black Stazon ink onto the right end of the Pear Pizzazz CS strip
Cut using the Layering Ovals Dies:
tractor scene
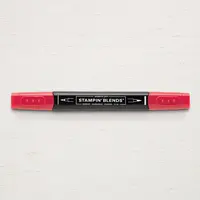
Colored using Stampin’ Blends Markers:
truck in Dark Real Red
tires in Dark Smoky Slate
ground in Light Crumb Cake, and shadows in Dark Crumb Cake
sky in Light Balmy Blue
dog in Dark Daffodil Delight, then went over it in Light Crumb Cake to tone down the yellow
Assembled the card:
burnished the fold in the card base with a Bone Folder
Crumb Cake CS layer glued onto the front of the card base
2 pieces of overlapping Burlap Ribbon adhered onto the Crumb Cake CS layer using Tear & Tape
sentiment strip glued onto the Crumb Cake CS layer, overlapping the ribbon
tractor oval adhered onto the Crumb Cake CS layer using Stampin’ Dimensionals, overlapping the sentiment strip and ribbon
3 silver pearls applied onto the card front: 2 onto the Crumb Cake CS layer and 1 onto the sentiment strip
Very Vanilla CS glued onto the inside of the card base
S
Here are today’s colors:
You can click on each one to see all the products that come in that color!
It’s time for the InKing Royalty Blog Hop (IRBH) for July. This month’s theme is Sunshine. I can’t wait to see what this talented group has made. For my project, I made a thank you card the color of sunshine, with sunshine shining down on sunshine colored flowers. Do you think I captured the theme okay?
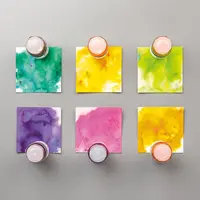
The look I was going for on this card was like one of those photos that has had all the color completely desaturated except for just a few areas that are left vibrant. I used the Daffodil Delight Pigment Sprinkles and an Aqua Painter to color the tulips and the sun. Yes, even the orange bits are Daffodil Delight – just with a heavier concentration of the Sprinkles. A clear block makes the perfect palette for this.
To continue with the desaturated look, I colored the rest of the image in Smoky Slate.
SI
Here’s what I made:
I made this card all wrong. I started out doing one thing, then changed my mind. So I thought it would just be a trial run, then I would redo it properly. But then I kind of liked how it turned out. So to do it “correctly” I would use Stazon on ink instead of Memento, and Watercolor Paper or Shimmery White Cardstock instead of regular Whisper White Cardstock.
I found that using a very light touch with the Aqua Painter worked fine for the tulips on the Whisper White Cardstock. While I like the way this sun turned out, you could get a smoother look by using the two other types of paper.
S
Here’s what I did:
Cut and scored with my paper trimmer:
Daffodil Delight card stock (CS) cut to 4-1/4″ x 11″, then scored in half at 5-1/2″
Pumpkin Pie CS cut to 3-7/8″ x 5-1/8″
Whisper White CS layer cut to 3-3/4″ x 5″
optional: Whisper White CS cut to 3-3/4″ x 5″ for the inside of the card base
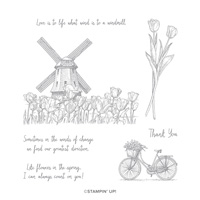
Stamped with the Winds of Change stamp set:
large image in Memento black ink onto the Whisper White CS layer
sentiment in Memento black ink onto the Whisper White CS layer
Colored using Pigment Sprinkles and an Aqua Painter:
tulips in Daffodil Delight
sun at top right corner in Daffodil Delight
Colored using a Blender Pen:
windmill, stems, leaves, and ground in Smoky Slate
Assembled the card:
burnished the fold in the card base with a Bone Folder
Pumpkin Pie CS layer glued onto the front of the card base
stamped layer glued onto the Pumpkin Pie CS layer
optional: Whisper White CS glued onto the inside of the card base
Supply List <– Click here for a clickable and printable list!
S
Preorder the Daisy Lane Online Class by today!
Make 6 cards in the comfort of your own home
2 each of 3 designs
Features the Daisy Lane Bundle on page 23 of the 2019-2020 Annual Catalog
I’ve done the trimming and scoring for you!
You’ll receive all you need to make the cards, including the stamp set, punches, pre-cut/pre-scored/pre-embossed card kits, and 6 envelopes.
Full detailed instructions
Limited spots available
Click on the image below for details and class options, or copy and paste this link into your browser: https://stampcandy.net/online-classes/daisy-lane-card-class-preorder/


 S
S