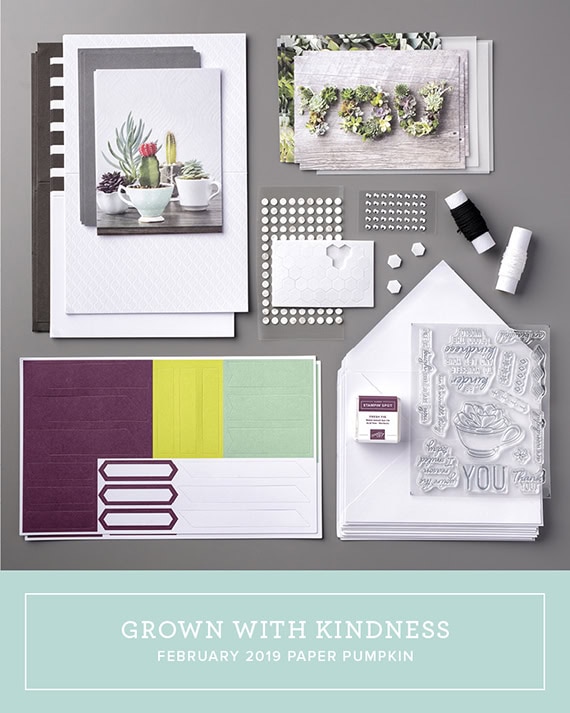
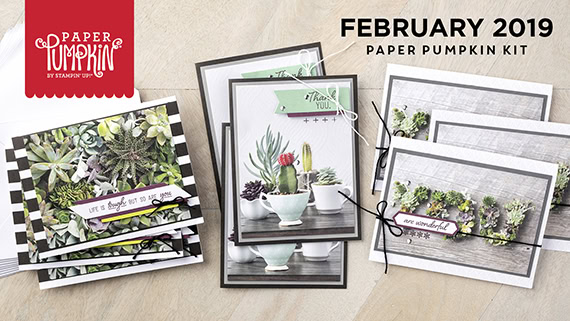
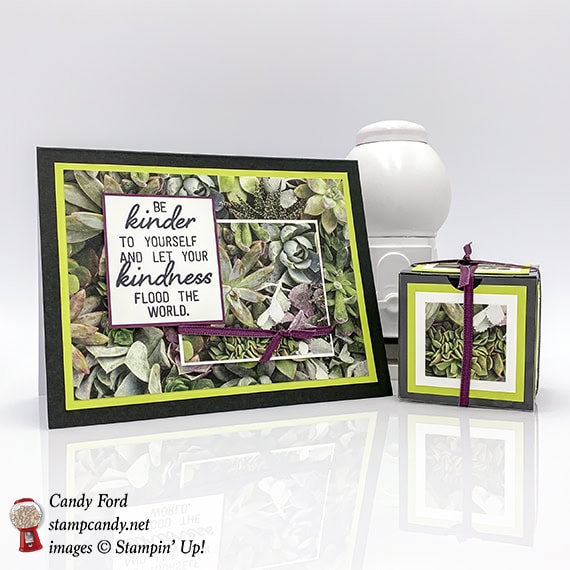
It’s time for the APPT Blog Hop for February! This month’s kit is called Grown with Kindness and it features 9 sweet cards with photographic images of succulent plants.
S
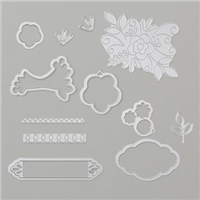
Here’s the Grown With Kindness kit:
What comes in the kit:
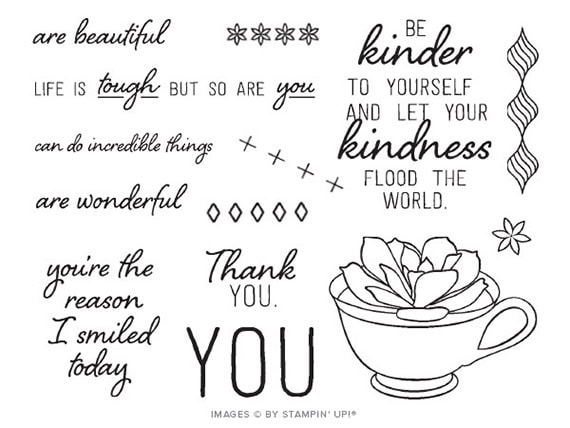
The stamp set:
The kit makes 9 cards:
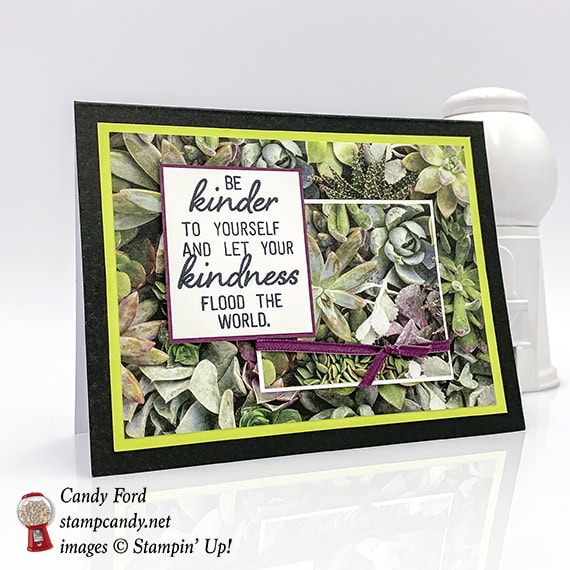
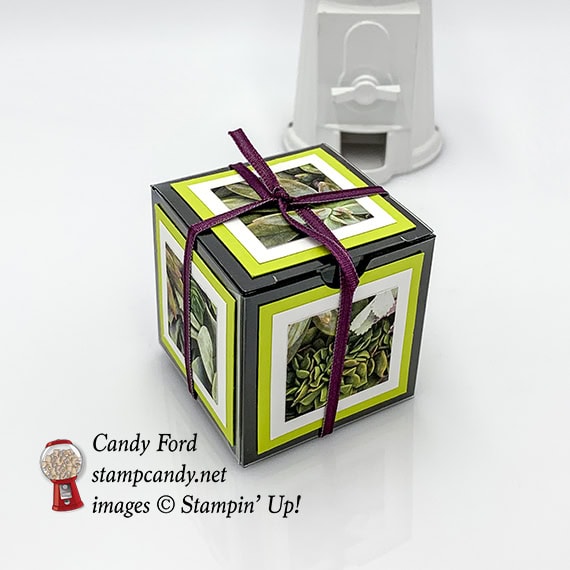
I used a card base and a couple of photographic pieces from the kit along with a few other Stampin’ Up! products for my alternate projects: a card and a gift/treat box. I can’t wait to see what all the talented stampers on the blog hop have come up with for their alternate projects. Be sure to hop all the way around, because you won’t want to miss any of them.
S
Here’s what I made:
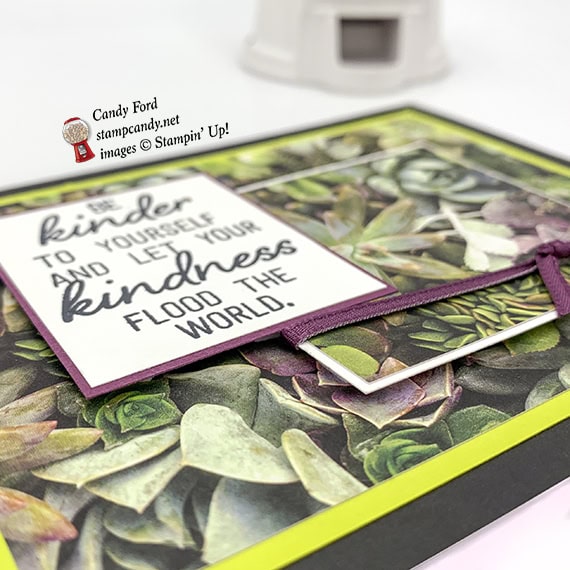
The ribbon is a bit loose and saggy on the card, probably because it got manhandled too much before making its way upstairs for the photos. And the ribbon on the box is a little crooked. I guess I was too tired to notice when I took the photos. Just be mindful of the ribbon when you make yours.
The bottom of the box: S
Here’s what I did:
Cut and scored with my Stampin’ Trimmer:
Lemon Lime Twist card stock (CS) cut to 5″ x 3-3/4″
photographic card layer cut to 4-3/4″ x 3-1/2″
Whisper White CS cut to 2-5/8″ x 2-3/8″
photographic card layer cut to 2-1/2″ x 2-1/4″
Fresh Fig CS cut to 1-7/8″ x 2-1/8″
Whisper White CS cut to 1-3/4″ x 2″
Basic Black CS cut to 2″ x 8″, then scored at 2″, 4″, and 6″
Basic Black CS cut to 2″ x 6″, then scored at 2″ and 4″
Lemon Lime Twist CS cut to 1-3/4″ x 1-3/4″ (5 pieces)
Whisper White CS cut to 1-1/2″ x 1-1/2″ (5 pieces)
photographic card layer cut to 1-3/8″ x 1-3/8″ (5 pieces)
Stamped with the Grown With Kindness stamp set:
sentiment in Memento black ink onto the 1-3/4″ x 2″ Whisper White CS
Cut using the 1/2″ Circle Punch:
semicircle from one end of the 8″ long Basic Black CS
Lemon Lime Twist square for the front of the box
Assembled the card:
burnished the fold in the card base with a Bone Folder
Lemon Lime Twist CS layer glued onto the front of the card base
largest photographic layer glued onto the Lemon Lime Twist CS layer
sentiment glued onto the Fresh Fig CS layer
2-1/2″ x 2-1/4″ photographic layer glued onto the 2-5/8″ x 2-3/8″ Whisper White CS layer
Fresh Fig 1/8″ ribbon tied around the bottom of the photographic layered piece
the two small layered pieces glued together, then adhered onto the largest photographic layer using Stampin’ Dimensionals
Assembled the box:
burnished the folds in the box with a Bone Folder, then assembled the box
burnished the folds in the two Basic Black CS pieces
8″ Basic Black CS inserted into the box, with the punched notch at the front
6″ Basic Black CS inserted into the box to line both sides
1-3/8″ photographic piece glued onto a 1-1/2″ Whisper White piece, and that glued onto a 1-3/4″ Lemon Lime Twist CS piece (did this for all 5 pieces)
the 5 layered pieces adhered onto the top and four sides of the box using Tear & Tape
Fresh Fig 1/8″ ribbon tied around the box
S
Here’s the hop:
S
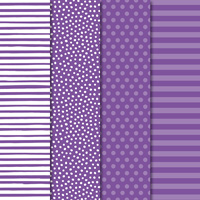
Here are today’s colors:
You can click on each one to see all the products that come in that color!
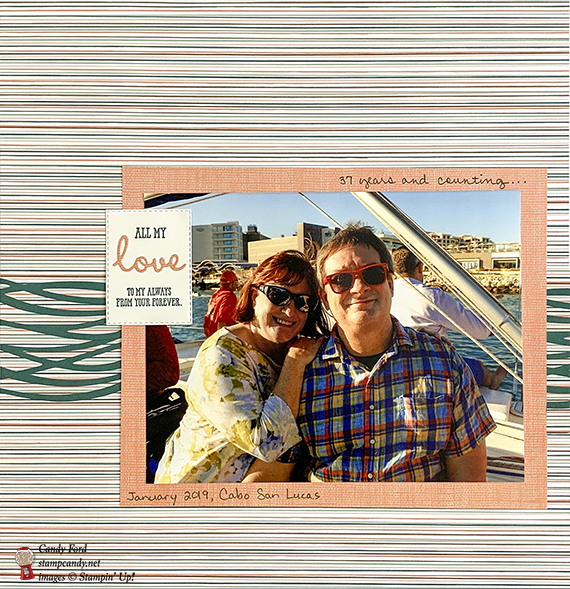
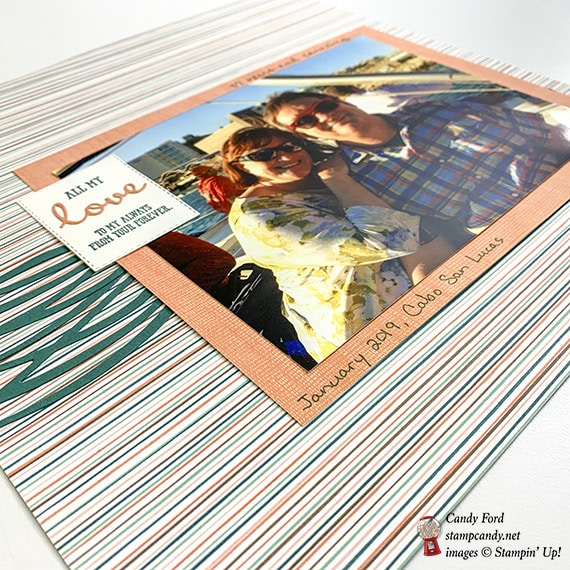
This month the Scrapbooking Global Blog Hop has a theme challenge: Love & Marriage. My page definitely has a love theme, but not necessarily marriage, unless you count the note I made above the photo of how long hubby and I have been together. I used the Nature’s Poem Designer Series Paper because I thought the colors went well with the photo (I must say it looks better in person than in my pics below.) The Well Said Bundle, plus a couple more die sets, Rectangle Stitched Framelits and Swirly Scribbles Thinlits, added the accents. I always try to add some handwriting to my scrapbook pages, and I used a Tranquil Tide Stampin’ Write Marker for this one.
Here’s what I made:
The photo is of the two of us on a sailboat in Cabo this past January. I thought the colors of the paper and the wavy die cuts were perfect for the background. And the stitched edges of the sentiment reminded me of the sails. This was a great outing. We saw some humpback whales and they kept jumping out of the water and crashing back down, like they were putting on a show for us, for almost an hour. They made me completely forget that my back was killing me, although it was already much better at this point, after relaxing by the pool for several days prior. Pain shmain. Life is good.
See what’s missing? I took this shot before I added the other Tranquil Tide die cut on the right side of the photo:
Here’s what I did:
Stamped with the Well Said stamp set:
sentiment in Tranquid Tide ink onto a scrap of Whisper White card stock (CS)
the Stamparatus made it easy to line up the two stamps
Die cut using the Rectangle Stitched Framelits:
sentiment – The die was longer than I needed so I cut the sentiment close to the top, then again close to the bottom.
Die cut using the Well Written dies:
“love” from a scrap of the DSP
Die cut using the Swirly Scribbles Thinlits:
a scrap of Tranquil Tide card stock using the long wavy die, two pieces
Cut with my Stampin’ Trimmer:
Nature’s Poem Designer Series Paper (DSP) full 12″ x 12″ for the background
DSP cut to 9″ x 7″, to mat the 8″ x 6″ photo
one of the wavy die cuts vertically in half (2 pieces about 3″ wide each)
the other wavy die cut vertically to two pieces about 3/4″ wide each
Assembled the page:
photo adhered onto DSP mat using Snail adhesive
Tranquil Tide wavy die cuts glued onto the DSP background page, the 3″ pieces on the left and the 3/4″ pieces on the right.
DSP mat adhered onto the DSP background using Snail, covering the ends of the wavy die cuts
die cut word glued onto the die cut sentiment
sentiment adhered over other layers using Snail
notes handwritten onto the DSP mat using a Tranquil Tide marker
Here’s the hop:
You can click on the next button to hop to the next stop, or you can use the list below to navigate the hop.
Here are today’s colors:
You can click on each one to see all the products that come in that color!
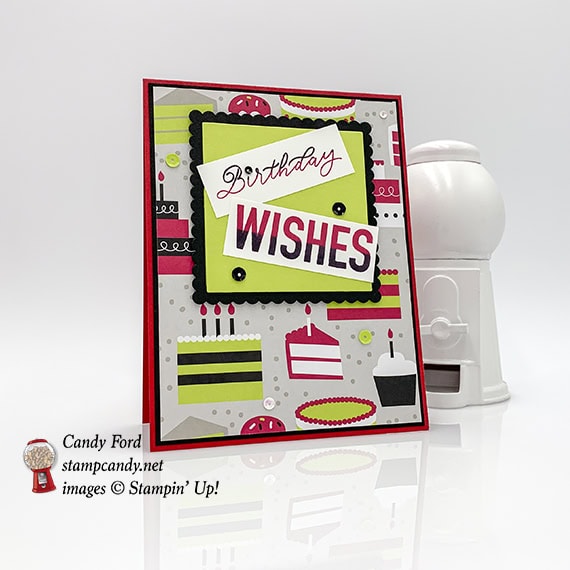
Welcome to InKing Royalty’s February Blog Hop! This year’s Blog Hop themes are inspired by a single word, and this month our projects are centered around BIRTHDAY. I used the upcoming More Than Words stamp set along with the Layering Squares Framelits Dies and Broadway Bound Designer Series Paper. The Stamparatus makes the two tone stamping super easy!
It’s always special to celebrate the birthday of someone you love, so handmade birthday cards are always fun to share. We are excited to share our creations with you today! After you read my post, I hope you’ll hop over to the next person on the list at the base of this post, the wonderful Jackie Beers of Blue Line Stamping.
When I use small embellishments like sequins or pearls, I always try to use odd numbers, usually 3. Today I used 7, which I would normally feel is too many. But I think they kind of blend in on this card, so they don’t seem like too much. What do you think?
S
Here’s what I made:
I originally cut the sentiment using one of the square dies, so it fit perfectly on the other die cut squares. But that just didn’t seem very fun. So I opted to cut the words apart and glue them onto the squares in a more whimsical fashion.
S
Here’s what I did:
Cut and scored with my Stampin’ Trimmer:
Lovely Lipstick card stock (CS) cut to 4-1/4″ x 11″, then scored in half at 5-1/2″
Basic Black CS cut to 4-1/8″ x 5-3/8″
Broadway Bound Designer Series Paper (DSP) cut to 4″ x 5-1/4″
Whisper White CS cut to 4″ x 5-1/4″ for the inside of the card
trimmed around sentiments after stamping
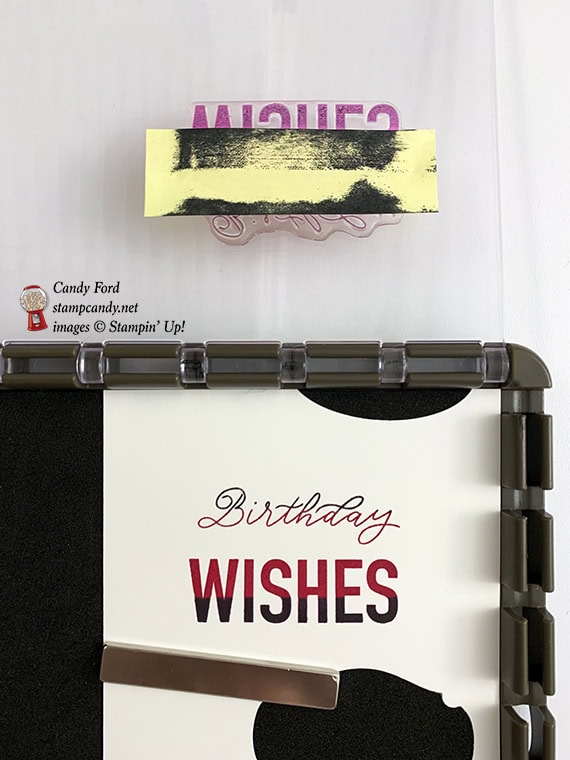
Stamped with the More Than Words stamp set:
sentiment in Lovely Lipstick ink onto a scrap of Whisper White CS
part of sentiment in black Memento ink over the Lovely Lipstick ink
To accomplish this two tone effect, I used the Stamparatus: 1) stamped the sentiment first in Lovely Lipstick ink 2) used a Shammy to clean the stamps. 3) cut a sticky note to about 7/8″ wide and placed it over the part of the sentiment I wanted to remain Lovely Lipstick. 4) inked up the stamps in black ink, then removed the sticky note strip before stamping over the original image.
You can see in the photo that I really do use “scraps” of card stock.
Die cut using the Layering Squares Framelits:
a square from a scrap of Lemon Lime Twist CS
a scalloped square from a scrap of Basic Black CS
Assembled the card:
burnished the fold in the card base with a Bone Folder
Basic Black CS layer glued onto the front of the card base
DSP layer glued onto the Basic Black CS layer
Lemon Lime Twist CS square glued onto the Basic Black CS scalloped square
Basic Black CS scalloped square adhered onto the DSP layer using Stampin’ Dimensionals
sentiment pieces glued onto the Lemon Lime Twist CS square
2 black sequins glued onto the Lemon Lime Twist square
1 small black sequin glued onto the sentiment, dotting the “i”
Whisper White CS glued onto the inside of the card base
S
Here’s the Birthday hop:
Thank you for hopping along with us. After you read my post, I hope you’ll hop on over to the next stop, Jackie Beers at Blue Line Stamping. If you get stuck during the Blog Hop, please use this line-up as a guide:
For this month’s OSAT blog hop, we are featuring simple projects. #simplestamping The idea is to use only stamps, ink, and paper. I made mine even simpler by using a premade card from the Whisper White Large Memories & More Cards & Envelopes pack, and a Mini Pizza Box. I stamped directly onto the card, envelope, and box, and BOOM I was done! I used three stamp sets (Here Comes the Sun for the sentiment, Balloon Celebration for the cloud, and Artisan Textures for the rain) and three ink colors (Mango Melody, Daffodil Delight, and Smoky Slate.)
S
Here’s what I made:
Here’s what I did:
Stamped with the Here Comes the Sun stamp set:
sentiment in Mango Melody ink onto the front of the card base and onto the top of the mini pizza box
sunshine in Daffodil Delight ink inside the sentiment on both the card and the box
sunshine in Daffodil Delight ink onto the front of the envelope (bottom left) and onto the back flap of the envelope (top left)
Stamped with the Balloon Celebration stamp set:
cloud in Smoky Slate ink (stamped off once) onto the front of the card base
Stamped with the Artisan Textures stamp set:
rain in Smoky Slate ink under the cloud
The cloud and rain were an afterthought. You can leave them off and only use the one stamp set I you prefer.
Assembled the #simplestamping projects:
burnished the fold in the card base with a Bone Folder
burnished the folds in the box and folded it together
DONE!
Here’s the #simplestamping blog hop:
Here are today’s colors:
You can click on each one to see all the products that come in that color!
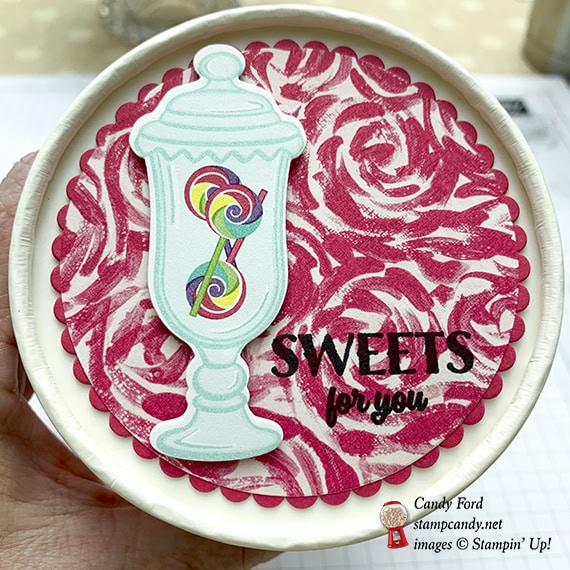
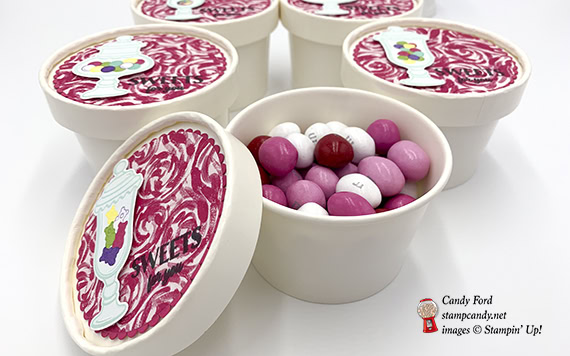
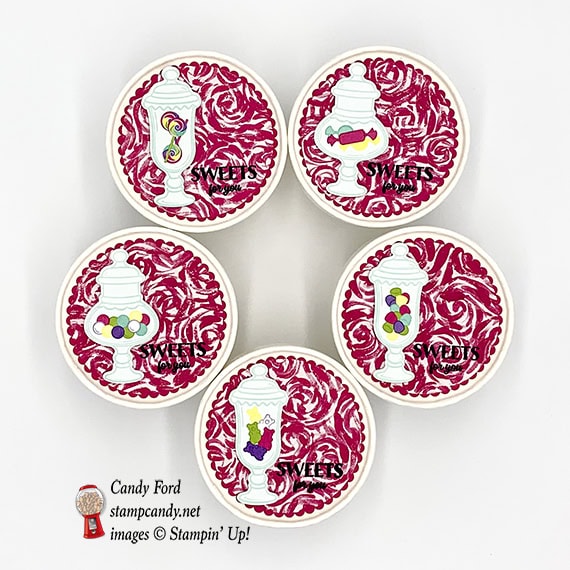
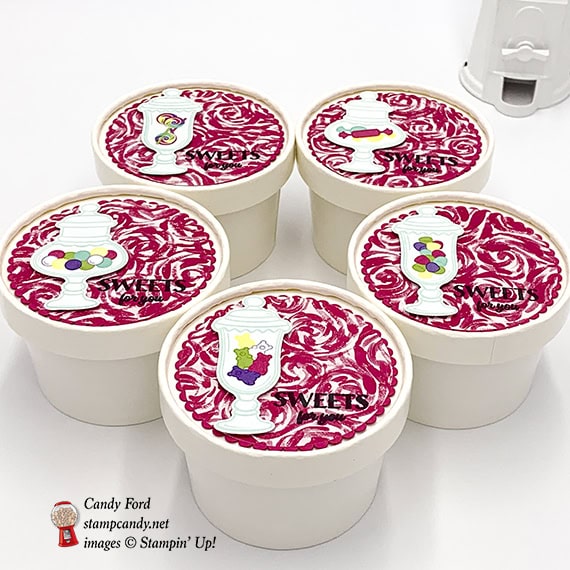
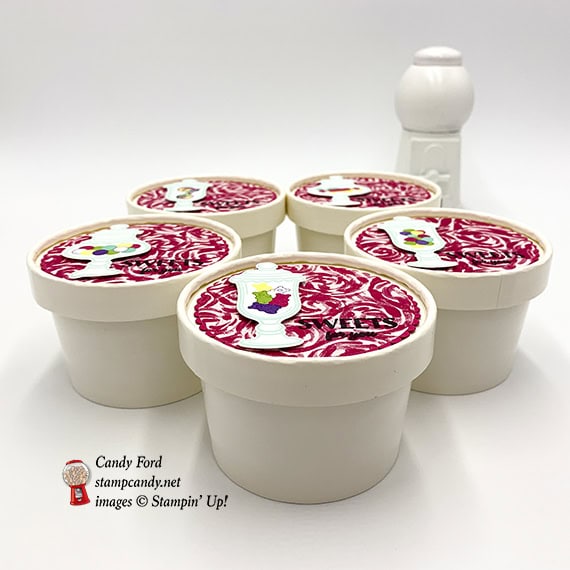
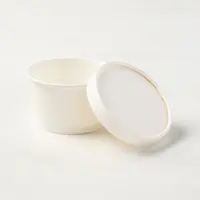
Today for the ICS Love Thing Blog Hop we are sharing projects for wedding, anniversary or Valentines Day. I’m sharing the little gifts I made for some friends of mine for Valentine’s Day. I filled Sweet Cups with Valentine themed peanut M&Ms, and decorated the lids with the Sweetest Thing bundle, How Sweet It Is and Garden Impressions Designer Series Papers, and the Layering Circles Framelits Dies. I used the Stamparatus to stamp the sentiment so it would be in exactly the same place on each one – read on to see how I did that. Super quick and easy!
Here’s what I made:
Here’s what I did:
Die cut using the Layering Circles Framelits:
largest scalloped circle from Melon Mambo card stock (CS)
largest plain circle from Garden Impressions Designer Series Paper (DSP)
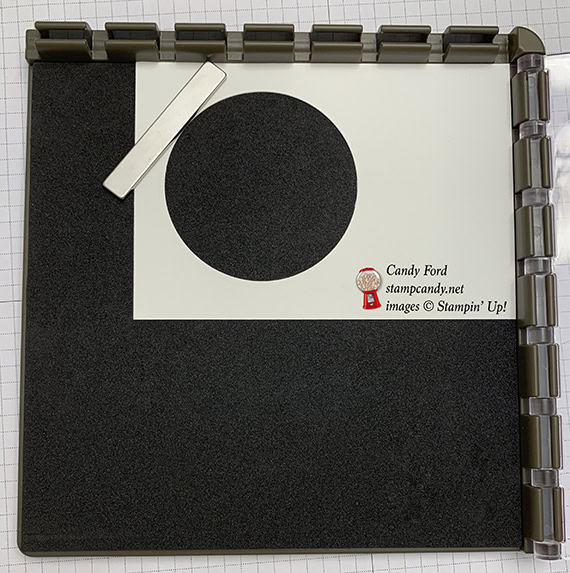
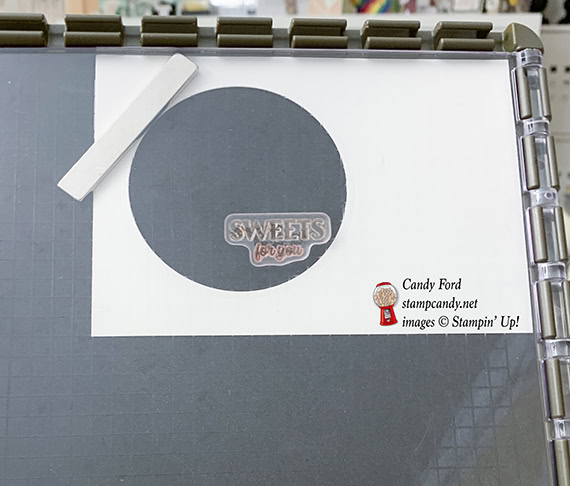
largest plain circle from a scrap of CS (any color) for a Stamparatus template (see below)
Die cut using the Jar of Sweets Framelits:
candy jars from a piece of How Sweet It Is DSP
Stamped with the Sweetest Thing stamp set:
sentiment in black ink onto the DSP circle
I placed the die cut template on the Stamparatus and placed the stamp where I wanted it on all the circles. Then I placed each DSP circle in the template and stamped. This is great for stamping multiples of the same thing, or for stamping in the same place more than once if you didn’t get a good stamp the first time.
Assembled the sweet cups:
DSP circle glued onto the Melon Mambo CS circle
die cut candy jar adhered onto the DSP circle using Stampin’ Dimensionals
Melon Mambo CS circle adhered onto the lid of the sweet cup using Tear & Tape
Here’s the It’s A Love Thing blog hop:
Here are today’s main colors:
You can click on each one to see all the products that come in that color!
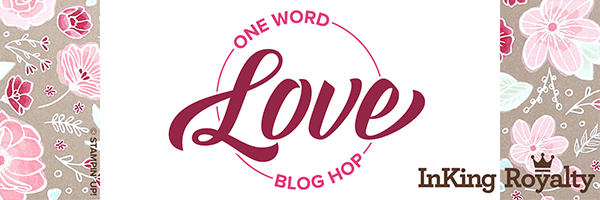
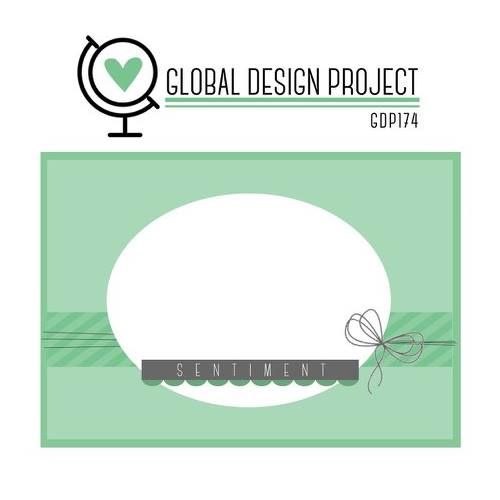
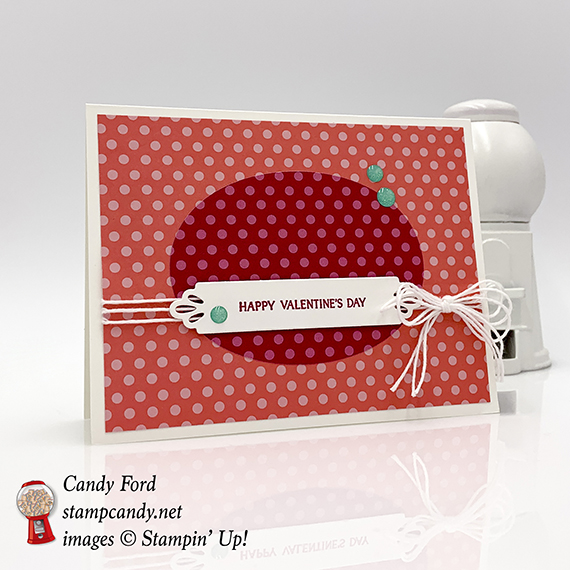
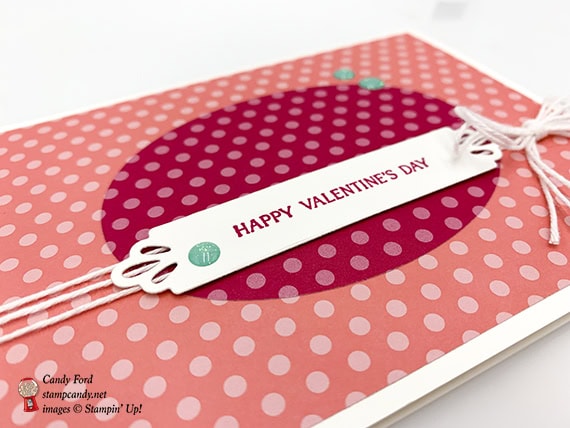
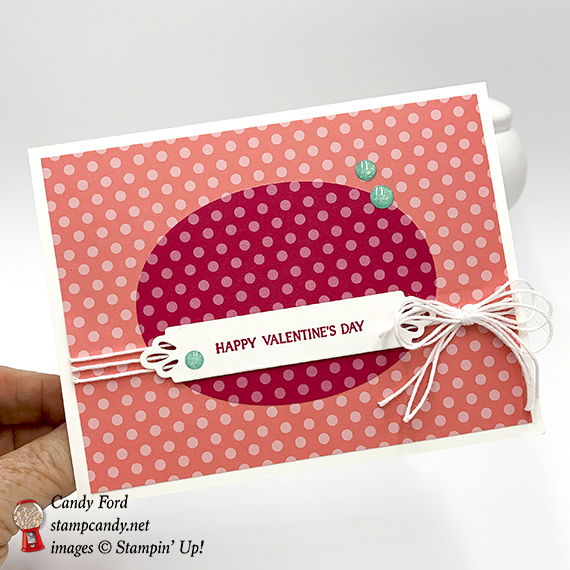
It’s time for the IRBH Blog Hop! I always look forward to hopping with this amazing group of stampers. The theme for this month’s hop is Love. I made a simple Valentine’s card using products from both the Occasions and Annual catalogs. My card was inspired by the GDP sketch challenge for this week:


 S
S