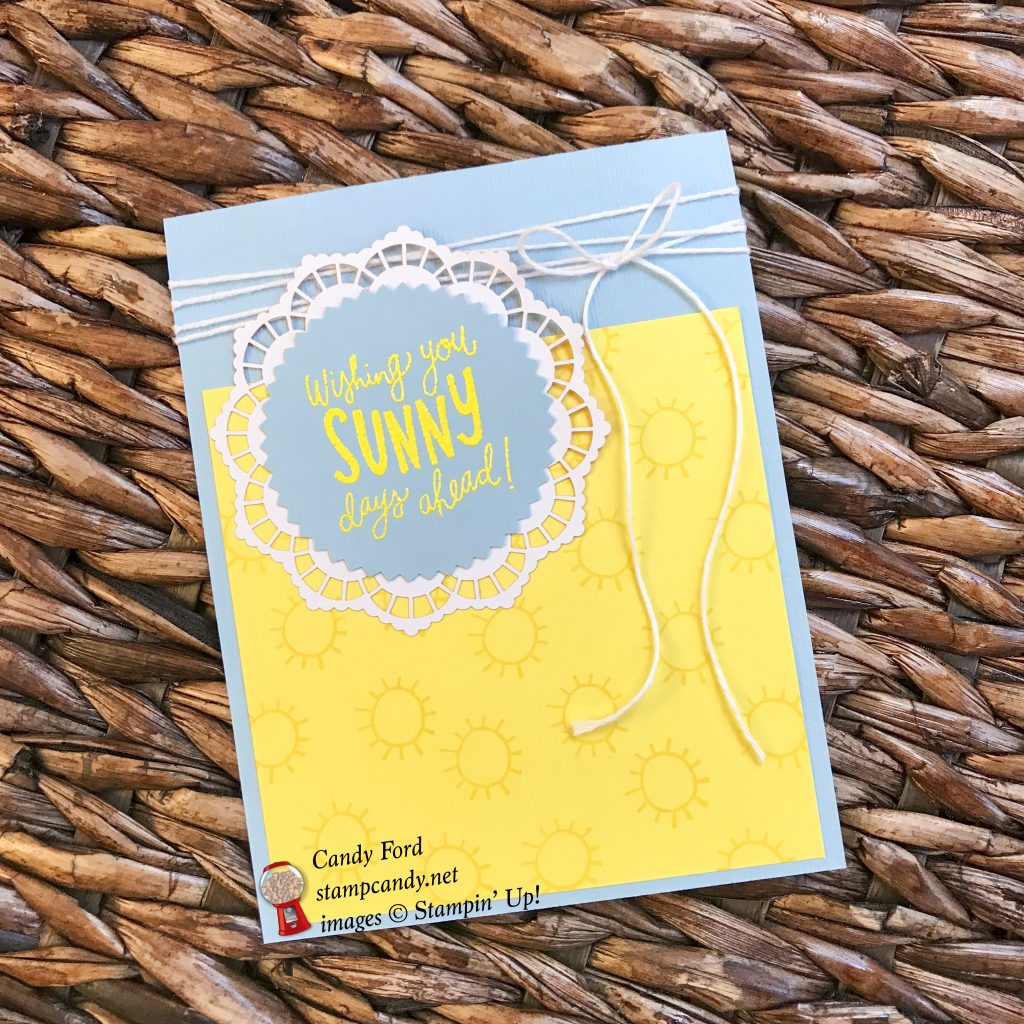
It’s time for the InKing Royalty Blog Hop for June! This year’s Blog Hop themes are inspired by popular songs, and this month’s theme song is “Here Comes the Sun.”As you can guess, our Blog Hop today is filled with projects that are inspired by the joy of the summer sun. We are excited to share our creations with you today! After you read my post, I hope you’ll hop over to the next person on the list at the base of this post. I chose the new stamp set aptly named Sunny Days for my card. The new In Color called Pineapple Punch the perfect color for sunshine. It’s so very bright and cheerful, you can’t help but smile. And Balmy Blue makes a sweet soft sky.
Here’s the song by George Harrison:
https://www.youtube.com/watch?v=GwmVfewqu7I
Here’s my sunny card:
Here’s what I did:
Cut and scored with my Stampin’ Trimmer:
Balmy Blue card stock (CS) cut to 4-1/4″ x 11″, then scored in half at 5-1/2″
Pineapple Punch CS cut to 4″ x 4″
Optional: Whisper White CS cut to 4″ x 5-1/4″ for the inside of the card
Dry embossed using the Subtle Dynamic Embossing Folder:
the front of the Balmy Blue card base
Stamped with the Sunny Days stamp set:
sentiment in Versamark ink onto a scrap of Balmy Blue CS, then heat embossed in Pineapple Punch
tiny suns in Pineapple Punch ink onto the Pineapple Punch CS layer
Cut using the Starburst Punch:
sentiment
Assembled the card:
fold in card base burnished using a Bone Folder
Pineapple Punch CS layer glued onto the front of the card base
Whisper White Solid Twine wrapped several times around the front of the card base and tied in a bow
sentiment glued onto the back of a colored doily (It doesn’t matter which color. They’re all white on the back.)
sentiment and doily glued onto the card front, over the twine
Optional: You can glue a 4″ x 5-1/4″ piece of Whisper White CS onto the inside of the card base, but the Balmy Blue is light enough to write on without it.
Here’s the hop:
Thank you for hopping along with us. If you get stuck during the Blog Hop, please use this line-up as a guide:
This month on the OSAT Blog Hop, we are featuring scrapbook page layouts. I think a lot of people think of Stampin’ Up! products as only for card making. Of course, they do make amazing cards, but they can also be used for scrapbooking, or memory keeping. I’ve used the Best Route suite to create a scrapbook page and coordinating cards .
I spent last weekend in Minnesota with some dear friends. We live all over the US and we get together every June for a long crafting weekend. We take turns hosting, and this time it was Christine’s turn, who lives in Minnesota. She found a lovely old house by a lake, and it has a big craft room with lots of tables and chairs. The peonies were blooming in abundance. And we had some amazing food. The onion straws at the 5-8 Club were delicious, as were the Juicy Lucys!
Here’s what I made:
Here you can see the enamel shapes. I used the blue arrows with the journaling to point toward the photos. And each photo has a map marker.
You can also see that my handwriting is turning into an old lady’s scrawl! It has a lot of angles and points where it used to be more rounded, which is indicative of arthritis. Just FYI.
Here’s what I did:
Cut and scored with my Stampin’ Trimmer:
Blueberry Bushel card stock (CS) cut to 4-1/4″ x 11″, then scored in half at 5-1/2″
Best Route Designer Series Paper (DSP) cut to 4″ x 5-1/4″ (2 different patterns), then both pieces cut in half diagonally from corner to corner
Whisper White CS cut to 4″ x 5-1/4″
Blueberry Bushel CS cut to 4-1/4″ x 4-1/4″ (2 pieces)
Blueberry Bushel CS cut to 6-1/4″ x 4-1/4″
Whisper White CS cut to 2-7/8″ x 3-5/8″
Blueberry Bushel CS cut to 3-1/8″ x 3-7/8″
Stamped with the En Route stamp set:
sign post in Mango Melody ink onto the 2-7/8″ x 3-5/8″ Whisper White CS
sign post in Blueberry Bushel ink onto a scrap of Whisper White CS
airplane in Mango Melody ink onto the 4″ x 5-1/4″ piece of Whisper White CS
Die cut using the Layering Ovals Framelits:
Blueberry Bushel sign post
a scrap of Mango Melody CS
a scrap of Blueberry Bushel CS
Die cut using the Large Letters Framelits:
“FLOWERS FOOD & FRIENDS” from Blueberry Bushel CS
Assembled the card:
card base folded along the score line and burnished with a Bone Folder
half of each of the two diagonally cut DSP patterns glued onto the front of the card base
largest die cut oval (Blueberry Bushel CS) glued onto the center of the DSP
middle size die cut oval (Mango Melody CS) glued onto the Blueberry Bushel CS oval
stamped oval glued onto the Mango Melody CS oval
tied a tiny bow with Blueberry Bushel 1/8″ Grosgrain Ribbon and adhered it to the stamped oval using a mini glue dot
4″ x 5-1/4″ Whisper White CS glued onto the inside of the card base
Assembled the page:
adhered the two 4″ x 4″ photos onto the two 4-1/4″ x 4-1/4″ pieces of Blueberry Bushel CS using Snail
adhered the 6″ x 4″ photo onto the 6-1/4″ x 4-1/4″ piece of Blueberry Bushel CS using Snail
adhered the 2-7/8″ x 3-5/8″ piece of Whisper White CS (with Mango Melody sign post) onto the 3-1/8″ x 3-7/8″ piece of Blueberry Bushel CS
adhered the three photos, the stamped journaling piece, and all the letters as shown onto a 12″ x 12″ piece of the DSP using Snail
applied Best Route enamel shapes: one onto each photo, and three onto the journaling piece
Here’s the hop:
Click the Next button to hop to the next stop. You can use the list below if you get lost along the hop.
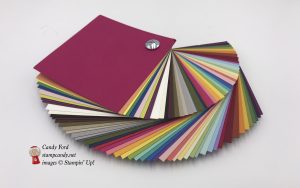
Here are today’s colors:
You can click on each one to see all the products that come in that color!
It’s time for the Remarkably Created Blog Tour for June 2018. We are showcasing new products from the 2018-2019 Annual Catalog. Be sure to check out all the stops on the tour, because you don’t want to miss any of the projects by these talented stampers. I used the Very Vintage host stamp set (yes, again, because it’s fabulous, and I love it, and I have it) and the Enjoy Life stamp set to create this sweet thank you card.
Here’s what I made:
Here’s what I did:
Cut and scored with my Stampin’ Trimmer:
Petal Pink card stock (CS) cut to 4-1/4″ x 11″, then scored in half at 5-1/2″
Whisper White CS cut to 4″ x 5-1/4″ (2 pieces)
Stamped with the Very Vintage stamp set:
floral image in Blueberry Bushel ink, stamped off once, onto one of the Whisper White CS pieces
Stamped with the Enjoy Life stamp set:
sentiment in Blueberry Bushel ink above the floral image
Assembled the card:
burnished the fold in the card base with a Bone Folder
stamped layer glued onto the front of the card base
the other Whisper White CS glued onto the inside of the card base
3 Petal Pink pearls applied to the stamped layer in a random pattern
Here’s the blog tour:
Here are today’s colors:
You can click on each one to see all the products that come in that color!
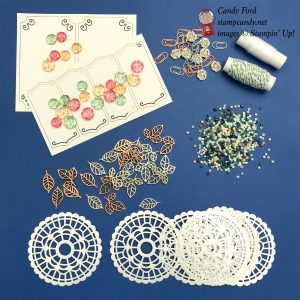
It’s time for the June ICS Blog Hop! This month we are featuring the new 2018-2020 In Colors, I used the new Accented Blooms stamp set and the Tailored Tag Punch.
Here’s what I made:
Here’s what I did:
Cut and scored with my Stampin’ Trimmer:
Basic Black card stock (CS) cut to 5-1/2″ x 8-1/2″, then scored in half at 4-1/4″
Whisper White CS cut to 5-1/4″ x 4″ for the inside of the card
Stamped with the Accented Blooms stamp set:
sentiment in black ink onto a scrap of Whisper White CS, then cut out using Paper Snips
Cut using the Tailored Tag Punch:
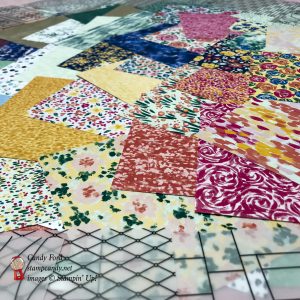
2-3 pieces from each of these five colors of card stock: Blueberry Bushel, Call Me Clover, Grapefruit Grove, Lovely Lipstick, Pineapple Punch
Assembled the card:
burnished the fold in the Basic Black card base with a Bone Folder
glued the punched pieces onto the front of the card base about 1/8″ apart, as shown in the photos
sentiment glued onto one of the punched shapes
Whisper White CS glued onto the inside of the card base
Here’s the hop:
Click the arrow to hop to the next blog, Cheryl Hamilton of Create With Cheryl.
Here are today’s colors:
You can click on each one to see all the products that come in that color!
It’s time for the A Paper Pumpkin Thing Blog Hop for May! I aways love this time, because I get to take something predesigned and put my spin on it. This month’s kit is called Manly Moments and includes the makings for cards with manly hues of greens and browns. I’ve made a birthday card and small gift holder, perfect for a manly man. Be sure to check out all the stops on the hop, because you don’t want to miss any of the great alternate projects made by this group.
Here’s what I made:
I tucked a little extra “green” into the gift holder:
Here’s what I did:
Cut and scored with my Stampin’ Trimmer:
a 4-1/8″ x 1/2″ strip of plaid paper from the inside of an envelope
a 1″ x 1-1/2″ piece of the same plaid paper
a 1″ x 7″ strip of wood paper from the inside of a different envelope, then scored down the length 1/4″ from each side, and across the strip at 3-1/2″
four piece of Mossy Meadow card stock (CS) to 2″ x 4-1/4″
Stamped with the Manly Moments stamp set:
stamped “happy” and “birthday” in Mossy Meadow ink onto a shield
stamped the lines in Shaded Spruce ink onto the same shield
stamped “for all you do” in Mossy Meadow ink onto a white banner
Cut using Paper Snips
notched the ends of the Plaid strip (or you could use the Banner Triple Punch)
snipped lots of little cuts along each long side the wood paper strip, only to the score line on each side
used a shield as a guide to cut the ends of the 4 Mossy Meadow CS pieces to fit inside the holder
cut other end of the 4 Mossy Meadow CS pieces about 2″ down to “shred” it (or you could use your paper trimmer to cut every 1/8″, or you could use fringe scissors if you have them)
Created the forest on the front of the Soft Sea Foam card base:
used the negative space of a tree die cut and sponge daubers to color each “layer”
used Mossy Meadow, Shaded Spruce, Pear Pizzazz, Old Olive, Granny Apple Green, Garden Green, and Tranquil Tide inks
started at the top and worked my way down
Assembled the card:
adhered a mountain die cut to the bottom of the front of the card base
glued the notched plaid strip to the card base
adhered the stamped shield over the plaid strip using Stampin’ Dimensionals
Assembled the holder:
glued one snipped side of the wood paper strip to the back edges of a shield, starting with the crosswise score line at the bottom tip of the shield.
glued the other snipped side to another shield, the same way
snip off any extra wood paper at the top, or fold it inside and glue it in place
glued the 1″ x 1-1\2″ plaid paper to the front shield
glued the stamped banner over the plaid paper piece. I should have adhered it with Stampin’ Dimensionals, but I wasn’t thinking and glued it down flat.
crinkled the shredded parts of the Mossy Meadow CS, then stuffed them into the box
inserted some folded money in between the Mossy Meadow CS pieces in the holder
It’s time for the InKing Royalty Blog Hop for May! Our theme this month is “I gotta feeling” and we’re showcasing new products from Stampin’ Up!’s upcoming 2018-2019 Annual Catalog. Because we’ve gotta feeling that you’re gonna love the new stuff! I used the new Hand Delivered host/hostess stamp set and the new Garden Impressions Designer Series Paper.
After you read my post, I hope you’ll hop along to the next stop on the bloghop, Shawn de Oliveira at Shawn Stamps. There’s a lot of inspiration to be found in this group, and you don’t want to miss any of it!
Here’s “I Gotta Feeling” by the Black Eyed Peas:
Here’s what I made:
This card is all about the color, so the construction is very simple. It’s only 2 layers of paper on a card base.
Here’s what I did:
Cut and scored with my Stampin’ Trimmer:
Whisper White Thick card stock (CS) cut to 8-1/2″ x 5-1/2″, then scored in half at 4-1/4″
Garden Impressions Designer Series Paper (DSP) layer cut to 4″ x 5-1/4″
Whisper White CS layer cut to 2-1/2″ x 4-3/4″
Stamped with the Hand Delivered stamp set:
skirt & legs, arms & balloons, and sentiment in Tuxedo Black Memento ink onto the Whisper White CS layer
NOTE: I stamped the sentiment after I colored in the balloon
Colored using Stampin’ Blends Markers:
skirt & shoes in Night of Navy and Cherry Cobbler
legs & arms in Ivory
balloons in Bermuda Bay, Calypso Coral, Night of Navy, Cherry Cobbler, Daffodil Delight, and Old Olive
Click on these images for more details and to purchase.
The two new products will be available to order on June 1, 2018. Also the Stampin’ Blends Markers are not orderable right now, but will be available in the new catalog.