With this week’s CanYouCaseIt.com Designer’s Choice challenge, you can make whatever you want!
Be sure to check out all the great projects here. Here’s mine.
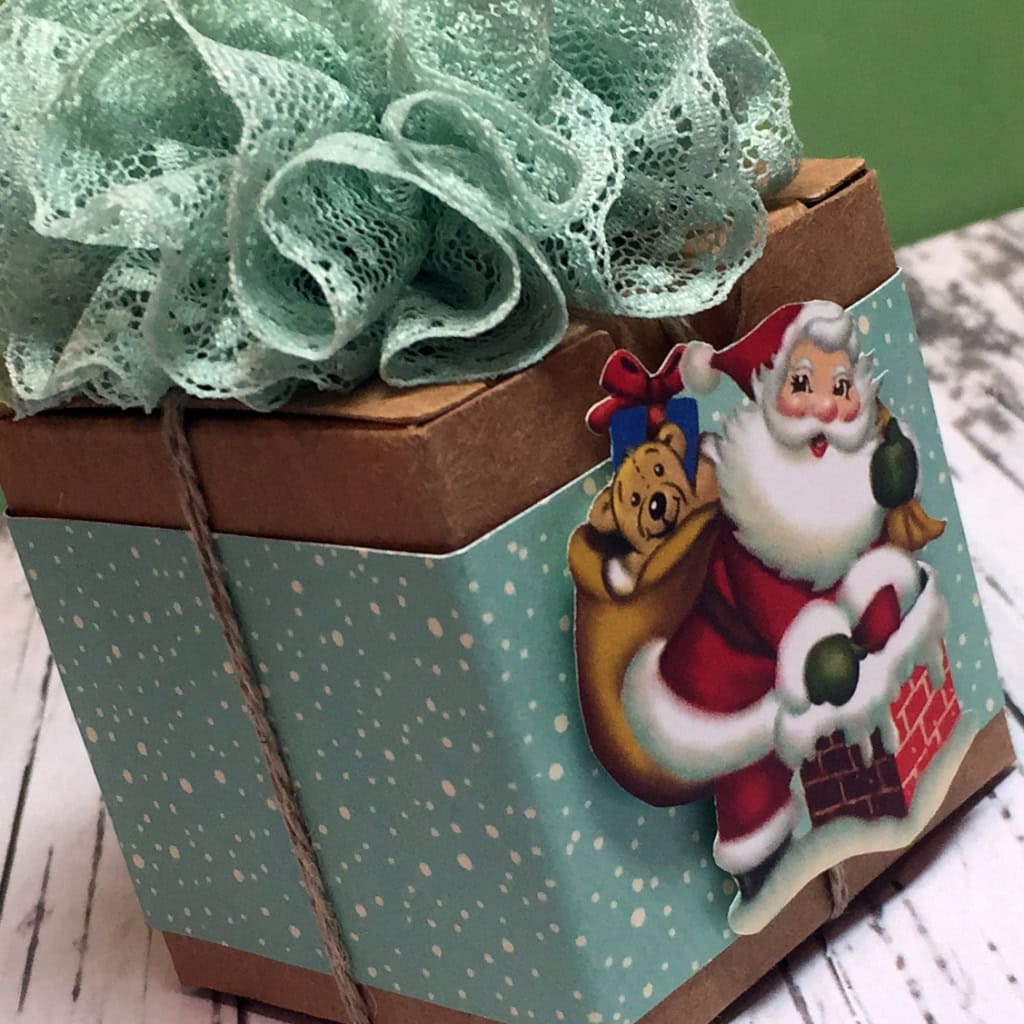
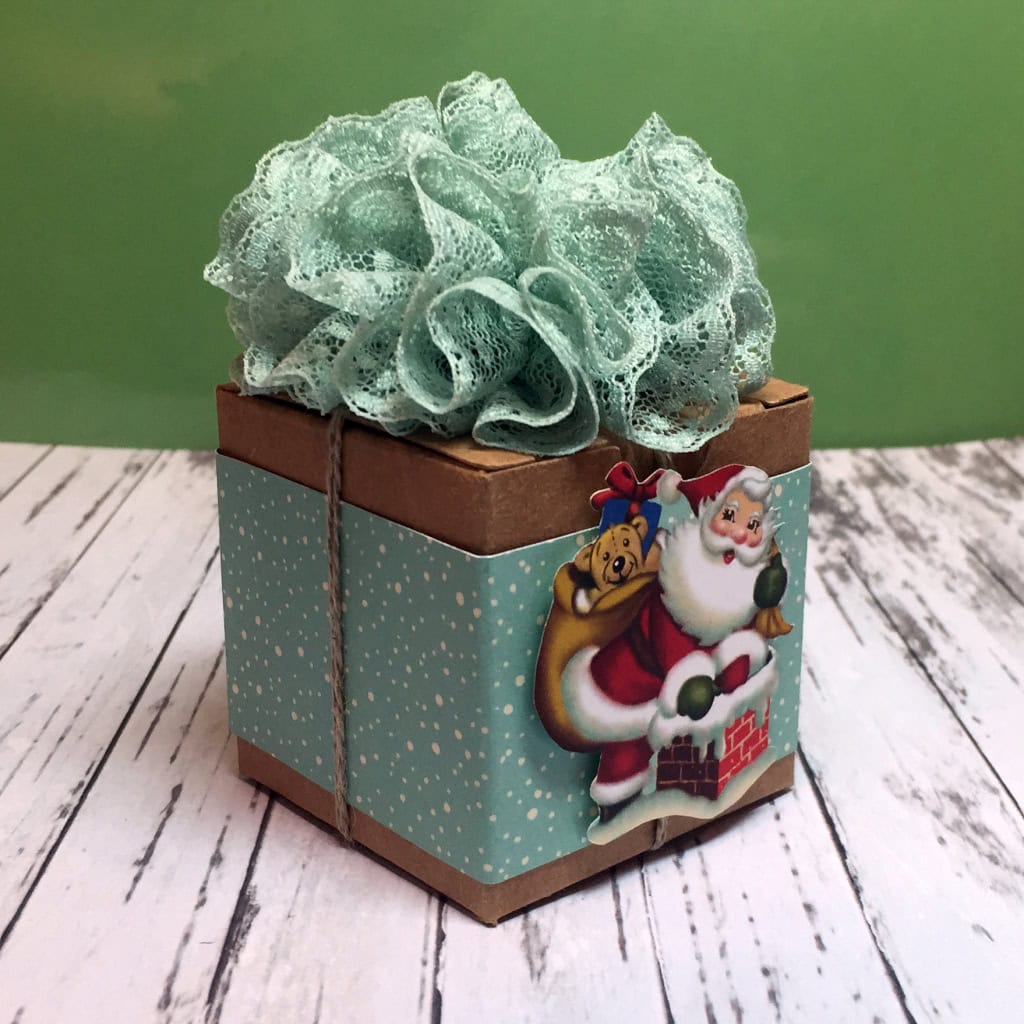
I just love these Tiny Treat Boxes. They’re so versatile. They are a great size for little treats and small gifts. (A Pandora charm box fits in perfectly.) You can use them individually, or stack them together to make an Advent calendar, for instance.
Today I’ve wrapped one with a belly band made from Home for Christmas Designer Series Paper. I used my Paper Snips to fussy cut a Santa from the same DSP, then attached it with Stampin’ Dimensionals.
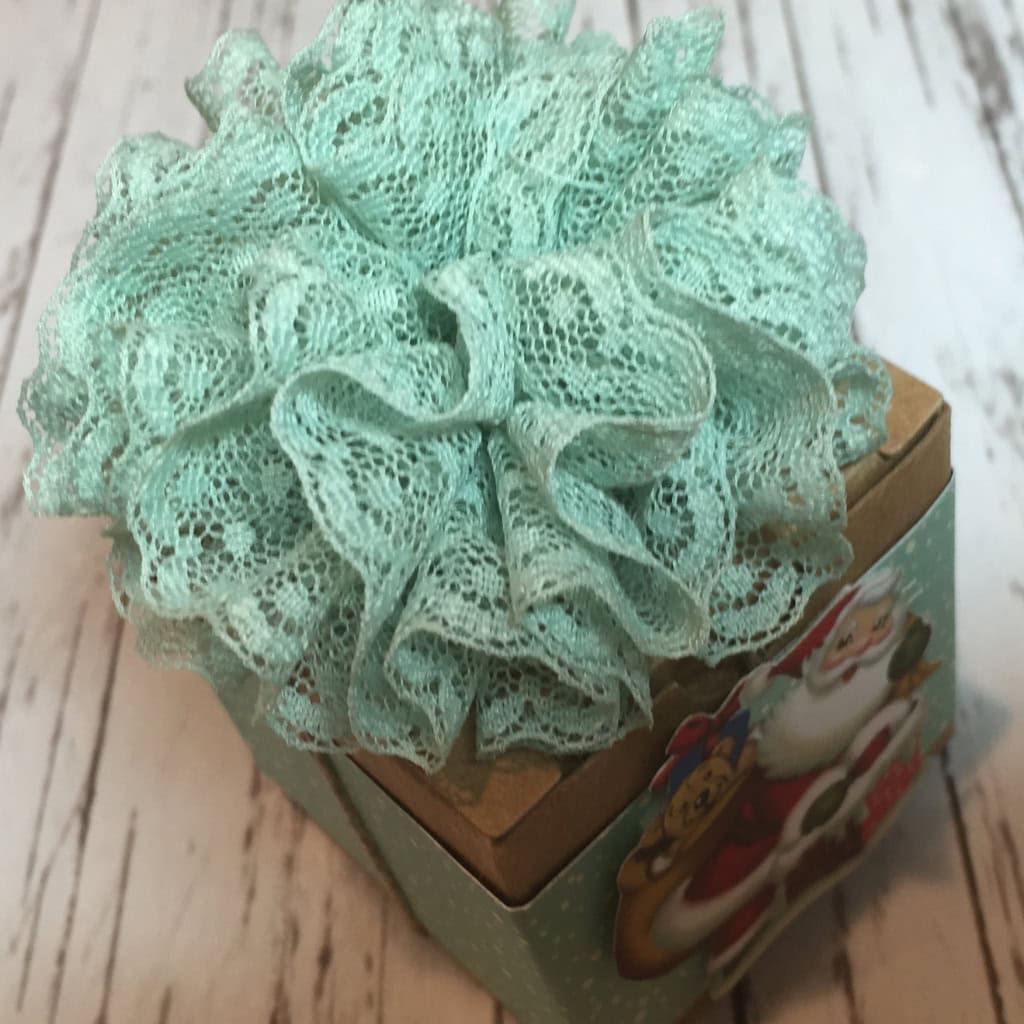
I tied up the box with Linen Thread and topped it with a pompom made of Mint Macaron 1″ Dotted Lace Trim.
TECHNIQUE: The pompom is easy to make. Cut a length of the Dotted Lace Trim (I used about 6 feet) and use a needle and thread to gather it along the straight edge. I used Linen Thread and a floss threader, because I had it at hand. Just gather it up and tie it off, then tie onto the box.
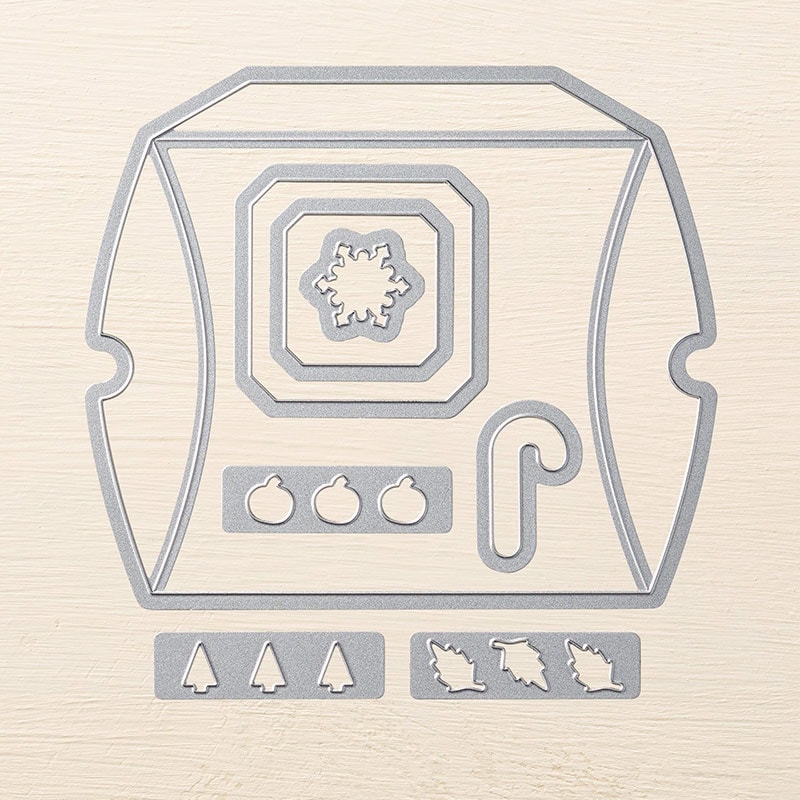
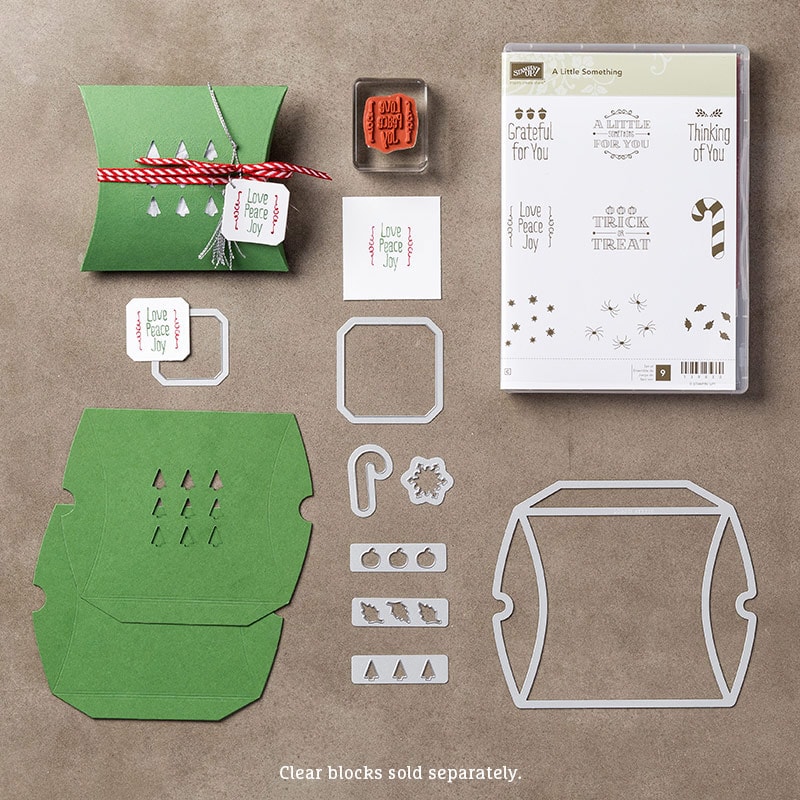
Need an adorable gift box in a hurry? The Square Pillow Box is your answer. This 5-15/16″ x 4-5/8″ box is perfect for all those small gifts and sweet treats you’ll be giving this holiday season. You can cut it from different paper for any time of year. It would be great cut from Happy Haunting Designer Series Paper for Halloween treats!
Today I’ve made it with Home For Christmas DSP. I love the festive stripes in Real Red and Very Vanilla. I cut a small window in one side and covered it with Vellum Card Stock so the recipient can get just a sneak peek of what’s inside.
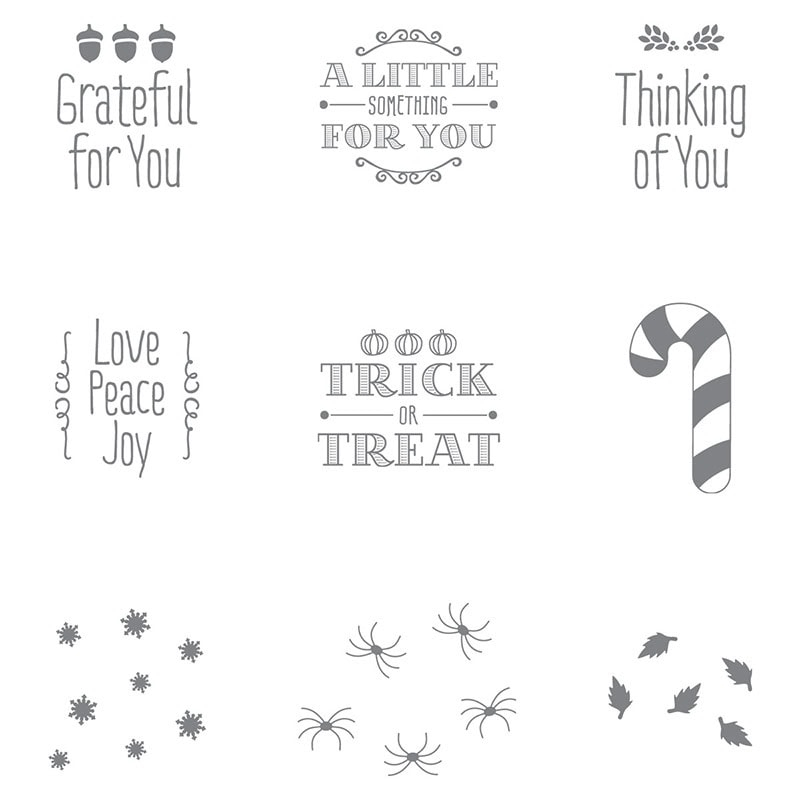
I used the same window die to cut the tag from Very Vanilla CS. I punched a hole with the 1/8″ Circle Punch to attach it to the box. The sentiment is from the A Little Something stamp set. I used the DSP piece cut from the window to cut the candy cane, and glued it onto the tag.
BUNDLE!!! You can buy the Pillow Box Thinlits Dies and A Little Something stamp set together in a bundle to save 15%! I looooooove bundles!
I tied some Real Red Pompom Trim around the box. Then I tied on pieces of Gold and Silver Cording Trim and Gold and Silver Metallic Thread, using one piece to tie on the tag.
The box is super easy to assemble. Cut two pieces with the box die. Fold in the flap on each one and apply Tear & Tape along the flap. Flip one piece over onto the other one and stick together. Fold in the ends of the box and you’re done.
TIP: If you want a window or anything else cut in the side of the box, be sure to do that before you assemble the box. Also, be sure to cover the window from the inside before assembling.
You can make this plus 11 different cards in my Christmas Bundle Up Class. I’m hosting one this Saturday, September 26, at 12:30. You’ll use 12 of the new Christmas Bundles. Bring your scissors and adhesive and I provide everything else. All for only $30! R.S.V.P. by Friday so I’ll have enough projects prepared.
I love hearing from you! Please leave your questions and comments below.
Stampin’ Up! has some really amazing kits in both the annual and holiday catalogs. Today I’m using the All Boxed Up kit from the annual catalog.
Here are some of the pieces that come in the kit. Everything is precut, and the boxes have adhesive strips already in place. You just assemble the boxes, stamp the tags, and decorate.
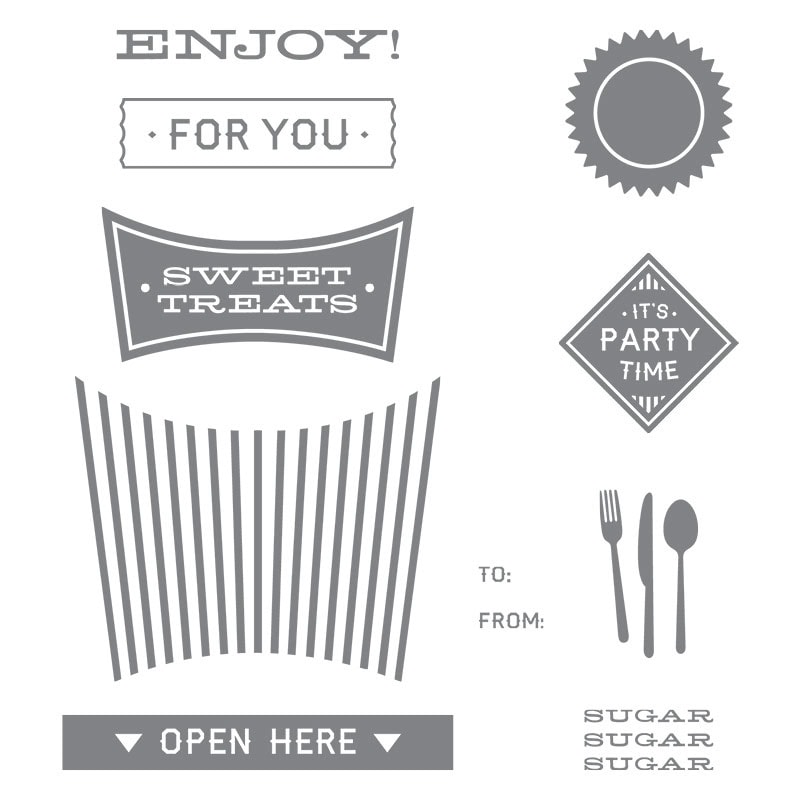
The All Boxed Up stamp set coordinates with the kit.
This would be perfect as a party favor, or for each place setting at a holiday gathering.
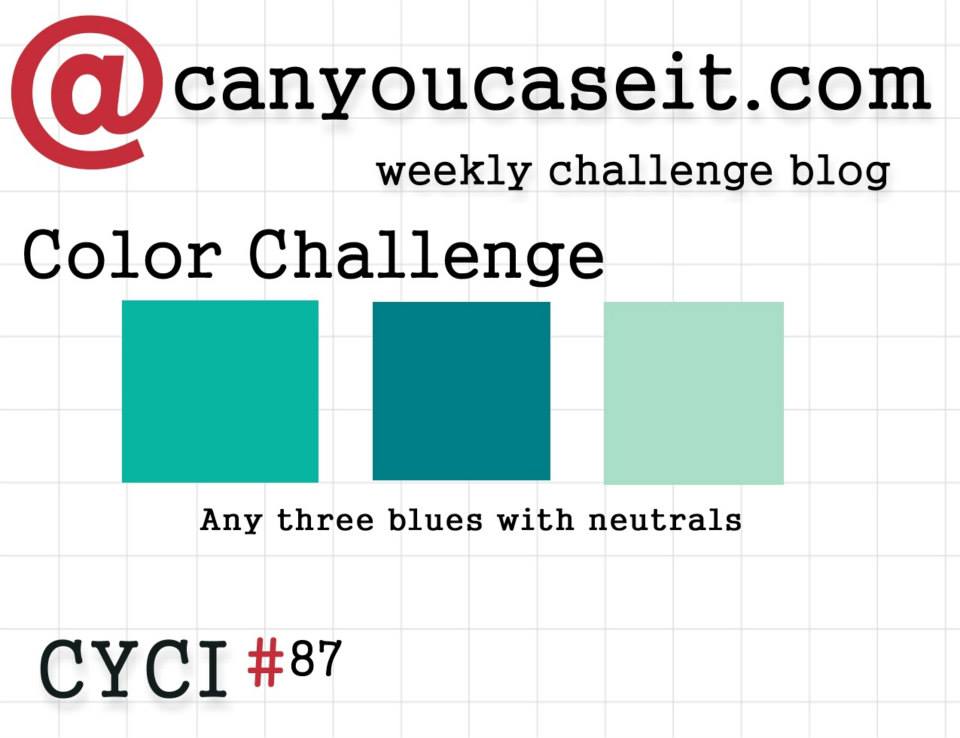
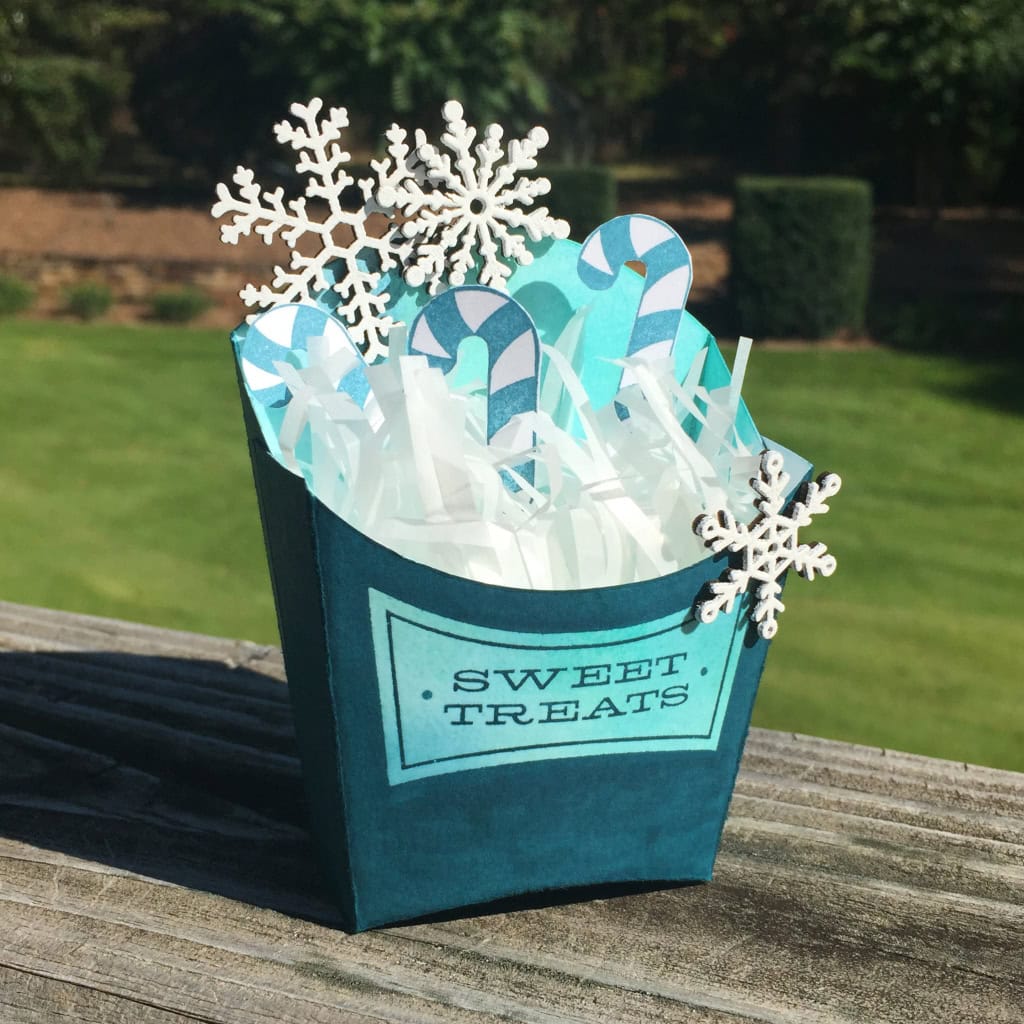
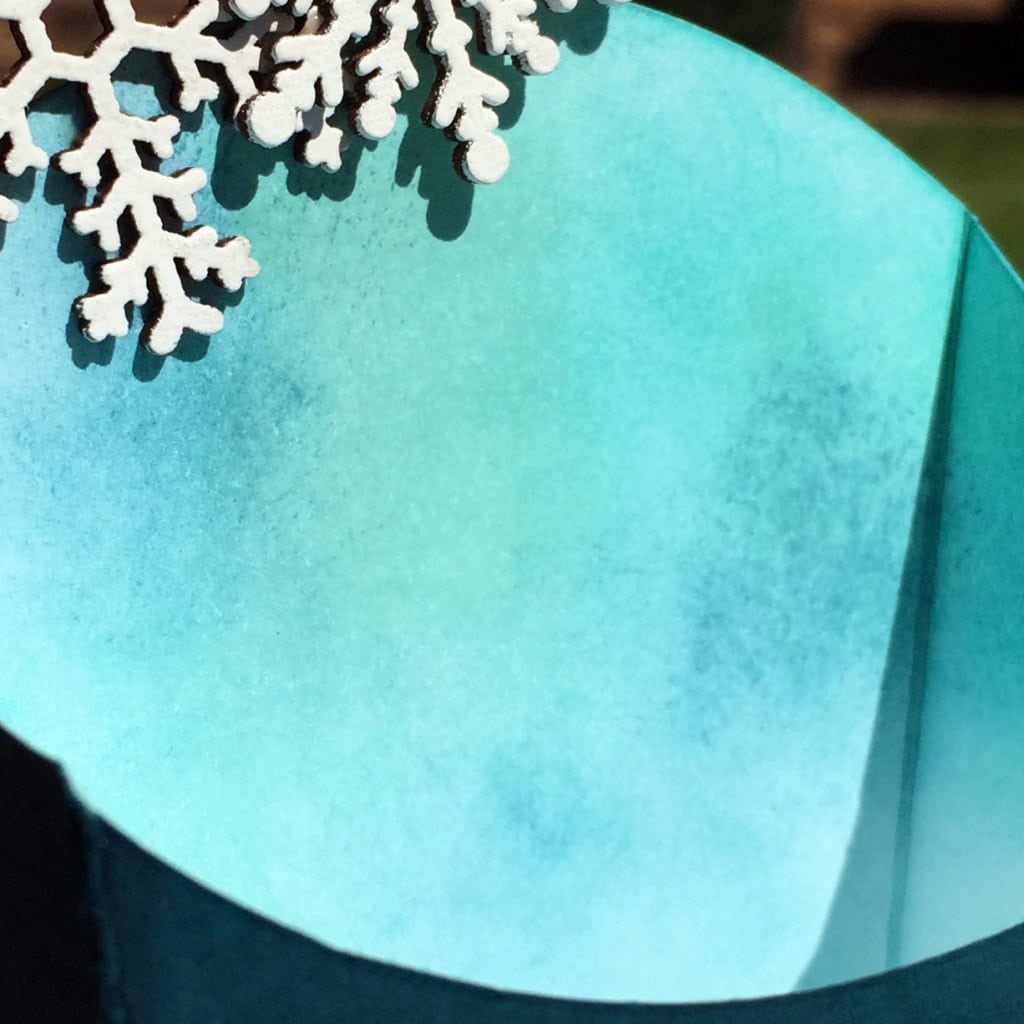
I used Soft Sky, Bermuda Bay, and Island Indigo as my three blues. I cut the Fry Box out of Whisper White Thick Card Stock. Then I sponged the whole thing, inside and out, with the three colors of blue for a marbled/mottled sort of look.
On the front of the box I stamped the sentiment in Versamark ink, then heat embossed it with Clear Stampin’ Embossing Powder.
The All About Sugar stamp set is made to coordinate with the Fry Box Bigz L Die, and the two are available as a bundle to save 15%!
After heat embossing, I colored the entire exterior of the box with Island Indigo ink. This is called the Joseph’s Coat technique. There are a few ways to do this, but the two most efficient are 1) using a brayer, and 2) taking your ink pad directly to the paper. You could also use a Stamping Write Marker, but that will take longer. Be careful as you’re doing this, as the card stock can start to pill if it gets too wet. As it happened, I got it just wet enough to make the fibers stand up a tiny bt, so it looks like suede. I love happy accidents!
I assembled the box by adhering the sides with Tear & Tape. Now I had an Island Indigo Fry Box, with a mottled tri-color sentiment and interior.
The three snowflakes are from the new Snowflake Elements wooden embellishments. Holding each one with tweezers, I pressed it into the Versamark ink pad, then into White Stampin’ Emboss Powder, then heated it with my Heat Tool. I adhered them with Multipurpose Liquid Glue.
For the filler, I cut a Glassine Sheet with Fringe Scissors, then crumpled it with my fingers.
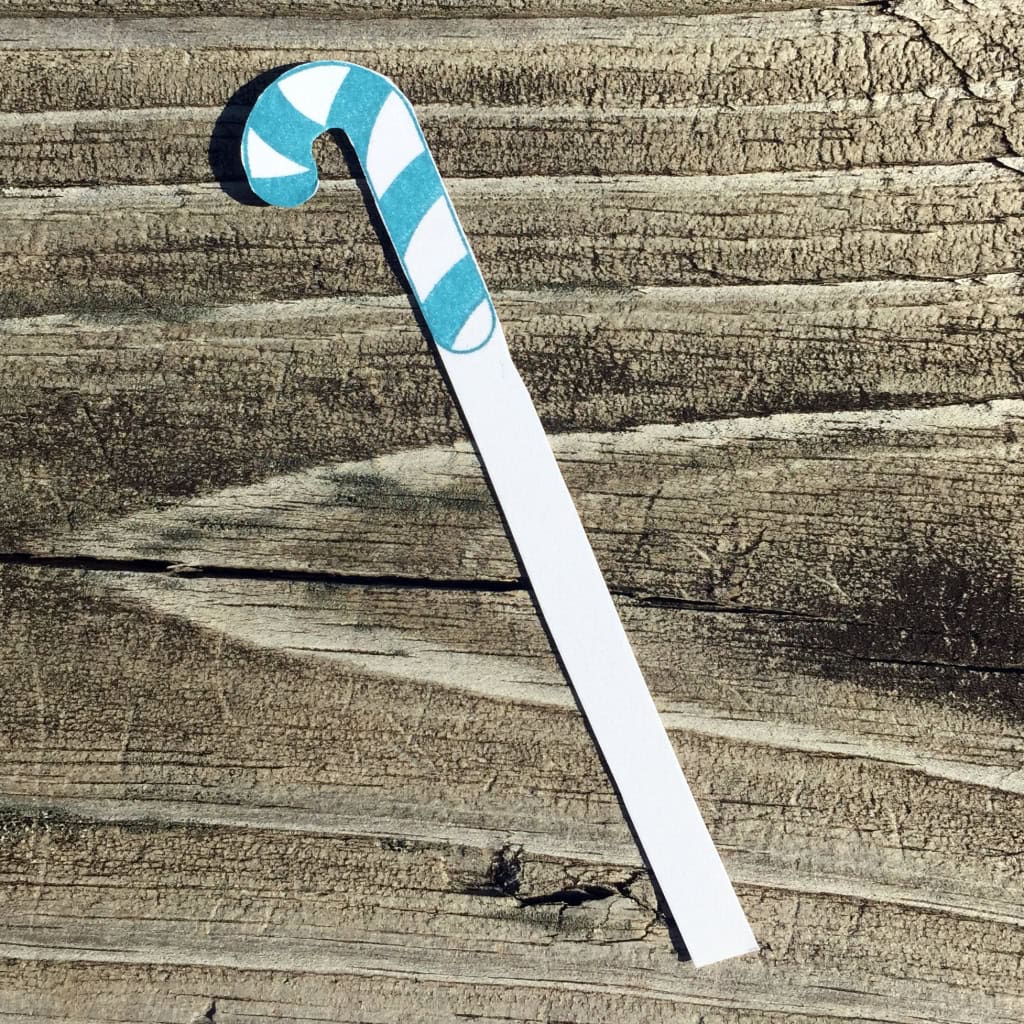
I stamped the candy cane from the A Little Something stamp set three times in Island Indigo. I fussy cut them with my Paper Snips, leaving a long stem to stick down into the Glassine filler. (The Snow Place stamp set has a longer, thinner candy cane stamp, but I preferred the fatter one for this project.)
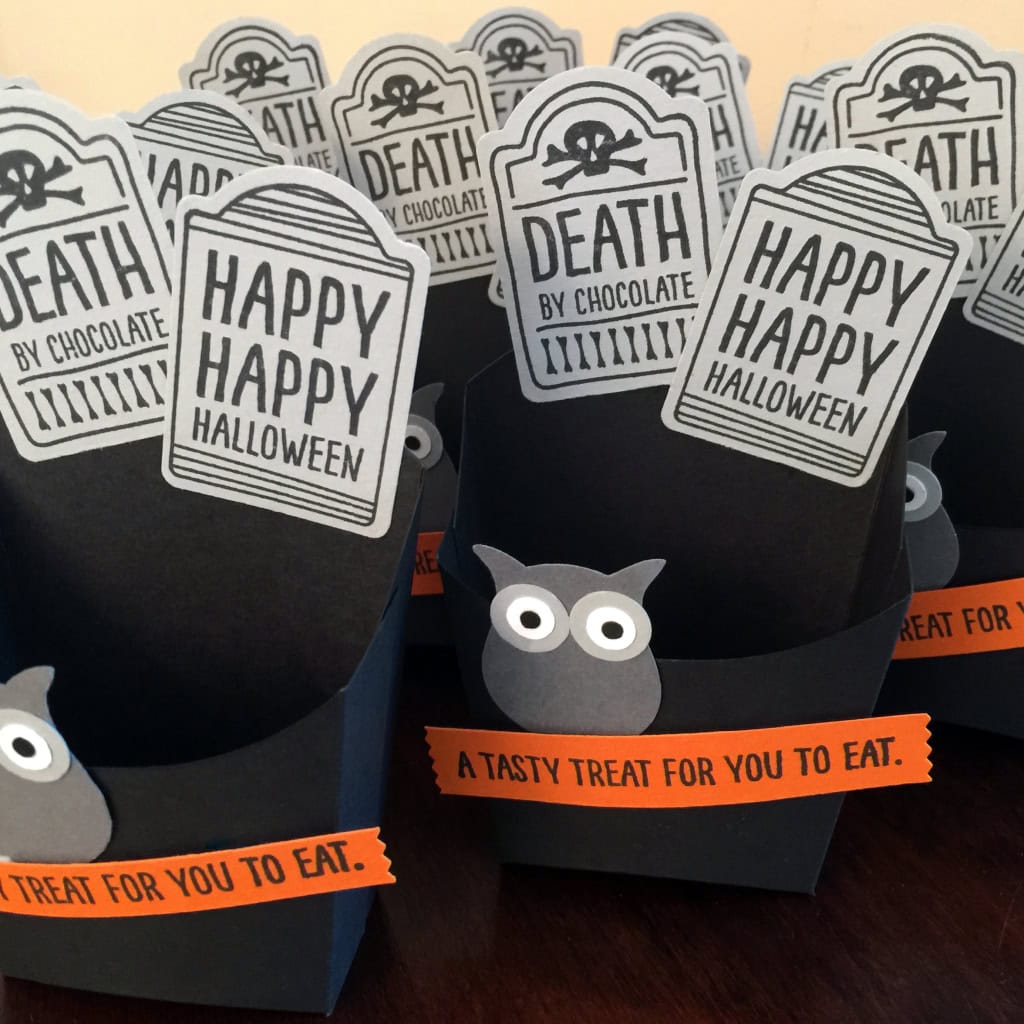
I like to have treats ready for my Stamp Club members when we meet. This month I decorated some Basic Black Fry Boxes with Smoky Slate “tombstones” and Basic Grey owls. A Tangelo Twist banner lets everyone know what’s inside. Here they are decorated and waiting to be filled…
…and here they are full of chocolates. Since the one tombstone says “Death by chocolate” it HAD to be chocolates, right? But really you could put all manner of goodies in these adorable little boxes.
TIP 1: I stamped the sentiments on Tangelo Twist card stock, then cut them into strips. I inserted each end into the back of the Washi Label Punch to cut the ends.
TIP 2: For the owls’ eyes, I used Circle Punches in 1/2″, 1/4″, and 1/8″.
———————
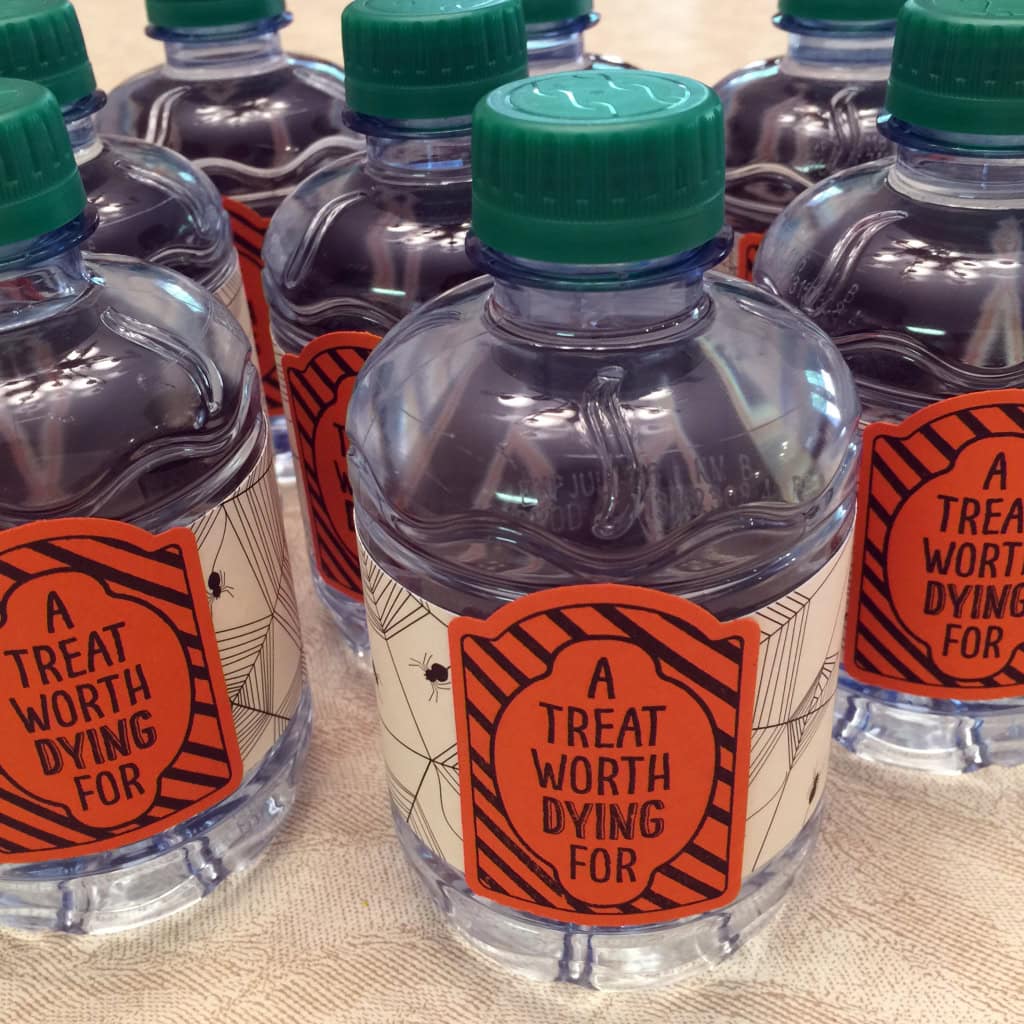
I decorated the water bottles with Happy Haunting DSP belly bands and Tangelo Twist labels cut with the Note Tag Punch.
TIP 3: Attach the belly bands to the bottles before attaching the labels. I use a piece of Tear & Tape at each end of the belly band. If you adhere the labels to the belly bands first, they may not curve correctly around the bottles.
Both of these projects are quick and easy, and would be great for your Halloween gatherings, school classes, and even Trick or Treaters.
———————
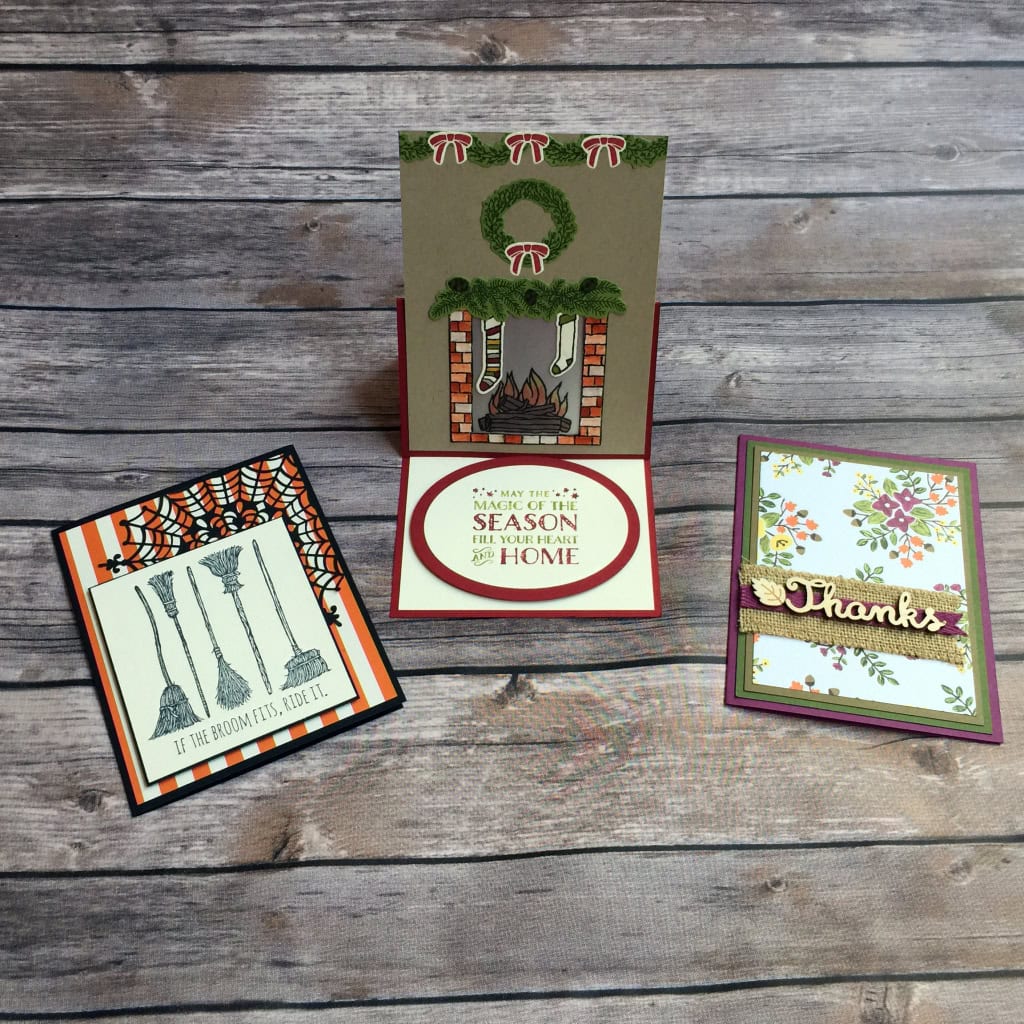
We made three cards this month: Halloween, Thanks, and a Christmas easel card. Be sure to check back in the coming days for details on each one.
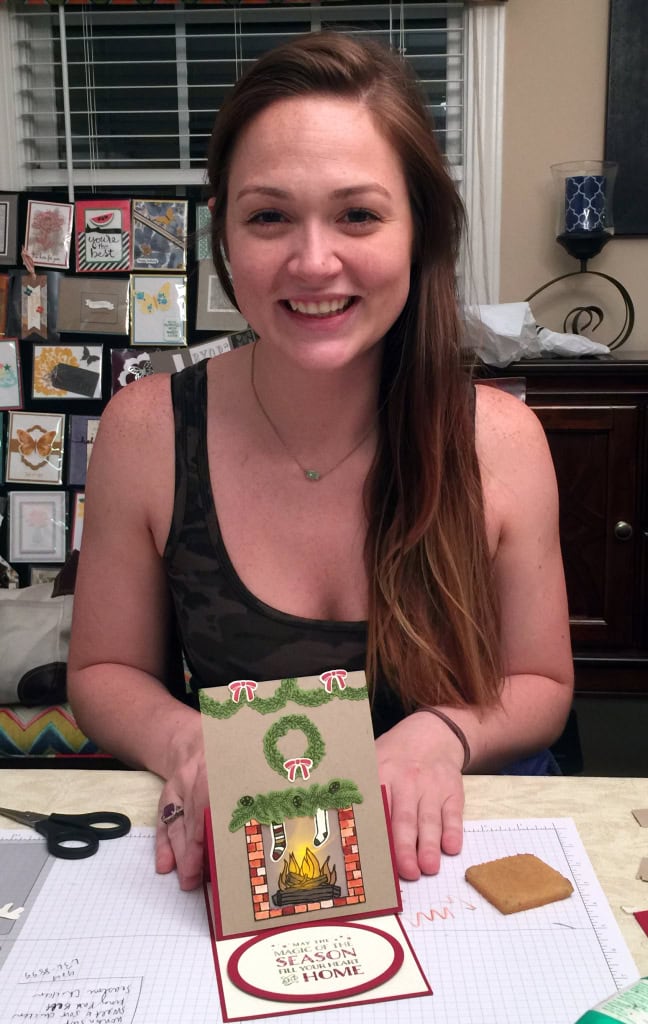
I can’t seem to remember to take photos during our gatherings – I’m always too busy having fun – but I did get this shot of Caitlin proudly showing off her easel card. Check back to see how we lit the fire in the fireplace!
Here’s what I used for the treat boxes and water bottle labels:
Ever wonder what to do with those great boxes your Paper Pumpkin kits come in? They’re too nice to get rid of – you know we crafters want to use everything! But the orange doesn’t always go with our decor, and the shipping labels take away from the overall aesthetic. Watch this video for a quick tip.
Monika Davis was the first one to show me how to do this, so most of the credit goes to her. I just wanted to be sure you knew about it.
If you haven’t tried Paper Pumpkin, now is a great time to sign up.
For new subscribers only. Use the code HALFOFF to join Paper Pumpkin before September 10, 2015, and get 50% off the first two months!
After that, keep the creativity coming for only $19.95 + tax per month (includes shipping!) Or purchase a prepaid subscription HERE. Save $1 per month with a 6 month subscription, or $2 per month with a one year subscription.
This is just one example of a past Paper Pumpkin kit. Each month is a surprise, but they are always wonderful, and include everything you need except scissors and adhesive. I took this “pie” to my family’s Thanksgiving gathering last year with each “slice” full of nuts, candies, and other goodies.
Current subscribers – and ONLY current subscribers – can purchase past kits and refills.
All stamp sets in Paper Pumpkin kits are exclusive to Paper Pumpkin and will never be seen elsewhere.
Here’s the skinny:
For new subscribers only.
Available for month-to-month subscriptions, not prepaid subscriptions.
Discount applied to one kit per month for the first two months of a new subscription. After the first two months, the price for each month’s kit will renew at the regular price: $19.95.
A Paper Pumpkin membership is $19.95 per month (and shipping is included!)
There’s no commitment. You can cancel your monthly Paper Pumpkin or skip a month by logging into your Paper Pumpkin account and changing your preference at “manage my account” on or before the 10th of the month.