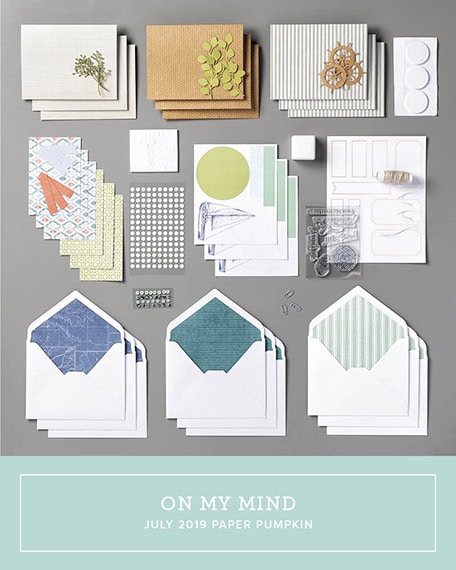
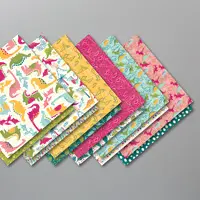
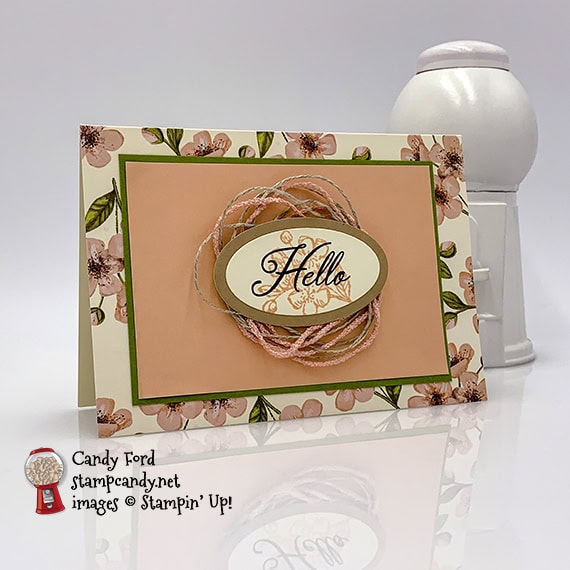
It’s time for the PPP July 2019 Blog Hop! This month’s kit is called On My Mind and it coordinates with three suites in the annual catalog. Three! There’s no end to the project possibilities with this kit.
S
Be sure to hop around to all the stops to see the great alternate projects this group has made using this month’s Paper Pumpkin kit!
S
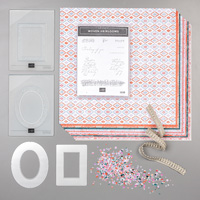
Here’s what comes in the kit:
S
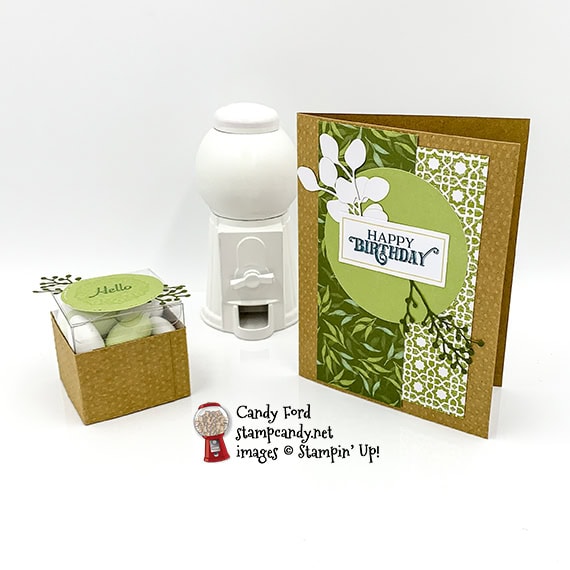
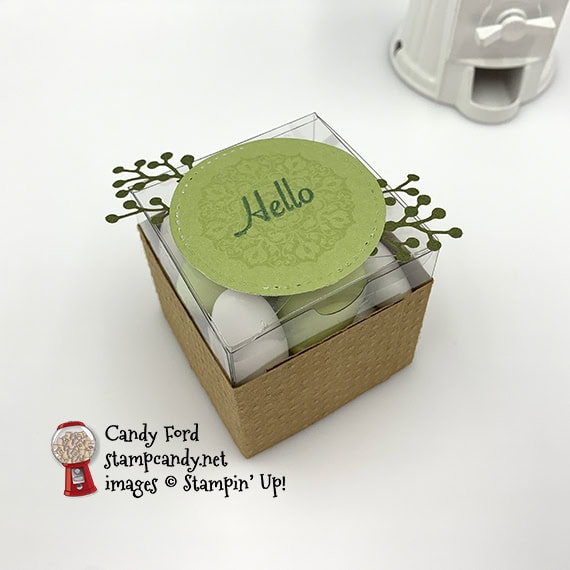
Here’s what I made:
S
S
Here’s what I did:
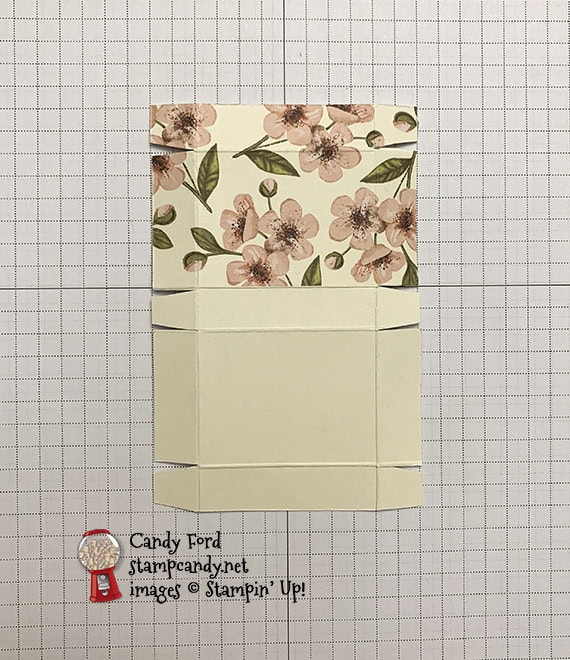
Cut and scored with my paper trimmer:
Garden Lane Designer Series Paper (DSP) layer to 2″ x 5-3/8″
front of a dotted card base cut to 1-1/2″ x 5-1/2″ (two of these)
Cut using the Stitched Shapes Dies:
a precut stitched circle down to a smaller stitched circle
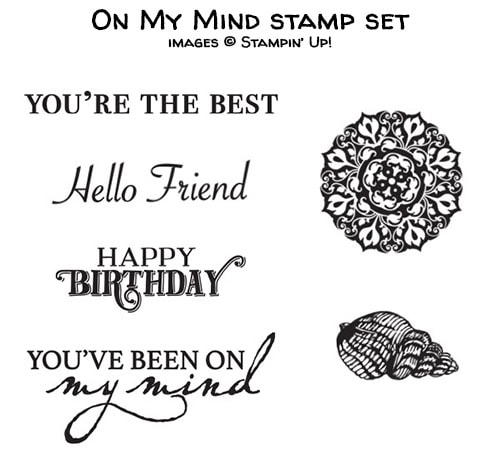
Stamped with the On My Mind stamp set:
card sentiment in Pretty Peacock ink onto a rectangular die cut label
medallion in Soft Sea Foam ink onto the smaller die cut circle
Hello in Pretty Peacock ink onto the smaller die cut circle
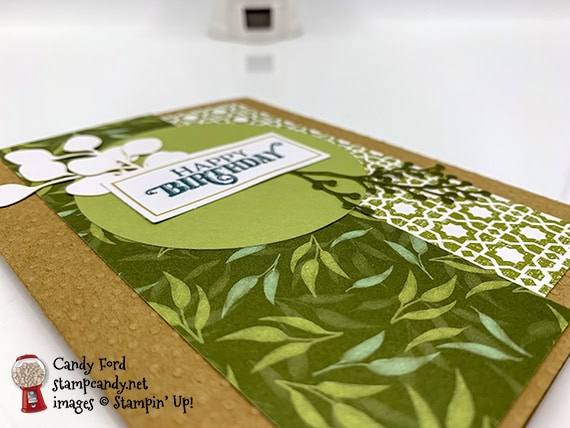
Assembled the card:
burnished the fold in the card base with a Bone Folder
lattice design precut paper glued onto the front a a dotted card base, centered top to bottom, about 1/2″ from the right
DSP layer glued over the lattice design paper, centered top to bottom, about 1/2″ from the left
precut stitched circle glued over the layers
2 leaves and a sprig glued over the circle
sentiment glued over the leaves and sprig
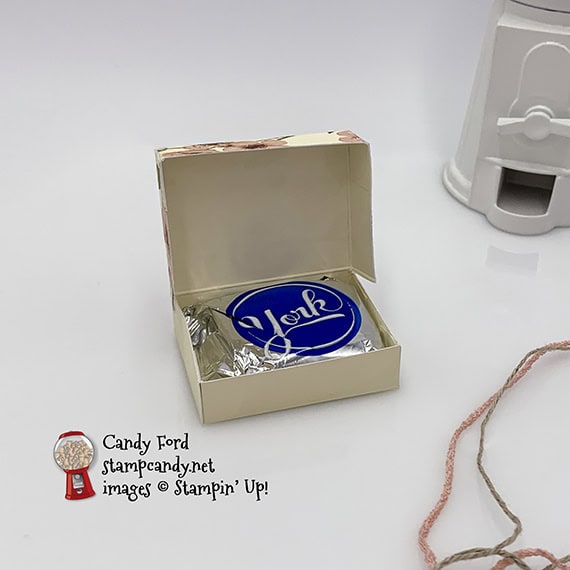
Assembled the box:
folded and assembled a Clear Tiny Treat Box
2 pieces of dotted card base wrapped around a treat box and adhered using Tear & Tape
2 twigs adhered onto the back of the small die cut circle using Tear & Tape
circle adhered onto the top of the box using Tear & Tape
S
Here’s the PPP July 2019 blog hop:
Click on the pumpkin to hop to the next blog, Charmane Hopkins of Renee’s Paper Treasures.
S
Here’s the video for this month’s kit:
S
CLICK HERE to download the stamp case insert for this month’s kit.
S
Here are today’s colors:
You can click on each one to see all the products that come in that color!
It’s time for the June 2019 A Paper Pumpkin Thing Blog Hop! This month’s kit is called A Little Smile. It’s beach themed kit that makes 16 gift cards and envelopes with a box to hold them. I used the kit to create a full sized card and a little treat holder.
Be sure to hop around to all the stops to see all the alternative projects this talented group of stampers has made using the A Little Smile kit!
S
Here’s what I made:
No, those aren’t smudge marks on the flap. They’re actually part of the weathered wood pattern of the envelope.
S
Here’s what I did:
Cut and scored with my paper trimmer:
Coastal Cabana card stock (CS) cut to 4-1/4″ x 11″, then scored in half at 5-1/2″
Crumb Cake CS layer cut to 3-3/4″ x 5″
Whisper White CS layer cut to 3-3-8″ x 4-5/8″
two card fronts from the kit cut to 3-1/4″ x 2-1/4″
Whisper White CS cut to 4″ x 5-1/4″ for the inside of the card base
Coastal Cabana envelope from the kit scored 1/2″ from the bottom and from both sides
Stamped with the A Little Smile stamp set:
sentiment in Coastal Cabana ink onto a die cut label from the kit, near one end
Cut using Paper Snips:
shortened the stamped label, using another label as a template, to match the curve
envelope flap trimmed along the score lines
Assembled the card:
burnished the fold in the card base with a Bone Folder
two trimmed card fronts glued onto the Whisper White CS layer
Whisper White CS layer glued onto the Crumb Cake CS layer
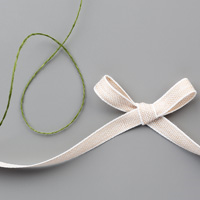
anchor trinket strung onto the twine from the kit, then the twine wrapped around the layers, with the ends secured onto the back using Tear & Tape
anchor secured in place using a Mini Glue Dot
3 glitter starfish die cuts tucked into the twine and secured using Mini Glue Dots
stamped label tucked into the twine and secured using Mini Glue Dots
Crumb Cake CS layer adhered onto the front of the card base using Tear & Tape
Whisper White CS glued onto the inside of the card base
Assembled the treat holder:
burnished the folds in the envelope with a Bone Folder
inverted the sides and bottom to form a box
put treats (I used small chocolates) in the holder and closed the flap
twine tied around the treat holder and tied in a bow
S
Here’s the APPT A Little Smile Blog Hop:
Here are today’s colors:
You can click on each one to see all the products that come in that color!
Supply List <– Click here for a clickable and printable list!
S
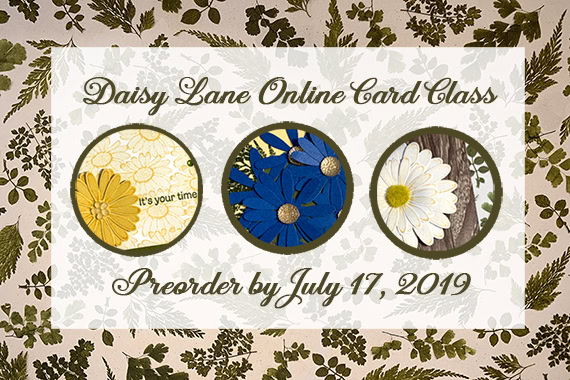
Preorder the Daisy Lane Online Class by July 17:
Make 6 cards at home in your PJs!
2 each of 3 designs
Features the Daisy Lane Bundle on page 23 of the 2019-2020 Annual Catalog
I’ve done the trimming and scoring for you!
You’ll receive all you need to make the cards, including the stamp set, punches, pre-cut/pre-scored/pre-embossed card kits, and 6 envelopes.
Full detailed instructions
Limited spots available
Click on the image below for details and class options, or copy and paste this link into your browser: https://stampcandy.net/online-classes/daisy-lane-card-class-preorder/
It’s time for the June 2019 A Paper Pumpkin Thing Blog Hop! This month’s kit is called A Little Smile. It’s beach themed kit that makes 16 gift cards and envelopes with a box to hold them. I used the kit to create a full sized card and a little treat holder.
Be sure to hop around to all the stops to see all the alternative projects this talented group of stampers has made using the A Little Smile kit!
S
Here’s what I made:
No, those aren’t smudge marks on the flap. They’re actually part of the weathered wood pattern of the envelope.
S
Here’s what I did:
Cut and scored with my paper trimmer:
Coastal Cabana card stock (CS) cut to 4-1/4″ x 11″, then scored in half at 5-1/2″
Crumb Cake CS layer cut to 3-3/4″ x 5″
Whisper White CS layer cut to 3-3-8″ x 4-5/8″
two card fronts from the kit cut to 3-1/4″ x 2-1/4″
Whisper White CS cut to 4″ x 5-1/4″ for the inside of the card base
Coastal Cabana envelope from the kit scored 1/2″ from the bottom and from both sides
Stamped with the A Little Smile stamp set:
sentiment in Coastal Cabana ink onto a die cut label from the kit, near one end
Cut using Paper Snips:
shortened the stamped label, using another label as a template, to match the curve
envelope flap trimmed along the score lines
Assembled the card:
burnished the fold in the card base with a Bone Folder
two trimmed card fronts glued onto the Whisper White CS layer
Whisper White CS layer glued onto the Crumb Cake CS layer
anchor trinket strung onto the twine from the kit, then the twine wrapped around the layers, with the ends secured onto the back using Tear & Tape
anchor secured in place using a Mini Glue Dot
3 glitter starfish die cuts tucked into the twine and secured using Mini Glue Dots
stamped label tucked into the twine and secured using Mini Glue Dots
Crumb Cake CS layer adhered onto the front of the card base using Tear & Tape
Whisper White CS glued onto the inside of the card base
Assembled the treat holder:
burnished the folds in the envelope with a Bone Folder
inverted the sides and bottom to form a box
put treats (I used small chocolates) in the holder and closed the flap
twine tied around the treat holder and tied in a bow
S
Here’s the APPT A Little Smile Blog Hop:
Here are today’s colors:
You can click on each one to see all the products that come in that color!
Supply List <– Click here for a clickable and printable list!
S
Preorder the Daisy Lane Online Class by July 17:
Make 6 cards at home in your PJs!
2 each of 3 designs
Features the Daisy Lane Bundle on page 23 of the 2019-2020 Annual Catalog
I’ve done the trimming and scoring for you!
You’ll receive all you need to make the cards, including the stamp set, punches, pre-cut/pre-scored/pre-embossed card kits, and 6 envelopes.
Full detailed instructions
Limited spots available
Click on the image below for details and class options, or copy and paste this link into your browser: https://stampcandy.net/online-classes/daisy-lane-card-class-preorder/
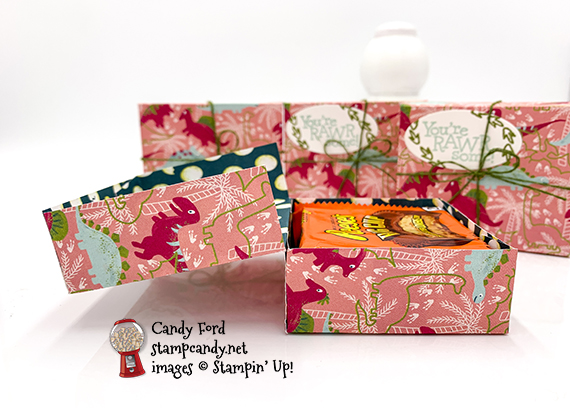
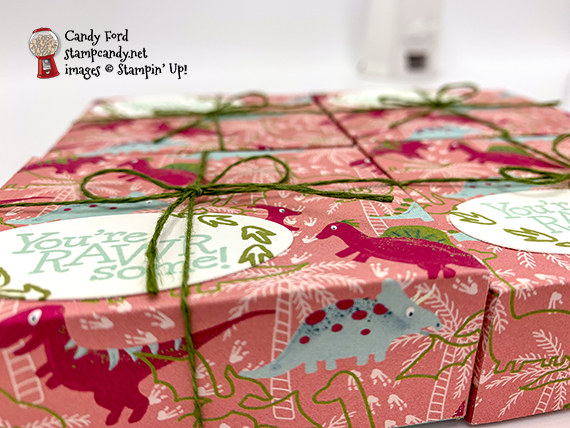
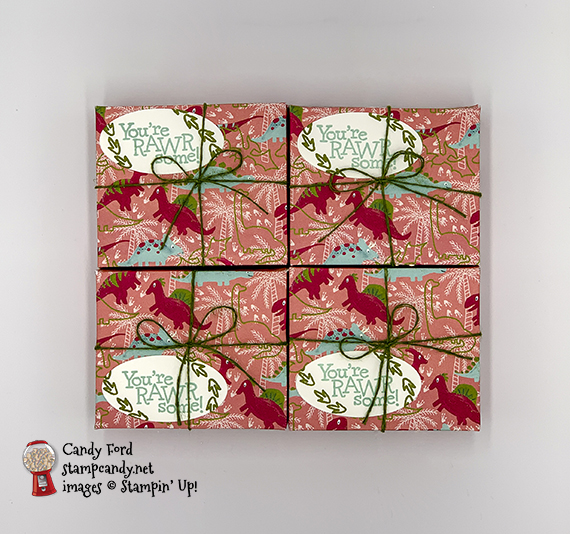
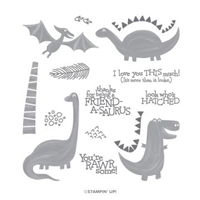
Today I’m sharing some little treat boxes I made with the new Dinoroar Designer Series Paper and the Dino Days stamp set. It’s the same basic box I shared a few days ago – you can see that post here. It holds a Reese’s Big Cup perfectly. I made these for our Candy Hearts team play date. I thought the playful paper pattern was appropriate for the occasion. (And everyone got their treat – I didn’t eat them all before they got there.)
S
Here’s what I made:
S
S
Here’s what I did:
Cut and scored with my paper trimmer:
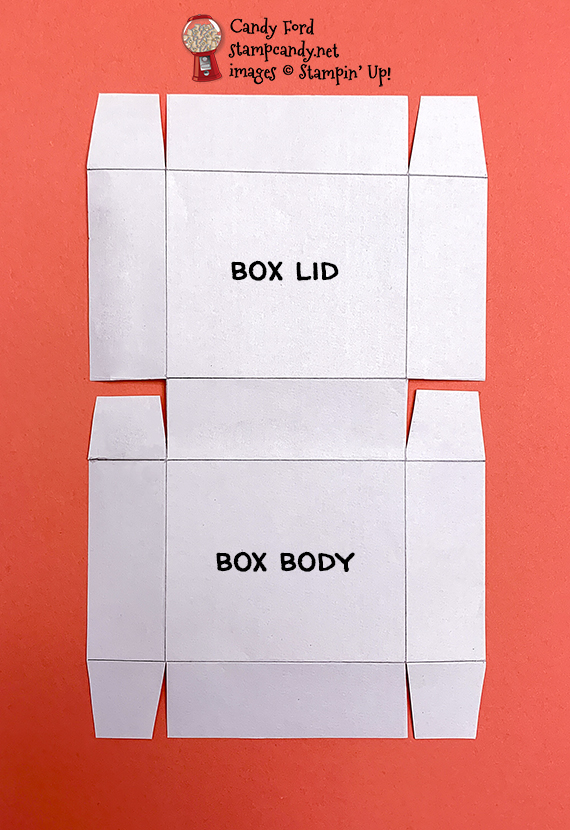
Dinoroar Designer Series Paper (DSP) cut to 5″ x 8″, and scored 1″ from each long side, then scored across at 1″, 3-1/2″, 4-1/2″, and 7″
Stamped with the Dino Days stamp set:
sentiment in Pool Party ink onto a scrap of Whisper White CS
footprints in Old Olive ink around the sentiment
Cut using the Layering Ovals Dies:
sentiment
Assembled the cbox:
burnished the folds in the box with a Bone Folder
angled the edges of the 6 tabs using Paper Snips
all tabs glued to the inside of the adjacent side
inserted Reese’s Big Cup and closed lid
sentiment glued onto the lid (I placed the sentiment wherever I thought it looked best on each box, according to the paper pattern.)
Mossy Meadow thread wrapped around the box and tied in a bow
S
Here are today’s colors:
You can click on each one to see all the products that come in that color!
Supply List <– Click here for a clickable and printable list!
S
Preorder the Sailing Home Online Class by June 26:
Make 6 cards at home in your PJs!
2 each of 3 designs
Features the Come Sail Away Suite on pages 144-146 of the 2019-2020 Annual Catalog
I’ve done the trimming and scoring for you!
You’ll receive all you need to make the cards, including the stamp set, dies, embossing folder, precut/prescored card kits, and 6 Whisper White envelopes.
Full detailed instructions
Limited spots available
Click on the image below for details and class options, or copy and paste this link into your browser:
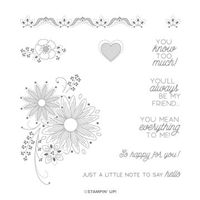
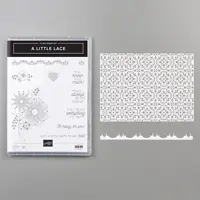
It’s time for the June 2019 OSAT Blog Hop! This month’s theme is Something Old, Something New. We’re featuring new products used along with products that carried over from previous catalogs. For my projects, I used the new A Little Lace stamp set with the returning Stitched Shapes Dies. The treat box fits a Reese’s Big Cup. Hopefully it will make it to its intended recipient – I do love a Big Cup!
Be sure to hop around to all the stops to see all the great projects created by this awesome group of stampers! Scroll down to see the June 2019 OSAT Blog Hop list.
S
Here’s what I made:
S
Here’s what I did:
Cut and scored with my paper trimmer:
Soft Sea Foam card stock (CS) cut to 8-1/2″ x 5-1/2″, then scored in half at 4-1/4″
Very Vanilla CS card layer cut to 3-3/4″ x 4-3/4″
Very Vanilla CS box layer cut to 2-5/8″ x 2-1/8″
Soft Sea Foam CS cut to 5″ x 8″, and score 1″ from each long side, then scored at 1″, 3-1/2″, 4-1/2″, and 7″
Stamped with the A Little Lace stamp set:
two card sentiments in Rococo Rose ink onto a scrap of Very Vanilla CS
floral image in Rococo Rose, Old Olive, Crushed Curry, and Balmy Blue inks onto both Very Vanilla CS layers
NOTE: I colored the different parts of the floral stamp using Stampin’ Write markers, then stamped.
box sentiment in Rococo Rose onto a scrap of Very Vanilla CS (I used a marker to color just that part of the stamp)
Cut using the Stitched Shapes Dies:
the three stamped sentiments
three circles from a scrap of Soft Sea Foam CS
Assembled the card:
burnished the fold in the card base with a Bone Folder
Very Vanilla CS layer glued onto the front of the card base
die cut circles and sentiments glued onto the Very Vanilla CS layer as shown
Assembled the box:
burnished the folds in the box with a Bone Folder
angled the edges of the 6 tabs using Paper Snips
Very Vanilla CS layer glued onto the lid of the box
die cut sentiment and Soft Sea Foam circle glued onto the Very Vanilla CS layer
all tabs glued to the inside of the adjacent side
inserted Reese’s Big Cup and closed lid
S
Here’s the June 2019 OSAT Blog Hop:
S
Here are today’s colors:
You can click on each one to see all the products that come in that color!
Supply List <– Click here for a clickable and printable list!
S
Preorder the Sailing Home Online Class by June 26:
Make 6 cards at home in your PJs!
2 each of 3 designs
Features the Come Sail Away Suite on pages 144-146 of the 2019-2020 Annual Catalog
I’ve done the trimming and scoring for you!
You’ll receive all you need to make the cards, including the stamp set, dies, embossing folder, precut/prescored card kits, and 6 Whisper White envelopes.
Full detailed instructions
Limited spots available
Click on the image below for details and class options, or copy and paste this link into your browser: https://stampcandy.net/online-classes/sailing-home-card-class-preorder/
It’s time for the May 2019 APPT Blog Hop. This month’s kit was designed by Stampin’ Up! Co-founder and Board Chair, Shelli Gardner. It’s called Hugs From Shelli. Be sure to hop all the way around to all the blogs to see all the different ways to send hugs in the mail. You’ll see the list farther down in this post.
S
Here’s what I made:
S
Here’s what I did:
Cut and scored with my Stampin’ Trimmer:
Old Olive card stock (CS) cut to 4-3/8″ x 3-1/8″
envelope cut to 4-1/4″ x 3″ (solid pink)
card base cut to 3″ x 4-1/2″, with the original score line at 2″, then score 1/2″ from all sides, and cut according to the diagram below (dotted lines are scored, solid lines are cut)
also score across at 2-1/2″
Stamped with the Hugs From Shelli stamp set:
sentiment in Early Espresso ink onto a piece of a Very Vanilla card base
flowers in Petal Pink ink over the sentiment
Cut using the Layering Ovals Dies:
sentiment
a slightly larger oval from a scrap of Crumb Cake CS
Assembled the card:
burnished the fold in the card base with a Bone Folder
Old Olive CS layer glued onto the front of the card base
solid pick layer glued onto the Old Olive CS layer
24″ of each twine from the kit wrapped around my fingers, then adhered onto the solid pink layer using Tear & Tape
sentiment glued onto the Crumb Cake CS oval
Crumb Cake CS oval adhered over the twine using Stampin’ Dimensionals
Assembled the box:
burnished the folds in the box with a Bone Folder
glued tabs to inside of adjacent sides to form box and lid
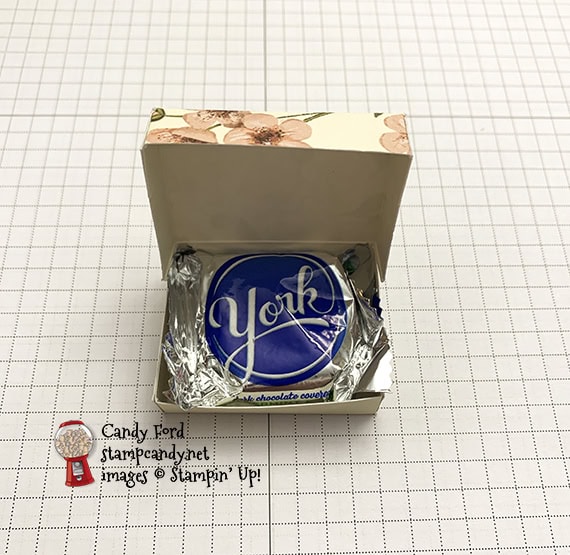
pattie inserted into box and the lid closed
a piece of each twine wrapped around the box and tied in a bow
I just dropped this pattie in the box for the photo, but I find it fit, and looks, better if you tuck the side pieces of the wrapper underneath it:
S
Here’s the Hugs From Shelli blog hop:
S
Here are today’s colors:
You can click on each one to see all the products that come in that color!
Order your Swatch Books and Product Shares by June 3!
S
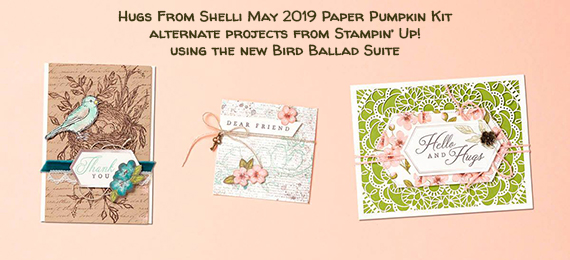
Here are some alternate projects from Stampin’ Up!:
All three of our alternate projects feature products from the stunningly beautiful Bird Ballad Suite, available for purchase beginning June 4.
Hello and Hugs Card
Just tuck a piece of cardstock behind the Bird Ballad Laser-Cut Card front to make the lacy details pop.
Free as a Bird Stamp Set; Old Olive Cardstock; ; Mossy Meadow Classic Stampin’ Pad; Bird Ballad Laser-Cut Cards & Tin; Bird Ballad Trinkets; Blender Pen; Stitched Nested Labels Dies
Thank You Card
Stamp the adorable bird from the Free as a Bird Stamp Set, watercolor (our ink colors are just a suggestion!), and fussy cut. Then, pop him up on your card front with a Stampin’ Dimensional and he will capture the heart of your recipient.
Free as a Bird Stamp Set; Shimmery White and Very Vanilla Cardstock; Coastal Cabana and Crushed Curry Classic Stampin’ Pads; 3/8″ Scalloped Lace Trim; Aqua Painter
Dear Friend Card
This card becomes an instant classic with the addition of a Bird Ballad Trinket. Just tie it to the card with linen thread (included).
Free as a Bird Stamp Set; Shimmery White and Very Vanilla Cardstock; Pool Party Classic Stampin’ Pad; Bird Ballad Trinkets
S
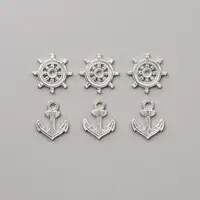
Here’s what comes in the Hugs from Shelli kit:
This kit’s coordinating colors are Crumb Cake, Old Olive, Petal Pink, Pretty Peacock, Soft Suede, Pool Party, and Very Vanilla.
 S
S