Nov 28, 2017 | Christmas, Food, Gallery, Gift Wrap, Gifts, Holiday, Tags |
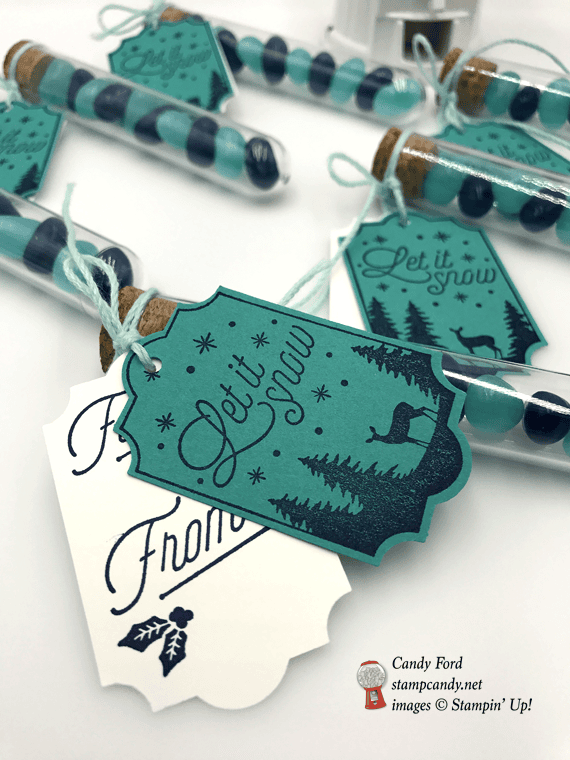
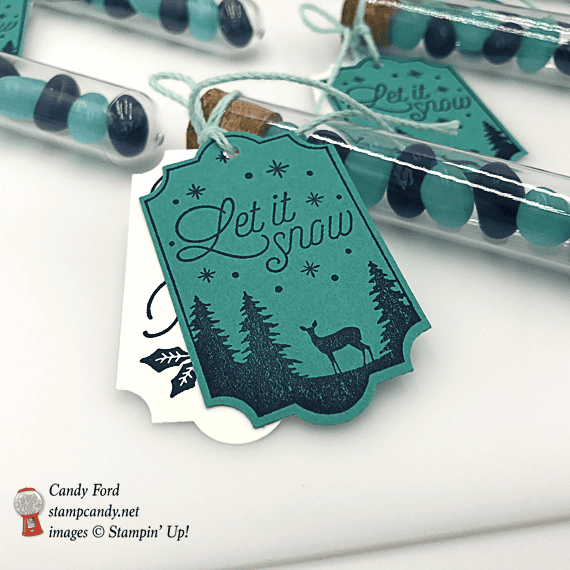
I love using blues for Christmas and Winter projects. For today’s Treat Tubes, I made tags in two lovely blues from the Stampin’ Up! repertoire: Bermuda Bay and Night of Navy. I was able to find jelly beans that matched really well: Blueberry and Berry Blue by Jelly Bellies. The Merry Little Labels Bundle (Merry Little Labels stamp set and Everyday Label Punch) from the 2017 Holiday Catalog made quick work of these little goodies. I set up a sort of assembly line for these, stamping lots of tags on full sheets of card stock, them punching them all out at once, etc. I made a few dozen of these.
Here’s what I made:


Here’s what I did:
Stamped with the Merry Little Labels stamp set:
- To From image in Night of Navy ink onto Whisper White Thick card stock (CS)
- Let it Snow image in Night of Navy ink onto Bermuda Bay CS (I tried pressing down on the stamp with less pressure than usual, and got the sort of speckled appearance of the trees and deer, which I like.)
Cut using the Everyday Label Punch:
Cut using the 1/8″ Circle Punch:
- a hole in the top of each tag
Assembled the treats:
- put jelly beans in the Treat Tube, alternating colors, and put in the cork
- ran Pool Party Solid Twine through both tags and tied them to the treat tube, around the cork just above the tube itself
Here are today’s colors:
You can click on each one to see all the products that come in that color!
Here’s what I used:
Click on the images for more details and to purchase.
Here are some key points to remember:
- Sale-a-bration Stamp Fest coming January 20. Details and register HERE
- Check out My Events Calendar HERE
- Stampin’ Blends alcohol markers are now available! Click HERE for more info.
- Hostess Code for the month of November (JBHB42YT) Find out more about HOW, WHEN and WHY to use the code HERE.
- November’s FREE gift: Stitched Felt Embellishments – Find out more HERE.
- Gumball Rewards for all orders over $50. Find out more HERE
- This is a great time to join my team! With you demonstrator discount of at least 20%, you can get Christmas gifts for all the stampers on your list, including yourself! No selling required! CLICK HERE for more information. Contact me with any questions: email candy@stampcandy.net or call/text 404-661-5222
Thanks for stopping by today, and Sweet Stamping!

Nov 26, 2017 | Bags, Christmas, Food, Gallery, Gift Wrap, Gifts, Holiday, Sales, Tags |
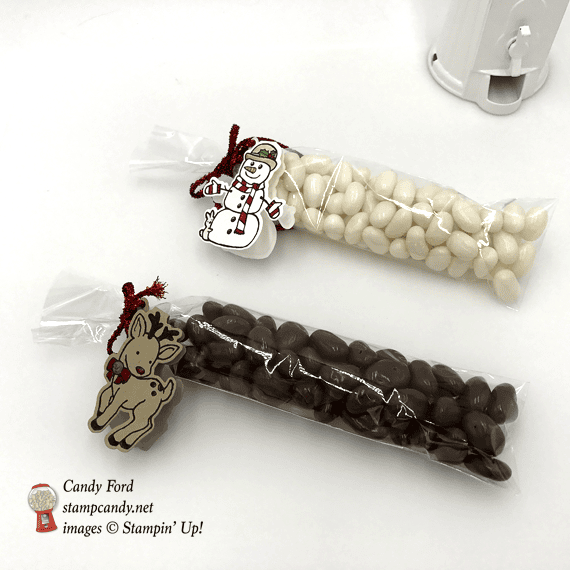
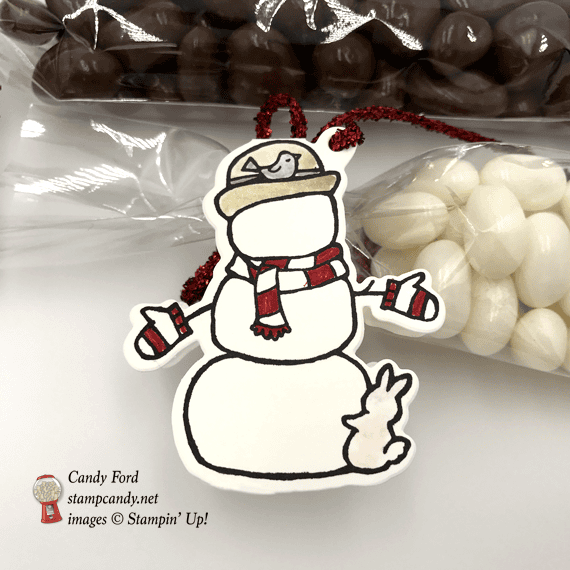
Today’s little gifts are so easy to make and they are adorable! I filled these bags with candy, but you could fill them with anything small. The tags, made with the Seasonal Chums Bundle, fold in half for a front side and a back side to the image, with space inside for To and From.

Seasonal Chums Bundle © Stampin’ Up!
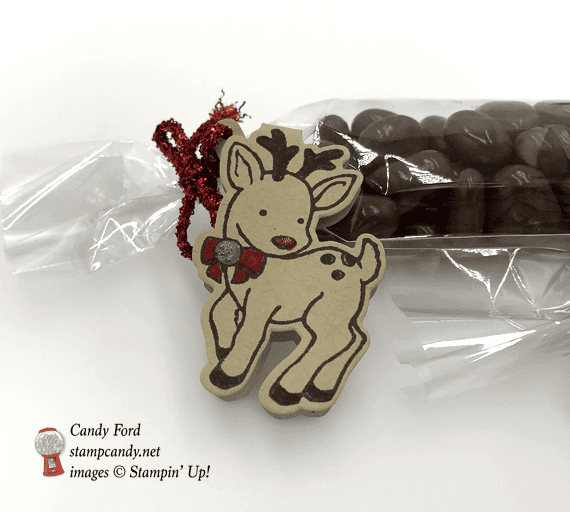
In these examples from Stampin’ Up!, you can see how the stamp and die create the whole tag. You can also trim away the little hanger and add the image to a card, like the reindeer here: 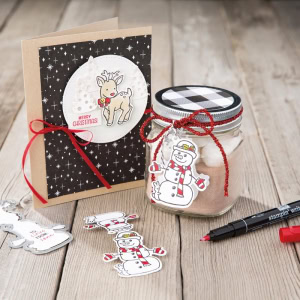
Here’s what I made:


Here’s what I did:
Stamped with the Seasonal Chums stamp set:
- snowman in Basic Black ink onto a scrap of Whisper White Thick card stock (CS)
- reindeer in Basic Black ink onto a scrap of Crumb Cake CS
Die cut using the Seasonal Tags:
- snowman tag and reindeer tag
Colored using Stampin’ Write Markers:
- snowman tag in Real Red, Crumb Cake, Pumpkin Pie, Garden Green, Smoky Slate, Pink Pirouette, and Soft Sky
- NOTE: I colored the bunny Pink Pirouette, but I let it white on the rest of these I made later. I prefer the white bunny, but you make him any color you want!
- reindeer in Early Espresso, Real Red, and Smoky Slate, then added Clear Wink of Stella to the bell
Assembled the gifts:
- filled a 2″ x 8″ Cellophane Bag with white (coconut) jelly beans
- filled another 2″ x 8″ Cellophane Bag with chocolate covered raisins
- used Red Tinsel Trim to attach the tags and tie both bags closed
Here are today’s main colors:
You can click on each one to see all the products that come in that color!
Here’s what I used:
Click on the images for more details and to purchase.
Here are some key points to remember:- Online Extravaganza ends today! Click HERE to shop these amazing deals!
- FREE SHIPPING tomorrow only! Any order you place on November 27 will receive free regular shipping! These are the times of the offer by Time Zone: 2am Nov 27 – 2am Nov 28 Eastern; 1am Nov 27 – 1am Nov 28 Central; 12am Nov 27 – 12 am Nov 28 Mountain; 11pm Nov 26 – 11pm Nov 27 Pacific. SHOP HERE
- Sale-a-bration Stamp Fest coming January 20. Details and register HERE
- Check out my events calendar HERE
- Stampin’ Blends alcohol markers are now available! Click HERE for more info.
- Hostess Code for the month of November (JBHB42YT) Find out more about HOW, WHEN and WHY to use the code HERE.
- November’s FREE gift: Stitched Felt Embellishments Find out more HERE.
- Gumball Rewards for all orders over $50. Find out more HERE
- This is a great time to join my team! In addition to the great sale prices in the Online Extravaganza, you’ll also get the demonstrator discount of 20%. CLICK HERE for more information. Contact me with any questions: email candy@stampcandy.net or call/text 404-661-5222
Thanks for stopping by today, and Sweet Stamping!
Nov 24, 2017 | Christmas, Food, Gallery, Gift Wrap, Gifts, Holiday, New Year |
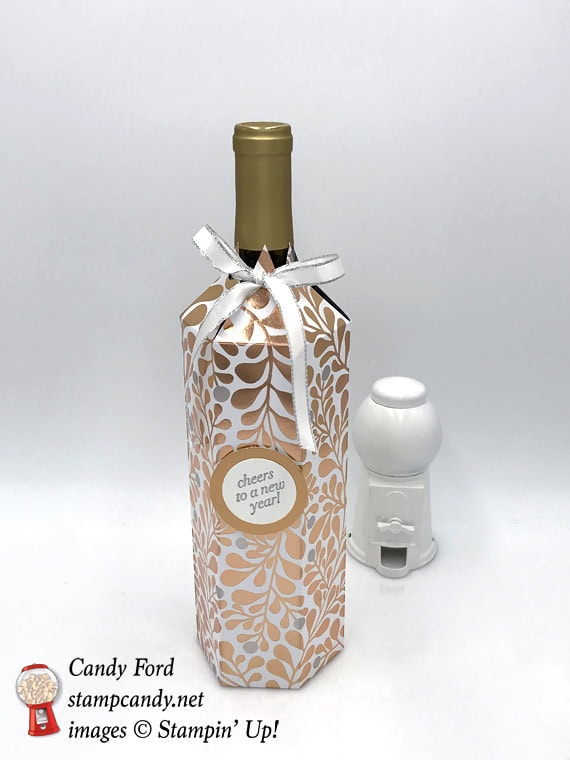
This time of year we all have lots of parties and events to attend. A bottle of wine (or fancy vinegar, or flavored oil, or…) is the most common host gift to take. Make it extra special with a beautiful cover you made yourself. You’ll feel proud to give the gift, and they will appreciate it so much more. And this cover is deceptively easy to make! You can see another one I made recently here.
Here’s what I made:
Here’s what I did:
Cut and scored with my Stampin’ Trimmer:
- Year of Cheer Specialty Designer Series Paper (DSP) cut to 11″ x 12
- scored along the 11″ side at 1-3/4″, 3-1/2″, 5-1/4″, 7″, 8-3/4″, 10-1/2″
- scored along the 12″ side at 2″ and 10″
Cut using Paper Snips, according to the diagram:
- removed two smallest rectangles, and angled the leftover tab (in blue)
- cut vertical score lines along the bottom just up to the first horizontal score line
- marked along the top side at 7/8″, 2-5/8″, 4-3/8″, 6-1/8″, 7-7/8″, and 9-5/8″
- cut from marks to the intersections of the vertical score lines and the first horizontal score line – this cuts away the green areas
- used a 1/4″ circle punch to cut a hole in each triangle, about 1/2″ or so from the top – you may want to use a smaller circle punch, like the 1/8″, depending on the size of your ribbon

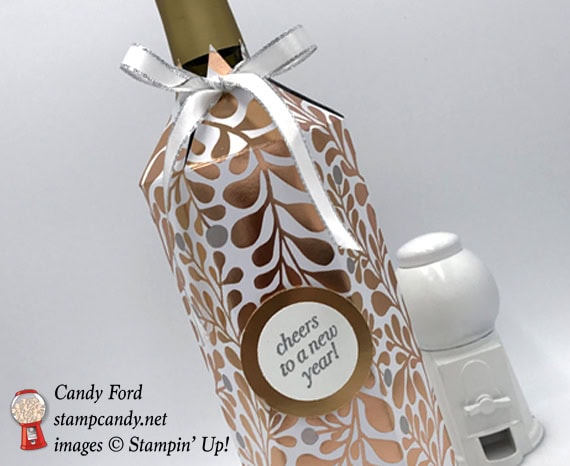
Stamped with the Cheers to the Year stamp set:
- sentiment in Versamark ink onto a piece of Whisper White card stock (CS), then heat embossed in silver
Die cut using the Layering Circles Framelits:
- sentiment
- a scrap of Copper Foil Sheet
Assembled the project:
- skinny tab on one side of the bottle cover adhered to the inside of the other end of the cover with Fast Fuse
- bottle inserted into the cover to make the next step easier:
- folded in one of the bottom tabs, then adhered the opposite tab to it with Fast Fuse, making sure the tabs lined up with each other
- repeated this step for the remaining two pairs of tabs, adhering them all together
- ran a 22″ piece of ribbon through each hole in the top triangles, always front to back, then pulled it tight (not too hard or you’ll tear the paper) and tied a bow
- sentiment adhered onto the Copper circle with Fast Fuse
- adhered sentiment to the cover with Stampin’ Dimensionals
NOTE 1: I prefer to use dry adhesives (like Fast Fuse, Tear & Tape, and Stampin’ Dimensionals) on slick papers like the metallic foils.
NOTE 2: If you’d like to make the cover from solid color card stock, and add panels of DSP to it, each DSP panel should be 1-1/2″ x 7-3/4″.
Here are today’s colors:
You can click on each one to see all the products that come in that color!
Here’s what I used:
Click on the images for more details and to purchase.
Here are some key points to remember:
- Online Extravaganza is happening now through November 26! Click HERE to shop these amazing deals!
- Sale-a-bration Stamp Fest coming January 20. Details and register HERE
- Check out my events calendar HERE
- Stampin’ Blends alcohol markers are now available! Click HERE for more info.
- Hostess Code for the month of November (JBHB42YT)
Find out more about HOW, WHEN and WHY to use the code HERE. - November’s FREE gift: Stitched Felt Embellishments
Find out more HERE. - Gumball Rewards for all orders over $50. Find out more HERE
Thanks for stopping by today, and Sweet Stamping!
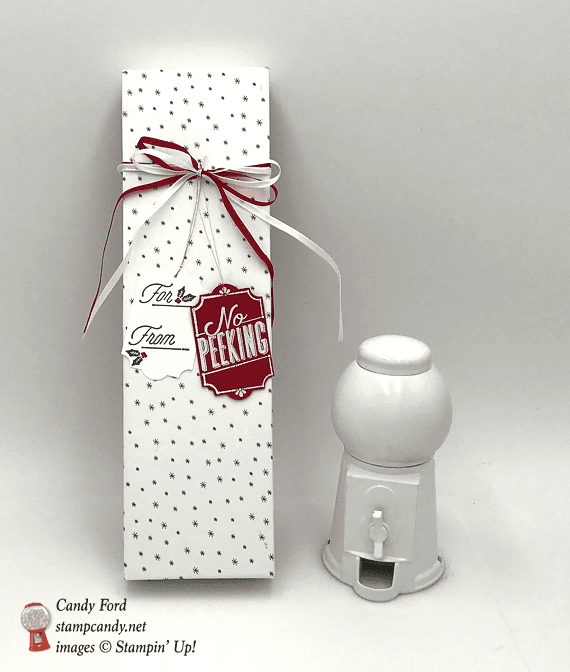
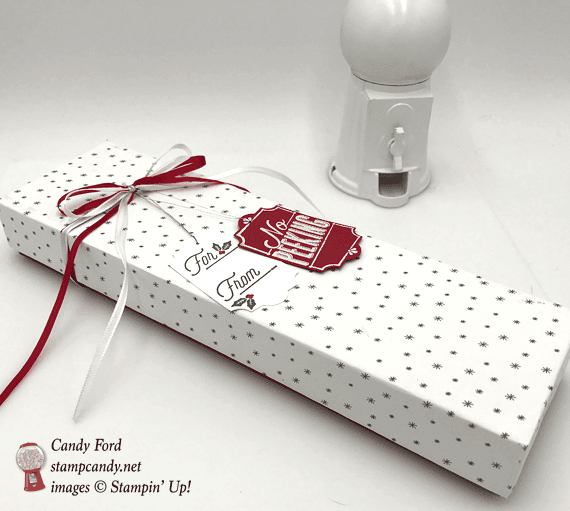
Nov 22, 2017 | Boxes, Christmas, Gallery, Gift Wrap, Gifts, Holiday |
I love orangettes. I mean I LOOOOVE them. Little strips of candied orange peel dipped in high quality dark chocolate have to be one of my favorite treats ever! I recently finished off a box of them from Maison du Chocolat and thought the heavy red box was way too nice to just through out. So I pulled out all the inserts that held the orangettes, covered the lid with Be Merry Designer Series Paper, and added a couple tags made with the Merry Little Labels bundle. Voila! A nice box that still has just a hint of a chocolate scent.
Here’s what I made:
Here’s what I did:
Cut and scored with my Stampin’ Trimmer:
- measured the box lid across the top in both directions (3″ x 10-1/2″), down the side (1-1/8″), and around to the inside 1″, and came up with 7-1/4″ x 14-1/4″
- Be Merry Designer Series Paper (DSP) cut to 7-1/4″ x 14-1/4″
- NOTE: You have to cut the paper on the diagonal to get the long measurement. Don’t worry if the corners are clipped a little bit – that part will be inside the box.
- scored the DSP along the short side at 1 “, 2-1/8″, 5-1/8″ and 6-1/4”
- scored the DSP along the long side at 1 “, 2-1/8″, 12-1/8″ and 13-1/4”
- cut along the score lines at each short end to the second score line
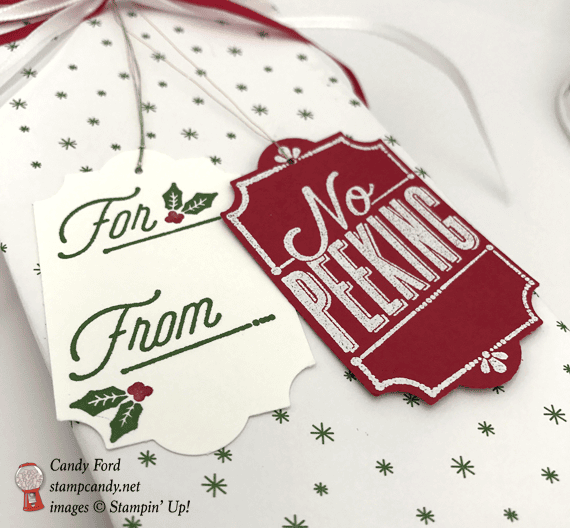
Stamped with the Merry Little Tags stamp set:
- For/From tag in Garden Green ink onto a scrap of Whisper White card stock (CS)
- Note: before stamping onto the CS, I wiped the green ink off of the berry parts of the stamp and colored them with a Real Red Stampin’ Write Marker
- No Peeking tag onto a scrap of Real Red CS in Versamark ink, then heat embossed in white
Cut using the Everyday Label Punch:
Cut using the 1/16″ Circle Punch:
- one hole at the top of each tag, to hang it by
Assembled the box:
- DSP glued onto the box lid, on top first, then down the long sides, then down the ends, and then around and up the inside of all 4 sides
- two pieces of 1/8″ ribbon (about 20″) wrapped around the box and tied a bow
- the two tags attached to the ribbon with Gold Thread
Here are today’s colors:
You can click on each one to see all the products that come in that color!
Here’s what I used:
Click on the images for more details and to purchase.
Here are some key points to remember:
- Online Extravaganza only lasts through November 26. Don’t miss these deals! 10-40% off! Click HERE to shop.
- Stampin’ Blends alcohol markers are now available! Click HERE for more info.
- Hostess Code for the month of November (JBHB42YT)
Find out more about HOW, WHEN and WHY to use the code HERE. - November’s FREE gift: Stitched Felt Embellishments
Find out more HERE. - Gumball Rewards for all orders over $50. Find out more HERE
Thanks for stopping by today, and Sweet Stamping!
Oct 29, 2017 | Cards, Christmas, Gallery, Holiday, Techniques |
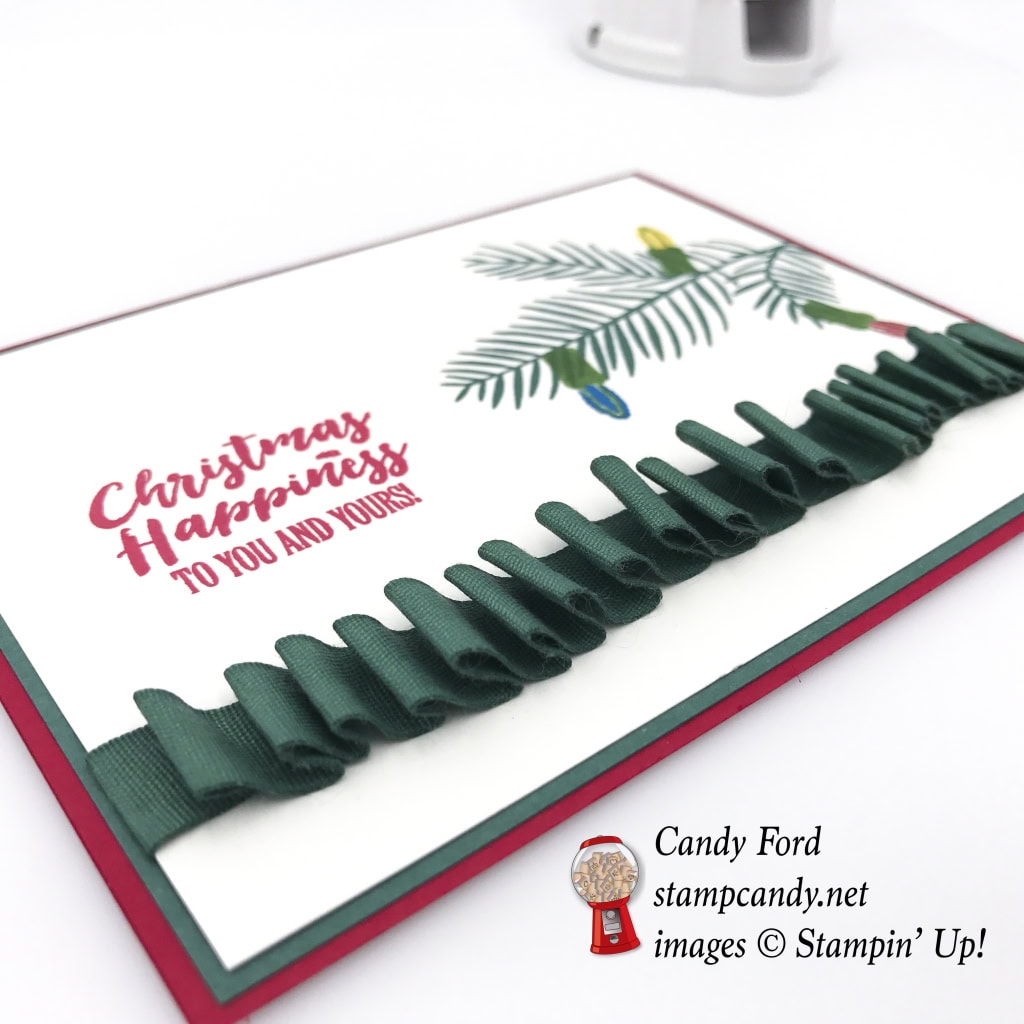
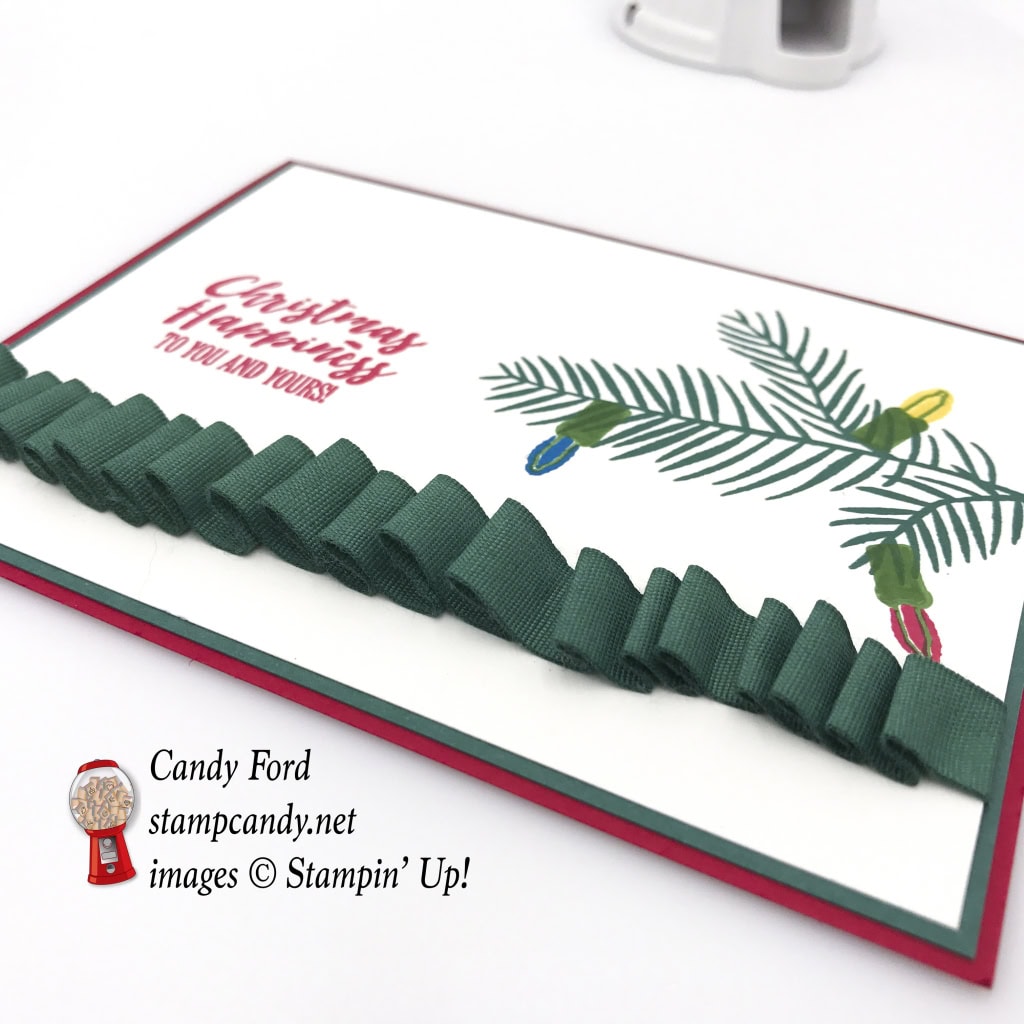
I finally got around to using the Christmas Happiness stamp set from the 2017 Holiday Catalog, and it’s a beauty. It has images of mistletoe, pine cones, pine sprig, and Christmas lights, plus some very sweet sentiments. For today’s card, I used the sprig and lights and one of the sentiments. I added a special touch by ruching some Tranquil Tide 1/2″ Finely Woven Ribbon on the front of the card. At first I tried to make it look uneven, but it looked very even, so I tried to continue making it look even, then it started getting wonky. Tell me what you think.
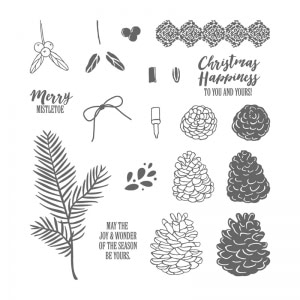
Christmas Happiness stamp set © Stampin’ Up!
Here’s what I made:

Here’s what I did:
Cut and scored with my Stampin’ Trimmer:
- Real Red card stock (CS) cut to 5-1/2″ x 8-1/2″, then scored in half at 4-1/4″
- Tranquil Tide CS cut to 5-1/4″ x 4″
- Whisper White CS cut to 5″ x 3-3/4″ (2 pieces: one for the top layer and one for the inside)
Stamped with the Christmas Happiness stamp set:
- sprig in Tranquil Tide ink onto the Whisper White CS layer
- light sockets in Garden Green ink onto the sprig
- light bulbs filled in with Real Red, Pacific Point, and Daffodil Delight inks
- sentiment in Real Red ink to the left of the sprig
Assembled the card:
- ribbon adhered to the Whisper White CS layer using Fast Fuse – put a line of adhesive on the CS; adhered the ribbon, making waves with my fingers to create the ruched effect; wrapped the ends around to the back of the CS and secured with Fast Fuse (Tear & Tape works well for this technique, too.)
- Whisper White CS layer glued onto the Tranquil Tide CS layer
- Tranquil Tide CS layer glued onto the front of the card base
- second piece of Whisper White CS glued to the inside of the card base
Here are today’s colors:
You can click on each one to see all the products that come in that color!
Here’s what I used:
Click on the images for more details and to purchase.
Here are some great ways to save until October 31:
- Designer Series Paper Sale October 1-31, Buy 3 Get 1 FREE! See details HERE.
- Hostess Code for the month of October (HGB2HGXK)
Find out more about HOW, WHEN and WHY to use that HERE. - October’s FREE gift
Mini Pizza Boxes
Find out more HERE. - New Merry Patterns Hostess Stamp Set – added to your Host Rewards
There’s a brand new stamp set that isn’t in any catalog. You can’t buy it, but you can get if for free with a qualifying order! You can host a party, or place your own order, or join under me and get a 20% discount on your demonstrator order. Find out more HERE.
Join me November 4 in Riverdale, GA for the Autumn Artisan Bazaar. I will have lots of cards and gifts for sale. And I’ll be doing a prize drawing! CLICK HERE for more details!
Thanks for stopping by today, and Sweet Stamping!
Oct 28, 2017 | Cards, Christmas, Gallery, Holiday |
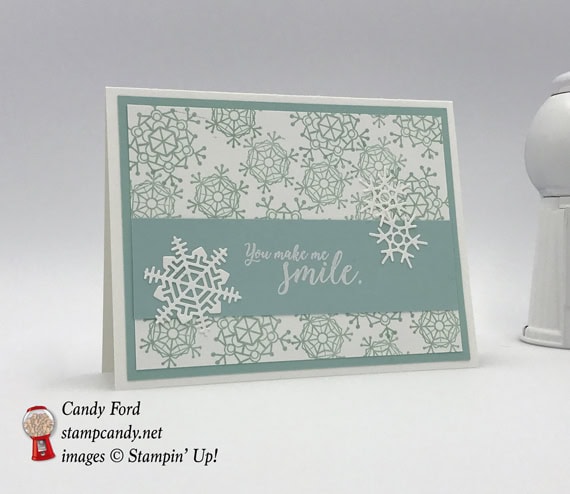
The Colorful Seasons bundle has to be one of my faves in Stampin’ Up!’s 2017-2018 Annual Catalog. It really is for all year round. Today’s card is winter themed, and the sentiment is general enough to use for almost any occasion. Tell someone they make you smile with this Pool Party and Whisper White, soothing, snowflake covered card.

Colorful Seasons Bundle © Stampin’ Up!
Here’s what I made:

Here’s what I did:
Cut and scored with my Stampin’ Trimmer:
- Whisper White Thick Card Stock (CS) cut to 8-1/2″ x 5-1/2″, then scored in half at 4-1/4
- Pool Party CS cut to 5-1/4″ x 4″
- Whisper White CS cut to 5″ x 3-3/4″
- Pool Party CS cut to 5″ x 1-1/2″
Stamped with the Colorful Seasons stamp set:
- snowflakes in Pool Party ink onto the Whisper White CS layer
- sentiment in Whisper White Craft ink onto the Pool Party CS strip
Die cut using the Seasonal Layer Thinlit Dies:
- snowflakes from Whisper White CS
Assembled the card:
- Pool Party CS layer glued onto the front of the card base
- Whisper White CS layer glued onto the Pool Party CS layer
- Pool Party CS strip glued onto the Whisper White CS layer
- snowflakes glued onto the card front
Here are today’s colors:
You can click on each one to see all the products that come in that color!
Here’s what I used:
Click on the images for more details and to purchase.
Here are some specials that end October 31:
- Designer Series Paper Sale October 1-31, Buy 3 Get 1 FREE! See details HERE.
- Hostess Code for the month of October (HGB2HGXK)
Find out more about HOW, WHEN and WHY to use that HERE. - October’s FREE gift
Mini Pizza Boxes
Find out more HERE. - New Merry Patterns Hostess Stamp Set – added to your Host Rewards
There’s a brand new stamp set that isn’t in any catalog. You can’t buy it, but you can get if for free with a qualifying order! You can host a party, or place your own order, or join under me and get a 20% discount on your demonstrator order. Find out more HERE.
Thanks for stopping by today, and Sweet Stamping!
