This year the theme of our Halloween party was Outer Space. The invitations were made of Stampin’ Up! products old and new.
The card base and alien were made from Old Olive card stock (or Pear Pizzazz when I ran out of Old Olive.) The background is from the Happy Haunting Designer Series Paper in the current Holiday Catalog. The flying saucer body is made from Silver Foil Sheets cut with the Ovals Collections Framelits Dies. The bubble is made from Window Sheets cut with the Circles Collection Framelits Dies. The inside floor of the flying saucer is Silver Shimmer Paper (retired) – not to be confused with Silver Glimmer Paper which is still available.
The alien is from a retired stamp set called Make a Monster – I stamped it on several sheets of the Old Olive or Pear Pizzazz card stock, about 25 aliens per sheet. There were way too many to fussy cut, so I used my Brother Scan ‘n Cut, which did a pretty good job. I glued on the little googly eyes and assembled the card.
For the inside, I printed the invitation info on 8-1/2″ x 11″ sheets of card stock, then scored them and cut them in half for two invitations from each sheet.
We decorated the house with lots of blue lights and silver lamé to give the feel of a UFO. Our patio has brick walls but no roof, so we rented a large tent. That’s where the food was. We hung long silver foil fringe around the tent with blue lights. We made UFOs out of aluminum pie pans and hung them with clear fishing line. The long center food table was covered in silver lamé and had lots of tiny battery operated blue lights strewn on it. My nephew graciously offered his huge Lego Star Wars Death Star as the centerpiece. At the far end you can see the chafing dishes for the hot food. There were ice buffets at the other end for sushi and other cold foods.
The Lego Death Star.
Here’s a photo of the stamping studio turned bar area, before we dimmed the lights. The whole place had silver lamé and blue fairy lights, giving it an eery glow.
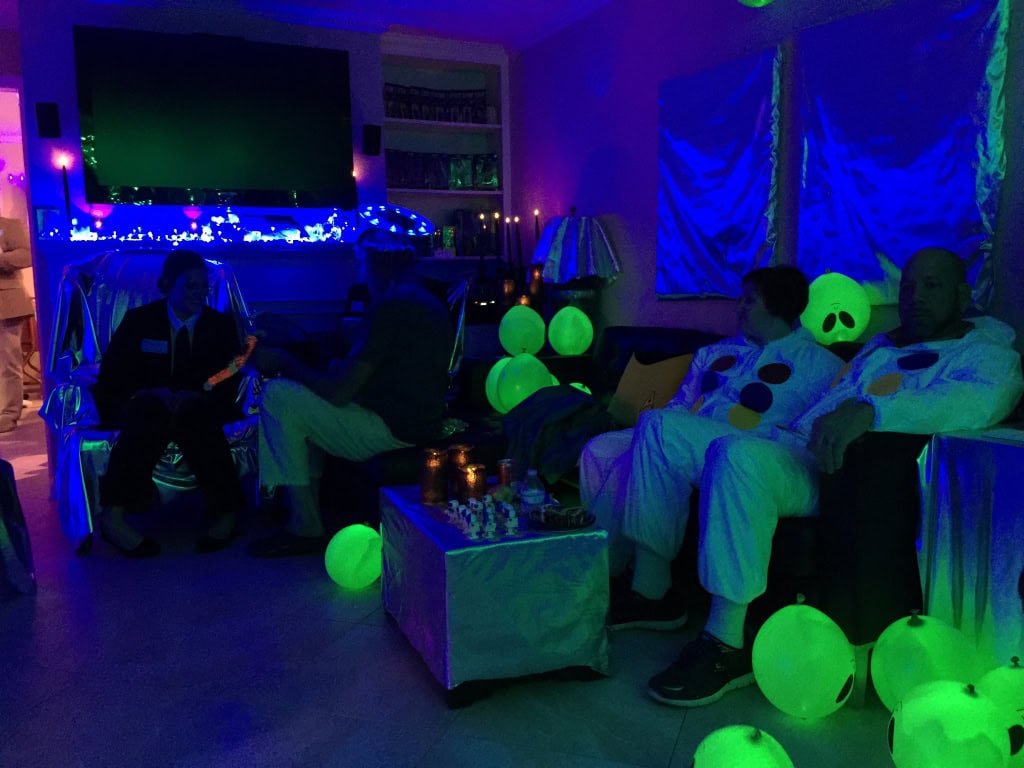
Here’s a snapshot of the living room. Most of the furniture was covered in, you guessed it, silver lamé. We had alien balloons that had lights inside. They were filled with helium, but didn’t stay afloat very long, so they just piled up. They did stay inflated for days afterward.
THE CAKE:
Every year we get our cake from Mark & Becky Brickman of Bakers Man, Inc. in Alpharetta, GA. Here they are delivering it. Their wonderful assistant Elizabeth did most of the designing on this one. She did a phenomenal job! It’s a flying saucer that has crashed in the desert and there’s an alien hiding behind a rock. Essentially everything you see is edible, including the alien, the mountains and rocks, and the top half of the flying saucer.
If you’re in the Atlanta area, I highly recommend Bakers Man. Their cakes are always delicious, but the carrot cake is amazing. Not only is it the best carrot cake I’ve ever had, it’s probably the best cake period.
Here’s a close up of the flying saucer. Everything from the widest part up to the top was cake.
And here’s the alien made of sugar. The detail on this little guy was astounding.
THE PEOPLE:
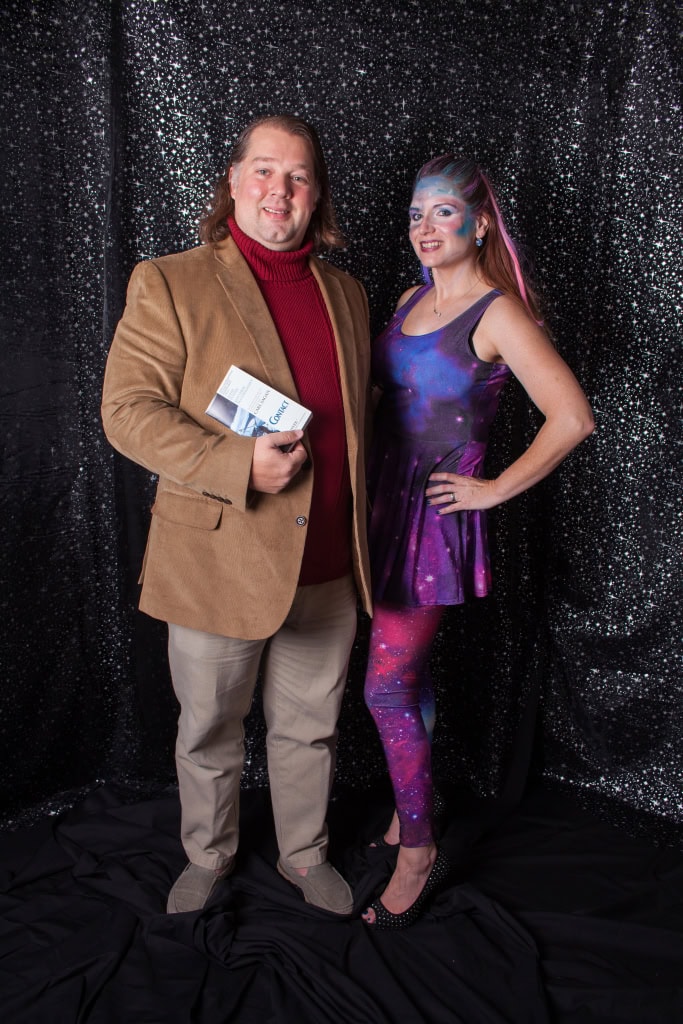
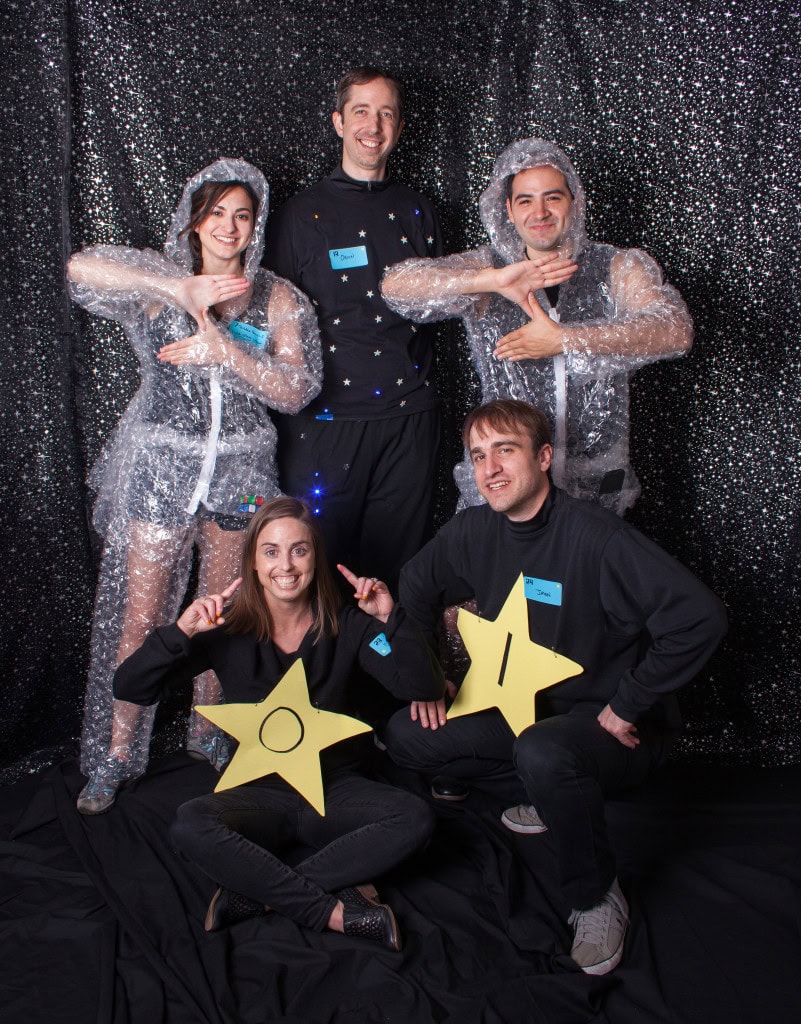
There were some great costumes. Here are just a few: Space Chick, Diet Coke, Twister game, One-Eyed One-Horned Flying Purple People Eater, Soylent Green cracker, Men In Black, guy on safari, Carl Sagan and the Cosmos, Star Trek characters, binary star, a couple dressed in bubble wrap, the constellation Orion, black hole, Saturn, and the Big Dipper.
Neal and I were Mal & Kaylee (older, chubbier, bespectacled versions) from the Firefly TV show.
Okay, so that was the first event in the last month that took my time away from my blog. Next was the Stampin’ Up! Rising Star Retreat in Utah….to be continued.
I haven’t forgotten you! Of course, I had the best intentions of prescheduling blog posts for all the time I would be away from home, but alas, I just didn’t get it done. Between traveling, recuperating from traveling, traveling more, recuperating,… – you get the idea – I’m afraid my energy for blogging has been lacking.
It’s been a wacky few weeks, and the wackiness continues. As it has turned out, mid-October through late November is just a crazy chunk of time in my 2015 schedule. While I’m extremely grateful for the opportunities I have had to travel, spend time with friends, and attend wonderful events, I’m pooped! And I’m afraid my blog has suffered for it.
I plan to post photos from my adventures. First was our huge annual Halloween party – it took weeks to put together, and then a week to recuperate afterward. Here’s a sneak peek of the invitation and the living room:
Then I got to attend Stampin’ Up’s Rising Star Retreat in Utah, where five fabulous demonstrators from around the country and myself were pampered and trained and given an inside look at Stampin’ Up! Then I went on a week long crafting cruise around the Caribbean.
I’m on my way now to attend Stampin’ Up’s OnStage Local event in Tampa, FL. Then there’s another cruise, a family gathering at my brother’s house in the Smoky Mountains, and Thanksgiving with my husband’s family at the Georgia coast. Phew!
I’m looking forward to December when I can sit in my stamping studio with my cats and make stuff!
The new 2015-2016 Stampin’ Up! Annual Catalog goes live tomorrow! To celebrate, this weekend I hosted an Open House to feature some of the new products. Everyone in attendance said they had a really fun time. I know I sure did!
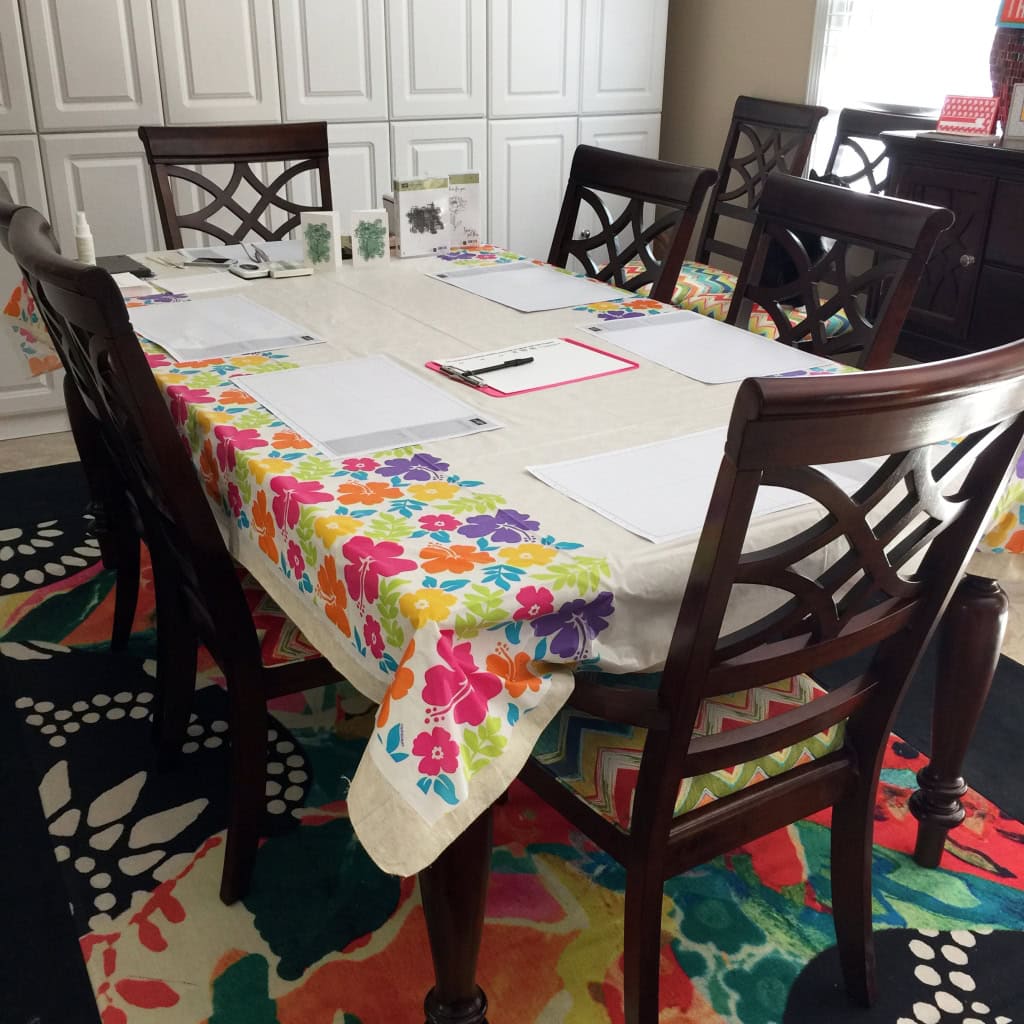
THE LAY OUT
The dining table was set up for the Make & Take.
Some of the new papers: Cherry on Top DSP Stack, Envelope Paper, Cotton Paper, and Bohemian DSP. (The double Thanks sign is from a Paper Pumpkin kit.)
This table had a display of Paper Pumpkin kits…
…and Project Life.
Big Shot station display.
The bottom drawer of the Big Shot station was full of kits for sale. There was a box of adhesives for sale as well.
And of course, there was an area where guests could sign up to join the Candy Hearts team.
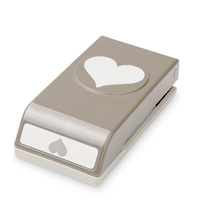
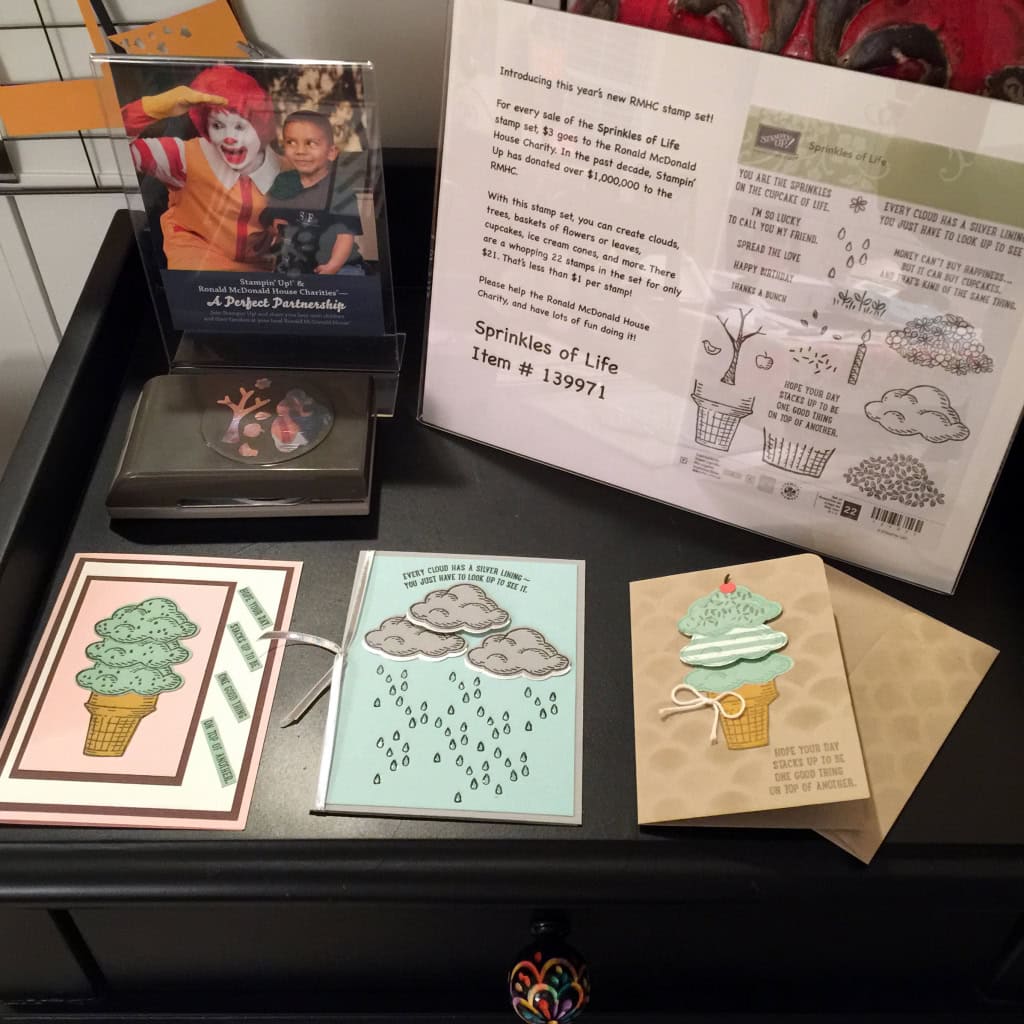
The Ronald McDonald House Charity stamp set, Sprinkles of Life is a wonderfully versatile – and adorable – stamp set, and $3 from every sale goes to the RMHC. Did you know that Stampin’ Up! has donated over $1,000,000 to the RMHC in the last decade? The coordinating Tree Builder Punch makes it even more versatile.
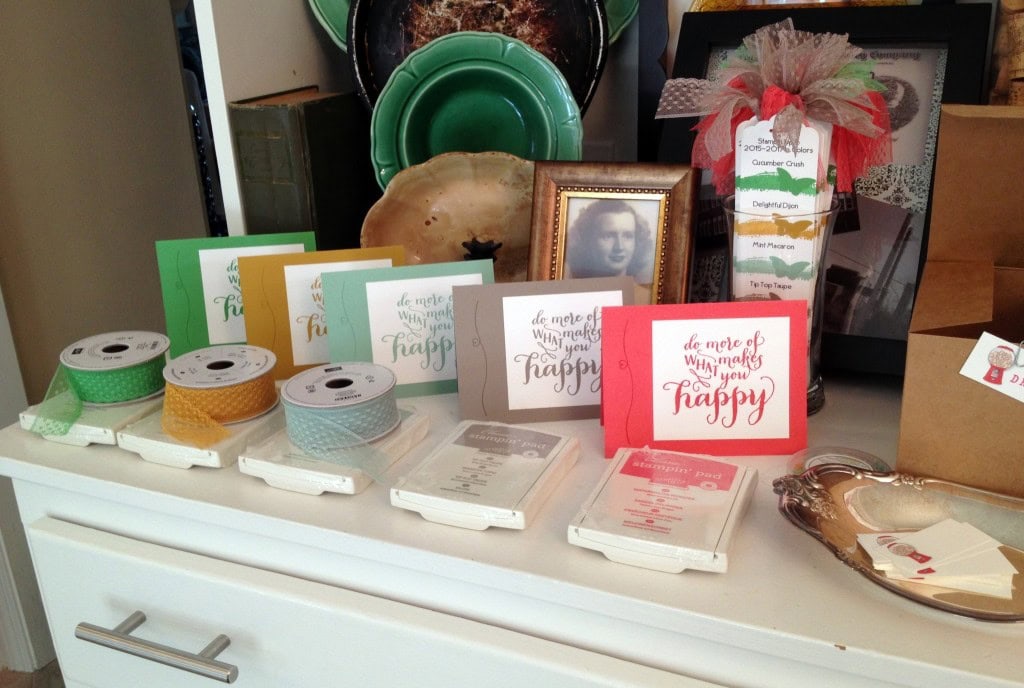
Here are the 2015-2017 In Colors: Cucumber Crush, Delightful Dijon, Mint Macaron, Tip Top Taupe, and watermelon Wonder. I’m afraid I used all my Tip Top Taupe and Watermelon Wonder 1″ Dotted Lace Trim on the bookmarks (top right.) At the far right, you can just see the prize drawing area. Five prizes were awarded at the end of the Open House, including kits and stamp sets!
THE PEOPLE (Unfortunately I did’t get a photo of everyone who attended, but here are few snapshots.)
My team member (and dear sister) Judy guided the Make & Take. Guests made a cards using Whisper White Notecards & Envelopes, the new You’ve Got This stamp set, Mint Macaron ink pad, black Memento ink pad, and Pearls Basic Jewels.
Here’s Linda working on her order, with the assistance of the handsome Brian King. (I caught him unawares.)
Donica made two cards. She wasn’t happy with the stamping job on the one on the right, so she covered the offending area with a sentiment (from the Teeny Tiny Wishes stamp set) stamped on Mint Macaron card stock, cut with the Modern Label punch, adorned with Pearls Basic Jewels, and attached to the card with Stampin’ Dimensionals.
This is a perfect example of the saying, “it isn’t a mistake; it’s an opportunity to embellish.” I think it looks awesome.
Here are a couple more examples of the Make & Take card, showing how you can use the same simple supplies to make different cards just by changing the placement of the components.
Margie stayed for the Open House and the Paper Pumpkin Party that evening. Here she is relaxing between events with little Winston.
Parker was also on hand to supervise and lobby for rubbies from guests.
THE REFRESHMENTS – the new In Colors were the inspiration.
Thanks to Brian King for photos of the food!
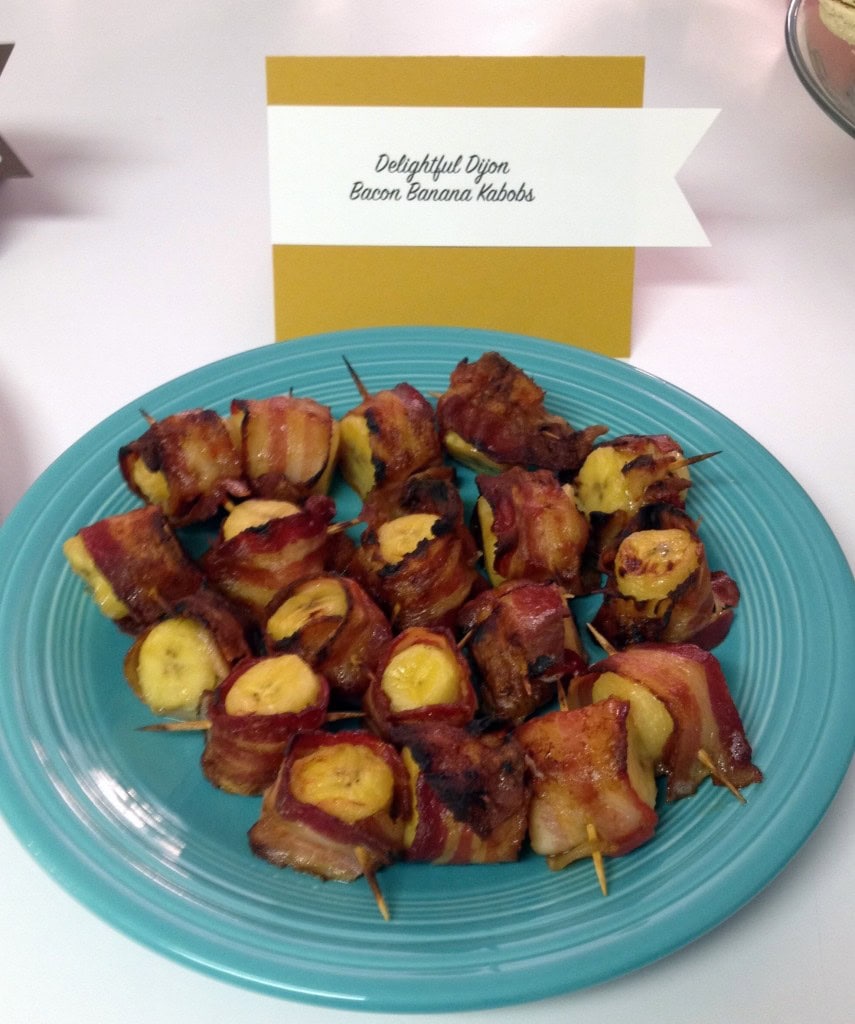
Delightful Dijon Bacon Banana Kabobs (recipe below) were by far the most popular dish of the day.
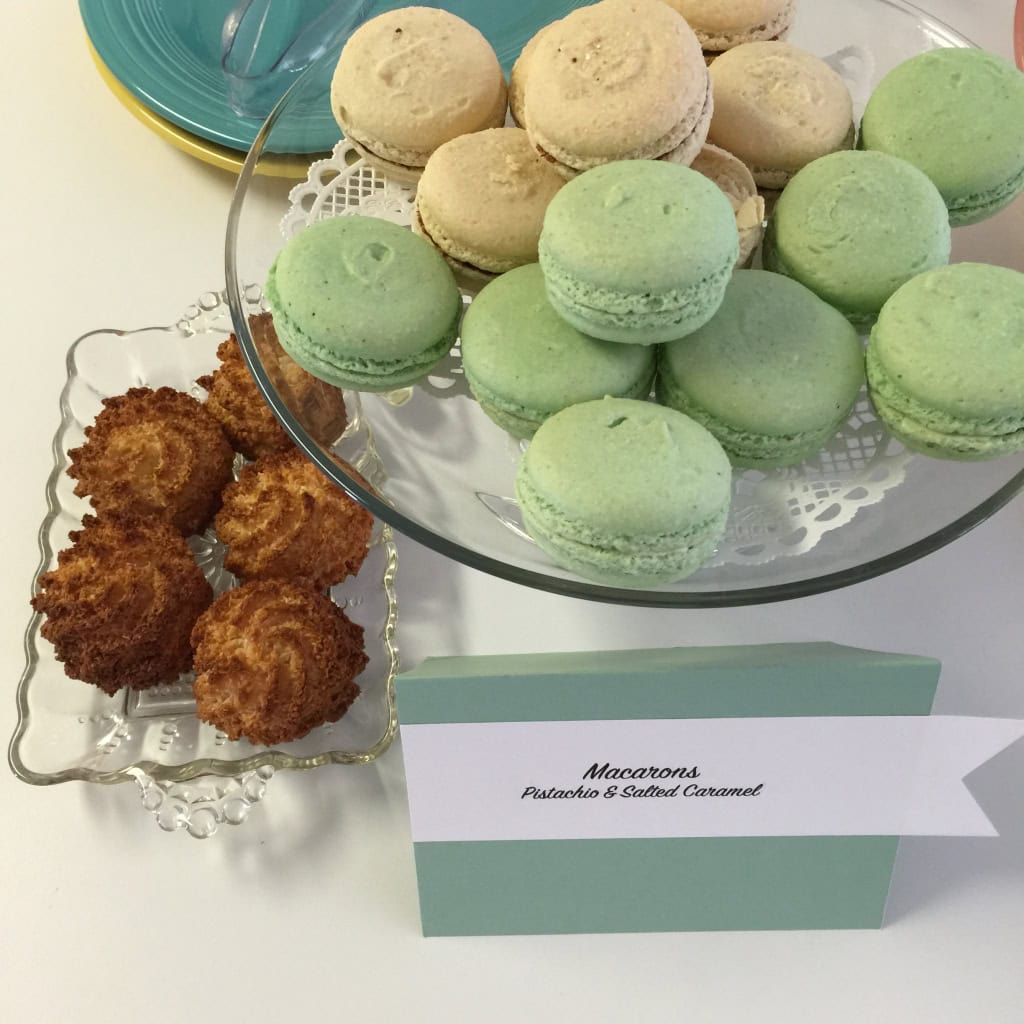
I didn’t find Mint Macarons, so I got Pistachio, which were a similar color. I also added in some Salted Caramel ones. The items on the left are Coconut Macaroons. (My attempt to show the difference between the two.)
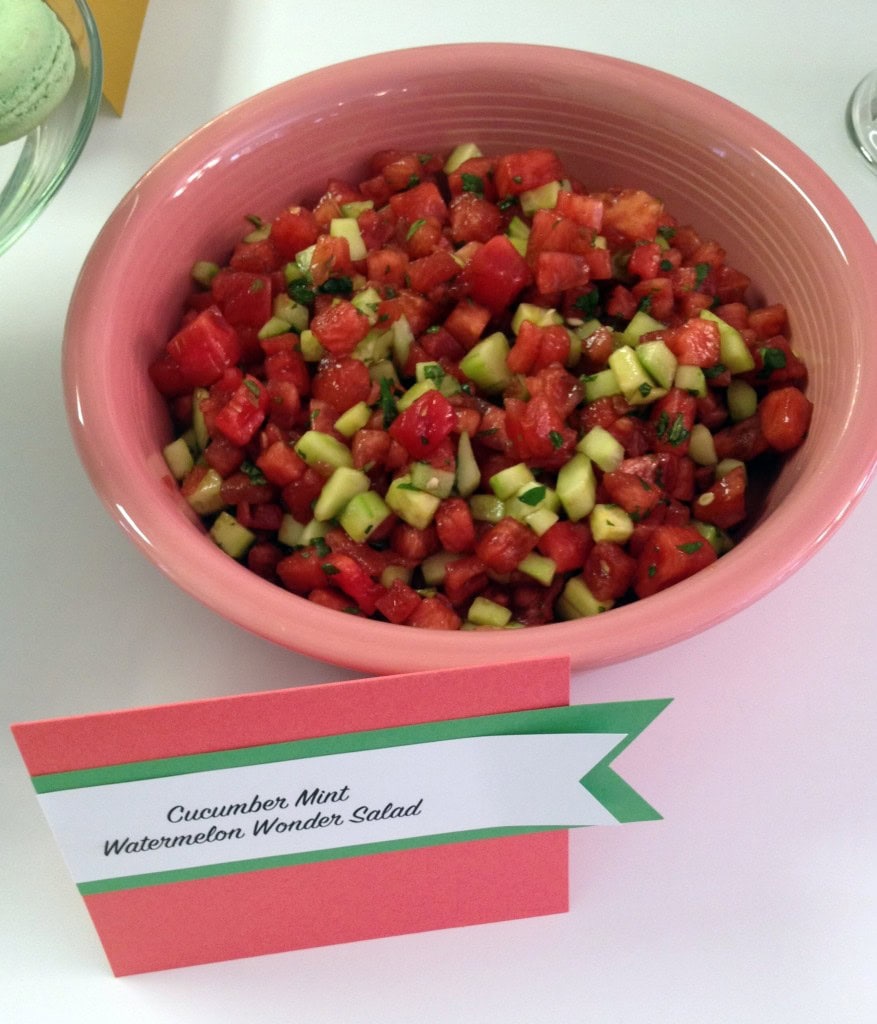
I found a recipe online for Cucumber Mint Watermelon Salad, representing the colors Cucumber Crush, Mint Macaron, and Watermelon Wonder. It was dressed with Balsamic vinegar, sugar, and salt.
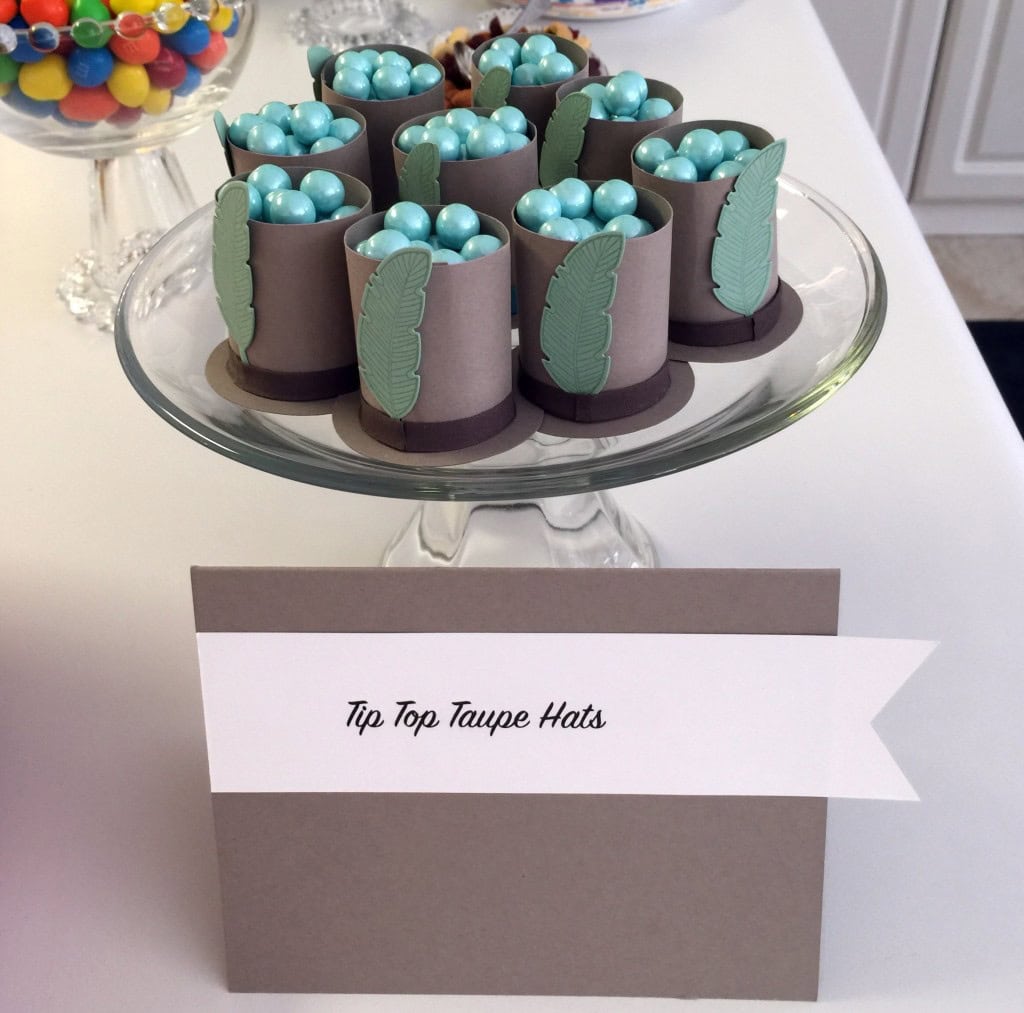
Taupe food didn’t sound very appetizing, so instead I made little top hats and filled them with candies. I used Tip Top Taupe and Mint Macaron card stocks, two sizes of Circle Punches, Early Espresso Cotton Ribbon, Mint Macaron ink, the Four Feathers stamp set, and the Feathers Framelits Dies. Multipurpose Liquid Glue holds it all together.
While Cherry Cobbler and Chocolate Chip aren’t new Stampin’ Up! colors, they do make a tasty combination. These are super simple: phyllo cups, cherry pie filling, and mini chocolate chips. Yum!
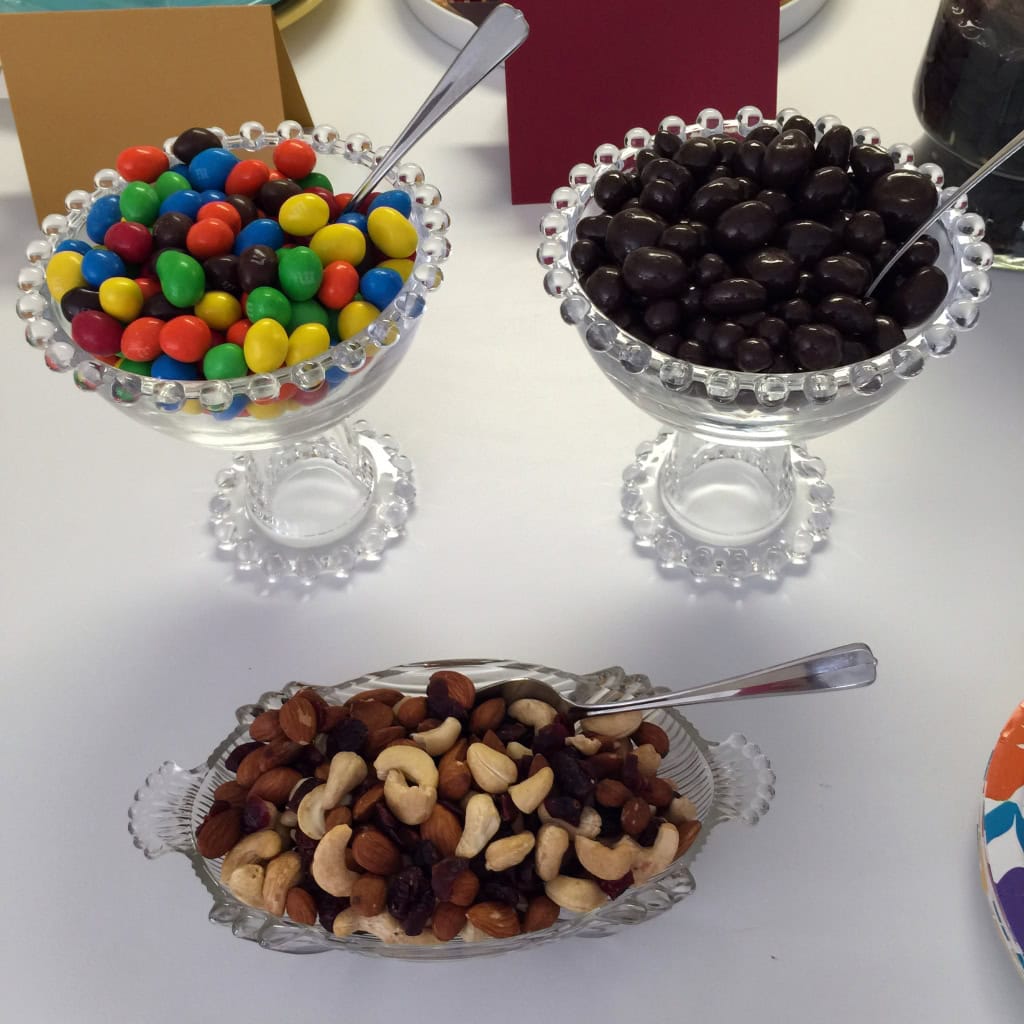
Assorted nuts and candies.
I printed these labels on 8-1/2″ x 11″ paper, cut them apart, and adhered them to the water bottles. Easy Peasy.
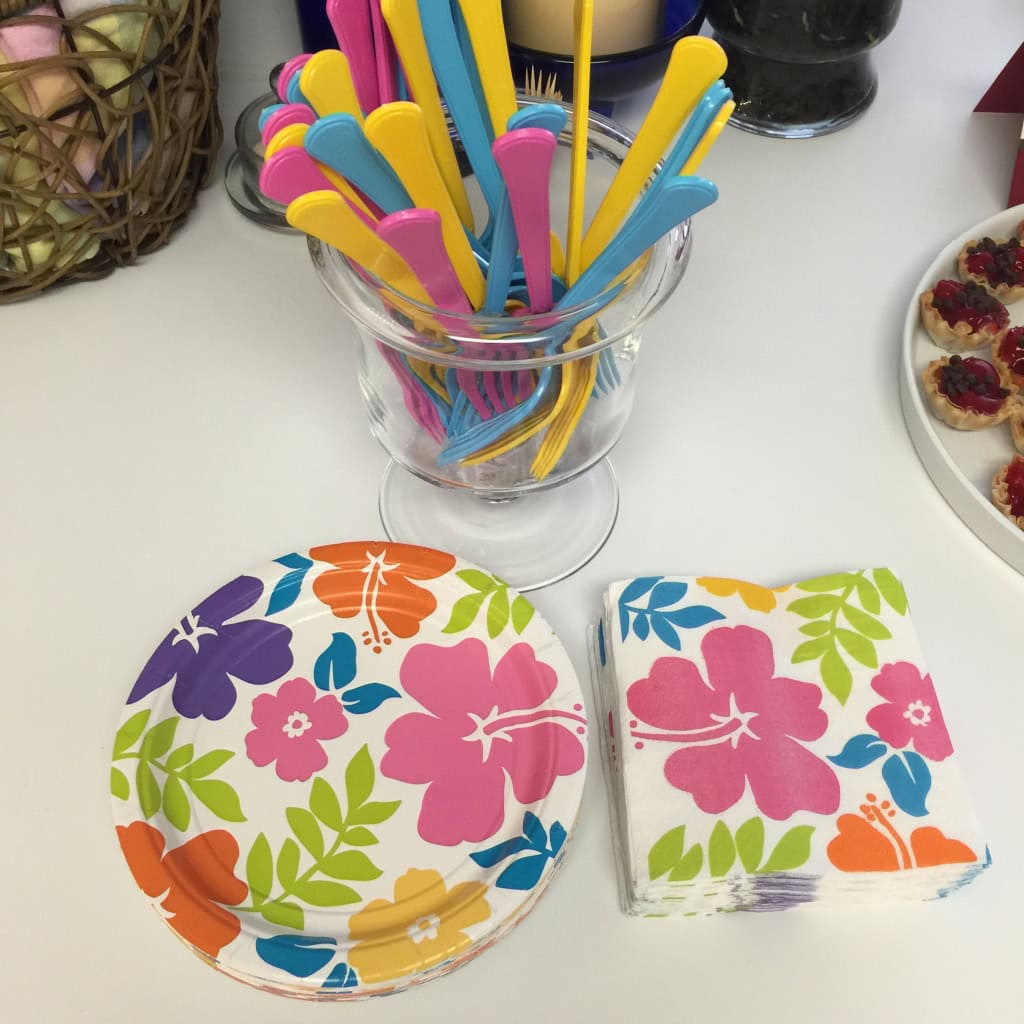
Brightly colored plates, napkins and flatware added to the festive atmosphere. These were the closest to Melon Mambo, Tempting Turquoise, and Daffodil Delight (my blog and logo colors) that I could find.
RECIPE
Delightful Dijon Bacon Banana Kabobs (I made 2-3 times this amount.)
2 Tbsp. fresh lemon juice
1 Tbsp. Dijon style mustard
2 large firm-ripe bananas
8 slices lean bacon
In a bowl, whisk together the lemon juice and dijon mustard.
Slice each banana crosswise 1″ pieces. Add them to the lemon mustard mixture and stir gently to coat. Let them marinate for 15 minutes, turning them occasionally.
Cook the bacon until cooked but still limp. I prefer to bake it on a jelly roll pan, but you can cook it in a large skillet on the stove. Transfer it to paper towels to drain. Halve each slice crosswise.
Wrap each piece of banana in a piece of bacon and stick a wooden toothpick through to hold it together. Broil on the rack of a broiler pan about 4 inches from the heat, turning once, for 6 – 8 minutes, or until the bacon is crisp.
Parties/workshops are such a great way to gather with friends for some crafting fun. You provide the friends and I’ll provide the fun! Let’s find a date and time that work for you!
Candy Ford, call or text 404-661-5222, email candy@stampcandy.net
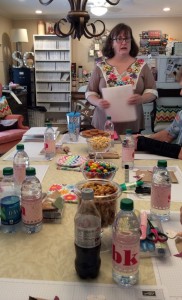
We had so much fun at our April team meeting! We do this every couple of months to make sure everyone stays up to date on everything Stampin’ Up and, of course, to have fun! All five of my downlines were able to attend. Also a dear friend and avid Stampin’ Up user, Sharon, was visiting from Tennessee and was able to join us. Brian King was able to stop by for a while, and he brought a wonderful giveaway prize – Chalkboard Banner Simply Created Kit and Build A Banner Simply Created Kit – which the lovely Marion won.
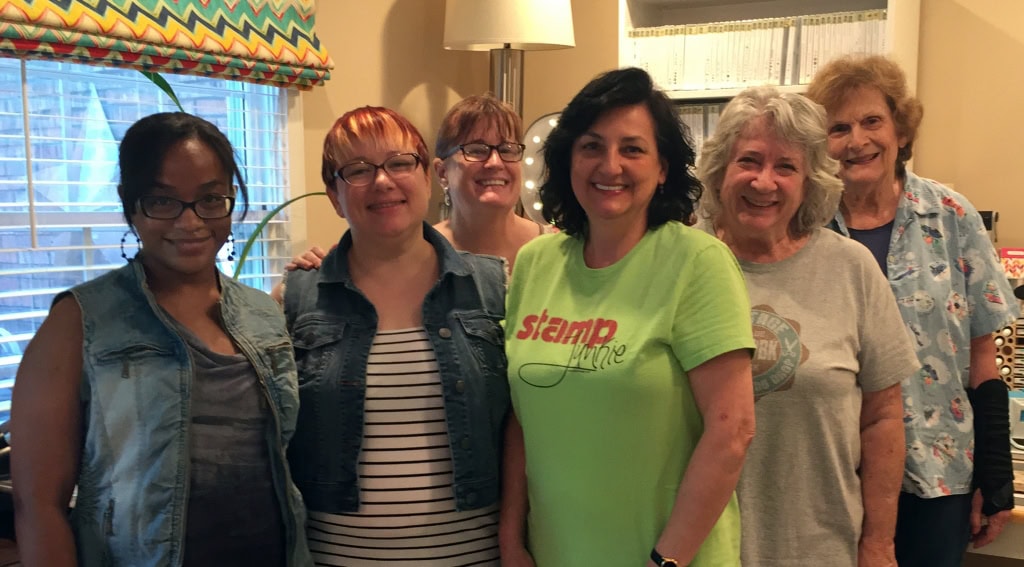
The Sweethearts: Marion, Angel, Candy, Debbie, Judy, Margie (Don’t you just love Debbie’s “Stamp Junkie” shirt?)
Here are a few snapshots from our meeting:
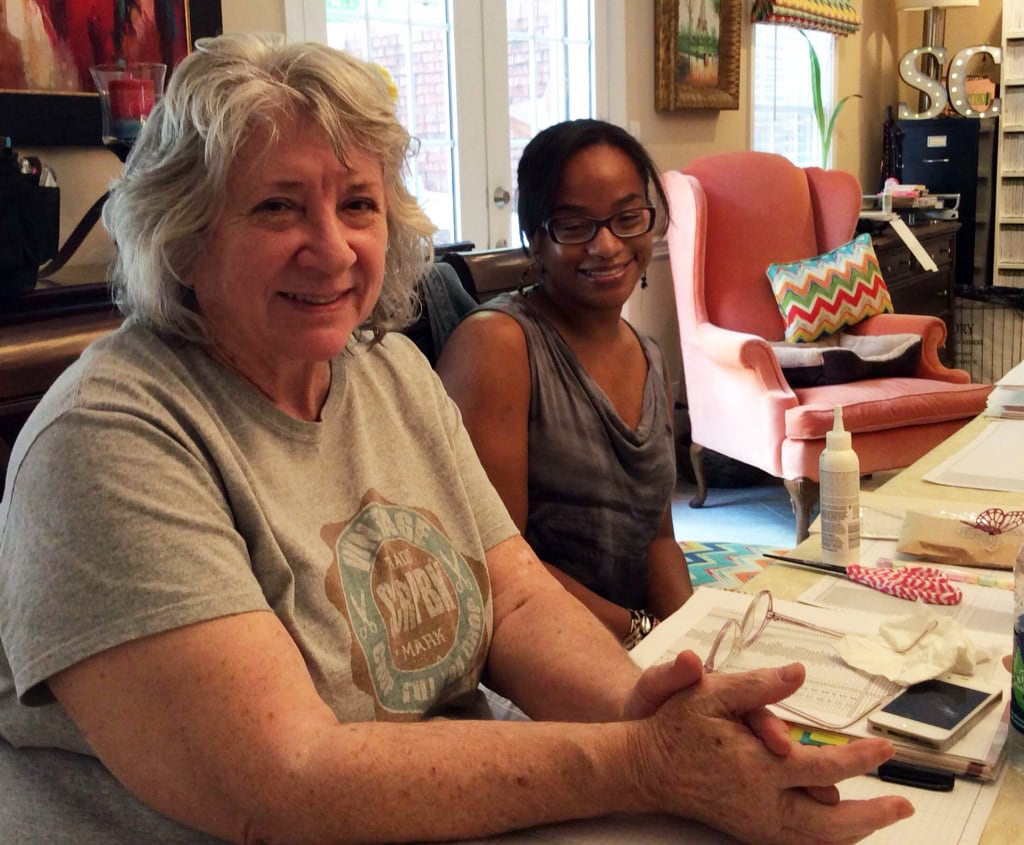
Judy & Marion
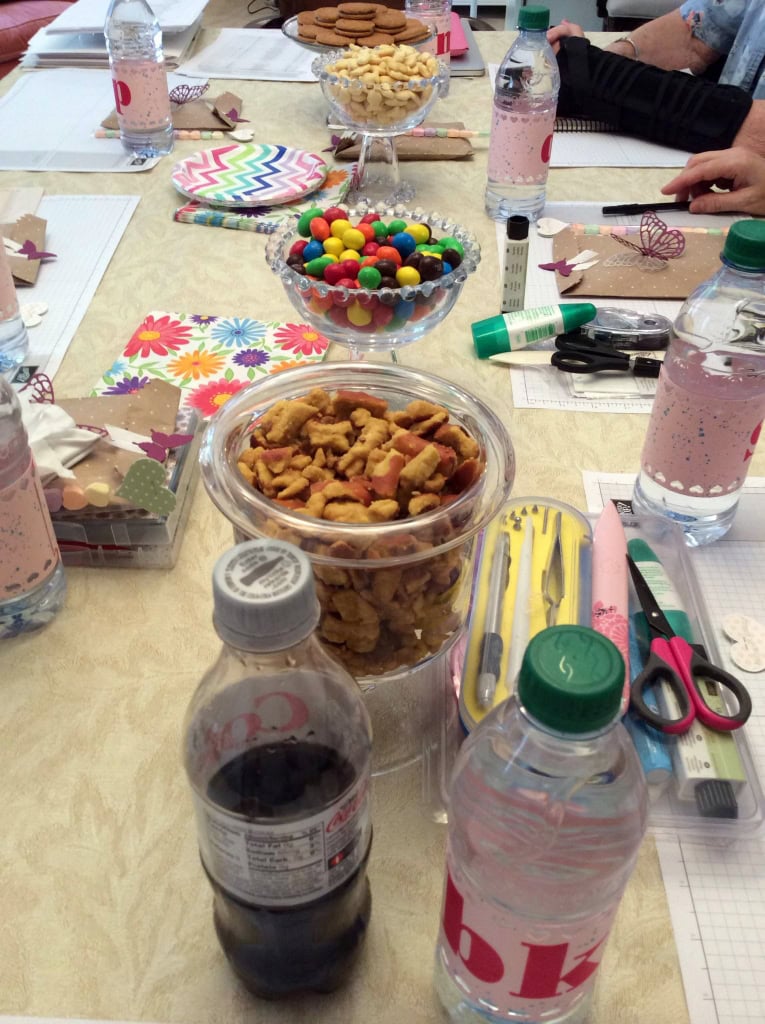
Treats
Margie, Debbie, and Sharon
Brian gave me this beautiful card
Don’t you just love it when someone snaps a photo of you while you’re talking and you come out looking like this? But you can see all the fun chaos we had going on.
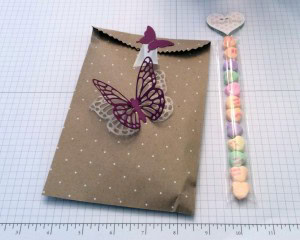
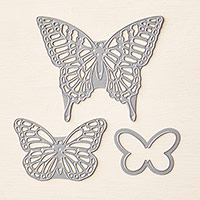
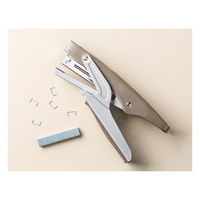
These are the treats I put at each Sweetheart’s place setting. Inside the Polka Dot Tag a Bag Gift Bag are a pack of Candy Dots and an In Color Accessory Pack from the recent Sale-a-Bration. The large Rich Razzleberry butterfly was cut using the Butterflies Thinlit Dies. I used wax paper to help them pop out of the die more easily. I thought the wax paper butterlies were so pretty, I used them on the bags as well. The small butterfly was cut using the Elegant Butterfly Punch, then it and a piece of Whisper White Seam Binding Ribbon were stapled on with the Handheld Stapler, positioning the staple to be the body of the butterfly.
The sweethearts candies fit perfectly in a 1″ x 8″ Cellophane Bag. I used stamps from the Groovy Love stamp set to stamp a Pink Pirouette heart with Pistachio Pudding sentiment. I cut it using the Sweetheart Punch. I punched another heart from a piece of Pistachio Pudding paper out of the 2013-2015 In Color Background DSP Stack. Then I stapled both hearts to the top of the bag.
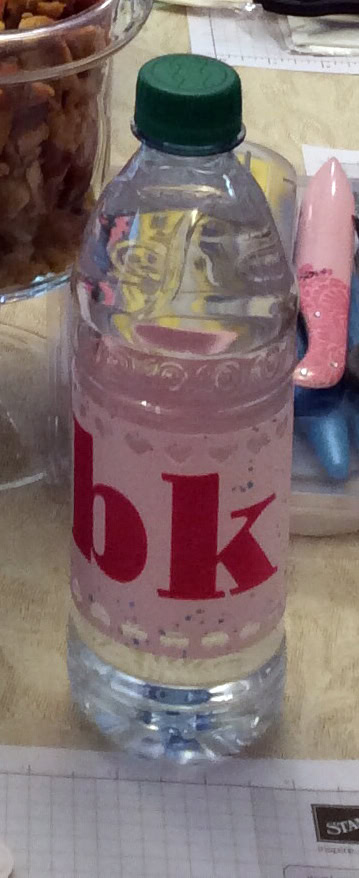
I decorated bottles of water with each person’s initials. I cut Pink Pirouette card stock to size, then stamped the initials in Melon Mambo with the Larger Than Life Alphabet stamp set. I used the Gorgeous Grunge stamp set to create Tempting Turquoise speckles. Then I used the Hearts Border Punch along the top and bottom edges. I attached the labels with a piece of Sticky Strip at each end.
Check back to see our two Make & Take projects!
Thank you for stopping by today, and Sweet Stamping!
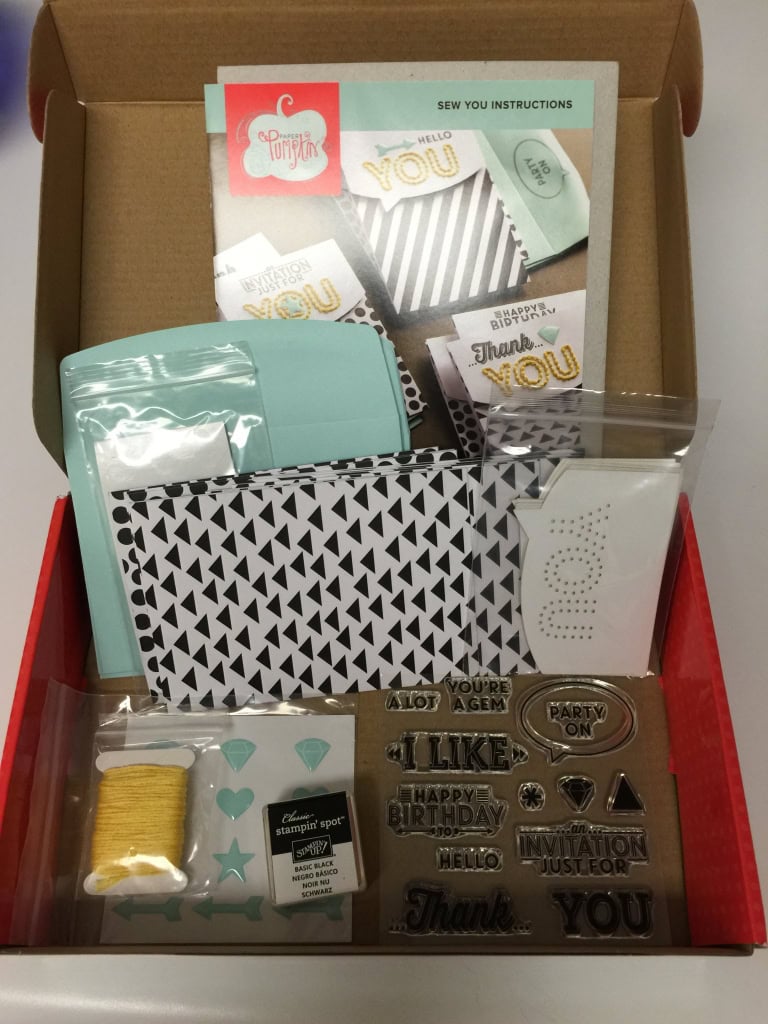
Every month I get so excited when I see that orange box in the mail, because I know it’s gonna be chock-full of stampin’ fun. This month is no exception. Here’s a peek at what all comes in the box.
Watch this short video to see how easy it is to assemble this month’s kit according to the included instructions.
COME TO MY PAPER PUMPKIN PARTY, 7:00 pm on 26 March at my house in Atlanta . It’s always fun to gather together to assemble our kits. I’ll help you assemble your kit, and I’ll show you some alternative ideas for it.
Not a Paper Pumpkin subscriber yet? No problem! Come to the party and play with mine, and you’ll see just how much fun this monthly gift to yourself really is.
The class fee is only $5 — FREE to my subscribers!
Call, text, or email me for details: 404-661-5222 or candy@stampcandy.net. RSVP by the day before.
Want to give a subscription as a gift? It’s easy. Buy as many subscriptions as you’d like. Then you’ll add a name and mailing address for each subscription.
HURRY! SALE-A-BRATION IS ALMOST OVER! You only have until the end of this month to save on a 3 month Paper Pumpkin subscription and qualify for free Sale-a-bration items!
Click on the images below to see all the new Sale-a-bration items that have been added this month! When you place an order, you get a free Sale-a-bration item for every $50 you spend, before tax & shipping.


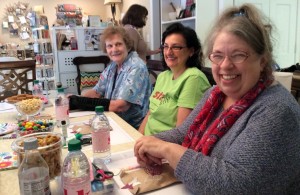 Margie, Debbie, and Sharon
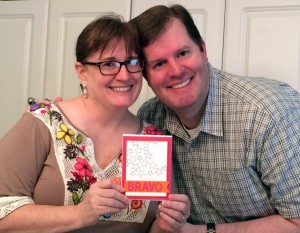 Brian gave me this beautiful card