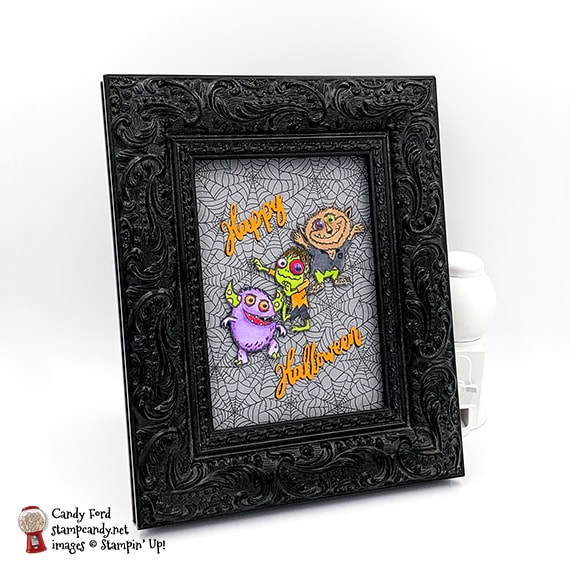
Today is my first time participating in the Home Decor SU Style Blog Hop. I used the Boo to You stamp set, Word Wishes Dies, and Monster Bash Designer Series Paper to create this greeting for my foyer table. I just love the Boo to You stamp set’s three adorable little monsters. Now I realize that “adorable monsters” might seem like an oxymoron, but these guys really are cute.
S
Here’s what I made:
S
Here’s what I did:
Cut and scored with my paper trimmer:
Monster Bash Designer Series Paper (DSP) background cut to 5″ x 7″
Stamped with the Boo to You stamp set:
3 monsters in Tuxedo Black Memento ink onto Whisper White cardstock (CS)
Cut using the Word Wishes Dies:
“Happy” and “Halloween” from scraps of Pumpkin Pie and Basic Black CS
Colored using Stampin’ Blends Markers:
monsters in Granny Apple Green, Highland Heather, Pumpkin Pie, Real Red, Bronze, and Basic Black
I also added some shading using an Early Espresso Stampin’ Write Marker.
Cut using Paper Snips:
3 colored monsters
Assembled the project:
googly eyes glued onto the monsters (purple monster has two small orange eyes; zombie had a small white eye and a large purple eye; werewolf has a large purple eye and a small green eye.)
Pumpkin Pie CS words glued on top of the Basic Black CS words, just slightly askew to make a shadow
monsters adhered onto the DSP using Black Stampin’ Dimensionals
die cut words glued onto the DSP
the whole thing popped into a 5″ x 7″ frame
S
Here’s the hop:
Here are today’s colors:
You can click on each one to see all the products that come in that color!
Click on these images for more details and to purchase.
<– Click here for a clickable and printable list!
S
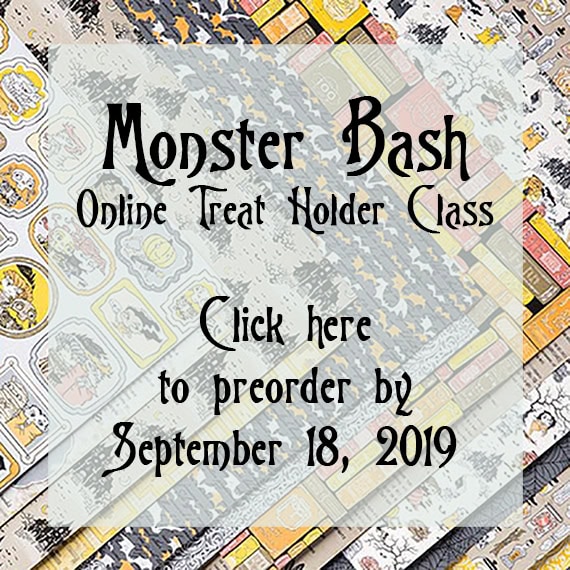
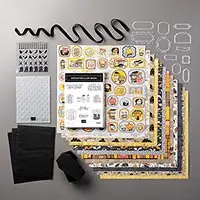
Preorder the Monster Bash Online Treat Holder Class by TOMORROW, September 18:
Make 6 adorable treat holders in the comfort of your own home!
2 each of 3 designs
Features the Monster Bash Suite on pages 52-54 of the 2019 Holiday Catalog
I’ve done the trimming and scoring for you!
You’ll receive the stamp set, dies, pre-cut kits, and Black Stampin’ Dimensionals.
Full detailed instructions
Limited spots available
Click on the image below for details and class options, or copy and paste this link into your browser: https://stampcandy.net/online-classes/monster-bash-treat-holder-class-preorder/
Gift Certificates are available in any U.S. dollar amount from me. Contact mefor details.
Have you shopped from me within the past year? Join my private VIP Facebook groupfor exclusive project tutorials and more!
Join my team and enjoy a 20% discount (or more) on all your purchases! You choose $125 in products and pay only $99, and get free shipping! No obligation! No selling required!
Today’s project is a card I made with the Harvest Hellos bundle (Harvest Hellos stamp set and Apple Builder Punch,) Layered Leaves embossing folder, and Ornate Frames Dies. The three enamel dots are from the Monster Bash Enamel Shapes, and the Mossy Meadow linen thread is from the Magnolia Lane Ribbon Combo Pack.
The Harvest Hellos bundle is quite versatile. You can make pumpkins, jack-o-lanterns, and apples for Autumn, Halloween, Thanksgiving, school, get well, and more.
S
Here’s what I made:
S
Here’s what I did:
Cut and scored with my paper trimmer:
Mossy Meadow card stock (CS) cut to 4-1/4″ x 11″, then scored in half at 5-1/2″
Basic Black CS layer cut to 4-1/8″ x 5-3/8″
Very Vanilla CS layer cut to 2-5/8″ x 3-7/8″
Mossy Meadow CS layer cut to 2-1/2″ x 3-3/4″
Very Vanilla CS cut to 4″ x 5-1/4″ for the inside of the card base
Stamped with the Harvest Hellos stamp set:
pumpkin in Pumpkin Pie ink onto a scrap of Pumpkin Pie CS
face in Tuxedo Black Memento ink onto the Pumpkin Pie CS pumpkin
pumpkin in Pumpkin Pie ink, stamped off once, onto the Very Vanilla CS for the inside of the card base (Oops, I forgot to photograph the inside of the card. I stamped the pumpkin in the bottom right corner.)
sentiment in Tuxedo Black Memento ink onto a scrap of Very Vanilla CS
leaf and tendril in Mossy Meadow ink onto the Mossy Meadow CS layer
stem in Tuxedo Black Memento ink onto a scrap of Soft Suede CS
Cut using the Apple Builder Punch:
Pumpkin Pie CS pumpkin
stem
Cut using the Ornate Frames Dies:
sentiment
Embossed using the Layered Leaves embossing folder:
Basic Black CS layer
Assembled the card:
burnished the fold in the card base with a Bone Folder
Mossy Meadow linen thread wrapped twice around the Basic Black CS layer and tied in a bow
Basic Black CS layer glued onto the front of the card base
stem glued onto the back of the punched pumpkin
punched pumpkin glued onto the Mossy Meadow CS layer
sentiment glued onto the Mossy Meadow CS layer
Mossy Meadow CS layer glued onto the Very Vanilla CS layer
Very Vanilla CS layer glued onto the Basic Black CS layer
2 Basic Gray enamel dots applied onto the Basic Black CS layer
Click on these images for more details and to purchase.
<– Click here for a clickable and printable list!
S
Preorder the Monster Bash Online Treat Holder Class by September 18:
Make 6 adorable treat holders in the comfort of your own home!
2 each of 3 designs
Features the Monster Bash Suite on pages 52-54 of the 2019 Holiday Catalog
I’ve done the trimming and scoring for you!
You’ll receive the stamp set, dies, pre-cut kits, and Black Stampin’ Dimensionals.
Full detailed instructions
Limited spots available
Click on the image below for details and class options, or copy and paste this link into your browser: https://stampcandy.net/online-classes/monster-bash-treat-holder-class-preorder/
Gift Certificates are available in any U.S. dollar amount from me. Contact mefor details.
Have you shopped from me within the past year? Join my private VIP Facebook groupfor exclusive project tutorials and more!
Join my team and enjoy a 20% discount (or more) on all your purchases! You choose $125 in products and pay only $99, and get free shipping! No obligation! No selling required!
For today’s project, I used the Everything Festive and Boo to You stamp sets to decorate a Coffin Box. The Everything Festive stamp set has sentiments for several different holidays and occasions, and the Boo to You stamp set has three adorable little monsters. I used Stampin’ Blends Markers to color the little zombie guy, and I used a couple of the Assorted Googly Eyes to really make him pop!
S
Here are the stamp sets:
S
Here’s what I made:
S
Here’s what I did:
Cut and scored with my paper trimmer:
bottom of coffin box traced onto Granny Apple Green card stock (CS), then cut just inside the lines
Stamped with the Boo to You stamp set:
zombie in Tuxedo Black Memento ink onto a scrap of Whisper White Thick CS
small sentiment in Tuxedo Black Memento ink next to the zombie
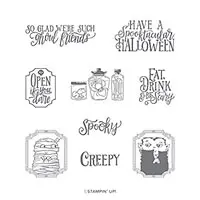
Stamped with the Everything Festive stamp set:
large sentiment in Tuxedo Black Memento ink onto the coffin shaped Granny Apple Green CS
Cut using the Layering Ovals Dies:
zombie/sentiment
Colored using Stampin’ Blends Markers:
zombie in Basic Black, Smoky Slate, Granny Apple Green, Real Red, and Bronze
Assembled the project:
burnished the folds in the box and lid with a Bone Folder
glued the outside of the flaps onto the inside of the adjacent sides to create the box and lid shapes
Granny Apple Green CS glued onto the inside of the box
put lid on the box and wrapped ribbon around it, enough to overlap about 1″ or so on the lid
NOTE: Be sure the ribbon is snug enough to stay on, and loose enough to be able to slide it off.
adhered the ribbon ends together using Tear & Tape, being careful not to stick it to the lid
googly eyes glued onto the zombie (I used a purple eye and an orange eye.)
adhered the zombie oval onto the ribbon using Tear & Tape
S
Here are today’s colors:
You can click on each one to see all the products that come in that color!
Click on these images for more details and to purchase.
<– Click here for a clickable and printable list!
S
Preorder the Monster Bash Online Treat Holder Class by September 18:
Make 6 adorable treat holders in the comfort of your own home!
2 each of 3 designs
Features the Monster Bash Suite on pages 52-54 of the 2019 Holiday Catalog
I’ve done the trimming and scoring for you!
You’ll receive the stamp set, dies, pre-cut kits, and Black Stampin’ Dimensionals.
Full detailed instructions
Limited spots available
Click on the image below for details and class options, or copy and paste this link into your browser: https://stampcandy.net/online-classes/monster-bash-treat-holder-class-preorder/
Gift Certificates are available in any U.S. dollar amount from me. Contact mefor details.
Have you shopped from me within the past year? Join my private VIP Facebook groupfor exclusive project tutorials and more!
Join my team and enjoy a 20% discount (or more) on all your purchases! You choose $125 in products and pay only $99, and get free shipping! No obligation! No selling required!
Today’s project is a fun little treat box shaped like a coffin. Stampin’ Up!’s new Coffin Boxes come pre-cut and scored, so you only have to glue the corners to assemble them. There’s a window in the coffin lid so you can see its occupant, a vampire from the Monster Bash Designer Series Paper (DSP.) The coffin is lined with more of the DSP, and the spiders on top are cut from a Black Foil Sheet using the Wicked Dies.
S
Here’s what I made:
S
Here’s what I did:
Cut and scored with my paper trimmer:
first traced around a coffin box onto two pieces of Monster Bash Designer Series Paper (DSP), then…
cut both pieces along the traced lines
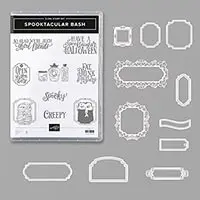
Stamped with the Spooktacular Bash stamp set:
sentiment in Whisper White Craft Ink onto a scrap of Basic Gray card stock (CS)
heat set the ink using a Heat Tool
Cut using the Ornate Frames Dies:
sentiment
ornate frame from a scrap of Basic Gray CS
Cut using the Wicked Dies:
3 spiders from a scrap of Black Foil Sheet
Cut using the Layering Circles Dies:
hole in the die cut ornate frame, and in the top of the coffin box, using the same small die
vampire from the Monster Bash DSP, and a scrap of clear Window Sheet, using the same larger die
Assembled the box:
burnished the folds in the box and lid with a Bone Folder
clear circle adhered onto the inside of the lid, lining the hole, using Tear & Tape
vampire adhered onto the clear circle using Tear & Tape, so he shows through the window in the lid
box and lid folded and glued into shape
one piece of DSP glued onto the inside of the box (bats)
the other piece of DSP glued onto the inside of the lid (cobwebs)
ornate frame glued onto the top of the lid, around the window
sentiment glued onto the top of the lid
3 spiders adhered onto the top of the lid using Mini Glue Dots
2 Red Rhinestones applied onto each spider, to resemble a Black Widow’s hourglass pattern (Yes, I know it’s actually on the bottom of a real spider and not up on its back, but I took a little artistic license.)
S
Here are today’s colors:
You can click on each one to see all the products that come in that color!
Click on these images for more details and to purchase.
<– Click here for a clickable and printable list!
S
Preorder the Monster Bash Online Treat Holder Class by September 18:
Make 6 adorable treat holders in the comfort of your own home!
2 each of 3 designs
Features the Monster Bash Suite on pages 52-54 of the 2019 Holiday Catalog
I’ve done the trimming and scoring for you!
You’ll receive the stamp set, dies, pre-cut kits, and Black Stampin’ Dimensionals.
Full detailed instructions
Limited spots available
Click on the image below for details and class options, or copy and paste this link into your browser: https://stampcandy.net/online-classes/monster-bash-treat-holder-class-preorder/
Gift Certificates are available in any U.S. dollar amount from me. Contact mefor details.
Have you shopped from me within the past year? Join my private VIP Facebook groupfor exclusive project tutorials and more!
Join my team and enjoy a 20% discount (or more) on all your purchases! You choose $125 in products and pay only $99, and get free shipping! No obligation! No selling required!
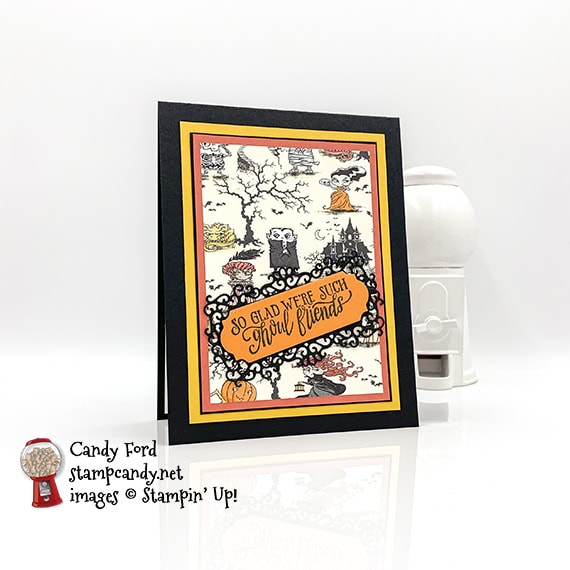
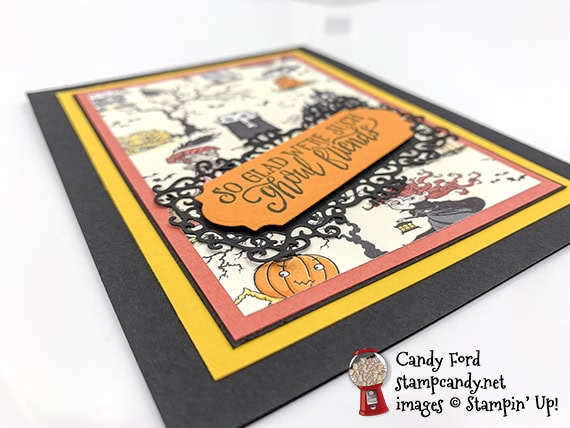
Today’s card is one of the Make & Take projects I made for our August Candy Hearts team meeting. It features some products from the new Monster Bash Suite: the Spooktakular Bash Bundle (Spooktacular Bash stamp set and Ornate Frames Dies) and Monster Bash Designer Series Paper (DSP.) The DSP has some great spooky images, without being too creepy for kids. If you know anything about me, you should know that I’m a Halloween nut. My husband and I host a costume party every year. And I love this suite!
S
Here’s what I made:
Here’s what I did:
Products in italics will be available beginning September 4, 2019.
Cut and scored with my paper trimmer:
Basic Black card stock (CS) cut to 4-1/4″ x 11″, then scored in half at 5-1/2″
Crushed Curry CS layer cut to 3-5/8″ x 4-7/8″
Basic Black CS layer cut to 3-5/16″ x 4-9/16″
Terracotta Tile CS layer cut to 3-1/4″ x 4-1/2″
Monster Bash Designer Series Paper (DSP) layer cut to 3″ x 4-1/4″
Whisper White CS cut to 4″ x 5-1/4″ for the inside of the card base
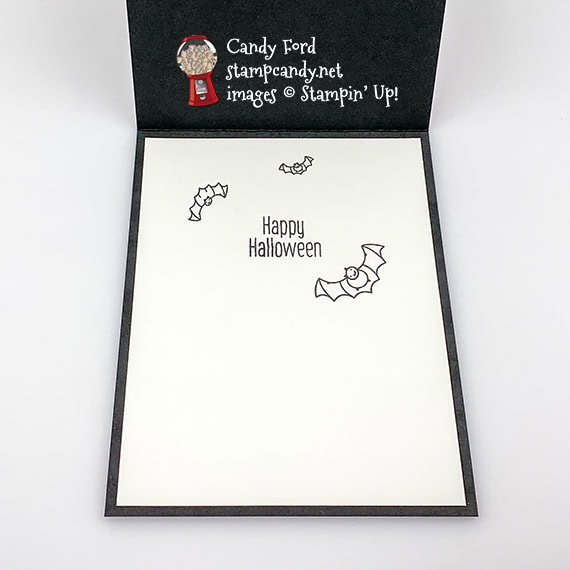
Stamped with the Halloween Bash stamp set:
outer sentiment in black ink onto a scrap of Pumpkin Pie CS
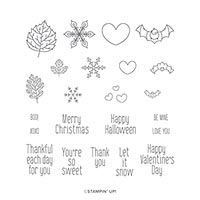
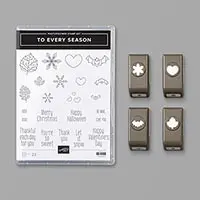
Stamped with the To Every Season stamp set:
inner sentiment and 3 bats in black ink onto the Whisper White CS for the inside of the card base
Cut using the Ornate Frames Dies:
outer sentiment
ornate piece from a scrap of Basic Black CS
Assembled the card:
burnished the fold in the card base with a Bone Folder
Crushed Curry CS layer glued onto the front of the card base
Basic Black CS layer glued onto the Crushed Curry CS layer
Terracotta Tile CS layer glued onto the Basic Black CS layer
DSP layer glued onto the Terracotta Tile CS layer
outer sentiment adhered onto the Basic Black ornate die cut using Black Stampin’ Dimensionals
Basic Black ornate die cut glued onto the DSP layer
Whisper White CS glued onto the inside of the card base
S
Here are today’s colors:
You can click on each one to see all the products that come in that color!
Supply List <– Click here for a clickable and printable list!S
Preorder the Pretty Petals Online Class by September 5:
Make 6 cards at home in your PJs!
2 each of 3 designs
Features the Pretty Petals Suite on pages 72-74 of the 2019-2020 Annual Catalog
I’ve done the trimming and scoring for you!
You’ll receive all you need to make the cards, including the stamp set, dies, embossing folder, pre-cut card kits, and 6 Very Vanilla envelopes.
Full detailed instructions
Limited spots available
Click on the image below for details and class options, or copy and paste this link into your browser: https://stampcandy.net/online-classes/pretty-petals-class-preorder/
Gift Certificates are available in any U.S. dollar amount from me. Contact mefor details.
Have you shopped from me within the past year? Join my private VIP Facebook groupfor exclusive project tutorials and more!
Join my team and enjoy a 20% discount (or more) on all your purchases! If you join by August 31 you’ll receive and extra $30 of free products in your Starter Kit! You choose $155 in products and pay only $99, and get free shipping! No obligation! No selling required!
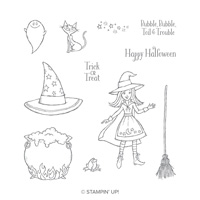
Welcome to InKing Royalty’s October Blog Hop! This year’s Blog Hop themes are inspired by popular songs – this month’s song is “Monster Mash.” You can watch a video of the song at the bottom of this blog post. As you can guess, our Blog Hop today is filled with fun projects that are inspired by the spookiest night of the year – Halloween. We are excited to share our creations with you today! After you read my post, I hope you’ll hop over to the next person on the list at the base of this post.
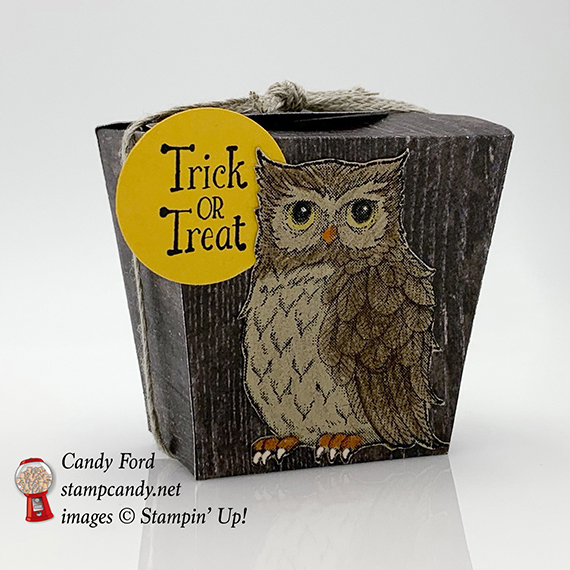
Here’s what I made:
Here’s what I did:
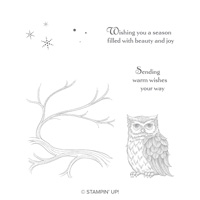
Stamped with the Still Night stamp set:
owl in Stazon black ink onto a scrap of Crumb Cake card stock (CS)
Stamped with the Cauldron Bubble stamp set:
sentiment in black ink onto a scrap of Crushed Curry CS
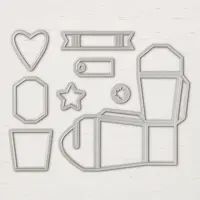
Die cut using the Takeout Thinlits:
two box pieces from Wood Textures Designer Series Paper (DSP)
Cut using the 1″ Circle Punch:
sentiment
Colored using Watercolor Pencils:
owl in Early Espresso, Basic Gray, Basic Black, Daffodil Delight, Pumpkin Pie, and Whisper White
Cut using Paper Snips:
fussy cut the owl (Seriously, Stampin’ Up!’s Paper Snips are the best scissors for fussy cutting paper!)
Assembled the card:
folded and burnished the score lines in the box pieces with a Bone Folder
the bottoms of the two box pieces glued to each other
flaps adhered to the inside of the adjacent sides of the box with Tear & Tape
sentiment “moon” and owl glued onto the front of the box
treats put inside, the closed the box
Braided Linen Trim tied around the box and tied in a knot
Here’s the Monster Mash hop:
Thank you for hopping along with us today. I hope you’ll hop to the next stop, Robin Myren at Songbird Designs by Robin. There’s a lot of inspiration to be found in this group, and you don’t want to miss any of it! If you get stuck during the Blog Hop, please use this line-up as a guide: