This is what Stampin’ Up! has to say about The Little Things stamp set:
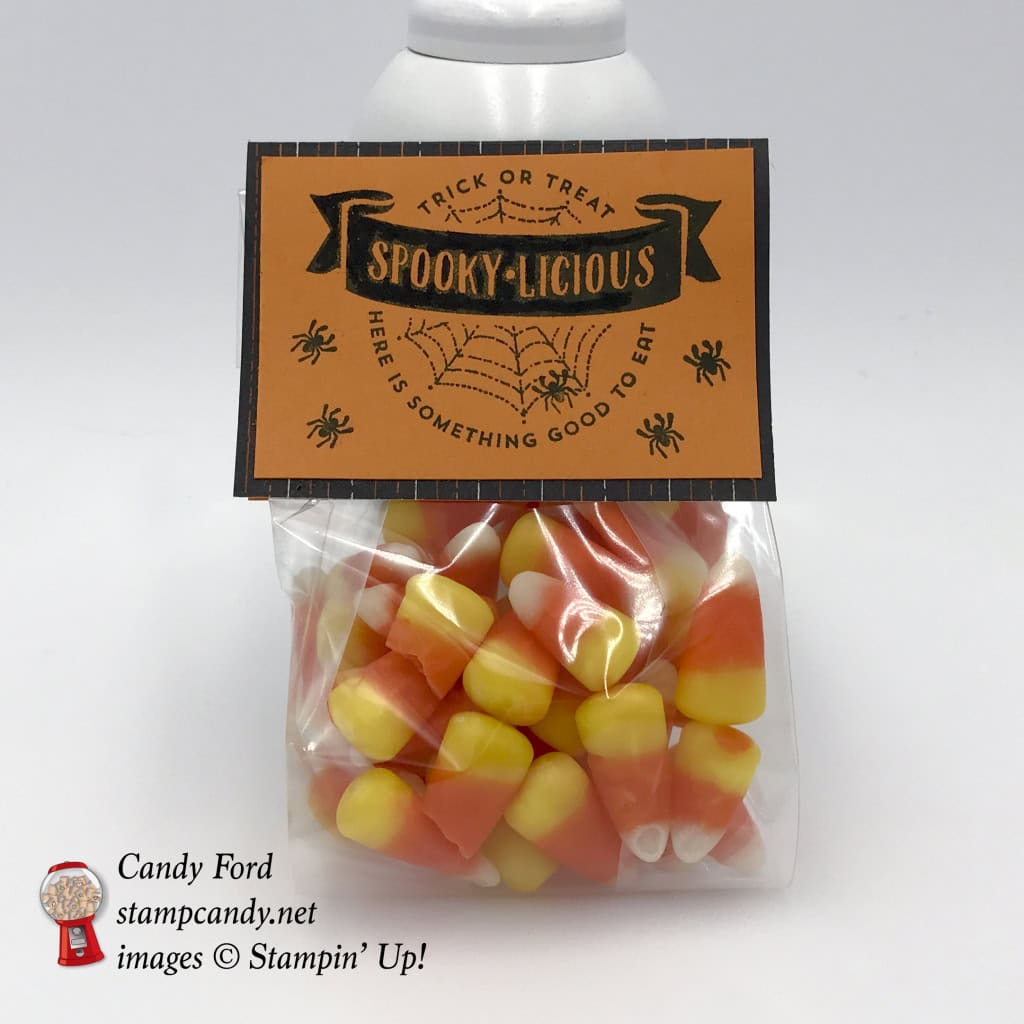
It’s the little things that matter, such as stamps for 3″ x 3″ cards and tags. Use this stamp set to create them for your giveaways in the autumn and winter months. The way to happiness is to give others—and yourself—a treat once in a while!
For today’s project, I’ve used it on a cute little Halloween treat bag filled with candy corn. Who wouldn’t like to receive this gift? I know I would, and I don’t even like candy corn! But you can also use this stamp set on projects for all sorts of occasions, including Christmas, Valentines, and just because.
Click on the images for more details and to purchase.
There’s a brand new stamp set that isn’t in any catalog. You can’t buy it, but you can get if for free with a qualifying order! You can host a party, or place your own order, or join under me and get a 20% discount on your demonstrator order.
Watch this video from Stampin’ Up!:
Details:
Promotion period: September 1–October 31
The Merry Patterns Stamp Set is exclusive to this promotion and will not be available after October 31
In order to qualify, the event merchandise total must reach $300 (before tax and shipping)
There is no limit to the number of times the Merry Patterns Stamp Set may be earned, but only one set can be redeemed per qualifying order
Demonstrator, Customer, Workshop, and online orders qualify
Orders must be closed by:
October 31 at 10:50 PM (PT)
October 31 at 11:50 PM (MT)
November 1 at 12:50 AM (CT)
November 1 at 1:50 AM (ET)
The Merry Patterns Stamp Set is in addition to Stampin’ Rewards
The Merry Patterns Stamp Set may not be exchanged for another stamp set
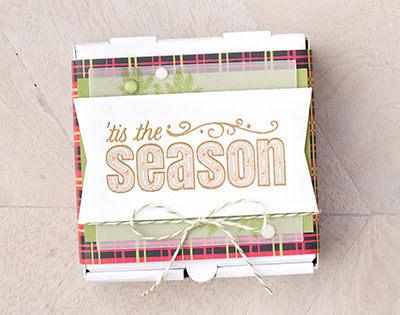
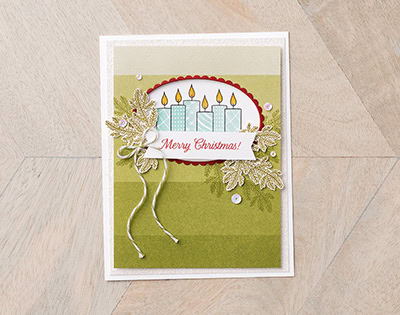
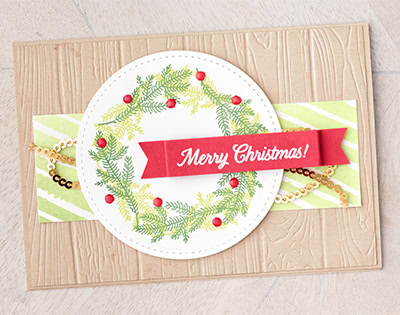
Here are the samples from the video:
Shop and help those affected by
Hurricane Harvey
I will donate 20% of my September sales to the American Red Cross for Hurricane Harvey Relief.
Please help make a difference. CLICK HERE to shop now.
September Host Code
N4ZFHXK9
September’s FREE gift is the brand new Quilt Top Textured Impressions Embossing Folder:
Create a beautiful quilt pattern background with this Embossing Folder.It’s easy to make a great impression! Just place flat cardstock in this embossing folder, run it through the Big Shot, and out comes cardstock with a bold textured design.* 1 folder
* 6″ x 6″ (15.2 x 15.2 cm)
* Use with Big Shot
Watch this video on the Quilted Christmas Suite in the new Holiday Catalog
Use the Host Code on your online orders under $150. You can see how to use a Host Code here.
Orders between $75 and $149.99, using the Host Code, will receive my FREE Gift of the Month. Orders of $150 and above will automatically receive the gift – do no use the Host Code.
I can ship only within the United States. “No contact” orders are not eligible.
You always earn a Gum Ball for every $50 you spend on an order with me. Earn 10 Gum Balls and I’ll send you a free stamp set of your choice! See the Gum Ball Rewards page for details.
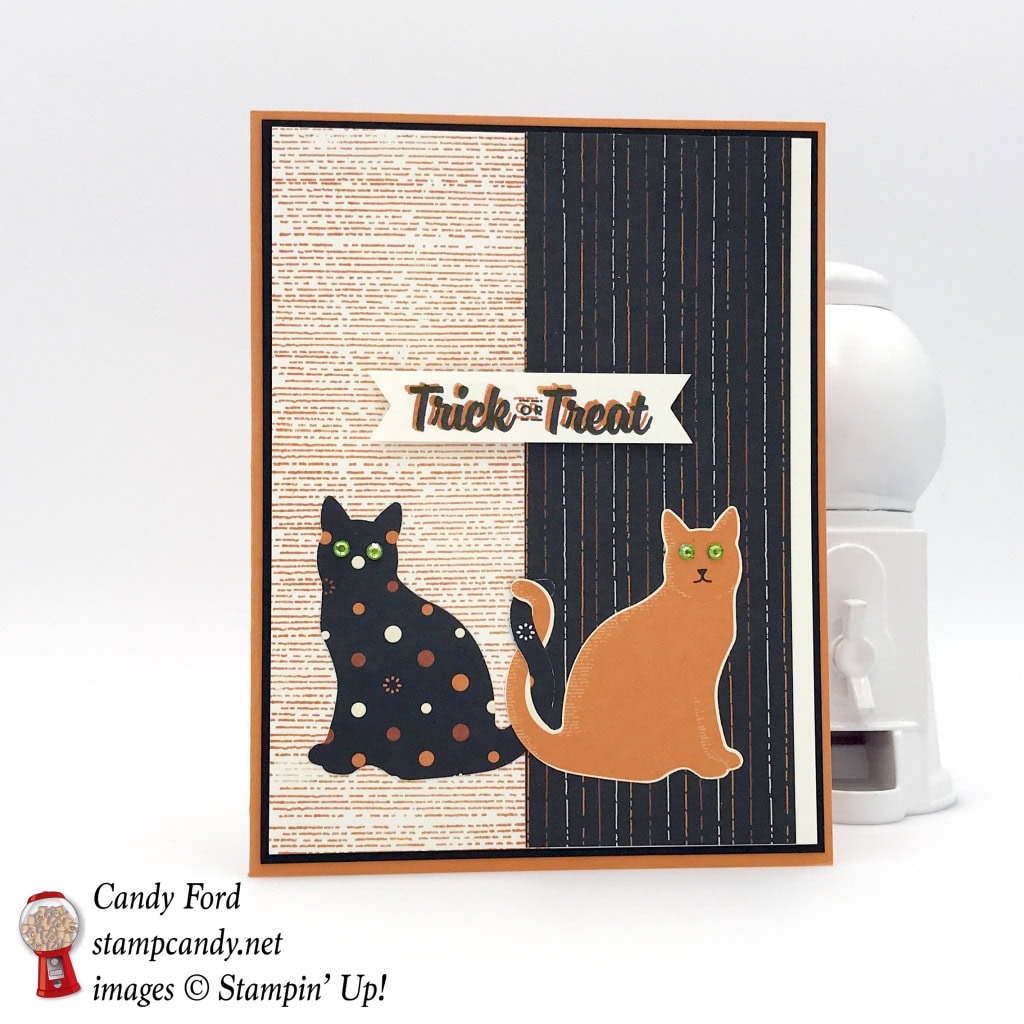
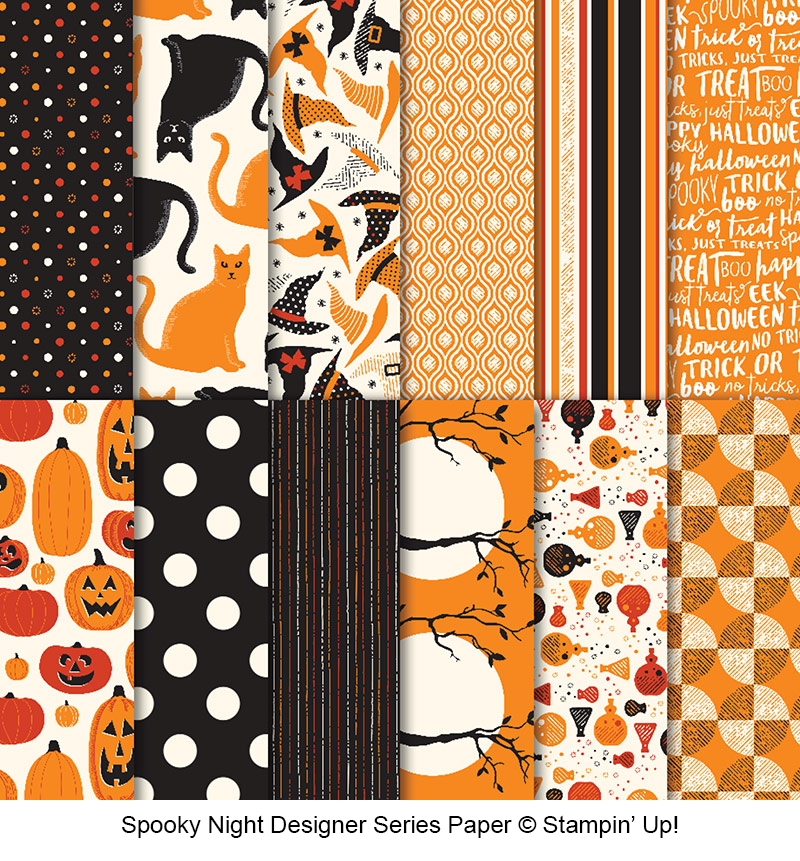
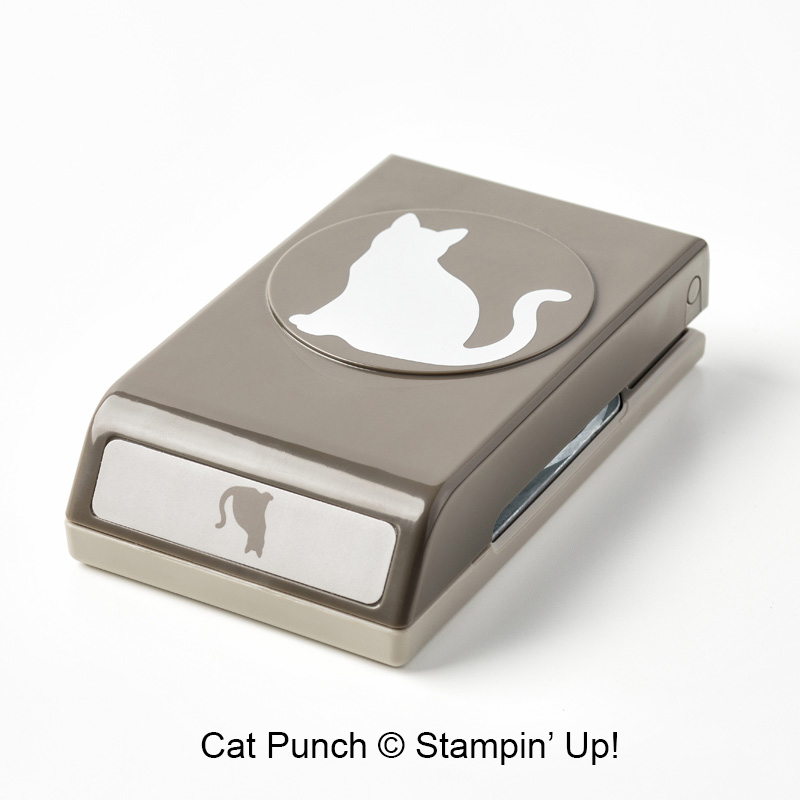
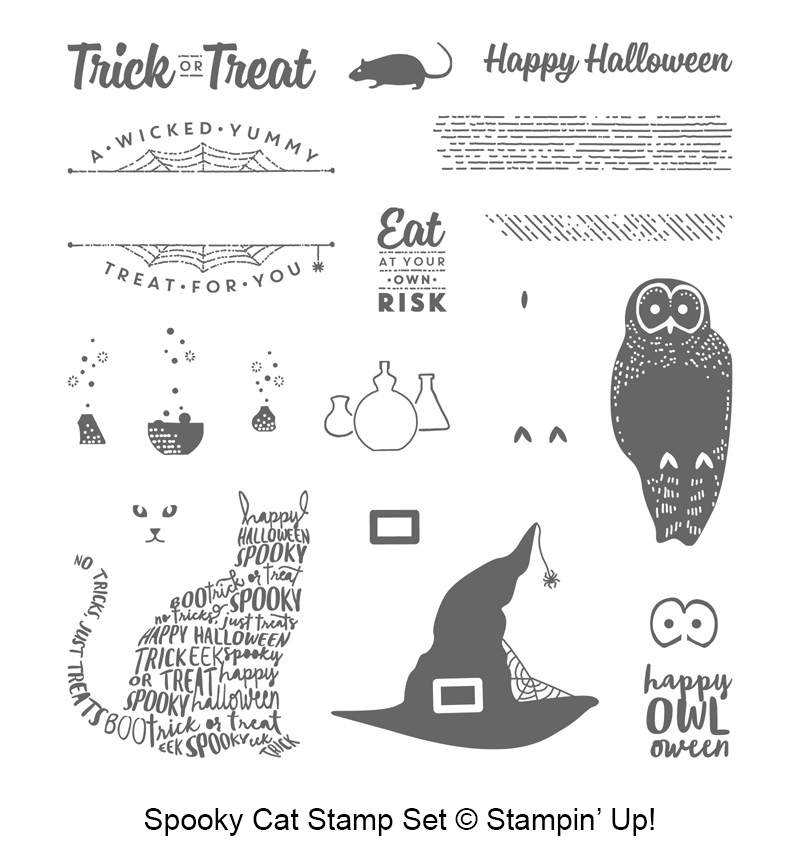
Anyone who knows me knows how much I love Halloween. It’s my favorite holiday. Lately I’ve really been enjoying playing with the new Spooky Cat Bundle (Spooky Cat stamp set and Cat Punch) and Spooky Night Designer Series Paper (DSP.) I used this great new items on today’s card, along with Rhinestone Basic Jewels to make the cats’ eyes seem to glow (in the right light.) I think almost all of my customers have already bought this bundle and DSP, but if you haven’t, I highly recommend them. You can make cute projects or scary ones. I’ll be sharing more projects made with these, so stay tuned!
And be sure to scroll all the way down to check out the new FREE Merry Patterns Stamp Set promotion!
Here’s what I made:
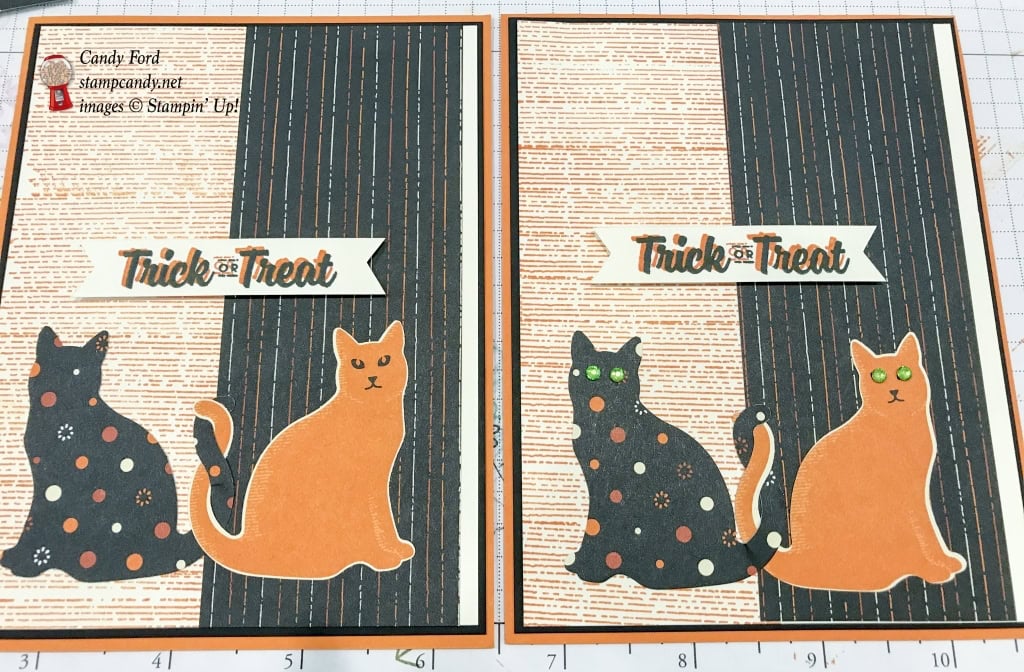
In this photo, it looks like I drew a black dot on the centers of the green eyes, but it’s just a trick of the light. See other photos below.
Here’s what I did:
Cut and scored with my Stampin’ Trimmer:
Pumpkin Pie card stock (CS) cut to 8-1/2″ x 5-1/2″, then scored in half at 4-1/4″
Basic Black CS cut to 4-1/8″ x 5-3/8″
Very Vanilla CS cut to 4″ x 5-1/4″ (2 pieces)
Spooky Night Designer Series Paper (DSP) cut to 2″ x 5-1/4″ (black with skinny stripes)
Very Vanilla CS cut to 3″ x 3/4″
Stamped with the Spooky Cat stamp set:
sentiment in Basic Black ink onto the Very Vanilla CS strip
sentiment in Pumpkin Pie ink over the Basic Black sentiment, but slightly offset
texture image in Pumpkin Pie ink down the left side of the 4″ x 5-1/4″ Very Vanilla CS piece
Cut using the Cat Punch:
2 cats from the the DSP (orange cat from on one side, and the other cat from the other side of the DSP with dots)
Cut using the Banner Triple Punch:
both ends of the sentiment strip
Assembled the card:
2″ x 5-1/4″ piece of DSP glued onto the 4″ x 5-1/4″ piece of Very Vanilla CS, with about 1/8″ showing on the right side
then glued both cats to this top layer, with their tails intertwined (Get both cats straight and glued down, then glue down the tails, which will be sticking up a bit.)
glued this top layer onto the Basic Black CS layer
glued the Basic Black CS layer to the front of the card base
adhered the sentiment to the card front with Stampin’ Dimensionals
Optional: colored Rhinestone Basic Jewels with a green Sharpie marker (any alcohol marker should work) then applied them to the cats’ eyes. See the photo below showing the card with and without the rhinestone eyes.
Here are today’s colors:
You can click on each one to see all the products that come in that color!
Click on the images for more details and to purchase.
Shop and help those affected by
Hurricane Harvey
I will donate 20% of my September sales to the American Red Cross for Hurricane Harvey Relief.
Please help make a difference. CLICK HERE to shop now.
There’s a brand new stamp set that isn’t in any catalog. You can’t buy it, but you can get if for free with a qualifying order! You can host a party, or place your own order, or join under me and get a 20% discount on your demonstrator order.
Watch this video from Stampin’ Up!:
Details:
Promotion period: September 1–October 31
The Merry Patterns Stamp Set is exclusive to this promotion and will not be available after October 31
In order to qualify, the event merchandise total must reach $300 (before tax and shipping)
There is no limit to the number of times the Merry Patterns Stamp Set may be earned, but only one set can be redeemed per qualifying order
Demonstrator, Customer, Workshop, and online orders qualify
Orders must be closed by:
October 31 at 10:50 PM (PT)
October 31 at 11:50 PM (MT)
November 1 at 12:50 AM (CT)
November 1 at 1:50 AM (ET)
The Merry Patterns Stamp Set is in addition to Stampin’ Rewards
The Merry Patterns Stamp Set may not be exchanged for another stamp set
Here are the samples from the video:
September Host Code
N4ZFHXK9
September’s FREE gift is the brand new Quilt Top Textured Impressions Embossing Folder: Create a beautiful quilt pattern background with this Embossing Folder.It’s easy to make a great impression! Just place flat cardstock in this embossing folder, run it through the Big Shot, and out comes cardstock with a bold textured design.* 1 folder * 6″ x 6″ (15.2 x 15.2 cm) * Use with Big Shot
Watch this video on the Quilted Christmas Suite in the new Holiday Catalog
Use the Host Code on your online orders under $150. You can see how to use a Host Code here.
Orders between $75 and $149.99, using the Host Code, will receive my FREE Gift of the Month. Orders of $150 and above will automatically receive the gift – do no use the Host Code.
I can ship only within the United States. “No contact” orders are not eligible.
You always earn a Gum Ball for every $50 you spend on an order with me. Earn 10 Gum Balls and I’ll send you a free stamp set of your choice! See the Gum Ball Rewards page for details.
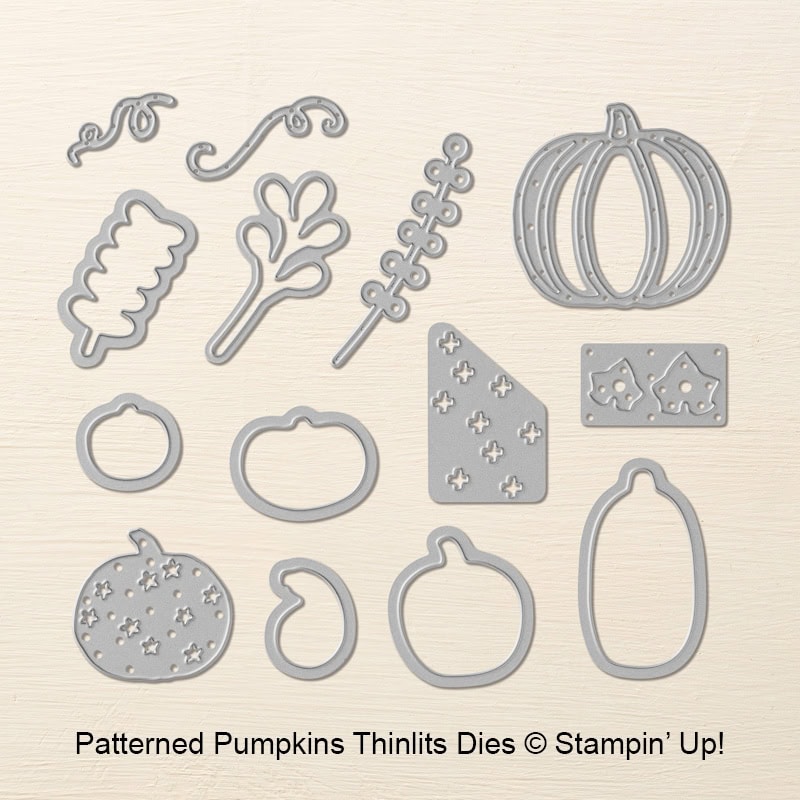
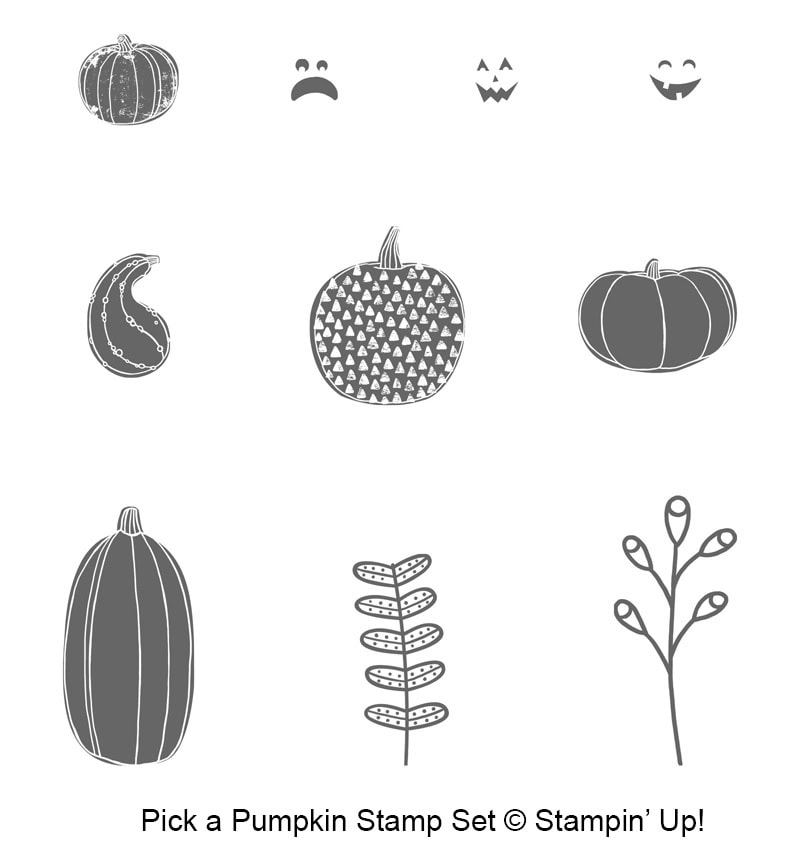
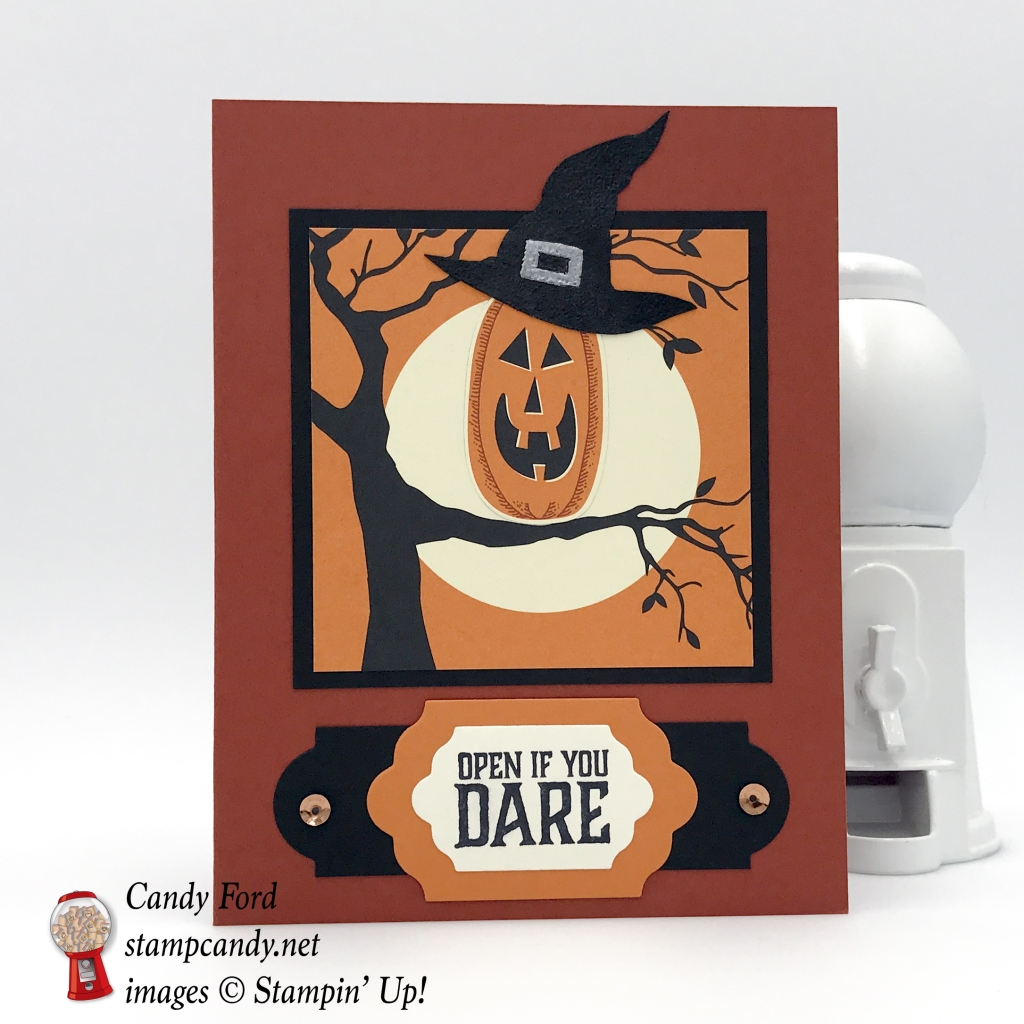
Today the 2017 Holiday Catalog goes live! I am so excited about this new catalog! There are some amazing new items, and I love how so many of them work together. For example, the Patterned Pumpkins Thinlits Dies work with the Pick a Pumpkin stamp set (available together in a bundle to save you 10%) as well as the Spooky Night Designer Series Paper (see the pumpkins in the lower left corner of the DSP pictured below.) The 4 pumpkin framelits in the set cut out the pumpkins in the paper! And the Cat Punch works with the Spooky Cat stamp set (also bundled) as well as the Spooky Night Designer Series Paper (see the cats second from the upper left corner of the DSP pictured below.)
Here’s what I made:
The piece of Spooky Night Designer Series Paper (DSP) I used for the background has 16 repeats of this 3″ x 3″ design, so you can cut them apart and make 16 cards or invitations out of just one sheet of DSP!
Here’s what I did:
Cut and scored with my Stampin’ Trimmer:
Cajun Craze card stock (CS) cut to 8-1/2″ x 5-1/2″, then scored in half at 4-1/4″
Basic Black CS cut to 3-1/4″ x 3-1/4″
Spooky Night Designer Series Paper (DSP) cut to 3″ x 3″
Very Vanilla CS cut to 4″ x 5-1/4″, for the inside
Stamped with the Graveyard Gate stamp set:
sentiment in Basic Black ink onto a scrap of Very Vanilla CS
Stamped with the Spooky Cat stamp set:
witch hat in Versamark ink onto a scrap of Basic Black CS, then heat embossed in Clear
hat buckle in Versamark ink onto the hat, then heat embossed in silver
Die cut using the Patterned Pumpkin Thinlits:
jack-o-lantern from a piece of DSP
Die cut using the Lots of Labels Framelits:
sentiment
larger size from a scrap of Pumpkin Pie CS
strip using a much larger die to cut the ends of a 1″ strip of Basic Black CS
Cut using Paper Snips:
witch hat
Assembled the card:
3″ x 3″ DSP glued onto the 3-1/4″ x 3-1/4″ piece of Basic Black CS
jack-o-lantern glued onto the DSP
witch hat glued onto the jack-o-lantern’s head
this whole thing glued onto the front of the card base
sentiment glued onto the Pumpkin Pie CS label
Pumpkin Pie CS label glued onto the Basic Black CS strip
this whole thing glued onto the front of the card base
2 copper sequins glued to the Basic Black CS strip
4″ x 5-1/4″ Very Vanilla CS glued to the inside of the card base
Here are today’s colors:
You can click on each one to see all the products that come in that color!
Click on the images for more details and to purchase.
Only 5 days left to register for the
Merry Little Christmas Mega Suite Class!
A Class in Two Parts
September 9, 2017
10am-1pm and 2pm-5pm
Candy’s Stamping Studio, Atlanta, GA
Let me know if you need directions.
In this two part class you’ll make Christmas cards and coordinating gift packaging. You can sign up for just one, but why not sign up for both and have matching cards and gifts, and save money?
Part 1:
10am-1pm, $15
You’ll make 6 cards using products from the suite.
Part 2:
2pm-5pm, $15
You’ll make 4 gift bags and boxes, complete with tags and decoration.
When you register for the class AND you order from me:
– one of the two bundles included in the Mega Suite, I will give you a $10 gift certificate for Stampin’ Up! product at the class.
– both bundles, I will give you a $20 gift certificate for Stampin’ Up! product at the class!
Gift certificates are good only for Stampin’ Up! products ordered through Candy Ford. Customer is responsible for tax and shipping.
Shop with me in September and help those affected by Hurricane Harvey
I will donate 20% of my September sales to the American Red Cross for Hurricane Harvey Relief.
Please help make a difference. CLICK HERE to shop now.
September Host Code
N4ZFHXK9
September’s FREE gift is the brand new Quilt Top Textured Impressions Embossing Folder:
Create a beautiful quilt pattern background with this Embossing Folder. It’s easy to make a great impression! Just place flat card stock in this embossing folder, run it through the Big Shot, and out comes card stock with a bold textured design.
* 1 folder
* 6″ x 6″ (15.2 x 15.2 cm)
* Use with Big Shot
Watch this video from Stampin’ Up! on the Quilted Christmas Suite in the new Holiday Catalog
Use the Host Code on your online orders under $150. You can see how to use a Host Code here.
Orders between $75 and $149.99, using the Host Code, will receive my FREE Gift of the Month. Orders of $150 and above will automatically receive the gift – do no use the Host Code.
I can ship only within the United States. “No contact” orders are not eligible.
You always earn a Gum Ball for every $50 you spend on an order with me. Earn 10 Gum Balls and I’ll send you a free stamp set of your choice! See the Gum Ball Rewards page for details.
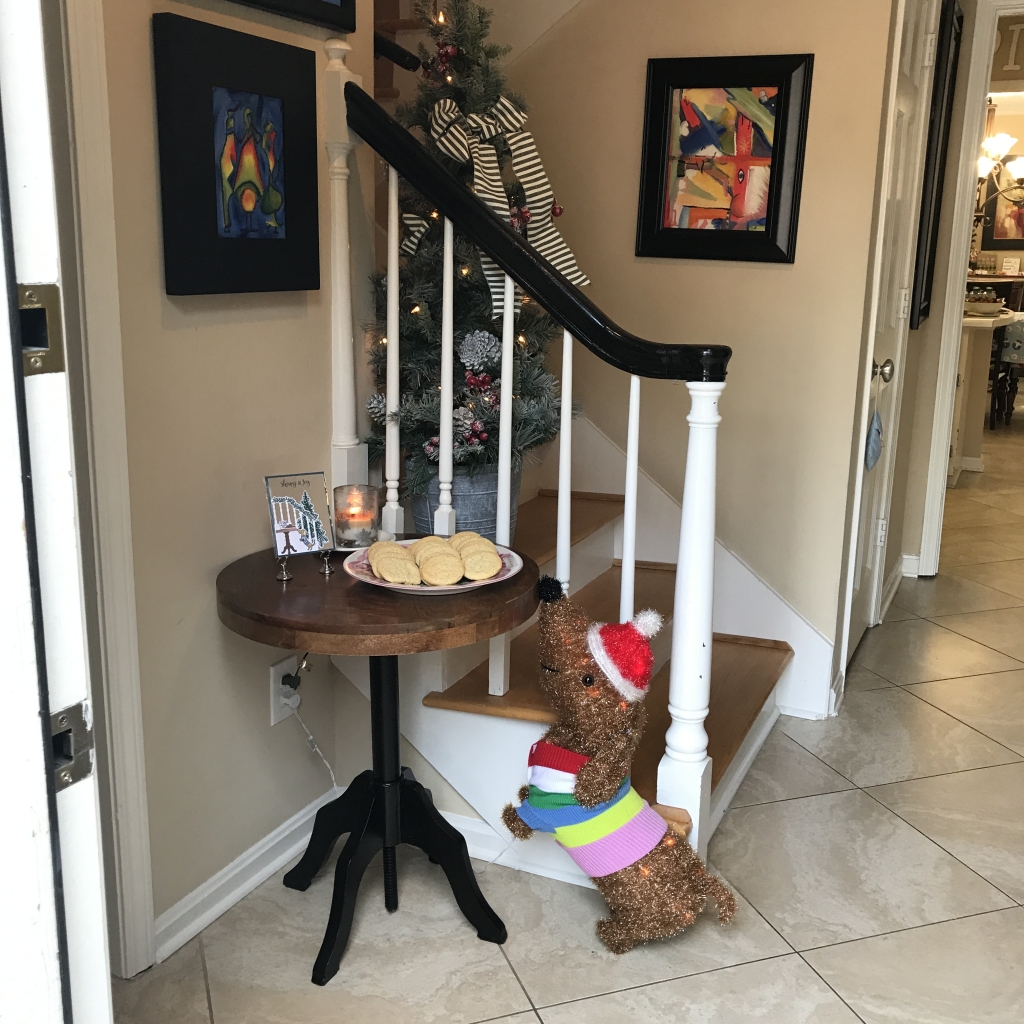
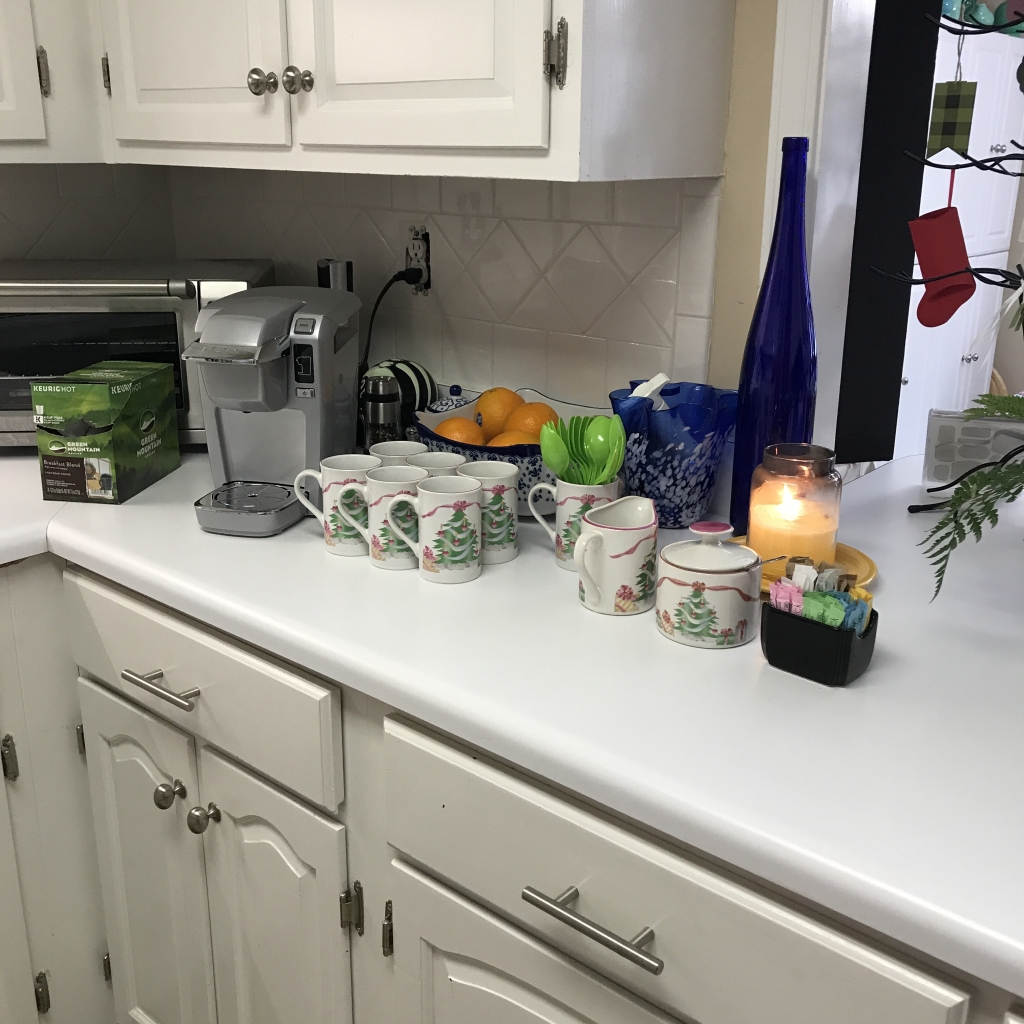
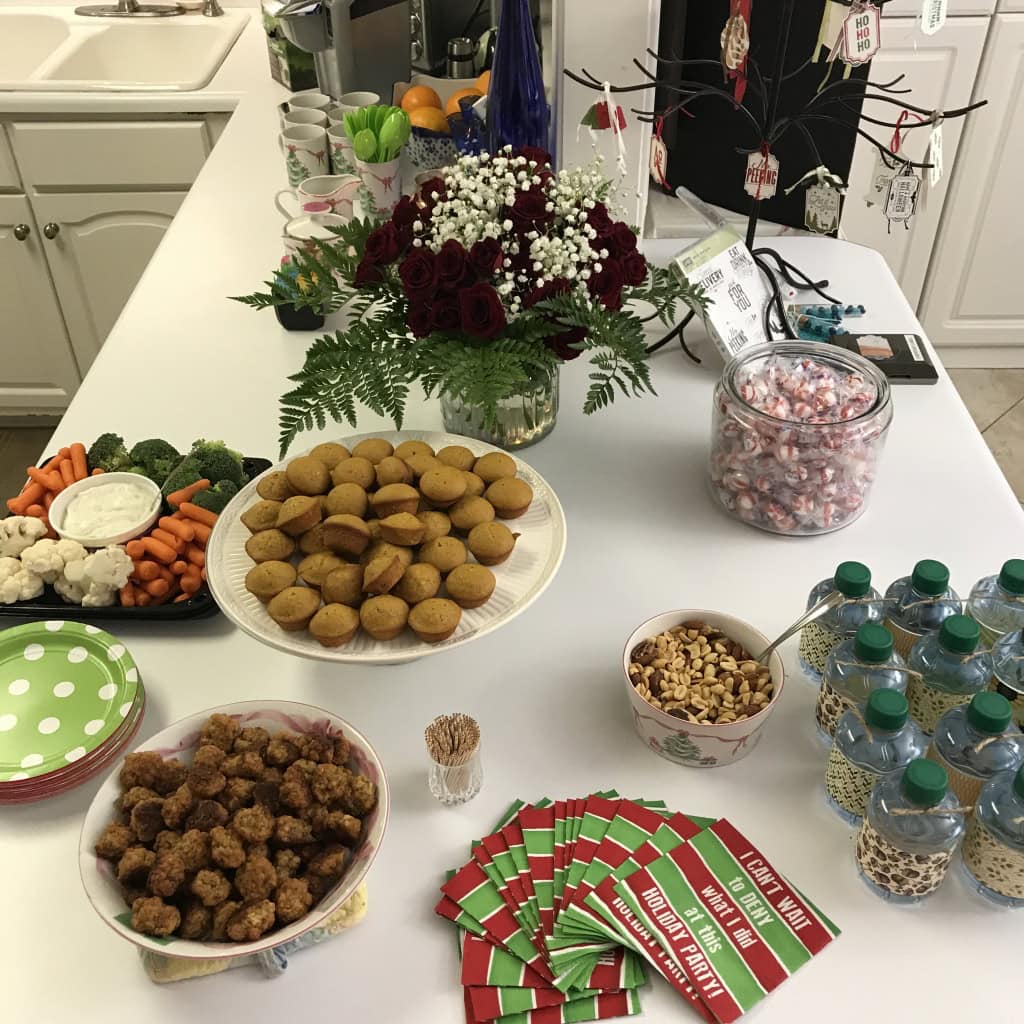
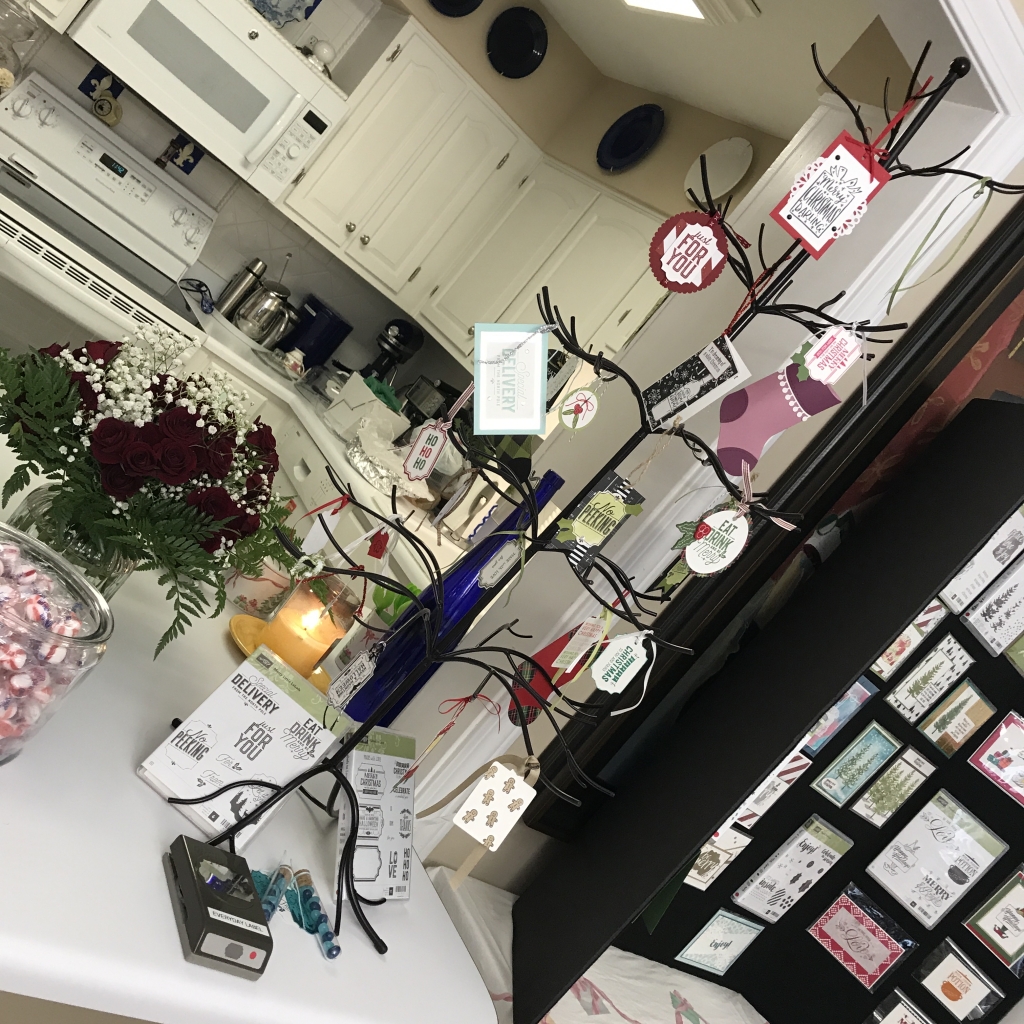
Yesterday, I hosted an Open House style Launch Party highlighting products from the new Holiday Catalog. It was a lot of fun! Below are some photos of the displays, and instructions for the Make & Take. (Wouldn’t you know, I completely forgot to take any photos during the actual event. Guess I was having too much fun!)
Here are the Launch Party photos:
I recreated the scene on this card made with the Ready for Christmas Bundle.
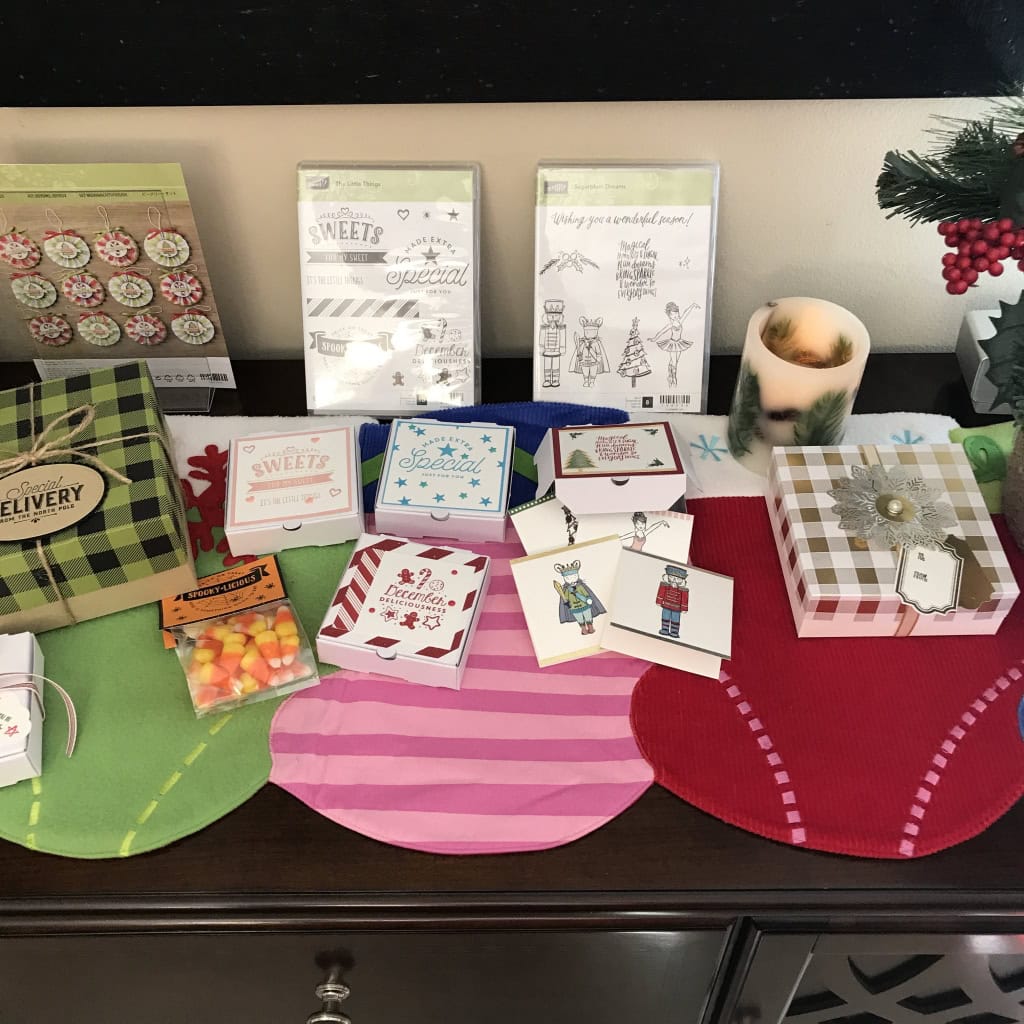
Coffee bar
Yummy snacks, and a lovely floral arrangement from Fresh Market
Tags and stockings on the ornament tree
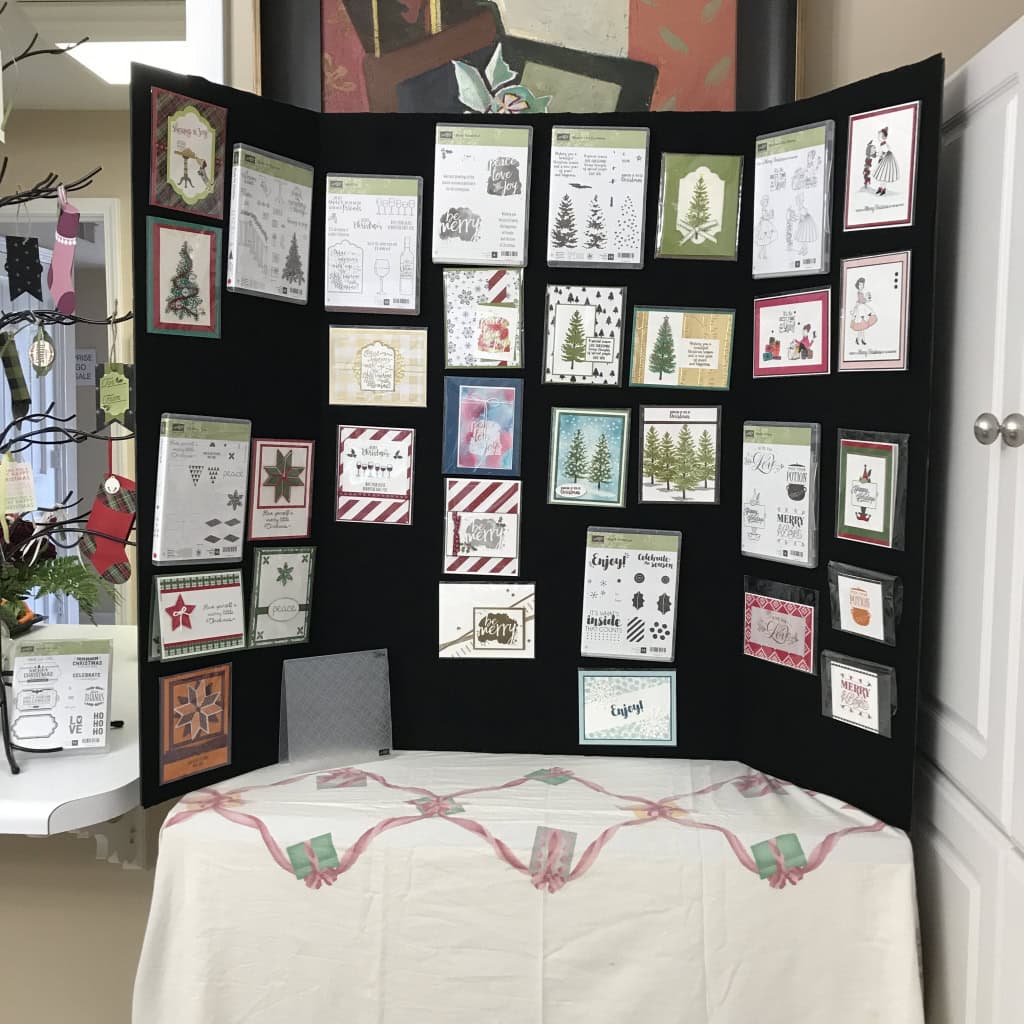
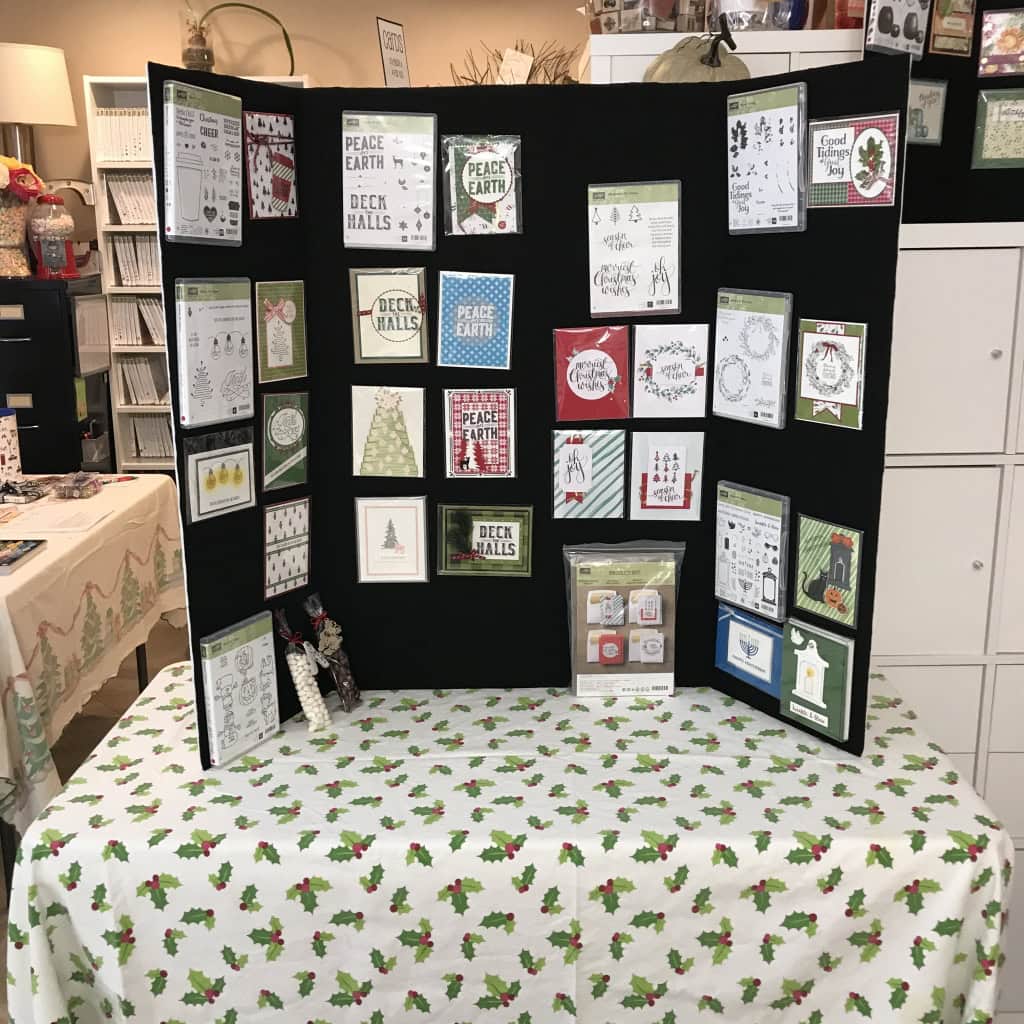
#1 display board
Be Merry Ornament Kit, and gift ideas
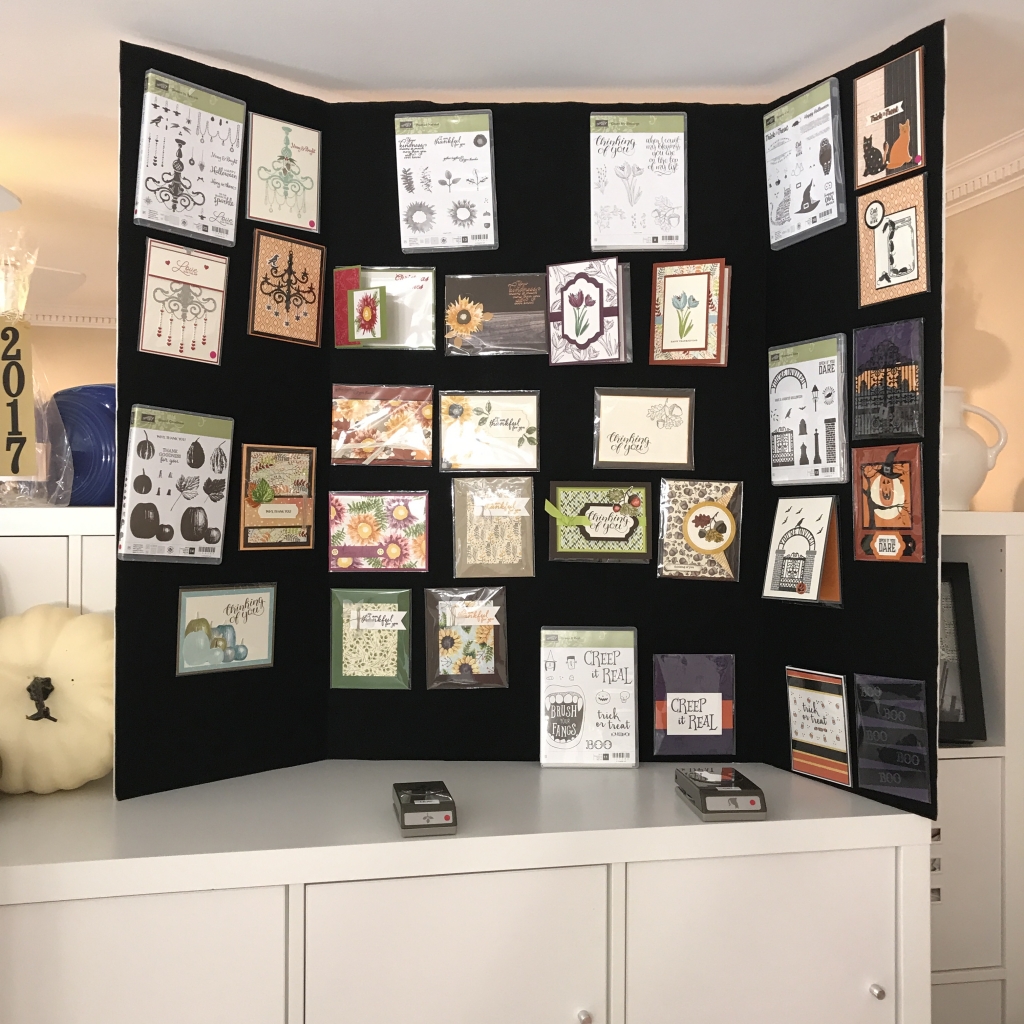
#2 display board
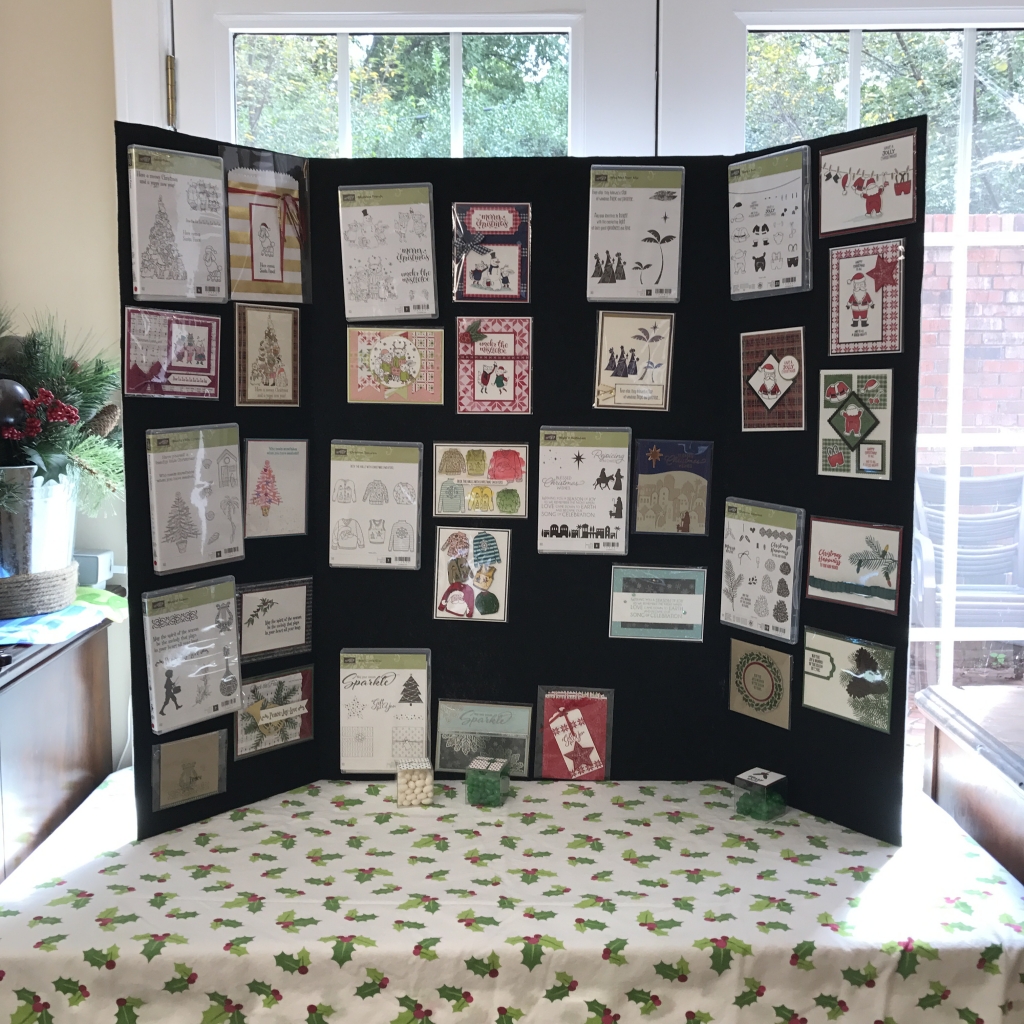
#3 display Board
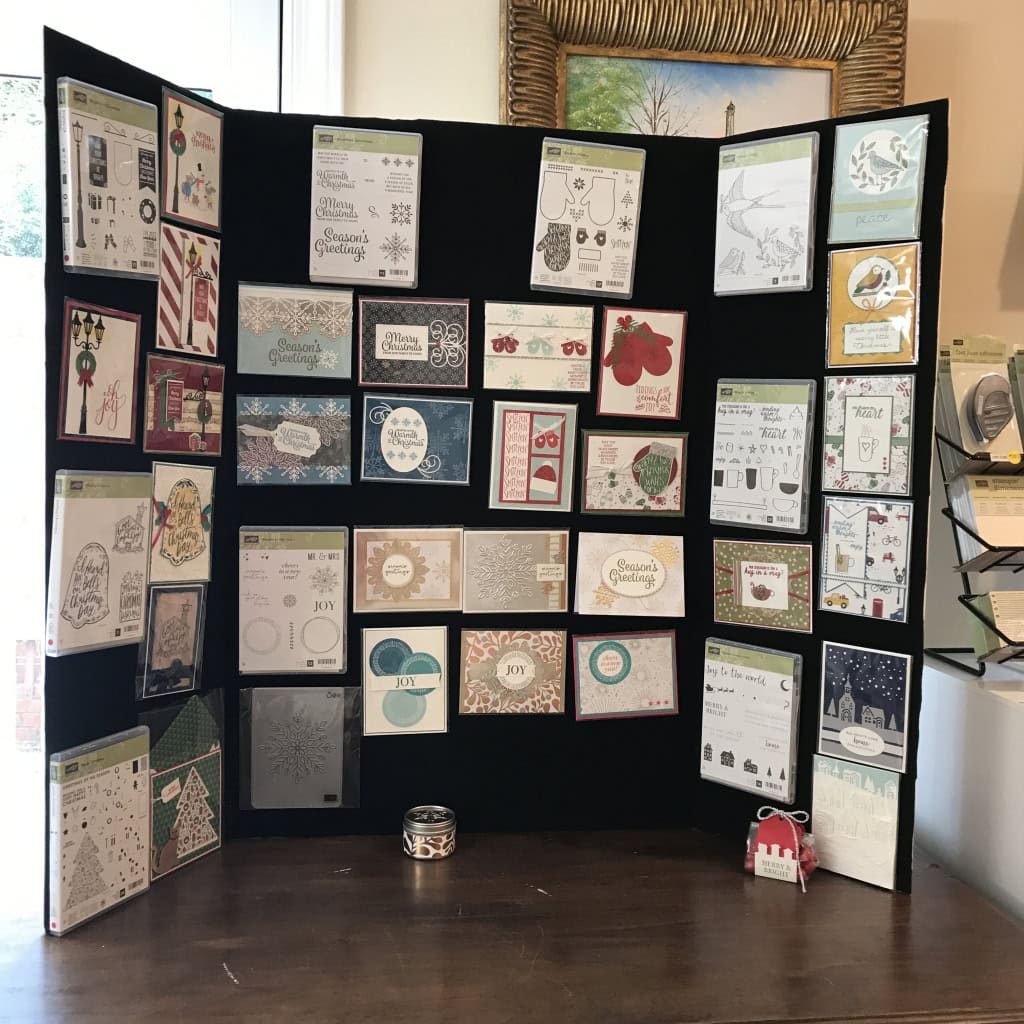
#4 display board
a little Autumn decor
#5 display board
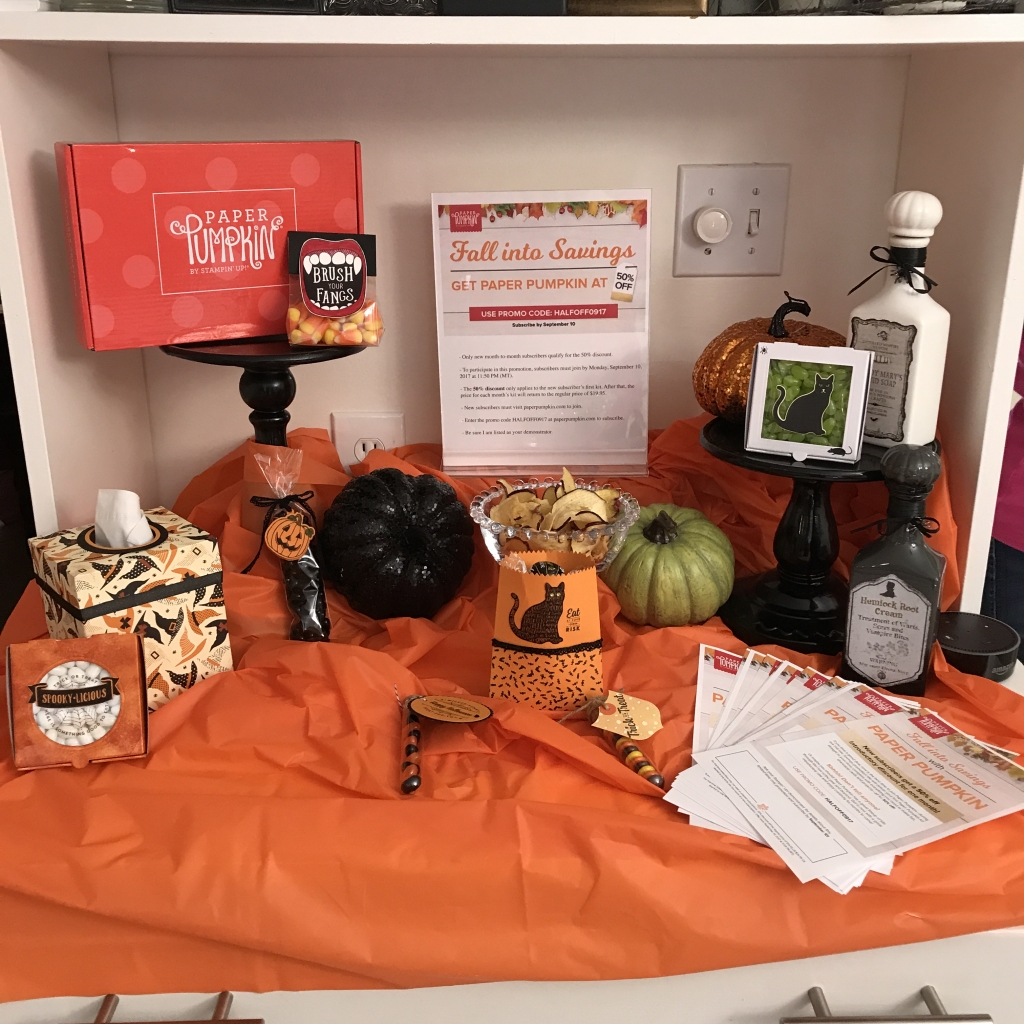
Paper Pumpkin Half Off Promotion, and Halloween treat ideas
catalogs, forms, and prizes
samples of ribbons and embellishments in my Product Shares, Swatch Books,
and espresso cups full of candies for bringing someone new
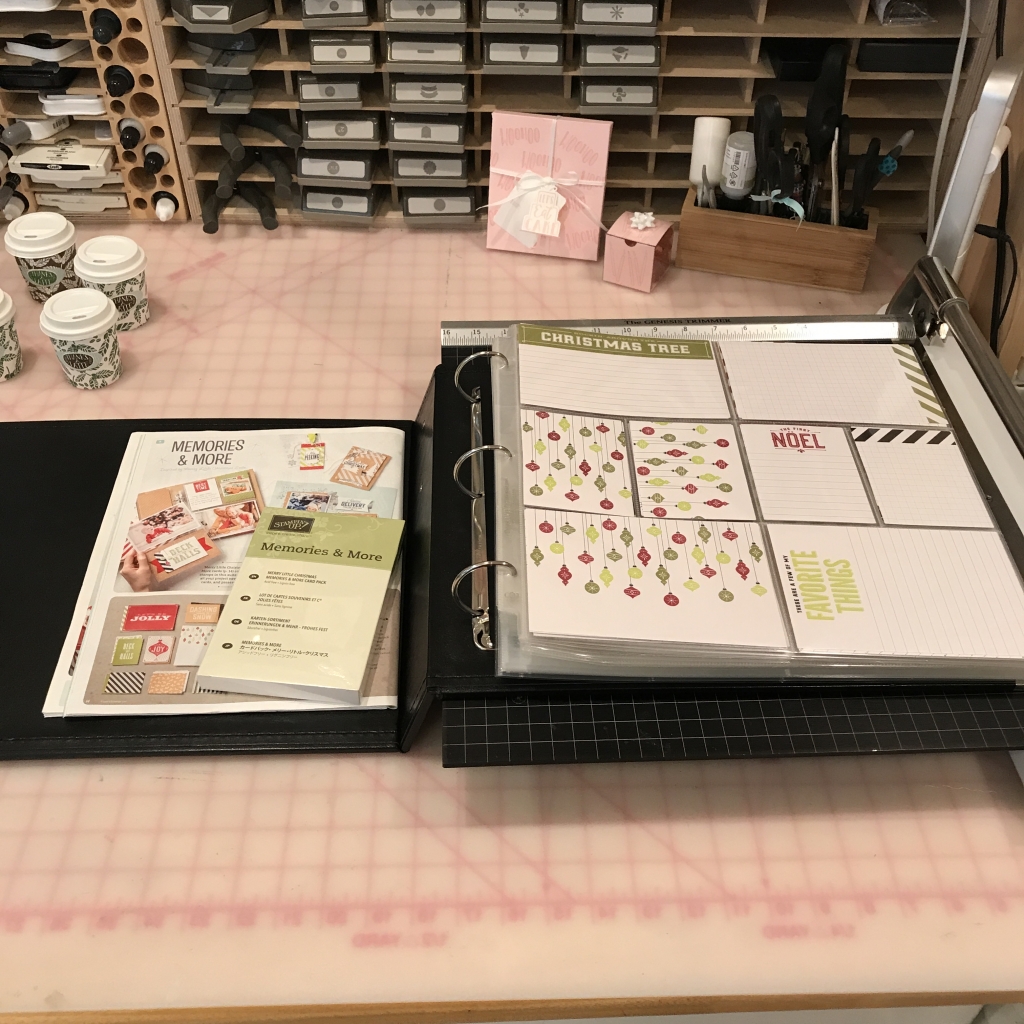
Merry Little Christmas Memories & More Card Pack display
Make & Take table
Here’s what we made:
I borrowed an extra stamp set, so there are more stamps in this photo than you actually need.
We used two stamp sets for this card. The Painted Harvest stamp set (which will be available in a Bundle with the new Leaf Punch) has some lovely sentiments, but I just adore the font used in the Count My Blessings stamp set.
If you’ve wanted to try a multi-step stamp set but were afraid to, the Painted Harvest stamp set is the perfect one to try first. The flower layers don’t have to be lined up exactly, so it’s good practice for the ones that do.
Here’s what we did:
Stamped with the Painted Harvest stamp set:
first flower layer in Crushed Curry onto the front of the card base
second flower layer in Cajun Craze
flower center in Chocolate Chip
Stamped with the Count My Blessing stamp set:
sentiment in Chocolate Chip
Assembled the card:
used a Bone Folder to burnish the score line in the Note Card
put the card in the envelope
That’s it! Using the pre-cut and pre-scored Note Cards makes this card super easy!
Here are today’s colors:
You can click on each color to see all the products that come in/with that color!
Happy World Card Making Day! And welcome to the World Card Making Day International Blog Hop! We think using current Stampin’ Up!® products to share lots of amazing inspiration with you is a fantastic way to celebrate this annual event. You are currently visiting my blog, Stamp Candy, in the US, but you will be visiting different countries in your hop today. There is a list near the bottom of this post which will help you hop along from blog to blog, so you can see all the amazing projects we have lined up for you.
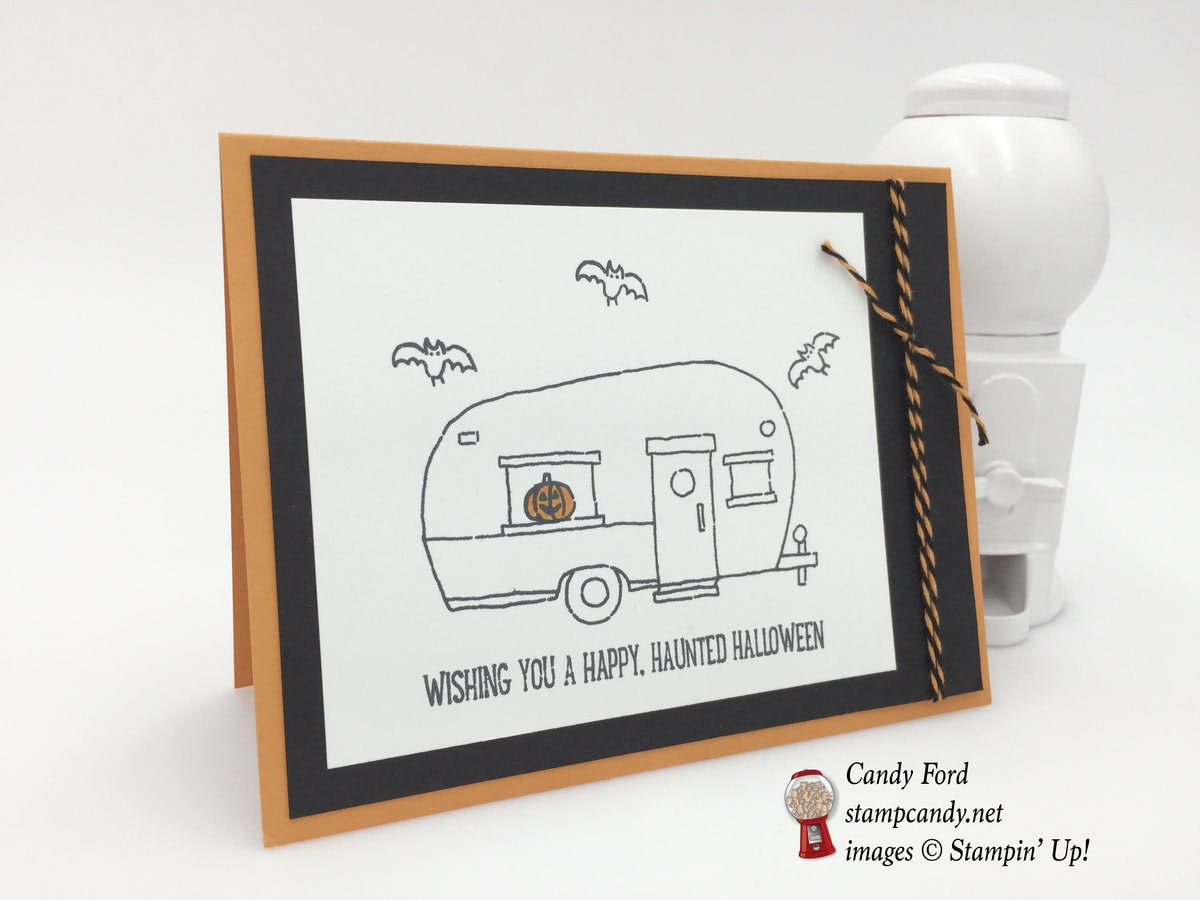
I am in serious Halloween mode right now. We have a party every year and there’s a lot to do to get ready: costumes, decorating, food, etc. So today I’m sharing a sweet Halloween card with you.
Here’s what I made:
Here’s how I did it:
All the images are from the Glamper Greetings stamp set. I stamped them in Black Memento ink onto Whisper White card stock. You could also use Basic Black Archival ink. I used a Pumpkin Pie Stampin’ Write Marker to color in the jack-o-lantern.
I glued this to a piece of Basic Black card stock. I cut a couple pieces of twine, from the Halloween Night Baker’s Twine pack. I wrapped them around and adhered them to the back. Then I tied a smaller piece around those two pieces. I did this for two reasons: 1) there is less bulk on the back of the layer, and 2) it’s easier to get it smooth and not twisted, and to tie the knot where you want it.
I then glued that to the Pumpkin Pie card base. That’s it! Easy peasy!
Thanks for hopping with us today! Remember that you are currently at my blog, Candy Ford at Stamp Candy. For lots of amazing ideas and inspiration that you don’t want to miss, check the line up below to see who is next on the list. Have fun hopping around the world with us!
Welcome to InKing Royalty’s September Blog Hop! We are excited to share some super-fun creations with you today! This month’s Blog Hop is filled with inspiring projects that feature each artist’s take on the spookiest time of year – Halloween. What fun! After you read my post, I hope you’ll hop over to the next person on the list at the base of this post.
This is the hop I’ve been waiting for! Anyone who knows me knows that I am a huge fan of Halloween. My husband and I throw a party every year and invite all our friends. Some people fly cross country for it. We’ve even had folks cross an ocean for it!
We always have a costume contest, and I like to make the awards. A few years ago I found some little plastic skulls with spines on stands in a bargain bin somewhere (probably Target or Michael’s.) They were super cheap and I knew I would be able to use them at some point, so I got them. This is their year. The party theme is Circus, so I’m making creepy little clown trophies out of them.
Here’s how I did it:
I made the hat from a piece of paper from the Playful Palette Designer Series Paper Stack and Emerald Envy Solid Baker’s Twine. I’m the first to admit that I am an abysmal pompom maker, but for this project I don’t think it matters so much. The loops of twine along the bottom of the hat are also messy. I think it adds to the creepiness of the overall look. The hat is put together, and attached to the skull, with Fast Fuse, Mini Glue Dots, and Tear & Tape adhesives.
I used the 1″ Circle Punch to cut a piece of Real Red card stock and attached it to the nose with 4 layered Stampin’ Dimensionals.
For the bowtie, I used the Bow Builder Punch to cut a piece of Basic Black card stock. I photocopied the pieces at 300%, and cut out the larger pieces. I used these to cut out the bowtie pieces from a piece of Petals & Paisleys Designer Series Paper. I assembled the bow with Fast Fuse, and attached it to the spine with Mini Glue Dots.
I haven’t made the tags yet for each award: Scariest Costume, Prettiest Costume, etc. I’m still trying to decide exactly what I want to do. Please let me know if you have any suggestions!
Thank you for hopping along with us. I hope you’ll hop along to the next stop on the blog hop, Lory Robinson at The Robin’s Nest Designs. There’s a lot of inspiration to be found in this group – and you don’t want to miss it!
If you get stuck during the Blog Hop, please use this line-up as a guide:


 You always earn a Gum Ball for every $50 you spend on an order with me. Earn 10 Gum Balls and I’ll send you a free stamp set of your choice! See the Gum Ball Rewards page for details.


