My card today, for the Autumn InKing Royalty Blog Hop, gives you a sneak peek at some of the fabulous Autumnal products you’ll be able to order from the 2017 Holiday Catalog beginning September 1. I used the new Gourd Goodness stamp set, which has beautiful two step images – today I used the leaf. The new Painted Autumn Designer Series Paper inspired the colors for my card. And I used the new Everyday Label Punch in a slightly different way than usual. I’d love to hear what you think of my card, so please leave a comment at the bottom of this post. Thanks!
Welcome to InKing Royalty’s August Blog Hop! Today’s Blog Hop is filled with projects inspired by some of our favorite Fall-themed products. What fun! Stampin’ Up!’s catalogs (both the Annual Catalog and soon-to-be-released Holiday Catalog) are filled with so many fun products for the Autumn holidays – and we are excited to share our creations with you today. And Kim Jolley of Stampin’ Artfully is our guest stamper this month! After you read my post, I hope you’ll hop over to the next person on the list farther down this page.
Here’s what I made:
Here’s what I did:
Cut and scored with my Stampin’ Trimmer:
Peekaboo Peach card stock (CS) cut to 4-1/4″ x 11″, then scored in half at 5-1/2″
Early Espresso CS cut to 4″ x 5-1/4″
multicolor Painted Autumn Designer Series Paper (DSP) cut to 3-1/2 x 4-3/4″
DSP with spots cut to 4″ x 1-1/2″
Early Espresso CS cut to 4″ x 1-3/4″
Very Vanilla CS cut to 3/4″ x 4″
Very Vanilla CS cut to 4″ x 5-1/4″, for the inside
Stamped with the Gourd Goodness stamp set:
two step leaf in Crushed Curry and Cajun Craze inks onto a scrap of Very Vanilla CS
two step leaf in Lemon Line Twist and Garden Green inks onto a scrap of Very Vanilla CS
sentiment in Early Espresso ink onto the 3/4″ strip of Very Vanilla CS
Cut using the Everyday Label Punch:
sentiment – I lined up the stamped strip in the center of the punch to cut the ends
Cut using Paper Snips:
the two leaves
Assembled the card:
DSP with spots glued onto the Early Espresso CS strip
sentiment adhered to DSP with spot using Stampin’ Dimensionals
pulled one strand from a piece of Burlap Ribbon, then wrapped it around the end of the strip, adhering to the back with Fast Fuse (or Tear n Tape)
Early Espresso CS layer glued to front of card base
multicolor DSP layer glued to the Early Espresso layer
strip with sentiment and twine glued onto the card front
leaves adhered with Stampin’ Dimensionals, tucking stems under sentiment
4″ x 5-1/4″ Very Vanilla CS glued to the inside of the card base
Here’s the hop:
Thank you for hopping along with us. If you get stuck during the Blog Hop, please use this line-up as a guide:
Click on the images for more details and to purchase. The sneak peek items will be available for purchase on September 1, 2017.
6 Ways to Save!
Check out my post from a few days ago to see all the ways you can save money on the Stampin’ Up! products you want! Be sure to sign up for my newsletter (at the top right of this page) to receive even more special offers.
You always earn a Gum Ball for every $50 you spend on an order with me. Earn 10 Gum Balls and I’ll send you a free stamp set of your choice! See the Gum Ball Rewards page for details.
I’m sorry I’ve been MIA the past couple weeks. A spilled Coke made its way into my laptop and caused what Apple calls “Tier 4 damage.” Luckily there is a flat fee for the repair, and it was only a few days before they called to say it was ready to pick up. The reason the repair was so quick is that, well, there was no repair. They just gave me a brand new laptop. I guess “Tier 4” = “totalled.” I’ve been getting it all set up – thank goodness for backups!
But that’s enough about my woes. Let’s talk about how you can save money and get all the terrific Stampin’ Up! products you have your eye on. Plus the ones in the upcoming Holiday Catalog you may not have even seen yet! Be sure to subscribe to my newsletter at the right side of your screen, just under my photo, to stay informed of all specials, including some that are for my newsletter subscribers only, such as my Bundle of the Week deal!
#1: I want to go to Alaska!
So I’m giving away free product! What?!?
Each year, Stampin’ Up! offers demonstrators the opportunity to earn a fabulous incentive trip. Not only is there a great deal of satisfaction in knowing I worked hard enough to earn the trip, but it’s also the only opportunity I have to meet with demonstrators from around the world. These past two years I’ve been to Thailand and on a Mediterranean Cruise, and they were amazing experiences. Right now, we demos are working toward a trip to Alaska and the deadline is fast approaching! I’m getting close, but I still have a little way to go. So… la;ksdjf;alsdkfjalskdjf;asldkfj;asldkfj;asldkfja;sldfkjas;ldkfj;asldfkj;alsdkfj;lasdkfj;asldkfjlsdfkj;lsdkf
I’m offering YOU an incentive between now and the end of August. In the next couple weeks, when you place an order with me of $50 or more, I will give you $10 in free product of your choice. When you place an order of $100 or more, I will give you $20 in free product. See where I’m going with this? Whenever you cross another $50 threshold, I will add $10 in free product to your order. And this is in addition to any Stampin’ Rewards or half price items you may earn from Stampin’ Up! Now that’s a deal!
as;lkdhf;aosief;aosiehf;aoiehf;aoeifh;asodifha;sodihfa;sodihfa;soidghfa;sdifha;sldkfhj;woaeiurlkdhRemember you have until August 31 to take advantage of my Alaska promotion!
Use the Host Code on your online orders under $150. You can see how to use a Host Code here.
Orders between $75 and $149.99, using the Host Code, will receive my FREE Gift of the Month. Orders of $150 and above will automatically receive the gift – do no use the Host Code.
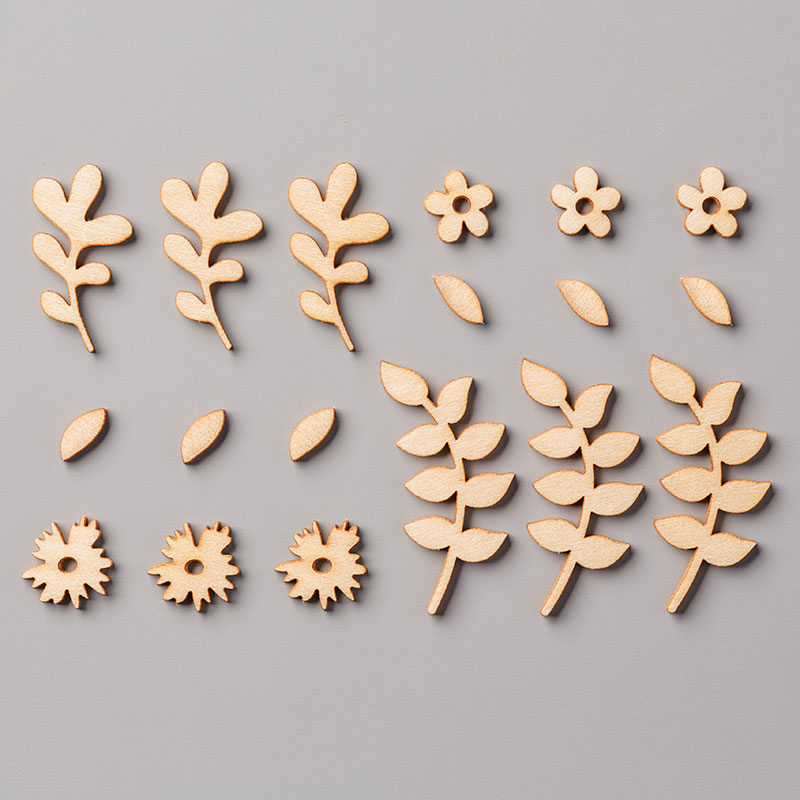
August’s FREE gift is a pack of Touches of Nature Elements:
36 pieces: 6 each of 4 designs and 12 each of 1 design
wood flowers and leaves with light whitewash finish on one side
largest piece: 1-5/8″ x 3/4″
I can ship only within the United States. “No contact” orders are not eligible. CLICK HERE to shop in my online store!
You may take advantage of my Alaska promotion above AND this free gift promotion.
Only new month-to-month subscribers qualify for the 50% discount.
To participate in this promotion, subscribers must join by Monday, September 10, 2017 at 11:50 PM (MT).
The 50% discount only applies to the new subscriber’s first kit. After that, the price for each month’s kit will return to the regular price of $19.95.
Of course, the best way to save money on Stampin’ Up! products is to buy the Starter Kit. You’ll always get at least a 20% discount on everything you buy. No obligation to sell! No fees or penalties! No Risk! CLICK HERE for more information.
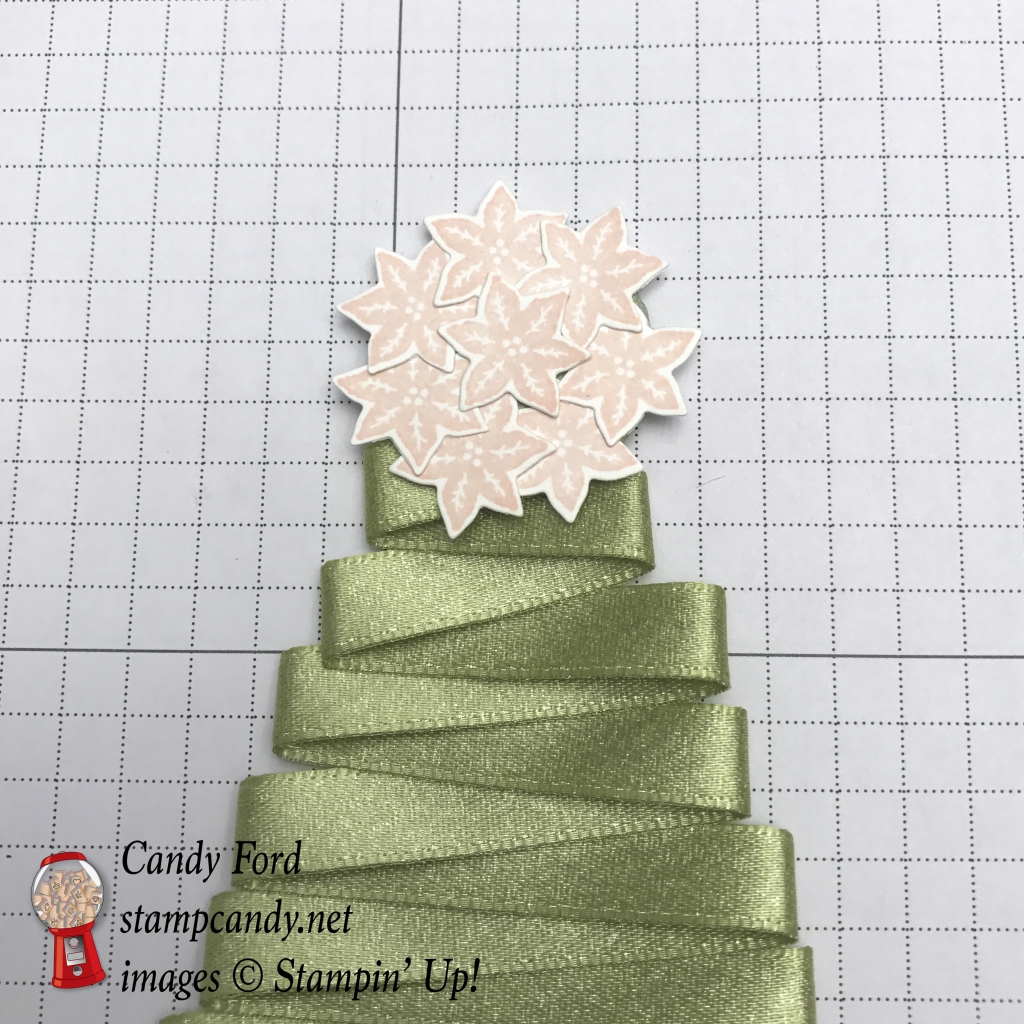
My card today for the ICS Blog Hop is made with the new Carols of Christmas Bundle (Carols of Christmas stamp set and card Front Builder Thinlits Dies) and Pear Pizzazz 3/8″ Shimmer Ribbon. You can preorder this new bundle now – before the 2017 Holiday Catalog goes live September 1!
This month’s theme for the ICS Blog Hop is Knotty Ways with Ribbon for Christmas, highlighting the wonderful Christmas products and ribbons by Stampin’ Up! While I didn’t actually tie my ribbon in knots, I hope you’ll like what I came up with.
Here’s what I made:
Here’s what I did:
Cut and scored with my Stampin’ Trimmer:
Whisper White Thick card stock (CS) cut to 4-1/4″ x 11″, then scored in half at 5-1/2″
Pear Pizzazz CS cut to a triangle 3″ wide and 4-3/4″ tall (see diagram, cut away yellow areas)
Stamped with the Carols of Christmas stamp set:
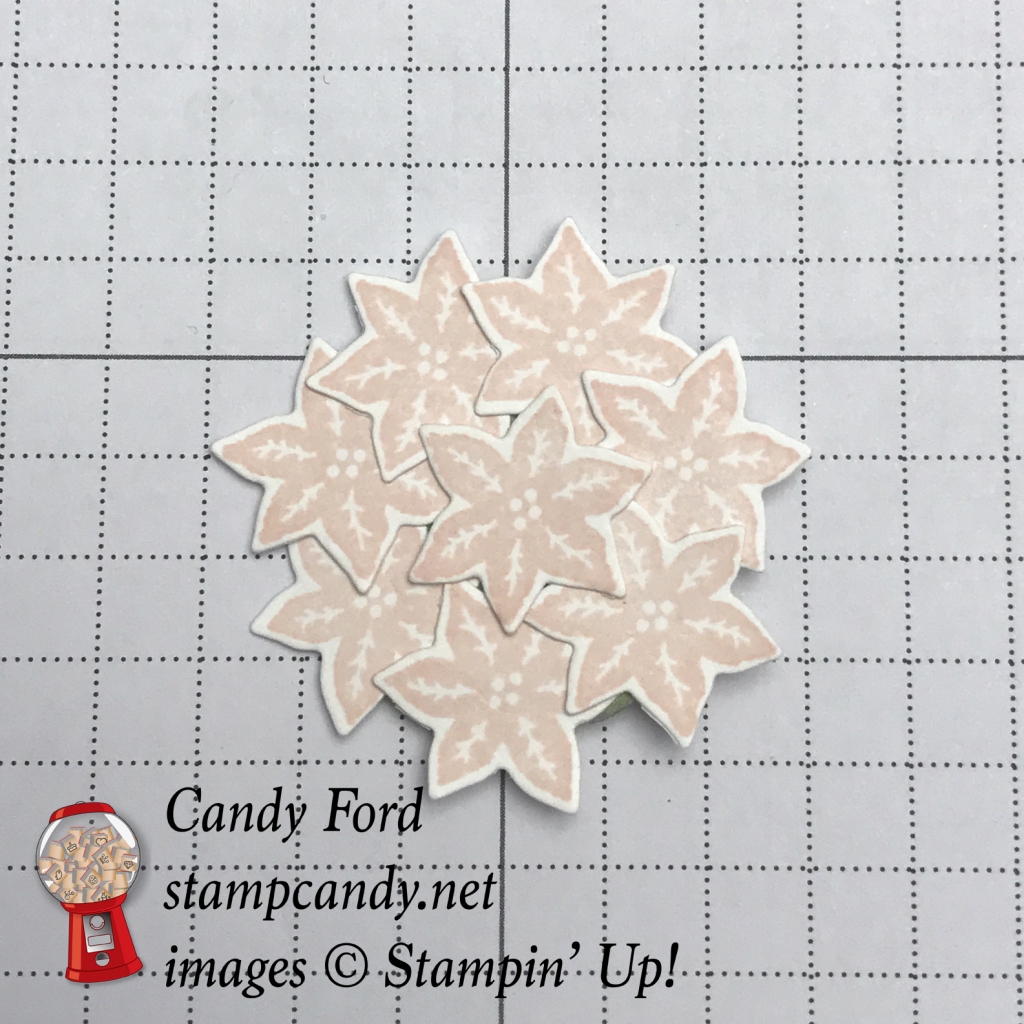
ornaments and flowers in Powder Pink ink onto a scrap of Whisper White CS
leaves in Pear Pizzazz ink onto a scrap of Whisper White CS
sentiment in Pear Pizzazz ink onto the inside of the card base
Die cut using the Card Front Builder Thinlits:
the stamped ornaments, flowers, and leaves
Die cut using the Layering Circles Framelits:
Pear Pizzazz CS with the smallest circle die
Assembled the card:
applied Fast Fuse adhesive to one side of the Pear Pizzazz CS triangle
starting at the bottom of the triangle, stuck ribbon to the triangle, going back and forth across it, working my way up
adhered the ends of the ribbon to the back of the triangle with Fast Fuse
applied Fast Fuse to one side of the Pear Pizzazz CS circle
stuck flowers to the circle to cover it
adhered the flower tree topper to the top of the ribbon tree with Fast Fuse
used Fast Fuse to adhere the tree to the front of the card base, and used a Stampin’ Dimensional under the top part of the tree topper
double leaves glued around the pink flower topper
single leaves glued amongst the pink flowers
pearls applied to centers of flowers
ornaments adhered to the tree with Mini Glue Dots
exposed area of the front of the card base covered with Clear Wink of Stella
NOTE: I suggest using Shimmery White CS as the card base – then you don’t have to use the Wink of Stella! I think I applied a bit too much Wink of Stella to this card. It looks a bit uneven, and even muddy, when the light hits it just right (or just wrong?)
Click the arrow to go to the next stop on the blog hop, Deb Naylor of The Flying Stamper!
Here are today’s colors:
You can click on each color to see all the products that come in/with that color!
Click on the images for more details and to purchase.
August Host Code
BF94WFWR
Use the Host Code on online orders less than $150. See how to use a Host Code here.
Online orders of $75-149.99 placed with the Host Code will receive the FREE gift of the month!
Online orders of $150 or more will automatically receive the FREE gift of the month! Do not use the Host Code.
August’s FREE gift is a pack of Touches Of Nature Elements:
* Wood flowers and leaves with light whitewash finish on one side * 36 pieces: 6 each of 4 designs and 12 each of 1 design * Largest piece: 1-5/8″ x 3/4″ (4.1 x 1.9 cm)
You always earn a Gum Ball for every $50 you spend on an order with me. Earn 10 Gum Balls and I’ll send you a free stamp set of your choice! See the Gum Ball Rewards page for details.
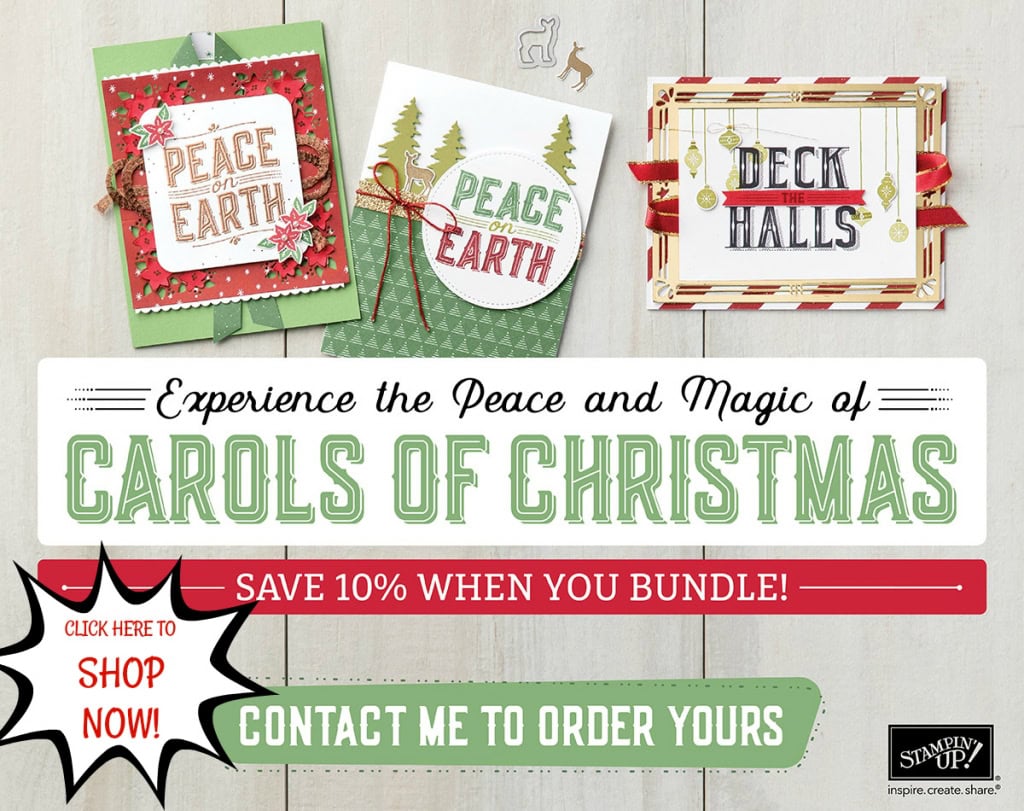
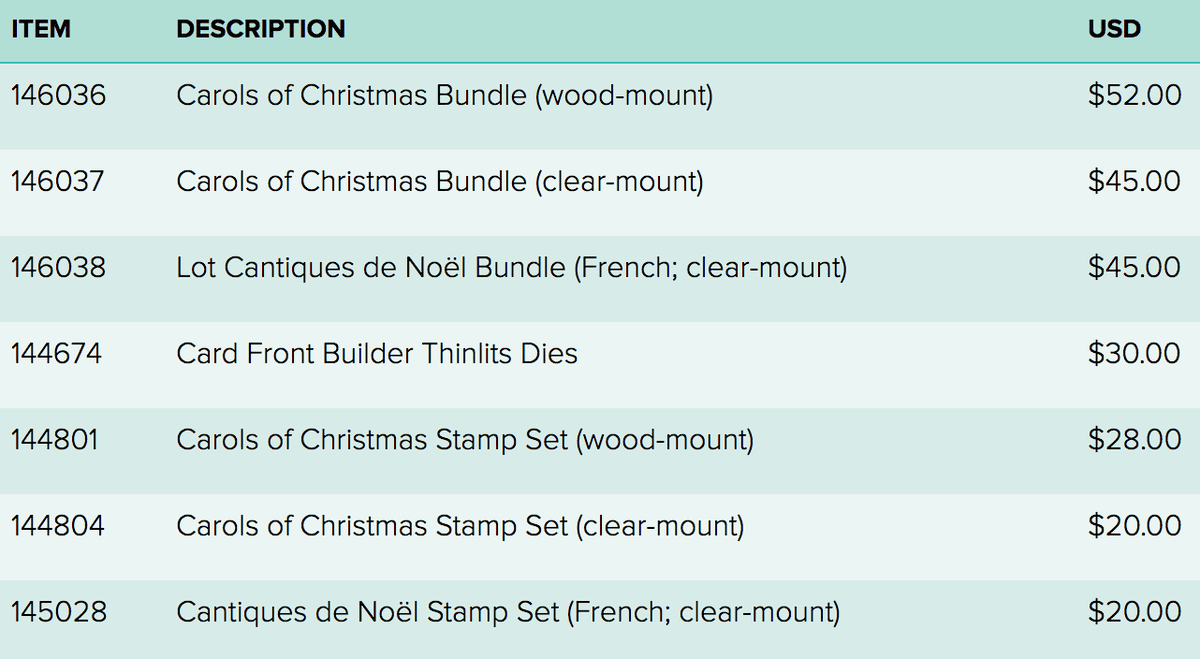
Starting today, you can order from the upcoming 2017 Holiday Catalog, just like we demonstrators can! (Well, not just like we can. We can order anything from the catalog, and you’re very limited. If you want to order more before the catalog goes live in September, click here.) The Carols of Christmas bundle is now available to order! You can buy the Carols of Christmas stamp set, or the Card Front Builder Thinlits Dies, OR you can by them together in a bundle to SAVE 10%!
This would be a great time to used those Bonus Days coupons you earned in July!
Here’s what you can order:
Save 10% when you buy the stamp set and Thinlits bundled together. You can also buy each item individually.
Here’s a video from Stampin’ Up!:
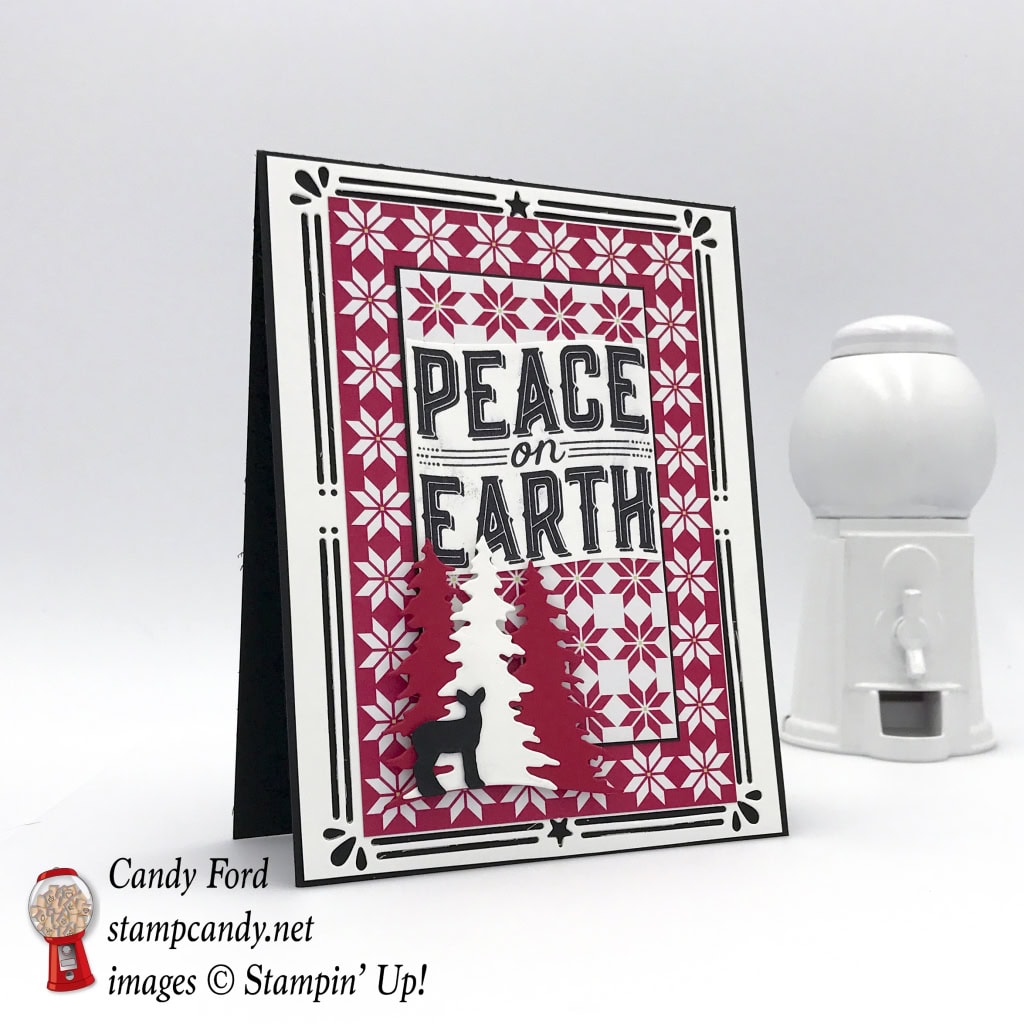
Here’s what I made:
I’m also giving you a sneak peek of the Quilted Christmas Designer Series Paper from the upcoming 2017 Holiday Catalog. I used the same pattern but with the colors reversed.
Here’s what I did:
Cut and scored with my Stampin’ Trimmer:
Basic Black card stock (CS) cut to 4-1/4″ x 11″, then scored in half at 5-1/2″
Whisper White CS cut to 4-3/16″ x 5-7/16″ (4-1/4″ x 5-1/2″ with 1/16″ cut from the length and width)
Quilted Christmas Designer Series Paper (DSP) cut according to the star pattern – 6 stars wide x 9 stars tall
Quilted Christmas DSP cut to 4 stars x 7 stars
Basic Black CS cut to 1/16″ larger than the smaller piece of DSP
Whisper White CS cut to 4″ x 5-1/4″, for the inside
Stamped with the Carols of Christmas stamp set:
sentiment in Basic Black ink onto a scrap of Whisper White CS, then trimmed around it with Paper Snips
Die cut using the Card Front Builder Thinlits:
edge pattern from the 4-3/16″ x 5-7/16″ Whisper White CS
double trees from a scrap of Real Red CS
single tree from a scrap of Whisper White CS
deer from a scrap of Basic Black CS
Assembled the card:
4-3/16″ x 5-7/16″ Whisper White CS glued onto the front of the card base
larger piece of DSP glued onto the Whisper White CS layer
Basic Black CS glued onto the larger piece of DSP
smaller piece of DSP glued onto the Basic Black CS
sentiment glued onto the smaller piece of DSP
white tree glued onto the red trees
deer glued onto the trees
deer/trees adhered to card front with Stampin’ Dimensionals (I used the regular and the mini)
4″ x 5-1/4″ Whisper White CS glued to the inside of the card base
Here are today’s colors:
You can click on each one to see all the products that come in that color!
You always earn a Gum Ball for every $50 you spend on an order with me. Earn 10 Gum Balls and I’ll send you a free stamp set of your choice! See the Gum Ball Rewards page for details.
Today’s card, for the Christmas in July Blog Hop, features the Carols of Christmas stamp set, which you can order beginning Tuesday! You can even get it bundled with the Card Front Builder Thinlits Dies to save 10%! Today’s card also features a sneak peek at a couple of brand new items from the 2017 Holiday Catalog: Merry Little Christmas Designer Series Paper and Green Sprigs.
Here’s what I made:
Here’s what I did:
Cut and scored with my Stampin’ Trimmer:
Old Olive card stock (CS) cut to 5-1/2″ x 8-1/2″, then scored in half at 4-1/4″
Basic Black CS cut to 5-1/4″ x 4″
Merry Little Christmas Designer Series Paper (DSP) cut to 5″ x 3-3/4″
Merry Little Christmas Designer Series Paper (DSP) cut to 3-3/8″ x 2-7/8″
Whisper White CS cut to 2-7/8″ x 2-3/8″
Whisper White CS cut to 5-1/4″ x 4″, for the inside
Stamped with the Carols of Christmas stamp set:
sentiment in Basic Black ink onto the smaller piece of Whisper White CS
deer in Basic Black ink onto the corner of the larger piece of Whisper White CS
Assembled the card:
Basic Black CS glued onto the front of the card base
larger piece of DSP glued onto the Basic Black CS
smaller piece of DSP glued onto the larger piece of DSP
sentiment glued onto the smaller piece of DSP
ribbon tied around a Green Sprig
sprig adhered to card front with Mini Glue Dots
second Green Sprig adhered with Mini Glue Dots, stem end tucked under first sprig
larger piece of Whisper White CS (with deer) glued to inside of the card base
Be sure to check out all the great projects!
Here are today’s colors:
You can click on each one to see all the products that come in that color!
These items will be available to purchase September 1, 2017:
Merry Little Christmas Designer Series Paper, Item #144621
Green Sprigs, Item #144627
Click on the images below for more details and to purchase. (Carols of Christmas will be available August 1, 2017!)
ONLY ONE DAY LEFT!
For every $50 you spend in July, you get a $5 coupon to spend in August! Click here for details.
ONLY ONE DAY LEFT!
If you join my team in July, you will receive $72 EXTRA FREE PRODUCT! There is no obligation to sell. There’s no risk at all! Click here for the details.
Plus if you join now, you’ll be able to preorder items from the upcoming Holiday Catalog in July and August!
ONLY ONE DAY LEFT!
July Host Code
WXKSQ6HT
Use the Host Code on online orders less than $150. See how to use a Host Code here.
Online orders of $75-149.99 placed with the Host Code will receive the FREE gift of the month!
Online orders of $150 or more will automatically receive the FREE gift of the month! Do not use the Host Code.
July’s FREE gift is a pack of 3″ x 6″ Gusseted Cellophane Bags! Use these bags for treat or gift bags. Just pop the treat or gift into one of our shiny cellophane bags and add a stamped header. These bags are also great for storing finished projects, parts for future projects, or any other odds and ends
* 25 gusseted bags * 3″ x 6″ (7.6 x 15.2 cm) * Stampable with StazOn ink * Food safe * Acid free
(I can ship within US only.)
“No Contact” orders are not eligible for the free gift.
You always earn a Gum Ball for every $50 you spend on an order with me. Earn 10 Gum Balls and I’ll send you a free stamp set of your choice! See the Gum Ball Rewards page for details.
Welcome to InKing Royalty’s July Blog Hop! It’s Christmas in July, and today’s Blog Hop is filled with projects inspired by … you guessed it … Christmas! What fun! Although Stampin’ Up!’s 2017 Holiday Catalog will be released to demonstrators this week (we can’t wait to share that with you), our Annual Catalog is filled with fun, festive and beautiful products to make Christmas special, such as the new Merry Mistletoe stamp set and the new Be Merry Designer Series Paper. We are excited to share our creations with you today. After you read my post, I hope you’ll hop over to the next person on the list at the base of this post.
Here’s what I made:
The Be Merry Designer Series Paper colors are Cherry Cobbler, Whisper White, and Garden Green. For today’s card, I decided to replace Garden Green with Pear Pizzazz for a softer feel. What do you think?
Here’s what I did:
Cut and scored with my Stampin’ Trimmer:
Pear Pizzazz card stock (CS) cut to 5-1/2″ x 8-1/2″
Whisper White CS cut to 5-3/8″ x 4-1/8″
Be Merry Designer Series Paper (DSP) cut to 5-1/4″ x 4″
Whisper White CS cut to 2-1/2″ x 3-3/4″
Whisper White CS cut to 5-1/4″ x 4″, for the inside
Stamped with the Merry Mistletoe stamp set:
deer and mistletoe in Pear Pizzazz ink onto the 2-1/2″ x 3-3/4″ Whisper White CS
sentiment onto a scrap of Whisper White CS
Die cut using the Layering Ovals Framelits:
sentiment
one size larger oval from a scrap of Cherry Cobbler CS
two sizes larger oval from a scrap of Pear Pizzazz CS
Cut using the 1/16″ Circle Punch:
three circles from a scrap of Cherry Cobbler CS
Assembled the card:
5-3/8″ x 4-1/8″ Whisper White CS glued onto the front of the card base
DSP glued onto the 5-3/8″ x 4-1/8″ Whisper White CS
2-1/2″ x 3-3/4″ Whisper White CS (stamped with deer and mistletoe) glued onto the DSP
three ovals glued together, then glued onto the DSP and stamped piece
applied three small Cherry Cobbler Enamel Dots in the corner above the deer
glued 1/16″ circles: 2 to the sentiment, and one to the deer
went over the mistletoe berries with a white chalk marker, to give them that “white with a green tinge” that real mistletoe berries have
5-1/4″ x 4″ Whisper White CS glued to the inside of the card base
Here’s the hop:
Thank you for hopping along with us. I hope you’ll hop along to the next stop on the bloghop, Lynn Kolcun at Avery’s Owlery. There’s a lot of inspiration to be found in this group – and you don’t want to miss it!
If you get stuck during the Blog Hop, please use this line-up as a guide:
Click on the images for more details and to purchase.
Just a few days left!
For every $50 you spend in July, you get a $5 coupon to spend in August! Click here for details.
Just a few days left!
If you join my team in July, you will receive $72 EXTRA FREE PRODUCT! There is no obligation to sell. There’s no risk at all! Click here for the details.
Plus if you join now, you’ll be able to preorder items from the upcoming Holiday Catalog in July and August!
July Host Code
WXKSQ6HT
Use the Host Code on online orders less than $150. See how to use a Host Code here.
Online orders of $75-149.99 placed with the Host Code will receive the FREE gift of the month!
Online orders of $150 or more will automatically receive the FREE gift of the month! Do not use the Host Code.
July’s FREE gift is a pack of 3″ x 6″ Gusseted Cellophane Bags! Use these bags for treat or gift bags. Just pop the treat or gift into one of our shiny cellophane bags and add a stamped header. These bags are also great for storing finished projects, parts for future projects, or any other odds and ends
* 25 gusseted bags * 3″ x 6″ (7.6 x 15.2 cm) * Stampable with StazOn ink * Food safe * Acid free
I can ship within US only. “No Contact” orders are not eligible for the free gift.
You always earn a Gum Ball for every $50 you spend on an order with me. Earn 10 Gum Balls and I’ll send you a free stamp set of your choice! See the Gum Ball Rewards page for details.


 You always earn a Gum Ball for every $50 you spend on an order with me. Earn 10 Gum Balls and I’ll send you a free stamp set of your choice! See the Gum Ball Rewards page for details.