Jan 20, 2020 | Cards, Gallery, Holiday, New Products |
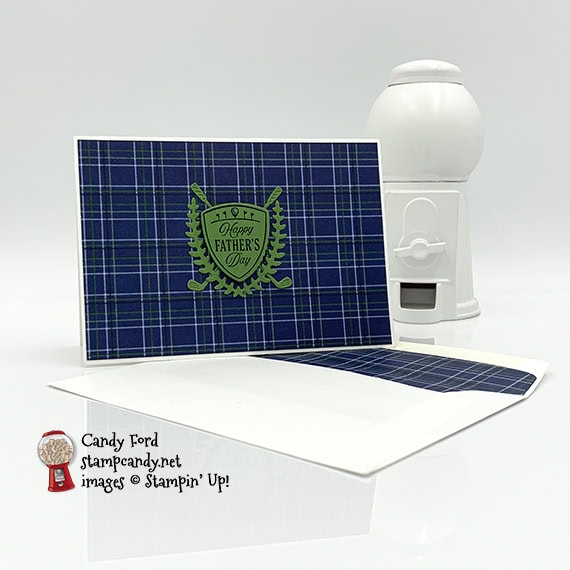
Today’s Whisper White Note Card and Envelope were adorned for Father’s Day using the new Country Club Suite. It’s easy to line the envelope. Just trace around the open envelope for the shape, then cut it out using Paper Snips. Stick it in the envelope, far enough so the envelope adhesive still shows, and glue it in place.
envelope envelope
Here’s what I made:
 S
S
Here’s what I did:
Cut and scored with my paper trimmer:
- Country Club Designer Series Paper (DSP) layer cut to 4-7/8″ x 3-3/8″
- Country Club Designer Series Paper (DSP) cut to 5″ x 5″ for the envelope liner
Stamped with the Clubhouse stamp set:
- sentiment in Night of Navy ink onto a scrap of Garden Green card stock (CS)
Cut using the Golf Club Dies:
- sentiment
- 2 golf clubs and 1 laurel from a scrap of Garden Green CS
Assembled the card:
- burnished the fold in the note card base with a Bone Folder
- DSP layer glued onto the front of the note card base
- 2 golf clubs glued onto the DSP layer, crossed
- sentiment adhered over the golf clubs using Black Stampin’ Dimensionals
- laurel glued around the sentiment
Lined the envelope:
- traced around the envelope flap onto the back of the DSP using a pencil
- trimmed around the traced line using Paper Snips
- glued the DSP onto the inside of the envelope flap, making sure not to cover the envelope’s adhesive
S
Here are today’s colors:
You can click on each one to see all the products that come in that color!
S
Here’s what I used:
Click on these images for more details and to purchase.
Click “Supply List” for a clickable and printable list!
S
Here are some helpful links:
S
Thanks for stopping by today, and Sweet Stamping!
Jan 17, 2020 | Cards, Gallery, New Products |
Today’s project is a notecard for a great guy who plays golf – the greatest guy in fact. The greatest guy by par. (I do love puns.) Premade note cards make it so easy to send handmade cards. All you have to do is decorate them. golf golf golf golf
golf golf golf golf golf golf
Here’s what I made:
S
S
Here’s what I did:
Cut and scored with my paper trimmer:
- Garden Green card stock (CS) layer cut to 3-1/4″ x 4-3/4″
- Whisper White (CS) layer cut to 3″ x 4-1/2″
- Country Club Designer Series Paper (DSP) cut to 1/2″ x 5″
Stamped with the Clubhouse stamp set:
- sentiment in Garden Green ink onto the Whisper White CS layer
- sentiment and ball in Garden Green ink onto a scrap of Whisper White Thick CS
Cut using the Golf Club Dies:
- ball and banner portion of sentiment from the scrap of Whisper White Thick CS
Assembled the card:
- burnished the fold in the note card base with a Bone Folder
- Whisper White CS layer glued onto the Garden Green CS layer
- die cut pieces adhered onto the Whisper White CS layer using Stampin’ Dimensionals
- DSP strip glued onto the left side of the Whisper White CS layer
- Poppy Parade twine wrapped around the Garden Green CS layer and tied in a knot on top of the DSP strip
- Garden Green CS layer glued onto the front of the note card base
S
Here are today’s colors:
You can click on each one to see all the products that come in that color!
S
Here’s what I used:
Click on these images for more details and to purchase.
Click “Supply List” for a clickable and printable list!
S
Here are some helpful links:
S
Thanks for stopping by today, and Sweet Stamping!
Jan 14, 2020 | Cards, Gallery, New Products |
When a new catalog comes out with lots of great new products, one thing I like to do is see how I can use the new stuff with the older stuff. Today’s card is an example of that. I used the Country Club Suite (from the new Spring Mini Catalog) with the On to Adventure stamp set (from the 2019-2020 Annual Catalog.) There’s a golfer image in the On to Adventure set, so it goes perfectly with the new golf themed suite. This is a perfect “congratulations on your retirement” card for someone who plans to play a lot of golf.
adventure adventure adventure adventure
Here’s what I made:
S

Here’s what I did:
Cut and scored with my paper trimmer:
- Night of Navy card stock (CS) cut to 4-1/4″ x 11″, then scored in half at 5-1/2″
- Poppy Parade (CS) layer cut to 2″ x 5-1/4″
- Country Club Designer Series Paper (DSP) layer cut to 2″ x 2-1/4″ (flags)
- DSP layer cut to 2″ x 3″ (balls and tees)
- Whisper White CS cut to 4″ x 5-1/4″
Stamped with the On to Adventure stamp set:
- sentiment in black Memento ink onto a scrap of Whisper White Thick CS
- golfer in black Memento ink onto a scrap of Whisper White CS
Colored using Stampin’ Blends Markers:
- golfer in Night of Navy, Poppy Parade, and Ivory
Colored using Stampin’ Write Markers:
- flag in Crushed Curry
- grass in Garden Green
- added shading to the mini golf ball die in Basic Black before die cutting
Cut using the Golf Club Dies:
- mini golf ball from a scrap of Whisper White Thick CS
- 3 golf clubs from a scrap of Crushed Curry CS
Cut using the Stitched Rectangles Dies:
Cut using the Stitched Shapes Dies:
Embossed using the Absolutely Argyle embossing folder:
Assembled the card:
- burnished the fold in the card base with a Bone Folder
- Poppy Parade CS layer and 2 DSP layers glued onto the front of the card base
- die cut mini golf ball glued onto the golfer image
- die cut sentiment glued onto the die cut golfer image, then both adhered onto the card front using Stampin’ Dimensionals
- Night of Navy Twine wrapped around the card front and tied in a knot (I secured the knot in place using a Mini Glue Dot, and put a tiny line of glue on the inside of the card base under the twine, just to keep it in place.)
- die cut Crushed Curry CS golf clubs glued onto the Whisper White CS
- Whisper White CS glued onto the inside of the card base
S
Here are today’s colors:
You can click on each one to see all the products that come in that color!
S
Here’s what I used:
Click on these images for more details and to purchase.
Click “Supply List” for a clickable and printable list!
S
Here are some helpful links:
S
Thanks for stopping by today, and Sweet Stamping!
Jan 13, 2020 | Cards, Gallery, New Products |
Today’s card is made with the Country Club Suite, but using colors that might not immediately come to mind when you think of this set. While golf is usually considered a masculine sport, there are girly girl golfers, too. I used Petal Pink and Soft Sea Foam with a bit of clear Wink of Stella to froufrou it up a bit.
S
Here’s the Clubhouse bundle:

club club club club
Here’s what I made:
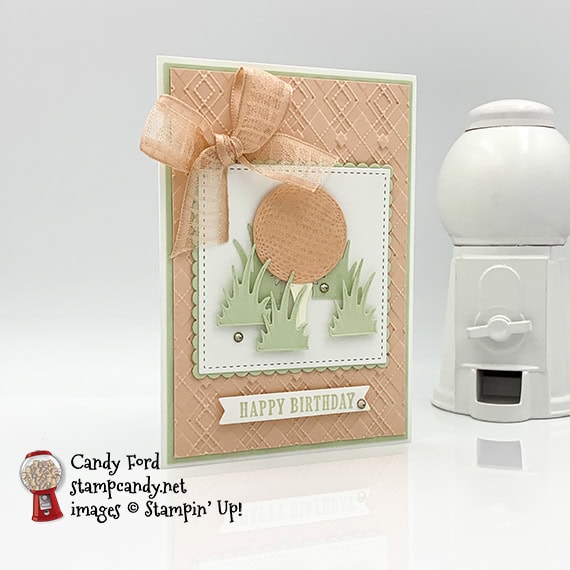
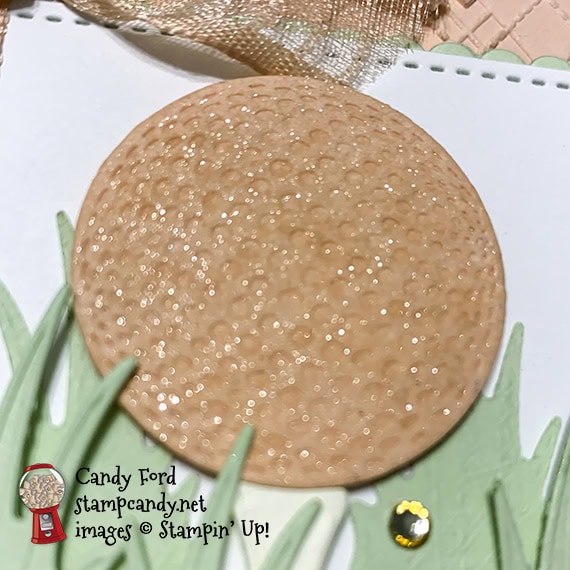
It’s hard to get Wink of Stella to show up in a photo, but I really laid it on thick here, so it does show a little at just the right angle. The golf ball die both cuts and embosses the ball at the same time!
Here’s what I did:
Cut and scored with my paper trimmer:
- Soft Sea Foam card stock (CS) layer cut to 3-3/8″ x 4-7/8″
- Petal Pink CS layer cut to 3-1/4″ x 4-3/4″
Stamped with the Clubhouse stamp set:
- sentiment in Soft Sea Foam ink onto a scrap of Whisper White Thick CS
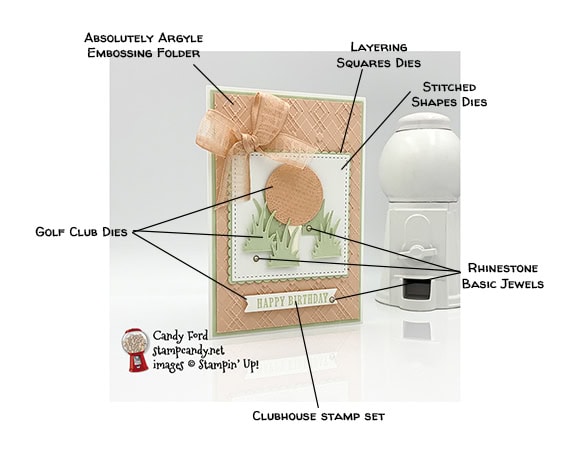
Embosssed using the Absolutely Argyle Embossing Folder:
Cut using the Layering Squares Dies:
- scalloped square from a scrap of Soft Sea Foam CS
Cut using the Stitched Shaped Dies:
- square from a scrap of Whisper White CS
Cut using the Golf Club Dies:
- large golf ball from a scrap of Petal Pink CS
- tee from a scrap of Very Vanilla Thick CS
- grass from a scrap of Soft Sea Foam CS
- sentiment
Colored using a Stampin’ Blends Marker:
- 3 rhinestones in Dark Petal Pink (The color doesn’t show well in the photos. You can also use the Petal Pink Rhinestone Gems, but I wanted something smaller for this card.)
Assembled the card:
- burnished the fold in the note card base with a Bone Folder
- Soft Sea Foam CS layer glued onto the front of the note card
- embossed Petal Pink CS layer glued onto the Soft Sea Foam CS layer
- 2 clumps of grass glued onto the Whisper White CS square
- ball, tee, and remaining clumps of grass adheres onto the Whisper White CS square using Stampin’ Dimentionsals.
- Whisper White square glued onto the Soft Sea Foam scalloped square
- Soft Sea Foam scalloped square glued onto the embossed Petal Pink CS layer
- sentiment banner adhered onto the embossed Petal Pink CS layer using Stampin’ Dimensionals
- 3 rhinestones applied onto the card front
- Petal Pink ribbon tied in a bow and adhered onto the embossed Petal Pink CS layer using Mini Glue Dots
S
Here are today’s colors:
You can click on each one to see all the products that come in that color!
S
Here’s what I used:
Click on these images for more details and to purchase.
Click “Supply List” for a clickable and printable list!
S
Here are some helpful links:
S
Thanks for stopping by today, and Sweet Stamping!
Jan 10, 2020 | Cards, Gallery, New Products |
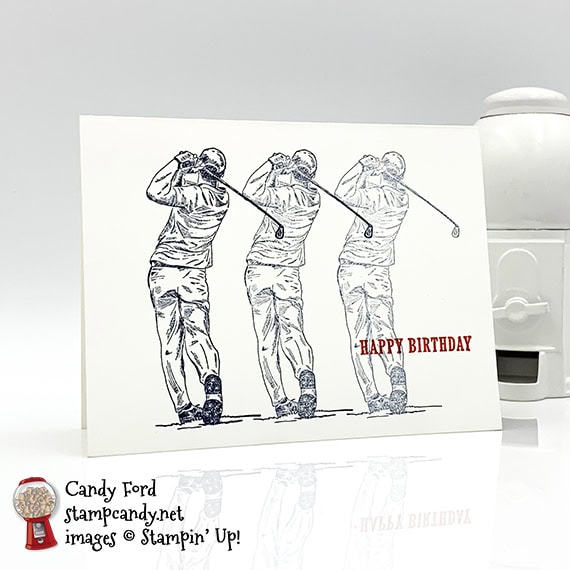
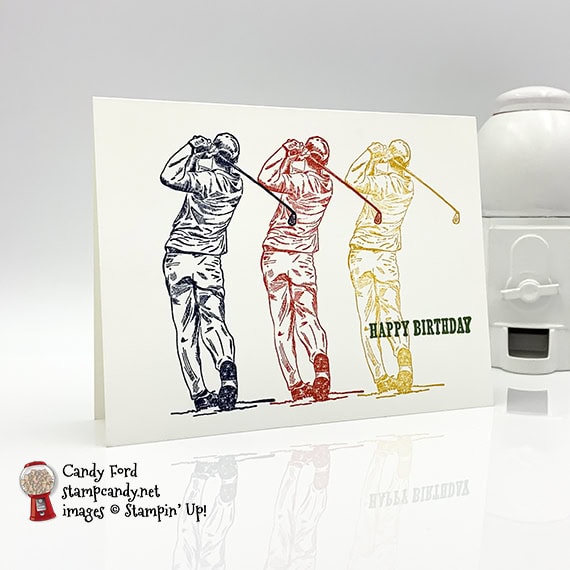
Today’s project is a card I made for my recent demonstration at OnStage. I used the Clubhouse stamp set from the Country Club Suite. It’s so easy, especially if you have a Stamparatus! It’s just stamps, ink, and paper. That’s it! You can stamp the 3 golfers in the same color, or clean the stamp after each one and apply a different color of ink. Super simple! #simplestamping
clubhouse clubhouse clubhouse clubhouse
Here’s what I made:
I stamped the golfer three times without reinking each time, so they got lighter as I went:
I used different colors of ink on this card:
 S
S
Here’s what I did:
Cut and scored with my paper trimmer:
- Whisper White Thick card stock (CS) cut to 5-1/2″ x 8-1/2″, then scored in half at 4-1/4″
Stamped with the Clubhouse stamp set:
- golfer in Night of Navy ink, stamped three times without reinking between stamps
- NOTE: on the Stamparatus, I moved the paper 1-1/4″ between stamps
- sentiment in Poppy Parade ink
- For the other card, I stamped the golfer in Night of Navy, Poppy Parade, and Crushed Curry, and the sentiment in Garden Green
Assembled the card:
- burnished the fold in the card base with a Bone Folder
- That’s it!
S
Here are today’s colors:
You can click on each one to see all the products that come in that color!
S
Here’s what I used:
Click on these images for more details and to purchase.
Click “Supply List” to download a clickable and printable list!
S
Here are some helpful links:
S
Thanks for stopping by today, and Sweet Stamping!
Jan 8, 2020 | Cards, Christmas, Gallery, New Products |
I realize Christmas is over, but it’s never too soon to plan for the next one. And what would be more perfect for a golfer than ornaments made from golf balls? Today I’m sharing a Christmas card I made using the Golf Club Dies, Winter Woods stamp set, and In the Woods Dies. Of course, in the woods is where you want your golf ball never to go. (Sorry, I couldn’t resist the pun.)
Here’s what I made:

 S
S
Here’s what I did:
Cut and scored with my paper trimmer:
- Garden Green card stock (CS) cut to 5-1/2″ x 8-1/2″, then scored in half at 4-1/4″
- Country Club Designer Series Paper (DSP) layer cut to 5″ x 3-3/4″
- Whisper White CS 5-1/4″ x 4″ for the inside of the card base
- DSP strip cut to 5-1/4″ x 1″
Stamped with the Winter Woods stamp set:
- sentiment in Garden Green ink onto a scrap of Whisper White CS
Cut using the Golf Club Dies:
- large golf balls from a scrap of Whisper White Thick CS
- mini golf balls from a scrap of Poppy Parade CS
- golf tees from a scrap of Golf Foil Sheet
Cut using In the Woods Dies:
- small trees from a scrap of Garden Green CS that I used as pine sprigs
Cut using the Layering Ovals Dies:
Assembled the card:
- burnished the fold in the card base with a Bone Folder
- DSP layer glued onto the front of the card base
- sentiment glued onto the DSP layer
- Whisper White golf balls glued onto the DSP layer, then the gold tees glued at the tops of the balls
- Garden Green sprigs glued along the top of the card front, left to right
- Poppy Parade mini balls glued onto the sprigs
- DSP strip glued onto the Whisper White CS
- Whisper White CS glued onto the inside of the card base
S
Here are today’s main colors:
You can click on each one to see all the products that come in that color!
S
Here’s what I used:
Click on these images for more details and to purchase.
Click “Supply List” for a clickable and printable list!
S
Here are some helpful links:
S
Thanks for stopping by today, and Sweet Stamping!

