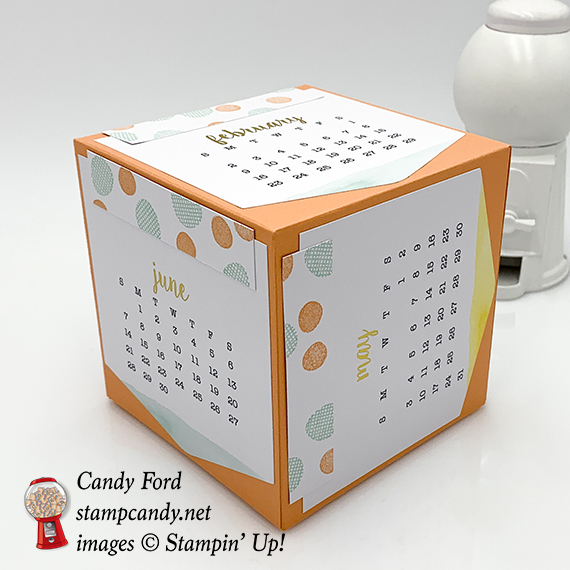
It’s time for the last A Paper Pumpkin Thing Blog Hop of the year! The December kit is called Day By Day and if featured a cute little calendar and a gift box it fits in. For my alternate projects I used some of the calendars to make birthday cards and some to make a calendar cube. I’ll send the cards to someone with a birthday or anniversary that month, and I’ll circle the date on the calendar – there’s a handy little circle stamp in the set just for this purpose! I’ve left the insides blank for now so I can stamp the appropriate sentiment in them later. I haven’t lined these yet either, but I’ll glue a piece of Whisper White card stock inside each one for the sentiment and handwritten note.
The kit makes an 18 month calendar: January 2019 – June 2020. You can make 3 cubes, 6 months each, or you can use some for cards. Get two kits and you can do both!
Here’s what I made:
I only got 3 cards made so far. For the first two I used only kit components on a card base. For the third one I also used a Gold Foil Sheet and some ribbon not in the kit.
The cube is 4″ x 4″ x 4″. I glued on the calendars going in all different directions.
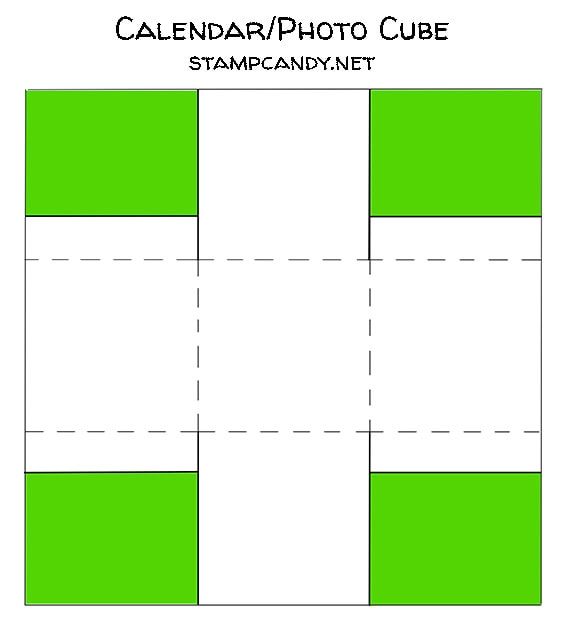
Here you can see where the two boxes go together to make the cube.
Here’s what I did:
Cut and scored with my Stampin’ Trimmer:
12″ x 12″ Grapefruit Grove card stock (CS) scored at 4″ and 8″ in both directions
Grapefruit Grove CS cut to 11-7/8″ x 11-7/8″, then scored at 3-15/16″ from all four sides
Pool Party, Grapefruit Grove, and Gray Granite CS cut to 4-1/4″ x 11″, then scored in half at 5-1/2″
Gold Foil Sheet cut to 4″ x 5-1/4″
trimmed the sides off the sheets of white rectangular stickers (see below) – this gave me more stickers of the same length but different widths, some 1-1/8″ tall and some 3/4″ tall
trimmed some of the 1-1/8″ tall stickers to 3/4″ tall
trimmed the tops off the calendars for the cube and for one of the cards
Stamped with the Day By Day stamp set:
dots in Pool Party, Grapefruit Grove, and Gray Granite inks onto some of the stickers
Assembled the cards:
burnished the folds in the card bases with a Bone Folder
applied a stamped sticker onto two of the calendars, then glued them onto the front of the card bases
ran a 4″ piece of ribbon through the two holes and adhered the ends on the back
tied a 4″ piece of ribbon around the first piece of ribbon and trimmed the ends
adhered the first two calendars onto the fronts of the card bases using Stampin’ Dimensionals
gold foil layer glued onto the front of the third card base
calendar with the top trimmed away (to remove the holes) adhered onto the gold layer
a piece of Gray Granite ribbon adhered onto the calendar
a piece of gold ribbon adhered onto the Gray Granite ribbon
glued (or will glue) a 4″ x 5-1/4″ piece of Whisper White CS to the inside of each card base
Assembled the cube:
burnished the folds in the two large Grapefruit Grove CS pieces with a Bone Folder
cut down one score line on each corner, only to the first score line it crosses
cut away most of the 4 corner panels (the green areas below) leaving a little for a tab
glued each tab to the inside of the adjacent side – this gave me two topless boxes
inserted the smaller box inside the larger box, open side first, and put a little adhesive just inside the seam where they met
glued the 6 calendars (I used January – June 2020) onto the 6 sides of the cube
applied a 3/4″ tall stamped sticker to each calendar
Here’s the hop:
Here are today’s colors:
You can click on each one to see all the products that come in that color!
Click on these images for more details and to purchase.
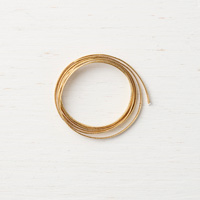
Oops! I realized the 1/8″ gold ribbon I used on the third card is retired. I substituted the 1/8″ gold cord below. Looks like I need to recheck my current products!
During the Year-End Closeout promotion, you can save on a selection of retiring and surplus items—while supplies last. Definitely place your orders sooner rather than later, because supplies are limited and the Year-End Closeout ends on January 2. After that, some of your favorite retiring items may be gone for good!
CLICK HERE to see all the Year-End Closeout items.
Here’s how to get your copy of the new catalogs:
Just click on this button and I’ll send you the new catalogs, along with a list of the bundles, the Designer Series Paper coordinating colors, and a handmade card!
Here’s how to shop 2019 Occasions/Sale-a-bration items now!
Become a Candy Heart!
Join my team and you can order the new products right now, instead of having to wait another month!
No selling required! I welcome Hobby Demos! (Hobby Demos join to get the discount for themselves.)
There are so many things going on in Stampin’ Up! right now! I just want to make sure you know about all of them.
The Year-End Closeout is Stampin’ Up!’s chance to do a little inventory cleaning—and your opportunity to take advantage of special year-end deals on retiring and surplus items. During this promotion, you will be able to save on a selection of retiring and surplus items—while supplies last. Definitely place your orders sooner rather than later, because supplies are limited and the Year-End Closeout ends on January 2. After that, some of your favorite retiring items may be gone for good! It’s your last chance to show 2018 some love! Through January 2 or while supplies last. CLICK HERE to see all the Year-End Closeout items.
The Holiday Catalog order period is coming to an end January 2. Many of the products are retiring. Some are already gone. CLICK HERE to shop now while you can!
This tote is amazing! It’s very well made and sturdy. It holds a lot. There are dividers inside that are removable. It looks great. But only Demos can purchase this tote, and only this month. Join my team so you can buy it now!
You can purchase Stampin’ Up!’s theme songs from the past 30 years, but they’re only available through December 31, 2018
You have two options:
Complete Collection of Stampin’ Up! Theme Songs $15.00 USD
Single Love, Live & Share It Today – 30-year anniversary song $5.00 USD
Stampin’ Up! will donate 100 percentof the funds raised to the following Autism organizations: Autism Speaks; Autism Speaks Canada; The National Autistic Society; Autism Europe; Autism New Zealand; Autism Spectrum (ASPECT); Japan Autism Society
Would you like to see and order the new products from the 2019 Occasions catalog now, instead of having to wait until January? Would you like to earn the new Sale-a-bration items now, too? Only Demos can participate in the Occasions catalog preorder and the Sale-a-bration pre-earn. So…
Become a Candy Heart!
Join my team and you can order the new products right now, instead of having to wait another month!
No selling required! I welcome Hobby Demos! (Hobby Demos join to get the discount for themselves.)
Just click on the Free Catalog button below to order the new catalogs. I will include a list of the bundles, the Designer Series Paper coordinating colors, and a handmade card! All FREE!
The Stamparatus Accessories are not in a catalog. To see and purchase them, CLICK HERE.
Don’t you love it when you have just the right thing to hold your supplies? I sure do. The new Stamparatus Bag is exactly that. It hold the Stamparatus and all the accessories with room to spare. CLICK HEREto purchase it.
January’s Paper Pumpkin Kit and Animal Expedition are going wild for Valentine’s Day! Next month’s Be Mine, Valentine kit combines everything you love about Paper Pumpkin-style treat packaging with adorable critter coordination in the popular Animal Expedition Kit! CLICK HEREto purchase a prepaid subscription, or CLICK HERE to subscribe month to month. Subscribe by January 10 to get this kit!
With the seasonal catalogs coming out every few months, it’s easy to forget about the Annual Catalog. But don’t! It’s full of amazing products, including the basics like card stock and ink pads, and stamp sets for all occasions. SHOP HERE
Right now you have 3 stamp types to choose from: wood mount, clear mount, and photopolymer. In future catalogs, beginning with the 2019 Occasions Catalog, there will be *2 options: cling and photopolymer. Cling stamps are essentially the same as the clear mount stamps we have now with one big difference: the individual stamp labels are very, very clingy. There will be no chance of these stamps falling off the block. If you want to try them out now,join my team and get Occasions catalog products in your Starter Kit!
*In North America, the large background stamps will still be available in wood mount.
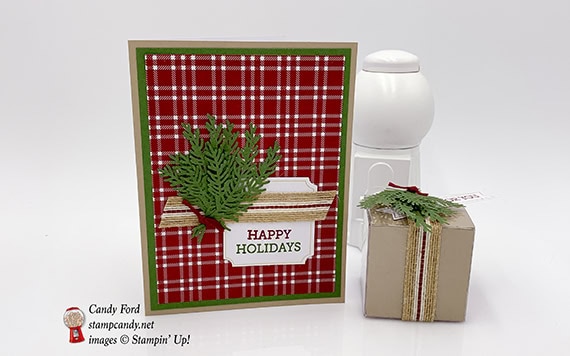
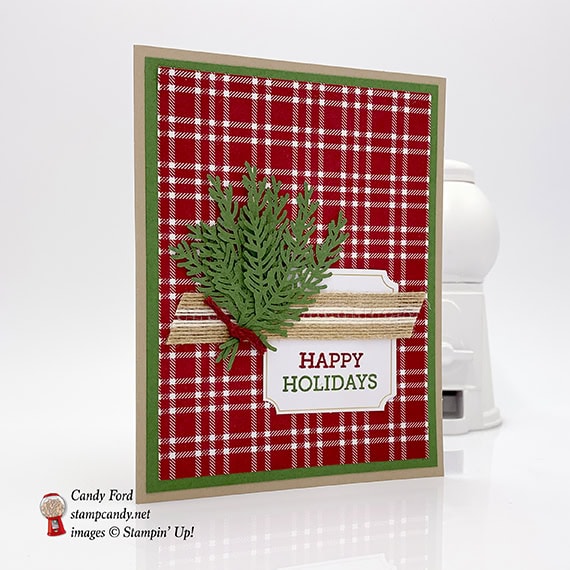
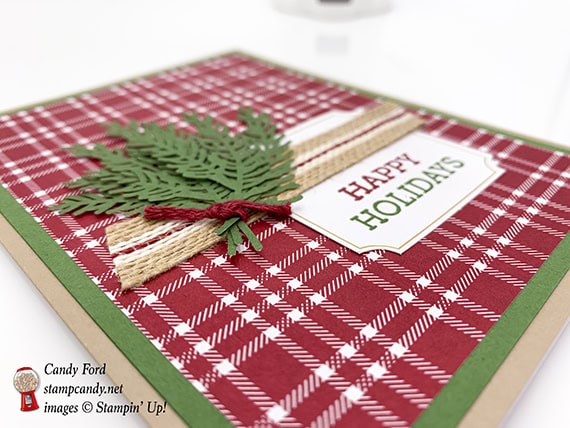
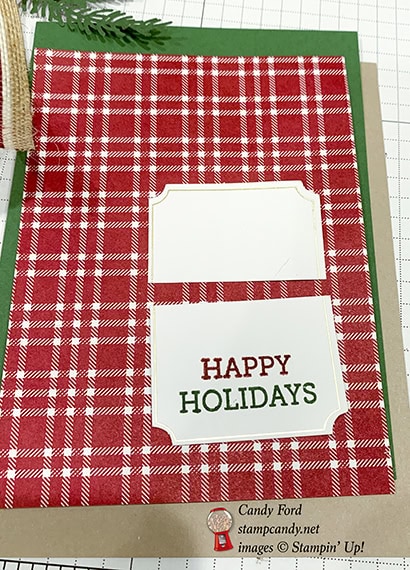
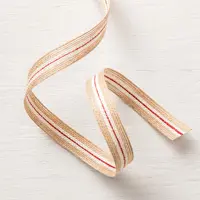
It’s time for the A Paper Pumpkin Thing (APPT) Blog Hop! This month’s kit is called To You and Yours, and it makes 10 awesome Christmas/holiday cards. I used it to make an alternate card and treat box. I only used items from the kit, except for the following: Garden Green ink pad, one Clear Tiny Treat Box, one piece of Garden Green card stock and two pieces of Striped Burlap Trim.
The kit comes with card layers in two different plaid designs. The envelopes are lined with a third plaid design, which is what I used on my projects today.
Here’s what I made:
Here’s what I did:
Cut and scored with my Stampin’ Trimmer:
Garden Green card stock (CS) cut to 4″ x 5-1/4″
plaid paper from the inside of an envelope cut to 3-3/4″ x 5″
plaid paper from the inside of an envelope cut to 2″ x 6″
card base cut to 2″ x 8″, making sure the original score line is at the 4″ mark, then scoring at 2″ and 6″
die cut label cut in half
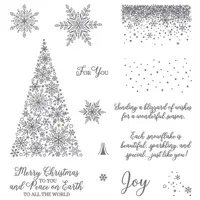
Stamped with the kit’s stamp set:
“For You” in Cherry Cobbler ink onto the right end of a die cut banner
“Happy” in Cherry Cobbler ink and “Holidays” in Garden Green ink onto the bottom half of the die cut label
Cut with a 1/2″ Circle Punch:
a half moon shape from one end of the 2″ x 8″ piece, to match up with the finger notch of the treat box
Assembled the card:
burnished the fold in the card base with a Bone Folder
Garden Green CS layer glued onto the front of a card base
plaid paper layer glued onto the Garden Green CS layer
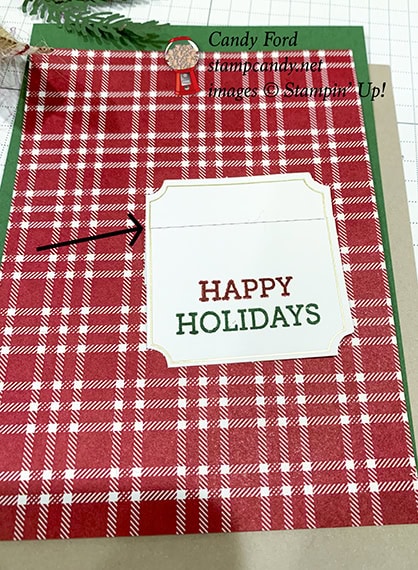
the stamped half of the die cut label layered over the other half, to shorten it, and glued onto the plaid layer
I had to draw a line so you could see where the two halves of the label overlap:
burlap trim adhered onto the plaid layer, hiding the seam in the label
5 die cut sprigs bundled and tied together using a piece of Cherry Cobbler trim, then adhered to the plaid layer and burlap trim
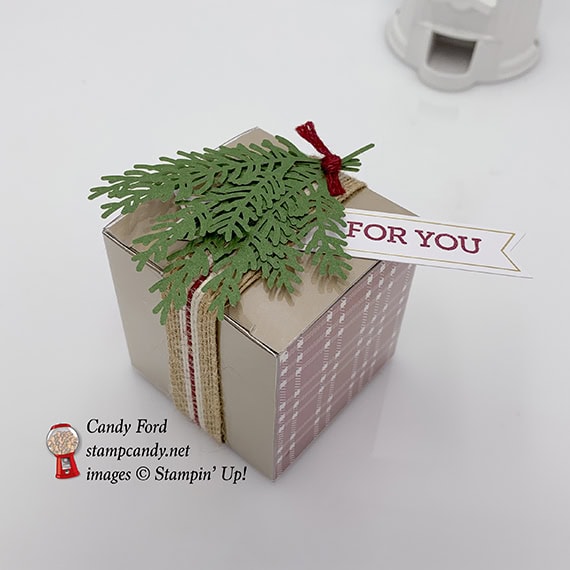
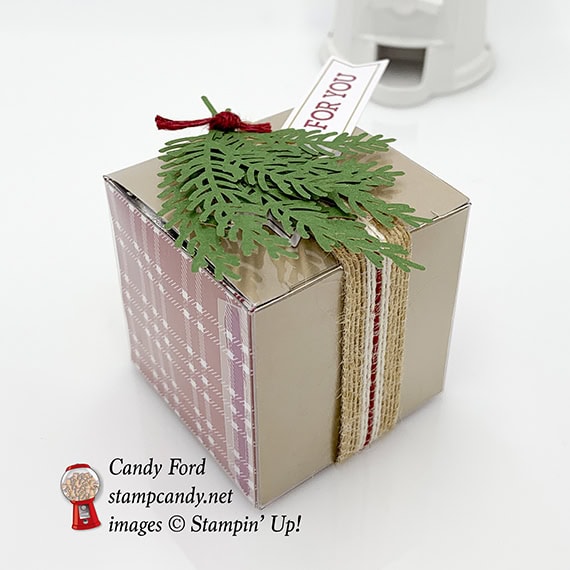
Assembled the box:
assembled the treat box
burnished the folds in the 2″ strip cut from plaid paper, and in the 2″ strip cut from a card base
plaid strip inserted into the treat box side to side
the other strip inserted into the treat box front to back, lining up the finger notch in the front
put the goodies in and closed the lid (I used Hershey’s Kisses. You can see from the photos I got it just a little too full. It’s bulging a little.)
10″ piece of burlap trim wrapped around the box and the ends adhered together, but not to the box, so it can slip on and off
5 die cut sprigs bundled and tied together using a piece of Cherry Cobbler trim, then adhered to the ribbon on top of the box
“For You” banner slipped under the ribbon
Here’s the To You and Yours Blog Hop:
Here are today’s colors:
You can click on each one to see all the products that come in that color!
Get cozy this Christmas season with Paper Pumpkin! The Paper Pumpkin team designed November’s kit to give you a One-Stop Box™ for your holiday crafting needs. When you subscribe by November 10, you;ll receive the specially-designed box filled with everything you need for a holly-jolly, handmade holiday.
The holidays are the best time to share our appreciation for others, and nothing does that like a handmade holiday card. November’s kit gives a you everything you need to make plenty of those! (10 cards; 5 each of 2 unique holiday designs.)
Are you new to Paper Pumpkin? The holiday kit is the perfect introduction to this fabulous monthly kit, especially if you’re looking for a fun and easy holiday crafting experience.
Current subscribers are going to love the holiday kit. In fact, you may want to purchase extra kits to give away as gift – plus you’ll want lots of refills!
The November kit makes the perfect gift for your crafty friends this holiday season. Purchase a prepaid code(s) and give them to your friends/family members as gifts. Tell them to redeem their prepaid codes on paperpumpkin.com by November 10 to get the special holiday edition kit!
The box is a great sneak of what’s inside! (See photo at top of this post.)
Coordinating colors:
You can click each color to see coordinating products, to make more, or alternate projects.
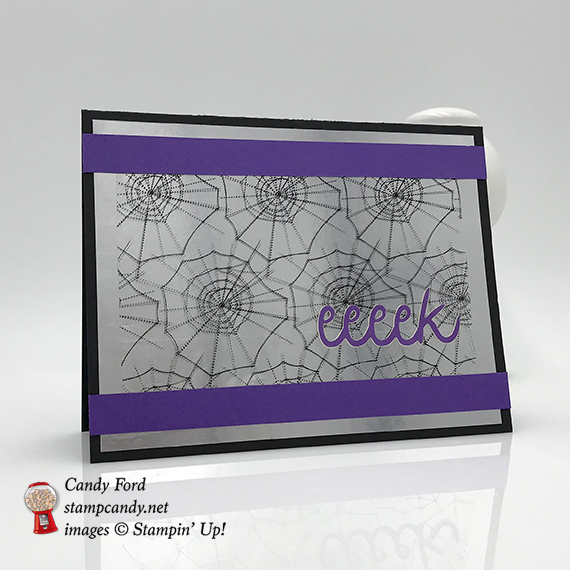
It’s time for the Paper Pumpkin Pop-Up Blog Hop! Yes, this is my second Paper Pumpkin themed blog hop using the September Frights & Delights Paper Pumpkin kit. The alternate project I made for today’s hop coordinates with the projects I made for the other hop, which you can see here.The kit makes 24 adorable Halloween treat bags, but I used some of the pieces to make this shiny card. I like the way the spider webs on the clear bag reflect in the Silver Foil layer.
Here’s what I made:
Here’s what I did:
Cut and scored with my Stampin’ Trimmer:
Basic Black card stock (CS) cut to 5-1/2″ x 8-1/2″, then scored in half at 4-1/4″
Silver Foil Sheet cut to 5-1/4″ x 4″
Gorgeous Grape CS cut to 5-1/2″ x 1/2″ (2 pieces)
a treat bag cut open and cut to 4-5/8″ x 3″
Whisper White CS cut to 5-1/2″ x 1/2″ for the inside of the card
Assembled the card:
burnished the fold in the card base with a Bone Folder
Silver Foil layer adhered onto the front of the card base using Tear & Tape
bag piece laid on the Silver Foil layer
Gorgeous Grape CS strips adhered onto the card front, overlapping the top and bottom edges of the bag, using Tear & Tape (This is what holds the bag onto the card.)
Gorgeous Grape self stick word applied onto the Bag.
Whisper White CS glued onto the inside of the card base.
Here’s the Paper Pumpkin Pop-Up Blog Hop:
Click on the pumpkin below to hop to the next stop, Debbie Green.
Here are today’s colors:
You can click on each one to see all the products that come in that color!
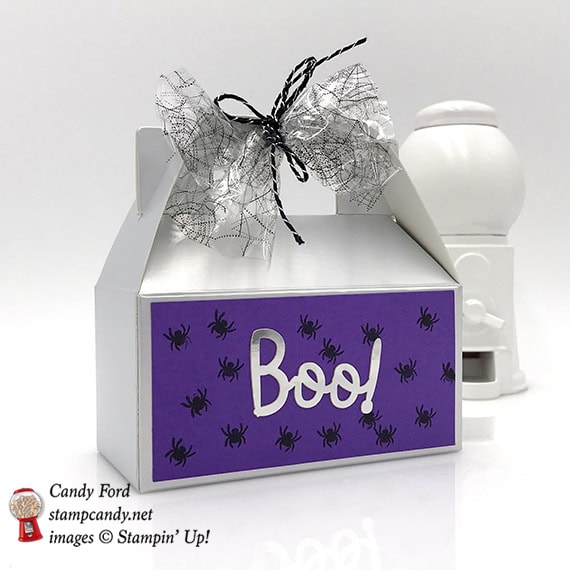
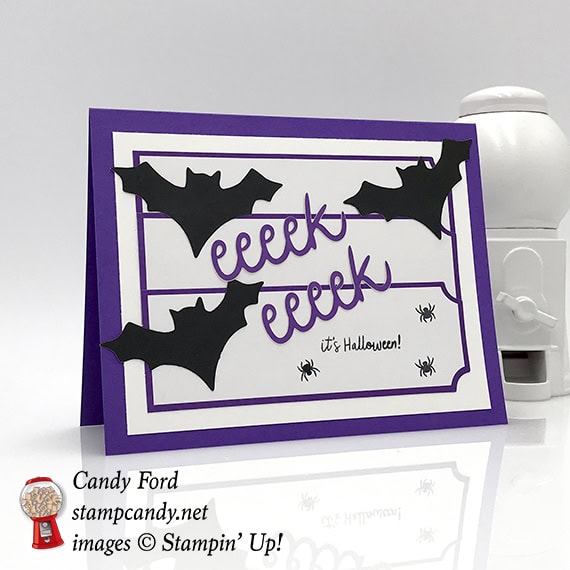
It’s time for the A Paper Pumpkin Thing Blog Hop for September! This month’s kit is called Frights & Delight and it’s adorable! Using the directions in the kit, you can make 24 sweet little treat bags. We are featuring some alternative projects you can make using the pieces in the kit.
Here’s what I made:
Here’s what I did:
Cut and scored with my Stampin’ Trimmer:
Gorgeous Grape card stock (CS) cut to 5-1/2″ x 8-1/2″, then scored in half at 4-1/4″
Whisper White CS layer cut to 5″ x 3-3/4″
Whisper White CS cut to 5-1/4″ x 4″ for the inside of the card
Gorgeous Grape CS cut to 3-3/4″ x 1-2/4″
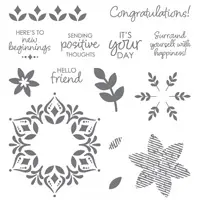
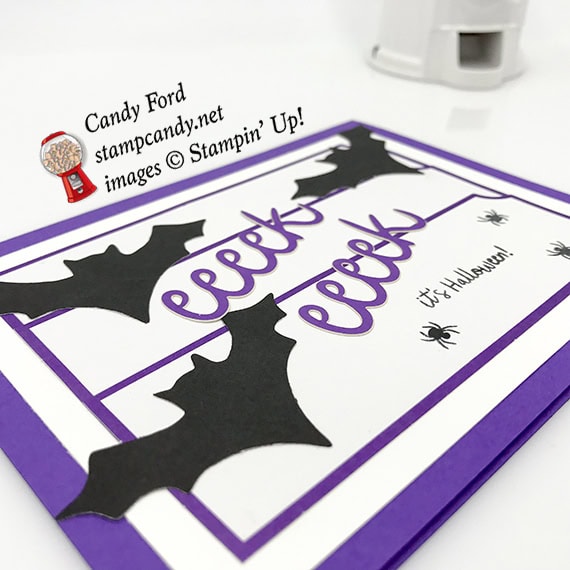
Stamped with the Frights & Delights stamp set:
tiny spiders in Memento black ink onto the 3-3/4″ x 1-2/4″ Gorgeous Grape CS
sentiment and spiders in Memento black ink onto one of the tags
Cut using Paper Snips:
bottom off one of the bags
Assembled the card:
burnished the fold in the card base with a Bone Folder
5″ x 3-3/4″ Whisper White CS layer glued onto the front of the card base
three tags glued onto the Whisper White CS layer, including the stamped one
3 black bats glued onto the tags
2 Gorgeous Grape word stickers applied onto the tags
5-1/4″ x 4″ Whisper White CS glued onto the inside of the card base
Assembled the card:
burnished the score lines in the box, and assembled it
3-3/4″ x 1-2/4″ stamped Gorgeous Grape CS glued onto the front of the box
silver word sticker applied onto the Gorgeous Grape CS
put treats inside the box
treat bag with bottom cut away gathered (with top and bottom at the sides) gathered and tied in the middle using the twine from the kit, and tied onto the top of the box
Here’s the Frights & Delights APPT Blog Hop:
Here are today’s colors:
You can click on each one to see all the products that come in that color!
Here’s the Dashing Along September special from Stampin’ Up:
Only 3 days left!!!
Receive one pack of Dashing Along Designer Series Paper with any $250 order in September!
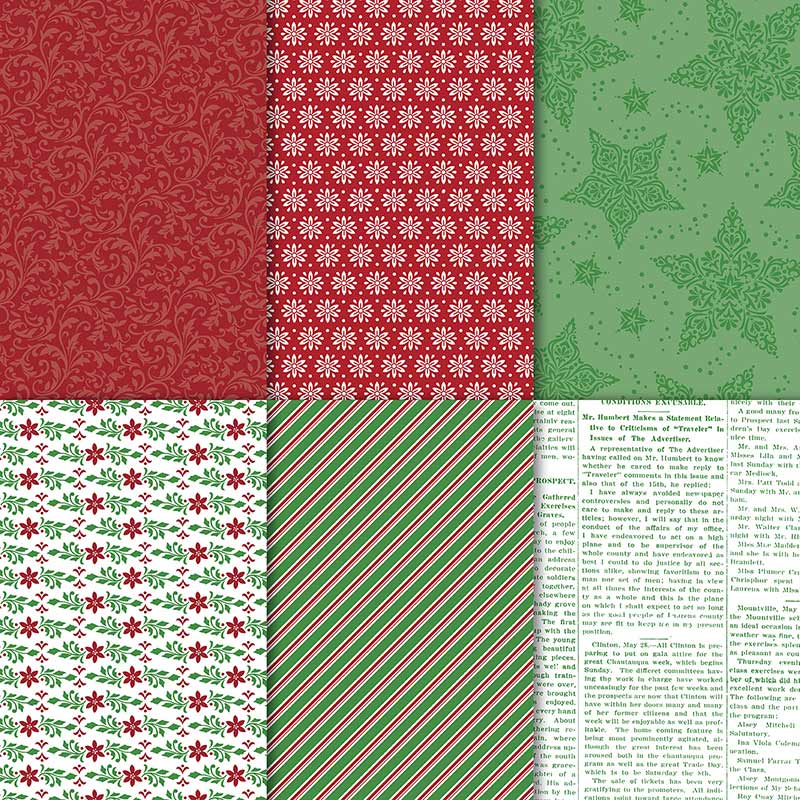
Perfect for layering, this beautiful, traditional Christmas paper includes a mix of old favorites and new patterns to create a festive, eclectic feel.
Item number 149903
12 sheets: 3 double-sided sheets (6 total designs); 4 sheets of each design – perfect for making lots of Christmas cards!
12″ x 12″
Promotion period: September 1–30
Dashing Along Designer Series Paper is exclusive to this promotion and will not be available after September 30.
In order to qualify, the event merchandise total must reach $250 (before shipping and handling).
One package of Designer Series Paper may be redeemed per qualifying order, with no limit on how many packages of Designer Series Paper can be earned.
Demonstrator, Customer, Workshop, and online orders qualify.
Dashing Along Designer Series Paper may not be redeemed using Stampin’ Rewards. You will receive this FREE gift with a qualifying order in addition to any Stampin’ Rewards you may earn.
Dashing Along Designer Series Paper may not be exchanged for other paper.