Feb 12, 2020 | Cards, Gallery, Sale-A-Bration |
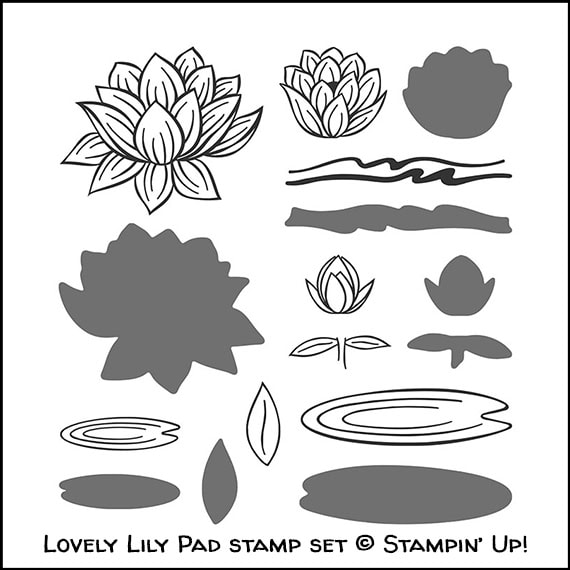
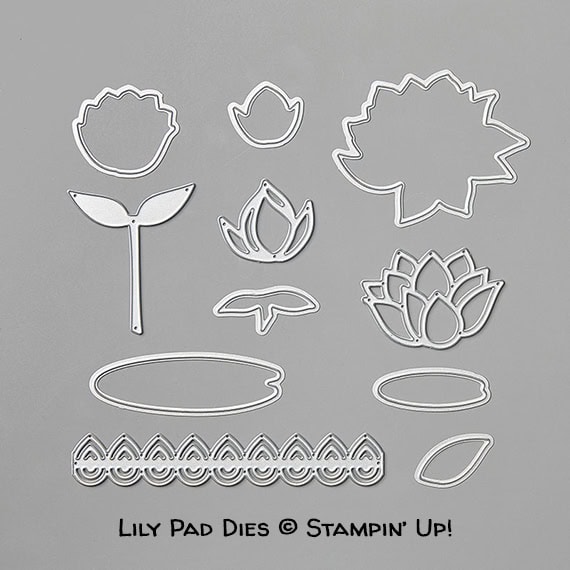
Today I’m sharing the cards I made for our January Candy Hearts team swap. The theme was Sale-A-Bration, and I used the Lovely Lily Pad stamp set, Lily Pad Dies, and Lily Impressions Designer Series Paper.
Here are the Sale-A-Bration products I used:
Just look at all the colors in this gorgeous paper!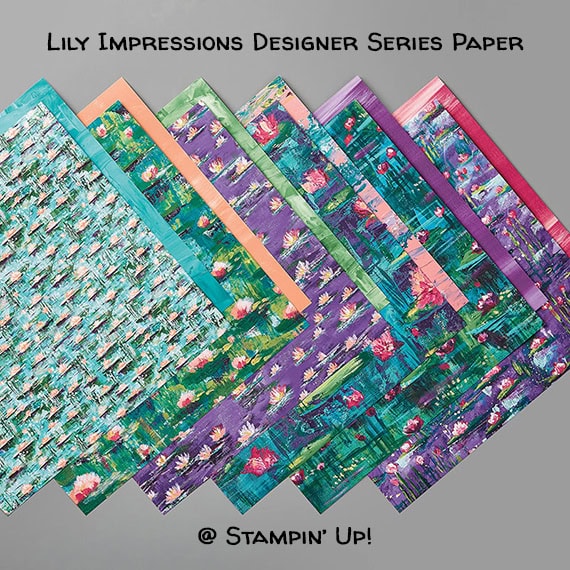
Lovely Lily Pad Lovely Lily Pad
Here’s what I made:
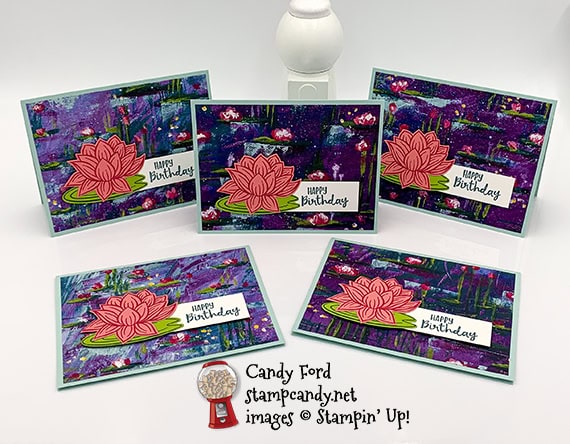

These two cards look so different, and it’s only because the Designer Series Paper layers are from different parts of the same piece of paper: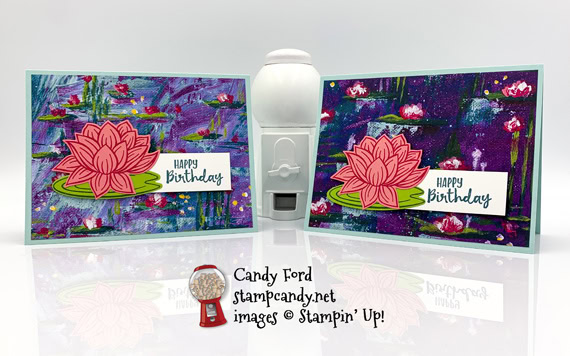
S
Here’s what I did:
Cut and scored with my paper trimmer:
- Pool Party card stock (CS) cut to 5-1/2″ x 8-1/2″, then scored in half at 4-1/4″
- Lily Impressions Designer Series Paper (DSP) layer cut to 5-1/4″ x 4″
- Whisper White Thick CS cut to 3-1/2″ x 1″ for the sentiment
- Whisper White CS cut to 5-1/4″ x 4″ for the inside of the card base
Stamped with the Lovely Lily Pad stamp set:
- lily in Melon Mambo ink onto a scrap of Flirty Flamingo CS
- lily pad in Pretty Peacock ink onto a scrap of Granny Apple Green CS
- sentiment in Pretty Peacock ink onto the small piece of Whisper White Thick CS, on the right
Cut using the Lily Pad Dies:
Assembled the card:
- burnished the fold in the card base with a Bone Folder
- DSP layer glued onto the front of the card base
- lily glued onto the lily pad, then both glued onto the left end of the sentiment piece
- lily, lily pad, and sentiment adhered onto the DSP layer using Stampin Dimensionals
- Whisper White CS glued onto the inside of the card base
S
Here are today’s main colors:
You can click on each one to see all the products that come in that color!
S
Here’s what I used:
Click on these images for more details and to purchase.
Click “Supply List” for a clickable and printable list of the products!
S
Here are some helpful links:
Thanks for stopping by today, and Sweet Stamping!
Feb 7, 2020 | Cards, Gallery, Sale-A-Bration |
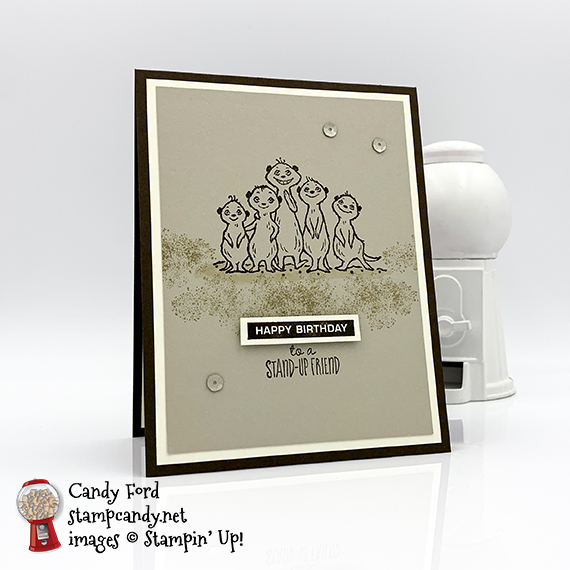
Today I’m sharing a fast and easy happy birthday card I made using The Gang’s All Meer and Label Me Bold stamp sets. The sentiment is cut using scissors, and the sequins come with adhesive already on the backs. How easy is that?!
S meer meer meer
Here’s what I made:
S
Here’s what I did:
Cut and scored with my paper trimmer:
- Early Espresso card stock (CS) cut to 4-1/4″ x 11″, then scored in half at 5-1/2″
- Very Vanilla CS layer cut to 4″ x 5-1/4″
- Sahara Sand CS layer cut to 3-3/4″ x 5″x
- Very Vanilla CS cut to 4″ x 5-1/4″ for the inside of the card base
Stamped with the The Gang’s All Meer stamp set:
- meerkat group image and sentiment in Early Espresso ink onto the Sahara Sand CS layer
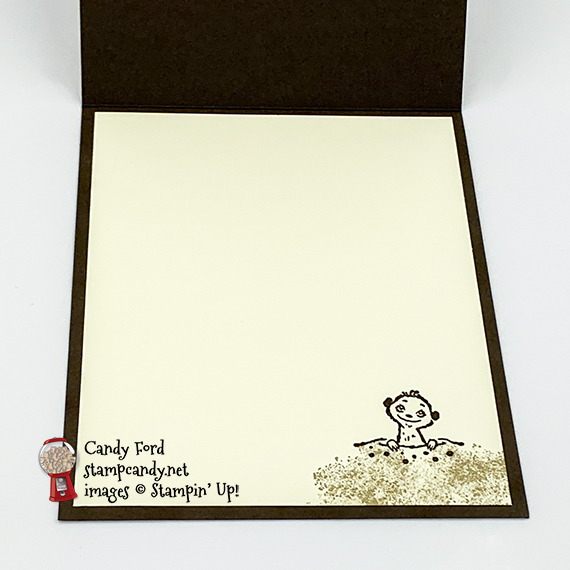
- single meerkat image in Early Espresso ink onto the Very Vanilla CS for the inside of the card base
Stamped with the Label Me Bold stamp set:
- bold sentiment in Early Espresso ink onto a scrap of Very Vanilla Thick CS
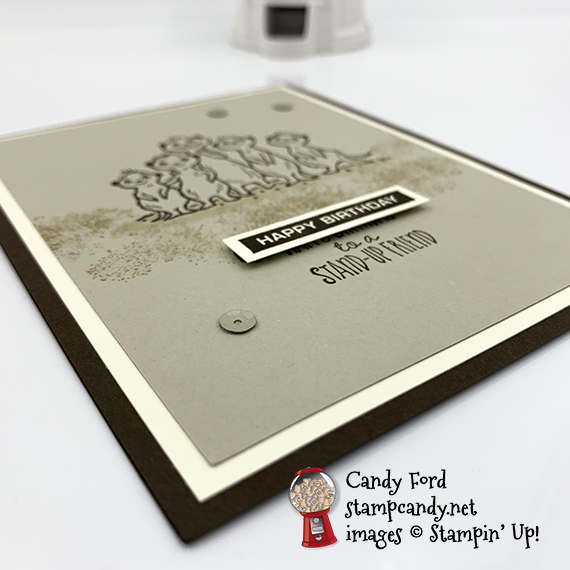
- “dirt” in Sahara Sand ink around the bottom of both meerkat images
Cut using Paper Snips:
Colored using a Stampin’ Blends Marker:
- shadow around the bottom of the meerkat group in Light Crumb Cake
- Note: Once I decided to stamp the “dirt” I realized this step isn’t really necessary.
Assembled the card:
- burnished the fold in the card base with a Bone Folder
- Very Vanilla CS layer glued onto the front of the card base
- Sahara Sand CS layer glued onto the Very Vanilla CS layer
- bold sentiment adhered over the top part of the other sentiment using Black Mini Stampin’ Dimensionals
- 3 Sahara Sand sequins applied onto the Sahara Sand CS layer
- Very Vanilla CS glued onto the inside of the card base
S
Here are today’s colors:
You can click on each one to see all the products that come in that color!
S
Here’s what I used:
Click on these images for more details and to purchase.
Click “Supply List” for a clickable and printable list of the products!
S
Here are some helpful links:
Thanks for stopping by today, and Sweet Stamping!
Feb 6, 2020 | Cards, Gallery, Sale-A-Bration |
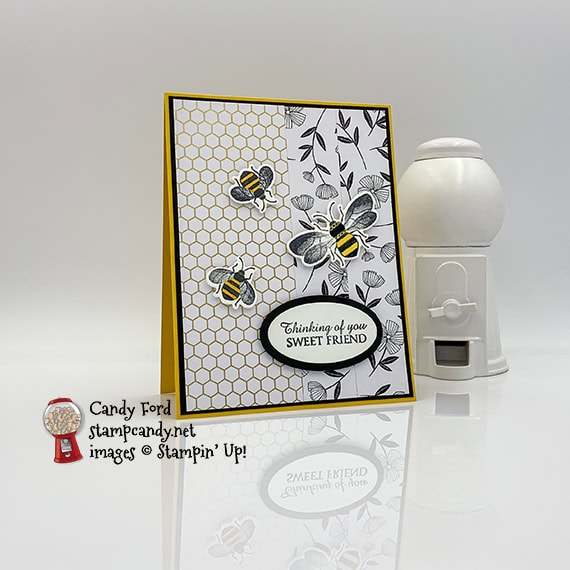
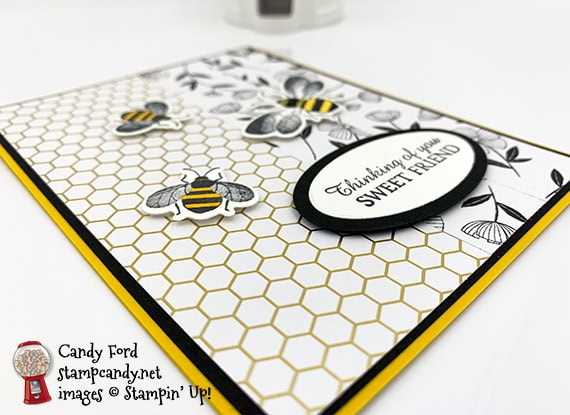
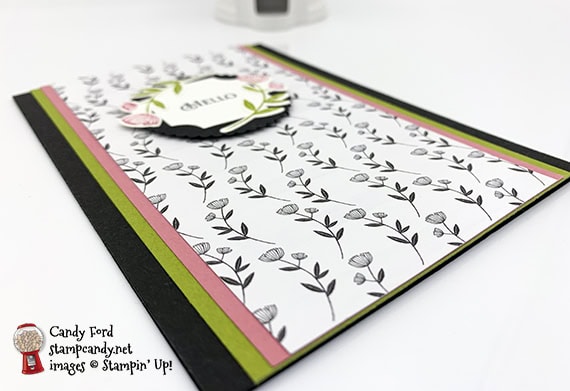
Today’s card is one I made for my January Stamp Club. I used the Honey Bee Bundle (Honey Bee stamp set and Detailed Bee Dies,) Layered Ovals Dies, and Golden Honey Specialty Designer Series (DSP) Paper to create this thinking of you sweet friend card.
The front most layer is made of two pieces of the DSP, one with gold foil honeycomb and one with black flowers. After I had cut all the Make & Take kits for the club, I only had 1″ wide strips of the floral DSP left. That’s why my card has two 1″ x 5-1/2″ pieces, instead of one 2″ x 5-1/2″ pieces, on the right side. You may not even have noticed, but in case you did, I wanted to explain the difference between the photo and the instructions.
bee bee bee
Here’s what I made:
S
Here’s what I did:
Cut and scored with my paper trimmer:
- Daffodil Delight card stock (CS) cut to 4-1/4″ x 11″, then scored in half at 5-1/2″
- Basic Black CS layer cut to 4-1/8″ x 5-3/8″
- Golden Honey Specialty Designer Series Paper (DSP) layer cut to 2″ x 5-1/4″ (2 pieces of 2 different designs)
- Whisper White CS cut to 4″ x 5-1/4
Stamped with the Honey Bee stamp set:
- sentiment in Tuxedo Black Memento ink onto a scrap of Whisper White CS
- one large and two small bees in Tuxedo Black Memento ink onto a scrap of Whisper White Thick CS
Cut using the Detailed Bee Dies:
Cut using the Layering Ovals Dies:
- sentiment
- scrap of Basic Black CS
Colored using Stampin’ Blends Markers:
- bee stripes in Daffodil Delight
- Note: I used the light marker on the large bee and the dark marker on the small bees. You can decide which you like better. I think the light matches the cardstock better, and the dark looks more like a real bee.
Assembled the card:
- burnished the fold in the card base with a Bone Folder
- Basic Black CS layer glued onto the front of the card base
- 2 DSP layers glued, side by side, onto the Basic Black CS layer
- sentiment glued onto the Basic Black CS oval
- Basic Black CS oval adhered onto the DSP layers using Black Stampin’ Dimensionals
- bees adhered onto the DSP layers using Stampin’ Dimensionals and Mini Stampin’ Dimensionals
- Whisper White CS glued onto the inside of the card base
S
Here are today’s colors:
You can click on each one to see all the products that come in that color!
S
Here’s what I used:
Click on these images for more details and to purchase.
Click “Supply List” for a clickable and printable list of the products!
S
Here are some helpful links:
Thanks for stopping by today, and Sweet Stamping!
Feb 5, 2020 | Blog Hop, Boxes, Cards, Gallery, Gifts, Sale-A-Bration |

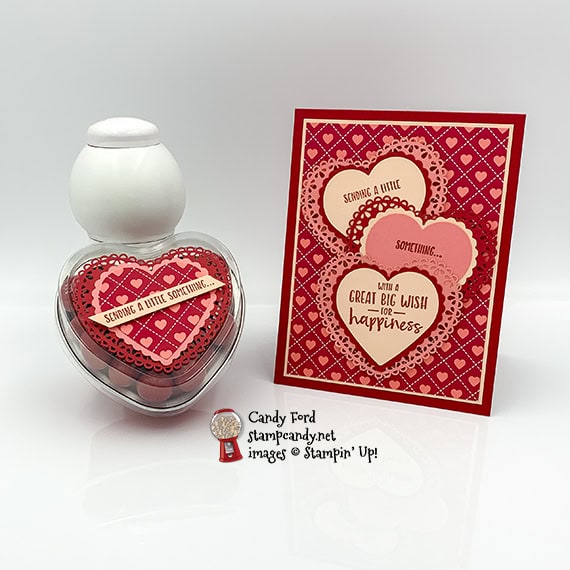
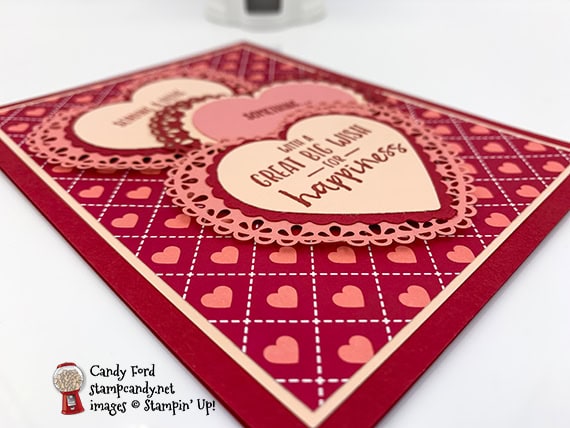
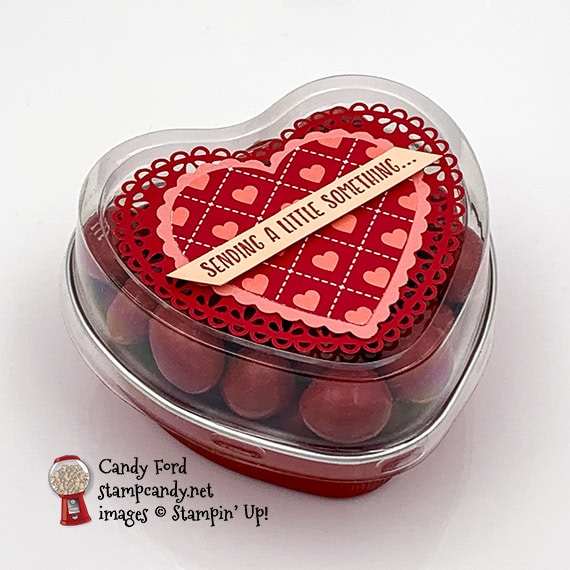
Welcome to the February 2020 ICS Blog Hop! This month’s theme is “Thinking of You” and we’re featuring projects for get well, sympathy, and other times you want to let someone know “I’m thinking of you.” I used the Sending You Thoughts Sale-A-Bration stamp set to create today’s project. It’s free with a $50 order!
Sending You Thoughts Sending You Thoughts
Here’s what I made:
S
Here’s what I did:
Cut and scored with my paper trimmer:
- Real Red card stock (CS) cut to 4-1/4″ x 11″, then scored in half at 5-1/2″
- Petal Pink CS layer cut to 3-7/8″ x 5-1/8″
- From My Heart Specialty Designer Series Paper (DSP) layer cut to 3-3/4″ x 5″
- Petal Pink CS cut to 4″ x 5-1/4″ for the inside of the card base
- Petal Pink CS cut to 2-1/2″ x 5/16″ for the tin sentiment
Stamped with the Sending You Thoughts stamp set:
- tin sentiment in Real Red ink onto the Petal Pink CS strip
- that same sentiment stamped in two parts, one onto a scrap of Petal Pink CS and the other onto a scrap of Flirty Flamingo CS (both in Real Red ink)
- larger sentiment in Real Red ink onto a scrap of Petal Pink CSx
Cut using the Heart Punch Pack:
- plain hearts: the 3 card sentiments and a scrap of DSP
- scalloped hearts: 1 Flirty Flamingo CS, 1 Petal Pink CS, and 2 Real Red CS
Cut using Paper Snips:
- angled the ends of the tin sentiment
Assembled the card:
- burnished the fold in the card base with a Bone Folder
- Petal Pink CS layer glued onto the front of the card base
- DSP layer glued onto the Petal Pink CS layer
- 2 Petal Pink stamped hearts glued onto 2 Real Red scalloped hearts
- Flirty Flamingo stamped heart glued onto the Petal Pink scalloped heart
- 2 Real Red scalloped hearts glued onto Flirty Flamingo Heart Doilies
- Petal Pink scalloped heart glued onto a Real Red Heart Doily
- hearts glued together in a cascading design
- hearts adhered onto the DSP layer using Stampin’ Dimensionals
- Petal Pink CS glued onto the inside of the card base
Assembled the tin:
- DSP heart glued onto the Flirty Flamingo scalloped heart
- Flirty Flamingo scalloped heart glued onto a Real Red Heart Doily
- sentiment adhered onto the hearts using Mini Stampin’ Dimensionals
- Heart Doily adhered onto the lid of the tin using Stampin’ Dimensionals
S
Here’s the ICS Blog Hop for January 2020:
Click the Next button to check out Melissa Tennison’s post at Melissa’s Kre8tions:

S
Here are today’s colors:
You can click on each one to see all the products that come in that color!
S
Here’s what I used:
Click on these images for more details and to purchase.
<– Click “Supply List” for a clickable and printable list!
S
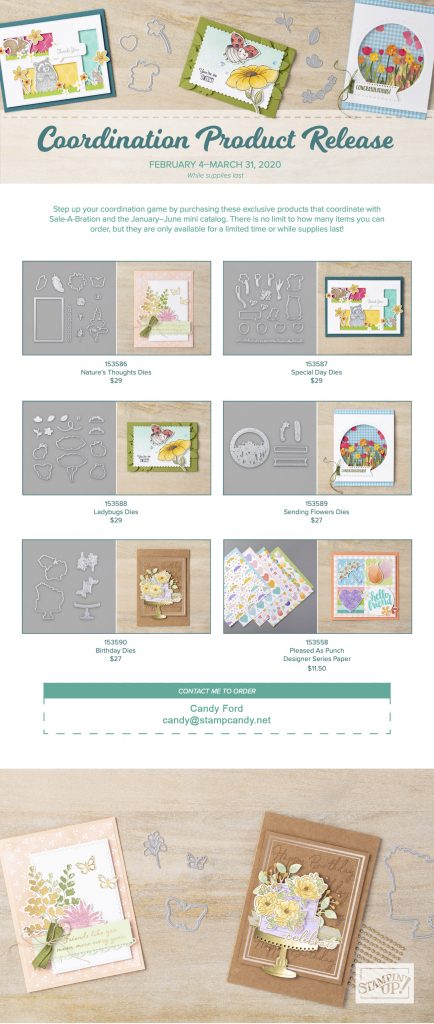
Coordination Product Release is Live!
Only available through March 31, 2020, or while supplies last!
Click “Supply List” for a clickable and printable list of the products!
S
Here are some helpful links:
S
Thanks for stopping by today, and Sweet Stamping!
Feb 3, 2020 | Cards, Gallery, Sale-A-Bration |
I used the Honey Bee stamp set and Detailed Bee Dies (available together in the Honey Bee Bundle to sale 10%) along with the Golden Honey Specialty Designer Series Paper (available free with a $50 purchase during Sale-a-bration) to create today’s card. You may think it looks a little skinnier than normal. That’s because it is. I intended to have wider bands of Basic Black on each side. I accidentally cut the card base 4″ wide instead of 4-1/4″. Oops! But I already had it mostly finished so I decided to go with it. The instructions below use the 4-1/4″ wide card base.
S honey honey honey
Here’s what I made:
S 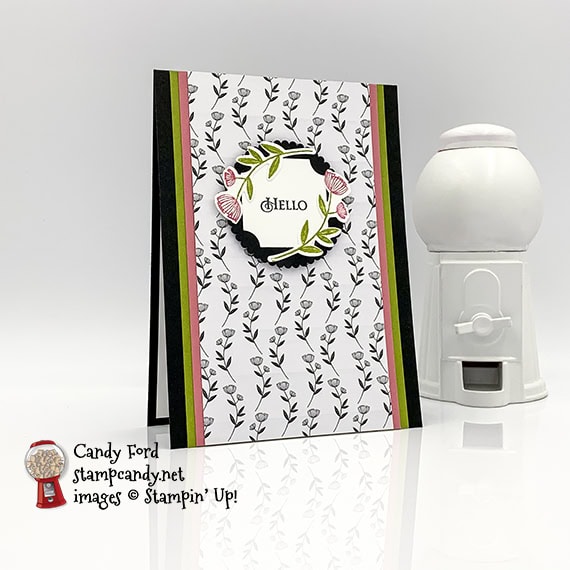
 S
S
Here’s what I did:
Cut and scored with my paper trimmer:
- Basic Black card stock (CS) cut to 4-1/4″ x 11″, then scored in half at 5-1/2″
- Old Olive CS layer cut to 3-1/2″ x 5-1/2″
- Rococo Rose CS layer cut to 3-1/4″ x 5-1/2″
- Golden Honey Specialty Designer Series Paper (DSP) layer cut to 3″ x 5-1/2″
- Whisper White CS cut to 4″ x 5-1/4″ for the inside of the card
Stamped with the Honey Bee stamp set:
- sentiment in Tuxedo Black Memento ink onto a scrap of Whisper White CS
- two flowers in Old Olive and Rococo Rose onto a scrap of Whisper White CS
- Note: I colored the flower stamp using Stampin’ Write Markers
Cut using the Detailed Bee Dies:
Cut using the Darling Label Punch:
Cut using the Layering Circle Dies:
- scrap of Basic Black CS using a scalloped die
Assembled the card:
- burnished the fold in the card base with a Bone Folder
- Old Olive CS layer glued onto the front of the card base
- Rococo Rose CS laeyr glued onto the Old Olive CS layer
- DSP layer glued onto the Rococo Rose CS layer
- sentiment glued onto the Basic Black CS scalloped circle
- flowers glued around the sentiment
- Basic Black CS scalloped circle adhered onto the DSP layer using Black Stampin’ Dimensionals
- Whisper White CS glued onto the inside of the card base
S
Here are today’s colors:
You can click on each one to see all the products that come in that color!
S
Here’s what I used:
Click on these images for more details and to purchase.
Click “Supply List” for a clickable and printable list of the products!
S
New Coordination Products Available Tomorrow!!!
Click the image below to see the full size graphic.
S
Here are some helpful links:
Thanks for stopping by today, and Sweet Stamping!
Jan 1, 2020 | Blog Hop, Cards, Sale-A-Bration |
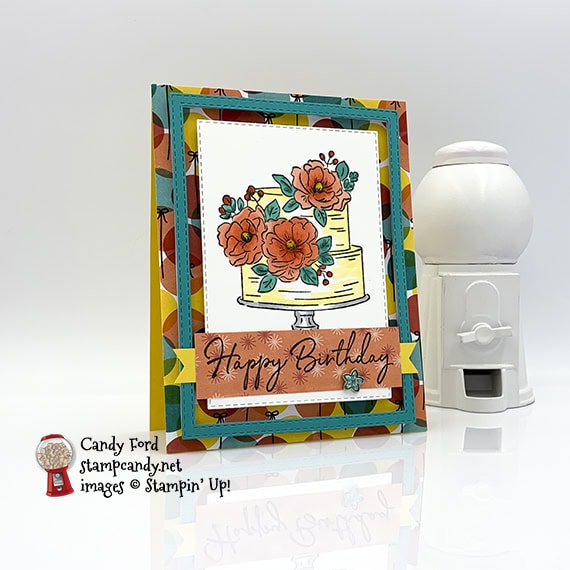
Happy New Year! Welcome to the first ICS Blog Hop of 2020! This month’s theme is “Let the Sale-A-Bration Begin” and we’re featuring products from the new Sale-A-Bration brochure that goes live in just 2 days. I used the Happy Birthday to You stamp set to create today’s project.
S
Here’s what I made:
 S
S
Here’s what I did:
Cut and scored with my paper trimmer:
- Daffodil Delight card stock (CS) cut to 4-1/4″ x 11″, then scored in half at 5-1/2″
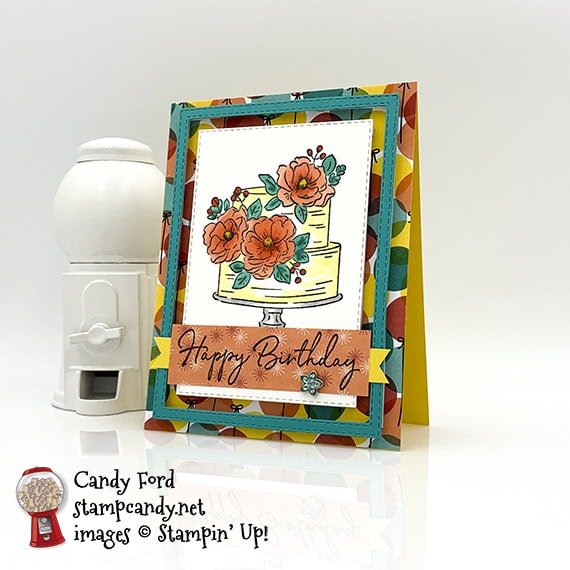
- Birthday Bonanza Designer Series Paper (DSP) layer cut to 4-1/4″ x 5-1/2″
- DSP sentiment layer cut around the stamped sentiment
- Daffodil Delight CS cut to 4-1/2″ x 1/2″
Stamped with the Happy Birthday to You stamp set:
- cake in black Memento ink onto a scrap of Whisper White Thick CS
- sentiment in black Memento ink onto a scrap of DSP
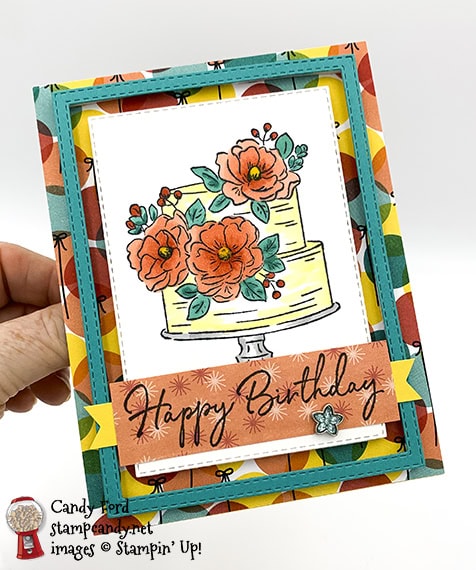
Cut using the Stitched Rectangle Dies:
- cake layer (used the 3rd largest rectangle die)
- border from a scrap of Bermuda Bay CS (used the largest and the 2nd largest rectangle dies)
Cut using the Banner Triple Punch:
- both ends of the Daffodil Delight CS strip
Colored using Stampin’ Blends Markers:
- cake in Light Daffodil Delight, leaving the center white
- flowers in Light and Dark Calypso Coral, and Dark Daffodil Delight
- leaves in Light and Dark Bermuda Bay
- cake stand in Light Smoky Slate, leaving the center white
Assembled the card:
- burnished the fold in the card base with a Bone Folder
- DSP layer glued onto the front of the card base
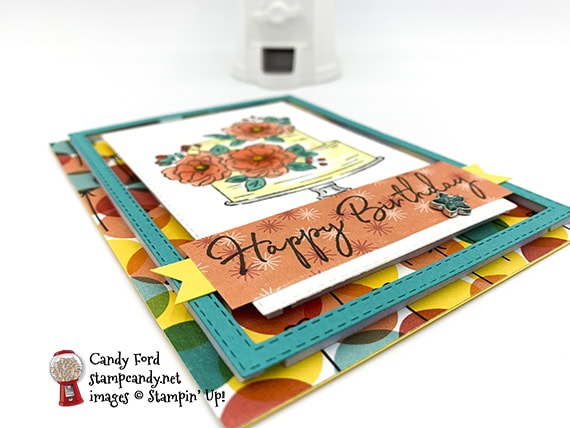
- Bermuda Bay CS border and cake layer adhered onto the DSP layer using Foam Adhesive Strips
- Daffodil Delights CS strip glued onto the back of the sentiment layer
- sentiment layer glued onto the cake layer
- Flower Faceted Gem applied onto the sentiment layer
- optional: glue a 4″ x 5-1/4″ piece of Whisper White CS onto the inside of the card. This isn’t needed because the Daffodil Delight CS is light enough to write on.
 SS
SS
Here’s the ICS Blog Hop for January 2020:
Click the button below to go to the next stop on the hop, Terri Takashige of Territerbear’s Stamp & Scrap Spot:
S
Here are today’s main colors:
You can click on each one to see all the products that come in that color!
S
Here’s what I used:
Click on these images for more details and to purchase.
<– Click here for a clickable and printable list!
S
Here are some helpful links:
S
Thanks for stopping by today, and Sweet Stamping!

