Oct 5, 2017 | Cards, Christmas, Gallery, Holiday, Swaps |
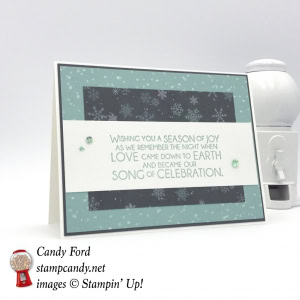
This is the third of four cards I made for the Rising Star card swap, using the Night in Bethlehem stamp set. You can see more from the swap here, here and here. I used a sentiment from the stamp set, but no images, just to show how easy it is to make great cards without fancy images. The sentiment on this card actually serves as the image.
Here’s what I made:

Here’s what I did:
Cut and scored with my Stampin’ Trimmer:
- Whisper White Thick card stock (CS) cut to 5-1/2″ x 8-1/2″, then scored in half at 4-1/4″
- Basic Gray CS cut to 5-3/8″ x 4-1/8″
- Christmas Around the World Designer Series Paper (DSP) cut to 5-1/4″ x 4″ (blue with white dots)
- DSP cut to 3-3/4″ x 2-1/2″ (gray with snowflakes)
- Whisper White CS cut to 5-1/4″ x 2-1/2″
Stamped with the Night in Bethlehem stamp set:
- sentiment in Pool Party ink onto the strip of Whisper White CS
Assembled the card:
- Basic Gray CS layer glued onto the front of the card base
- blue DSP layer glued onto the Basic Gray CS layer
- gray DSP layer glued onto the blue DSP layer
- Whisper White strip with sentiment glued over the card front
- three Pool Party sequins glued onto the Whisper White strip
Here are today’s colors:
You can click on each one to see all the products that come in that color!
Here’s what I used:
Click on the images for more details and to purchase.
Here are some key points to remember:
- Gumball Rewards for all orders over $50
Find out more HERE. - Hostess Code for the month of October (HGB2HGXK)
Find out more about HOW, WHEN and WHY to use that HERE. - October’s FREE gift
Mini Pizza Boxes
Find out more HERE. - New Merry Patterns Hostess Stamp Set – added to your Host Rewards
There’s a brand new stamp set that isn’t in any catalog. You can’t buy it, but you can get if for free with a qualifying order! You can host a party, or place your own order, or join under me and get a 20% discount on your demonstrator order. Find out more HERE.
Thanks for stopping by today, and Sweet Stamping!

Oct 3, 2017 | Cards, Christmas, Gallery, Holiday, Swaps |
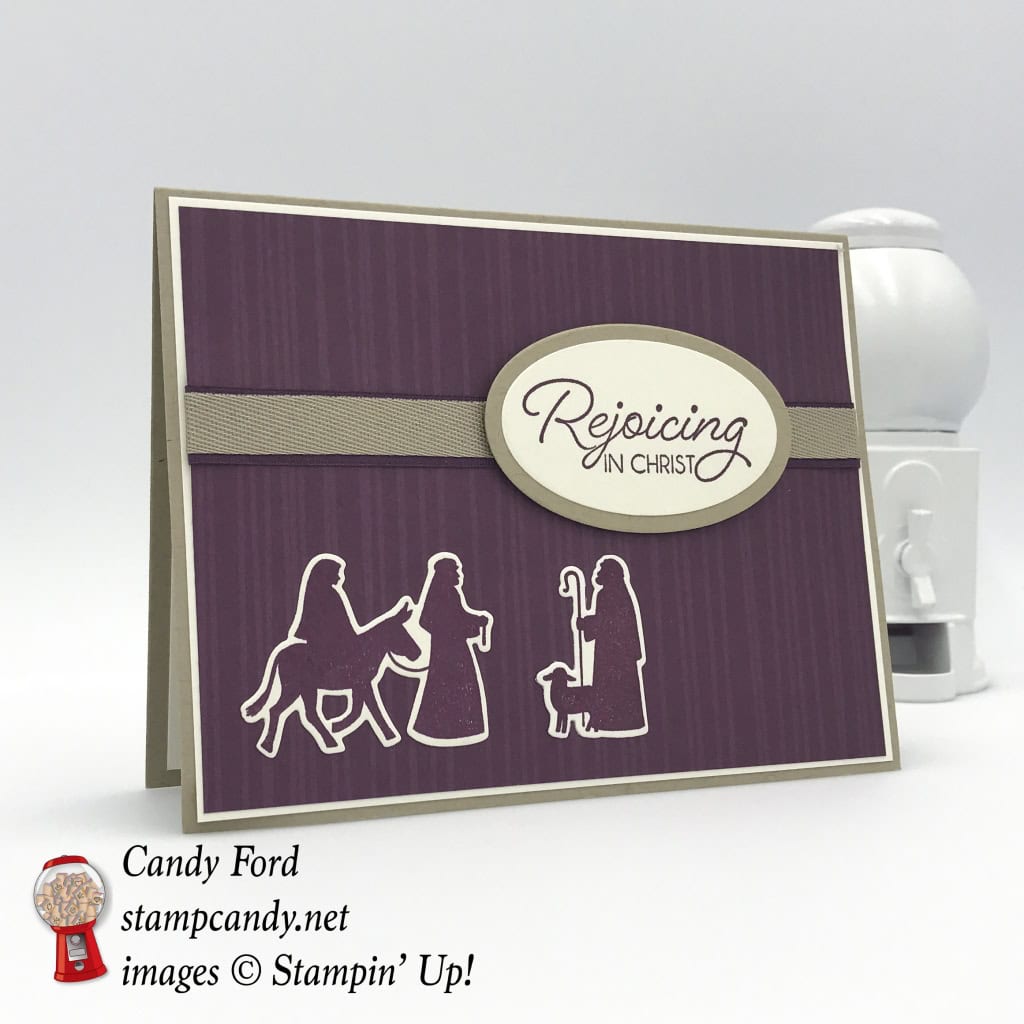
Today’s card is the second of four that I made for the Rising Stars card swap, using the Night in Bethlehem Bundle. You can see more here and here. For this card I used the rich Fresh Fig and Very Vanilla. The Bethlehem Thinlits Dies make it so easy to cut out the images. And the sentiment features the Layering Ovals Framelits Dies.
Here’s what I made:
Here’s what I did:
Cut and scored with my Stampin’ Trimmer:
- Crumb Cake card stock (CS) cut to 5-1/2″ x 8-1/2″, then scored in half at 4-1/4″
- 2 pieces of Very Vanilla CS cut to 5-1/4″ x 4″ (one layer for the front and one piece for the inside)
- Eastern Palace Designer Series Paper (DSP) cut to 5-1/8″ x 3-7/8″
Stamped with the Night in Bethlehem stamp set:
- sentiment in Fresh Fig ink onto a scrap of Very Vanilla CS
- people in Fresh Fig ink onto a scrap of Very Vanilla CS
Die cut using the Bethlehem Thinlits:
Die cut using the Layering Ovals Framelits:
- sentiment
- larger oval cut from Crumb Cake CS
Assembled the card:
- Very Vanilla CS layer glued onto the front of the card base
- Fresh Fig 1/2″ Finely Woven Ribbon adhered to the DSP layer with Tear & Tape*
- Crumb Cake 3/8″ Classic Weave Ribbon adhered to the Fresh Fig ribbon with Tear & Tape*
- sentiment oval glued to Crumb Cake CS oval
- ovals adhered to the DSP layer, over ribbons, with Stampin’ Dimensionals
- people glued onto the DSP layer
- DSP layer glued onto Very Vanilla layer
- second Very Vanilla CS piece glued to the inside of the card base
*or you could use Fast Fuse
Here are today’s colors:
You can click on each one to see all the products that come in that color!
Here’s what I used:
Click on the images for more details and to purchase.
Here are some key points to remember:
- World Card Making Day Sale October 1-10, 15% off select card making essentials. See details HERE.
- Designer Series Paper Sale October 1-31, Buy 3 Get 1 FREE! See details HERE.
- Gumball Rewards for all orders over $50
Find out more HERE. - Hostess Code for the month of October (HGB2HGXK)
Find out more about HOW, WHEN and WHY to use that HERE. - October’s FREE gift
Mini Pizza Boxes
Find out more HERE. - New Merry Patterns Hostess Stamp Set – added to your Host Rewards
There’s a brand new stamp set that isn’t in any catalog. You can’t buy it, but you can get if for free with a qualifying order! You can host a party, or place your own order, or join under me and get a 20% discount on your demonstrator order. Find out more HERE.
Thanks for stopping by today, and Sweet Stamping!
Oct 1, 2017 | Cards, Christmas, Gallery, Holiday, Swaps |
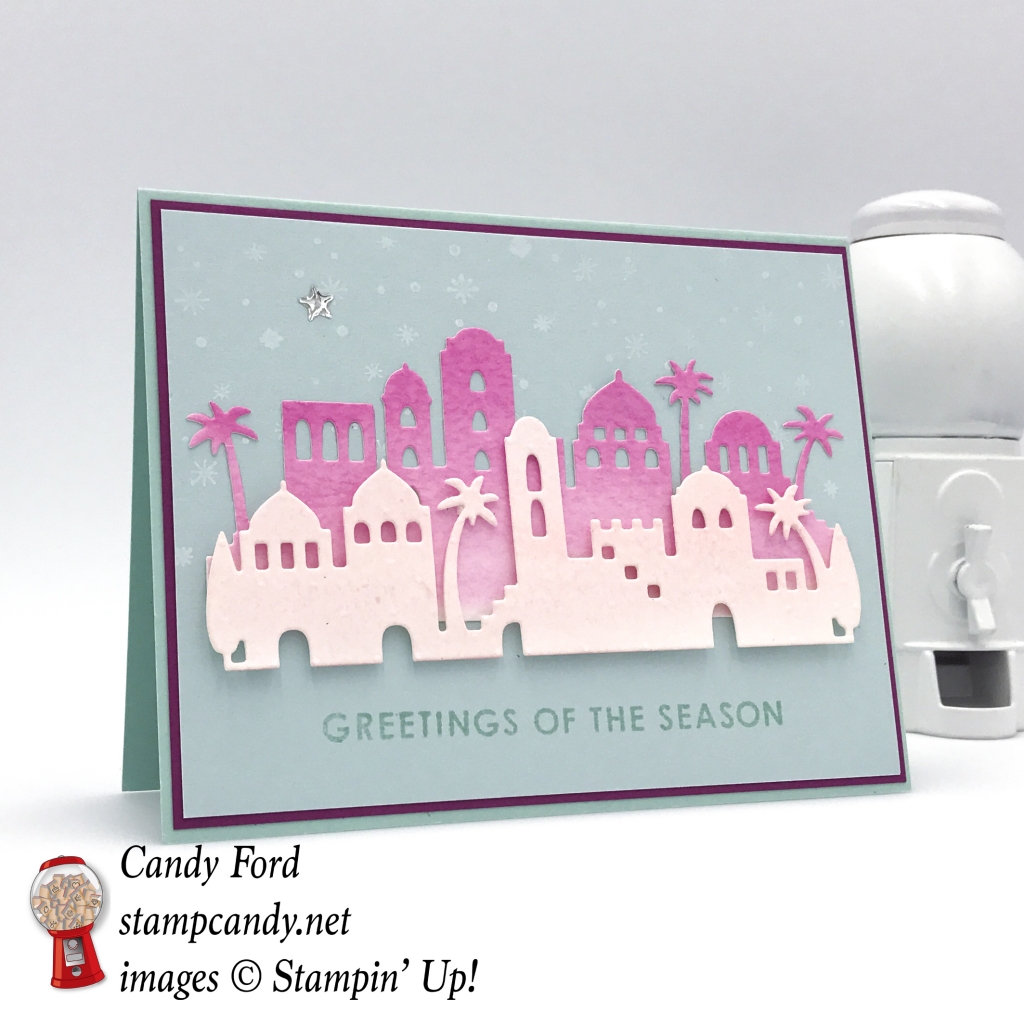
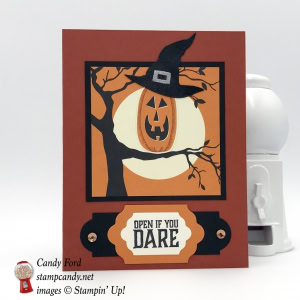
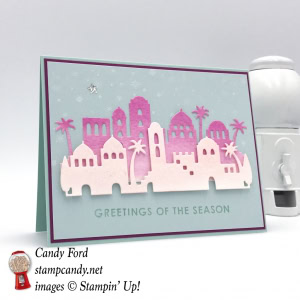
Today I’m featuring the first of four cards I made for the Rising Stars card swap using the Night of Bethlehem bundle (Night of Bethlehem stamp set and Bethlehem Edgelits Dies.) You can see all the swap cards here. I used some unexpected colors on this card: Pink Pirouette, Berry Burst, and Soft Sky. It reminds me of the pastel painted buildings I’ve seen in tropical areas.
Here’s what I made:
Here’s what I did:
Cut and scored with my Stampin’ Trimmer:
- Soft Sky card stock (CS) cut to 5-1/2″ x 8-1/2″, then scored in half at 4-1/4″
- Berry Burst CS cut to 5-3/8″ x 4-1/8″
- Soft Sky CS cut to 5-1/4″ x 4″
- 2 pieces of Watercolor Paper cut to 5″ x 3″
Stamped with the Night of Bethlehem stamp set:
- stars in Whisper White Craft ink onto the upper half of the Soft Sky CS layer, then set the ink with a Heat Tool)
Stamped with the Iconic Christmas stamp set:
- sentiment in Pool Party ink onto the bottom of the Soft Sky CS layer
Watercolored using Aqua Painters:
- one piece of Watercolor Paper with Pink Pirouette ink
- the other piece of Watercolor Paper with Berry Burst ink
Die cut using the Bethlehem Edgelits:
- Pink Pirouette Watercolor Paper with one Edgelits die
- Berry Burst Watercolor Paper with the other Edgelits die
Assembled the card:
- Berry Burst CS layer glued onto the front of the card base
- stamped Soft Sky CS layer glued onto the Berry Burst CS layer
- Berry Burst die cut glued onto the Soft Sky CS layer
- Pink Pirouette die cut adhered over the Berry Burst die cut using Mini Stampin’ dimensionals
- silver star enamel shape applied to the Soft Sky CS layer
Here are today’s colors:
You can click on each one to see all the products that come in that color!
Here’s what I used:
Click on the images for more details and to purchase.
Here are some key points to remember:
- World Card Making Day Sale October 1-10, 15% off select card making essentials. See details HERE.
- Designer Series Paper Sale October 1-31, Buy 3 Get 1 FREE! See details HERE.
- Gumball Rewards for all orders over $50
Find out more HERE. - Hostess Code for the month of October (HGB2HGXK)
Find out more about HOW, WHEN and WHY to use that HERE. - October’s FREE gift – Mini Pizza Boxes. Find out more HERE.
- New Merry Patterns Hostess Stamp Set – added to your Host Rewards
There’s a brand new stamp set that isn’t in any catalog. You can’t buy it, but you can get it for free with a qualifying order! You can host a party, or place your own order, or join under me and get a 20% discount on your demonstrator order. Find out more HERE.
Thanks for stopping by today, and Sweet Stamping!
Sep 28, 2017 | Bags, Cards, Christmas, Gallery, Guest Stamper, Halloween, Holiday, Swaps |
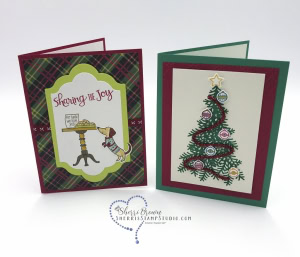
My first year as a Stampin’ Up! Demonstrator, I earned the Rising Star award along with five very talented stampers. We’ve become great friends in the two years since then – we even keep in touch with our own private Facebook group! Five of us had a card swap for the new Holiday Catalog, and today’s post is about those cards. Be sure to click through to everyone’s blog to see just how talented they are!
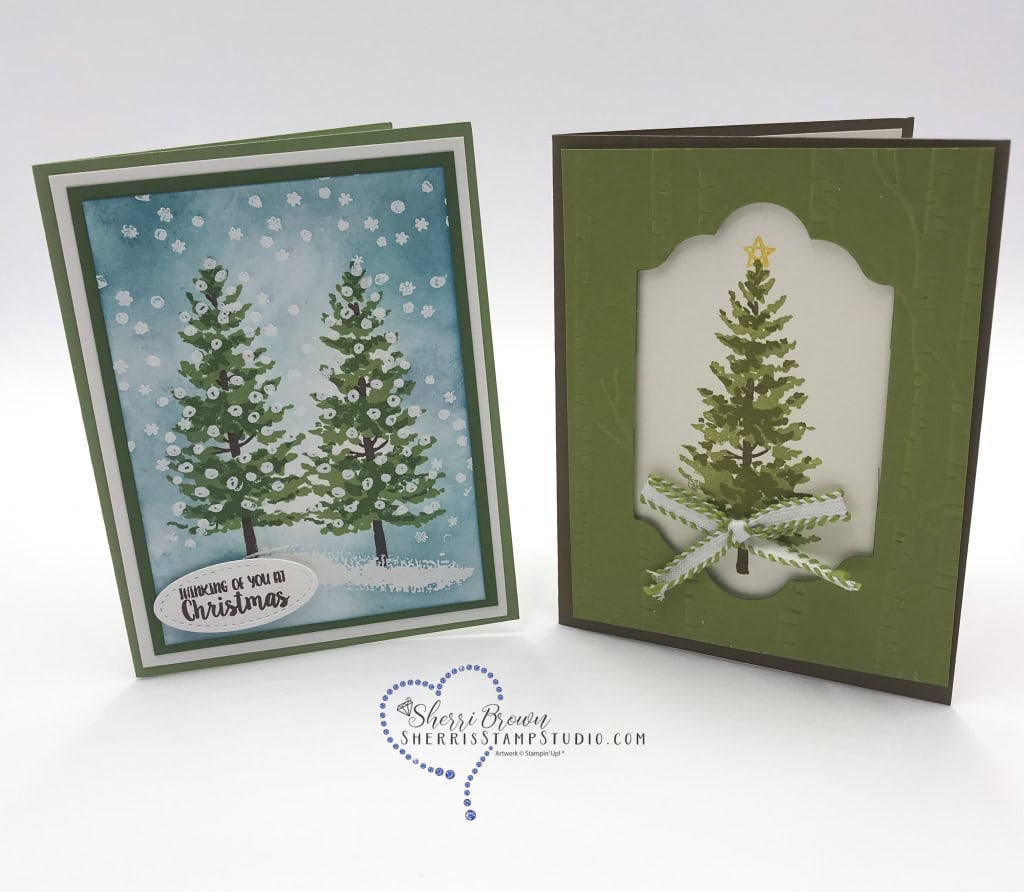
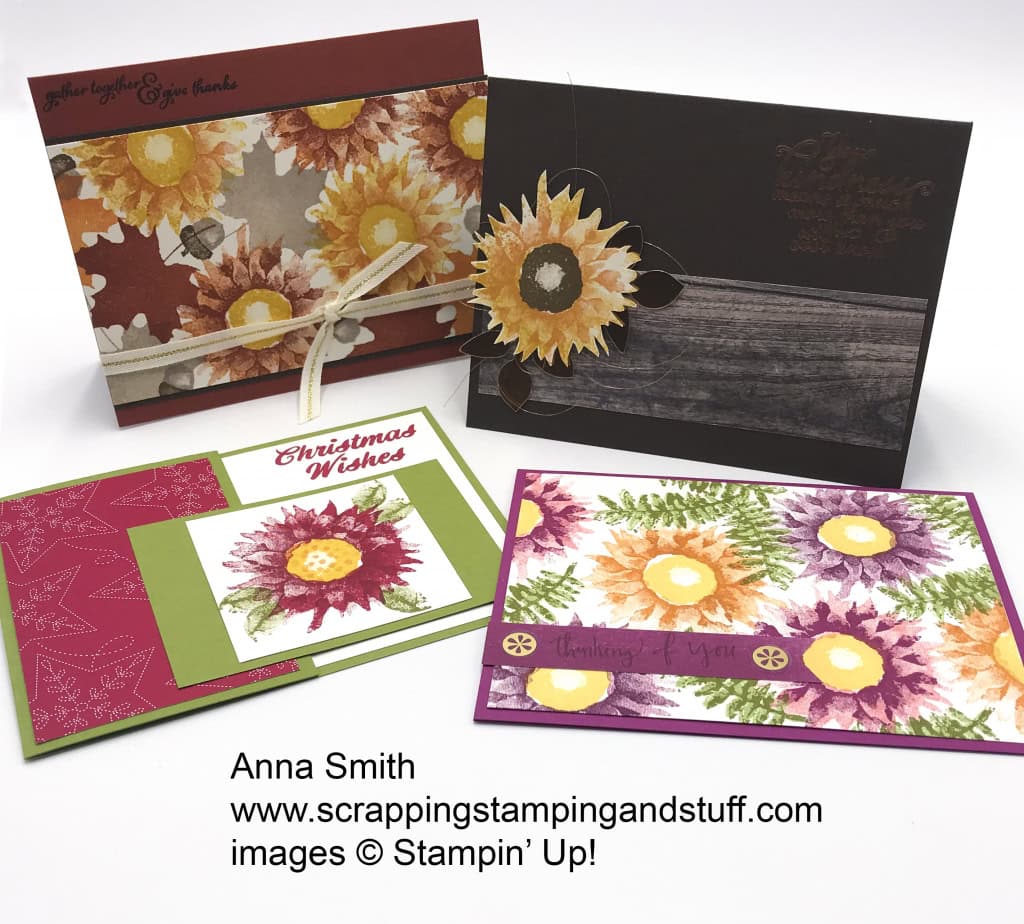
Here are the Rising Star swap cards:

Ready For Christmas Bundle © Stampin’ Up!

Santa’s Suit Bundle © Stampin’ Up!

Season Like Christmas Stamp Set © Stampin’ Up!

Snowflakes Sentiments Bundle © Stampin’ Up!
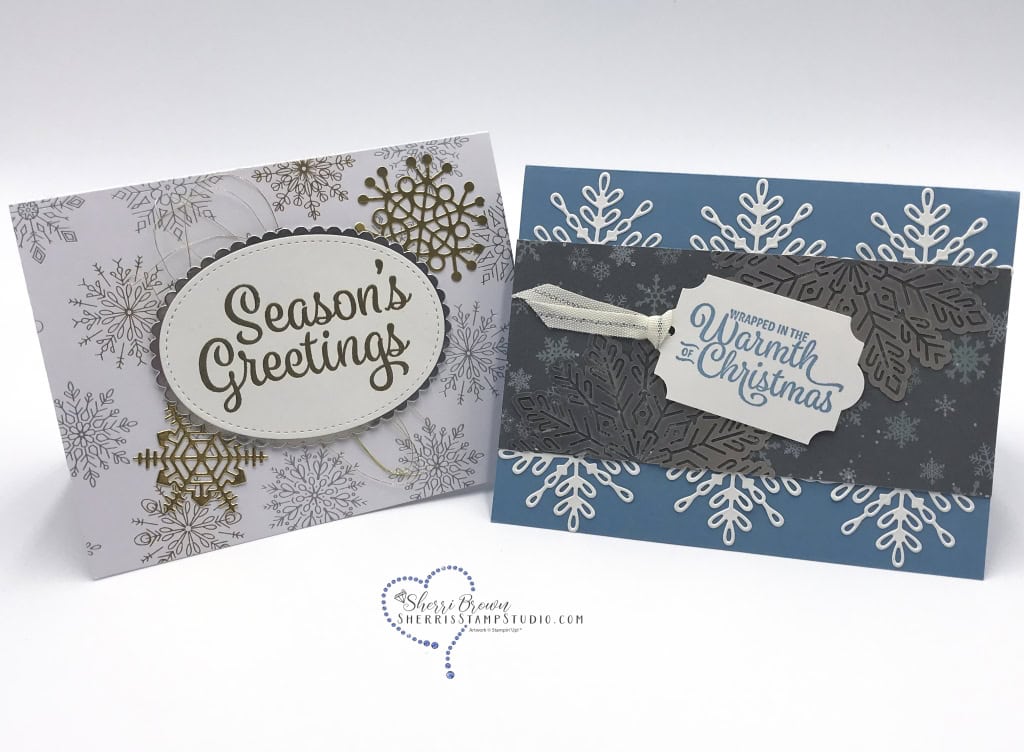

Every Good Wish Stamp Set © Stampin’ Up!


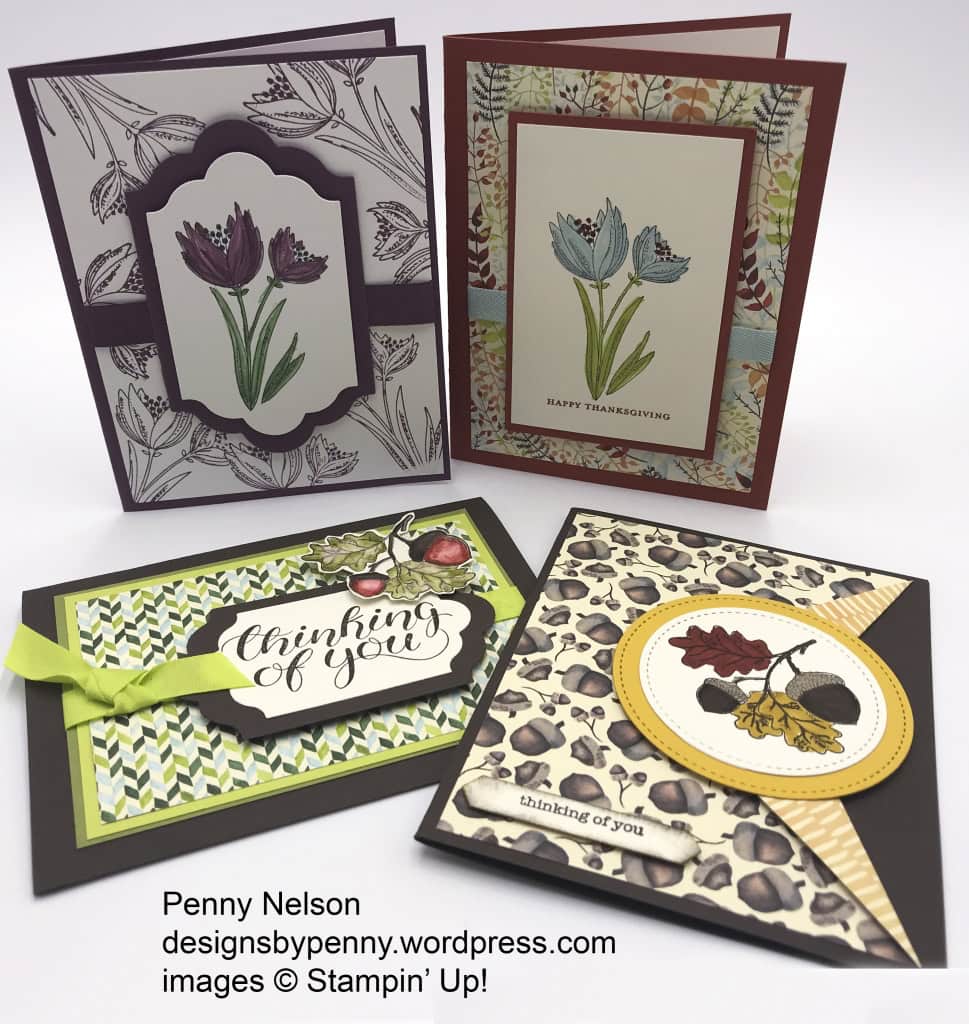
Painted Harvest Bundle © Stampin’ Up!

Smitten Mittens Bundle © Stampin’ Up!
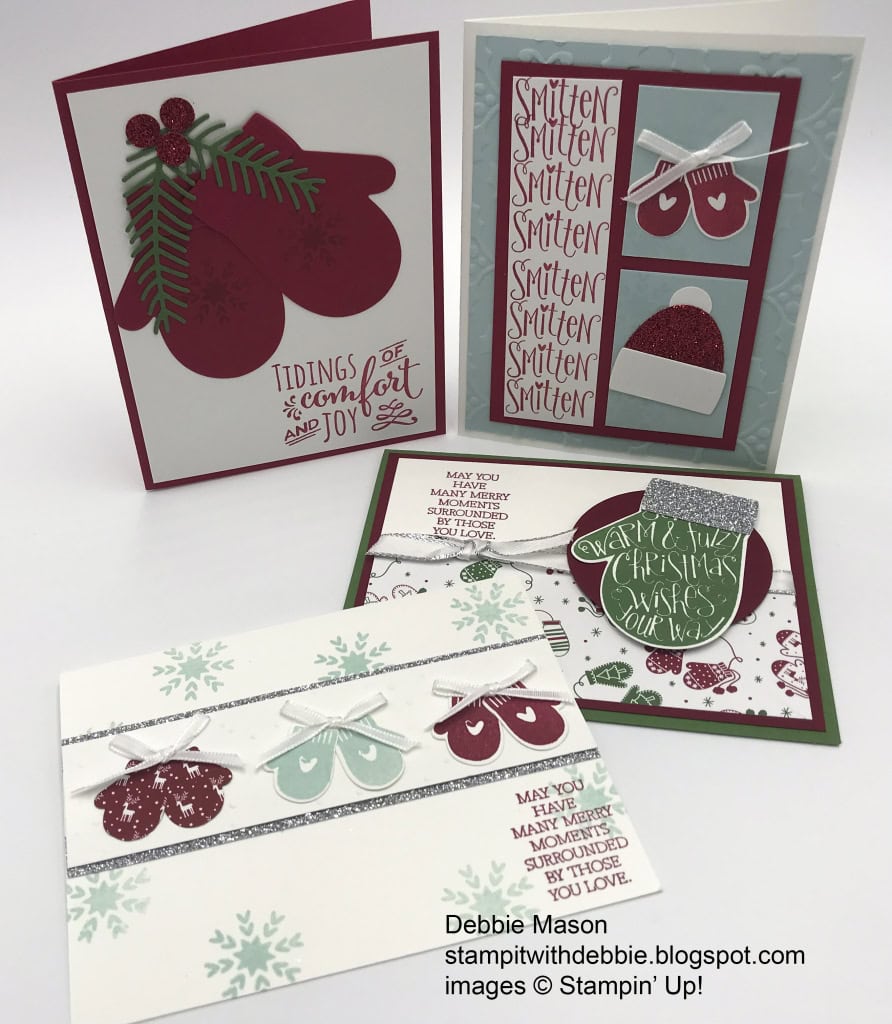

Brightly Lit Christmas Bundle © Stampin’ Up!
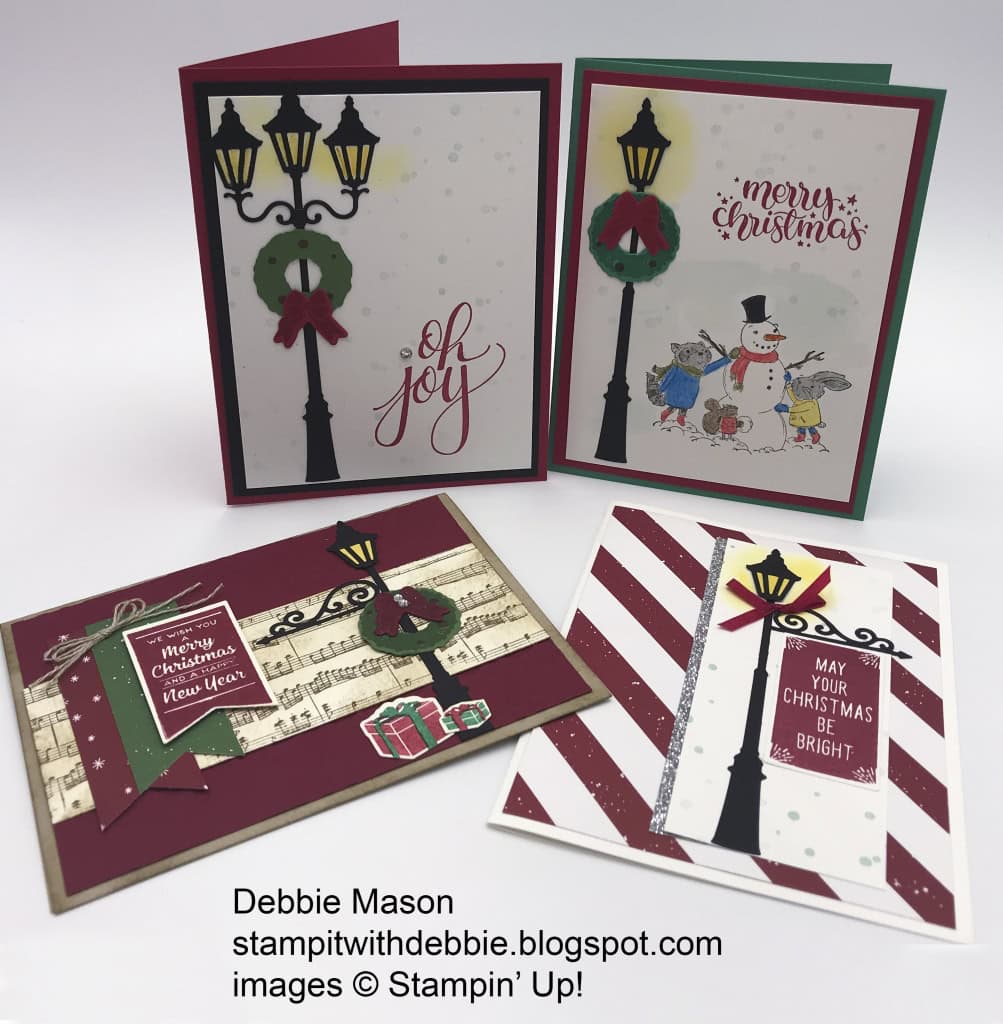

Christmas Quilt Bundle © Stampin’ Up!
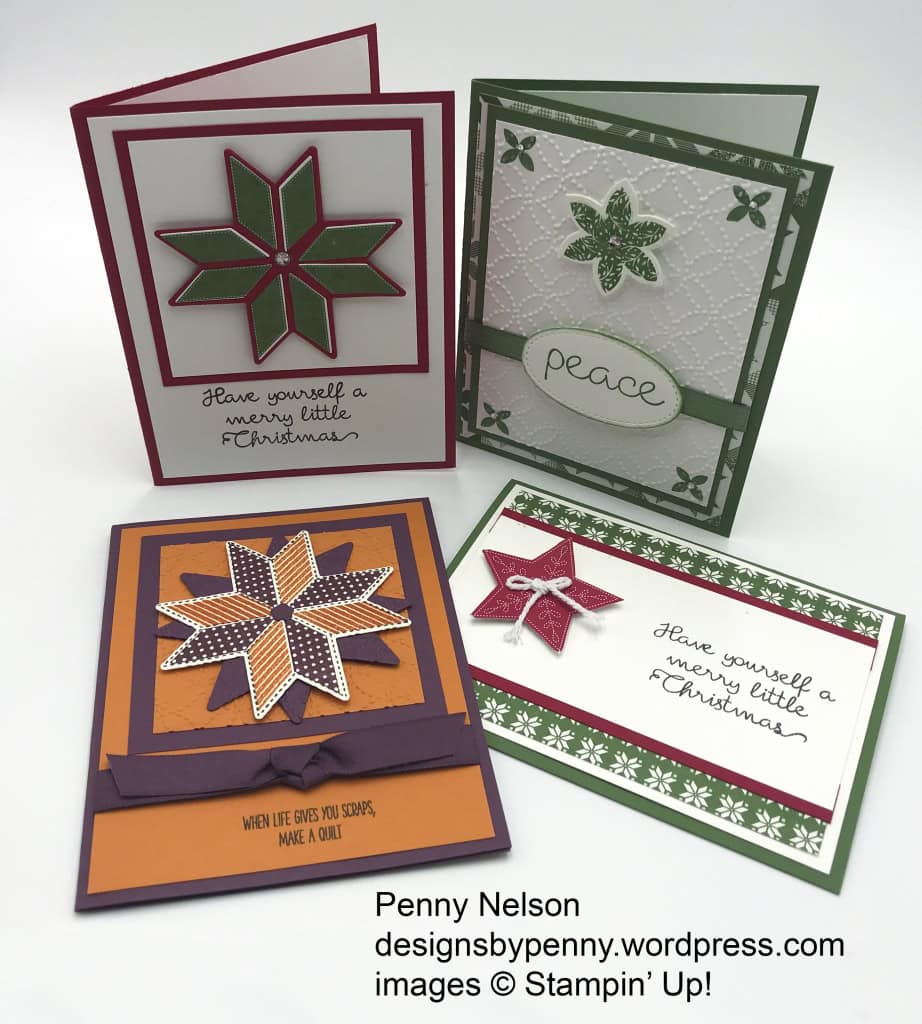

Count My Blessings Stamp Set © Stampin’ Up!
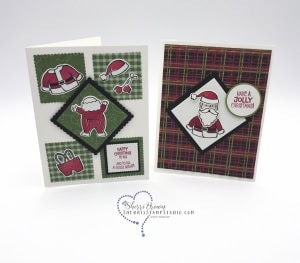
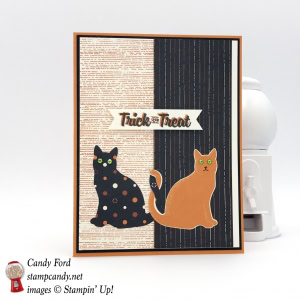
Here are my swap cards:
I’ve already posted these made with the Spooky Cat Bundle, so you can click on each photo to see the post about that card:

Spooky Cat Bundle © Stampin’ Up!

I have not yet posted these made with the Night of Bethlehem Bundle, so stay tuned for more details:

Night of Bethlehem Bundle © Stampin’ Up!


Here are the stamp sets and bundles we used:
Click on each item for more details and to purchase.
Here are some key points to remember:
- World Card Making Day Sale October 1-10, 15% off select card making essentials. See details HERE.
- Designer Series Paper Sale October 1-31, Buy 3 Get 1 FREE! See details HERE.
- Gumball Rewards for all orders over $50
Find out more HERE. - Hostess Code for the month of September (N4ZFHXK9)
Find out more about HOW, WHEN and WHY to use that HERE. - September’s FREE gift
Quilt Top Textured Impressions Embossing Folder
Find out more HERE. - Help those affected by Hurricanes Harvey and Irma
I will donate 20% of my September sales (matched by Stampin’ Up! corporate) to the American Red Cross for Hurricane Harvey & Irma Relief. Please help make a difference. Click HERE for more details. CLICK HERE to shop now. - New Merry Patterns Hostess Stamp Set – added to your Host Rewards
There’s a brand new stamp set that isn’t in any catalog. You can’t buy it, but you can get if for free with a qualifying order! You can host a party, or place your own order, or join under me and get a 20% discount on your demonstrator order. Find out more HERE.
Thanks for stopping by today, and Sweet Stamping!
Sep 23, 2017 | Cards, Gallery, Guest Stamper, Swaps, Techniques |
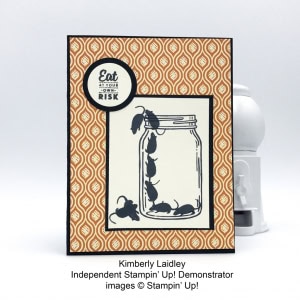
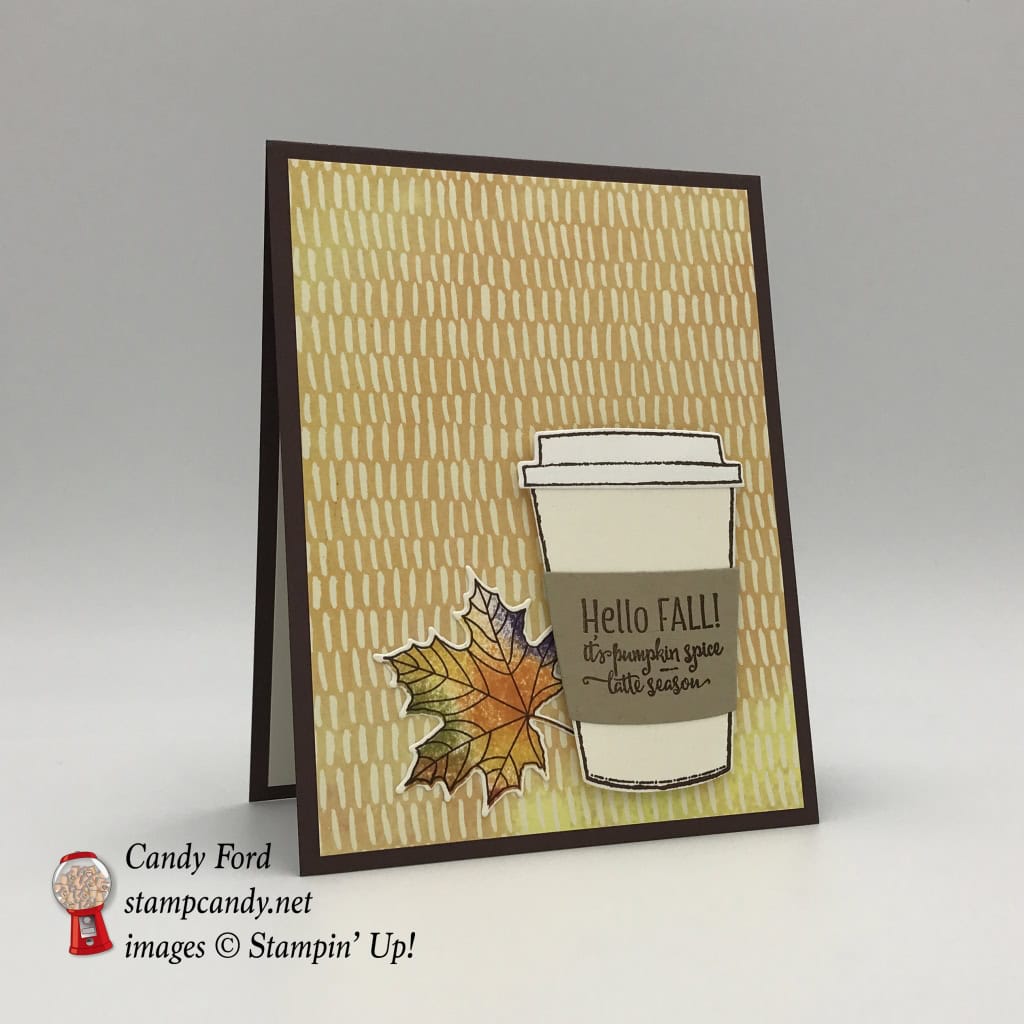
My team, the Candy Hearts, meets once a month. We eat, talk, and stamp, among other things. We have monthly challenges and a monthly swap. Today’s post is all about this month’s swap cards. September’s theme was Autumn. For my swap card, I used the Merry Cafe stamp set, Coffee Cafe Bundle, Colorful Seasons Bundle, and Painted Autumn Designer Series Paper.
Brian King joined us for this month’s meeting. He acted as official meeting photographer, and he participated in the swap. Be sure to check out his blog post today for more photos from the meeting, and for details on his swap card!
Here are the swap cards:
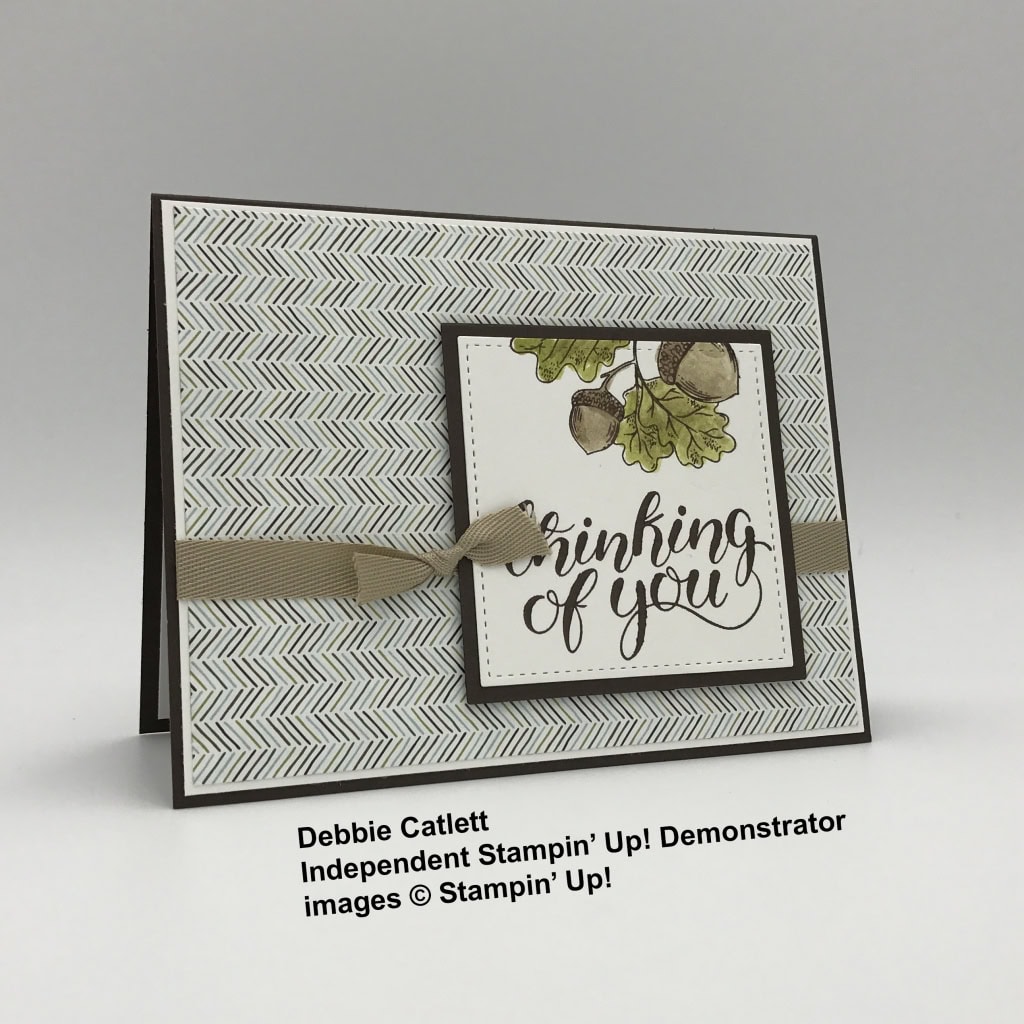
Debbie used the Count My Blessings stamp set, Stitched Shapes Framelits, Layering Squares Framelits, Coffee Break Designer Series Paper, and Crumb Cake 3/8″ Classic Weave Ribbon.
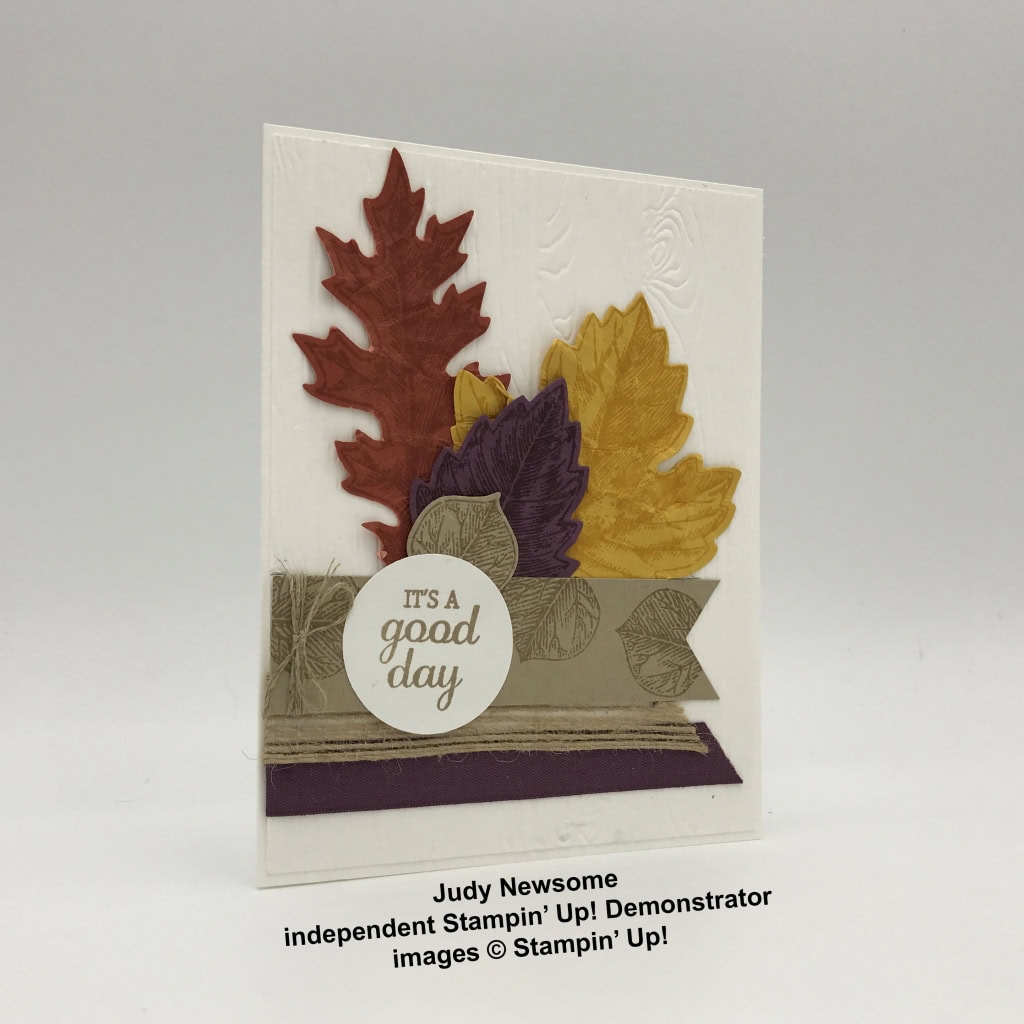
Judy used the Vintage Leaves stamp set, Leaflets Framelits, Best Birds stamp set, Layering Circle Framelits, 5/8″ Burlap Ribbon, and Pinewood Planks Dynamic Embossing Folder.
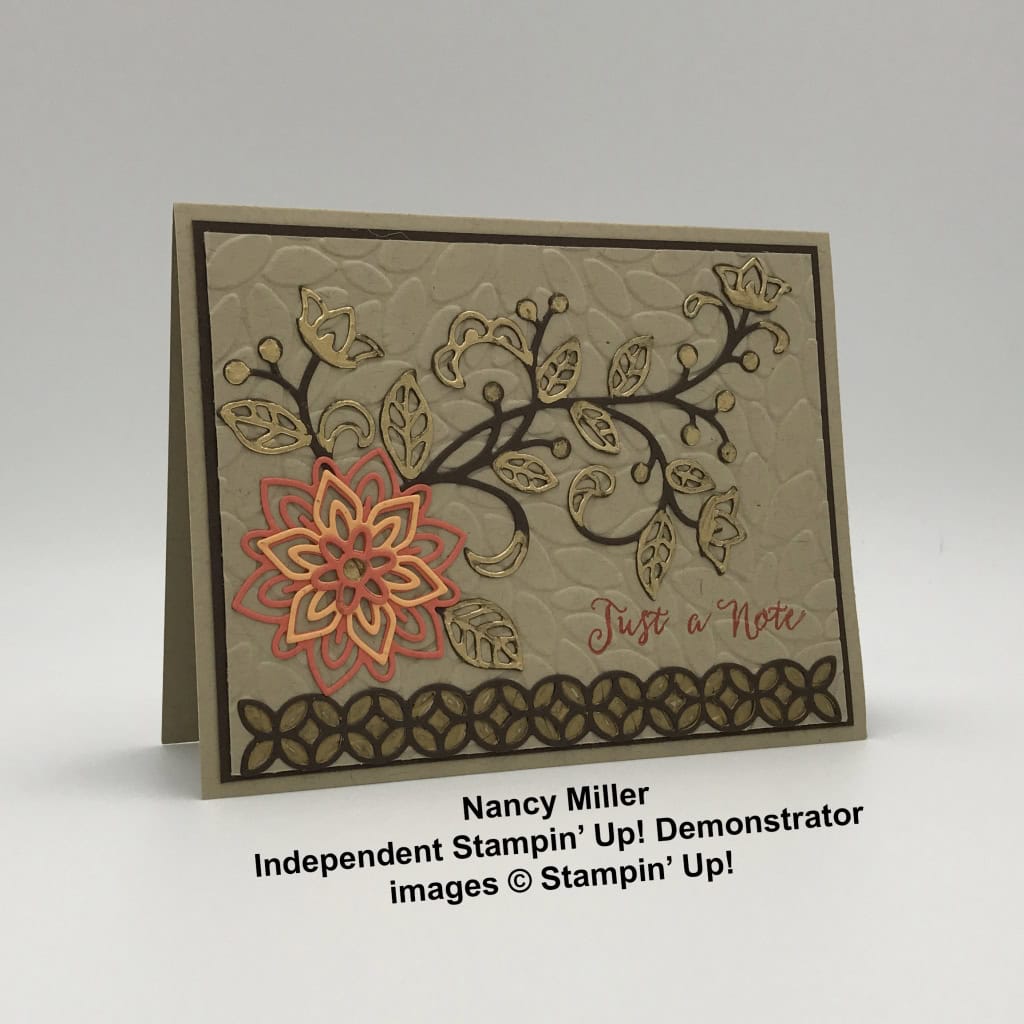
Nancy used the Flourishing Phrases stamp set, Flourish Thinlits, and Petal Burst Embossing Folder.
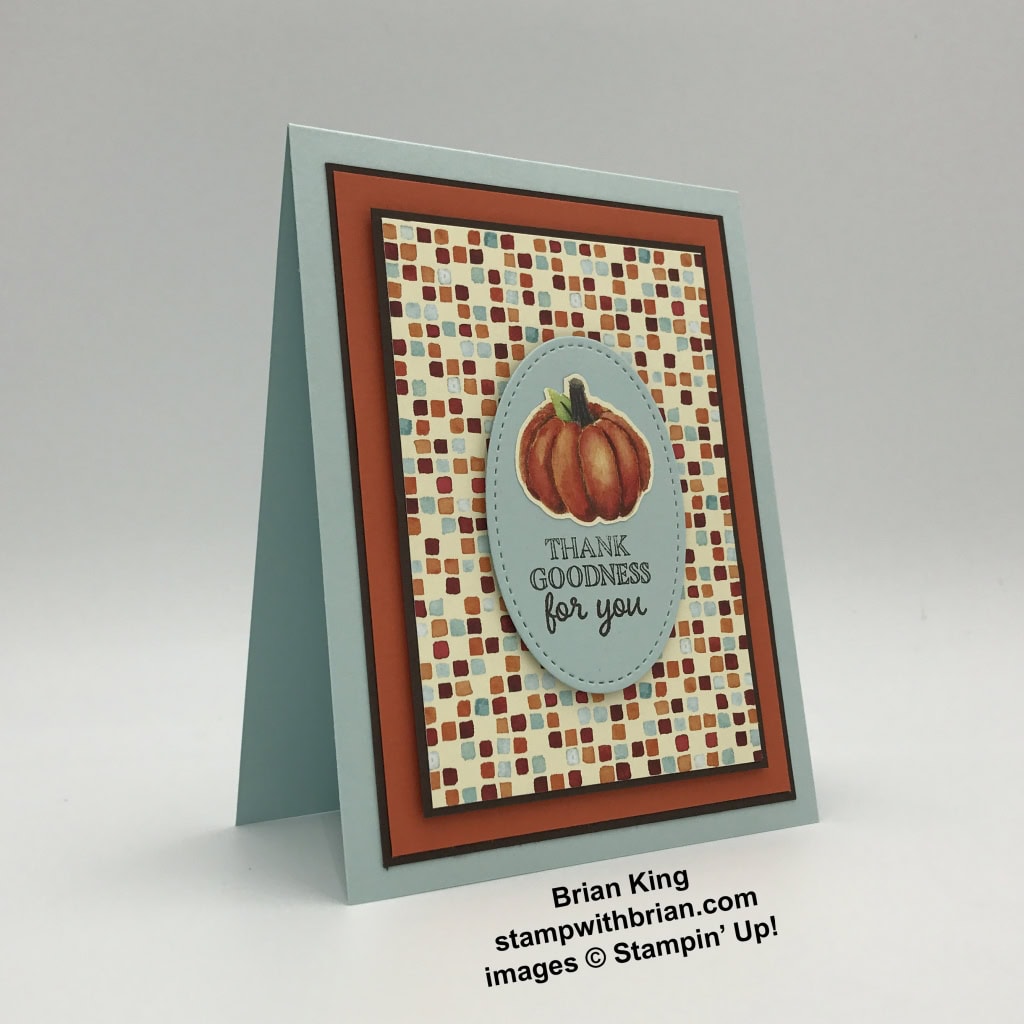
Brian used the Gourd Goodness stamp set, Painted Autumn Designer Series Paper, and Stitched Shapes Framelits. Check out his blog post today for details on his card!
Here’s what I made:
Here’s what I did:
Cut and scored with my Stampin’ Trimmer:
- Chocolate Chip card stock (CS) cut to 4-1/4″ x 11″, then scored in half at 5-1/2″
- Painted Autumn Designer Series Paper (DSP) cut to 4″ x 5-1/4″
- Very Vanilla CS cut to 4″ x 5-1/4″ for the inside
Stamped with the Merry Cafe stamp set:
- cup in Chocolate Chip ink onto a scrap of Very Vanilla CS
- lid in Chocolate Chip ink onto a scrap of Whisper White CS
- sentiment in Chocolate Chip ink onto a scrap of Crumb Cake CS
Stamped with the Colorful Seasons stamp set:
- solid leaf image in Crushed Curry, Pumpkin Pie, Cajun Craze, Old Olive, and Elegant Eggplant inks using the technique described below*
- leaf lines in Chocolate Chip ink over the solid stamped image
*Baby Wipe Stamping Technique:
- applied scattered drops of ink onto a wet baby wipe, and used it as my ink pad
- NOTE: this is usually best using a solid image (like the leaf) instead of a detailed one (like the leaf lines)
Cut using the Coffee Cups Framelits:
Cut using the Seasonal Layers Thinlits:
Assembled the card:
- leaf glued to the DSP layer
- lid and sentiment glued onto the cup
- cup adhered to DSP layer with Stampin’ Dimensionals
- DSP layer glued onto the front of the card base
- Very Vanilla CS glued to the inside of the card base
Here are today’s colors:
You can click on each one to see all the products that come in that color!
Here’s what I used:
Click on the images for more details and to purchase.
Here are some key points to remember:
- Gumball Reward for all orders over $50.
Find out more HERE. - Hostess Code for the month of September (N4ZFHXK9)
Find out more about HOW, WHEN and WHY to use that HERE. - September’s FREE gift
Quilt Top Textured Impressions Embossing Folder
Find out more HERE. - Help those affected by Hurricane Harvey and Irma
I will donate 20% of my September sales (matched by Stampin’ Up! corporate) to the American Red Cross for Hurricane Harvey & Irma Relief. Please help make a difference. CLICK HERE to shop now. Click HERE for more details. - New Merry Patterns Hostess Stamp Set – added to your Host Rewards
There’s a brand new stamp set that isn’t in any catalog. You can’t buy it, but you can get if for free with a qualifying order! You can host a party, or place your own order, or join under me and get a 20% discount on your demonstrator order. Find out more HERE.
Thanks for stopping by today, and Sweet Stamping!
Apr 16, 2017 | Cards, Events, Gallery, Retiring Products, Swaps, Techniques |
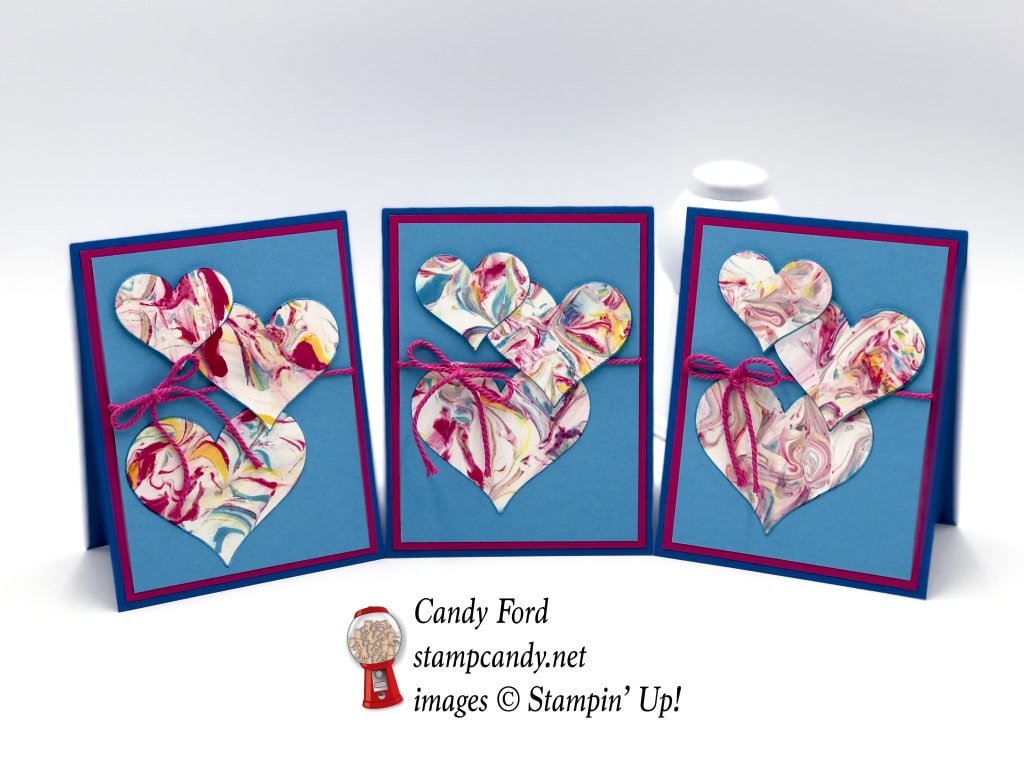
Today I’m sharing another project, technically three, that I made using the shaving cream marbling technique. To see the first card I made, and a video on the technique, click here. I used the three pieces of marbled paper that I made before, and used the Sweet & Sassy Framelits Dies to cut out the marbled hearts.

Here’s what I made:

Here’s what I did:
Cut and scored with my Stampin’ Trimmer:
- Pacific Point card stock (CS) to 4-1/4″ x 11″, then scored in half at 5-1/2″
- Melon Mambo CS to 4″ x 5-1/4″
- Tempting Turquoise CS to 3-3/4″ x 5″
- Whisper White CS to 3-3/4″ x 5″ for the inside
Die cut using the Sweet & Sassy Framelits:
- one small, one medium, and one large heart from each piece of marbled paper
Assembled the card:
- Melon Mambo Thick Baker’s Twine wrapped around front of Tempting Turquoise CS and adhered to back with Fast Fuse
- a second piece of Melon Mambo Thick Baker’s Twine tied around the first piece, and tied in a bow
- used the brush end of a Tempting Turquoise Stampin’ Write Marker to color just the very edges of all the marbled hearts
- largest marbled heart glued to Tempting Turquoise CS
- medium and small hearts adhered to Tempting Turquoise CS with Stampin’ Dimensionals
- Tempting Turquoise CS glued onto Melon Mambo CS
- Melon Mambo CS glued onto Pacific Point card base
- Whisper White CS for inside of card – you can glue it to the inside of the card base, or you can write your personal note on it and leave it loose inside, so the recipient can reuse the card
Here’s what I used:
Click on the images for more details and to purchase.
Retiring Products
Click here to get them before they’re gone for good!
 Gum Ball Rewards
 You always earn a Gum Ball for every $50 you spend on an order with me. Earn 10 Gum Balls and I’ll send you a free stamp set of your choice! See the Gum Ball Rewards page for details.
Click here to shop my online store!
April Host Code
HV6MJT2X
Use the Host Code on online orders less than $15o. See how to use a Host Code here.
Online orders of $75-149.99 placed with the Host Code will receive the gift of the month!
Online orders of $150 or more will automatically receive the gift of the month! Do not use the Host Code.
April’s gift is a pack of Urban Underground Embellishments! Each pack contains 24 brushed silver embellishments – 8 each of 3 designs. (I can ship within US only.)
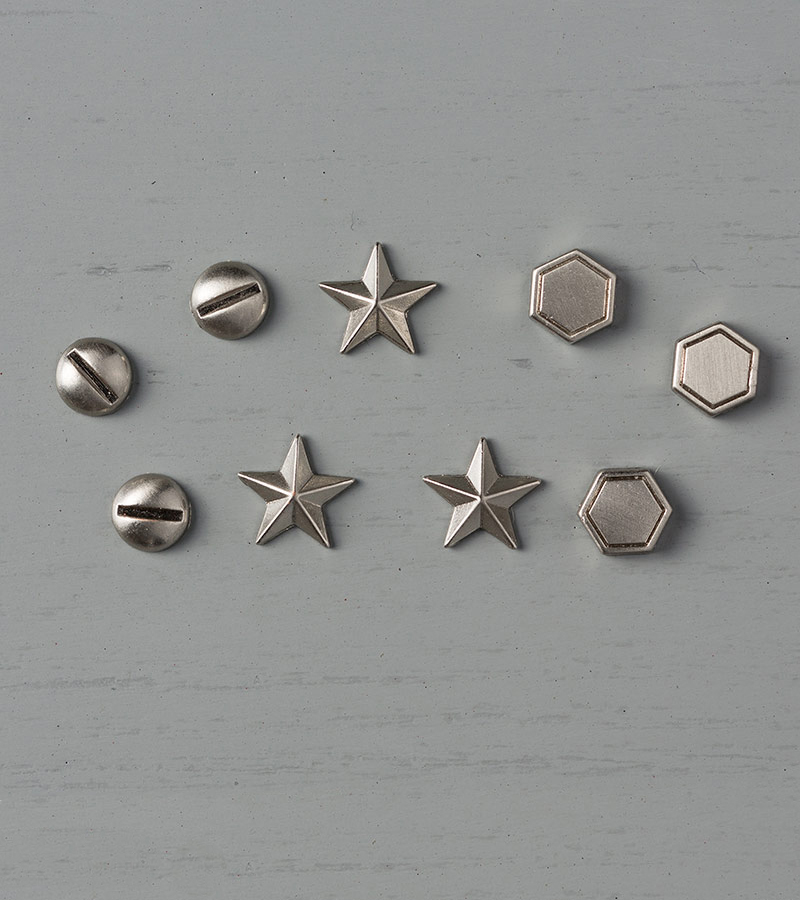
Urban Underground Embellishments © Stampin’ Up!
Thanks for stopping by today, and Sweet Stamping!

