Jul 14, 2020 | Cards, Catalogs, New Products |

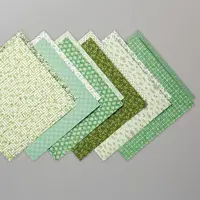
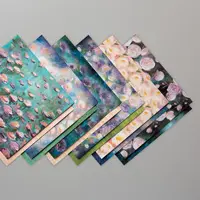
The new holiday mini catalog goes live August 4! I will be selling Designer Series Paper Swatch Books as well as Paper Shares, Ribbon Shares, and Embellishment Shares. This is a great way to get a little bit of everything without having to buy a whole package of everything. CLICK HERE to see all the details and to order.
If you complete the order form before July 27, I will send you an invoice on July 27, which must be paid by August 3.
If you complete the order form between July 27 and August 3, you will pay when you place the order.
I use PayPal for my ordering. You do not have to have a PayPal account. You can pay with a credit card.
If you have ordered from me, or requested a catalog, in the last year, I have mailed you a free catalog. Otherwise, you can request one HERE. If you already have a demonstrator, please get your catalog from them. Thank you!
S swatch shares swatch shares swatch shares swatch shares
Bonus Days are here!
Click the image below to shop now and earn Bonus Days coupons to use next month!

S
Here are some helpful links:
Thanks for stopping by today, and Sweet Stamping!
Jun 11, 2020 | Blog Hop, Cards, Gallery, New Products |

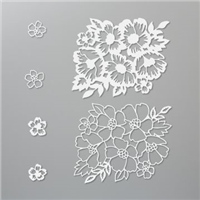
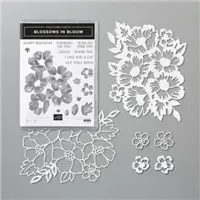
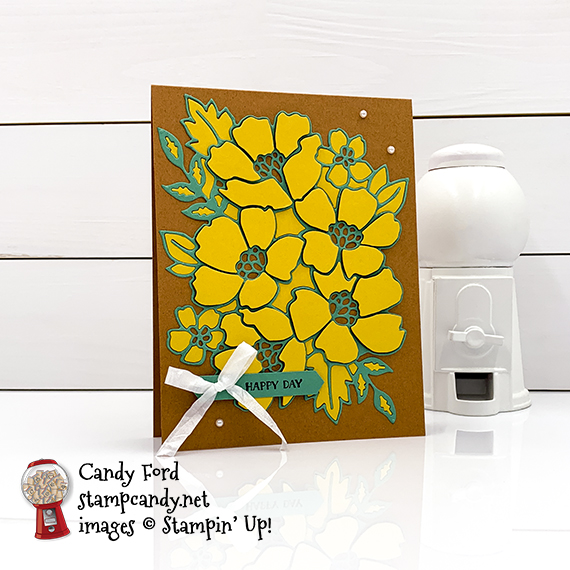
Its a New Review for the 06-2020 OSAT Blog Hop! Today we are featuring brand new products from the brand new 2020-2021 Annual Catalog. I used the Many Layered Blossoms Dies and the PPPS Technique by Kylie Bertucci of Australia to create my card. I used three of the new In Colors: Cinnamon Cider, Bumblebee, and Just Jade.
What is the PPPST? Paper Piecing Press n Seal Technique. Press n Seal plastic wrap is slightly sticky on one side, and it makes paper piecing from intricate die cuts so much easier! It’s available in your local grocery store.
Be sure to hop around to all the stops to see all the great new projects! Use the line up below if you get lost.
If you are reading this in email, some photos may appear blurry, or may not appear at all. Please click here to see the post on my blog.
S 06-2020 OSAT 06-2020 OSAT 06-2020 OSAT 06-2020 OSAT 06-2020 OSAT
Here’s what I made:

S
Here’s what I did:
Cut and scored with my paper trimmer:
- Cinnamon Cider card stock (CS) cut to 4-1/4″ x 11″, then scored in half at 5-1/2″
- Whisper White CS cut to 4″ x 5-1/4″ for the inside of the card base
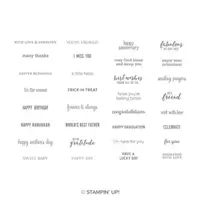
Stamped with the Itty Bitty Greetings stamp set:
- sentiment in black Memento ink onto a scrap of Just Jade CS
Cut using the Many Layered Blossoms Dies:
- a piece of Bumblebee CS using the large outline die
- a piece of Just Jade CS using the same die
- NOTE: before removing each die cut from the die cutting machine, burnish a piece of Press n Seal over it to keep all the pieces in place
Cut using the Classic Label Punch:
Assembled the card:
- burnished the fold in the card base with a Bone Folder
- removed the outline piece from the Bumblebee CS die cut
- onto the back of the Bumblebee CS die cut, applied Stampin’ Dimensionals onto the large flower petals, and glue onto the other pieces
- pressed the whole thing in place onto the front of the card base, then very gently peeled back the Press n Seal
- removed the outline piece from the Just Jade CS die cut, applied glue onto the back, and glued it around the Bumblebee CS pieces (A pointy tip, like a Take Your Pick Tool, is very helpful.)
- tied a piece of ribbon in a bow and adhered it onto the sentiment using a Mini Glue Dot
- adhered sentiment over flowers (I used a Mini Stampin’ Dimensional at the left end, and glued the rest of it onto the large petals.
- 3 pearls applied onto the front of the card base
- Whisper White CS glued onto the inside of the card base
What I would do differently:
- After looking at the photo, I think the bow seems a bit large. I would probably make it smaller.
- Maybe I’d emboss the background, probably with the Subtle embossing folder.
- Maybe I’d heat emboss the sentiment in white.
- How would you change this card?
S
Here’s the 06-2020 OSAT Blog Hop:
S
Here are today’s colors:
You can click on each one to see all the products that come in that color!
S
Here’s what I used:
Click on these images for more details and to purchase. If you are reading this post in email, the product images may not show up. Please click here to see the post on my blog.
Supply List <— Click for a clickable and printable list of the products!
S
Here are some helpful links:
S
Thanks for stopping by today, and Sweet Stamping!
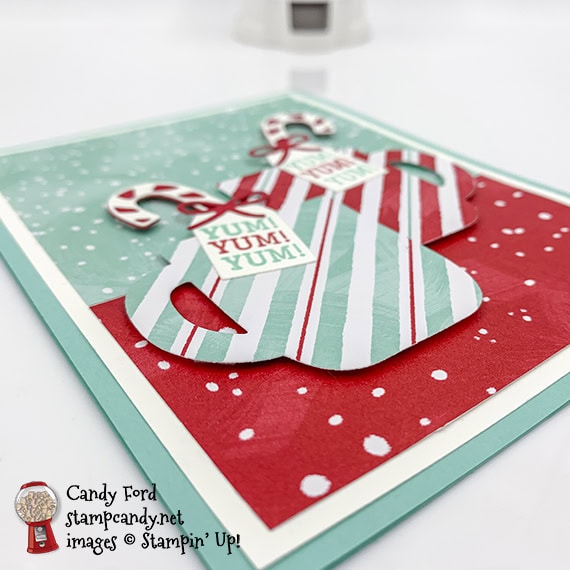
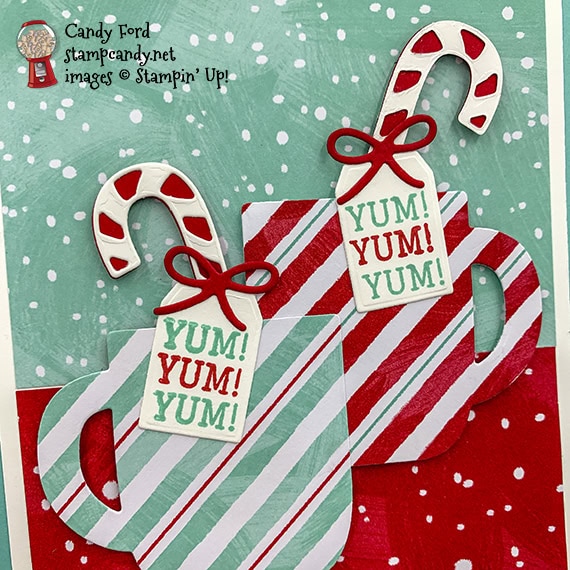
Sep 7, 2019 | Cards, Christmas, Gallery, Holiday, New Products |
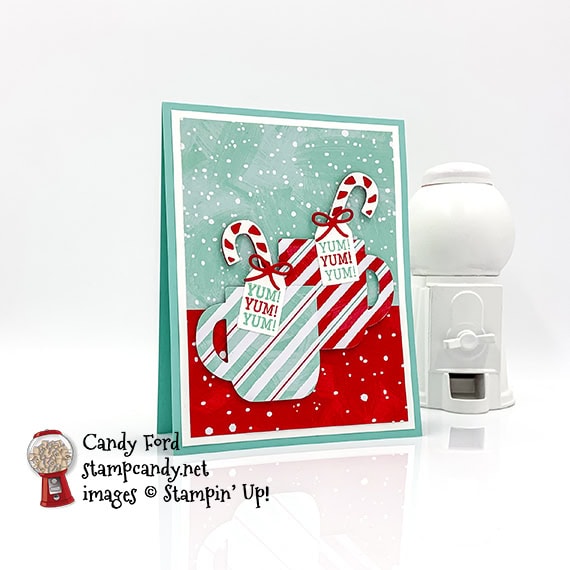
What’s better in winter than a cup of hot cocoa? Today I’m sharing a card I made using the new Cup of Christmas Bundle (Cup of Christmas stamp set and Cup of Cheer Dies) and Let It Snow Specialty Designer Series Paper. You can use it as a Christmas card, but it’s really an all occasion winter themed card.
S
Here’s what I made:
S
Here’s what I did:
Cut and scored with my paper trimmer:
- Coastal Cabana card stock (CS) cut to 4-1/4″ x 11″, then scored in half at 5-1/2″
- Whisper White card stock (CS) layer cut to 4″ x 5-1/4″
- Let It Snow Specialty Designer Series Paper (DSP) layer (blue) cut to 3-3/4″ x 3-1/2″
- Let It Snow Specialty Designer Series Paper (DSP) layer (red) cut to 3-3/4″ x 2-1/2″
- optional: Whisper White CS cut to 4″ x 5-1/4″ for the inside of the card base
Stamped with the Cup of Christmas stamp set:
- YUM in Real Red and Coastal Cabana inks onto a scrap of Whisper White Thick CS – stacked close together – stamped this for 2 tags
Cut using the Cup of Cheer Dies:
- stamped tags (2)
- cups from scraps of DSP (2 different stripe patterns)
- solid candy canes from a scrap of Real Red CS (2)
- striped candy canes from a scrap of Whisper White CS (2)
- bows from a scrap of Real Red CS (2)
Assembled the card:
- burnished the fold in the card base with a Bone Folder
- Whisper White CS layer glued onto the front of the card base
- 2 DSP layers glued onto the Whisper White CS layer
- Whisper White candy canes glued onto the Real Red candy canes
- candy canes glued onto the back of the cups
- tags glued onto the candy canes and cups
- bows glued onto the tags
- top right part of blue cup glued onto the bottom left part of the red cup
- cup assembly adhered onto the DSP layers using Stampin’ Dimensionals
- Whisper White CS glued onto the inside of the card base
S
Here are today’s colors:
You can click on each one to see all the products that come in that color!
S
Here’s what I used:
Click on these images for more details and to purchase.
<– Click here for a clickable and printable list!
S
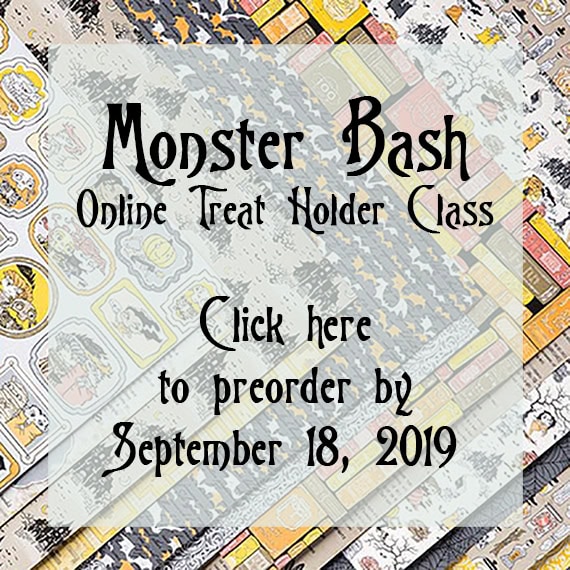
Preorder the Monster Bash Online Treat Holder Class by September 18:
- Make 6 adorable treat holders in the comfort of your own home!
- 2 each of 3 designs
- Features the Monster Bash Suite on pages 52-54 of the 2019 Holiday Catalog
- I’ve done the trimming and scoring for you!
- You’ll receive the stamp set, dies, pre-cut kits, and Black Stampin’ Dimensionals.
- Full detailed instructions
- Limited spots available
Click on the image below for details and class options, or copy and paste this link into your browser: https://stampcandy.net/online-classes/monster-bash-treat-holder-class-preorder/
S
Here are some helpful links:
S
Thanks for stopping by today, and Sweet Stamping!

Sep 4, 2019 | Blog Hop, Cards, Gallery, New Products |
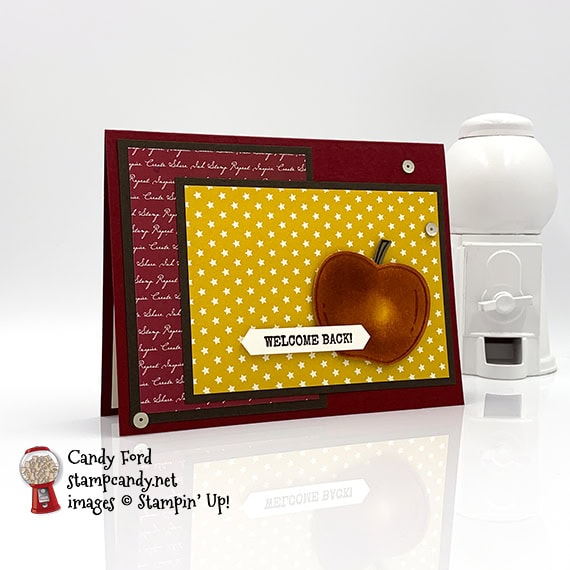
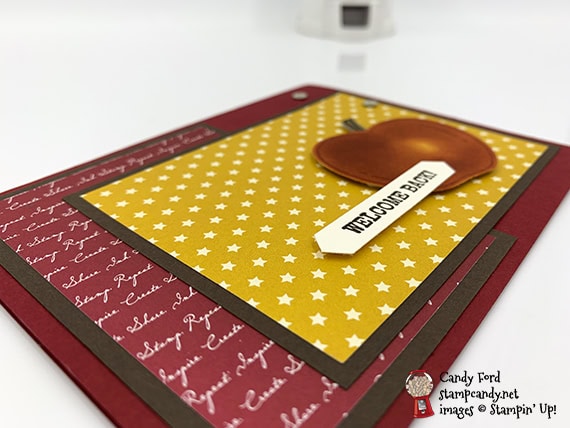
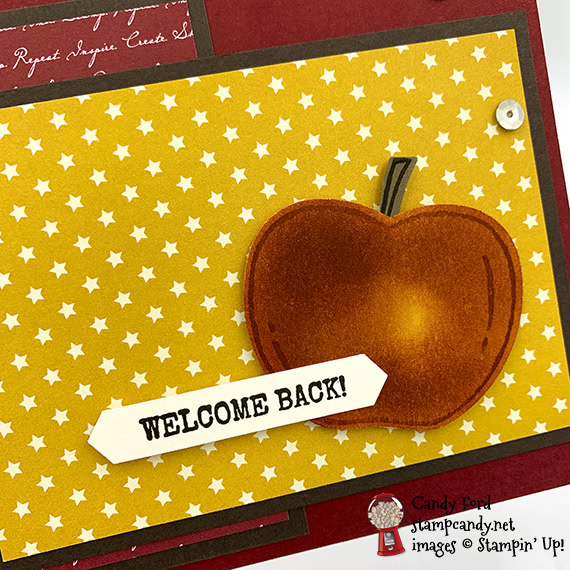
It’s time for the ICS 09-2019 Blog Hop! This month’s theme is Fabulous Fall. What could be more fabulous that going back to school? I know, not everyone feels that way, but when I was a kid, I couldn’t wait to get back to see my friends. I enjoyed school. And the beginning of the school year was special because I got a new notebook, paper, pencils, etc. and some new school clothes. My project for today is a welcome back to school card. I used the Harvest Hellos bundle (Harvest Hellos stamp set and Apple Builder Punch.) I sponged Cherry Cobbler ink onto Crushed Curry cardstock for the apple. The star background is from the Night Before Christmas Designer Series Paper. All the new holiday products are now available to order!

Be sure to hop all the way around to see all the great Autumnal projects made by this talented group of stampers!
S
Here’s what I made:
S
Here’s what I did:
Cut and scored with my paper trimmer:
- Cherry Cobbler card stock (CS) cut to 5-1/2″ x 8-1/2″, then scored in half at 4-1/4″
- smaller Early Espresso CS layer cut to 3″ x 4″
- Cherry Cobbler Designer Series Paper (DSP) layer cut to 2-3/4″ x 3-3/4″
- larger Early Espresso CS layer cut to 4-1/4″ x 3-1/4″
- Night Before Christmas DSP layer cut to 4″ x 3″
- Very Vanilla CS cut to 5-1/4″ x 4″ for the inside of the card base
Stamped with the Harvest Hellos stamp set:
- apple in Cherry Cobbler ink onto a scrap of Crushed Curry CS
- stem in Early Espresso ink onto a scrap of Soft Suede CS
- sentiment in Early Espresso ink onto a scrap of Very Vanilla Thick CS
Cut using the Apple Builder Punch:
Cut using the Classic Label Punch:
Colored using a Sponge Dauber:
- apple in Cherry Cobbler ink
Assembled the card:
- burnished the fold in the card base with a Bone Folder
- Cherry Cobbler DSP layer glued onto the smaller Early Espresso CS layer
- smaller Early Espresso CS layer glued onto the front of the card base
- Night Before Christmas DSP layer glued onto the larger Early Espresso CS layer
- larger Early Espresso CS layer glued onto the front of the card base, over the other DSP layer
- stem glued onto the back of the apple
- sentiment glued onto the front of the apple
- apple/stem/sentiment adhered onto the top DSP layer using Stampin’ Dimensionals
- 3 Sahara Sand Adhesive-Backed Sequins randomly applied onto the card front
- Very Vanilla CS glued onto the inside of the card base
S
Here’s the ICS 09-2019 Fabulous Fall Blog Hop:
Click the Next button to hop to the next stop, Deb Naylor of The Flying Stamper:

S
Here are today’s colors:
You can click on each one to see all the products that come in that color!
S
Here’s what I used:
Contact your demonstrator to place an order. If you don’t have a demonstrator, I’d love to be yours – please click on these images for more product details and to purchase. Thank you!
Click “Supply List” to download a clickable and printable list!
S
Preorder the Pretty Petals Online Class by Thursday, September 5:
- Make 6 cards at home in your PJs!
- 2 each of 3 designs
- Features the Pretty Petals Suite on pages 72-74 of the 2019-2020 Annual Catalog
- I’ve done the trimming and scoring for you!
- You’ll receive all you need to make the cards, including the stamp set, dies, embossing folder, pre-cut card kits, and 6 Very Vanilla envelopes.
- Full detailed instructions
- Limited spots available
Click on the image below for details and class options, or copy and paste this link into your browser: https://stampcandy.net/online-classes/pretty-petals-class-preorder/

S
Here are some helpful links:
S
Thanks for stopping by today, and Sweet Stamping!
Jun 19, 2019 | Baby, Blog Hop, Cards, Gallery, New Products |

I’m Wildly Happy that it’s time for the Inking Royalty June Blog Hop! This year we’re featuring one word each month. June’s word is NEW, which is appropriate since this is the month when the new annual catalog went live. I imagine a lot of us will be using new products for our projects – I know I am!
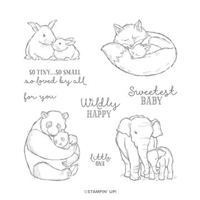
As soon as the new catalog went live, I couldn’t wait to get the new Wildly Happy stamp set on page 101. It has some of the sweetest images in the whole catalog.

I especially love the elephants. I learned a lot about these magnificent creatures when I visited the Phuket Elephant Sanctuary in Thailand a couple years ago. One of the elephants I saw was using her trunk to pull down bamboo trees – very big bamboo trees. The pattern of Garden Lane Designer Series Paper I used for the background on this card reminds me of bamboo leaves. It looks like mommy and baby are nuzzling in a cozy bamboo forest. So sweet!
S
Here’s what I made:


S
Here’s what I did:
Cut and scored with my paper trimmer:
- Pear Pizzazz card stock (CS) cut to 5-1/2″ x 8-1/2″, then scored in half at 4-1/4″
- Garden Lane Designer Series Paper (DSP) layer cut to 5-1/4″ x 2-1/2″
- Perennial Essence DSP layer cut to 5-1/4″ x 1-1/2″
- Whisper White CS cut to 5-1/4″ x 4″ for the inside of the card base
Stamped with the Wildly Happy stamp set:
- elephants in Memento black ink onto a scrap of Whisper White CS
- sentiment in Pear Pizzazz ink onto a scrap of Whisper White CS
- elephants in Memento black ink onto the DSP layers, after they were glued onto the front of the card base
Cut using the Layering Circles Dies:
- sentiment
- a slightly larger circle from a scrap of Pear Pizzazz CS
Colored using Stampin’ Blends Markers:
- elephants in Gray Granite
- 2 pearls in Gray Granite
- 1 pearl in Mossy Meadow
- shading in Gray Granite onto the DSP layers around the elephants
Colored using a Sponge Dauber:
- edges of the Whisper White CS for the inside of the card in Gray Granite ink
Cut using Paper Snips:
Assembled the card:
- burnished the fold in the card base with a Bone Folder
- DSP layers glued onto the front of the card base, Garden Lane at the top and Perennial Essence at the bottom (then stamped the elephants onto the layers)
- colored elephants glued over the elephants stamped onto the DSP layers
- sentiment glued onto the Pear Pizzazz die cut circle
- Pear Pizzazz die cut circle glued onto the DSP layers
- colored pearls applied onto the DSP layers and the sentiment
S
Here’s the hop:
Thank you for hopping along with us. I hope you’ll hop along to the next stop on the blog hop, Pam Morris at Tap Tap Stamp. There’s a lot of inspiration to be found in this group – and you don’t want to miss it! If you get stuck during the Blog Hop, please use this line-up as a guide:
- Brian King at Stamp with Brian
- Jennifer Spiller at Westside Paper Creations
- Denise Hoepfner at The Mountain Magpie
- Candy Ford at Stamp Candy <——- YOU ARE HERE
- Pam Morris at Tap Tap Stamp
- Robin Myren at Songbird Designs by Robin
- Jackie Beers at Blue Line Stamping
- Lynn Kolcun at Avery’s Owlery
- Robbye Hamilton at Miss Hammie’s Crafts
- Julie DiMatteo at The Paper Pixie
- Linda Krueger at The Stamp Coach
- Shawn de Oliveira at Shawn Stamps
- Sue Jackson at Just Peachy Stamping
S
Here are today’s main colors:
You can click on each one to see all the products that come in that color!
S
Here’s what I used:
Click on these images for more details and to purchase.
Supply List <– Click here for a clickable and printable list!
S
Preorder the Sailing Home Online Class by June 26:
- Make 6 cards at home in your PJs!
- 2 each of 3 designs
- Features the Come Sail Away Suite on pages 144-146 of the 2019-2020 Annual Catalog
- I’ve done the trimming and scoring for you!
- You’ll receive all you need to make the cards, including the stamp set, dies, pre-cut/pre-scored/pre-embossed card kits, and 6 Whisper White envelopes.
- Full detailed instructions
- Limited spots available
Click on the image below for details and class options, or copy and paste this link into your browser:
S
Here are some helpful links:
S
Thanks for stopping by today, and Sweet Stamping!