Sep 8, 2020 | Cards, Gallery |
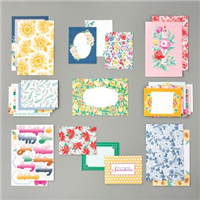
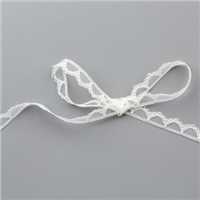
It is so easy to make pretty cards with the Flowers for Every Season Memories & More Card & Envelopes and Card Pack – you just stick one onto the other and you’re done! I’ve added extra interest to today’s project by angling the card on the front and adding a bow made with Very Vanilla Scalloped Lace Trim. It was done in no time!
If you are reading this in email, some photos may appear blurry, or may not appear at all. Please click here to see the post on my blog.
S lace trim lace trim lace trim lace trim
Here’s what I made:
S
Here’s what I did:
Assembled the card:
- burnished the fold in the Cinnamon Cider card base with a Bone Folder
- 3″ x 4″ M&M card glued onto the front of the card base, at an angle
- lace trim tied in a bow and adhered onto the M&M card using a glue dot
- That’s it!
S
Here are today’s colors:
You can click on each one to see all the products that come in that color!
S
Here’s what I used:
Click on these images for more details and to purchase. If you are reading this post in email, the product images may not show up. Please click here to see the post on my blog.
Supply List. <— Click for a clickable and printable list of the products!
S
Here are some helpful links:
S
Thanks for stopping by today, and Sweet Stamping!
Sep 7, 2020 | Cards, Gallery |
Today I’m sharing a card I made using the Flowers for Every Season Memories & More (M&M) Cards & Envelopes and the Flowers for Every Season M&M Card Pack along with the Tasteful Textile 3d Embossing Folder. It’s a quick and easy card, but the embossing, along with the ribbon bow, really packs a punch.
If you are reading this in email, some photos may appear blurry, or may not appear at all. Please click here to see the post on my blog.
S Tasteful Textile 3D Tasteful Textile 3D Tasteful Textile 3D Tasteful Textile 3D
Here’s what I made: 
S
Here’s what I did:
Cut and scored with my paper trimmer:
- Just Jade CS layer cut to 3-3/4″ x 5-3/4″
- Whisper White 3-1/4″ x 4-1/4″
Embossed using the Tasteful Textile 3D Embossing Folder:
Assembled the card:
- burnished the fold in the Bumblebee card base with a Bone Folder
- Just Jade embossed CS layer glued onto the front of the card base
- Whisper White CS layer glued onto the Just Jade CS layer
- 3″ x 4″ M&M card glued onto the Whisper White CS layer
- Bumblebee ribbon tied in a bow and adhered onto the M&M card using a glue dot
S
Here are today’s colors:
You can click on each one to see all the products that come in that color!
S
Here’s what I used:
Click on these images for more details and to purchase. If you are reading this post in email, the product images may not show up. Please click here to see the post on my blog.
Supply List. <— Click for a clickable and printable list of the products!
S
Here are some helpful links:
S
Thanks for stopping by today, and Sweet Stamping!
Sep 3, 2020 | Cards, Gallery, Techniques |
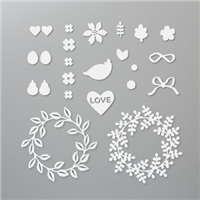
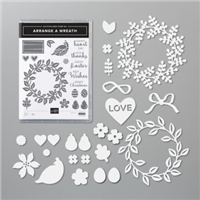
Wreaths aren’t just for the holidays. Today’s wreath card gives encouragement to a dear friend. I used the Wreath Builder Dies, Layering Circle Dies, Ornate Frames Dies, Forever Fern stamp set, and 1-1/2″ Circle Punch. And of course, several colors of card stock. The front of the card base is in two separate pieces that are held together by the wreath and the sentiment.
If you are reading this in email, some photos may appear blurry, or may not appear at all. Please click here to see the post on my blog.
S wreath builder wreath builder wreath builder wreath builder
Here’s what I made:


S
Here’s what I did:
Cut and scored with my paper trimmer:
- Whisper White Thick card stock (CS) cut to 5-1/4″ x 5-1/2″, then scored along the shorter side at 4-1/4″
- Whisper White Thick CS cut to 1″ x 5-1/2″
- Just Jade CS cut to 4″ x 1-1/8″
Stamped with the Forever Fern stamp set:
- inner sentiment in Pretty Peacock ink onto the inside of the card base
- outer sentiment in Pretty Peacock ink onto a scrap of Whisper White Thick CS
Cut using the Wreath Builder Dies:
- leaf wreaths from scraps of Pear Pizzazz, Just Jade, Garden Green, Shaded Spruce, and Pretty Peacock CS
- berry wreath from a scrap of Soft Sea Foam CS
Cut using the Ornate Frames Dies:
Cut using the Layering Circles Dies:
- a scrap of Whisper White Thick CS into a ring, using a larger and a smaller die, for the back of the wreath
- Be sure the ring doesn’t show inside the center of the wreath or outside the perimeter of the wreath.
Cut using the 1-1/2″ Circle Punch:
- both ends of the Just Jade CS piece
Assembled the card:
- burnished the fold in the card base with a Bone Folder
- wreaths stacked and glued onto each other
- 1″ strip of Whisper White Thick CS lined up along the right side of the card base
- Just Jade CS glued only at the ends onto the left side of the card base front and onto the 1″ strip
- flipped over the card base and glued the Whisper White Thick CS ring only on the sides onto the two sides of the card front, making sure the inner sentiment would show through the center
- flipped back over and glued the wreath onto the ring and the two sides of the card front, again making sure the inner sentiment would show through the center
- outer sentiment adhered into the Just Jade CS using Stampin’ Dimensionals
- Magenta Madness ribbon tied in a bow and adhered onto the wreath using a Mini Glue Dot
S
Here are today’s colors:
You can click on each one to see all the products that come in that color!
S
Here’s what I used:
Click on these images for more details and to purchase. If you are reading this post in email, the product images may not show up. Please click here to see the post on my blog.
Supply List. <— Click for a clickable and printable list of the products!
S
Here are some helpful links:
S
Thanks for stopping by today, and Sweet Stamping!
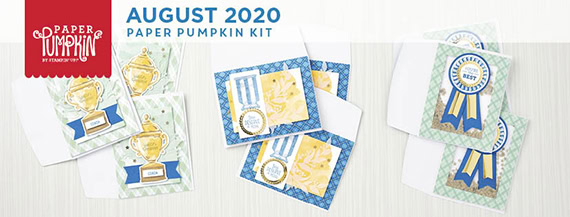
Aug 27, 2020 | Blog Hop, Boxes, Cards, Gallery, Paper Pumpkin |

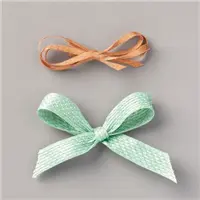
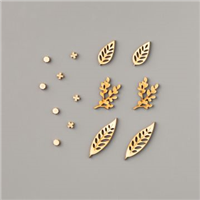
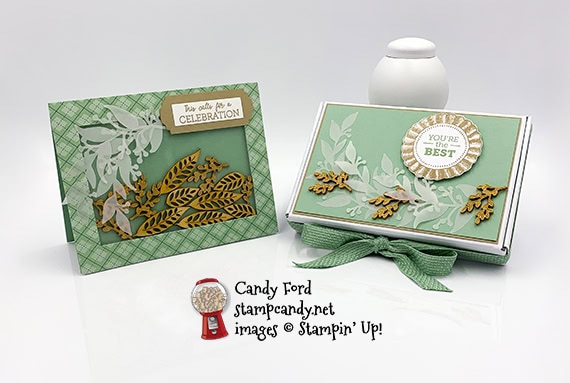
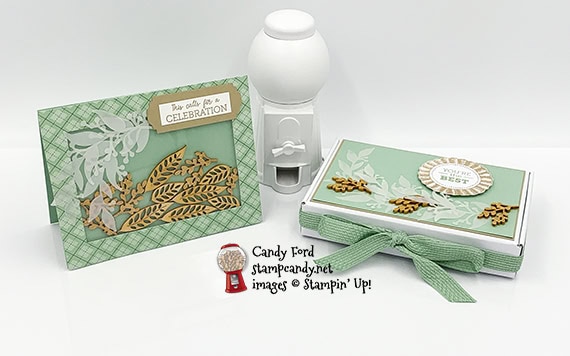
Welcome to the August 2020 APPT Blog Hop! This month we’re sharing alternate projects to make with the World’s Greatest kit. I used a Mini Paper Pumpkin Box, Mint Macaron ribbon, and In Good Taste Elements along with the kit to create a shaker card and gift box. The box is the perfect size for note cards. The colors in the kit are pretty bold and bright, and I wanted to make something calmer, so I used the Mint Macaron and white from the kit and added Crumb Cake. And I used glue and Stampin’ Seal+ in addition to the glue dots and dimensionals from the kit, but you don’t have to.
Be sure to hop around to all the stops to see all the great alternate projects shared by this talented group of stampers!
If you are reading this in email, some photos may appear blurry, or may not appear at all. Please click here to see the post on my blog.
S August 2020 APPT August 2020 APPT August 2020 APPT August 2020 APPT
Here’s what I made:
S
Here’s what I did:
Cut and scored with my paper trimmer:
- Mint Macaron card stock (CS) cut to 5-1/2″ x 8-1/2″, then scored in half at 4-1/4″, to create the card base
- Crumb Cake CS layer cut to 5-3/8″ x 3-5/8″
- Mint Macaron CS layer cut to 5-1/4″ x 3-1/2″
- Crumb Cake CS strip cut to 1″ x 3″
- Whisper White CS cut to 5-1/4″ x 4″ for the inside of the card base
Stamped with the World’s Greatest stamp set:
- card sentiment in Crumb Cake ink onto a scrap of Whisper White CS, then trimmed it down using my paper trimmer (It’s about 2″ x 9/16″.)
- round ribbon in Crumb Cake ink onto one of the larger white die cut circles from the kit
- box sentiment in Mint Macaron ink in the center of the Crumb Cake round ribbon
Cut using the Lovely Labels Pick a Punch:
- both ends of the Crumb Cake CS strip
Cut using Paper Snips:
- fussy cut around the Crumb Cake round ribbon
- trimmed the ends of the ribbon after tying the bow on the box
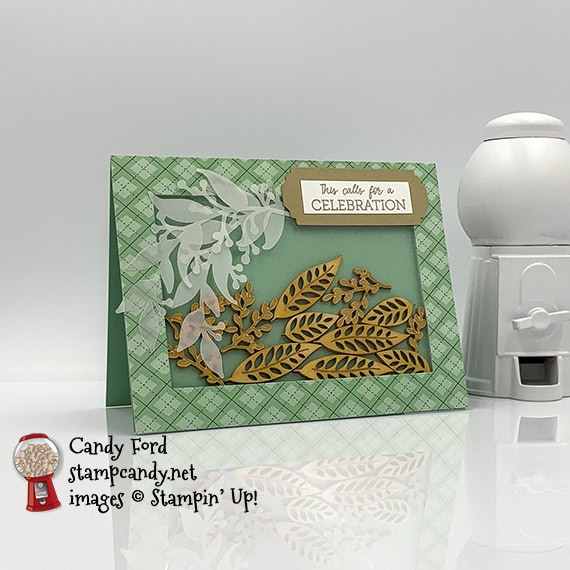
Assembled the card:
- burnished the fold in the card base with a Bone Folder
- a clear piece from the kit adhered onto one side of a foam rectangle, also from the kit
- a plaid frame from the kit adhered over the clear piece
- assorted pieces from the In Good Taste Elements laid onto the front of the card base, in one layer but clustered in the center
- stuck the other side of the foam rectangle onto the card front
- sentiment glued onto the punched Crumb Cake CS piece
- Crumb Cake piece adhered onto the card front using Stampin’ Seal+
- 2 vellum pieces from the kit adhered onto the card front using glue dots and glue
- Note: I used only a couple of glue dots where they wouldn’t show. I applied a small amount of glue to a few of the leaves and spread it with my finger, so it wouldn’t show through.
- Whisper White CS glued onto the inside of the card base (I had not done this yet when I took the photos.)
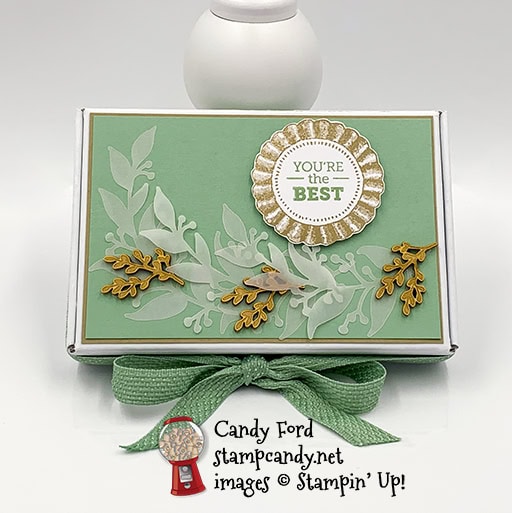
Assembled the box:
- burnished the folds in the box with a Bone Folder and folded to assemble
- Crumb Cake CS layer glued onto the top of the box
- Mint Macaron CS layer glued onto the Crumb Cake CS layer
- 3 vellum pieces glued onto the Mint Macaron CS layer, using small amounts of glue spread onto just a few of leaves
- 3 wooden elements tucked into the vellum pieces and adhered using glue dots
- round ribbon/sentiment adhered onto the Mint Macaron CS layer using Stampin’ Dimensionals
- Mint Macaron ribbon (about a yard or so) adhered onto the back and two sides of the box using Stampin’ Seal + (centering it on the back) then tied in a bow in the front
- Note: Untie the bow to open the box. The ribbon will stay attached to the box around 3 sides.
S
Here’s the August 2020 APPT Blog Hop:
S
Here are today’s colors:
You can click on each one to see all the products that come in that color!
S
Here’s what I used:
Click on these images for more details and to purchase. If you are reading this post in email, the product images may not show up. Please click here to see the post on my blog.
Supply List. <— Click for a clickable and printable list of the products!
S
Here’s how to get a prepaid Paper Pumpkin subscription:
Just click on the items below to order!
S
Here’s the World’s Greatest kit:
What it makes:
What you get: 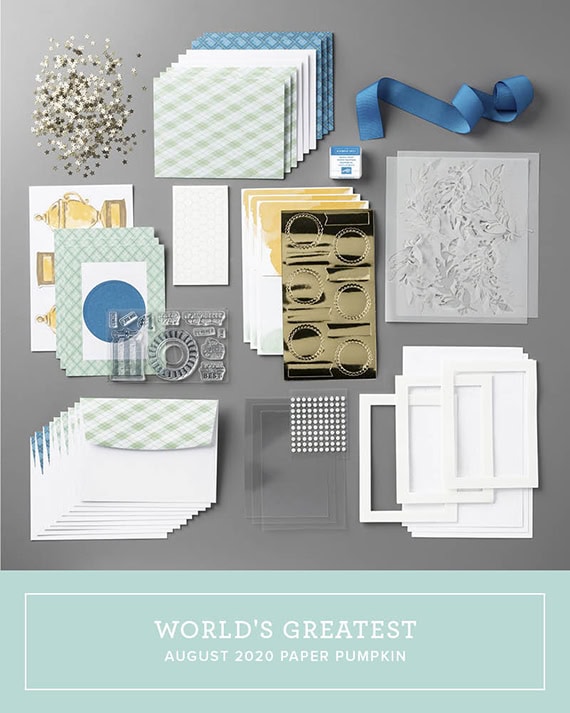
The stamp set: 
CLICK HERE to download a printable stamp case insert to store the stamp set and any left over pieces of the kit.
Use your Bonus Days coupons by August 31!
Click the image below to shop now and use your Bonus Days coupons!

S
Here are some helpful links:
S
Thanks for stopping by today, and Sweet Stamping!

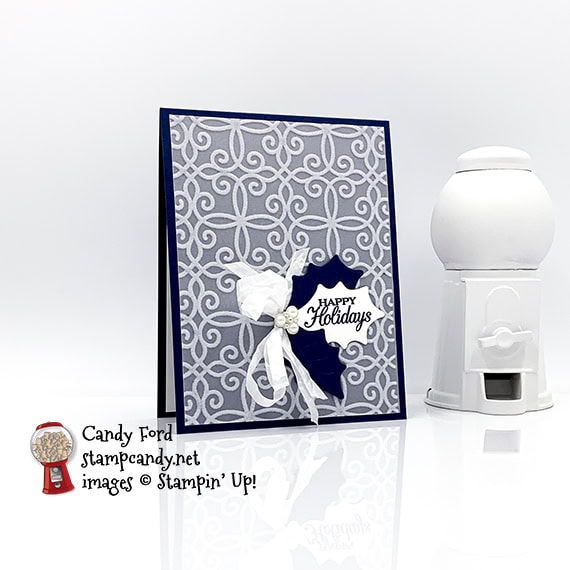
Aug 24, 2020 | Cards, Christmas, Gallery, Holiday |
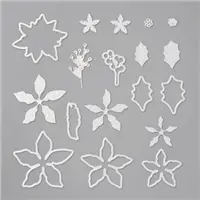
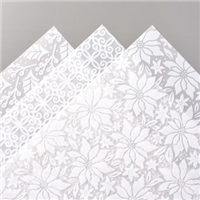
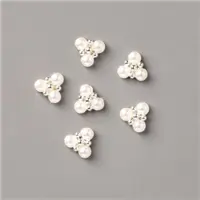
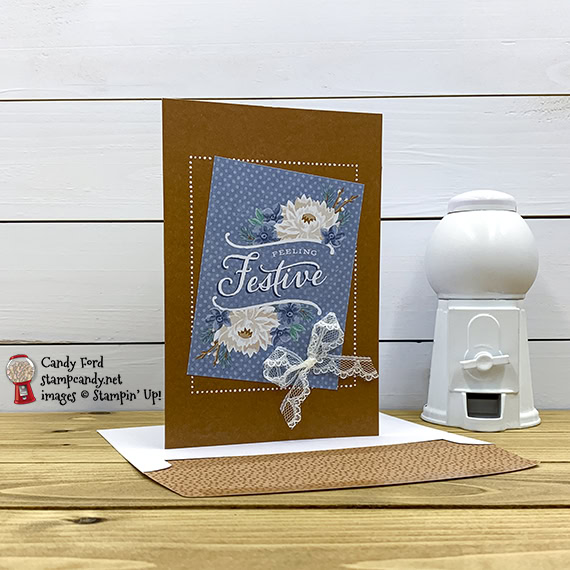
The elegant new Plush Poinsettia Specialty Paper has three flocked patterns on vellum. The flocked bits provide perfect cover for glue so you can’t see how it’s adhered onto the layer underneath. I cut three leaves using the Poinsettia Dies, and embossed two of them and stamped the sentiment onto the third one. I added a double bow and Beaded Pearl embellishment to create a cluster on the bottom right of the card front. x
If you are reading this in email, some photos may appear blurry, or may not appear at all. Please click here to see the post on my blog.
S Plush Poinsettia Plush Poinsettia Plush Poinsettia Plush Poinsettia
Here’s what I made:

S
Here’s what I did:
Cut and scored with my paper trimmer:
- Night of Navy card stock (CS) cut to 4-1/4″ x 11″, then scored in half at 5-1/2″
- Plush Poinsettia Specialty Paper (SP) layer cut to4″ x 5-1/4″
- Whisper White CS cut to 4″ x 5-1/4″ for the inside of the card base
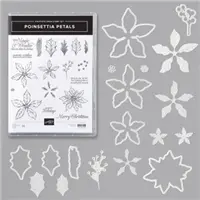
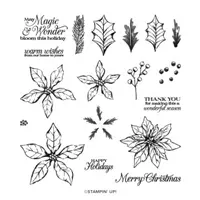
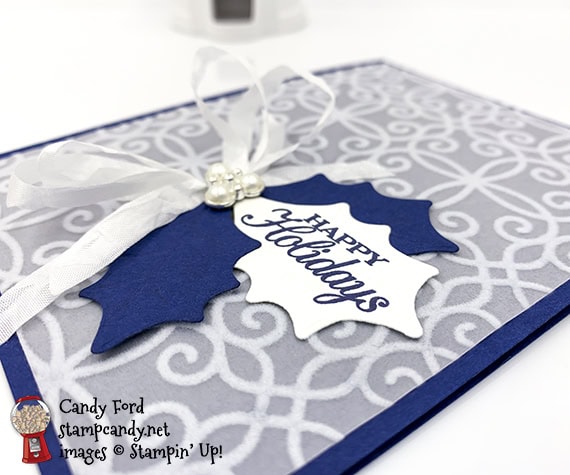
Stamped with the Poinsettia Petals stamp set:
- sentiment in Night of Navy ink onto a scrap of Whisper White Thick CS
- holly leaves and berries in Night of Navy ink onto the Whisper White CS for the inside of the card base
Cut using the Poinsettia Dies:
- sentiment using the larger leaf diex
- cut and embossed 2 holly leaves from a scrap of Night of Navy CS
Assembled the card:
- burnished the fold in the card base with a Bone Folder
- SP layer glued onto the front of the card base
- NOTE: I put glue only under the flocked areas around the edges
- 3 leaves glued together
- Beaded Pearl embellishment adhered onto the leaves using Mini Glue Dots
- ribbon tied into a double bow and adhered onto the SP layer using a Mini Glue Dot
- leaves adhered onto the SP layer using Stampin’ Dimensionals, over the knot in the ribbon
- Whisper White CS glued onto the inside of the card base
S
Here are today’s colors:
You can click on each one to see all the products that come in that color!
S
Here’s what I used:
Click on these images for more details and to purchase. If you are reading this post in email, the product images may not show up. Please click here to see the post on my blog.
Supply List. <— Click for a clickable and printable list of the products!
S
Use your Bonus Days coupons by August 31!
Click the image below to shop now and use your Bonus Days coupons!
S
Here are some helpful links:
S
Thanks for stopping by today, and Sweet Stamping!