Jun 17, 2020 | Blog Hop, Cards, Gallery, Holiday |

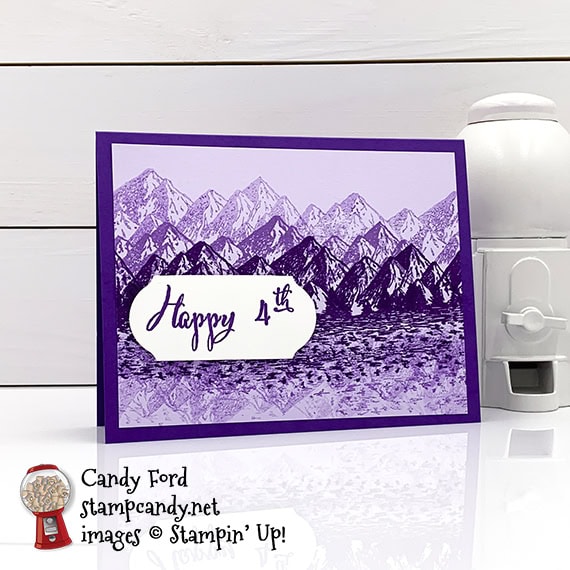
Welcome to the 06-2020 IRBH! This month we are featuring projects with a 4th of July theme. When you first look at my card, you may wonder what it has to do with America’s Independence Day holiday, other than the obvious sentiment. It’s purple instead of red, white, and blue – wait, what?
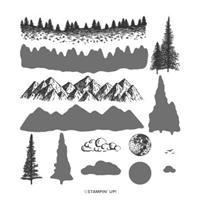
I started to make a more traditionally hued card, I really did, but I just couldn’t find my mojo. I started looking through my stamp sets for inspiration and realized I was humming “America the Beautiful.” Just when I got to the line “purple mountain majesties” my eyes fell upon the Mountain Air stamp set. Light bulb! So I used the Mountain Air stamp set to create a scene of purple mountains, along with a purple lake and a purple sky. I imagined one of those sunsets with vibrant purple at the bottom (you know the ones I’m talking about, right?) that casts its purple glow on everything for a brief moment.
Be sure to visit all the stops on the hop! You don’t want to miss any of the great projects this group has to share!
If you are reading this in email, some photos may appear blurry, or may not appear at all. Please click here to see the post on my blog.
S 06-2020 IRBH 06-2020 IRBH 06-2020 IRBH 06-2020 IRBH 06-2020 IRBH
Here’s what I made for the 06-2020 IRBH:

S
Here’s what I did:
Cut and scored with my paper trimmer:
- Gorgeous Grape card stock (CS) cut to 5-1/2″ x 8-1/2″, then scored in half at 4-1/4″
- Purple Posy CS layer cut to 5-1/8″ x 3-7/8″
- Whisper White Thick CS cut to 4″ x 1-1/8″
- Whisper White CS cut to 5-1/4″ x 4″ for the inside of the card base
Stamped with the Mountain Air stamp set:
- trees/water and first row of mountains in Gorgeous Grape ink across the center of the Purple Posy CS layer
- second row of mountains in Highland Heather ink above the first row
- third row of mountains in Highland Heather ink, stamped off once, above the second row
- mountains upside down in the water in Highland Heather ink, stamped off once
- inked up just the bottom (water) part of the tree/water stamp with Gorgeous Grape ink and stamped below the original water stamp
Stamped with the Make a Difference stamp set:
- “Happy 4th” in Gorgeous Grape ink onto the strip of Whisper White Thick CS
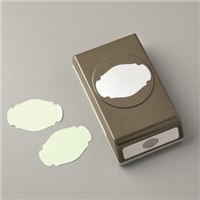
Cut using the Timeless Label Punch:
- both ends of the sentiment – I inserted each end down into the back of the punch to cut.
Assembled the card:
- burnished the fold in the card base with a Bone Folder
- Purple Posy CS layer glued onto the front of the card base
- sentiment adhered onto the Purple Posy CS layer using Stampin’ Dimensonals
- 5-1/4″ x 4″ Whisper White CS glued onto the inside of the card base
S
Here’s the 4th of July 06-2020 IRBH:
Thank you for hopping along with us. I hope you’ll hop along to the next stop on the hop, Jennifer Spiller at Westside Paper Creations. There’s an awful lot of inspiration to be found in this group, and you don’t want to miss any of it!
If you get stuck during the Blog Hop, please use this line-up as a guide:
- Brian King at Stamp with Brian
- Sue Jackson at Just Peachy Stamping
- Shawn de Oliveira at Shawn Stamps
- Ann Murray at Murray Stamps Ink
- Joanne Brown at Stamping with JoJo
- Julie DiMatteo at The Paper Pixie
- Lynn Kolcun at Avery’s Owlery
- Linda Krueger at The Stamp Coach
- Robin Myren at Songbird Designs by Robin
- Candy Ford at Stamp Candy <—– YOU ARE HERE!
- Jennifer Spiller at Westside Paper Creations
S
Did you know?
Inspired by a trip to Pikes Peak in 1893, Katherine Lee Bates (1859-1929) wrote the poem America the Beautiful, which first appeared in print on July 4, 1895 in The Congregationalist, a weekly journal. Ms. Bates revised the lyrics in 1904 and again in 1913. It has 8 verses! Click here to download it.
Here are today’s colors:
You can click on each one to see all the products that come in that color!
S
Here’s what I used:
Click on these images for more details and to purchase. If you are reading this post in email, the product images may not show up. Please click here to see the post on my blog.
Supply List. <— Click for a clickable and printable list of the products!
S
Here are some helpful links:
S
Thanks for stopping by today, and Sweet Stamping!
Jun 11, 2020 | Blog Hop, Cards, Gallery, New Products |

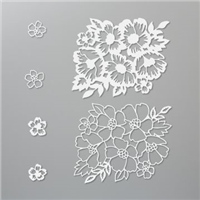
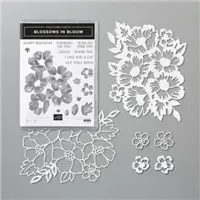
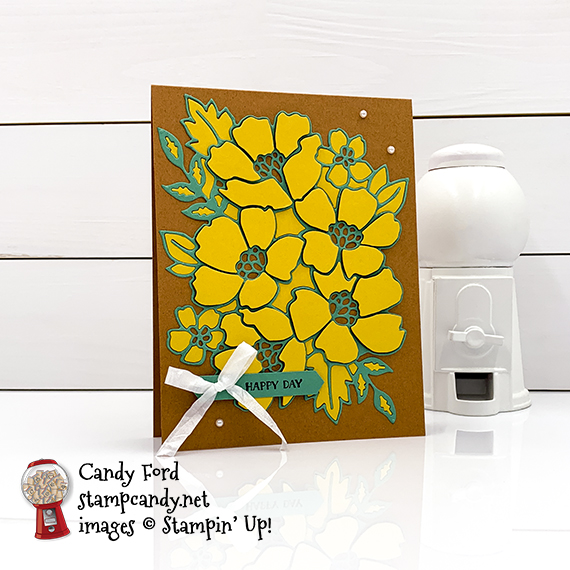
Its a New Review for the 06-2020 OSAT Blog Hop! Today we are featuring brand new products from the brand new 2020-2021 Annual Catalog. I used the Many Layered Blossoms Dies and the PPPS Technique by Kylie Bertucci of Australia to create my card. I used three of the new In Colors: Cinnamon Cider, Bumblebee, and Just Jade.
What is the PPPST? Paper Piecing Press n Seal Technique. Press n Seal plastic wrap is slightly sticky on one side, and it makes paper piecing from intricate die cuts so much easier! It’s available in your local grocery store.
Be sure to hop around to all the stops to see all the great new projects! Use the line up below if you get lost.
If you are reading this in email, some photos may appear blurry, or may not appear at all. Please click here to see the post on my blog.
S 06-2020 OSAT 06-2020 OSAT 06-2020 OSAT 06-2020 OSAT 06-2020 OSAT
Here’s what I made:

S
Here’s what I did:
Cut and scored with my paper trimmer:
- Cinnamon Cider card stock (CS) cut to 4-1/4″ x 11″, then scored in half at 5-1/2″
- Whisper White CS cut to 4″ x 5-1/4″ for the inside of the card base
Stamped with the Itty Bitty Greetings stamp set:
- sentiment in black Memento ink onto a scrap of Just Jade CS
Cut using the Many Layered Blossoms Dies:
- a piece of Bumblebee CS using the large outline die
- a piece of Just Jade CS using the same die
- NOTE: before removing each die cut from the die cutting machine, burnish a piece of Press n Seal over it to keep all the pieces in place
Cut using the Classic Label Punch:
Assembled the card:
- burnished the fold in the card base with a Bone Folder
- removed the outline piece from the Bumblebee CS die cut
- onto the back of the Bumblebee CS die cut, applied Stampin’ Dimensionals onto the large flower petals, and glue onto the other pieces
- pressed the whole thing in place onto the front of the card base, then very gently peeled back the Press n Seal
- removed the outline piece from the Just Jade CS die cut, applied glue onto the back, and glued it around the Bumblebee CS pieces (A pointy tip, like a Take Your Pick Tool, is very helpful.)
- tied a piece of ribbon in a bow and adhered it onto the sentiment using a Mini Glue Dot
- adhered sentiment over flowers (I used a Mini Stampin’ Dimensional at the left end, and glued the rest of it onto the large petals.
- 3 pearls applied onto the front of the card base
- Whisper White CS glued onto the inside of the card base
What I would do differently:
- After looking at the photo, I think the bow seems a bit large. I would probably make it smaller.
- Maybe I’d emboss the background, probably with the Subtle embossing folder.
- Maybe I’d heat emboss the sentiment in white.
- How would you change this card?
S
Here’s the 06-2020 OSAT Blog Hop:
S
Here are today’s colors:
You can click on each one to see all the products that come in that color!
S
Here’s what I used:
Click on these images for more details and to purchase. If you are reading this post in email, the product images may not show up. Please click here to see the post on my blog.
Supply List <— Click for a clickable and printable list of the products!
S
Here are some helpful links:
S
Thanks for stopping by today, and Sweet Stamping!
Jun 8, 2020 | Blog Hop, Cards, Gallery, Holiday |

Welcome to the June 2020 Candy Hearts Blog Hop! Today we are sharing Patriotic themed projects to get ready for the 4th of July, which is Independence Day here in the United States. After reading my post, I hope you will hop to the next person on the list below. Be sure to check out ALL the great projects the Hearts have created for you today.
My card is very simple. Except for two little pieces of ribbon, it’s just card stock and ink. I made it in honor of all healthcare workers, and really everyone who wears a mask any time they are around other people. If you are patriotic and care about the people of your country, please wear a mask. It literally saves lives.
One week ago I lost a dear family member to COVID-19. Someone at her husband’s work had no symptoms and refused to wear a mask, and infected a bunch of people. By the time they found out he had it, it was too late. She died, and her husband is still in ICU. Please, please, please, even if you don’t think COVID-19 is real, please wear a mask. Remember, it isn’t to protect you, it’s to protect everyone else, especially the more vulnerable folks and the people who will go home to them. Thank you.
If you are reading this in email, some photos may appear blurry, or may not appear at all. Please click here to see the post on my blog.
S June 2020 Candy Hearts Blog Hop June 2020 Candy Hearts Blog Hop June 2020 Candy Hearts Blog Hop June 2020 Candy Hearts Blog Hop
Here’s what I made:


S
Here’s what I did:
Cut and scored with my Paper Trimmer:
- Whisper White Thick card stock (CS) cut to 5-1/2″ x 8-1/2″, then scored in half at 4-1/4″
- Whisper White CS layer cut to 5-1/8″ x 3-7/8″
- Real Red CS strips cut to 1/4″ x 7″ (about 7 or 8 pieces)
- Night of Navy CS strips cut to 1/4″ x 7″ (about 7 or 8 pieces)
- Whisper White CS cut to 3″ x 4″, then scored at 1/2″, 1″, 1-1/2″, 2-1/2″, 3″, and 3-1/2″ (I left 1/2″ at the top and bottom to fold under, but you can delete these bits if you want. Cut it to 3″ x 3″, then score at 1/2″, 1″, 2″, and 2-1/2″)
- Whisper White CS cut to 1/2″ x 1-1/2″, then scored in half at 1/4″ (2 pieces)
- ends of the 1/4″ strips trimmed from the edges of the background layer (see below)
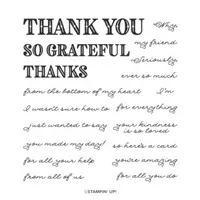
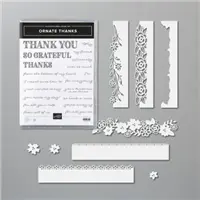
Stamped with the Ornate Thanks stamp set:
- THANKS in Real Red ink onto the top pleat of the mask
- for all you do in Night of Navy ink onto the bottom pleat of the mask
- The pleats are now, from the top down, in red, white, and blue!
Assembled the card:
- burnished the fold in the card base with a Bone Folder
- a Real Red CS strip and a Night of Navy CS strip glued side by side, at an angle, onto the middle area of the Whisper White CS layer, with the ends hanging off the side
- a CS strip laid next to them to make a space between the next red and navy strips, then removed the strip so the white shows through (OR you could cut Whisper White Thick CS strips and glue them between the others.)
- continued this until the layer was covered, then trimmed the excess pieces from the edges of the layer with the Paper Trimmer
- glued the layer onto the front of the card base
- burnished the folds in the 3″ x 4″ Whisper White CS and accordion folded to look like a mask
- burnished the folds in the 1/2″ x 1-1/2″ Whisper White CS pieces and glued them onto the ends of the mask
- adhered the ends of a piece of ribbon onto the back corners of the mask using Mini Glue Dots, one on each side
S
Here’s the June 2020 Candy Hearts Blog Hop:
Thank you for hopping with us today! Be sure to check out all the stops on the hop. Use this line up as a guide.
S
Here are today’s colors:
You can click on each one to see all the products that come in that color!
S
Here’s what I used:
Click on these images for more details and to purchase. If you are reading this post in email, the product images may not show up. Please click here to see the post on my blog.
Supply List. <— Click for a clickable and printable list of the products!
S
Here are some helpful links:
S
Thanks for stopping by today, and Sweet Stamping!
May 28, 2020 | Blog Hop, Boxes, Cards, Gallery |
 It’s time for the 05-2020 APPT Blog Hop! This month’s kit is called A Kit In Color, and it features some of the new 2020-2022 In Colors. It comes in a fun, colorful box and makes 12 fun, colorful cards. We are featuring alternate projects made with this kit. I made a card and decorated a Mini Pizza Box. Be sure to hop all the way around to see all the great alternate projects!
If you are reading this in email, some photos may appear blurry, or may not appear at all. Please click here to see the post on my blog.
S 05-2020 APPT 05-2020 APPT 05-2020 APPT 05-2020 APPT
Here’s the A Kit In Color kit:

The stamp set:
Click here to download the stamp case insert.
What comes in the kit: 
S
Here’s what I made:
The Misty Moonlight ink looks darker in these photos than in real life.


S
Here’s what I did:
Cut and scored with my paper trimmer:
- the front of one of the multicolor card bases cut into strips 1/2″ x 5-1/2″ (need 7 strips)
- a pink/orange/yellow layer cut to 2-3/4″ x 2-3/4″
- Just Jade card stock (CS) cut to 3-1/3″ x 3-1/4″
- trimmed excess strips from around the card base (see below)*
Stamped with the A Kit In Color stamp set:
- “hey” in Misty Moonlight ink onto the white side of a ticket shaped piece
- “you’re amazing” in Misty Moonlight ink onto a precut label
Assembled the card:
- burnished the fold in a small Purple Posy card base with a Bone Folder
- 1/2″ strips glued onto the front of the card base, staggering them, then trimmed excess from edges*
- adhered one of the larger vellum layers onto the strips
- wrapped a piece of twine around the top of the sentiment piece and tied in a bow
- adhered the sentiment piece onto the vellum
- applied 3 enamel shapes onto the card front

Assembled the box:
- burnished the folds in the pizza box and folded to assemble
- pink/orange/yellow layer glued onto the Just Jade CS layer
- top of a vellum tag folded over the top of the Just Jade CS layer, so the notched end comes just to the bottom of the front, and adhered in place on the back and in the center of the front
- Just Jade CS layer glued onto the top of the box
- sentiment label adhered over vellum layer
- 3 enamel shapes applied onto the box top
S
Here’s the 05-2020 APPT Blog Hop:
S
Here are today’s colors:
You can click on each one to see all the products that come in that color!
S
Here’s what I used other than the kit:
Click on these images for more details and to purchase. If you are reading this post in email, the product images may not show up. Please click here to see the post on my blog.
Supply List. <— Click for a clickable and printable list of the products!
S
Subscribe to Paper Pumpkin!
Once you buy a prepaid subscription, you will receive an email with a redemption code and instructions on how to use it to start your subscription. These make great gifts, too!
S
Last Chance Products!

Get these retiring products while you can. See them in my online store here.
S
Want a new 2020-2021 Annual Catalog?

The new catalog goes live June 3! If you have ordered from me in the past year, or have requested a catalog from me, I have already sent you one. Otherwise, if you would like a catalog, click here to request one. If you already have a Stampin’ Up! Demonstrator, please ask them for your catalog. Thank you.
S
Want a little bit of everything from the new catalog?

Click here to reserve your Swatch Books and Product Shares! Designer Series Paper Swatch Books are a useful tool. Paper Shares, Ribbon Shares, and Embellishment Shares give you a taste of all the new items, so you can decide which ones you want to order more of.
S
COVID-19 Product Giveback

Download this pdf file of fantastic sentiments and images for our current situation. Some are humorous and some are heartfelt. You get 15 pages full, and everything has a black version and a color version for variety. There are also 2 pages telling you the colors used and which punches or dies will work with each one. It’s only $12 and the full amount goes to COVID-19 relief. Download it here.
S
Here are some helpful links:
S
Thanks for stopping by today, and Sweet Stamping!
May 27, 2020 | Blog Hop, Cards, Gallery |

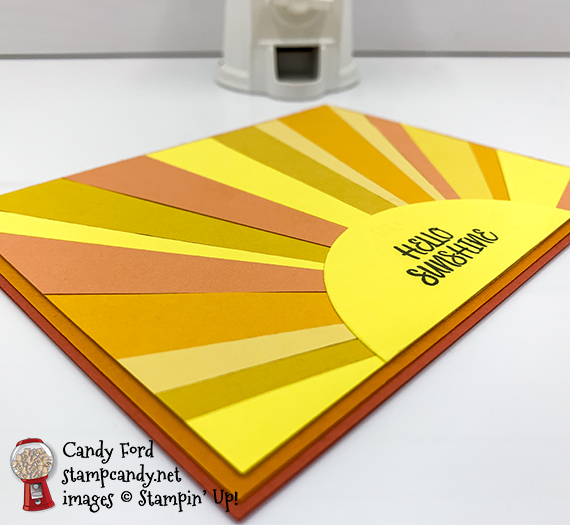
It’s time for the 05-2020 IRBH! This month’s theme is Sunshine. Sending a personal handmade card is one way to spread a little sunshine, especially in these days of social distancing and Zoom fatigue. And making cards is an excellent way to bring yourself some sunshine while staying at home. After reading my post, be sure to check out all the others on the hop. This is a very talented group of stampers, and you don’t want to miss a thing!
If you are reading this in email, some photos may appear blurry, or may not appear at all. Please click here to see the post on my blog.
S 05-2020 IRBH 05-2020 IRBH 05-2020 IRBH 05-2020 IRBH 05-2020 IRBH 05-2020 IRBH
Here’s what I made:

S
Here’s what I did:
Cut and scored with my paper trimmer:
- Terracotta Tile card stock (CS) cut to 5-1/2″ x 8-1/2″, then scored in half at 4-1/4″
- Pumpkin Pie CS layer cut to 5-3/8″ x 4-1/8″
- Crushed Curry CS layer cut to 5-1/4″ x 4″
- a strip of each color CS (Mango Melody, Grapefruit Grove, Crushed Curry, Daffodil Delight, So Saffron, Pineapple Punch, and Bumble Bee) cut to 1″ x 5″, then cut diagonally from corner to corner to create “rays”
- some of the rays cut down to skinnier rays
- Whisper White CS cut to 5-1/4″ x 4″ for the inside of the card base
- *sentiment circle cut in half (see below)
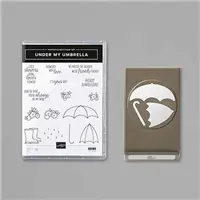
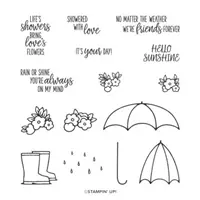
Stamped with the Under My Umbrella stamp set:
- sentiment in Basic Gray ink onto a scrap of Pineapple Punch CS
Cut using the Layering Circles Dies:
- sentiment
- *then cut it in half with the Paper Trimmer (see above)
Assembled the card:
- burnished the fold in the card base with a Bone Folder
- Pumpkin Pie CS layer glued onto the front of the card base
- CS strip “rays” glued side by side onto the Crushed Curry CS layer, beginning in the middle and working down both sides
- sentiment glued over the rays along the bottom of the layer
- Crushed Curry CS glued onto the Pumpkin Pie CS layer
- Whisper White CS glued onto the inside of the card base
S
Here’s a guide to the 05-2020 IRBH:
Thank you for hopping along with us! I hope you’ll hop along to the next stop on the blog hop, Jennifer Spiller at Westside Paper Creations. There’s a lot of inspiration to be found in this group, and you don’t want to miss any of it! If you get stuck during the hop, please use this line-up as a guide:
- Brian King at Stamp with Brian
- Linda Krueger at The Stamp Coach
- Jackie Beers at Blue Line Stamping
- Lynn Kolcun at Avery’s Owlery
- Robin Myren at Songbird Designs by Robin
- Julie DiMatteo at The Paper Pixie
- Joanne Brown at Stamping with JoJo
- Sheryl Sharp at Sharp Notes by Sheryl
- Pam Morris at Tap Tap Stamp
- Sue Jackson at Just Peachy Stamping
- Ann Murray at Murray Stamps Ink
- Candy Ford at Stamp Candy <—– YOU ARE HERE!
- Jennifer Spiller at Westside Paper Creations
S
Here are today’s colors:
You can click on each one to see all the products that come in that color!
S
Here’s what I used:
Click on these images for more details and to purchase. If you are reading this post in email, the product images may not show up. Please click here to see the post on my blog.
Supply List <— Click for a clickable and printable list of the products!
S
Last Chance Products!
Purchase these retiring products by June 2! See them in my online store here.
S
Want a new 2020-2021 Annual Catalog?
The new catalog goes live June 3! If you have ordered from me in the past year, or have requested a catalog from me, I have already sent you one. Otherwise, if you would like a catalog, click here to request one. If you already have a Stampin’ Up! Demonstrator, please ask them for your catalog. Thank you.
S
Want a little bit of everything from the new catalog?
Click here to reserve your Swatch Books and Product Shares by June 2! Designer Series Paper Swatch Books are a useful tool. Paper Shares, Ribbon Shares, and Embellishment Shares give you a taste of all the new items, so you can decide which ones you want to order more of.
S
COVID-19 Product Giveback
Download this pdf file of fantastic sentiments and images for our current situation. Some are humorous and some are heartfelt. You get 15 pages full, and everything has a black version and a color version for variety. There are also 2 pages telling you the colors used and which punches or dies will work with each one. It’s only $12 and the full amount to to COVID-19 relief. Download it here by June 2!
S
Here are some helpful links:
S
Thanks for stopping by today, and Sweet Stamping!

May 11, 2020 | Blog Hop, Cards, Gallery, Wedding |

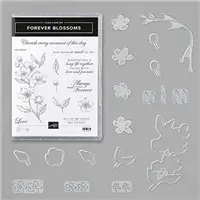
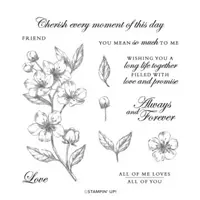
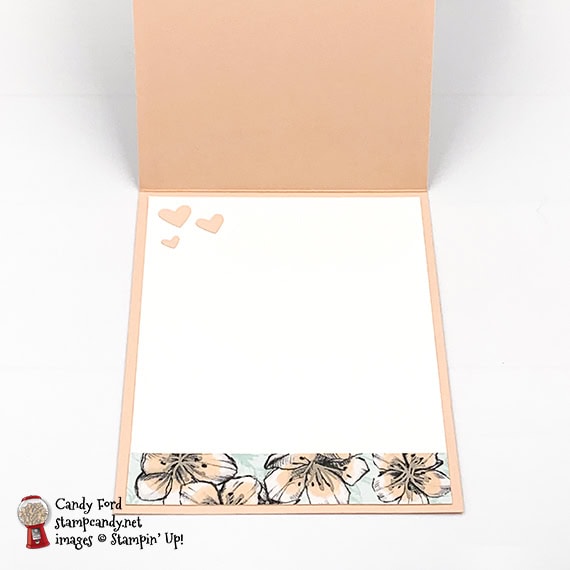
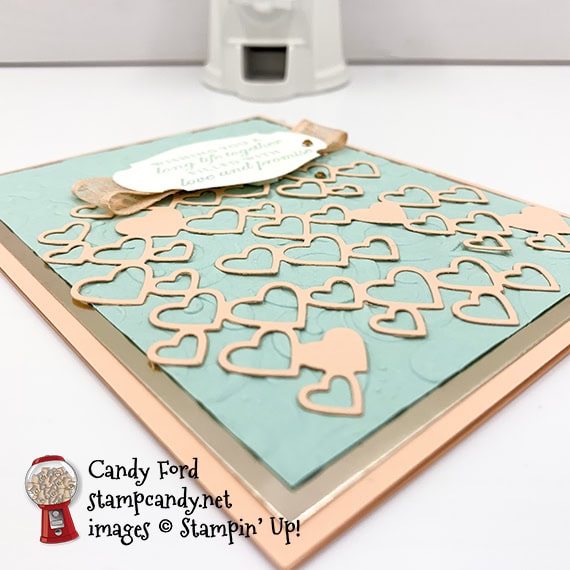
It’s time for the May 2020 CHBH! This month’s theme is Wedding and Anniversary. I used the Forever Blossoms stamp set, Detailed Hearts Die, Parisian Flourish 3D Embossing Folder, and Story Label Punch to create my wedding card.
If you are reading this in email, some photos may appear blurry, or may not appear at all. Please click here to see the post on my blog.
S May 2020 CHBH May 2020 CHBH May 2020 CHBH
Here’s what I made:

S
Here’s what I did:
Cut and scored with my paper trimmer:
- Petal Pink card stock (CS) cut to 4-1/4″ x 11″, then scored in half at 5-1/2″
- Champagne Foil Sheet layer cut to 4″ x 5-1/4″
- Pool Party CS layer cut to 3-3/4″ x 5″
- Whisper White CS cut to 4″ x 5-1/4″ for the inside of the card base
- Parisian Blossoms Specialty Designer Series Paper (DSP) strip cut to 4″ x 3/4″
Stamped with the Forever Blossoms stamp set:
- sentiment in Pool Party ink onto a scrap of Whisper White Thick CS
Cut using the Detailed Hearts Die:
- a scrap of Petal Pink CS
- then cut into two pieces using Paper Snips

Cut using the Story Label Punch:
Embossed using the Parisian Flourish 3D Embossing Folder:
Assembled the card:
- burnished the fold in the card base with a Bone Folder
- foil layer adhered onto the front of the card base using Tear & Tape
- Pool Party layer adhered onto the foil layer using Tear & Tape
- Petal Pink CS hearts die cut glued onto the Pool Party CS layer
- Petal Pink ribbon adhered onto the bak of the sentiment using Tear & Tape, with a loop on each side
- sentiment adhered onto the Pool Party layer using Stampin’ Dimensionals
- 2 Champagne Rhinestones applied onto the sentiment and Pool Party CS layer
- DSP strip glued onto the bottom edge of the Whisper White CS for the inside
- Whisper White CS glued onto the inside of the card base
S
Here’s the May 2020 CHBH:
Thank you for hopping with the Hearts today! Be sure to hop around to all the stops. You do not want to miss any of the creativity in this talented group of stampers!
Here are today’s colors:
You can click on each one to see all the products that come in that color!
S
Here’s what I used:
Click on these images for more details and to purchase. If you are reading this post in email, the product images may not show up. Click here to see the post on my blog.
Sale: $11.60
Price: $14.50
Supply List <— Click for a clickable and printable list of the products!
S
Here are some helpful links:
Thanks for stopping by today, and Sweet Stamping!