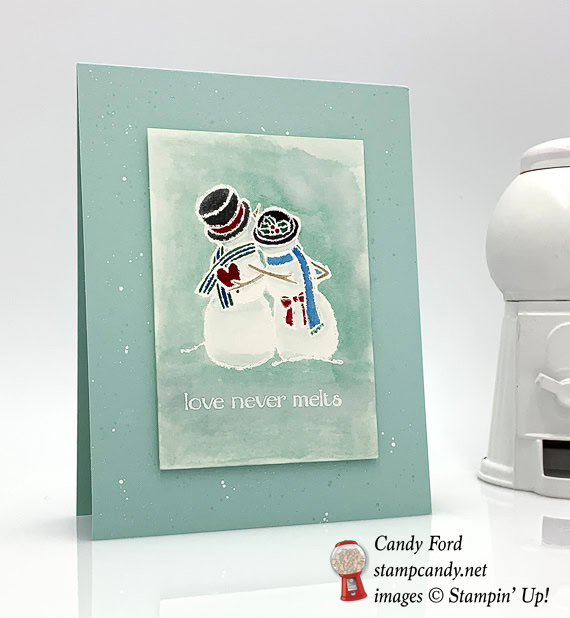
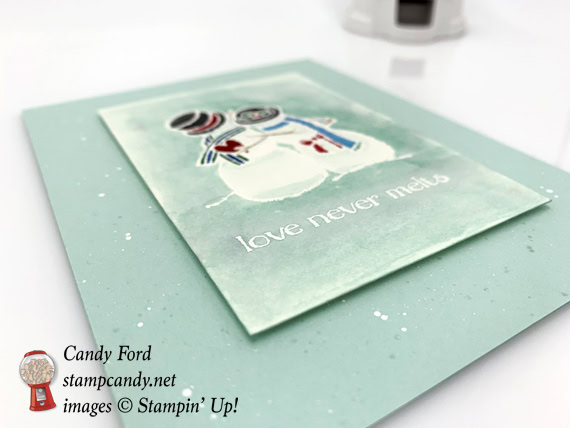
Today I’m sharing a card I made using the Spirited Snowmen stamp set. I heat embossed the image in white, then watercolored the background, and colored in the Snowpeople’s clothes using Stampin’ Write Markers. I flecked ink onto the front of the card base using a White Chalk Marker and a Clear Wink of Stella brush to represent snow. Unfortunately, once I started, I realized my chalk marker was almost dry, so I didn’t get a lot of snow. But I hope you get the idea.
Here’s what I made:
Here’s what I did:
Cut and scored with my Stampin’ Trimmer:
Pool Party card stock (CS) cut to 4-1/4″ x 11″, then scored in half at 5-1/2″
Shimmery White CS cut to 2-1/2″ x 3-3/4″
Whisper White CS cut to 4″ x 5-1/4″ for the inside of the card base
Stamped with the Spirited Snowmen stamp set:
snowpeople and sentiment in Versamark ink onto the Shimmery White CS layer, then heat embossed in white
Colored using an Aqua Painter:
background of Shimmery White CS layer in Pool Party ink
snowpeople shading in Pool Party ink
Colored using Stampin’ Write Markers:
snowpeople arms in Soft Suede ink
snowman nose in Pumpkin Pie
snowpeople clothes in Real Red, Pacific Point, Call Me Clover, Basic Black
Flecked front of card base:
using a White Chalk Marker (there isn’t a lot of white flecking on the card because my chalk marker was almost dry)
using a Clear Wink of Stella glitter brush
NOTE: I used the cap of each one to fleck the ink onto the paper.
Assembled the card:
burnished the fold in the card base with a Bone Folder
watercolored layer adhered onto the front of the card base using Stampin’ Dimensionals
Whisper White CS glued onto the inside of the card base
Here are today’s colors:
You can click on each one to see all the products that come in that color!
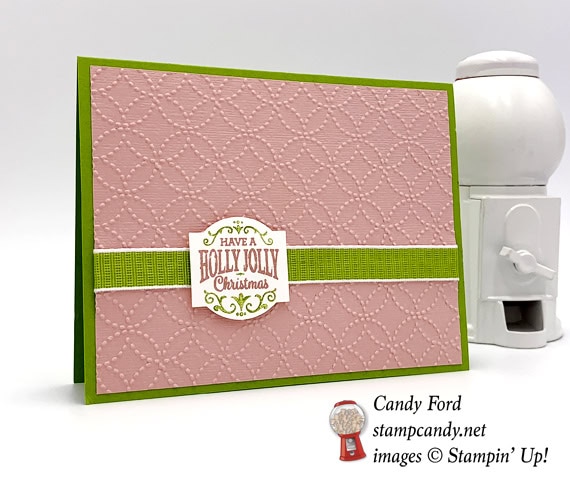
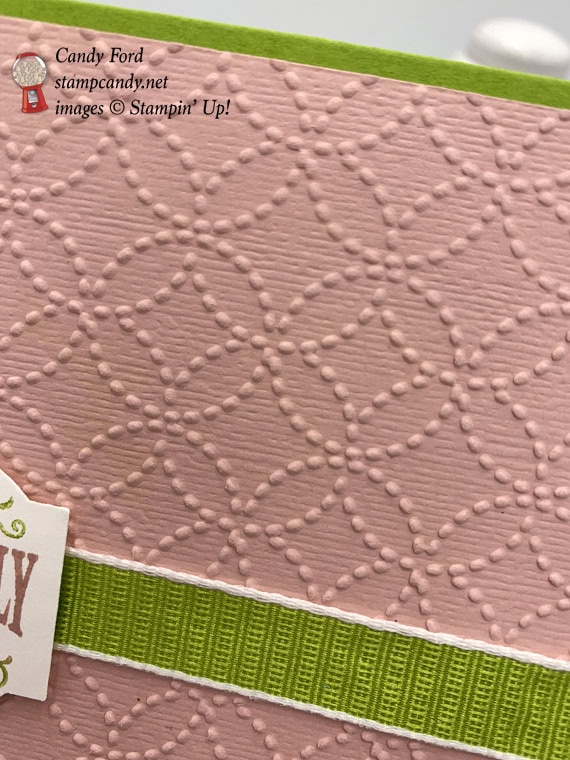
Today I’m sharing another card I made using the Christmas Traditions Punch Box. I also used the Textured Weave Ribbon and the Subtle and Quilt Top embossing folders to add some texture. The colors are Granny Apple Green and Blushing Bride. I like alternatives to red and green for Christmas. I especially like pink. My Christmas dishes are pink and green. I even have a pink Christmas tree with pink lights, AND matching wreath and garlands!
Here’s what I made:
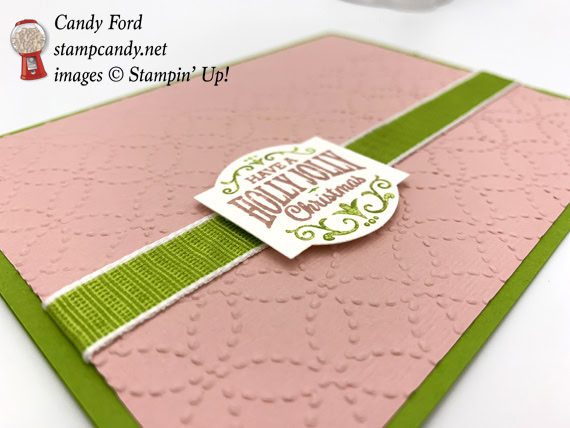
Here you can really see the texture from the two embossing folders and the ribbon:
Here’s what I did:
Cut and scored with my Stampin’ Trimmer:
Granny Apple Green card stock (CS) cut to 5-1/2″ x 8-1/2″, then scored in half at 4-1/4
Blushing Bride CS cut to 5-1/4″ x 4″
Whisper White CS cut to 5-1/4″ x 4″ for the inside of the card base
Stamped with the Christmas Traditions stamp set:
the image in Granny Apple Green and Blushing Bride inks onto a scrap of Whisper White Thick CS
NOTE: I used Stampin’ Write Markers to color the stamp, then huffed on it to reactivate the ink before stamping
Ran through the Big Shot to emboss:
Blushing Bride CS layer with the Subtle embossing folder
Blushing Bride CS layer with the Quilt Top embossing folder
NOTE: use them in this order. I think the Subtle folder would probably undo the Quilt Top pattern.
Cut using the Christmas Traditions Punch:
stamped image
Assembled the card:
burnished the fold in the card base with a Bone Folder
ribbon adhered to the Blushing Bride CS layer using Tear & Tape (or Snail) wrapping the ends around to the back
Blushing Bride CS layer glued onto the front of the card base
punched piece adhered over the ribbon using Stampin’ Dimansionals
Whisper White CS glued onto the inside of the card base
Here are today’s colors:
You can click on each one to see all the products that come in that color!
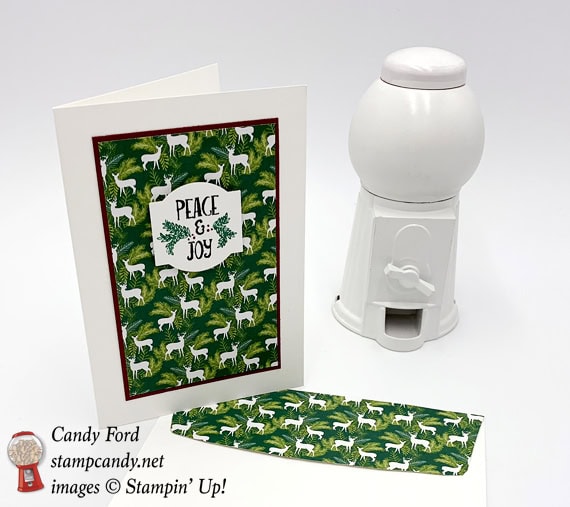
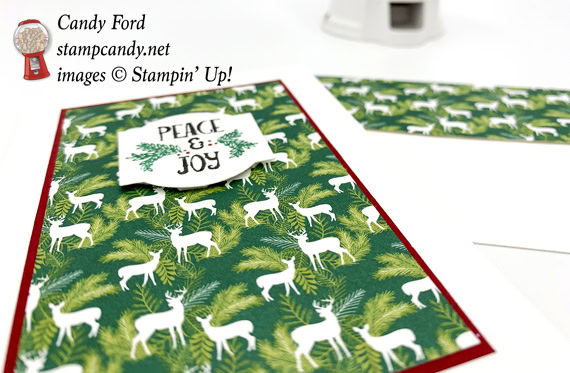
I love the new Christmas Traditions Punch Box! There are 6 different stamps that work with the punch. I used it, along with Whisper White Note Cards & Envelopes and Under the Mistletoe Designer Series Paper, to make today’s card.
Here’s what I made:
Here’s what I did:
Cut and scored with my Stampin’ Trimmer:
Real Red card stock (CS) cut to 2-1/2″ x 4″
Under the Mistletoe Designer Series Paper (DSP) cut to 2-1/4″ x 3-3/4″
DAP cut to 5-1/2″ x 2″ for the envelope flap
Stamped with the Christmas Traditions stamp set:
the image in Basic Black, Shaded Spruce, and Real Red inks onto a scrap of Whisper White Thick CS
NOTE: I colored the stamp using Stampin’ Write Markers, then huffed on it to reactivate the ink before I stamped
Cut using the Christmas Traditions Punch:
stamped image
Assembled the card:
burnished the fold in the note card base with a Bone Folder
Real Red CS layer glued onto the front of the note card base
DSP layer glued onto the Real Red CS layer
punched piece adhered onto the DSP layer using Stampin’ Dimensionals
DSP strip glued onto the envelope flap, then trimmed the excess with Paper Snips
Here are today’s colors:
You can click on each one to see all the products that come in that color!
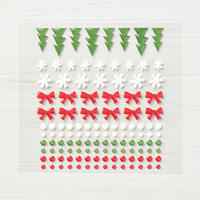
Today’s card is super quick and easy (QAE.) It’s also clean and simple (CAS.) There isn’t even any stamping! So you can crank out a bunch of these babies in no time. I used the Merry Christmas Thinlits Dies for the sentiment, and Black Foil Sheet for the background. Unfortunately the shiny quality doesn’t show in the photo, but it’s very nice. The “snow” is lots of little white enamel dots from the Santa’s Workshop Enamel Shapes. These embellishments have now sold out, but you can use Basic Pearl Jewels or Frosted & Clear Epoxy Shapes just as easily. Scroll down to see the other holiday items that are sold out or low inventory.
Here’s what I made:
Here’s what I did:
Cut and scored with my Stampin’ Trimmer:
Whisper White Thick card stock (CS) cut to 5-1/2″ x 8-1/2″, then scored in half at 4-1/4″
Black Foil Sheet cut to 5-1/4″ x 4″
Die cut using the Merry Christmas Thinlits:
“Merry Christmas”
Assembled the card:
burnished the fold in the card base with a Bone Folder
Black Foil layer glued onto the front of the card base
white dots applied onto the Black Foil layer to look like snow
NOTE: I like to use my Paper Piercing Tool (or pokey tool) to pick up the embellishments and place them on my project.
Here are today’s colors:
You can click on each one to see all the products that come in that color!
Look at these adorable embellishments! They’re flat so they’re great for cards. Just stick them on using Mini Glue Dots. (I even made a pair of earrings!)
150095: Santa’s Workshop Cards You Can Make It Bundle
147905: Santa’s Workshop Memories & More Card Pack
147815: Santa’s Workshop Memories & More Cards & Envelopes 147816: Joyous Noel Specialty Designer Series Paper 147890: Festive Farmhouse Elements 147811: Santa’s Workshop Enamel Elements
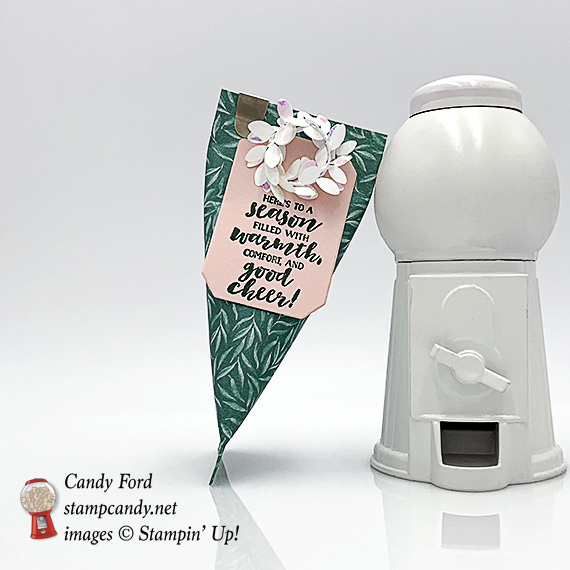
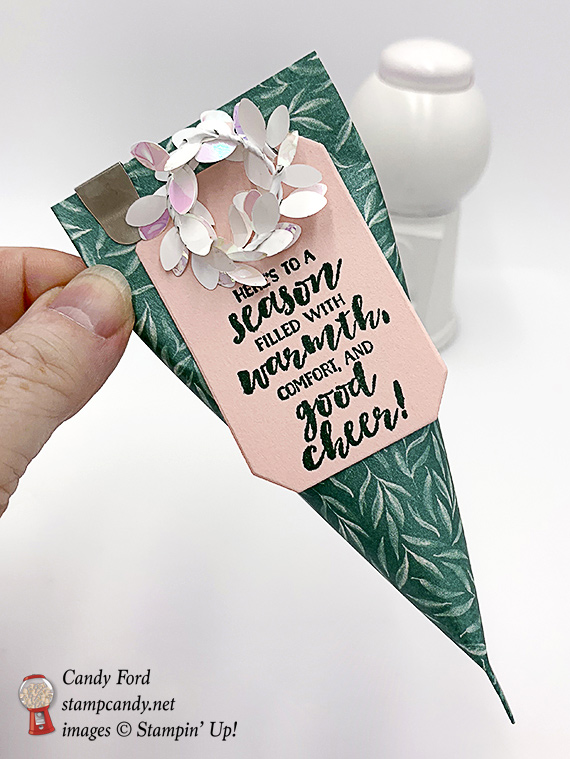
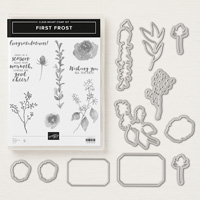
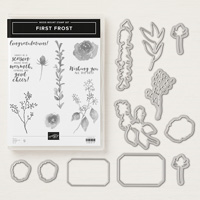
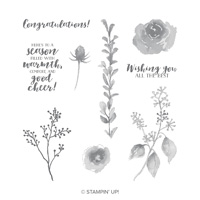
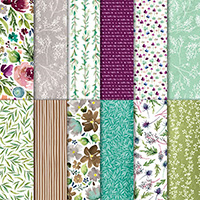
This is the time of year when we make lots of little treats and gifts, from Halloween through New Years. Today I’m sharing a quick and easy “sour cream container” made with the First Frost Bundle and Frosted Floral Specialty Designer Series Paper. I also used an Iridescent Boxwood Wreath Embellishment and a Galvanized Clip to decorate the container.
Here’s what I made:
Here’s what I did:
Cut and scored with my Stampin’ Trimmer:
Frosted Floral Specialty Designer Series Paper (DSP) cut to 6″ x 6″
Stamped with the First Frost stamp set:
sentiment in Tranquil Tide ink onto a scrap of Blushing Bride card stock (CS)
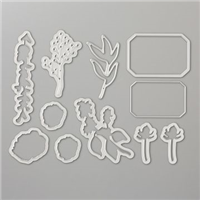
Die cut using the Frosted Bouquet Framelits:
sentiment
Assembled the container:
applied Tear & Tape along 3 sides of the inside of the DSP
rolled the side without adhesive onto the opposite edge, overlapping and adhering the edges together
pinched the bottom closed
added treats to the container
pinched the top closed perpendicular to the bottom
glued the sentiment label onto the container
adhered the wreath onto the label using a Mini Glue Dot
added the clip onto the top of the container
Here are today’s colors:
You can click on each one to see all the products that come in that color!
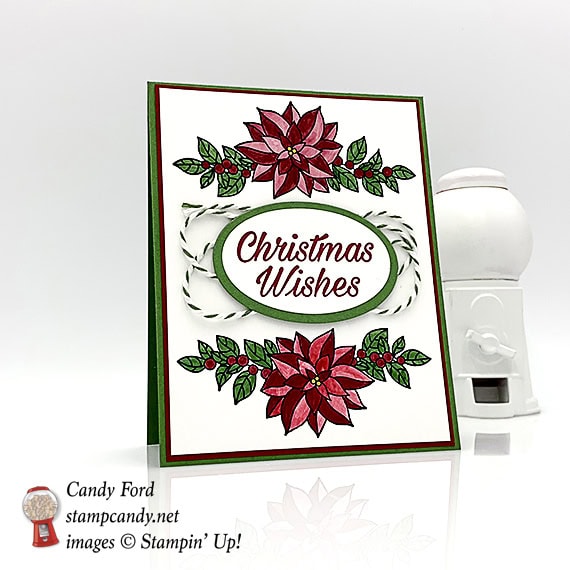
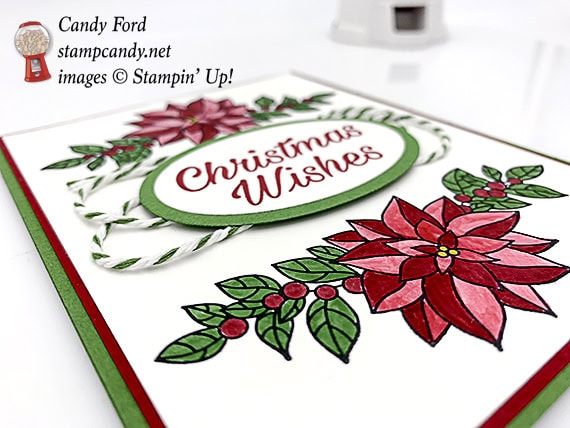
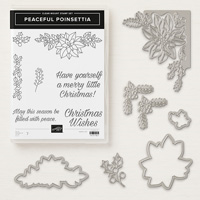
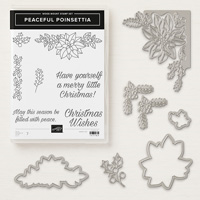
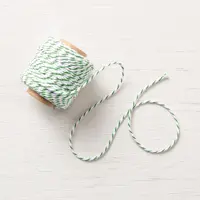
I’m baaaaaaaack! I apologize for not posting in so long. I’ve had serious internet connectivity issues. But now I’m here to share this lovely Christmas card with you. I used the Peaceful Poinsettia stamp set and a Blender Pen to create the images, and the Layering Oval Framelits Dies to cut out the sentiment. I added a little Garden Green & Whisper White Baker’s Twine to add a little somethin’ somethin’.
Here’s what I made:
Here’s what I did:
Cut and scored with my Stampin’ Trimmer:
Garden Green card stock (CS) cut to 4-1/4″ x 11″, then scored in half at 5-1/2″
Cherry Cobbler CS cut to 4-1/8″ x 5-3/8″
Whisper White CS cut to 4″ x 5-1/4″ (2 pieces)
Stamped with the Peaceful Poinsettia stamp set:
floral image in Memento Black ink onto the Whisper White CS layer, once at the top, and once at the bottom (flipped)
sentiment in Cherry Cobbler ink onto a scrap of Whisper White CS
Die cut using the Layering Ovals Framelits:
sentiment
a scrap of Garden Green CS, slightly larger than the sentiment
Colored using a Blender Pen:
poinsettias and berries in Cherry Cobbler ink
leaves in Garden Green ink
flower centers in Crushed Curry ink
Assembled the card:
burnished the fold in the card base with a Bone Folder
Cherry Cobbler CS layer glued onto the front of the card base
stamped Whisper White CS layer glued onto the Cherry Cobbler CS layer
sentiment glued onto the Garden Green die cut oval
Garden Green Baker’s Twine wound around my hand then adhered to the back of the Garden Green CS oval
Garden Green CS oval adhered onto the card front using Stampin’ Dimensionals
remaining Whisper White CS glued onto the inside of the card base
Here are today’s colors:
You can click on each one to see all the products that come in that color!