May 26, 2018 | Food, Gallery, Gift Wrap, Parties |
I always have bottled water at my events, and when I have time, I like to decorate the bottles. You can do this for any event. Today’s project is a bottle I decorated for a graduation party. The colors I used are Fresh Fig and Crushed Curry (garnet & gold) but of course you can use any colors you want. The Banners for You stamp set is perfect for this occasion, and for many others. And the Bunch of Banners Framelits Dies cut out the stamp set’s banners like a charm.
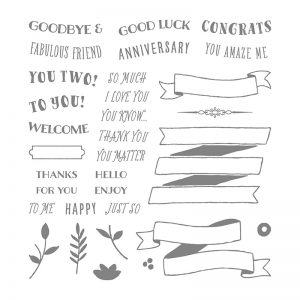
Banners For You stamp set © Stampin’ Up!
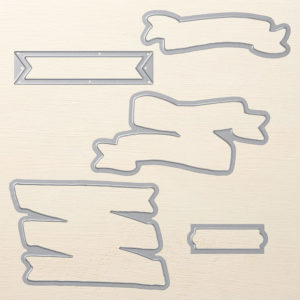
Bunch of Banners Framelits Dies © Stampin’ Up!
Here’s what I made:
How do you like the mortar board, complete with tassel?


Here’s what I did:
Cut and scored with my Stampin’ Trimmer:
- Crushed Curry card stock (CS) cut to 9″ x 3-1/2″
- Fresh Fig CS cut to 9″ x 3″
- Fresh Fig CS cut to 3″ x 3″
- Fresh Fig CS cut to 1-1/4″ x 5″, then scored 1/4″ from one of the long sides
Stamped with the Banners for you stamp set:
- banner in Crushed Curry ink onto a scrap of Very Vanilla CS
- sentiments in Fresh Fig ink on the banner
Die cut using the Bunch of Banners Framelits:
Assembled the project:
- burnished the fold in the Fresh Fig CS strip with a Bone Folder
- snipped all along the length, across the 1/4″ strip, up to the score line, using Paper Snips
- wrapped the strip around the top of the bottle to gauge the size (not too tight) then glued the ends together – do not adhere to the bottle or its cap.
- folded all the snipped bits in and glued them onto the center of the 3″ square piece of Fresh Fig CS
- tied a piece of gold ribbon onto a gold tassel, then adhered it to the top of the cap using Tear & Tape
- adhered a 1/4″ punched circle of Fresh Fig CS over the center of the top of the cap, over the end of the ribbon, using a Mini Glue Dot
- adhered the large piece of Crushed Curry CS around the bottle using Tear & Tape
- adhered the large piece of Fresh Fig CS on top of the Crushed Curry CS using Tear & Tape
- glued the banner onto the Fresh Fig CS
- NOTE: I used rubber bands to hold the banner on until the glue dried completely
- NOTE: Adhere the two large pieces of CS to the bottle separately. If you adhere them together, then wrap them around the bottle, they will pull apart.
Here are today’s colors:
You can click on each one to see all the products that come in that color!
Here’s what I used:
Click on these images for more details and to purchase.
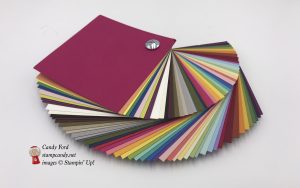
Swatch Books & Paper Shares
Order by May 31 to receive them early- to mid-June. Click here for details and to order!
Here’s some information you should check out:
Thanks for stopping by today, and Sweet Stamping!
May 7, 2018 | Decor, Food, Gallery, Gifts, Occasions, Parties, Retiring Products |
Today I’m sharing a super easy way to decorate a container for a party. I used the Picture Perfect Party Designer Series Paper, Bermuda Bay card stock, and Lemon Lime Twist ribbon. The colors in the paper look great with the multicolor gumballs in the jar.
I’ve had this jar for years, and I decorate it in different ways for different events. This is perfect for a fun birthday party, maybe for a child. I think I bought the jar at Target, or maybe T.J.Maxx or Home Goods.
I recommend using a small plastic scoop, so there aren’t a bunch of sticky little hands all over the gumballs. Don’t ask me how I learned that lesson.
Here’s what I made:


Here’s what I did:
Cut and scored with my Stampin’ Trimmer:
- Bermuda Bay card stock (CS) cut to 12″ x 4″ (2 pieces)
- Picture Perfect Party Designer Series Paper (DSP) cut to 6″ x 3-1/2″ (4 pieces)
- NOTE: I cut the top and bottom off the DSP pieces to have as much of the candles as possible.
Assembled the project:
- Bermuda Bay CS pieces wrapped around the jar and adhered with Tear & Tape, to each other and to the jar
- DSP pieces glued onto the CS, all the way around the jar
- tied a piece of Lemon Lime Twist Finely Woven Ribbon around the lid handle and tied it in a bow
Here are today’s main colors:
You can click on each one to see all the products that come in that color!
Here’s what I used:
Click on these images for more details and to purchase.
Here’s some stuff you should check out:
Thanks for stopping by today, and Sweet Stamping!
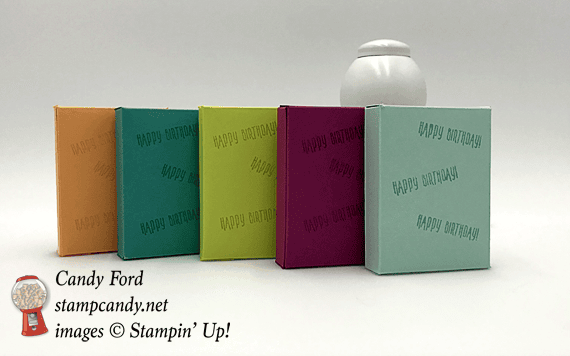
Apr 27, 2018 | Boxes, Food, Gallery, Gifts, Parties |
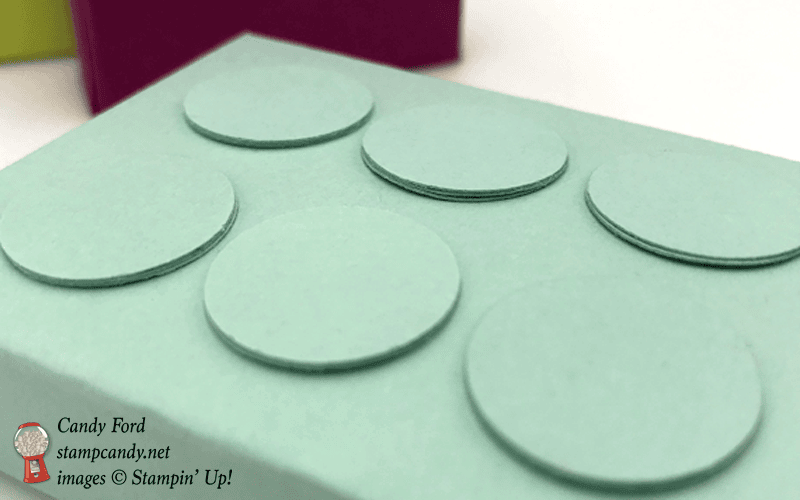
These cute little party favors for a child’s birthday party are really easy to make. It’s a simple box with some punched circles glued onto the front to resemble Lego blocks. The colors are from the Picture Perfect Party Designer Series Paper: Berry Burst, Lemon Lime Twist, Peekaboo Peach, Bermuda Bay, and Pool Party. I made them to coordinate with some other things I made for a presentation of projects for a child’s birthday party.
Here’s what I made:


Here’s what I did:
Cut and scored with my Stampin’ Trimmer:
- card stock (CS) cut to 6-3/8″ x 4-3/4″, then scored according to the diagram below
- along the 6-3/8″ side, scored at 5/8″, 2-7/8″ 3-1/2″, 5-3/4″, and 6-3/8″
- along the 4-3/4″ side, scored at 1/2″, 1-1/8″, and 4-1/8″
Cut using Paper Snips:
- the cardstock according to the diagram below (after burnishing all the score lines with a Bone Folder)
- cut away the green areas
- cut solid lines

Stamped with the Picture Perfect Birthday stamp set:
- Happy Birthday onto the back of the boxes in the same color ink
Cut using the 3/4″ Circle Punch:
- 18 circles from the same color CS for each box
Assembled the boxes:
- burnished the folds in the card stock with a Bone Folder, before cutting with Paper Snips
- 3 punched circles glued together – make 6 of these
- box glued together up one side (flap at far right glued to the inside of the flap at far left)
- bottom flaps of box glued together
- 6 circle stacks glued onto the front of the box
- inserted raisins and closed box
Here are today’s colors:
You can click on each one to see all the products that come in that color!
Here’s what I used:
Click on these images for more details and to purchase.
Here’s some stuff you should know:
Thanks for stopping by today, and Sweet Stamping!
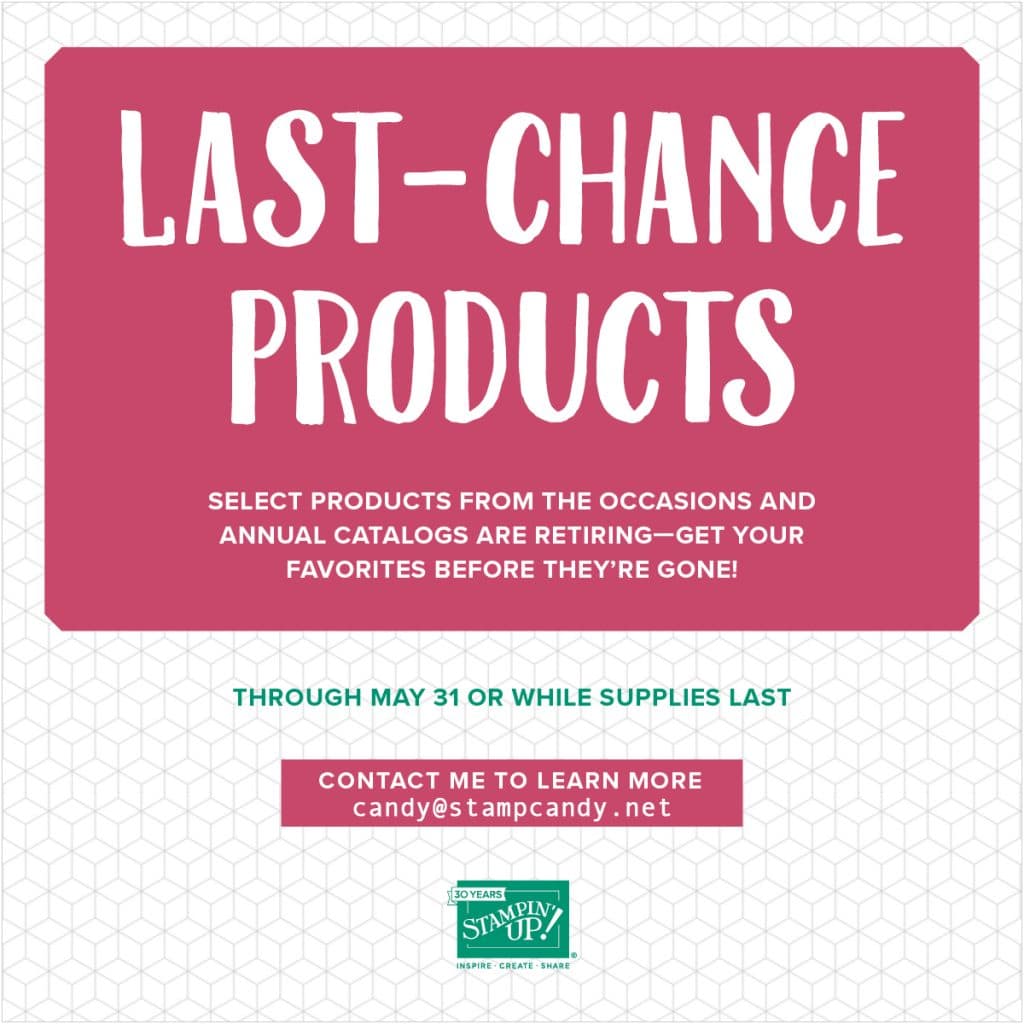
Apr 15, 2018 | Baby, Food, Gallery, Gifts, Parties, Promotions, Retiring Products |
Today’s project is made with several retiring products: World’s Best Trophy stamp set, Archival Basic Black ink pad, and card stock in Chocolate Chip, Pink Pirouette, and Soft Sky. Chocolate Chip is the perfect reddish brown color for a cigar. I wrapped it around large rolls of Sweetarts candies. The cigar bands are strips of card stock with 1″ punched circles. I didn’t have a stamp set that included “boy,” although there are a few that have the word “girl.” So I used the “son” and “daughter” from the World’s Best Trophy stamp set. These make great party favors for a baby shower. You can change the band color and sentiment for any occasion.
You can see everything that is retiring HERE. Everything is available through May 31, or while supplies last.
Here’s what I made:


Here’s what I did:
Cut and scored with my Stampin’ Trimmer:
- Chocolate Chip card stock (CS) cut to 3″ x 7-1/4″ (one for each cigar)
- Pink Pirouette CS cut to 3″ x 3/4″
- Soft Sky CS cut to 3″ x 3/4″
Stamped with the World’s Best Trophy stamp set:
- son in Basic Black ink onto a scrap of Soft Sky CS
- daughter in Basic Black ink onto a scrap of Pink Pirouette CS
Cut using the 1″ Circle Punch:
Assembled the cigars:
- burnished the Chocolate Chip CS pieces, and both of the CS strips, with a Bone Folder to soften and curl them
- wrapped the Chocolate Chip CS pieces around rolls of SweetTarts candy and secured using Tear & Tape
- wrapped the CS strips around the cigars and secured using Tear & Tape
- adhered the punched sentiments onto the cigar bands using Tear & Tape
Here are today’s colors:
You can click on each one to see all the products that come in that color!
Here’s what I used:
Click on these images for more details and to purchase.
Here’s some stuff you should know:
Thanks for stopping by today, and Sweet Stamping!
Apr 14, 2018 | Food, Gallery, Gifts, Parties |
Today I’m sharing another project I made for my presentation at last weekend’s Spring Stamp-Along hosted by Brian King of stampwithbrian.com. It’s an oh so quick and easy project (you know how I like those!) that I made for a kid’s birthday party theme. I used a little plastic champagne bottle filled with Mini M&Ms. The bottom comes off the tiny bottle so it’s easy to fill. I know it looks as big as my gumball machine prop in the pictures, but it’s only about 3″ tall. The sentiment is from the Teeny Tiny Wishes stamp set. I’ve been saying for years that everyone should own this stamp set. It has a sentiment for all the major occasions in life. If you don’t already have it, I strongly encourage you to get it before it disappears!
Here’s what I made:


Here’s what I did:
Stamped with the Teeny Tiny Wishes stamp set:
- sentiment in Pacific Point ink onto a scrap of Whisper White cardstock (CS)
Cut using the Classic Label Punch:
Assembled the project:
- adhered the sentiment to the bottle using Tear & Tape
- tied a piece of ribbon around the bottle neck and into a bow
Here are today’s colors:
You can click on each one to see all the products that come in that color!
Here’s what I used:
Click on these images for more details and to purchase.
The little champagne bottles came from orientaltrading.com. The Mini M&Ms came from the grocery store.
Here’s some stuff you should know:
Thanks for stopping by today, and Sweet Stamping!
Apr 11, 2018 | Baby, Food, Gallery, Gifts, Parties |
I am back from a fun, amazing, full, exhausting weekend full of stamping events: two official Stampin’ Up! events and two events hosted by Stampin’ Up! Demonstrators. I gave a presentation at the first event, Brian’s Spring Stamp-Along on April 6 hosted by Brian King. Today I’m sharing one of the projects from my presentation; chocolate bars decorated with A Whole Lot of Lovely Designer Series Paper for a baby shower. It’s a very quick and easy project. I mean very quick and easy. For the basic design, you need a chocolate bar, a couple pieces of paper, and a baby sock. Then you can froufrou it up however you want.
Here’s what I made:

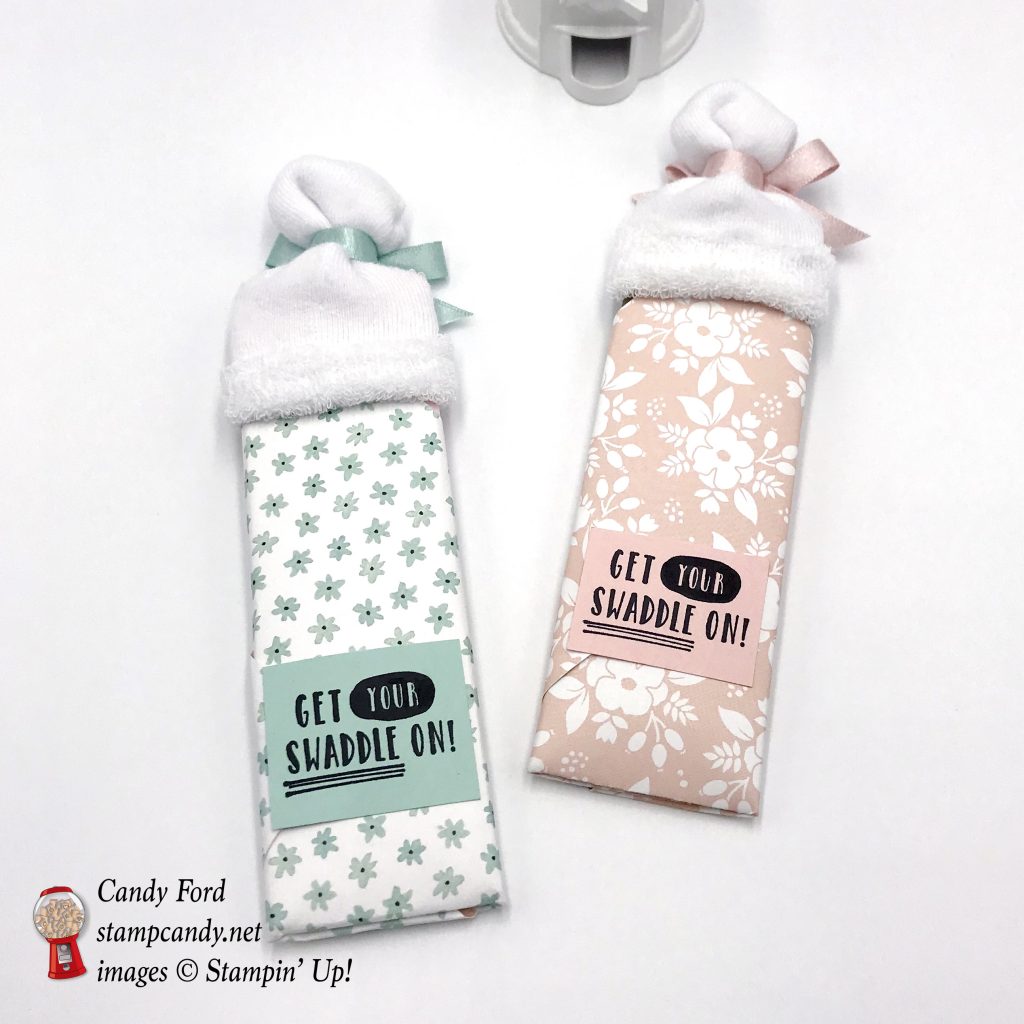
Here’s what I did:
Cut and scored with my Stampin’ Trimmer:
- A Whole Lot of Lovely Designer Series Paper (DSP) cut to 6″ x 6″ (2 pieces)
- Pink Pirouette card stock (CS) cut to 5″ x 6-1/4″ (the chocolate bar is 6-1/4″ long and just over 4″ around)
- Soft Suede CS cut to 5″ x 6-1/4″
- Pool Party CS cut to 1-3/4″ x 1-1/4″
- Powder Pink CS cut to 1-3/4″ x 1-1/4″
Stamped with the Little One stamp set:
- sentiment in Basic Black ink onto each 1-3/4″ x 1-1/4″ CS piece
Stamped with the Better Together stamp set:
- diaper pin in Basic Black ink onto the front of the DSP “blankets”
Drew using Journaling Markers:
- faces on the front of the CS wrapped chocolate bar “babies”
Assembled the project:
- wrapped each chocolate bar with a 5″ x 6-1/4″ piece of CS and adhered together on the back with Tear & Tape
- DSP wrapped around chocolate bar like a blanket, and adhered with Tear & Tape
- sentiment adhered to the back using Tear & Tape
- baby sock put on top like a hat
- ribbon tied around the top of the hat and tied in a bow
Here are today’s colors:
You can click on each one to see all the products that come in that color!
Here’s what I used:
Click on these images for more details and to purchase.
Here’s some stuff you should know:
Thanks for stopping by today, and Sweet Stamping!