Sep 7, 2020 | Cards, Gallery |
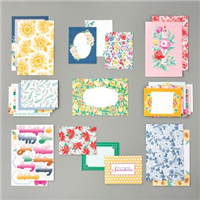
Today I’m sharing a card I made using the Flowers for Every Season Memories & More (M&M) Cards & Envelopes and the Flowers for Every Season M&M Card Pack along with the Tasteful Textile 3d Embossing Folder. It’s a quick and easy card, but the embossing, along with the ribbon bow, really packs a punch.
If you are reading this in email, some photos may appear blurry, or may not appear at all. Please click here to see the post on my blog.
S Tasteful Textile 3D Tasteful Textile 3D Tasteful Textile 3D Tasteful Textile 3D
Here’s what I made: 
S
Here’s what I did:
Cut and scored with my paper trimmer:
- Just Jade CS layer cut to 3-3/4″ x 5-3/4″
- Whisper White 3-1/4″ x 4-1/4″
Embossed using the Tasteful Textile 3D Embossing Folder:
Assembled the card:
- burnished the fold in the Bumblebee card base with a Bone Folder
- Just Jade embossed CS layer glued onto the front of the card base
- Whisper White CS layer glued onto the Just Jade CS layer
- 3″ x 4″ M&M card glued onto the Whisper White CS layer
- Bumblebee ribbon tied in a bow and adhered onto the M&M card using a glue dot
S
Here are today’s colors:
You can click on each one to see all the products that come in that color!
S
Here’s what I used:
Click on these images for more details and to purchase. If you are reading this post in email, the product images may not show up. Please click here to see the post on my blog.
Supply List. <— Click for a clickable and printable list of the products!
S
Here are some helpful links:
S
Thanks for stopping by today, and Sweet Stamping!
Sep 4, 2020 | Cards, Club, Gallery |
Who do you know who makes everything better? Make this fun card for them. I used the Nothing’s Better Than Bundle (Nothing’s Better Than stamp set & Love You More Than Dies) to make this messy card, complete with “coffee stain.” It’s one of the projects we made in Stamp Club this month.
If you are reading this in email, some photos may appear blurry, or may not appear at all. Please click here to see the post on my blog.
S Love You More Than Love You More Than Love You More Than Love You More Than
Here’s what I made:


S
Here’s what I did:
Cut and scored with my paper trimmer:
- Rococo Rose card stock (CS) cut to 5-1/2″ x 8-1/2″, then scored in half at 4-1/4″
- Pool Party card stock (CS) layer cut to 5-3/8″ x 4-1/8″
- Shimmery White CS layer cut to 5-1/4″ x 4″
- Whisper White CS cut to 5-1/4″ x 4″ for the inside of the card base
Stamped with the Nothing’s Better Than stamp set:
- sentiment in Pool Party ink onto a scrap of Whisper White Thick CS
- cups (2 in Pool Party and 1 in Rococo Rose) onto a scrap of Whisper White Thick CS
- steam in Early Espresso ink onto the Shimmery White CS layer just above the top cup
Cut using the Love You More Than Dies:
- 3 stamped cups
- word “Coffee”
Cut using Paper Snips:
- separated the words of the stamped sentiment
Watercolored using a Water Painter:
- “coffee stain” in Early Espresso ink onto the Shimmery White CS layer
- splattered same layer with more water and Early Espresso ink, by tapping the Water Painter on my hand over the layer
- Be sure to let the layer dry completely before adhering. You can use a Heat Tool to speed up the drying process.
Assembled the card:
- burnished the fold in the card base with a Bone Folder
- Pool Party CS layer glued onto the front of the card base
- Shimmery White CS layer glued onto the Pool Party CS layer
- die cut “Coffee” glued onto the Shimmery White CS layer
- 3 die cut cups glued together in a stack, then adhered onto the Shimmery White CS layer using Stampin’ Dimensionals
- stamped sentiment words adhered onto the Shimmery White CS layer using Mini Stampin’ Dimensionals
- Whisper White CS glued onto the inside of the card base
S
Here are today’s colors:
You can click on each one to see all the products that come in that color!
S
Here’s what I used:
Click on these images for more details and to purchase. If you are reading this post in email, the product images may not show up. Please click here to see the post on my blog.
Supply List. <— Click for a clickable and printable list of the products!
S
Here are some helpful links:
S
Thanks for stopping by today, and Sweet Stamping!
Sep 3, 2020 | Cards, Gallery, Techniques |
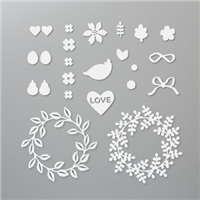
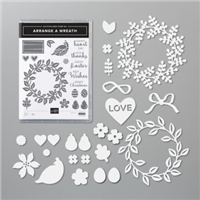
Wreaths aren’t just for the holidays. Today’s wreath card gives encouragement to a dear friend. I used the Wreath Builder Dies, Layering Circle Dies, Ornate Frames Dies, Forever Fern stamp set, and 1-1/2″ Circle Punch. And of course, several colors of card stock. The front of the card base is in two separate pieces that are held together by the wreath and the sentiment.
If you are reading this in email, some photos may appear blurry, or may not appear at all. Please click here to see the post on my blog.
S wreath builder wreath builder wreath builder wreath builder
Here’s what I made:


S
Here’s what I did:
Cut and scored with my paper trimmer:
- Whisper White Thick card stock (CS) cut to 5-1/4″ x 5-1/2″, then scored along the shorter side at 4-1/4″
- Whisper White Thick CS cut to 1″ x 5-1/2″
- Just Jade CS cut to 4″ x 1-1/8″
Stamped with the Forever Fern stamp set:
- inner sentiment in Pretty Peacock ink onto the inside of the card base
- outer sentiment in Pretty Peacock ink onto a scrap of Whisper White Thick CS
Cut using the Wreath Builder Dies:
- leaf wreaths from scraps of Pear Pizzazz, Just Jade, Garden Green, Shaded Spruce, and Pretty Peacock CS
- berry wreath from a scrap of Soft Sea Foam CS
Cut using the Ornate Frames Dies:
Cut using the Layering Circles Dies:
- a scrap of Whisper White Thick CS into a ring, using a larger and a smaller die, for the back of the wreath
- Be sure the ring doesn’t show inside the center of the wreath or outside the perimeter of the wreath.
Cut using the 1-1/2″ Circle Punch:
- both ends of the Just Jade CS piece
Assembled the card:
- burnished the fold in the card base with a Bone Folder
- wreaths stacked and glued onto each other
- 1″ strip of Whisper White Thick CS lined up along the right side of the card base
- Just Jade CS glued only at the ends onto the left side of the card base front and onto the 1″ strip
- flipped over the card base and glued the Whisper White Thick CS ring only on the sides onto the two sides of the card front, making sure the inner sentiment would show through the center
- flipped back over and glued the wreath onto the ring and the two sides of the card front, again making sure the inner sentiment would show through the center
- outer sentiment adhered into the Just Jade CS using Stampin’ Dimensionals
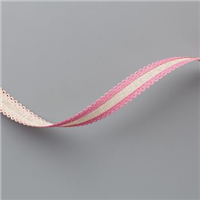
- Magenta Madness ribbon tied in a bow and adhered onto the wreath using a Mini Glue Dot
S
Here are today’s colors:
You can click on each one to see all the products that come in that color!
S
Here’s what I used:
Click on these images for more details and to purchase. If you are reading this post in email, the product images may not show up. Please click here to see the post on my blog.
Supply List. <— Click for a clickable and printable list of the products!
S
Here are some helpful links:
S
Thanks for stopping by today, and Sweet Stamping!
Sep 2, 2020 | Cards, Gallery, Simple Stamping |
Today I’m sharing one of the cards we made in our August Stamp Club. It’s a #simplestamping card made with the Nothing’s Better Than stamp set, Whisper White Thick card stock, and ink. You can save 10% when you buy the stamp set bundled with the coordinating dies.
If you are reading this in email, some photos may appear blurry, or may not appear at all. Please click here to see the post on my blog.
S nothing nothing nothing nothing
Here’s the bundle:

S
Here’s what I made:


S
Here’s what I did:
Cut and scored with my paper trimmer:
- Whisper White Thick card stock (CS) cut to 5-1/2″ x 8-1/2″, then scored in half at 4-1/4″
- CS layer cut to 5-1/4″ x 4″
- CS layer cut to 5″ x 3-3/4″
Stamped with the Nothing’s Better Than stamp set:
- drink outline in Early Espresso ink onto the smaller layer
- NOTE: You can use another color for the drink outline. I try to limit the number of ink colors we use at any given gathering, since we’re meeting via Zoom and folks have to have everything at home. These are the four ink colors we used for all the Stamp Club projects.
- drink contents in Pool Party ink onto the smaller layer
- lemon in Daffodil Delight ink onto the smaller layer
- umbrella in Rococo Rose ink onto the smaller layer
- sentiment in Rococo Rose ink onto the smaller layer
- tiny stars in Pool Party ink around the drink and sentiment
- inner sentiment in Pool Party ink onto the inside of the card base
- NOTE: I forgot to photograph the inside of the card. It says, “and I’m pretty sure tomorrow will be too.”
Assembled the card:
- burnished the fold in the card base with a Bone Folder
- smaller layer glued onto the larger layer
- larger layer glued onto the front of the card base
S
Here are today’s colors:
You can click on each one to see all the products that come in that color!
S
Here’s what I used:
Click on these images for more details and to purchase. If you are reading this post in email, the product images may not show up. Please click here to see the post on my blog.
Supply List. <— Click for a clickable and printable list of the products!
S
Here are some helpful links:
S
Thanks for stopping by today, and Sweet Stamping!
Sep 1, 2020 | Cards, Gallery |
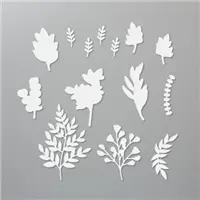
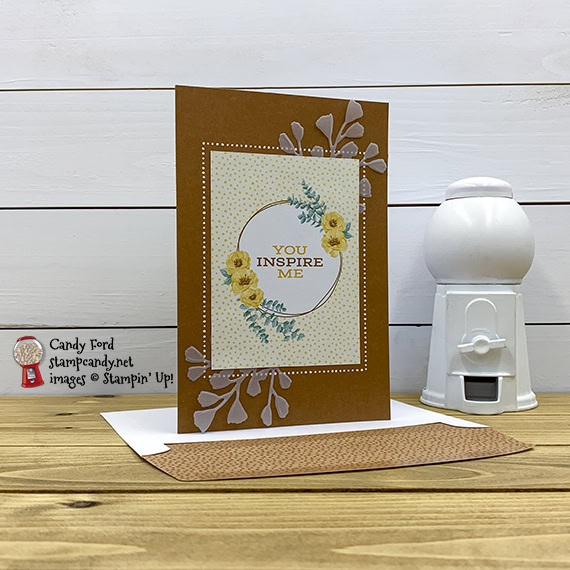
Vellum sprigs cut with the Forever Flourishing dies add a little somethin’ somethin’ to today’s card. Otherwise it’s just a 3″ x 4″ card from the Flowers for Every Season Memories & More (M&M) Card Pack on a Cinnamon Cider card from the Flowers for Every Season M&M Cards & Envelopes. So quick and easy!
If you are reading this in email, some photos may appear blurry, or may not appear at all. Please click here to see the post on my blog.
S forever flourishing forever flourishing forever flourishing forever flourishing
Here’s what I made:
S
Here’s what I did:
Cut using the Forever Flourishing Dies:
- 2 sprigs from Vellum card stock
Assembled the card:
- burnished the fold in the card base with a Bone Folder
- vellum sprigs adhered onto the back of the M&M card using Stampin’ Seal
- M&M card adhered onto the front of the card base using Stampin’ Seal
- Done!
S
Here are today’s main colors:
You can click on each one to see all the products that come in that color!
S
Here’s what I used:
Click on these images for more details and to purchase. If you are reading this post in email, the product images may not show up. Please click here to see the post on my blog.
Supply List. <— Click for a clickable and printable list of the products!
S
Here are some helpful links:
S
Thanks for stopping by today, and Sweet Stamping!
Aug 31, 2020 | Cards, Club, Gallery |
When was the last time you went a day without any chocolate. I’m not sure I can remember. I keep a supply of little dark chocolates in case of a chocolate emergency, which happens more often than you might thing. I used the Nothing’s Better Than stamp set (part of the Nothing’s. Better Than Bundle) to make today’s simple card. It was one of our August Stamp Club Projects.
If you are reading this in email, some photos may appear blurry, or may not appear at all. Please click here to see the post on my blog.
S better than better than better than better than
Here’s what I made:


S
Here’s what I did:
Cut and scored with my paper trimmer:
- Soft Suede card stock (CS) cut to 4-1/4″ x 11″, then scored in half at 5-1/2″
- Rococo Rose CS layer cut to 2-1/4″ x 3″
- Early Espresso CS layer cut to 2″ x 2-3/4″
- Whisper White CS layer cut to 1-3/4″ x 2-1/2″
- strip of Whisper White CS cut to 5/8″ x 5″, for under the ribbon
- Whisper White CS cut to 4″ x 5-1/4″ for the inside of the card base
Stamped with the Nothing’s Better Than stamp set:
- “Chocolate” in Early Espresso ink randomly onto the front of the card base
- sentiment and chocolates in Early Espresso ink onto the Whisper White CS layer
Colored using Stampin’ Blends Markers:
- chocolates in Dark and Light Soft Suede and Light Rococo Rose
Assembled the card:
- burnished the fold in the card base with a Bone Folder
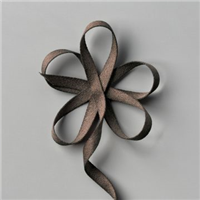
- Early Espresso ribbon adhered onto Rococo Rose ribbon using Tear & Tape
- Rococo Rose ribbon adhered onto the Whisper White CS strip using Tear & Tape
- ends of ribbon strip cut using Paper Snips
- strip glued onto the center of the front of the card base
- Whisper White CS layer glued onto the Early Espresso CS layer
- Early Espresso CS layer glued onto the Rococo Rose CS layer
- Rococo Rose CS layer adhered onto the front of the card base (over ribbon) using Stampin’ Dimensionals
- Be sure not to put any Dimensionals where it covers the ribbon
- Whisper White CS glued onto the inside of the card base
S
Here are today’s colors:
You can click on each one to see all the products that come in that color!
S
Here’s what I used:
Click on these images for more details and to purchase. If you are reading this post in email, the product images may not show up. Please click here to see the post on my blog.
Supply List. <— Click for a clickable and printable list of the products!
S
Today is the last day to use your Bonus Days coupons!
Click the image below to shop now and use your Bonus Days coupons!

S
Here are some helpful links:
S
Thanks for stopping by today, and Sweet Stamping!