Jul 24, 2020 | Cards, Gallery |
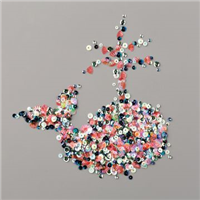
I made today’s birthday shaker card using more products from the Whale of a Time Suite: Whale Done stamp set, Seabed 3D Embossing Folder, Whale of a Time Designer Series Paper and Sequins. The Foam Adhesive Sheets made this shaker easy to put together. I cut it to shape using dies. Be sure to leave the backing on both sides or your die will stick to it.
If you are reading this in email, some photos may appear blurry, or may not appear at all. Please click here to see the post on my blog.
S Seabed Seabed Seabed Seabed
Here’s what I made:


This shot shows the embossed layer much better:
S
Here’s what I did:
Cut and scored with my paper trimmer:
- Whisper White Thick card stock (CS) cut to 4-1/4″ x 11″, then scored in half at 5-1/2″
- Whisper White CS layer cut to 4″ x 5-1/4″
Stamped with the Whale Done stamp set:
- sentiment in Calypso Coral ink onto the Whisper White CS layer
Cut using the Layering Circle Dies:
- I used 2 circle dies, close to each other in size.
- DSP using the larger die
- Window Sheet using the larger die
- Pacific Point CS on an adhesive sheet, using the smaller die, then the larger die, to create a ring
- foam adhesive sheet using the smaller die, then the larger, die to create a ring
Embossed using the Seabed 3D Embossing Folder:
- Whisper White CS layer (be sure to stamp the sentiment before embossing)
Assembled the card:
- burnished the fold in the card base with a Bone Folder
- embossed Whisper White CS layer glued onto the front of the card base
- shaker layers assembled: DSP, then foam adhesive ring, then put sequins inside, then window sheet, then the Pacific Point CS ring on top
- shaker glued onto the Whisper White CS layer
What I would do differently:
- I knew I was supposed to use powder, but for some reason I forgot. See how the sequins are stuck all around the sides inside the shaker? If I had thought to put some powder (the powder in an antistatic Embossing Buddy type pillow works great) on the inside around the ring of foam adhesive, the sequins wouldn’t stick. I use an old paint brush to apply the powder and remove the excess.
S
Only 11 days left to earn Bonus Days coupons!
For each $50 you spend on an order now through Monday, August 3, 2020, you will receive a $5 coupon code to use in August! Click the image below to shop now!

S
Here are today’s main colors:
You can click on each one to see all the products that come in that color!
S
Here’s what I used:
Click on these images for more details and to purchase. If you are reading this post in email, the product images may not show up. Please click here to see the post on my blog.
Supply List. <— Click for a clickable and printable list of the products!
S
S
Here are some helpful links:
S
Thanks for stopping by today, and Sweet Stamping!
Jul 23, 2020 | Cards, Gallery, Techniques |
Today I’m sharing a peekaboo card I made with products from the Whale of a Time Suite. When the card is closed, you see a whale peeking through a round window. When you open it, the whale disappears and the sentiment is in the window. I was surprised at how easy this was to put together. To me, the hardest part about a peekaboo card is getting the round holes to line up just right. I used the Whale Done Bundle (Whale Done stamp set and Whale Builder Punch) and Whale of a Time Designer Series Paper.
If you are reading this in email, some photos may appear blurry, or may not appear at all. Please click here to see the post on my blog.
S peekaboo card peekaboo card peekaboo card peekaboo card
Here’s what I made:
When the card is folded flat, no Calypso Coral will show through the window. I propped it up for the photo, so it completely flat.
The sentiment is starting to show as the card is opened and the sentiment panel slides to the right.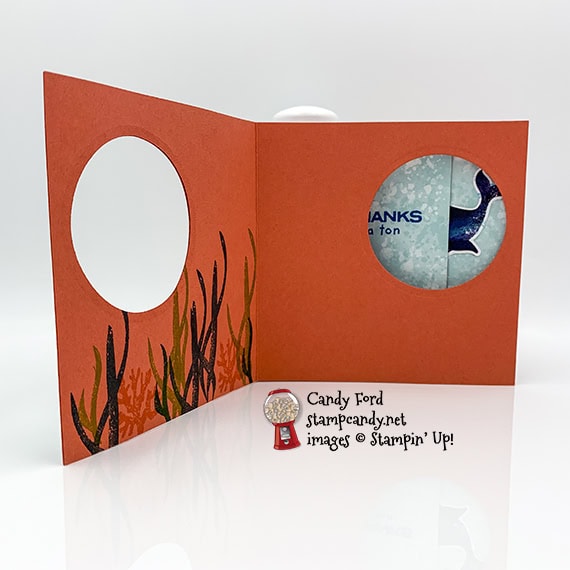
Fully open, the whale is covered by the sentiment.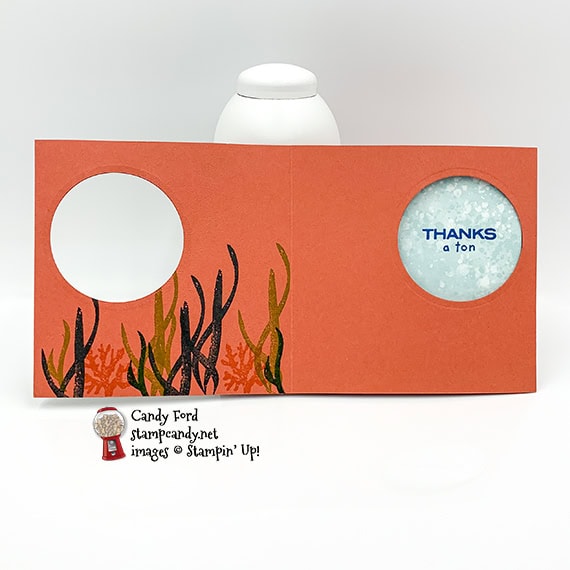
front, laid out flat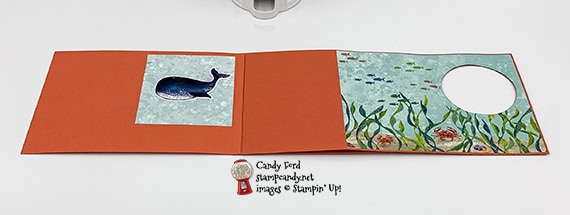
back, laid out flat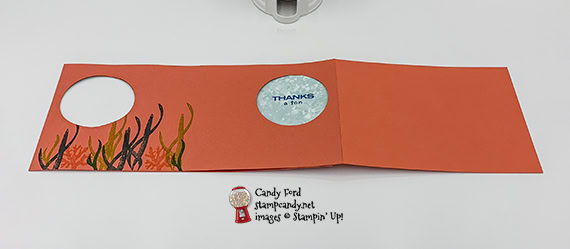 S
S
Here’s what I did:
Cut and scored with my paper trimmer:
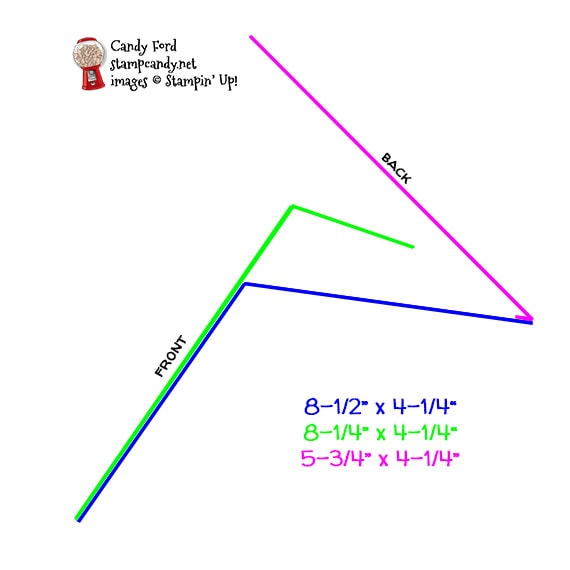
- first piece of Calypso Coral card stock (CS) cut to 8-1/2″ x 4-1/4″, then scored in half at 4-1/4″
- second piece of Calypso Coral CS cut to 8-1/4″ x 4-1/4″, then scored at 5-1/2″
- third piece of Calypso Coral CS cut to 5-3/4″ x 4-1/4″, then scored at 5-1/2″
- Whale of a Time Designer Series Paper (DSP) layer cut to 5-3/8″ x 4-1/8″ for front of card
- 2 pieces of DSP cut to about 3″ x 3″ (light blue water)
Stamped with the Whale Done stamp set:
- sentiment in Pacific Point ink onto one of the 3″ DSP pieces
- tiny fish in Calypso Coral, Pacific Point, Granny Apple Green, and Shaded Spruce inks onto the large DSP layer
- coral and seaweed in Calypso Coral, Granny Apple Green, and Shaded Spruce inks onto the inside of the card front
Cut using the Layering Circle Dies:
- using the 4th largest plain circle die, cut the large DSP layer, larger part of the 8-1/4″ Calypso Coral CS, and both halves of the 8-1/2″ Calypso Coral CS, making sure they all line up with each other
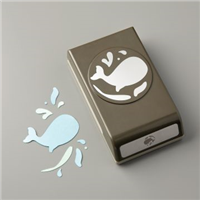
Cut using the Whale Builder Punch:
- whale from a piece of DSP
Assembled the peekaboo card:
- burnished the folds in the three Calypso Coral CS pieces with a Bone Folder
- large DSP layer glued onto the larger side of the 8-1/4″ Calypso Coral CS, lining up the die cut holes
- one half of the 8-1/2″ Calypso Coral CS glued onto the back of the 8-1/4″ Calypso Coral CS, lining up the die cut holes
- 1/4″ flap of the 5-3/4″ Calypso Coral CS glued onto the back of the loose end (opposite the end glued onto the 8-1/2″ piece)
- small DSP layer with sentiment glued onto the smaller side of the 8-1/4″ Calypso Coral CS, so it will show through the holes when the card is closed
- other small DSP layer glued onto the 5-3/4″ Calypso Coral CS so it will show through the holes
- whale glued onto the small DSP layer so it shows through the holes
- fold as shown in the photos
This gives you an idea of how the pieces are put together. See the diagram below.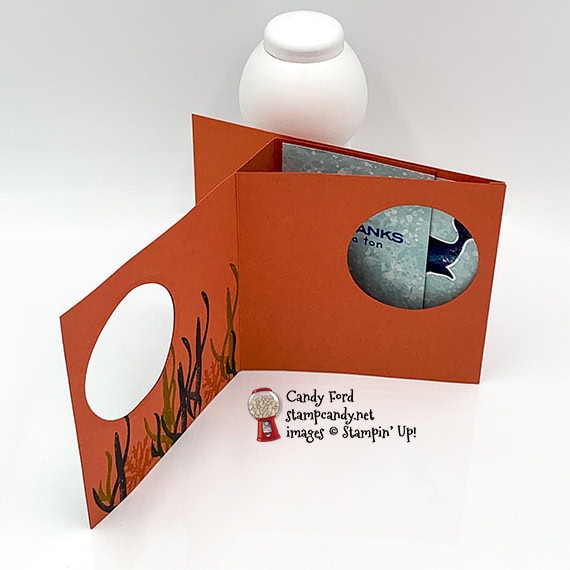
S
Only 10 days left to earn Bonus Days coupons!
For each $50 you spend on an order now through Monday, August 3, 2020, you will receive a $5 coupon code to use in August! Click the image below to shop now!
S
Here are today’s colors:
You can click on each one to see all the products that come in that color!
S
Here’s what I used:
Click on these images for more details and to purchase. If you are reading this post in email, the product images may not show up. Please click here to see the post on my blog. <— Click for a clickable and printable list of the products!
S
Here are some helpful links:
S
Thanks for stopping by today, and Sweet Stamping!
Jul 22, 2020 | Cards, Gallery |
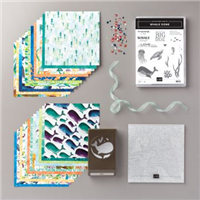
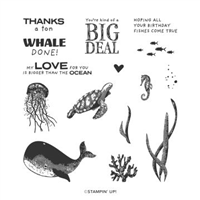
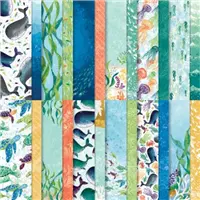
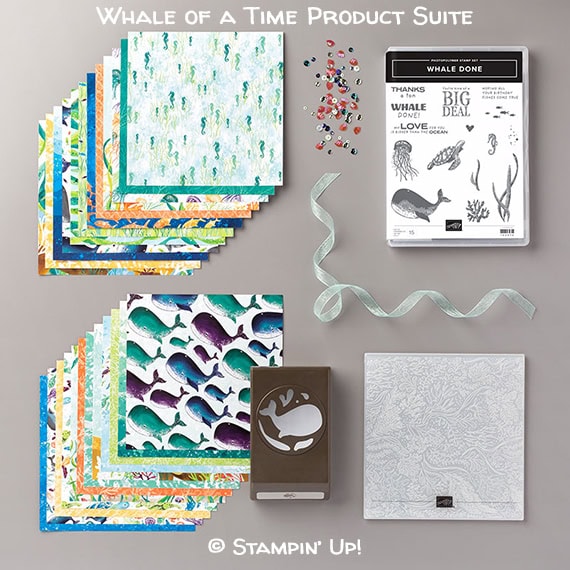
The Whale of a Time Suite is not one I thought I would be as drawn to as I am. The colors in the Whale of a Time Designer Series Paper are spectacular. That’s what got me first. Then the embossing folder. And the ribbon. And the sequins. Etc., etc., etc. For today’s card I used the Whale Done stamp set, Whale of a Time Designer Series Paper, and Whale of a Time Sequins.
If you are reading this in email, some photos may appear blurry, or may not appear at all. Please click here to see the post on my blog.
S Whale Whale Whale Whale
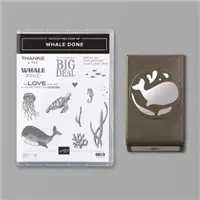
Here’s the Whale of a Time Suite:
S
Here’s what I made:


I just love this little guy. I fussy cut him from a piece of DSP and popped him up with Stampin’ Dimensionals.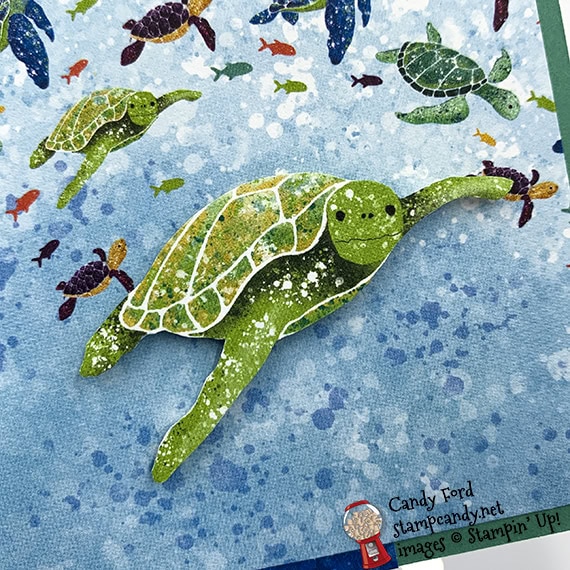
S
Here’s what I did:
Cut and scored with my paper trimmer:
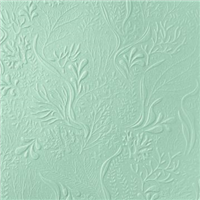
- Just Jade card stock (CS) cut to 4-1/4″ x 11″, then scored in half at 5-1/2″
- Whale of a Time Designer Series Paper (DSP) layer cut to 3″ x 5-1/2″ (dark blue)
- DSP layer cut to 3″ x 5-1/4″ (light blue with turtles)
- Whisper White CS strip cut to 4-1/4″ x 9/16″ (just over 1/2″)
- Whisper White CS cut to 4″ x 5-1/4″ for the inside of the card base
Stamped with the Whale Done stamp set:
- sentiment in Granny Apple Green ink onto the Whisper White CS strip
- sentiment in Pacific Point ink onto a scrap of Whisper White Thick CS
- turtles in Granny Apple Green ink onto the 4″ x 5-1/4″ Whisper White CS
Cut using Paper Snips:
- LOVE from the Pacific Point sentiment
- large turtle from a scrap of DSP
Assembled the card:
- burnished the fold in the card base with a Bone Folder
- larger DSP layer (dark blue) glued onto the front of the card base
- smaller DSP layer glued over the larger DSP layer
- sentiment strip glued near the top of the card front
- Pacific Point LOVE adhered over the Granny Apple Green LOVE using Mini Stampin’ Dimensionals
- large turtle adhered onto the smaller DSP layer using Stampin’ Dimensionals
- 5 sequins glued onto the card front
- Whisper White CS glued onto the inside of the card base
S
Only 12 days left to earn Bonus Days coupons!
For each $50 you spend on an order now through Monday, August 3, 2020, you will receive a $5 coupon code to use in August! Click the image below to shop now!
S
Here are today’s main colors:
You can click on each one to see all the products that come in that color!
S
Here’s what I used:
Click on these images for more details and to purchase. If you are reading this post in email, the product images may not show up. Please click here to see the post on my blog.
Supply List. <— Click for a clickable and printable list of the products!
S
Here are some helpful links:
S
Thanks for stopping by today, and Sweet Stamping!
Jul 21, 2020 | Cards, Gallery |
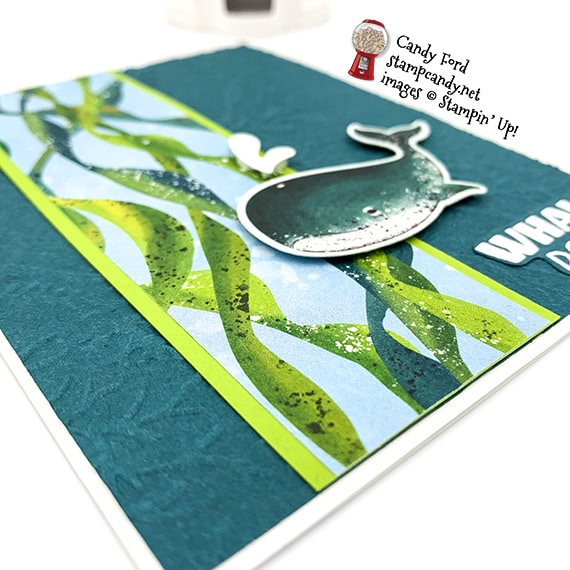
For today’s card I used the Whale Done Bundle (Whale Done stamp set and Whale Builder Punch,) Seabed 3D Embossing Folder, and Whale of a Time Designer Series Paper. I cut the whale from a piece of the paper and popped it up with Black Stampin’ Dimensionals. I heat embossed the sentiment and fussy cut it using Paper Snips so it would cover as small an area of the embossed background layer as possible.
If you are reading this in email, some photos may appear blurry, or may not appear at all. Please click here to see the post on my blog.
S Whale Done Whale Done Whale Done Whale Done
Here’s what I made:

S
Here’s what I did:
Cut and scored with my paper trimmer:
- Whisper White Thick card stock (CS) cut to 4-1/4″ x 11″, then scored in half at 5-1/2″
- Pretty Peacock CS layer cut to 4-1/8″ x 5-3/8″
- Granny Apple Green CS layer cut to 1-3/4″ x 5-3/8″
- Whale of a Time Designer Series Paper (DSP) layer cut to 1-1/2″ x 5-3/8″
Stamped with the Whale Done stamp set:
- sentiment in Versamark ink onto a scrap of Pretty Peacock CS, then heat embossed in white
Cut using the Whale Builder Punch:
- whale from a scrap of DSP
- spume from a scrap of Whisper White Thick CS
Cut using Paper Snips:
Embossed with the Seabed 3D Embossing Folder:
Assembled the card:
- burnished the fold in the card base with a Bone Folder
- Pretty Peacock CS layer glued onto the front of the card base
- Granny Apple Green CS layer glued onto the Pretty Peacock CS layer
- DSP layer glued onto the Granny Apple Green CS layer
- sentiment glued onto the Pretty Peacock CS layer
- whale adhered onto the card front using Black Stampin’ Dimensionals
- spume adhered onto the card front using Mini Stampin’ Dimensionals
S
Only 13 days left to earn Bonus Days coupons!
For each $50 you spend on an order now through Monday, August 3, 2020, you will receive a $5 coupon code to use in August! Click the image below to shop now!
S
Here are today’s colors:
You can click on each one to see all the products that come in that color!
S
Here’s what I used:
Click on these images for more details and to purchase. If you are reading this post in email, the product images may not show up. Please click here to see the post on my blog.
Supply List. <— Click for a clickable and printable list of the products!
S
Here are some helpful links:
S
Thanks for stopping by today, and Sweet Stamping!
Jul 20, 2020 | Cards, Gallery, Kits |
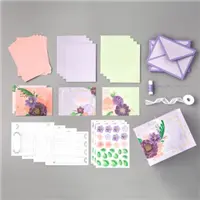
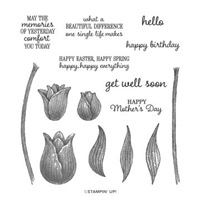
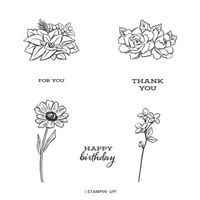
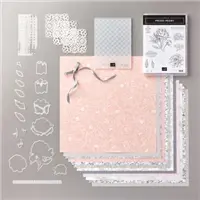
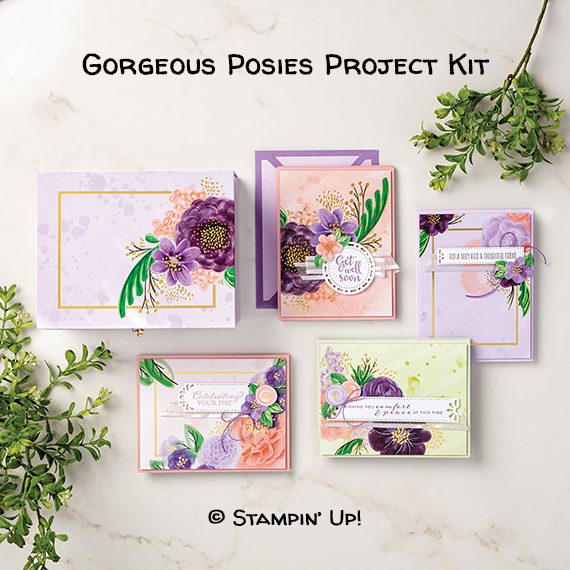
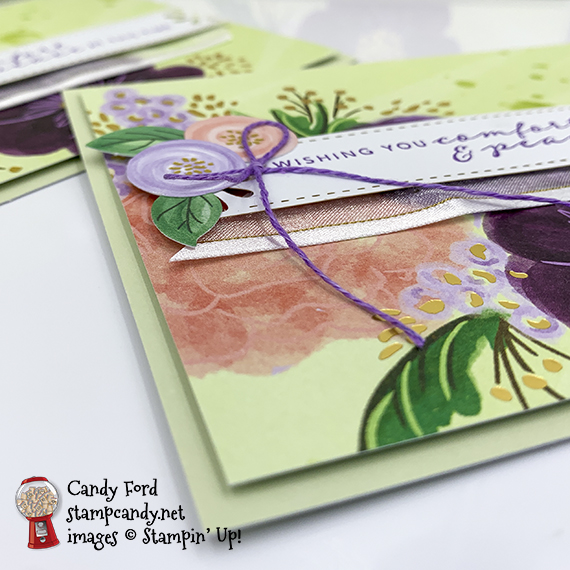
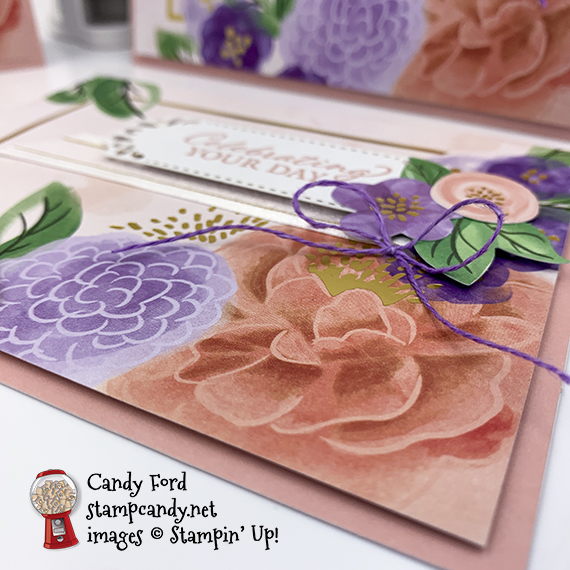
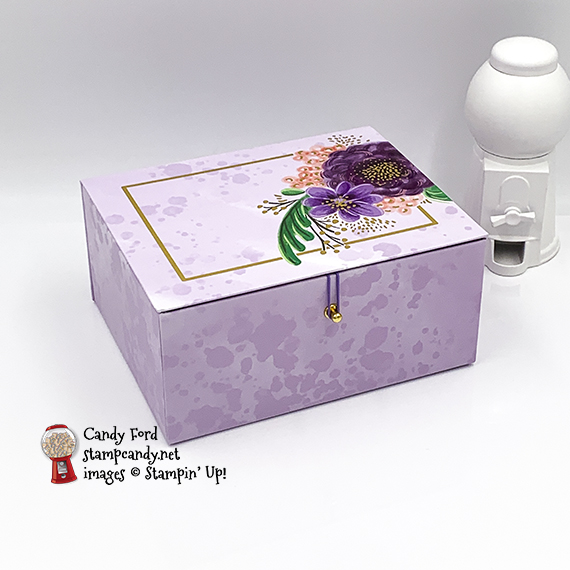
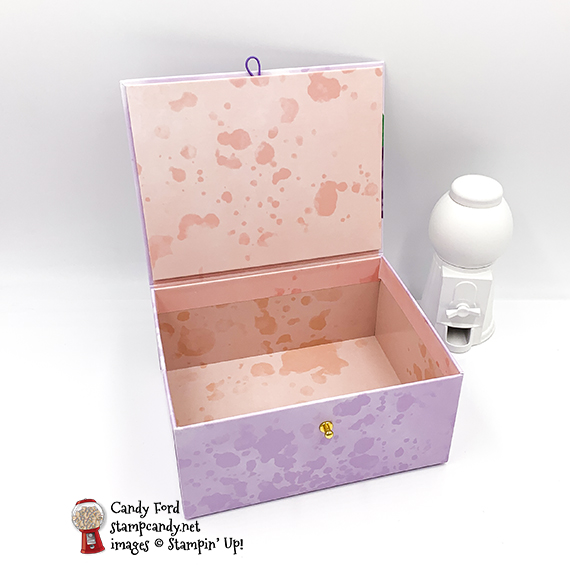
Today’s I’m sharing the Gorgeous Posies Project Kit. It makes 16 cards, 4 each of 4 designs, and they really are, well, gorgeous. I followed the kit instructions mostly. On some of the cards, I did use different sentiments from the Timeless Tulips and the Four Season Floral stamp sets. One of my favorite things about this kit is the box it comes in. I will definitely keep it in my office to hold assorted little items.
If you are reading this in email, some photos may appear blurry, or may not appear at all. Please click here to see the post on my blog.
S Gorgeous Posies Gorgeous Posies Gorgeous Posies Gorgeous Posies
Here’s the Gorgeous Posies Project Kit:

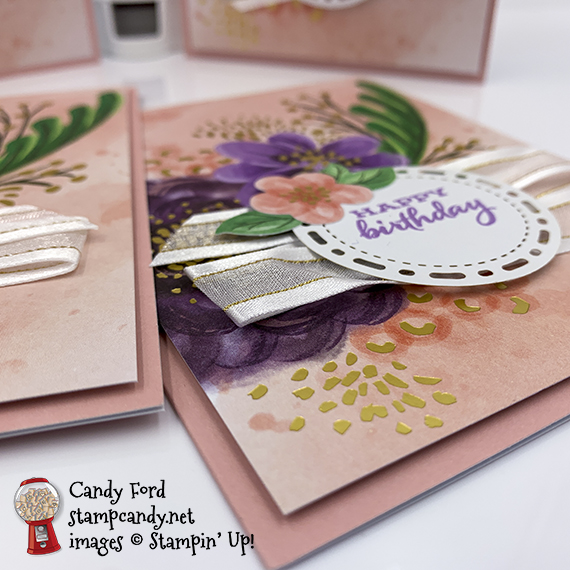
Here’s what I made:
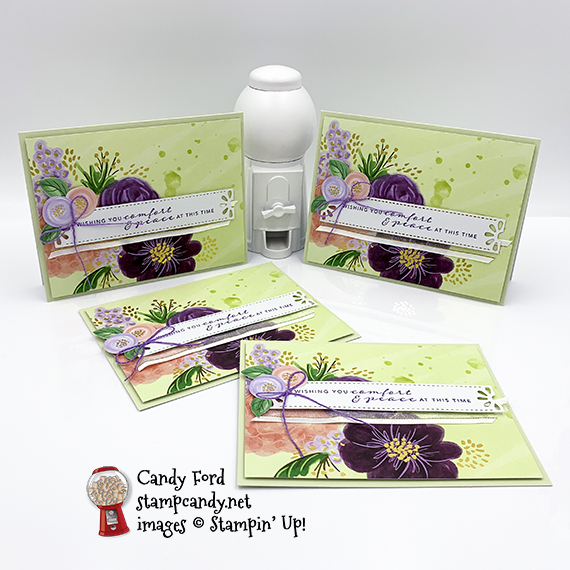
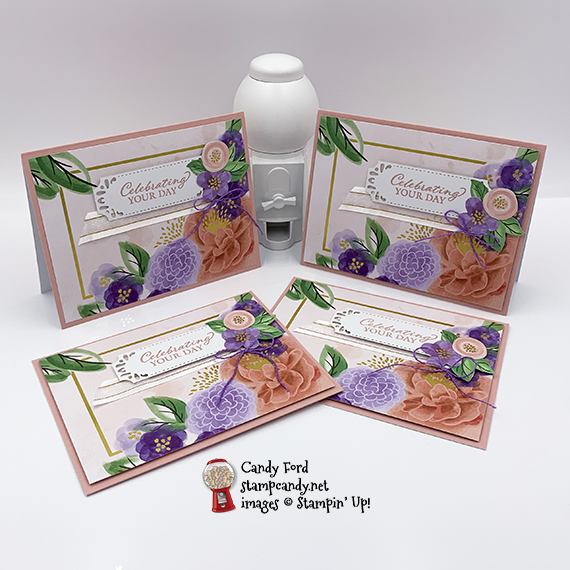
I used the Timeless Tulips stamp set to stamp the happy birthday sentiments in Blackberry Bliss ink.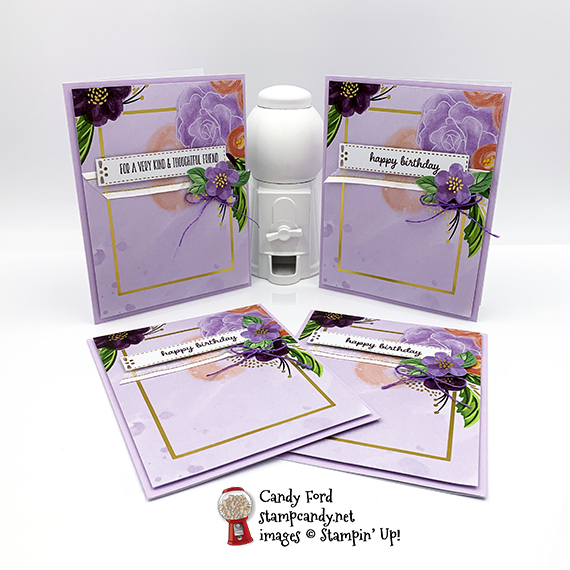

I used the Four Season Floral stamp set to stamp the happy birthday sentiments in Highland Heather ink.
This box is so pretty!
And how great are these envelopes?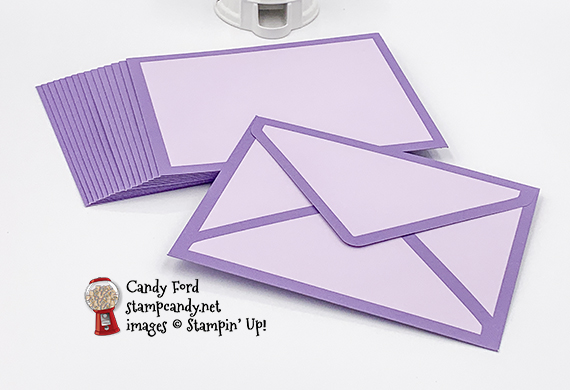
S
2 weeks left to earn Bonus Days coupons!
For each $50 you spend on an order now through Monday, August 3, 2020, you will receive a $5 coupon code to use in August! Click the image below to shop now!
S
Here are the colors in the kit:
You can click on each one to see all the products that come in that color!
S
Here’s what I used:
Click on these images for more details and to purchase. If you are reading this post in email, the product images may not show up. Please click here to see the post on my blog.
Supply List. <— Click for a clickable and printable list of the products!
S
S
Here are some helpful links:
S
Thanks for stopping by today, and Sweet Stamping!
Jul 17, 2020 | Cards, Gallery |
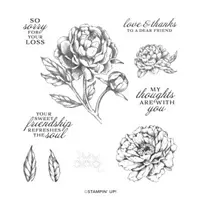
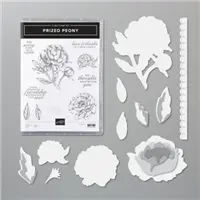
For today’s sympathy card I used the Prized Peony stamp set and Peony Garden Designer Series Paper from the Peony Garden Suite. I used two blues (Misty Moonlight and Seaside Spray) along with Gray Granite and Whisper White. I colored some Pearl Basic Jewels with a Misty Moonlight Stampin’ Blends Marker; and I colored the stamped image in Seaside Spray, So Saffron, and Gray Granite. The white ribbon is from the Flowers for Every Season Ribbon Combo Pack, and the blue ribbon is Misty Moonlight 1/4″ twill ribbon.
If you are reading this in email, some photos may appear blurry, or may not appear at all. Please click here to see the post on my blog.
S Peony Peony Peony Peony
Here’s what I made:


S
Here’s what I did:
Cut and scored with my paper trimmer:
- Gray Granite card stock (CS) cut to 4-1/4″ x 11″, then scored in half at 5-1/2″
- Misty Moonlight CS layer cut to 4-1/8″ x 5-3/8″
- Seaside Spray CS layer cut to 3-7/8″ x 5-1/8″
- Peony Garden Designer Series Paper (DSP) layer cut to 3-3/4″ x 5″
- Misty Moonlight CS layer cut to 2-3/4″ x 4″
- Whisper White CS layer cut to 2-5/8″ x 3-7/8″
- Whisper White CS cut to 4″ x 5-1/4″ for the inside of the card base
Stamped with the Prized Peony stamp set:
- peony, leaves, and sentiment in Misty moonlight ink onto the Whisper White CS layer
- peony in Seaside Spray ink onto the Whisper White CS for the inside of the card base
Colored using Stampin’ Blends Markers:
- peony in Light Seaside Spray and Light So Saffron
- leaves in Light Gray Granite
- 3 pearls in Light Misty Moonlightx
Assembled the card:
- burnished the fold in the card base with a Bone Folder
- DSP layer glued onto the Seaside Spray CS layer
- Seaside Spray CS layer glued onto the larger Misty Moonlight CS layer
- white ribbon adhered across the layers with Stampin’ Seal, and the ends wrapped around to the back
- Misty Moonlight CS layer glued onto the front of the card base
- Whisper White CS layer glued onto the smaller Misty Moonlight CS layer
- Misty Moonlight CS layer adhered onto the DSP layer using Stampin’ Dimensionals
- 3 pearls scattered around the card front
- Whisper White CS glued onto the inside of the card base

S
Bonus Days are here!
Click the image below to shop now and earn Bonus Days coupons to use next month!
S
Here are today’s colors:
You can click on each one to see all the products that come in that color!
S
Here’s what I used:
Click on these images for more details and to purchase. If you are reading this post in email, the product images may not show up. Please click here to see the post on my blog.
Supply List. <— Click for a clickable and printable list of the products!
S
Here are some helpful links:
S
Thanks for stopping by today, and Sweet Stamping!