Today’s project is a fun little treat box shaped like a coffin. Stampin’ Up!’s new Coffin Boxes come pre-cut and scored, so you only have to glue the corners to assemble them. There’s a window in the coffin lid so you can see its occupant, a vampire from the Monster Bash Designer Series Paper (DSP.) The coffin is lined with more of the DSP, and the spiders on top are cut from a Black Foil Sheet using the Wicked Dies.
S
Here’s what I made:
S
Here’s what I did:
Cut and scored with my paper trimmer:
first traced around a coffin box onto two pieces of Monster Bash Designer Series Paper (DSP), then…
cut both pieces along the traced lines
Stamped with the Spooktacular Bash stamp set:
sentiment in Whisper White Craft Ink onto a scrap of Basic Gray card stock (CS)
heat set the ink using a Heat Tool
Cut using the Ornate Frames Dies:
sentiment
ornate frame from a scrap of Basic Gray CS
Cut using the Wicked Dies:
3 spiders from a scrap of Black Foil Sheet
Cut using the Layering Circles Dies:
hole in the die cut ornate frame, and in the top of the coffin box, using the same small die
vampire from the Monster Bash DSP, and a scrap of clear Window Sheet, using the same larger die
Assembled the box:
burnished the folds in the box and lid with a Bone Folder
clear circle adhered onto the inside of the lid, lining the hole, using Tear & Tape
vampire adhered onto the clear circle using Tear & Tape, so he shows through the window in the lid
box and lid folded and glued into shape
one piece of DSP glued onto the inside of the box (bats)
the other piece of DSP glued onto the inside of the lid (cobwebs)
ornate frame glued onto the top of the lid, around the window
sentiment glued onto the top of the lid
3 spiders adhered onto the top of the lid using Mini Glue Dots
2 Red Rhinestones applied onto each spider, to resemble a Black Widow’s hourglass pattern (Yes, I know it’s actually on the bottom of a real spider and not up on its back, but I took a little artistic license.)
S
Here are today’s colors:
You can click on each one to see all the products that come in that color!
Click on these images for more details and to purchase.
<– Click here for a clickable and printable list!
S
Preorder the Monster Bash Online Treat Holder Class by September 18:
Make 6 adorable treat holders in the comfort of your own home!
2 each of 3 designs
Features the Monster Bash Suite on pages 52-54 of the 2019 Holiday Catalog
I’ve done the trimming and scoring for you!
You’ll receive the stamp set, dies, pre-cut kits, and Black Stampin’ Dimensionals.
Full detailed instructions
Limited spots available
Click on the image below for details and class options, or copy and paste this link into your browser: https://stampcandy.net/online-classes/monster-bash-treat-holder-class-preorder/
Gift Certificates are available in any U.S. dollar amount from me. Contact mefor details.
Have you shopped from me within the past year? Join my private VIP Facebook groupfor exclusive project tutorials and more!
Join my team and enjoy a 20% discount (or more) on all your purchases! You choose $125 in products and pay only $99, and get free shipping! No obligation! No selling required!
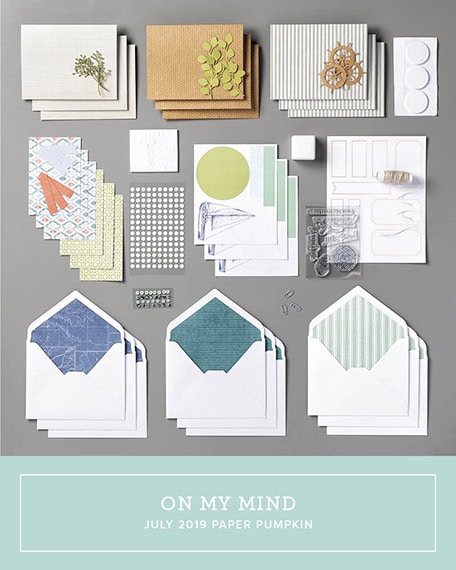
It’s time for the PPP July 2019 Blog Hop! This month’s kit is called On My Mind and it coordinates with three suites in the annual catalog. Three! There’s no end to the project possibilities with this kit.
S
Be sure to hop around to all the stops to see the great alternate projects this group has made using this month’s Paper Pumpkin kit!
S
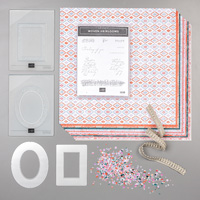
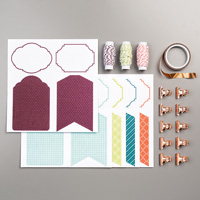
Here’s what comes in the kit:
S
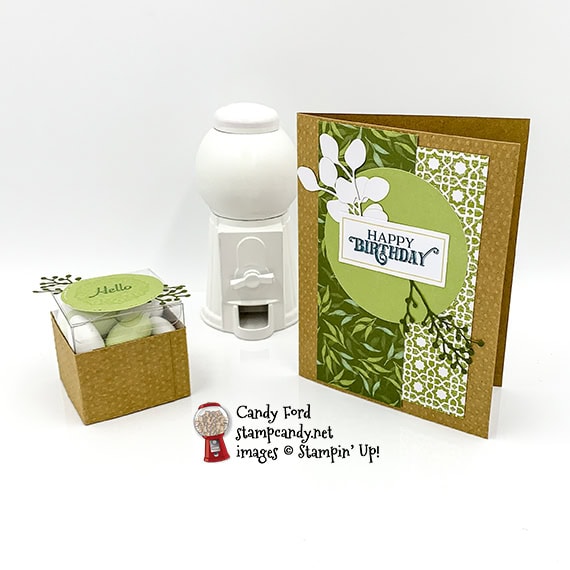
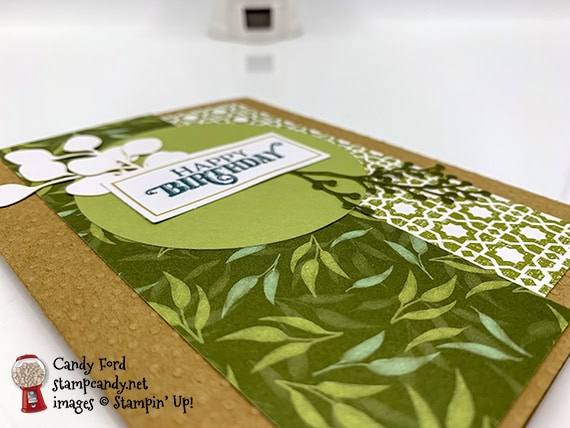
Here’s what I made:
S
S
Here’s what I did:
Cut and scored with my paper trimmer:
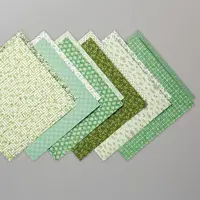
Garden Lane Designer Series Paper (DSP) layer to 2″ x 5-3/8″
front of a dotted card base cut to 1-1/2″ x 5-1/2″ (two of these)
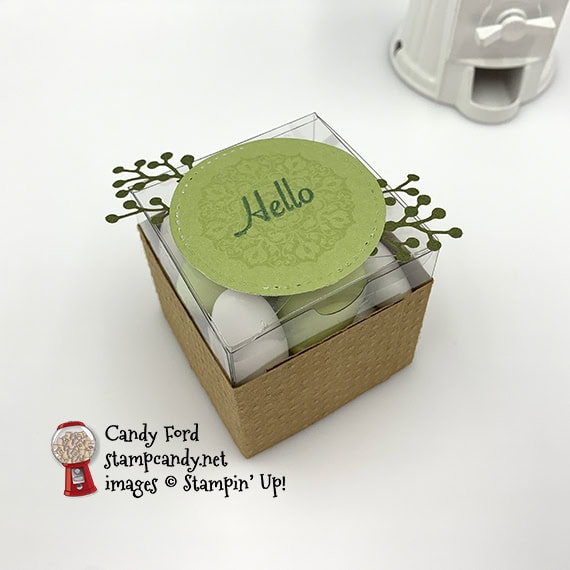
Cut using the Stitched Shapes Dies:
a precut stitched circle down to a smaller stitched circle
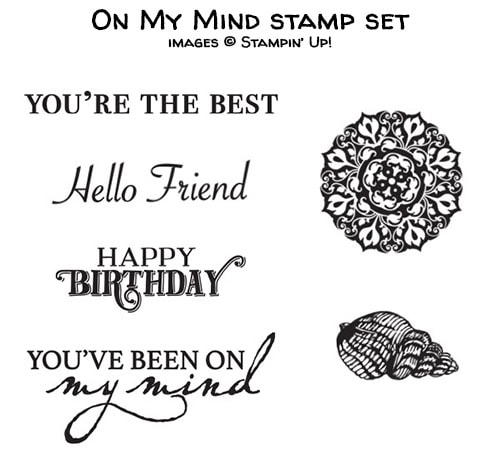
Stamped with the On My Mind stamp set:
card sentiment in Pretty Peacock ink onto a rectangular die cut label
medallion in Soft Sea Foam ink onto the smaller die cut circle
Hello in Pretty Peacock ink onto the smaller die cut circle
Assembled the card:
burnished the fold in the card base with a Bone Folder
lattice design precut paper glued onto the front a a dotted card base, centered top to bottom, about 1/2″ from the right
DSP layer glued over the lattice design paper, centered top to bottom, about 1/2″ from the left
precut stitched circle glued over the layers
2 leaves and a sprig glued over the circle
sentiment glued over the leaves and sprig
Assembled the box:
folded and assembled a Clear Tiny Treat Box
2 pieces of dotted card base wrapped around a treat box and adhered using Tear & Tape
2 twigs adhered onto the back of the small die cut circle using Tear & Tape
circle adhered onto the top of the box using Tear & Tape
S
Here’s the PPP July 2019 blog hop:
Click on the pumpkin to hop to the next blog, Charmane Hopkins of Renee’s Paper Treasures.
S
Here’s the video for this month’s kit:
S
CLICK HERE to download the stamp case insert for this month’s kit.
S
Here are today’s colors:
You can click on each one to see all the products that come in that color!
It’s time for the June 2019 A Paper Pumpkin Thing Blog Hop! This month’s kit is called A Little Smile. It’s beach themed kit that makes 16 gift cards and envelopes with a box to hold them. I used the kit to create a full sized card and a little treat holder.
Be sure to hop around to all the stops to see all the alternative projects this talented group of stampers has made using the A Little Smile kit!
S
Here’s what I made:
No, those aren’t smudge marks on the flap. They’re actually part of the weathered wood pattern of the envelope.
S
Here’s what I did:
Cut and scored with my paper trimmer:
Coastal Cabana card stock (CS) cut to 4-1/4″ x 11″, then scored in half at 5-1/2″
Crumb Cake CS layer cut to 3-3/4″ x 5″
Whisper White CS layer cut to 3-3-8″ x 4-5/8″
two card fronts from the kit cut to 3-1/4″ x 2-1/4″
Whisper White CS cut to 4″ x 5-1/4″ for the inside of the card base
Coastal Cabana envelope from the kit scored 1/2″ from the bottom and from both sides
Stamped with the A Little Smile stamp set:
sentiment in Coastal Cabana ink onto a die cut label from the kit, near one end
Cut using Paper Snips:
shortened the stamped label, using another label as a template, to match the curve
envelope flap trimmed along the score lines
Assembled the card:
burnished the fold in the card base with a Bone Folder
two trimmed card fronts glued onto the Whisper White CS layer
Whisper White CS layer glued onto the Crumb Cake CS layer
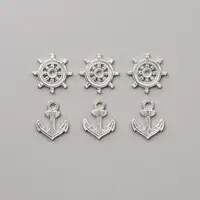
anchor trinket strung onto the twine from the kit, then the twine wrapped around the layers, with the ends secured onto the back using Tear & Tape
anchor secured in place using a Mini Glue Dot
3 glitter starfish die cuts tucked into the twine and secured using Mini Glue Dots
stamped label tucked into the twine and secured using Mini Glue Dots
Crumb Cake CS layer adhered onto the front of the card base using Tear & Tape
Whisper White CS glued onto the inside of the card base
Assembled the treat holder:
burnished the folds in the envelope with a Bone Folder
inverted the sides and bottom to form a box
put treats (I used small chocolates) in the holder and closed the flap
twine tied around the treat holder and tied in a bow
S
Here’s the APPT A Little Smile Blog Hop:
Here are today’s colors:
You can click on each one to see all the products that come in that color!
Supply List <– Click here for a clickable and printable list!
S
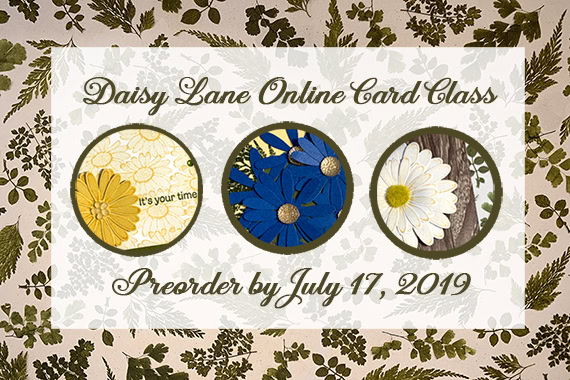
Preorder the Daisy Lane Online Class by July 17:
Make 6 cards at home in your PJs!
2 each of 3 designs
Features the Daisy Lane Bundle on page 23 of the 2019-2020 Annual Catalog
I’ve done the trimming and scoring for you!
You’ll receive all you need to make the cards, including the stamp set, punches, pre-cut/pre-scored/pre-embossed card kits, and 6 envelopes.
Full detailed instructions
Limited spots available
Click on the image below for details and class options, or copy and paste this link into your browser: https://stampcandy.net/online-classes/daisy-lane-card-class-preorder/
It’s time for the June 2019 A Paper Pumpkin Thing Blog Hop! This month’s kit is called A Little Smile. It’s beach themed kit that makes 16 gift cards and envelopes with a box to hold them. I used the kit to create a full sized card and a little treat holder.
Be sure to hop around to all the stops to see all the alternative projects this talented group of stampers has made using the A Little Smile kit!
S
Here’s what I made:
No, those aren’t smudge marks on the flap. They’re actually part of the weathered wood pattern of the envelope.
S
Here’s what I did:
Cut and scored with my paper trimmer:
Coastal Cabana card stock (CS) cut to 4-1/4″ x 11″, then scored in half at 5-1/2″
Crumb Cake CS layer cut to 3-3/4″ x 5″
Whisper White CS layer cut to 3-3-8″ x 4-5/8″
two card fronts from the kit cut to 3-1/4″ x 2-1/4″
Whisper White CS cut to 4″ x 5-1/4″ for the inside of the card base
Coastal Cabana envelope from the kit scored 1/2″ from the bottom and from both sides
Stamped with the A Little Smile stamp set:
sentiment in Coastal Cabana ink onto a die cut label from the kit, near one end
Cut using Paper Snips:
shortened the stamped label, using another label as a template, to match the curve
envelope flap trimmed along the score lines
Assembled the card:
burnished the fold in the card base with a Bone Folder
two trimmed card fronts glued onto the Whisper White CS layer
Whisper White CS layer glued onto the Crumb Cake CS layer
anchor trinket strung onto the twine from the kit, then the twine wrapped around the layers, with the ends secured onto the back using Tear & Tape
anchor secured in place using a Mini Glue Dot
3 glitter starfish die cuts tucked into the twine and secured using Mini Glue Dots
stamped label tucked into the twine and secured using Mini Glue Dots
Crumb Cake CS layer adhered onto the front of the card base using Tear & Tape
Whisper White CS glued onto the inside of the card base
Assembled the treat holder:
burnished the folds in the envelope with a Bone Folder
inverted the sides and bottom to form a box
put treats (I used small chocolates) in the holder and closed the flap
twine tied around the treat holder and tied in a bow
S
Here’s the APPT A Little Smile Blog Hop:
Here are today’s colors:
You can click on each one to see all the products that come in that color!
Supply List <– Click here for a clickable and printable list!
S
Preorder the Daisy Lane Online Class by July 17:
Make 6 cards at home in your PJs!
2 each of 3 designs
Features the Daisy Lane Bundle on page 23 of the 2019-2020 Annual Catalog
I’ve done the trimming and scoring for you!
You’ll receive all you need to make the cards, including the stamp set, punches, pre-cut/pre-scored/pre-embossed card kits, and 6 envelopes.
Full detailed instructions
Limited spots available
Click on the image below for details and class options, or copy and paste this link into your browser: https://stampcandy.net/online-classes/daisy-lane-card-class-preorder/
It’s time for the June 2019 Paper Pumpkin Possibilities Blog Hop! This month’s kit is called A Little Smile, and it everything you need for 16 gift cards & envelopes and a box to keep them in. I’ve used the kit components to create a full size card and a tag for a treat bag.
Be sure to hop around to all the stops to see all the great alternate projects this group has made using this month’s A Little Smile kit!
S
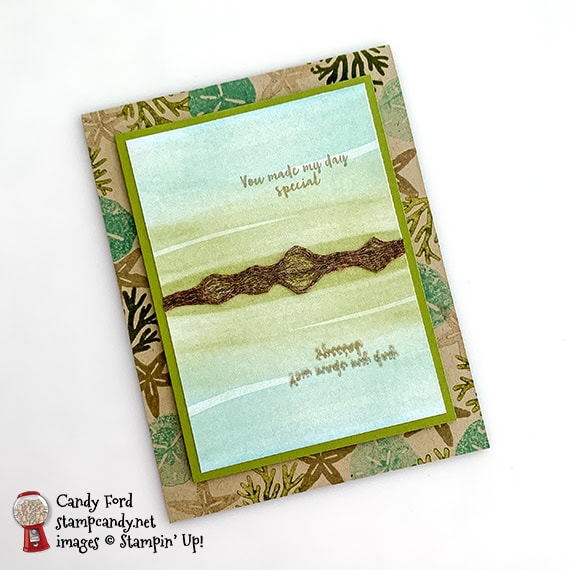
Here’s what I made:
I’m out of town at a craft retreat and don’t have my lightbox, so my photos look different than usual.
The card: I tried to create a reflection of mountains and sky. It isn’t a perfect mirrored image, but I think you get the idea.
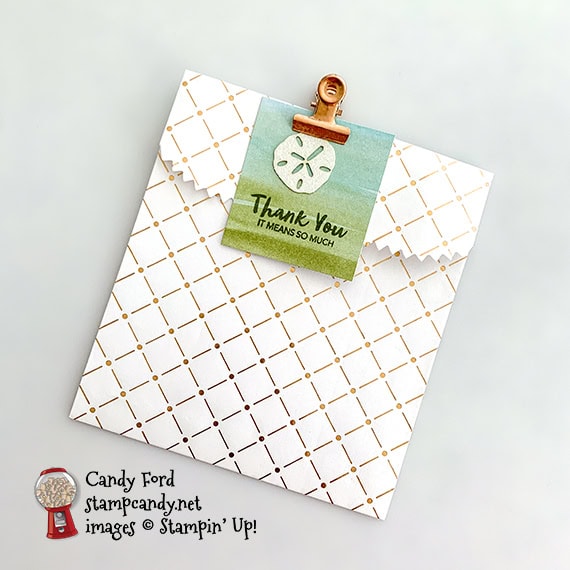
The treat bag: I made a simple tag that matched the card, and attached it using a copper library clip from the Tags & More Accessory Kit.
S
Here’s what I did:
Cut and scored with my paper trimmer:
Crumb Cake card stock (CS) cut to 4-1/4″ x 11″, then scored in half at 5-1/2″
Old Olive CS cut to 3-1/2″ x 4-3/4″
two cards fronts from the kit cut to 3-1/4″ x 2-1/4″
one card front from the kit cut to 2″ x 2-1/4″
Whisper White CS cut to 4″ x 5-1/4″ for the inside of the card base
Stamped with the A Little Smile stamp set:
sand dollars in Coastal Cabana ink onto the front of the card base, around the edges
starfish in Crumb Cake ink onto the front of the card base, around the edges
coral in Old Olive ink onto the front of the card base, around the edges
sentiment in Crumb Cake ink onto one of the trimmed card fronts
mirrored sentiment in Crumb Cake ink onto the other trimmed card front
sentiment in Old Olive ink onto the smallest trimmed card front
Assembled the card:
burnished the fold in the card base with a Bone Folder
two larger trimmed card fronts glued onto the Old Olive CS layer
Copper Trim pulled apart in a few places, then glued along the seam where the two trimmed card fronts meet
Old Olive CS layer adhered onto the front of the card base using Stampin’ Dimensionals
Whisper White CS glued onto the inside of the card base
Assembled the bag:
sentiment glitter sand dollar die cut glued onto the smallest trimmed card front, above the sentiment
top of a Copper Dotted Treat Bag folded over and burnished with a Bone Folder
smallest trimmed card front clipped onto the top of the treat bag using a Copper Library Clip
S
Here’s the A Little Smile blog hop:
Click on the pumpkin to hop to the next blog, Debbie Green of Creative Chaos Crafting.
Here are today’s colors:
You can click on each one to see all the products that come in that color!
Supply List <– Click here for a clickable and printable list!
S
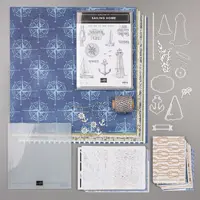
Preorder the Sailing Home Online Class by June 26:
Make 6 cards at home in your PJs!
2 each of 3 designs
Features the Come Sail Away Suite on pages 144-146 of the 2019-2020 Annual Catalog
I’ve done the trimming and scoring for you!
You’ll receive all you need to make the cards, including the stamp set, dies, pre-cut/pre-scored/pre-embossed card kits, and 6 Whisper White envelopes.
Full detailed instructions
Limited spots available
Click on the image below for details and class options, or copy and paste this link into your browser:
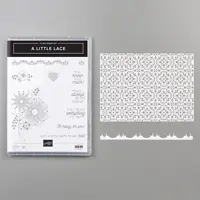
It’s time for the June 2019 OSAT Blog Hop! This month’s theme is Something Old, Something New. We’re featuring new products used along with products that carried over from previous catalogs. For my projects, I used the new A Little Lace stamp set with the returning Stitched Shapes Dies. The treat box fits a Reese’s Big Cup. Hopefully it will make it to its intended recipient – I do love a Big Cup!
Be sure to hop around to all the stops to see all the great projects created by this awesome group of stampers! Scroll down to see the June 2019 OSAT Blog Hop list.
S
Here’s what I made:
S
Here’s what I did:
Cut and scored with my paper trimmer:
Soft Sea Foam card stock (CS) cut to 8-1/2″ x 5-1/2″, then scored in half at 4-1/4″
Very Vanilla CS card layer cut to 3-3/4″ x 4-3/4″
Very Vanilla CS box layer cut to 2-5/8″ x 2-1/8″
Soft Sea Foam CS cut to 5″ x 8″, and score 1″ from each long side, then scored at 1″, 3-1/2″, 4-1/2″, and 7″
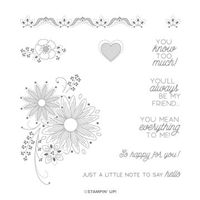
Stamped with the A Little Lace stamp set:
two card sentiments in Rococo Rose ink onto a scrap of Very Vanilla CS
floral image in Rococo Rose, Old Olive, Crushed Curry, and Balmy Blue inks onto both Very Vanilla CS layers
NOTE: I colored the different parts of the floral stamp using Stampin’ Write markers, then stamped.
box sentiment in Rococo Rose onto a scrap of Very Vanilla CS (I used a marker to color just that part of the stamp)
Cut using the Stitched Shapes Dies:
the three stamped sentiments
three circles from a scrap of Soft Sea Foam CS
Assembled the card:
burnished the fold in the card base with a Bone Folder
Very Vanilla CS layer glued onto the front of the card base
die cut circles and sentiments glued onto the Very Vanilla CS layer as shown
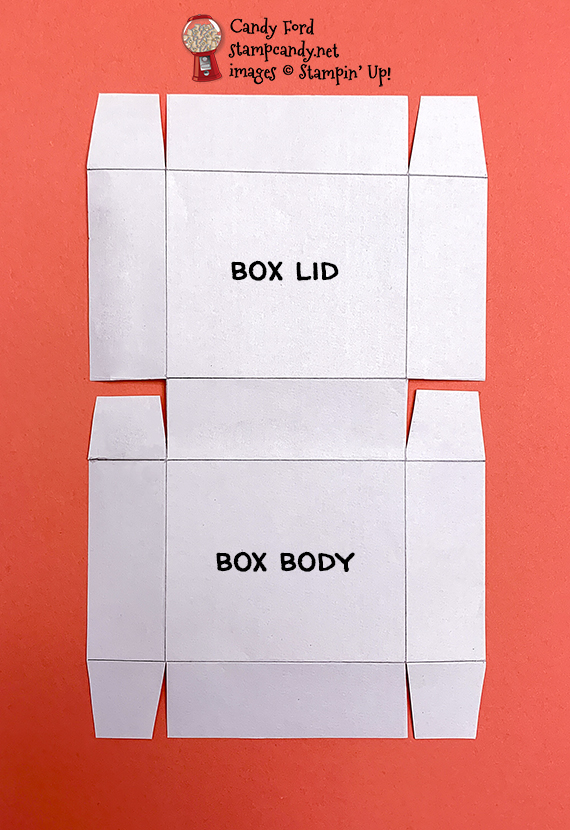
Assembled the box:
burnished the folds in the box with a Bone Folder
angled the edges of the 6 tabs using Paper Snips
Very Vanilla CS layer glued onto the lid of the box
die cut sentiment and Soft Sea Foam circle glued onto the Very Vanilla CS layer
all tabs glued to the inside of the adjacent side
inserted Reese’s Big Cup and closed lid
S
Here’s the June 2019 OSAT Blog Hop:
S
Here are today’s colors:
You can click on each one to see all the products that come in that color!
Supply List <– Click here for a clickable and printable list!
S
Preorder the Sailing Home Online Class by June 26:
Make 6 cards at home in your PJs!
2 each of 3 designs
Features the Come Sail Away Suite on pages 144-146 of the 2019-2020 Annual Catalog
I’ve done the trimming and scoring for you!
You’ll receive all you need to make the cards, including the stamp set, dies, embossing folder, precut/prescored card kits, and 6 Whisper White envelopes.
Full detailed instructions
Limited spots available
Click on the image below for details and class options, or copy and paste this link into your browser: https://stampcandy.net/online-classes/sailing-home-card-class-preorder/