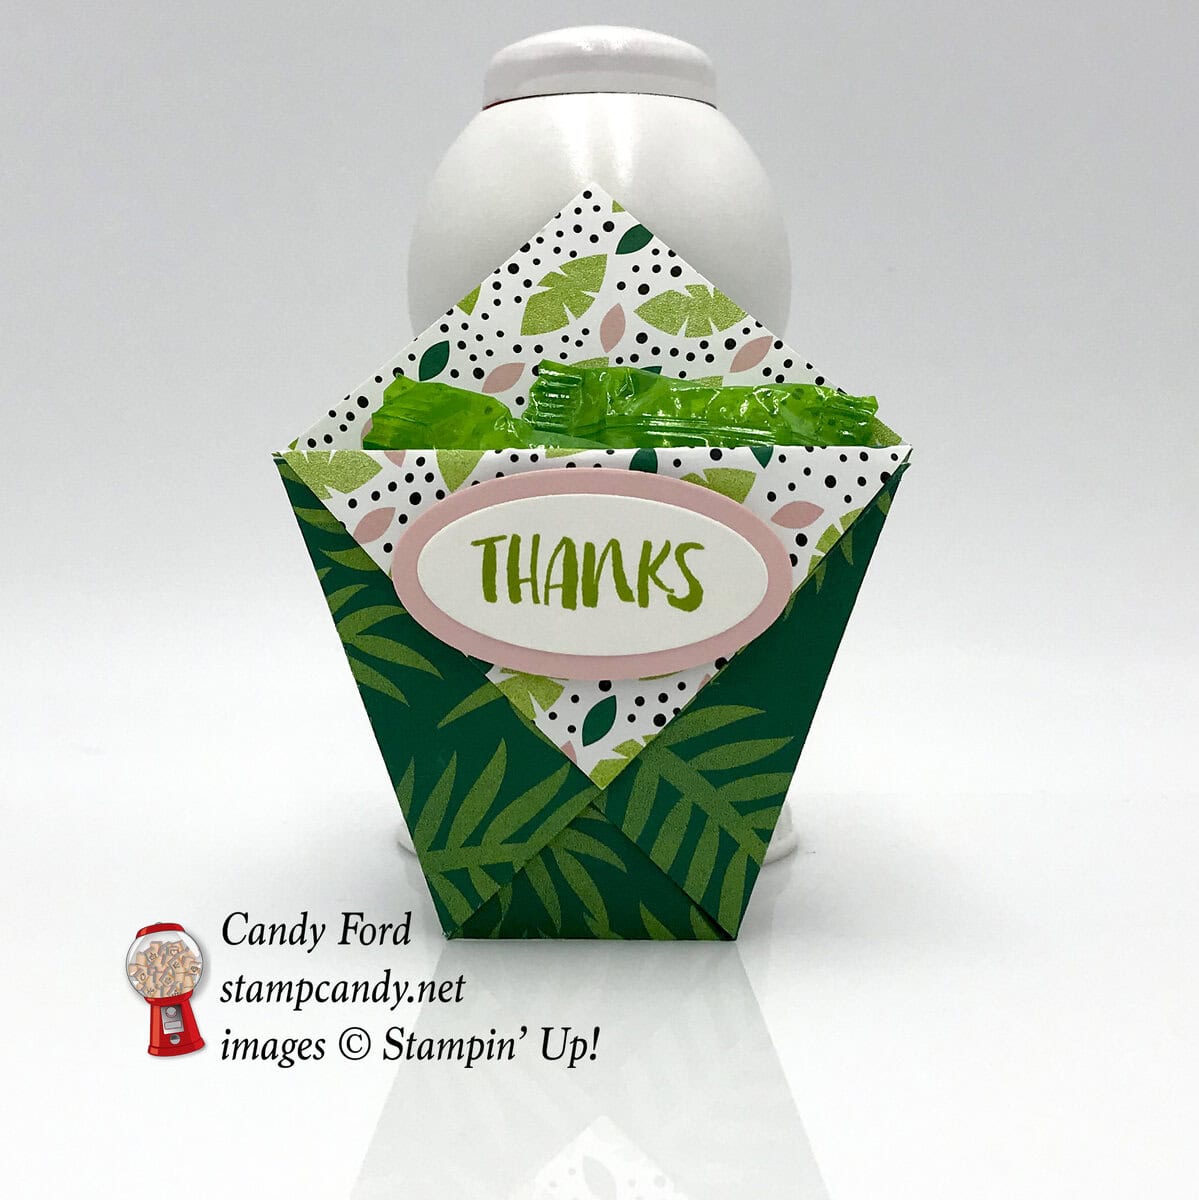
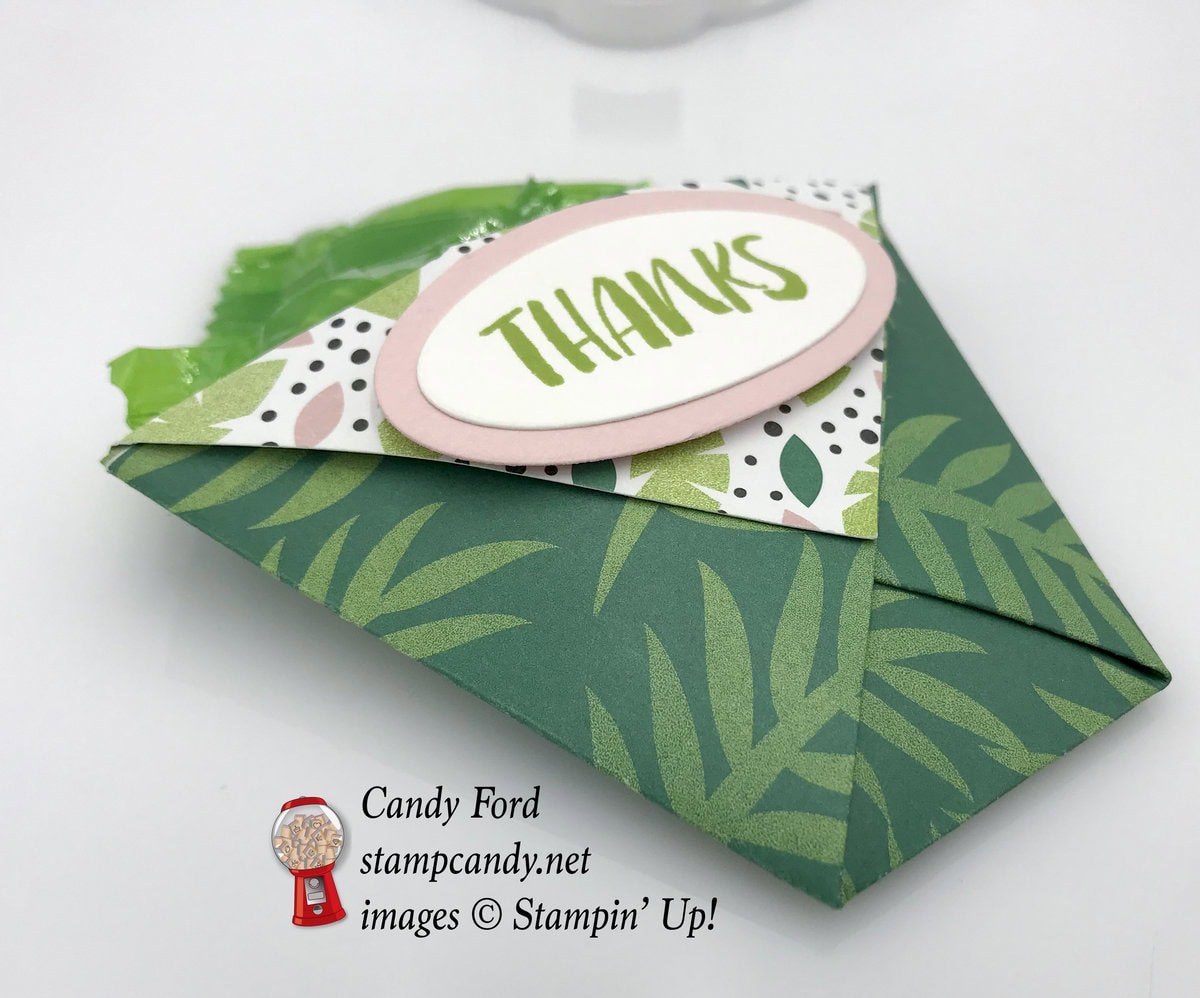
If you ever need a sweet (and fast) way to present a small treat or gift, this adorable little diaper fold treat holder is perfect. You can insert candies, tea bags, cash, jewelry, or anything else small. I made this one from a piece of Tropical Escape 6″ x 6″ Designer Series Paper – I love the pinks and greens in this paper! The sentiment is from the Fabulous Flamingo stamp set. I stuffed the treat holder full of Key Lime hard candies that I got from Amazon.com.
The diaper fold takes mere seconds! The rest depends on how fancy you want it decorated. This one took less than 5 minutes total.
Here’s what I made:
Here’s what I did:
Stamped with the Fabulous Flamingo stamp set:
sentiment in Granny Apple Green ink onto a scrap of Whisper White CS
Die cut using the Layering Oval Framelits:
sentiment
slightly larger oval from a scrap of Blushing Bride card stock (CS)
Assembled the treat holder:
You can see photos of each step in my blog post here.
Tropical Escape 6″ x 6″ Designer Series Paper (DSP) folded in half diagonally
with the fold at the bottom, folded up one side so the top edge is parallel to the bottom fold
other side folded up the same way
top triangle on the front folded down over the two previous folded pieces
burnished all folds with a Bone Folder
sentiment glued onto the Blushing Bride CS oval
Blushing Bride CS oval adhered to the front of the treat holder using Stampin’ Dimensionals
stuffed some candies inside for a fun treat
Optional: You can glue down the front flap, but once you have treats inside, it will stay down.
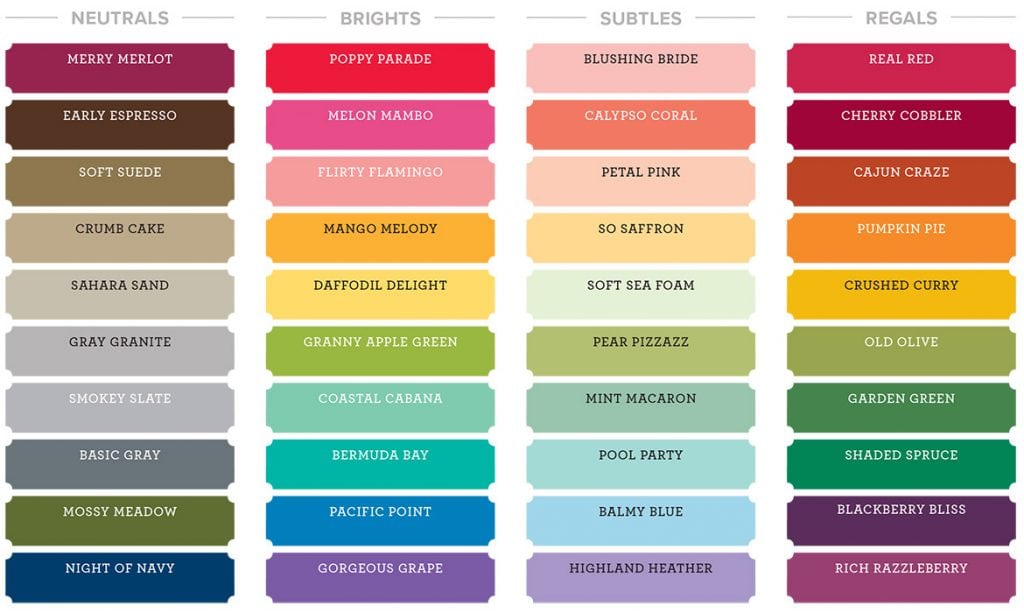
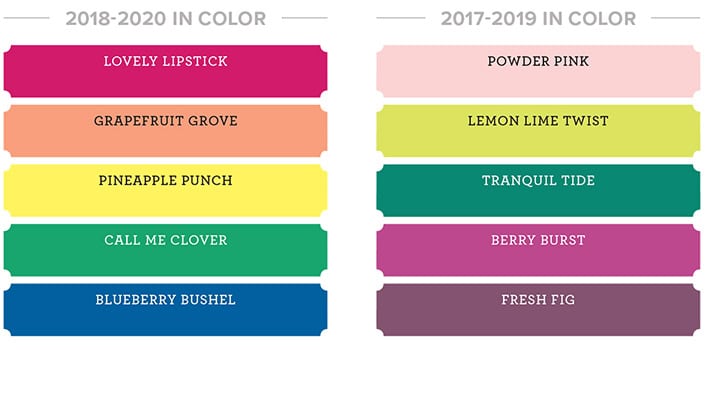
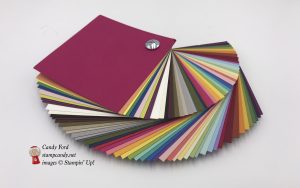
Here are today’s colors:
You can click on each one to see all the products that come in that color!
Click on these images for more details and to purchase.
Here are 3 amazing limited time offers – August only!:
1) Color Your Seasons Special, August 1-31, 2018, While Supplies Last!
Watch this new video by Stampin’ Up! about this special promotion!
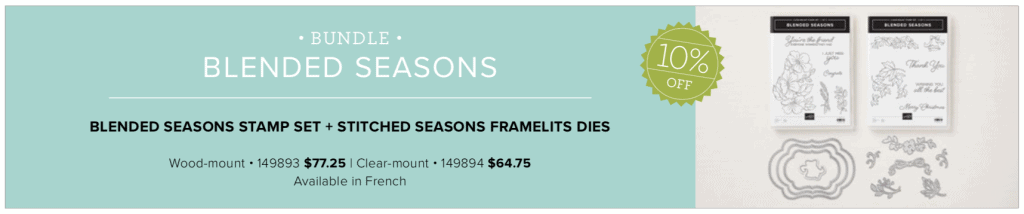
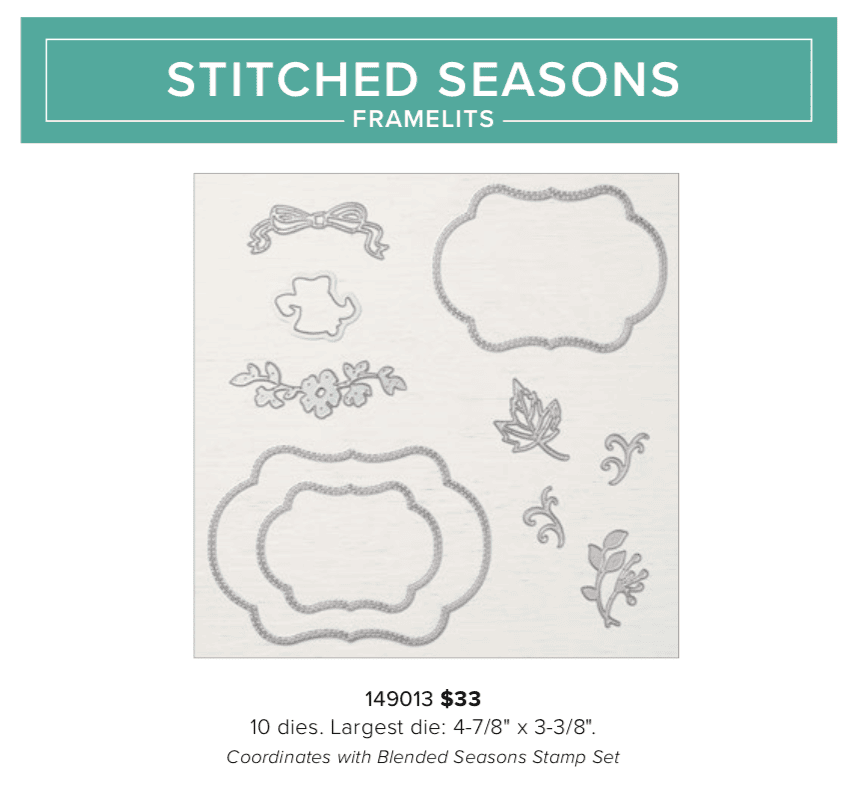
Stampin’ Up!’s® Blended Seasons Stamp Set, coordinating Framelits™ Dies, and Watercolor Pencils are perfect for every season of creating! Plus, save 10% when you buy the stamp set and Framelits in a bundle! But don’t wait—these exclusive products are only available until August 31 while supplies last. So get in the mood to create something full of colors and seasons!
Introducing the all-new, limited-time Color Your Season products:
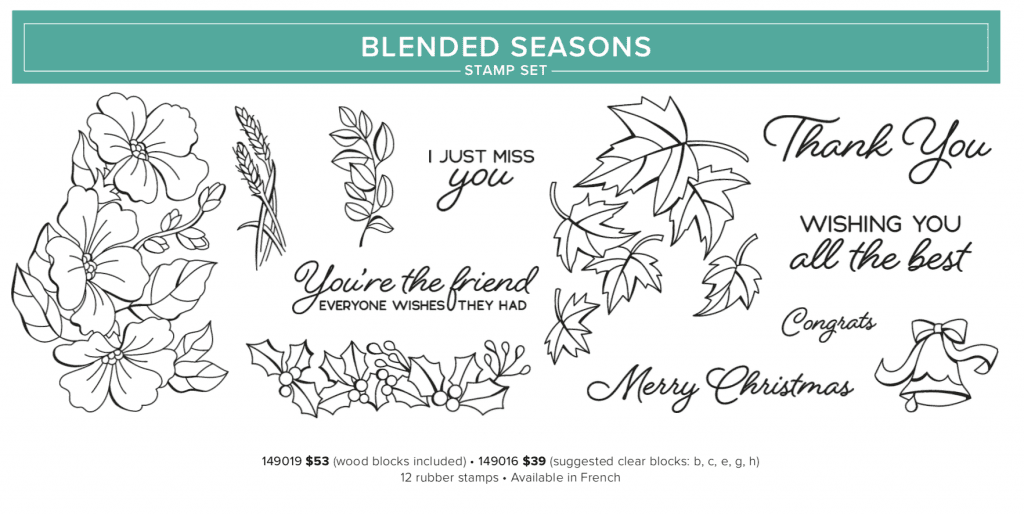
Blended Seasons Stamp Set, an exclusive 12-piece wood- or clear-mount stamp set with images for every season – #149019 @ $53 (wood blocks included); #149016 @ $39 (suggested clear blocks: b, c, e, g, h)
Stitched Season Framelits Dies, a coordinating stitched die that includes stitching on both the positive and negative images! #149013 @ $33. Has10 dies. Largest die: 4-7/8″ x 3-3/8″.
Save 10%! Blended Seasons BUNDLE – BLENDED SEASONS STAMP SET + STITCHED SEASONS FRAMELITS DIES – Wood-mount #149893 @ $77.25, Clear-mount #149894 @ $64.75
Watercolor Pencils in 10 new colors! #149014 @ $12.50. Acid free, lignin free.10 pencils in Stampin’ Up! colors: Balmy Blue, Cajun Craze, Cherry Cobbler, Coastal Cabana, Crushed Curry, Flirty Flamingo, Garden Green, Gorgeous Grape, Granny Apple Green, Night of Navy
Products available while supplies last until August 31, 2018 – while supplies last
Items may be included as part of a new demonstrator’s Starter Kit.
2) Bonus Days are back!
For every $50 you spend on an order in August, you will receive a $5 coupon to use in September!
There is no limit to the number of coupons you may earn.
An email address is required to participate; Bonus Days coupon codes can be delivered only via email.
Bonus Days coupon codes may be redeemed for any product (excluding Starter Kits, demonstrator supply items, and Paper Pumpkin subscriptions.) Although new prepaid Paper Pumpkin codes may be discounted with Bonus Days coupon codes.
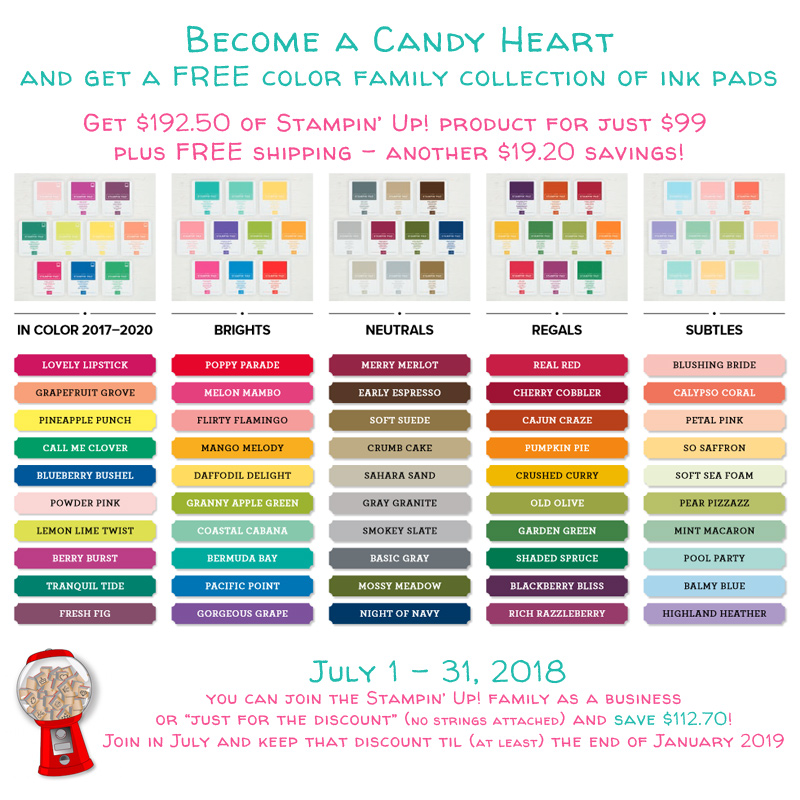
3) Buy 10 Stampin’ Ink pads in August and get one FREE!!
Buy any 10 ink pads from me in August, I will give you another one FREE!
Contact me to place your order, so I can add your FREE ink pad!
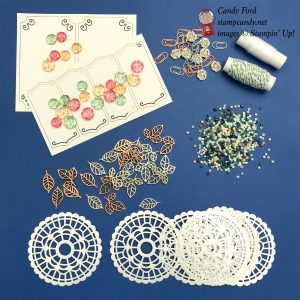
It’s time for the OSAT Blog Hop for August! This month we’re doing a Tic Tac Toe challenge. We must choose three items in a row (horizontally, vertically, or diagonally) and include all three on our projects. I used the Dragonfly Dreams stamp set and Detailed Dragonfly Thinlits Dies to create this card and gift container. The container came with cashews in it. Cashews would make a nice little gift, but since I ate the cashews already (they were honey roasted – how could I not?) I washed out the container and now it’s ready for candies or a small gift.
I’ve included a Holiday catalog sneak peek. The wood grain paper is from the new Festive Farmhouse Designer Series Paper, which is part of the new Festive Farmhouse suite. If you can’t wait until September 5 to order from the Holiday catalog, click here to join my team now. You can add the new products to your Starter Kit, and then you can order them on a demonstrator order!
Here’s the Tic Tac Toe challenge:
I went with the left column: Ribbon, DSP, Flowers.
First I used Gray Granite 1/2″ Textured Weave Ribbon on the card. Then I used Festive Farmhouse Designer Series Paper (DSP) on both the card and the container. And I used flowers (Crushed Curry dots) along the bottom of both projects.
The idea is that the critters are flying over a field of yellow flowers with a wooden barn or house in the background. At least that’s what I was going for.
Here’s what I made:
Here’s what I did:
Cut and scored with my Stampin’ Trimmer:
Gray Granite card stock (CS) cut to 4-1/4″ x 11″ , then scored in half at 5-1/2″
Basic Black CS cut to 4-1/8″ x 5-3/8″
Festive Farmhouse Designer Series Paper (DSP) cut to 4″ x 5-1/4″
Whisper White CS cut to 3″ x 1/2″
Basic Black CS cut to 3-1/2″ x 5/8″
Crushed Curry CS cut to 4″ x 5-1/4″
Whisper White CS cut to 3-5/8″ x 4-7/8″
DSP cut to 12″ x 2-1/2″ (You’ll cut it to fit around your container.)
Stamped with the Dragonfly Dreams stamp set:
dragonfly in Memento black ink onto the 4″ x 5-1/4″ DSP layer
filled in dragonfly’s wings in Gray Granite ink
first part of sentiment in Gray Granite ink onto the 3″ x 1/2″ Whisper White CS strip
second part of sentiment in Gray Granite ink onto the 3-5/8″ x 4-7/8″ Whisper White CS
bee in Memento black ink onto the 3-5/8″ x 4-7/8″ Whisper White CS
dots (flowers) in Crushed Curry ink along the bottom of both pieces of DSP
Die cut using the Detailed Dragonfly Thinlits:
one large dragonfly, one dragonfly cluster, and 2 bees from a scrap of Basic Black CS
Colored using a Stampin’ Write Marker:
bee’s body in Crushed Curry ink
Assembled the card:
burnished the fold in the card base with a Bone Folder
sentiment glued onto the Basic Black CS strip, then cut the ends of the Basic Black CS using Paper Snips
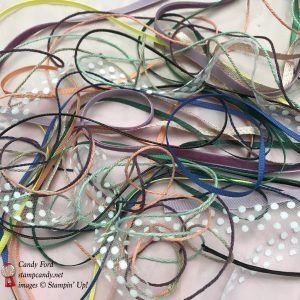
2 pieces of ribbon adhered onto the DSP layer using Tear & Tape
sentiment adhered onto the ribbon using Tear & Tape
DSP layer glued onto the Basic Black CS layer
3 Sahara Sand sequins applied to the DSP layer
Basic Black CS layer glued onto the front of the card base
stamped Whisper White CS layer glued onto the Crushed Curry CS layer
Crushed Curry CS layer glued onto the inside of the card base
Assembled the container:
die cut critters glued onto the 12″ x 2-1/2″ DSP, and trimmed any excess off the edges
12″ x 2-1/5″ DSP glued onto the nut container
Here’s the hop:
Here are today’s colors:
You can click on each one to see all the products that come in that color!
2) Color Your Seasons Special, August 1-31, 2018, While Supplies Last!
Stampin’ Up!’s® Blended Seasons Stamp Set, coordinating Framelits™ Dies, and Watercolor Pencils are perfect for every season of creating! Plus, save 10% when you buy the stamp set and Framelits in a bundle! But don’t wait—these exclusive products are only available until August 31 while supplies last. So get in the mood to create something full of colors and seasons!
Introducing the all-new, limited-time Color Your Season products:
Blended Seasons Stamp Set, an exclusive 12-piece wood- or clear-mount stamp set with images for every season – #149019 @ $53 (wood blocks included); #149016 @ $39 (suggested clear blocks: b, c, e, g, h)
Stitched Season Framelits Dies, a coordinating stitched die that includes stitching on both the positive and negative images! #149013 @ $33. Has10 dies. Largest die: 4-7/8″ x 3-3/8″.
Save 10%! Blended Seasons BUNDLE – BLENDED SEASONS STAMP SET + STITCHED SEASONS FRAMELITS DIES – Wood-mount #149893 @ $77.25, Clear-mount #149894 @ $64.75
Watercolor Pencils in 10 new colors! #149014 @ $12.50. Acid free, lignin free.10 pencils in Stampin’ Up! colors: Balmy Blue, Cajun Craze, Cherry Cobbler, Coastal Cabana, Crushed Curry, Flirty Flamingo, Garden Green, Gorgeous Grape, Granny Apple Green, Night of Navy
Products available while supplies last until August 31, 2018 – while supplies last
Items may be included as part of a new demonstrator’s Starter Kit.
3) Bonus Days are back!
For every $50 you spend on an order in August, you will receive a $5 coupon to use in September!
There is no limit to the number of coupons you may earn.
An email address is required to participate; Bonus Days coupon codes can be delivered only via email.
Bonus Days coupon codes may be redeemed for any product (excluding Starter Kits, demonstrator supply items, and Paper Pumpkin subscriptions.) Although new prepaid Paper Pumpkin codes may be discounted with Bonus Days coupon codes.
4) Buy 10 Stampin’ Ink pads in August and get one FREE!!
Buy any 10 ink pads from me in August, I will give you another one FREE!
Contact me to place your order, so I can add your FREE ink pad!
Today I’m sharing one of the projects my stamp club members made at our July gathering, a copper tea tin decorated with the Tea Room Suite of products.
Here’s what we made:
Here’s what I did:
Cut and scored with my Stampin’ Trimmer:
Tea Room Specialty Designer Series Paper (DSP) cut to 12″ x ___
Stamped with the Time For Tea stamp set:
sentiment in Calypso Coral ink onto a scrap of Very Vanilla card stock (CS)
cup in Calypso Coral ink onto a scrap of Calypso Coral CS
Die cut using the Spot of Tea Framelit Dies:
sentiment and cup
Applied Tea Room Copper Vinyl Stickers:
small design on cup
long design onto the front of the tin lid (I cut the sticker to the correct length.)
Decorated the tin:
DSP wrapped around the tin and adhered using Tear & Tape (I put some at each end and a tiny piece in the very middle
cup glued onto the sentiment piece
cup/sentiment adhered to the DSP (covering the seam where the two DSP ends met) using Stampin’ Dimensionals
laced Coastal Cabana ribbon through the hole on the left side of the sentiment, ran both ends around the back, laces one end through the hole on the right side, and tied a bow
Here are today’s colors:
You can click on each one to see all the products that come in that color!
It’s time for the July OSAT Blog Hop. This month’s theme is Creature Comforts. and we’re featuring animal themed projects. For my projects today, I used the Kindness & Compassion stamp set with the Graceful Glass Designer Vellum to create a thank you card and a box for the bird lover in your life.
There is an accidental technique used on these projects. I colored the vellum on the back with Stampin’ Write Markers and let them dry. Then I used a sponge to spread glue all over the back, and the ink smeared and created a marbled effect. I liked it so much that I repeated it on the second one.
Here’s what I made:
Here’s what I did:
Cut and scored with my Stampin’ Trimmer:
Petal Pink card stock (CS) cut to 5-1/2″ x 8-1/2″, then scored in half at 4-1/4″
Petal Pink CS cut to 2-1/2″ x 7/8″
Basic Black CS cut to 2-5/8″ x 1″
Graceful Glass Designer Vellum cut to 5-1/4″ x 2″ (birds)
Graceful Glass Designer Vellum cut to 5-1/4″ x 1″ (grid, 2 pieces)
Basic Black CS cut to 4″ x 2″
Petal Pink CS cut to 3-7/8″ x 1-7/8″
Graceful Glass Vellum cut to 3-7/8″ x 1-7/8″ (birds)
Stamped with the Kindness & Compassion stamp set:
sentiment in Memento black ink onto the 2-1/2″ x 7/8″ Petal Pink CS
Colored using Stampin’ Write Markers:
birds in Real Red, Soft Sea Foam, Calypso Coral, Blueberry Bushel, and Pineapple Punch
NOTE: color on the back of the vellum and let dry (can use Heat Tool to speed drying)
Assembled the card:
burnished the fold in the card base with a Bone Folder
vellum birds glued onto the front of the card base
two vellum grids glued onto the front of the card base, above and below the birds
sentiment glued onto the 2-5/8″ x 1″ Basic Black CS
2-5/8″ x 1″ Basic Black CS adhered to the card front using Stampin’ Dimensionals
Assembled the box:
3-7/8″ x 1-7/8″ vellum birds glued onto the 3-7/8″ x 1-7/8″ Petal Pink CS
3-7/8″ x 1-7/8″ Petal Pink CS glued onto the 4″ x 2″ Basic Black CS
4″ x 2″ Basic Black CS glued onto the gable box side
black satin ribbon tied in a bow around the top of the box
Here’s the hop:
Click on the Next button to hop to the next stop, Jo Anne Hewins of Luv 2 Create:
Use this list if you get lost along the hop:
Here are today’s colors:
You can click on each one to see all the products that come in that color!
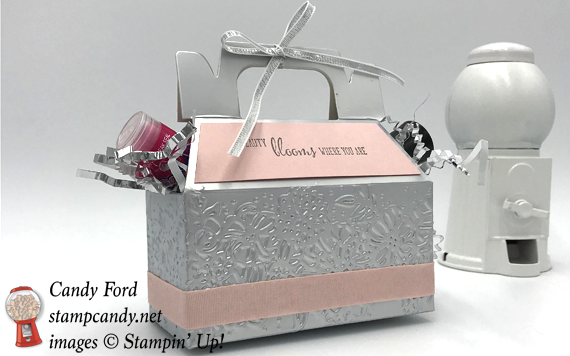
The Silver Gable Boxes are so pretty and so versatile. Don’t you just love products like that? Today I’ve decorated one for a bridesmaid’s gift. One stamp, an embossing folder, and some ribbon turned the simple box into a frilly gift, full of nail polish, lip glass, etc. – all pink of course.
Here’s what I made:
Here’s what I did:
Cut with my Stampin’ Trimmer:
Powder Pink card stock (CS) cut to fit the top panel of the box, as shown
Stamped with the Friendship’s Sweetest Thoughts stamp set:
sentiment in Smoky Slate ink onto the Powder Pink CS piece
Embossed using one of the Petal Pair Embossing Folders (TIEF):
sides of the box (see below for details)
Assembled the project:
burnished all the folds in the box with a Bone Folder to give it nice crisp edges
used a Heat Tool to warm the adhered seam of the box and pulled it apart
ran the box through the Big Shot twice, once on each side, with the TIEF
glued the box back together at the seam
assembled box, tucking the two end flaps down into the box
put gifts inside the box with some shreddie, then tied the top closed with a piece of 1/8″ Silver Ribbon
adhered Powder Pink all the way ribbon around the sides of the box using Tear & Tape
adhered the sentiment onto the box panel using Tear & Tape
Here are today’s colors:
You can click on each one to see all the products that come in that color!
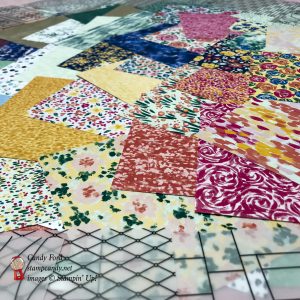
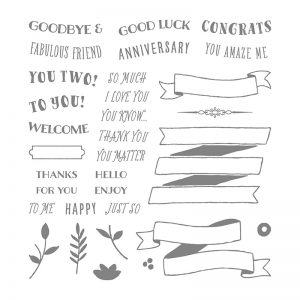
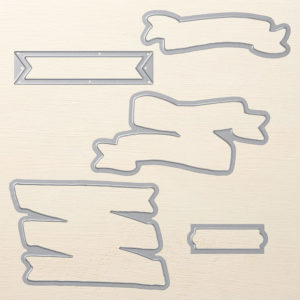
I always have bottled water at my events, and when I have time, I like to decorate the bottles. You can do this for any event. Today’s project is a bottle I decorated for a graduation party. The colors I used are Fresh Fig and Crushed Curry (garnet & gold) but of course you can use any colors you want. The Banners for You stamp set is perfect for this occasion, and for many others. And the Bunch of Banners Framelits Dies cut out the stamp set’s banners like a charm.
How do you like the mortar board, complete with tassel?
Here’s what I did:
Cut and scored with my Stampin’ Trimmer:
Crushed Curry card stock (CS) cut to 9″ x 3-1/2″
Fresh Fig CS cut to 9″ x 3″
Fresh Fig CS cut to 3″ x 3″
Fresh Fig CS cut to 1-1/4″ x 5″, then scored 1/4″ from one of the long sides
Stamped with the Banners for you stamp set:
banner in Crushed Curry ink onto a scrap of Very Vanilla CS
sentiments in Fresh Fig ink on the banner
Die cut using the Bunch of Banners Framelits:
banner
Assembled the project:
burnished the fold in the Fresh Fig CS strip with a Bone Folder
snipped all along the length, across the 1/4″ strip, up to the score line, using Paper Snips
wrapped the strip around the top of the bottle to gauge the size (not too tight) then glued the ends together – do not adhere to the bottle or its cap.
folded all the snipped bits in and glued them onto the center of the 3″ square piece of Fresh Fig CS
tied a piece of gold ribbon onto a gold tassel, then adhered it to the top of the cap using Tear & Tape
adhered a 1/4″ punched circle of Fresh Fig CS over the center of the top of the cap, over the end of the ribbon, using a Mini Glue Dot
adhered the large piece of Crushed Curry CS around the bottle using Tear & Tape
adhered the large piece of Fresh Fig CS on top of the Crushed Curry CS using Tear & Tape
glued the banner onto the Fresh Fig CS
NOTE: I used rubber bands to hold the banner on until the glue dried completely
NOTE: Adhere the two large pieces of CS to the bottle separately. If you adhere them together, then wrap them around the bottle, they will pull apart.
Here are today’s colors:
You can click on each one to see all the products that come in that color!