Sep 8, 2019 | Boxes, Gallery, Gift Wrap, Gifts, Halloween, Holiday, New Products |
Today’s project is a fun little treat box shaped like a coffin. Stampin’ Up!’s new Coffin Boxes come pre-cut and scored, so you only have to glue the corners to assemble them. There’s a window in the coffin lid so you can see its occupant, a vampire from the Monster Bash Designer Series Paper (DSP.) The coffin is lined with more of the DSP, and the spiders on top are cut from a Black Foil Sheet using the Wicked Dies.
S
Here’s what I made:


S
Here’s what I did:
Cut and scored with my paper trimmer:
- first traced around a coffin box onto two pieces of Monster Bash Designer Series Paper (DSP), then…
- cut both pieces along the traced lines
Stamped with the Spooktacular Bash stamp set:
- sentiment in Whisper White Craft Ink onto a scrap of Basic Gray card stock (CS)
- heat set the ink using a Heat Tool
Cut using the Ornate Frames Dies:
- sentiment
- ornate frame from a scrap of Basic Gray CS
Cut using the Wicked Dies:
- 3 spiders from a scrap of Black Foil Sheet
Cut using the Layering Circles Dies:
- hole in the die cut ornate frame, and in the top of the coffin box, using the same small die
- vampire from the Monster Bash DSP, and a scrap of clear Window Sheet, using the same larger die
Assembled the box:
- burnished the folds in the box and lid with a Bone Folder
- clear circle adhered onto the inside of the lid, lining the hole, using Tear & Tape
- vampire adhered onto the clear circle using Tear & Tape, so he shows through the window in the lid
- box and lid folded and glued into shape
- one piece of DSP glued onto the inside of the box (bats)
- the other piece of DSP glued onto the inside of the lid (cobwebs)
- ornate frame glued onto the top of the lid, around the window
- sentiment glued onto the top of the lid
- 3 spiders adhered onto the top of the lid using Mini Glue Dots
- 2 Red Rhinestones applied onto each spider, to resemble a Black Widow’s hourglass pattern (Yes, I know it’s actually on the bottom of a real spider and not up on its back, but I took a little artistic license.)
S
Here are today’s colors:
You can click on each one to see all the products that come in that color!
S
Here’s what I used:
Click on these images for more details and to purchase.
<– Click here for a clickable and printable list!
S
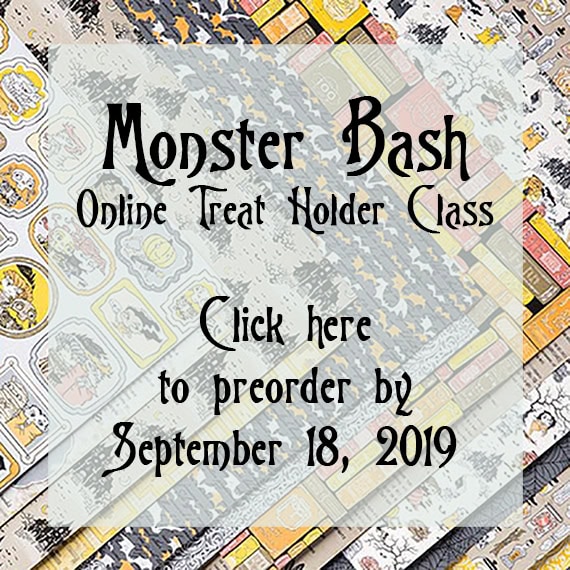
Preorder the Monster Bash Online Treat Holder Class by September 18:
- Make 6 adorable treat holders in the comfort of your own home!
- 2 each of 3 designs
- Features the Monster Bash Suite on pages 52-54 of the 2019 Holiday Catalog
- I’ve done the trimming and scoring for you!
- You’ll receive the stamp set, dies, pre-cut kits, and Black Stampin’ Dimensionals.
- Full detailed instructions
- Limited spots available
Click on the image below for details and class options, or copy and paste this link into your browser: https://stampcandy.net/online-classes/monster-bash-treat-holder-class-preorder/
S
Here are some helpful links:
S
Thanks for stopping by today, and Sweet Stamping!
Sep 7, 2019 | Cards, Christmas, Gallery, Holiday, New Products |
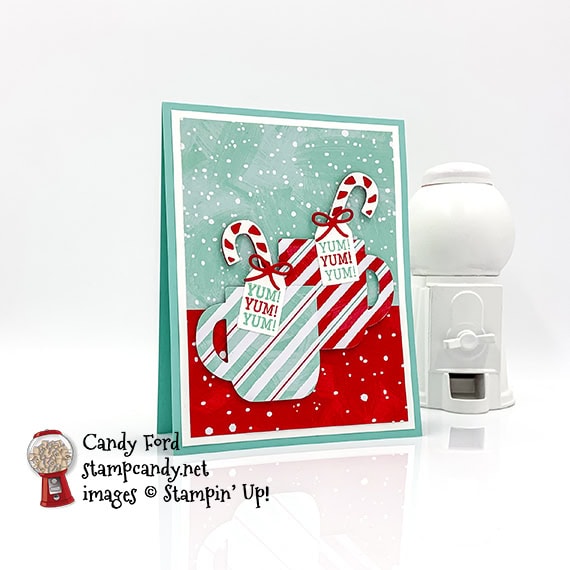
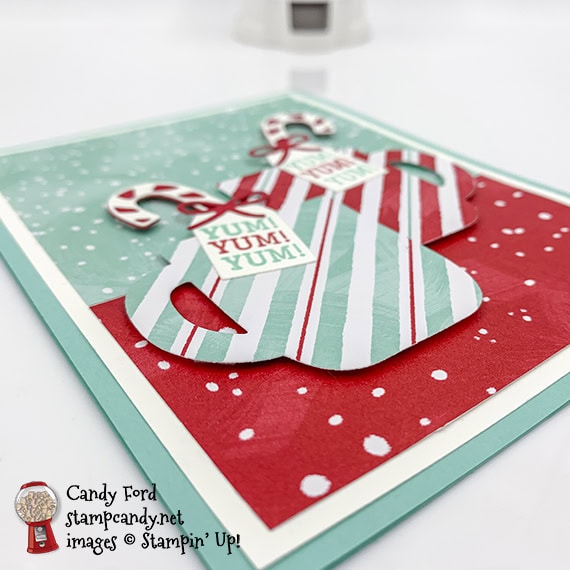
What’s better in winter than a cup of hot cocoa? Today I’m sharing a card I made using the new Cup of Christmas Bundle (Cup of Christmas stamp set and Cup of Cheer Dies) and Let It Snow Specialty Designer Series Paper. You can use it as a Christmas card, but it’s really an all occasion winter themed card.
S
Here’s what I made:
S
Here’s what I did:
Cut and scored with my paper trimmer:
- Coastal Cabana card stock (CS) cut to 4-1/4″ x 11″, then scored in half at 5-1/2″
- Whisper White card stock (CS) layer cut to 4″ x 5-1/4″
- Let It Snow Specialty Designer Series Paper (DSP) layer (blue) cut to 3-3/4″ x 3-1/2″
- Let It Snow Specialty Designer Series Paper (DSP) layer (red) cut to 3-3/4″ x 2-1/2″
- optional: Whisper White CS cut to 4″ x 5-1/4″ for the inside of the card base
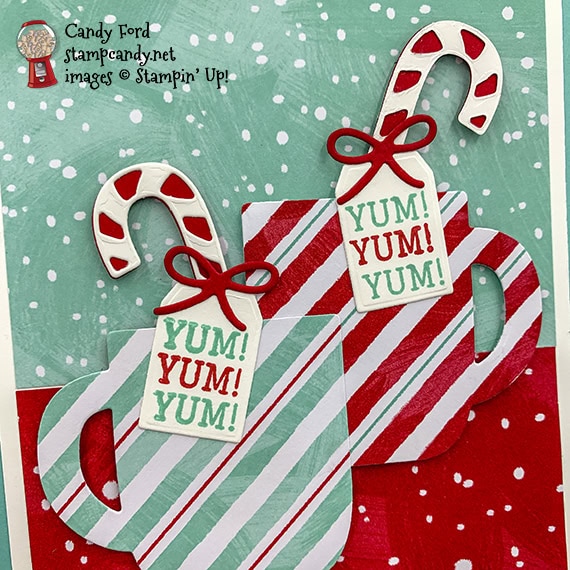
Stamped with the Cup of Christmas stamp set:
- YUM in Real Red and Coastal Cabana inks onto a scrap of Whisper White Thick CS – stacked close together – stamped this for 2 tags
Cut using the Cup of Cheer Dies:
- stamped tags (2)
- cups from scraps of DSP (2 different stripe patterns)
- solid candy canes from a scrap of Real Red CS (2)
- striped candy canes from a scrap of Whisper White CS (2)
- bows from a scrap of Real Red CS (2)
Assembled the card:
- burnished the fold in the card base with a Bone Folder
- Whisper White CS layer glued onto the front of the card base
- 2 DSP layers glued onto the Whisper White CS layer
- Whisper White candy canes glued onto the Real Red candy canes
- candy canes glued onto the back of the cups
- tags glued onto the candy canes and cups
- bows glued onto the tags
- top right part of blue cup glued onto the bottom left part of the red cup
- cup assembly adhered onto the DSP layers using Stampin’ Dimensionals
- Whisper White CS glued onto the inside of the card base
S
Here are today’s colors:
You can click on each one to see all the products that come in that color!
S
Here’s what I used:
Click on these images for more details and to purchase.
<– Click here for a clickable and printable list!
S
Preorder the Monster Bash Online Treat Holder Class by September 18:
- Make 6 adorable treat holders in the comfort of your own home!
- 2 each of 3 designs
- Features the Monster Bash Suite on pages 52-54 of the 2019 Holiday Catalog
- I’ve done the trimming and scoring for you!
- You’ll receive the stamp set, dies, pre-cut kits, and Black Stampin’ Dimensionals.
- Full detailed instructions
- Limited spots available
Click on the image below for details and class options, or copy and paste this link into your browser: https://stampcandy.net/online-classes/monster-bash-treat-holder-class-preorder/
S
Here are some helpful links:
S
Thanks for stopping by today, and Sweet Stamping!

Sep 1, 2019 | Boxes, Christmas, Gifts, Holiday, New Products |
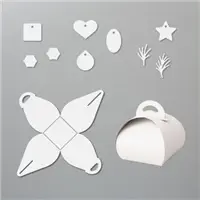
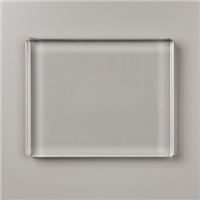
Today I’m sharing another 2019 Holiday Catalog sneak peek, and another Make & Take project I made for our August Candy Hearts team meeting. Not too long ago we had the Curvy Keepsakes Box Dies, which made a larger version of this box. Now we have this adorable mini version. We used the Mini Curvy Keepsakes Box Dies and Mercury Glass Designer Acetate to make this adorable box. It’s perfect for a battery operated tea light, small treats and gifts.
S
Here’s what I made:


S
Here’s what I did:
Cut using the Mini Curvy Keepsake Box Dies:
- box from a Mercury Glass Acetate Sheet
- 3 sprigs from a scrap of Shaded Spruce cardstock (CS)
Assembled the box:
- burnished the score lines using a Bone Folder, then closed the box
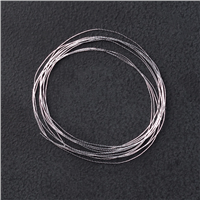
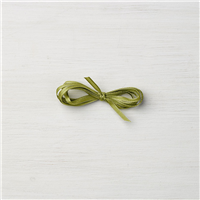
- 3 sprigs glued together in a spray, then silver thread wrapped around the stems and tied in a knot
- 3 Red Rhinestones applied onto the spray
- spray adhered onto the outermost flap of the box using Mini Glue Dots
- NOTE: Putting the spray on the outermost flap means you can still open and close the box easily
S
Here are today’s colors:
You can click on each one to see all the products that come in that color!
S
Here’s what I used:
Click on these images for more details and to purchase.
Supply List <– Click here for a clickable and printable list!
S
Preorder the Pretty Petals Online Class by September 5:
- Make 6 cards at home in your PJs!
- 2 each of 3 designs
- Features the Pretty Petals Suite on pages 72-74 of the 2019-2020 Annual Catalog
- I’ve done the trimming and scoring for you!
- You’ll receive the stamp set, dies, embossing folder, pre-cut card kits, and 6 Very Vanilla envelopes.
- Full detailed instructions
- Limited spots available
Click on the image below for details and class options, or copy and paste this link into your browser: https://stampcandy.net/online-classes/pretty-petals-class-preorder/

S
Here are some helpful links:
S
Thanks for stopping by today, and Sweet Stamping!
Apr 8, 2019 | Cards, Gallery, Holiday |
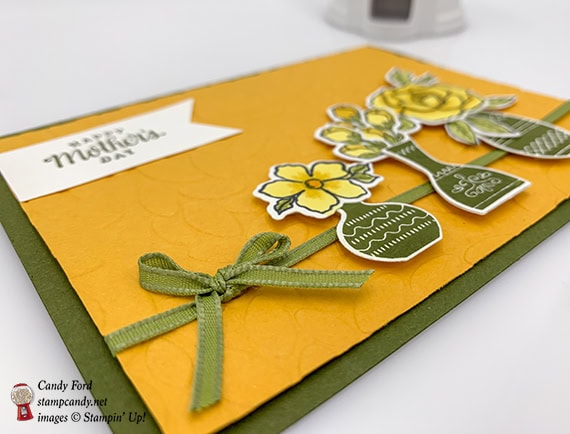
Today’s I’m sharing a Mother’s Day card I made using the You’re Inspiring stamp set. You can see another card I made using this same stamp set HERE. I used an Aqua Painter to watercolor the background of the main layer in a haphazard fashion. I also watercolored the piece I stamped the sentiment on – I wanted it to be lighter than the card stock so the sentiment would show better.
S
Here’s what I made:
S

Here’s what I did:
Cut and scored with my Stampin’ Trimmer:
- Daffodil Delight card stock (CS) cut to 5-1/2″ x 8-1/2″, then scored in half at 4-1/4″
- Shimmery White CS layer cut to 5-1/4″ x 4″
- Whisper White CS cut to 2-3/4″ x 1″
- Whisper White CS cut to 5-1/4″ x 4″ for the inside of the card base
Stamped with the You’re Inspiring stamp set:
- Daffodil image in Stazon black ink
- sentiment in Old Olive ink onto a watercolored piece of Shimmery White CS (see below)
Die cut using the Merry Christmas Thinlits:
Cut using the Bitty Blooms Punch Pack:
- all four corners of the 2-3/4″ x 1″ Whisper White CS, with the rounded petal of a flower punch
Colored using Watercolor Pencils:
- flowers in Daffodil Delight, Pumpkin Pie, and Whisper White
Colored using an Aqua Painter:
- background in Pear Pizzazz ink, around the flowers
- stems & leaves in Old Olive
- scrap of Shimmery White CS for the sentiment in Daffodil Delight (let it dry before stamping the sentiment above)
Assembled the card:
- burnished the fold in the card base with a Bone Folder
- Shimmery White CS layer glued onto the front of the card base
- a piece of Daffodil Delight ribbon, a piece of Pear Pizzazz ribbon, and a piece of Old Olive ribbon adhered onto the Shimmery White CS layer using Tear & Tape
- sentiment glued onto the small piece of Shimmery White CS, then adhered over the ribbons using Stampin’ Dimensionals
- 3 Pear Pizzazz sequins glued onto the watercolored background
- Whisper White CS glued onto the inside of the card base

S
Just to be clear on the order of steps for the layers:
For the large Shimmery White CS layer:
- stamped the flowers.
- water colored the background around the flowers, and let it dry.
- water colored the leaves and stems
- colored the centers of the flowers
For the sentiment layer:
- water colored the layer, then let it dry completely.
- stamped the sentiment.
- die cut
S
Here are today’s colors:
You can click on each one to see all the products that come in that color!
S
Here’s what I used:
Click on these images for more details and to purchase.
S
Preorder the Vibrant Vases Online Class by April 10:
- Make 6 gorgeous cards at home in your PJs!
- 2 each of 3 designs
- perfect for assorted occasions including love, celebration, and thanks
- You’ll receive all you need to make the cards, including the stamp set, punch, and the precut/prescored card kits PLUS a stamping template for the punch.
- Limited spots available
Click on the image below for details and class options:

S
Here are some helpful links:
S
Thanks for stopping by today, and Sweet Stamping!
Apr 6, 2019 | Cards, Gallery, Holiday |
Stampin’ Up!’s web site describes the You’re Inspiring stamp set like this: “A dignified dozen of delicate daffodils for dazzling demonstrations of your devotion.” They do love alliteration. It really is a lovely stamp set, and I used it to make today’s card for Easter.
When I was little, the whole family always gathered at my Aunt Edna’s house for Easter dinner. I was the only child at these dinners. My siblings and cousins were all at least 10 years older, so they were teenagers and didn’t care about hunting for eggs. But I loved it. The driveway to Aunt Edna’s house was lined in jonquils, and they were always thick and blooming at Easter. I always knew there would be at least a few eggs hidden amongst them. To this day, whenever I see jonquils (or daffodils or Narcissus) I always think of those childhood Easters.
S
Here’s what I made:
S

Here’s what I did:
Cut and scored with my Stampin’ Trimmer:
- Granny Apple Green card stock (CS) cut to 5-1/2″ x 8-1/2″, then scored in half at 4-1/4″
- Whisper White CS layer cut to 4″ x 2-3/4″
- Lemon Lime Twist CS layer cut to 3-7/8″ x 2-5/8″
- Whisper White CS cut to 5-1/4″ x 4″ for the inside of the card
Stamped with the You’re Inspiring stamp set:
- daffodils in Granny Apple Green ink onto the Lemon Lime Twist Cs layer
- sentiment in Daffodil Delight ink onto a scrap of Whisper White CS
Cut using the Classic Label Punch:
Embossed using the Subtle Dynamic embossing folder:
- the front of the card base
- NOTE: You can emboss a 5-1/2″ x 4-1/4″ piece of Granny Apple Green CS, then glue it onto the front of the card base. I thought it was easier to skip a step and emboss the front of the card base itself.
Colored using Watercolor Pencils (dry):
- flowers in Daffodil Delight
- flower centers in Pumpkin Pie
- stems & leaves in Old Olive
- drew three lines along the top, bottom, and both sides of the stamped image in white. I thought about using a ruler, but I think the crooked lines lends a subtle, whimsical quality to the card.
Assembled the card:
- burnished the fold in the card base with a Bone Folder – I did this with the front of the card base facing down, to avoid burnishing away any of the embossing.
- Lemon Lime Twist CS layer glued onto the Whisper White CS layer
- Whisper White CS layer adhered onto the front of the card base using Stampin’ Dimensionals
- sentiment glued onto the Lemon Lime Twist CS layer
- Whisper White CS glued onto the inside of the card base

S
Here are today’s colors:
You can click on each one to see all the products that come in that color!
S
Here’s what I used:
Click on these images for more details and to purchase.
S
Preorder the Vibrant Vases Online Class by April 10:
- Make 6 gorgeous cards at home in your PJs!
- 2 each of 3 designs
- perfect for assorted occasions including love, celebration, and thanks
- You’ll receive all you need to make the cards, including the stamp set, punch, and the precut/prescored card kits PLUS a stamping template for the punch.
- Limited spots available
Click on the image below for details and class options:
S
Here are some helpful links:
S
Thanks for stopping by today, and Sweet Stamping!
Feb 25, 2019 | Cards, Gallery, Holiday, Occasions, Sale-A-Bration |
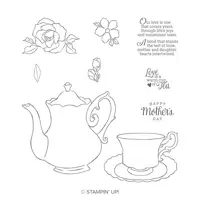
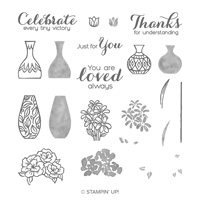
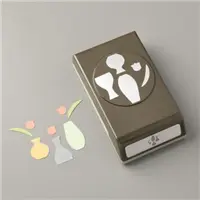
Today’s card is for Mother’s Day. I used the Tea Together stamp set and the coordinating Tea Time Framelits Dies, but only the flowers, and not the more obvious teapot and teacup. I plopped the flowers into vases from the Vibrant Vases stamp set, and cut using the Vases Builder Punch. For the background, I used the Petal Burst Textured Impressions Embossing Folder (TIEF) to create a totally floral motif.
S
Here’s what I made:
 You may notice at the bottom right corner of the card front, I neglected to get the corner of the layer stuck down properly before taking the picture. I’m not sure how I didn’t notice that, but rest assured it is fixed now.

 S
S
Here’s what I did:
Cut and scored with my Stampin’ Trimmer:
- Mossy Meadow card stock (CS) cut to 5-1/2″ x 8-1/2″, then scored in half at 4-1/4″
- Mango Melody CS cut to 5-1/4″ x 4″
- Whisper White CS cut to 4″ x 1″
- Whisper White Cs cut to 5-1/4″ x 4″ for the inside of the card
Stamped with the Tea Together stamp set:
- sentiment in Mossy Meadow ink onto the 1″ strip of Whisper White CS
- flowers (1 large, 1 medium, and 3 rose buds) and 3 leaves in Memento black ink onto a scrap of Whisper White CS
- 2 large flowers in Daffodil Delight ink onto the Whisper White CS for the inside of the card
Stamped with the Vibrant Vases stamp set:
- the 3 vases in Mossy Meadow ink onto a scrap of Whisper White CS
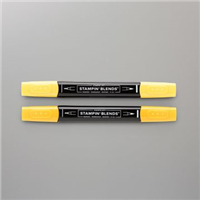
Colored using Stampin’ Blends Markers:
- all the Memento black ink stamped flowers and leaves: flowers in Daffodil Delight and Mango Melody, and leaves in Old Olive
Die cut using the Tea Time Framelits:
- the colored flowers and leaves
Embossed using the Petal Burst embossing folder:
Cut using the Vases Builder Punch:
Cut using the Banner Triple Punch:
- the left end of the sentiment strip
Assembled the card:
- burnished the fold in the card base with a Bone Folder
- adhere a piece of Old Olive 1/8″ ribbon onto the embossed Mango Melody CS layer, securing the ends on the back with Tear & Tape
- embossed Mango Melody CS layer glued onto the front of the card base
- piece of the same ribbon tied around the first piece, and tied in a bow – I secured the bow to the card using a Mini Glue Dot
- flowers and leaves glued together with vases, then adhered onto the embossed Mango Melody CS layer, over the ribbon, using Stampin’ Dimensionals
- sentiment glued onto the embossed Mango Melody CS layer
- Whisper White CS glued onto the inside of the card base
S
Here are today’s colors:
You can click on each one to see all the products that come in that color!
S
Here’s what I used:
Click on these images for more details and to purchase.
S
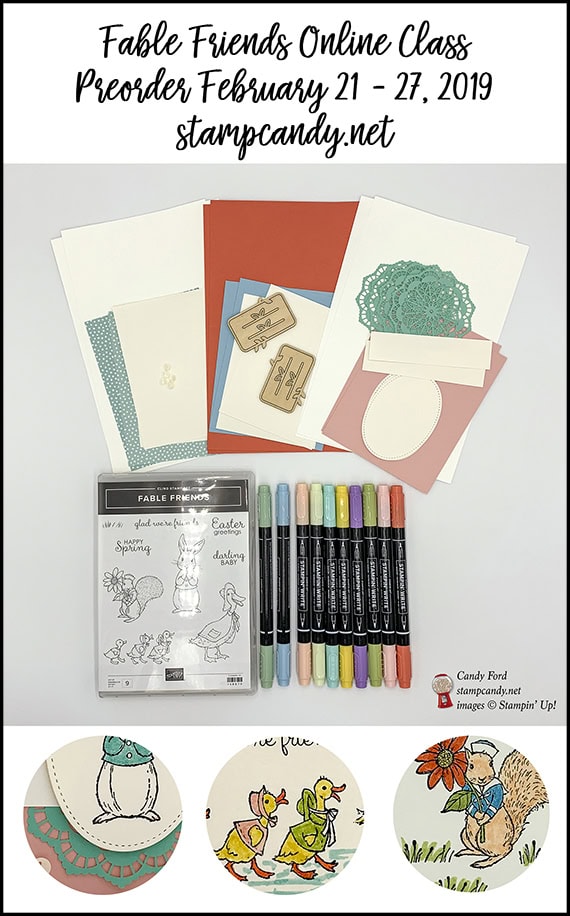
Preorder the Fable Friends Online Class by February 27!
- Make 6 adorable cards at home in your PJs!
- 2 each of 3 designs
- Perfect for Spring!
- Limited spots available!
Click on the image below for details:
S
Here are some helpful links to check out:

S
Thanks for stopping by today, and Sweet Stamping!