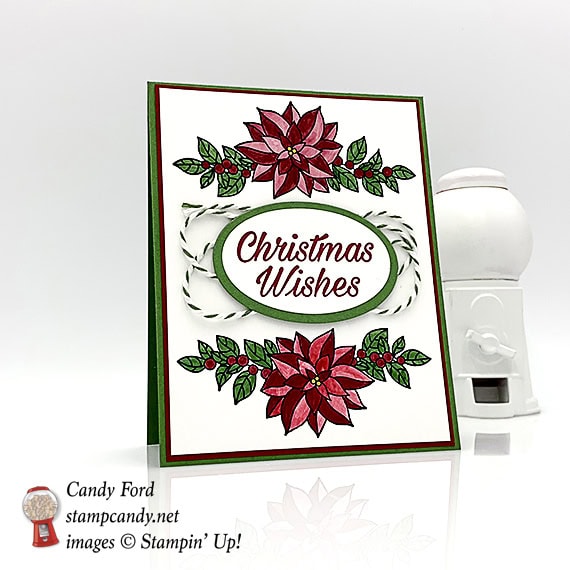
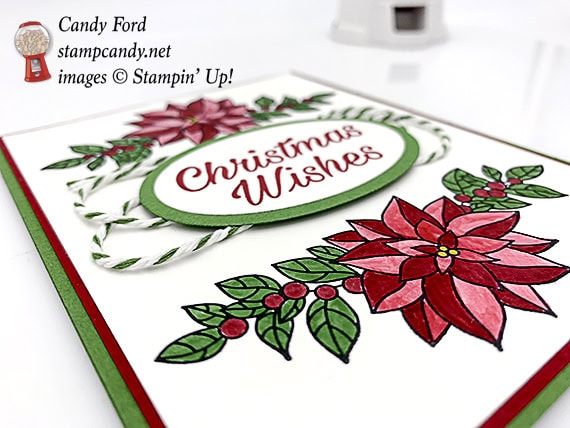
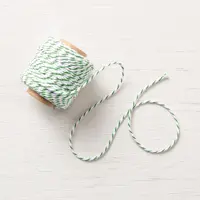
I’m baaaaaaaack! I apologize for not posting in so long. I’ve had serious internet connectivity issues. But now I’m here to share this lovely Christmas card with you. I used the Peaceful Poinsettia stamp set and a Blender Pen to create the images, and the Layering Oval Framelits Dies to cut out the sentiment. I added a little Garden Green & Whisper White Baker’s Twine to add a little somethin’ somethin’.
Here’s what I made:
Here’s what I did:
Cut and scored with my Stampin’ Trimmer:
Garden Green card stock (CS) cut to 4-1/4″ x 11″, then scored in half at 5-1/2″
Cherry Cobbler CS cut to 4-1/8″ x 5-3/8″
Whisper White CS cut to 4″ x 5-1/4″ (2 pieces)
Stamped with the Peaceful Poinsettia stamp set:
floral image in Memento Black ink onto the Whisper White CS layer, once at the top, and once at the bottom (flipped)
sentiment in Cherry Cobbler ink onto a scrap of Whisper White CS
Die cut using the Layering Ovals Framelits:
sentiment
a scrap of Garden Green CS, slightly larger than the sentiment
Colored using a Blender Pen:
poinsettias and berries in Cherry Cobbler ink
leaves in Garden Green ink
flower centers in Crushed Curry ink
Assembled the card:
burnished the fold in the card base with a Bone Folder
Cherry Cobbler CS layer glued onto the front of the card base
stamped Whisper White CS layer glued onto the Cherry Cobbler CS layer
sentiment glued onto the Garden Green die cut oval
Garden Green Baker’s Twine wound around my hand then adhered to the back of the Garden Green CS oval
Garden Green CS oval adhered onto the card front using Stampin’ Dimensionals
remaining Whisper White CS glued onto the inside of the card base
Here are today’s colors:
You can click on each one to see all the products that come in that color!
Mini cards are great to attach to gifts or to send little notes. Today’s card is 2-3/4″ x 2-3/4″, which fits perfectly in Stampin’ Up!’s 3″ x 3″ Envelopes. I used the Making Christmas Bright Bundle (Making Christmas Bright stamp set and Christmas Bulb Builder Punch) to create this sweet little card in just a few minutes.
Here’s what I made:
Here’s what I did:
Cut and scored with my Stampin’ Trimmer:
Garden Green card stock (CS) cut to 2-3/4″ x 5-1/2″, then scored in half at 2-3/4″
Whisper White CS cut to 2-1/2″ x 2-1/2″ (2 pieces)
Stamped with the Making Christmas Bright stamp set:
three bulbs in Call Me Clover, Pineapple Punch, and Real Red inks onto a scrap of Whisper White CS
cord in Garden green ink onto the Whisper White CS layer
“glow” around each bulb onto the Whisper white CS layer (after gluing the bulbs to the layer)
Cut using the Christmas Bulb Builder Punch:
stamped bulbs
3 bulb toppers from a scrap of Garden Green CS
Assembled the card:
burnished the fold in the card base with a Bone Folder
Whisper White CS layer glued onto the front of the card base
bulb toppers glued onto the bulbs
bulbs glued onto the Whisper White CS layer along the stamped cord
second piece of Whisper White CS glued onto the inside of the card base
Here are today’s colors:
You can click on each one to see all the products that come in that color!
Sometimes I forget about the precut and scored Note Cards and Envelopes available from Stampin’ Up! They make card making so fast and easy! Why did I remember to use them this time? I had a scrap of paper that was just the right size, so I thought Hey, this should go on a Note Card! I knew I wanted to use the Making Christmas Bright stamp set (look for another card I made with it tomorrow) and today’s card was born. Well, created, not born.
Here’s what I made:
Here’s what I did:
Cut and scored with my Stampin’ Trimmer:
Garden Green Designer Series Paper (DSP cut to 4-3/4″ x 3-1/4″
DSP cut to 2″ x 6″
Whisper White card stock (CS) cut to 4-1/2″ x 3″
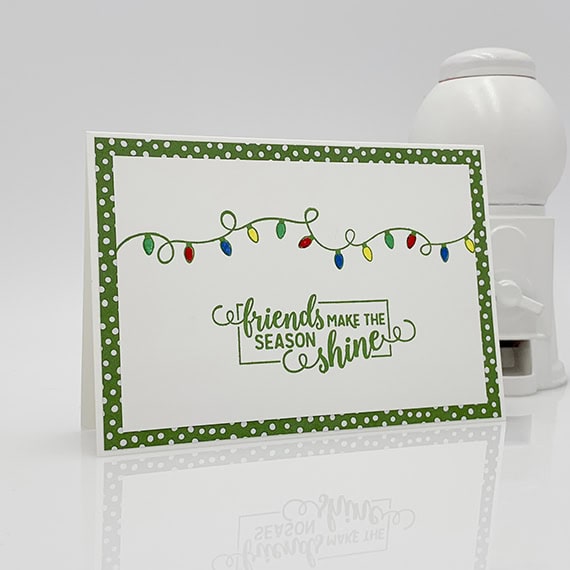
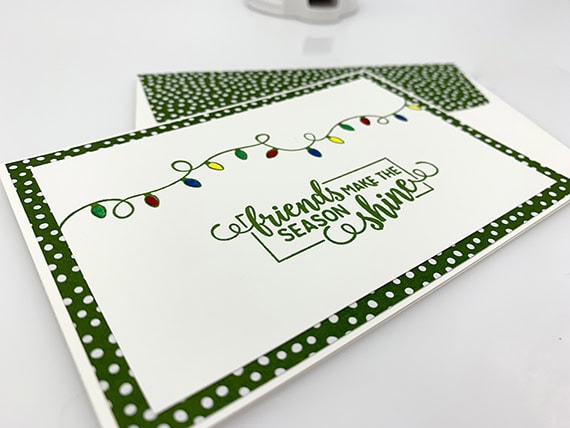
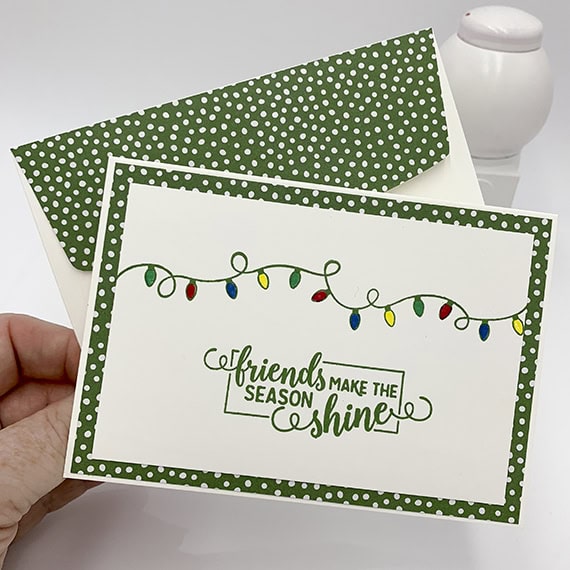
Stamped with the Making Christmas Bright stamp set:
sentiment and light strand in Garden Green ink onto the Whisper White CS layer
Colored using Stampin’ Write Markers:
lights in Real Red, Call Me Clover, Pacific Point, and Pineapple Punch
Assembled the card:
burnished the fold in the note card base with a Bone Folder
DSP layer glued onto the front of the note card base
Whisper White CS layer glued onto the DSP layer
DSP strip glued onto the flap of the note card envelope, then excess trimmed away using Paper Snips
Here are today’s colors:
You can click on each one to see all the products that come in that color!
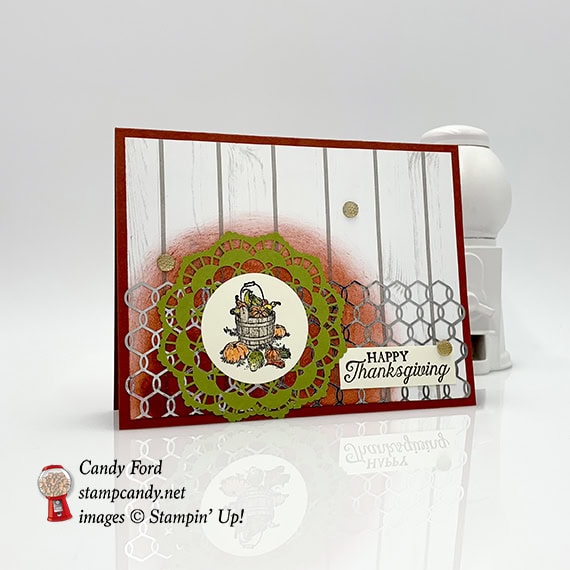
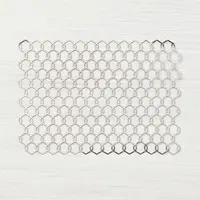
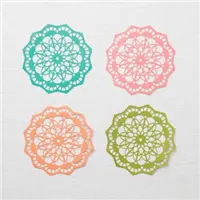
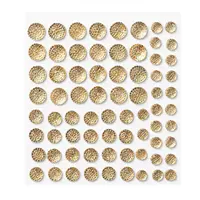
The Pleasant Pheasants stamp set has more than just pheasants. Today’s project uses the image of a wooden pail full of Autumn vegetables. I added a doily, a Chicken Wire Element, Festive Farmhouse Designer Series Paper, and Faceted Gems to make this Happy Thanksgiving card.
Here’s what I made:
Here’s what I did:
Cut and scored with my Stampin’ Trimmer:
Early Espresso card stock (CS) cut to 5-1/2″ x 8-1/2″, then scored in half at 4-1/4″
Festive Farmhouse Designer Series Paper (DSP) cut to 5-1/4″ x 4″
Chicken Wire Element cut in half lengthwise (to about 5″ x 2″)
Very Vanilla CS cut to 2″ x 3/4″
Very Vanilla CS cut to 5-1/4″ x 4″ for the inside of the card base
Stamped with the Pleasant Pheasants stamp set:
bucket image in black ink onto a scrap of Very Vanilla CS
sentiment in Early Espresso ink onto the 2″ x 3/4″ Very Vanilla CS
Colored using Watercolor Pencils:
bucket image in Early Espresso, Pumpkin Pie, Daffodil Delight, Calypso Coral, and Old Olive
Colored using a Stampin’ sponge:
Cajun Craze ink swirled onto bottom left of the DSP layer
Die cut using the Layering Circles Framelits:
bucket image
Assembled the card:
burnished the fold in the card base with a Bone Folder
Chicken Wire Element glued onto the lower part of the DSP layer
die cut bucket image glued onto an Old Olive doily
Old Olive doily glued over the Chicken Wire Element, then excess trimmed from the bottom using Paper Snips
sentiment glued over the Chicken Wire Element
DSP layer glued onto the front of the card base
leftover piece of doily glued onto the card base at the bottom of the doily
3 Gold Faceted Gems applied to the card front
Very Vanilla CS glued onto the inside of the card base
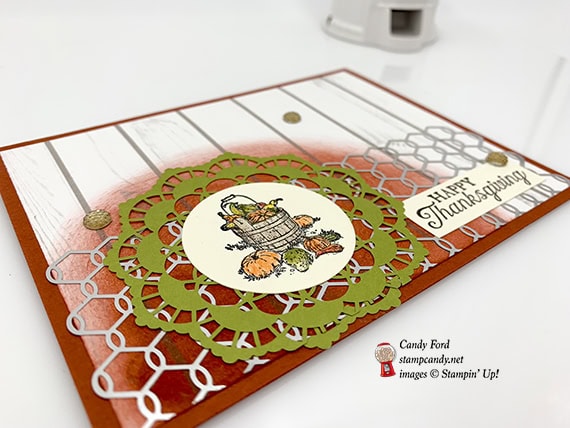
Here you can see how shiny the Chicken Wire Element is:
Here are today’s colors:
You can click on each one to see all the products that come in that color!
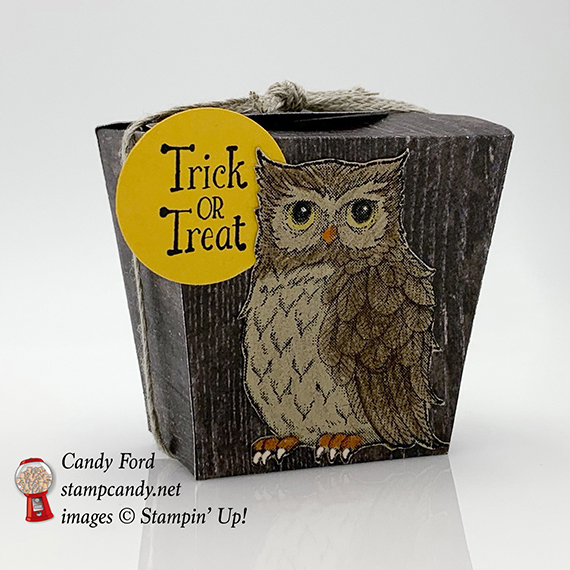
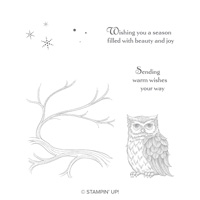
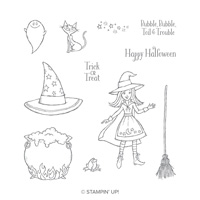
Welcome to InKing Royalty’s October Blog Hop! This year’s Blog Hop themes are inspired by popular songs – this month’s song is “Monster Mash.” You can watch a video of the song at the bottom of this blog post. As you can guess, our Blog Hop today is filled with fun projects that are inspired by the spookiest night of the year – Halloween. We are excited to share our creations with you today! After you read my post, I hope you’ll hop over to the next person on the list at the base of this post.
Here’s what I made:
Here’s what I did:
Stamped with the Still Night stamp set:
owl in Stazon black ink onto a scrap of Crumb Cake card stock (CS)
Stamped with the Cauldron Bubble stamp set:
sentiment in black ink onto a scrap of Crushed Curry CS
Die cut using the Takeout Thinlits:
two box pieces from Wood Textures Designer Series Paper (DSP)
Cut using the 1″ Circle Punch:
sentiment
Colored using Watercolor Pencils:
owl in Early Espresso, Basic Gray, Basic Black, Daffodil Delight, Pumpkin Pie, and Whisper White
Cut using Paper Snips:
fussy cut the owl (Seriously, Stampin’ Up!’s Paper Snips are the best scissors for fussy cutting paper!)
Assembled the card:
folded and burnished the score lines in the box pieces with a Bone Folder
the bottoms of the two box pieces glued to each other
flaps adhered to the inside of the adjacent sides of the box with Tear & Tape
sentiment “moon” and owl glued onto the front of the box
treats put inside, the closed the box
Braided Linen Trim tied around the box and tied in a knot
Here’s the Monster Mash hop:
Thank you for hopping along with us today. I hope you’ll hop to the next stop, Robin Myren at Songbird Designs by Robin. There’s a lot of inspiration to be found in this group, and you don’t want to miss any of it! If you get stuck during the Blog Hop, please use this line-up as a guide:
Get cozy this Christmas season with Paper Pumpkin! The Paper Pumpkin team designed November’s kit to give you a One-Stop Box™ for your holiday crafting needs. When you subscribe by November 10, you;ll receive the specially-designed box filled with everything you need for a holly-jolly, handmade holiday.
The holidays are the best time to share our appreciation for others, and nothing does that like a handmade holiday card. November’s kit gives a you everything you need to make plenty of those! (10 cards; 5 each of 2 unique holiday designs.)
Are you new to Paper Pumpkin? The holiday kit is the perfect introduction to this fabulous monthly kit, especially if you’re looking for a fun and easy holiday crafting experience.
Current subscribers are going to love the holiday kit. In fact, you may want to purchase extra kits to give away as gift – plus you’ll want lots of refills!
The November kit makes the perfect gift for your crafty friends this holiday season. Purchase a prepaid code(s) and give them to your friends/family members as gifts. Tell them to redeem their prepaid codes on paperpumpkin.com by November 10 to get the special holiday edition kit!
The box is a great sneak of what’s inside! (See photo at top of this post.)
Coordinating colors:
You can click each color to see coordinating products, to make more, or alternate projects.