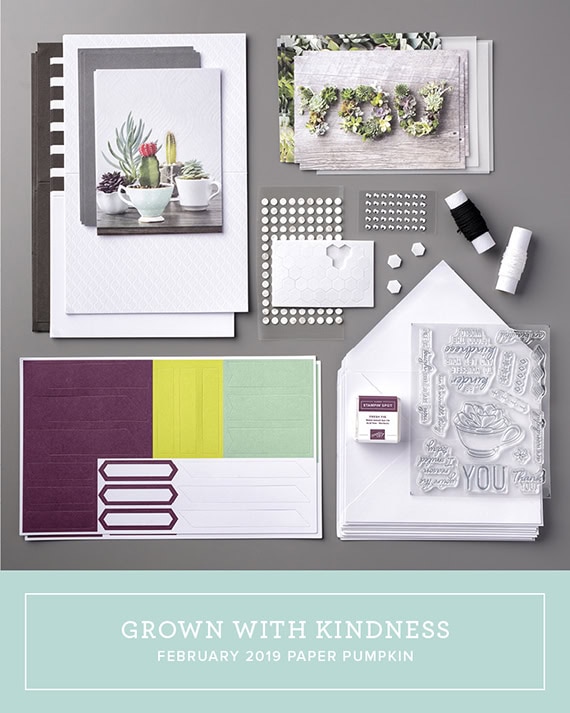
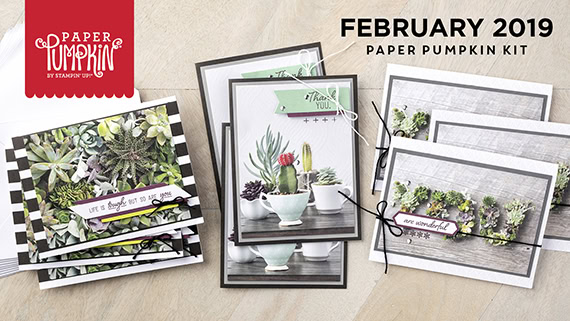
It’s time for the APPT Blog Hop for February! This month’s kit is called Grown with Kindness and it features 9 sweet cards with photographic images of succulent plants.
S
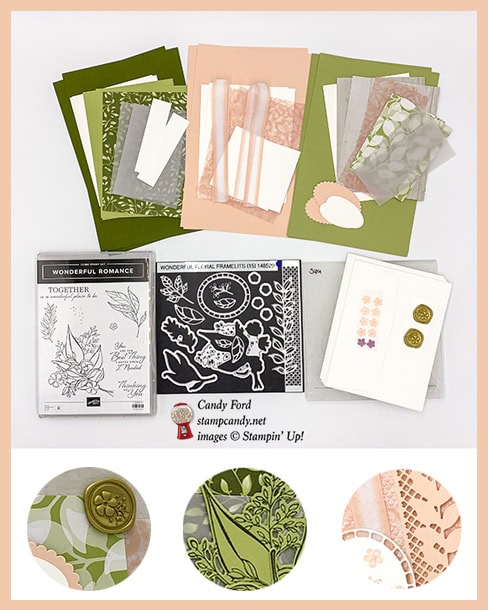
Here’s the Grown With Kindness kit:
What comes in the kit:
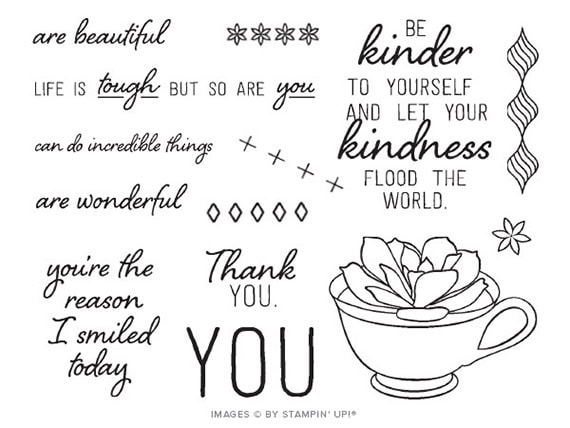
The stamp set:
The kit makes 9 cards:
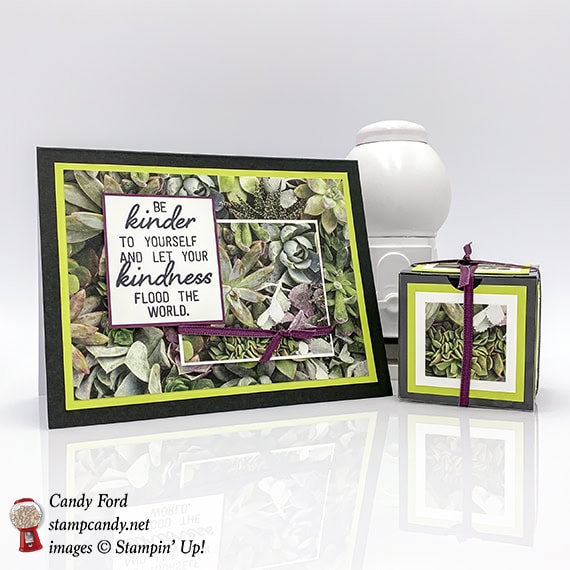
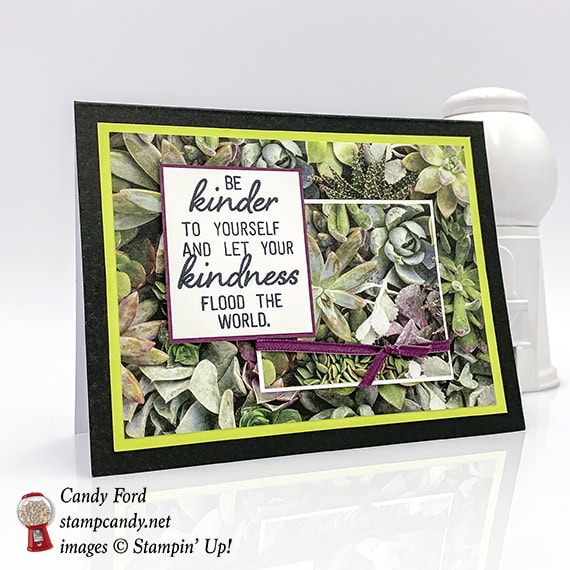
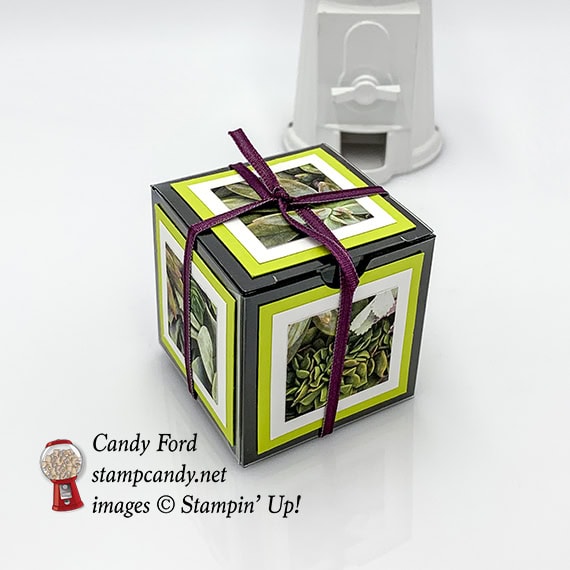
I used a card base and a couple of photographic pieces from the kit along with a few other Stampin’ Up! products for my alternate projects: a card and a gift/treat box. I can’t wait to see what all the talented stampers on the blog hop have come up with for their alternate projects. Be sure to hop all the way around, because you won’t want to miss any of them.
S
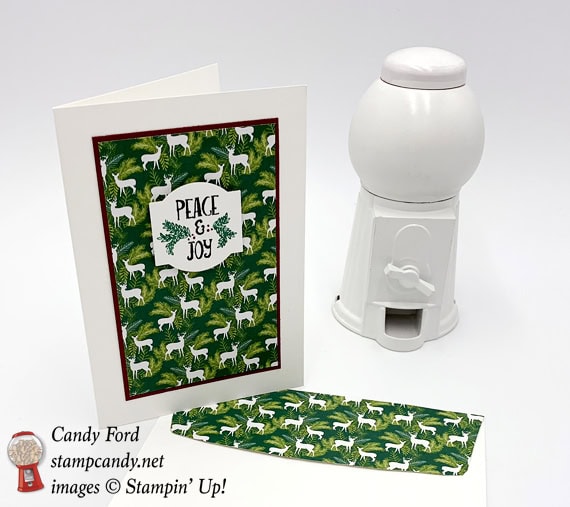
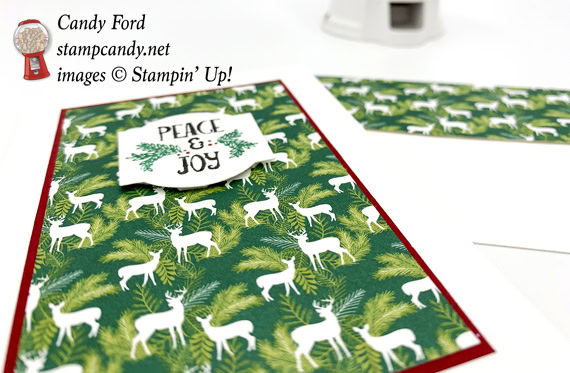
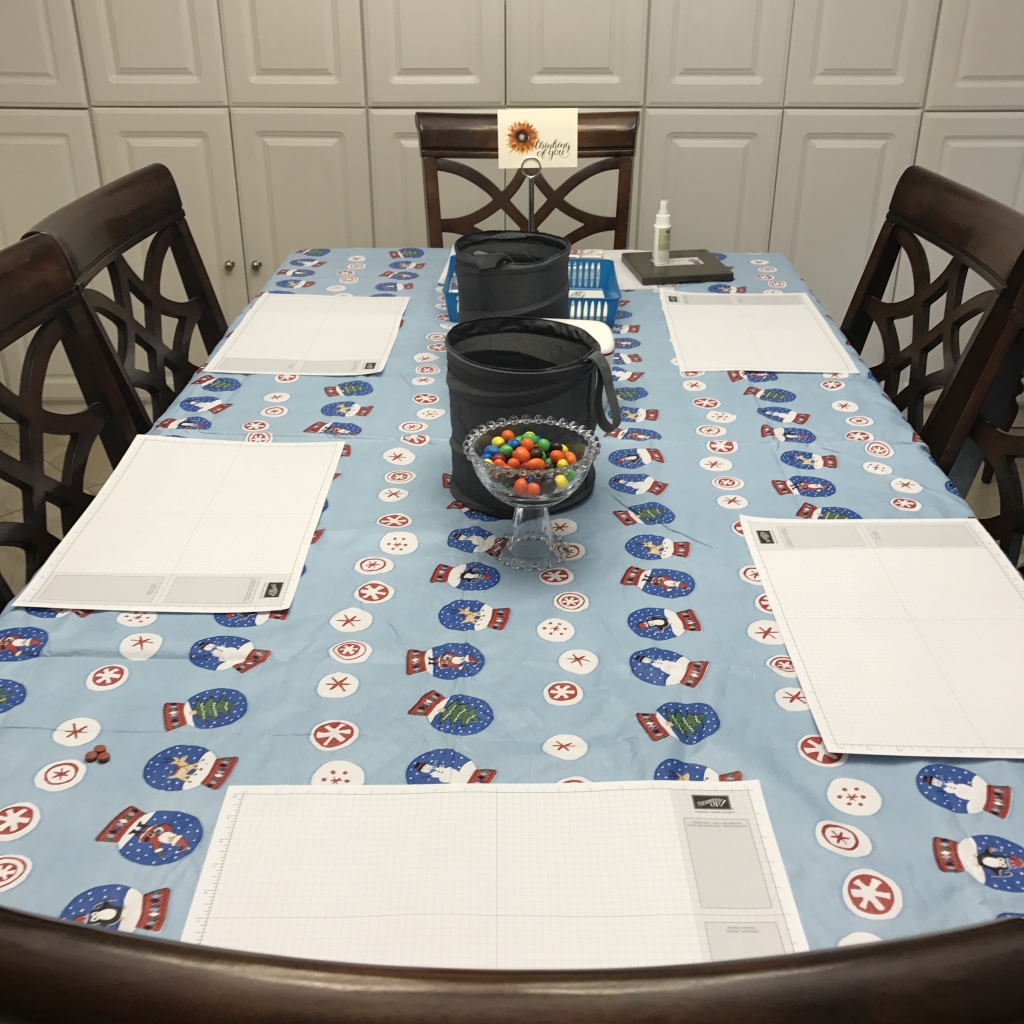
Here’s what I made:
The ribbon is a bit loose and saggy on the card, probably because it got manhandled too much before making its way upstairs for the photos. And the ribbon on the box is a little crooked. I guess I was too tired to notice when I took the photos. Just be mindful of the ribbon when you make yours.
The bottom of the box: S
Here’s what I did:
Cut and scored with my Stampin’ Trimmer:
Lemon Lime Twist card stock (CS) cut to 5″ x 3-3/4″
photographic card layer cut to 4-3/4″ x 3-1/2″
Whisper White CS cut to 2-5/8″ x 2-3/8″
photographic card layer cut to 2-1/2″ x 2-1/4″
Fresh Fig CS cut to 1-7/8″ x 2-1/8″
Whisper White CS cut to 1-3/4″ x 2″
Basic Black CS cut to 2″ x 8″, then scored at 2″, 4″, and 6″
Basic Black CS cut to 2″ x 6″, then scored at 2″ and 4″
Lemon Lime Twist CS cut to 1-3/4″ x 1-3/4″ (5 pieces)
Whisper White CS cut to 1-1/2″ x 1-1/2″ (5 pieces)
photographic card layer cut to 1-3/8″ x 1-3/8″ (5 pieces)
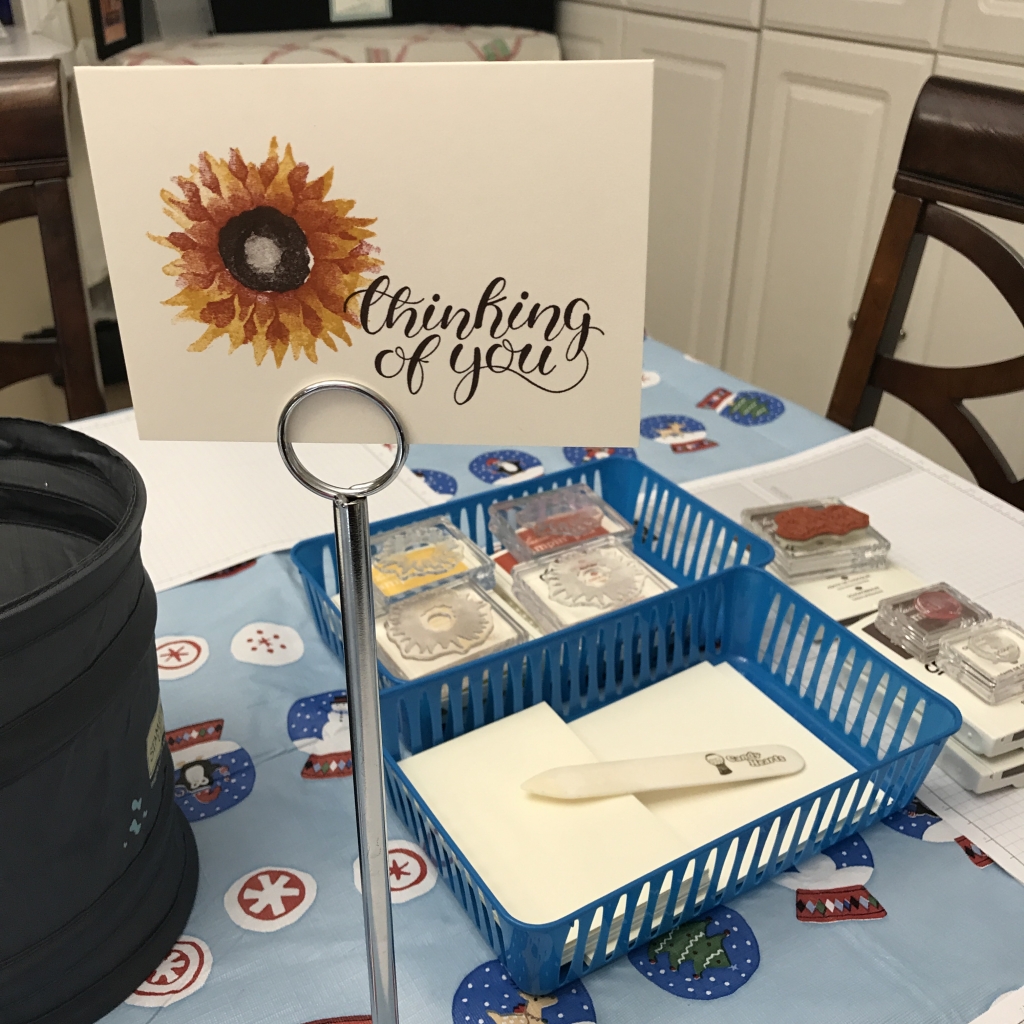
Stamped with the Grown With Kindness stamp set:
sentiment in Memento black ink onto the 1-3/4″ x 2″ Whisper White CS
Cut using the 1/2″ Circle Punch:
semicircle from one end of the 8″ long Basic Black CS
Lemon Lime Twist square for the front of the box
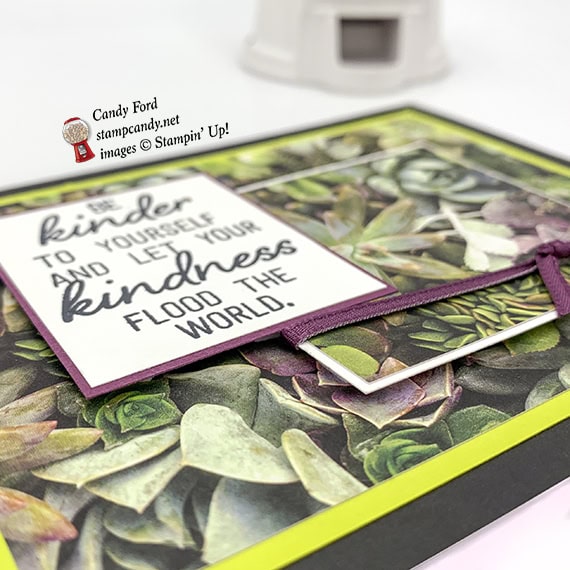
Assembled the card:
burnished the fold in the card base with a Bone Folder
Lemon Lime Twist CS layer glued onto the front of the card base
largest photographic layer glued onto the Lemon Lime Twist CS layer
sentiment glued onto the Fresh Fig CS layer
2-1/2″ x 2-1/4″ photographic layer glued onto the 2-5/8″ x 2-3/8″ Whisper White CS layer
Fresh Fig 1/8″ ribbon tied around the bottom of the photographic layered piece
the two small layered pieces glued together, then adhered onto the largest photographic layer using Stampin’ Dimensionals
Assembled the box:
burnished the folds in the box with a Bone Folder, then assembled the box
burnished the folds in the two Basic Black CS pieces
8″ Basic Black CS inserted into the box, with the punched notch at the front
6″ Basic Black CS inserted into the box to line both sides
1-3/8″ photographic piece glued onto a 1-1/2″ Whisper White piece, and that glued onto a 1-3/4″ Lemon Lime Twist CS piece (did this for all 5 pieces)
the 5 layered pieces adhered onto the top and four sides of the box using Tear & Tape
Fresh Fig 1/8″ ribbon tied around the box
S
Here’s the hop:
S
Here are today’s colors:
You can click on each one to see all the products that come in that color!
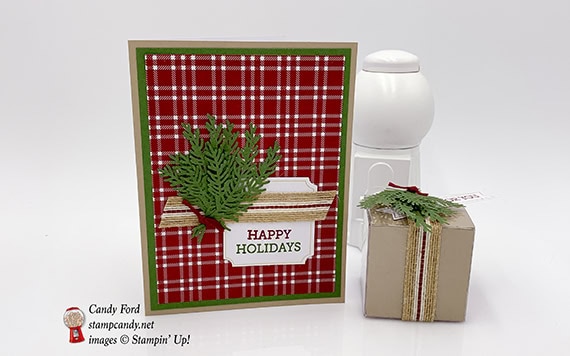
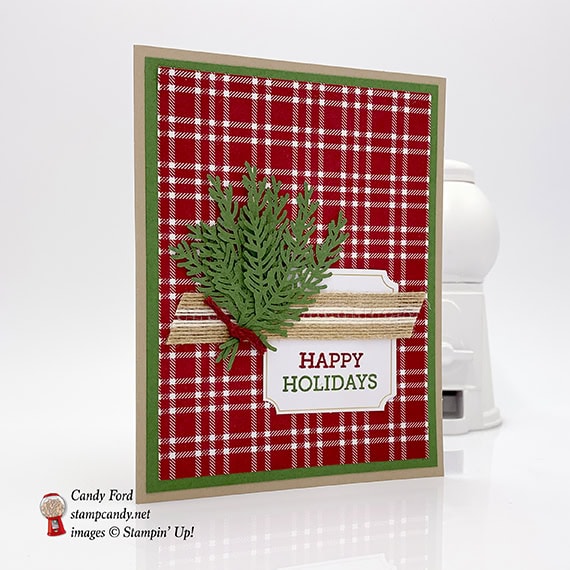
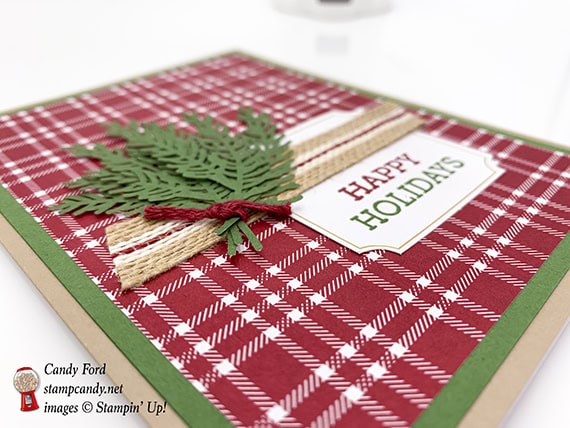
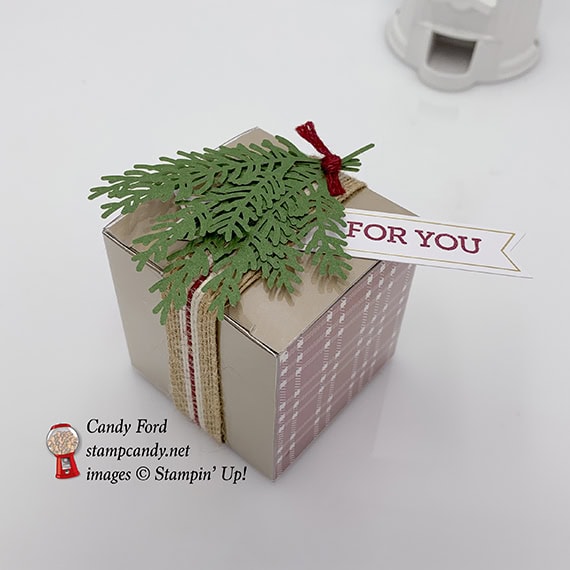
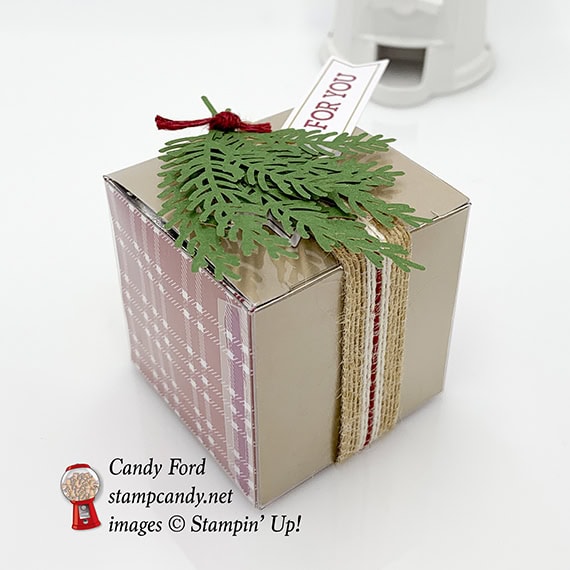
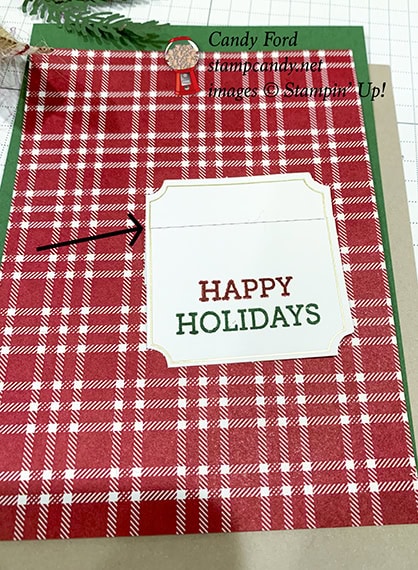
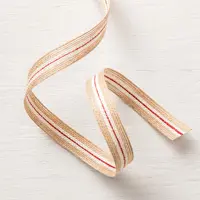
It’s time for the A Paper Pumpkin Thing (APPT) Blog Hop! This month’s kit is called To You and Yours, and it makes 10 awesome Christmas/holiday cards. I used it to make an alternate card and treat box. I only used items from the kit, except for the following: Garden Green ink pad, one Clear Tiny Treat Box, one piece of Garden Green card stock and two pieces of Striped Burlap Trim.
The kit comes with card layers in two different plaid designs. The envelopes are lined with a third plaid design, which is what I used on my projects today.
Here’s what I made:
Here’s what I did:
Cut and scored with my Stampin’ Trimmer:
Garden Green card stock (CS) cut to 4″ x 5-1/4″
plaid paper from the inside of an envelope cut to 3-3/4″ x 5″
plaid paper from the inside of an envelope cut to 2″ x 6″
card base cut to 2″ x 8″, making sure the original score line is at the 4″ mark, then scoring at 2″ and 6″
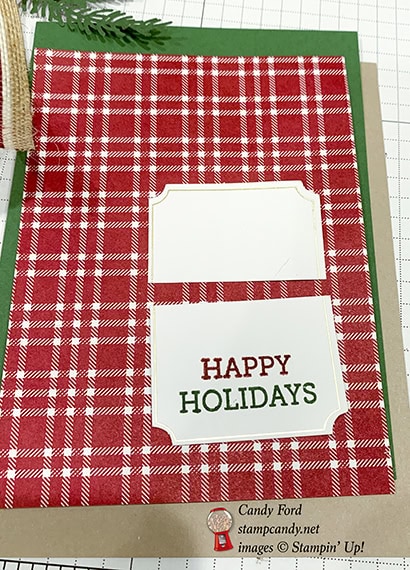
die cut label cut in half
Stamped with the kit’s stamp set:
“For You” in Cherry Cobbler ink onto the right end of a die cut banner
“Happy” in Cherry Cobbler ink and “Holidays” in Garden Green ink onto the bottom half of the die cut label
Cut with a 1/2″ Circle Punch:
a half moon shape from one end of the 2″ x 8″ piece, to match up with the finger notch of the treat box
Assembled the card:
burnished the fold in the card base with a Bone Folder
Garden Green CS layer glued onto the front of a card base
plaid paper layer glued onto the Garden Green CS layer
the stamped half of the die cut label layered over the other half, to shorten it, and glued onto the plaid layer
I had to draw a line so you could see where the two halves of the label overlap:
burlap trim adhered onto the plaid layer, hiding the seam in the label
5 die cut sprigs bundled and tied together using a piece of Cherry Cobbler trim, then adhered to the plaid layer and burlap trim
Assembled the box:
assembled the treat box
burnished the folds in the 2″ strip cut from plaid paper, and in the 2″ strip cut from a card base
plaid strip inserted into the treat box side to side
the other strip inserted into the treat box front to back, lining up the finger notch in the front
put the goodies in and closed the lid (I used Hershey’s Kisses. You can see from the photos I got it just a little too full. It’s bulging a little.)
10″ piece of burlap trim wrapped around the box and the ends adhered together, but not to the box, so it can slip on and off
5 die cut sprigs bundled and tied together using a piece of Cherry Cobbler trim, then adhered to the ribbon on top of the box
“For You” banner slipped under the ribbon
Here’s the To You and Yours Blog Hop:
Here are today’s colors:
You can click on each one to see all the products that come in that color!
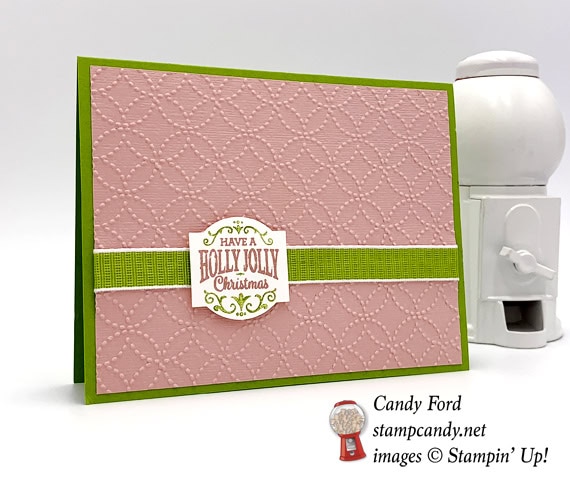
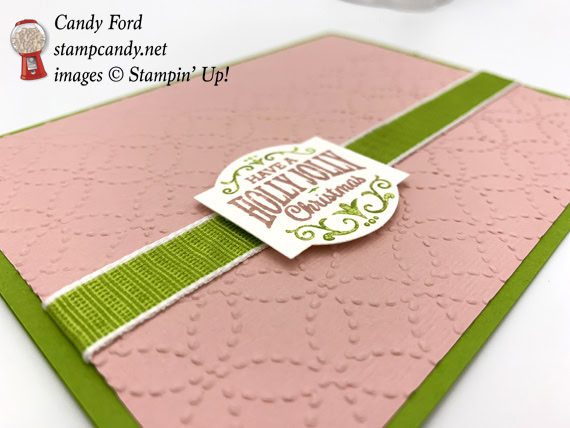
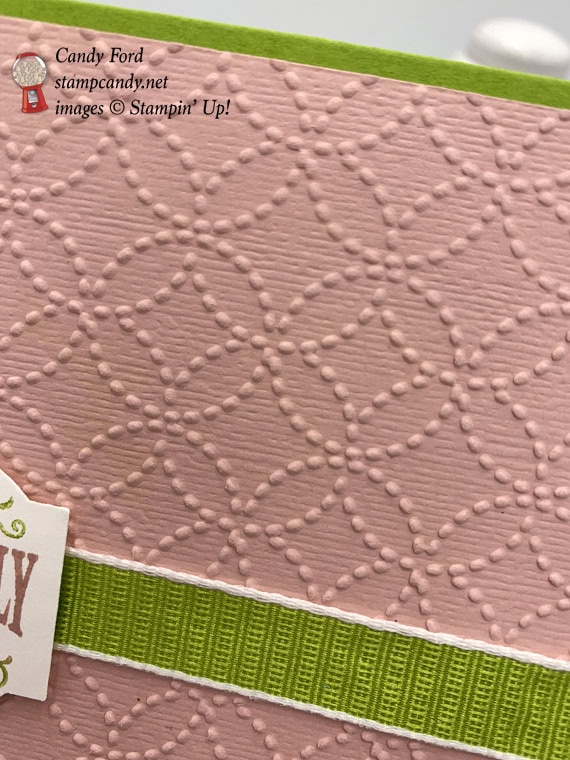
Today I’m sharing another card I made using the Christmas Traditions Punch Box. I also used the Textured Weave Ribbon and the Subtle and Quilt Top embossing folders to add some texture. The colors are Granny Apple Green and Blushing Bride. I like alternatives to red and green for Christmas. I especially like pink. My Christmas dishes are pink and green. I even have a pink Christmas tree with pink lights, AND matching wreath and garlands!
Here’s what I made:
Here you can really see the texture from the two embossing folders and the ribbon:
Here’s what I did:
Cut and scored with my Stampin’ Trimmer:
Granny Apple Green card stock (CS) cut to 5-1/2″ x 8-1/2″, then scored in half at 4-1/4
Blushing Bride CS cut to 5-1/4″ x 4″
Whisper White CS cut to 5-1/4″ x 4″ for the inside of the card base
Stamped with the Christmas Traditions stamp set:
the image in Granny Apple Green and Blushing Bride inks onto a scrap of Whisper White Thick CS
NOTE: I used Stampin’ Write Markers to color the stamp, then huffed on it to reactivate the ink before stamping
Ran through the Big Shot to emboss:
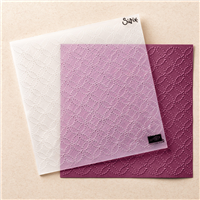
Blushing Bride CS layer with the Subtle embossing folder
Blushing Bride CS layer with the Quilt Top embossing folder
NOTE: use them in this order. I think the Subtle folder would probably undo the Quilt Top pattern.
Cut using the Christmas Traditions Punch:
stamped image
Assembled the card:
burnished the fold in the card base with a Bone Folder
ribbon adhered to the Blushing Bride CS layer using Tear & Tape (or Snail) wrapping the ends around to the back
Blushing Bride CS layer glued onto the front of the card base
punched piece adhered over the ribbon using Stampin’ Dimansionals
Whisper White CS glued onto the inside of the card base
Here are today’s colors:
You can click on each one to see all the products that come in that color!
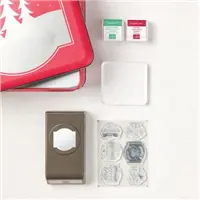
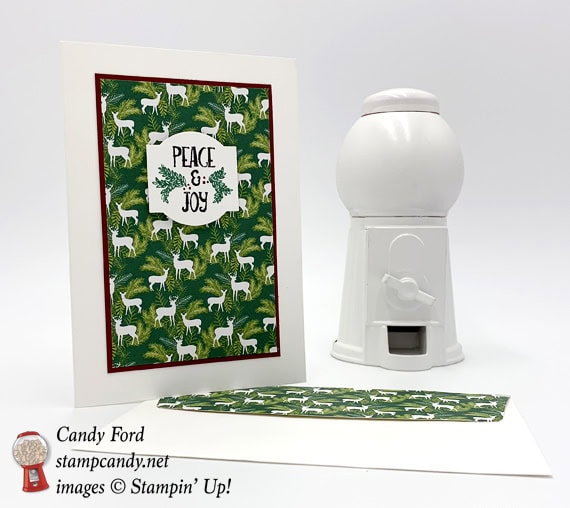
I love the new Christmas Traditions Punch Box! There are 6 different stamps that work with the punch. I used it, along with Whisper White Note Cards & Envelopes and Under the Mistletoe Designer Series Paper, to make today’s card.
Here’s what I made:
Here’s what I did:
Cut and scored with my Stampin’ Trimmer:
Real Red card stock (CS) cut to 2-1/2″ x 4″
Under the Mistletoe Designer Series Paper (DSP) cut to 2-1/4″ x 3-3/4″
DAP cut to 5-1/2″ x 2″ for the envelope flap
Stamped with the Christmas Traditions stamp set:
the image in Basic Black, Shaded Spruce, and Real Red inks onto a scrap of Whisper White Thick CS
NOTE: I colored the stamp using Stampin’ Write Markers, then huffed on it to reactivate the ink before I stamped
Cut using the Christmas Traditions Punch:
stamped image
Assembled the card:
burnished the fold in the note card base with a Bone Folder
Real Red CS layer glued onto the front of the note card base
DSP layer glued onto the Real Red CS layer
punched piece adhered onto the DSP layer using Stampin’ Dimensionals
DSP strip glued onto the envelope flap, then trimmed the excess with Paper Snips
Here are today’s colors:
You can click on each one to see all the products that come in that color!
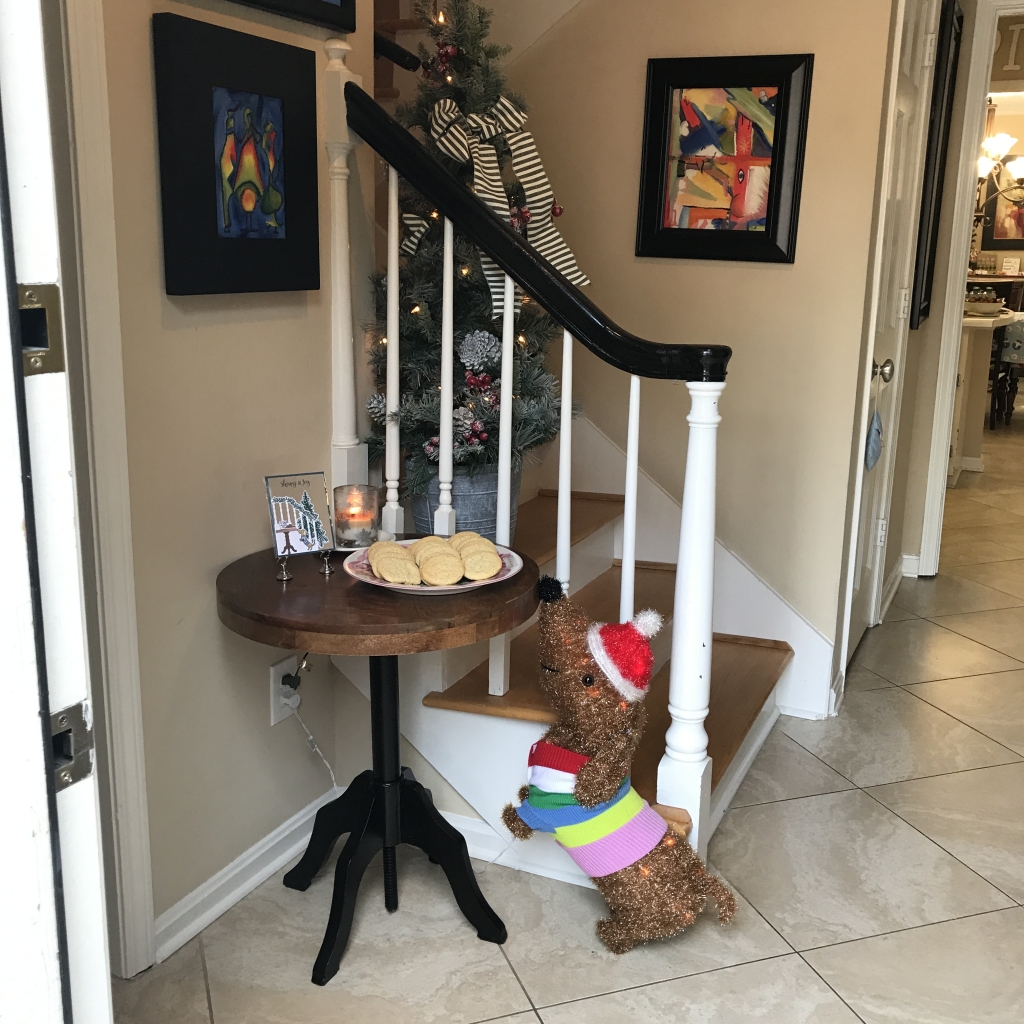
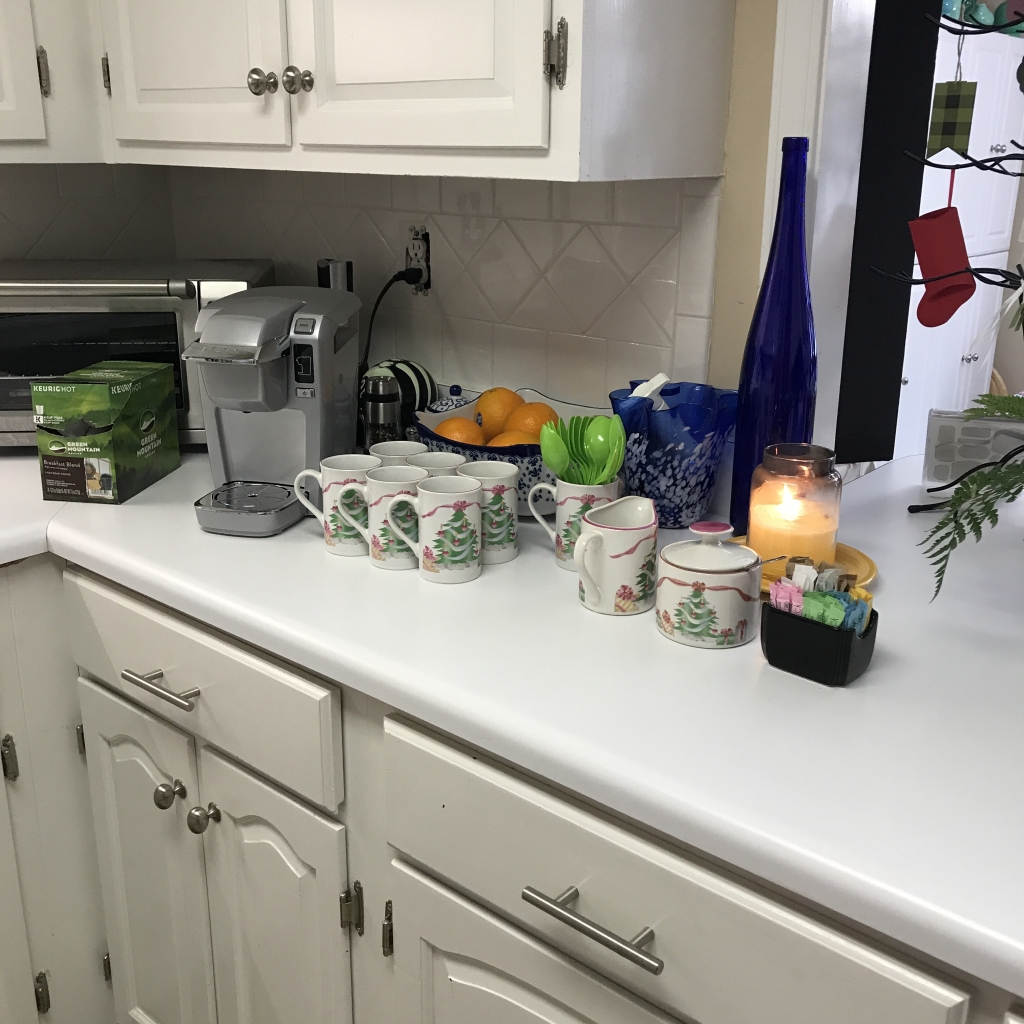
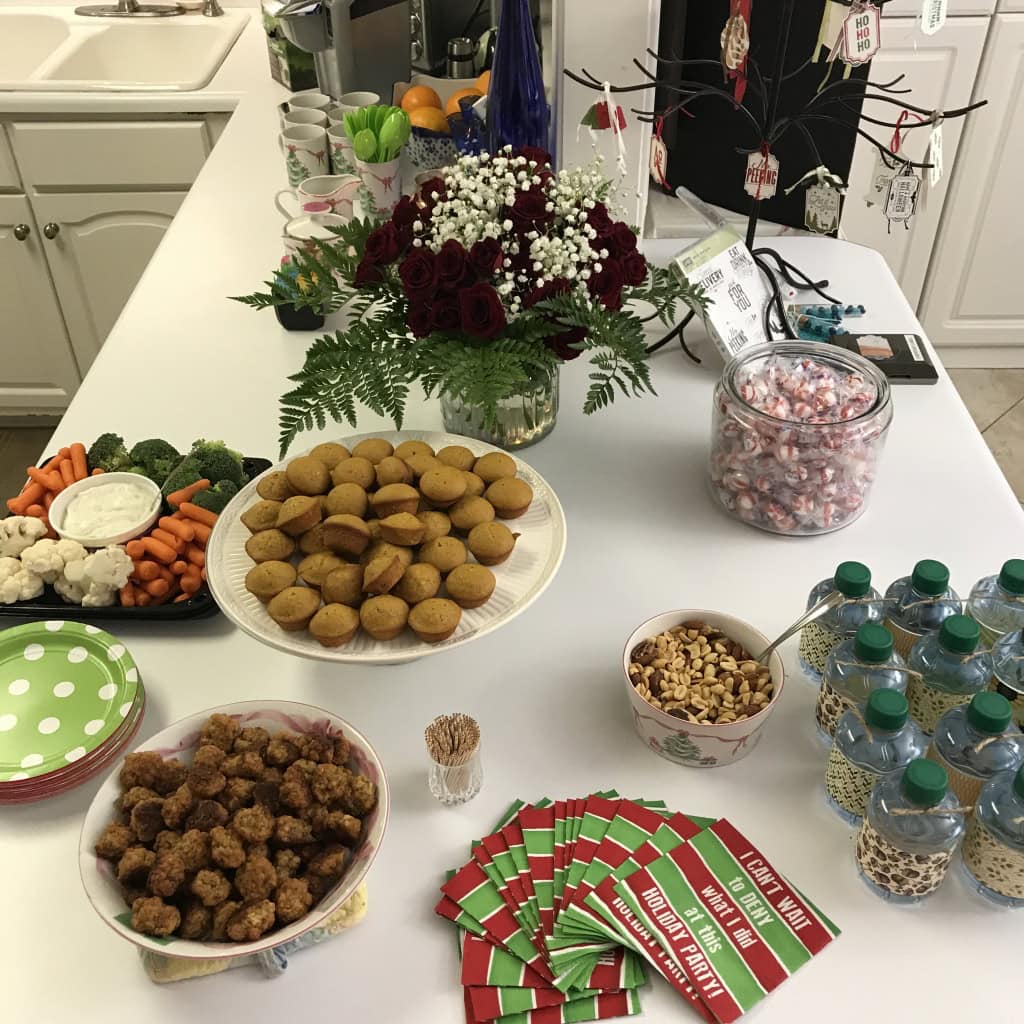
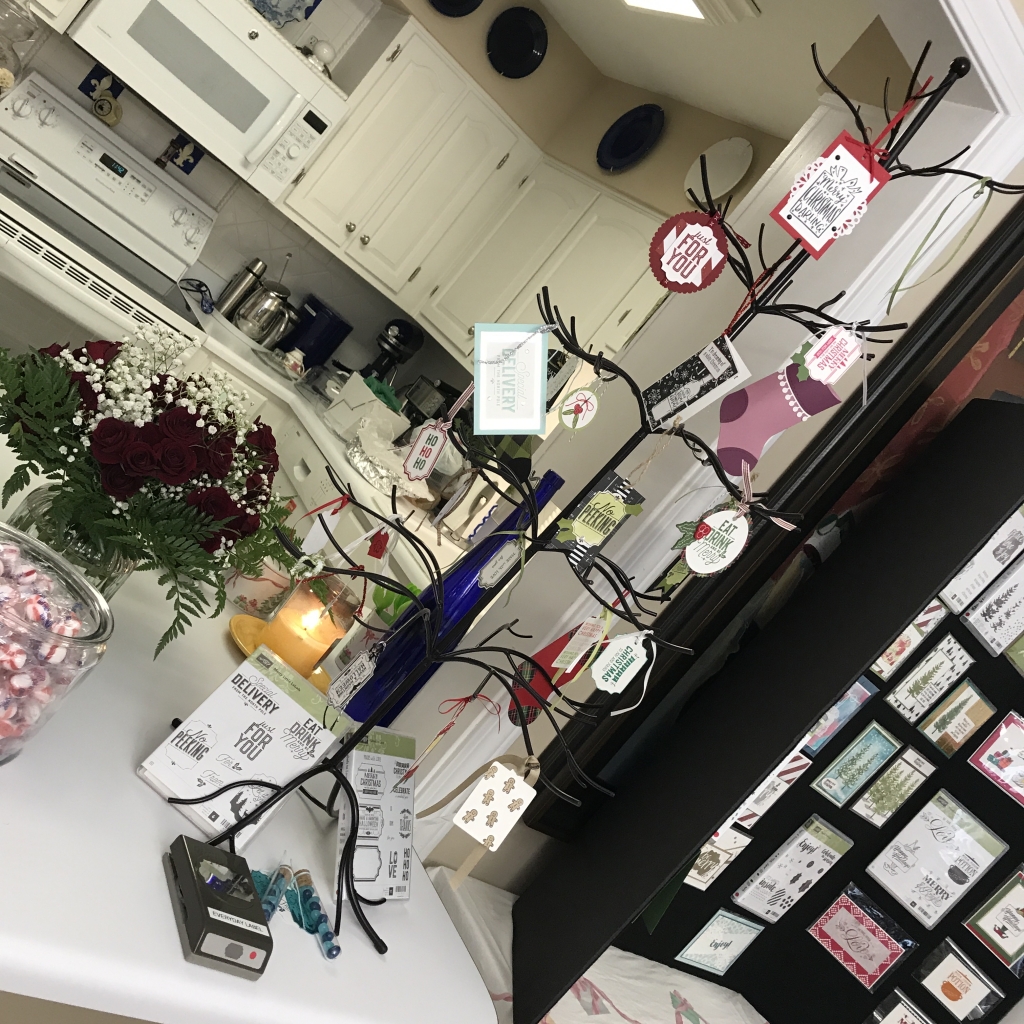
Yesterday, I hosted an Open House style Launch Party highlighting products from the new Holiday Catalog. It was a lot of fun! Below are some photos of the displays, and instructions for the Make & Take. (Wouldn’t you know, I completely forgot to take any photos during the actual event. Guess I was having too much fun!)
Here are the Launch Party photos:
I recreated the scene on this card made with the Ready for Christmas Bundle.
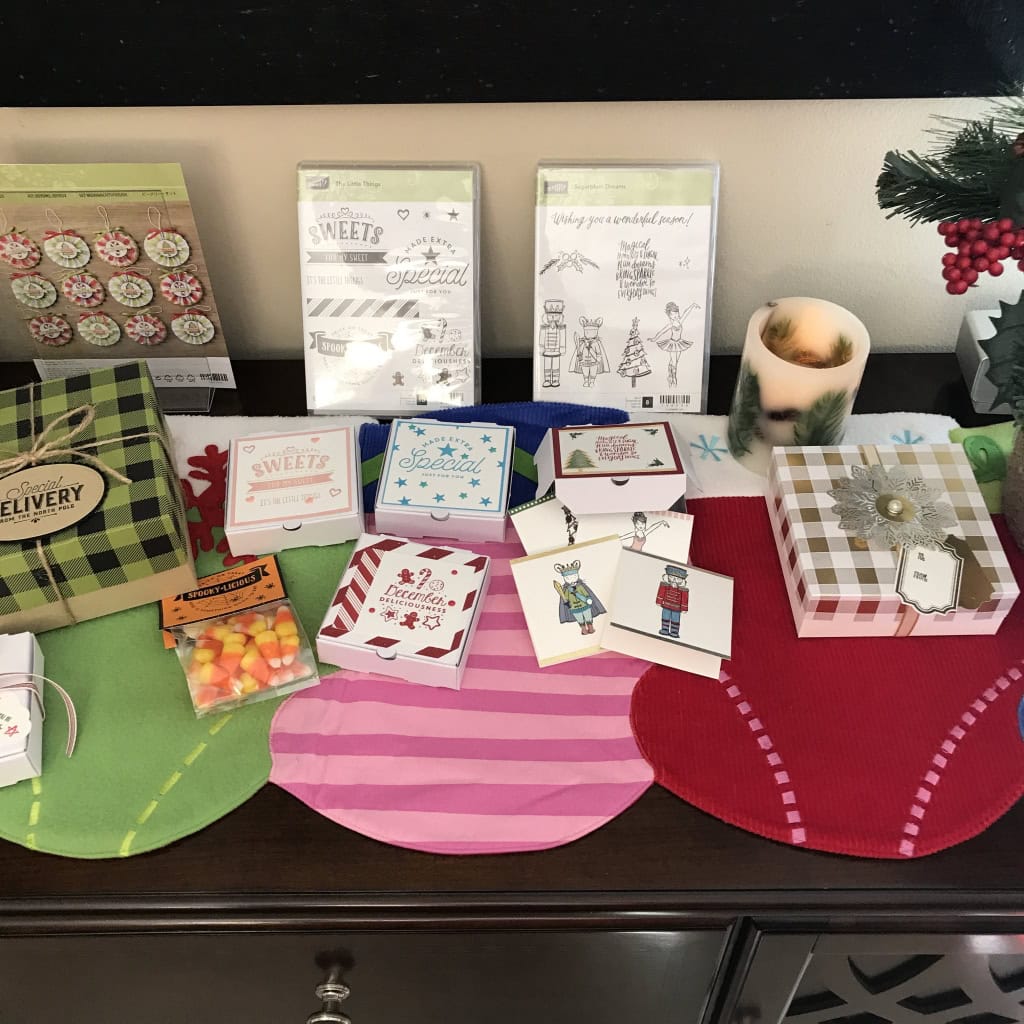
Coffee bar
Yummy snacks, and a lovely floral arrangement from Fresh Market
Tags and stockings on the ornament tree
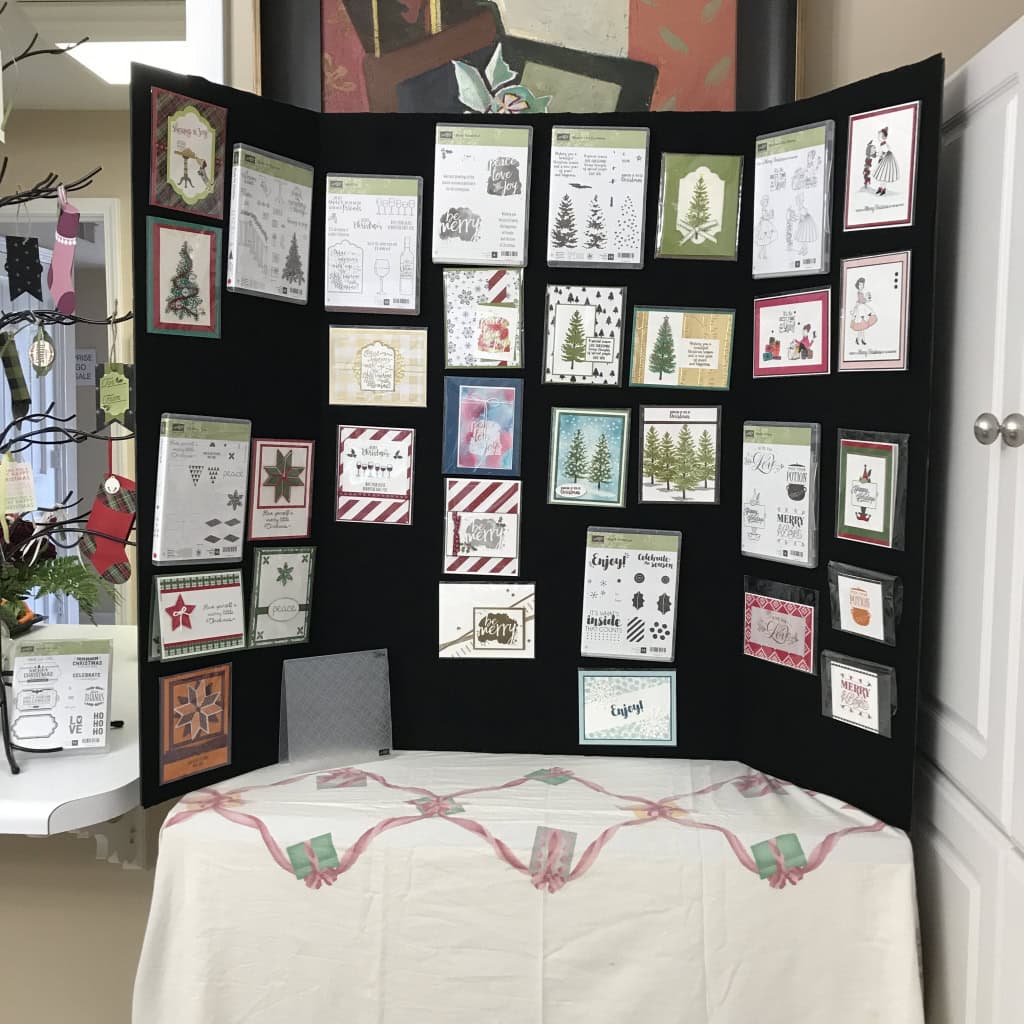
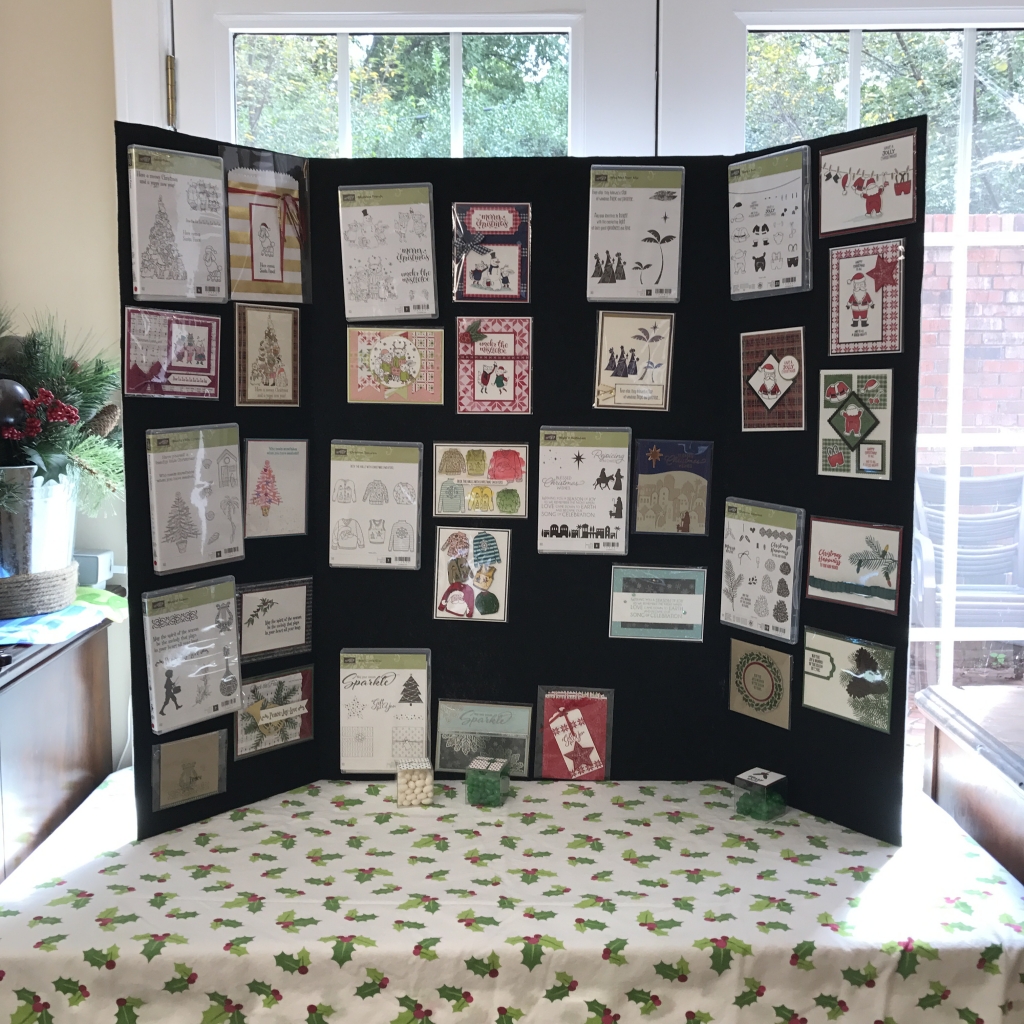
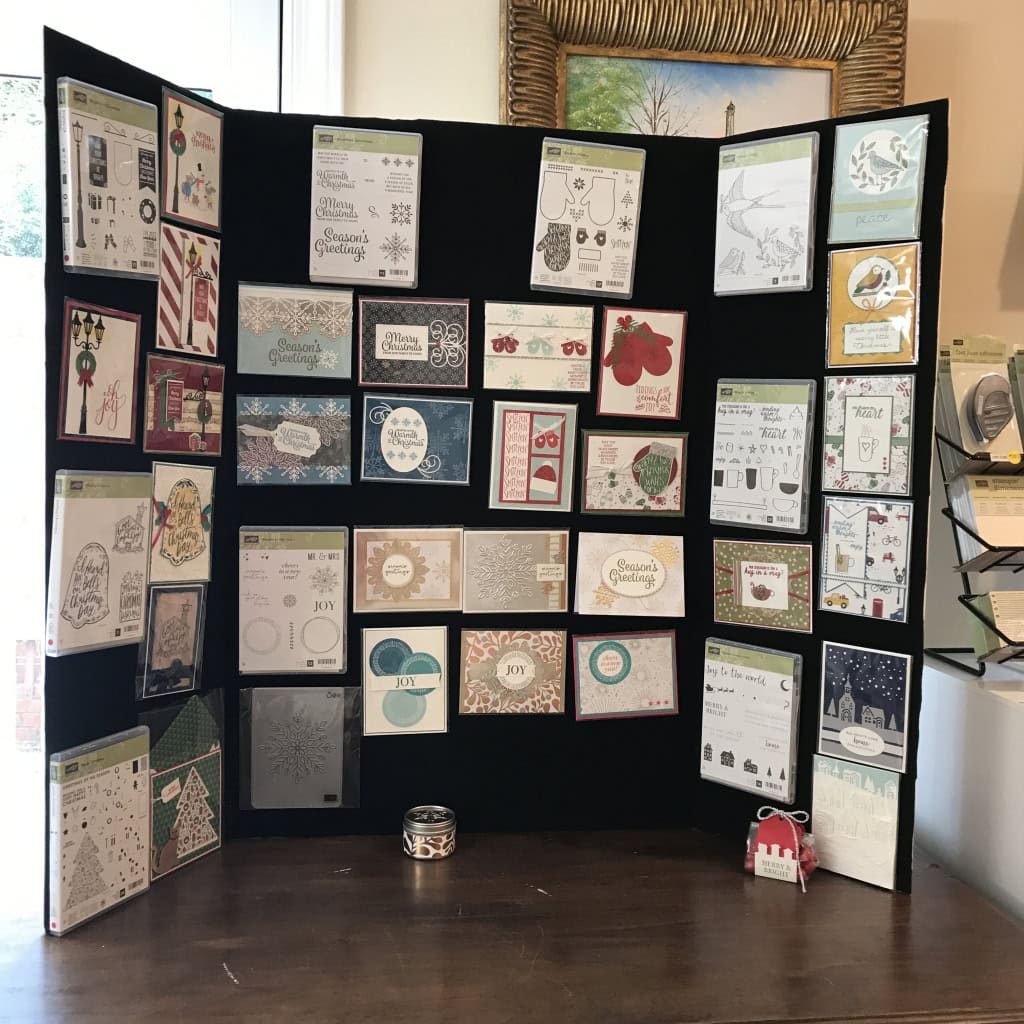
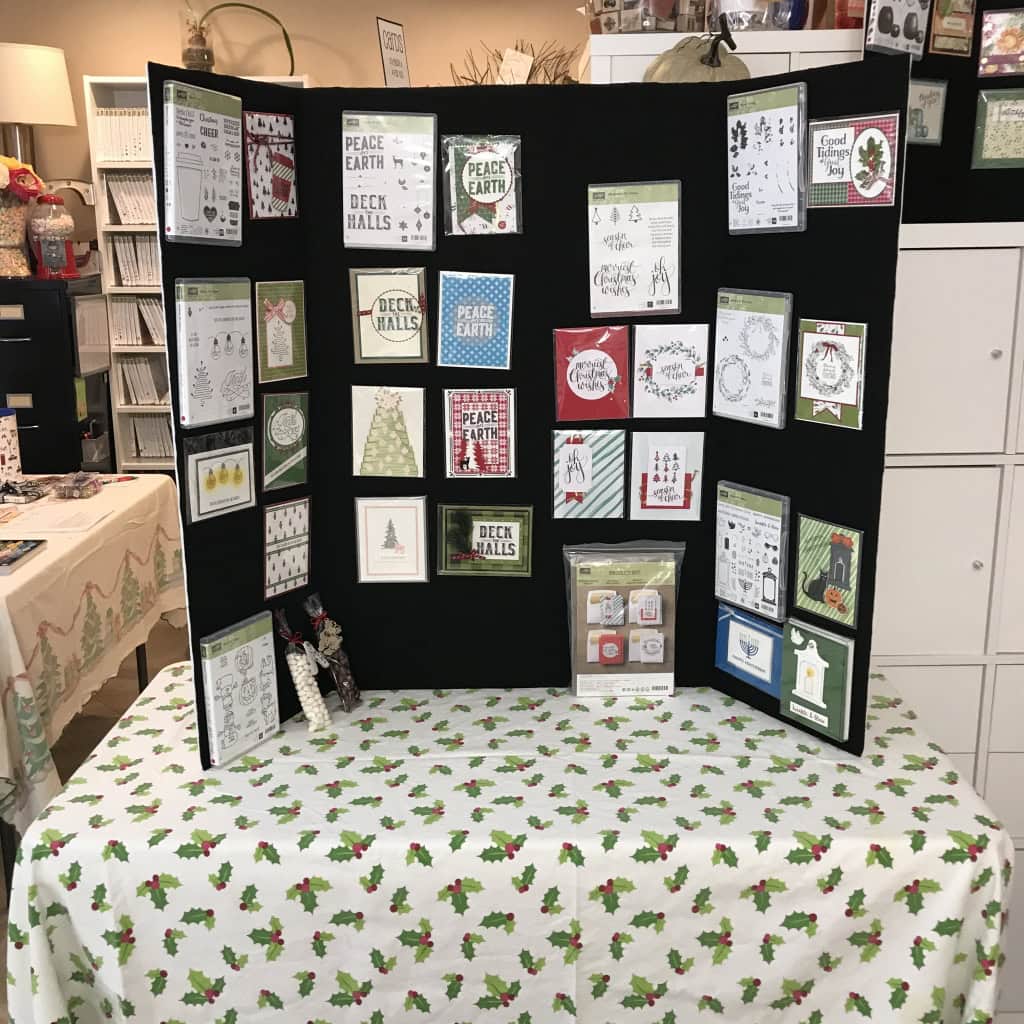
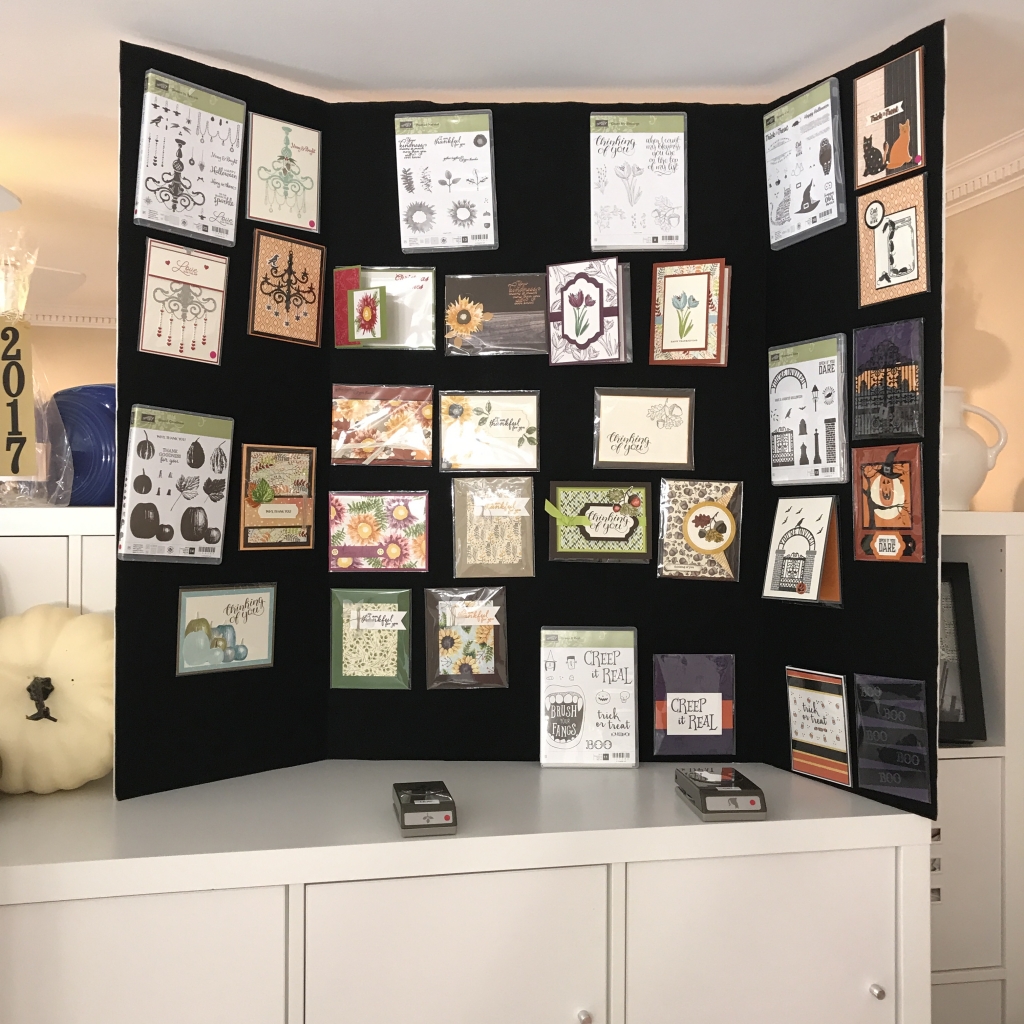
#1 display board
Be Merry Ornament Kit, and gift ideas
#2 display board
#3 display Board
#4 display board
a little Autumn decor
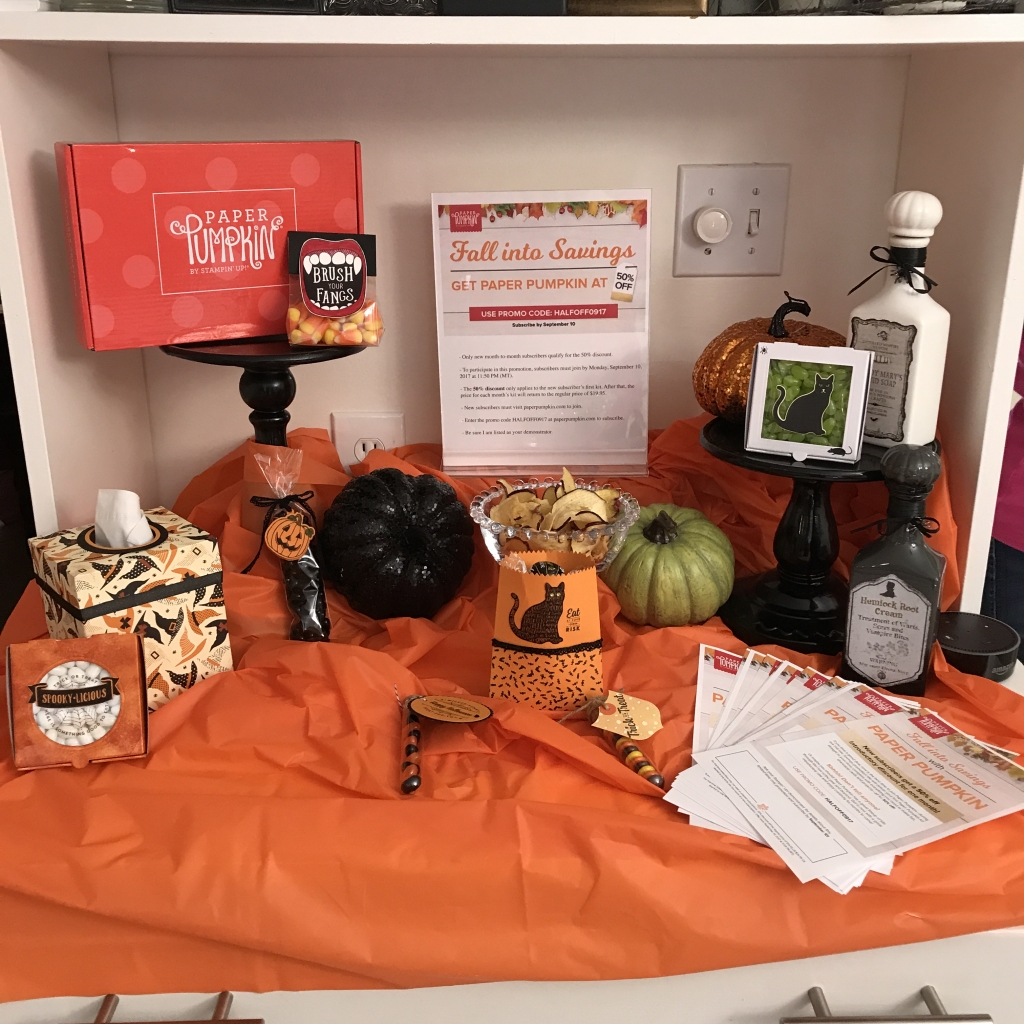
#5 display board
Paper Pumpkin Half Off Promotion, and Halloween treat ideas
catalogs, forms, and prizes
samples of ribbons and embellishments in my Product Shares, Swatch Books,
and espresso cups full of candies for bringing someone new
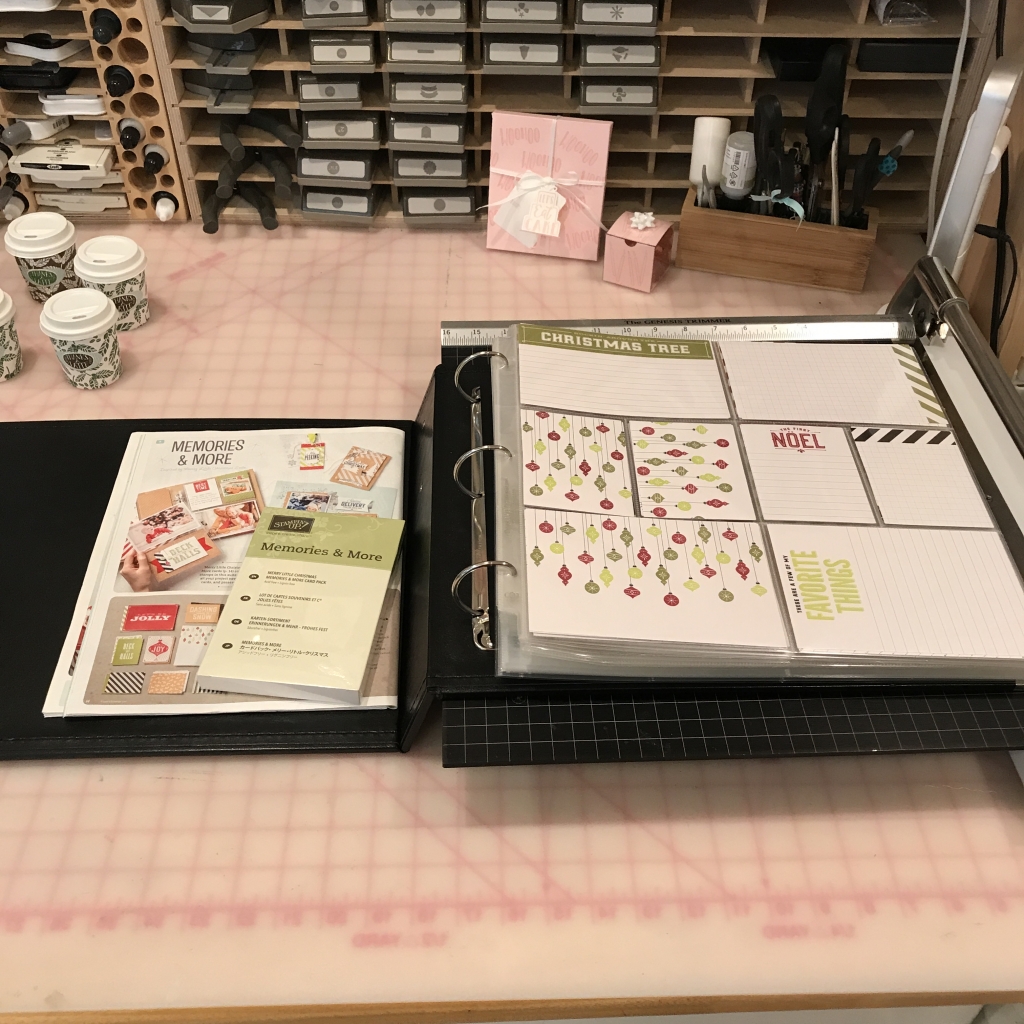
Merry Little Christmas Memories & More Card Pack display
Make & Take table
Here’s what we made:
I borrowed an extra stamp set, so there are more stamps in this photo than you actually need.
We used two stamp sets for this card. The Painted Harvest stamp set (which will be available in a Bundle with the new Leaf Punch) has some lovely sentiments, but I just adore the font used in the Count My Blessings stamp set.
If you’ve wanted to try a multi-step stamp set but were afraid to, the Painted Harvest stamp set is the perfect one to try first. The flower layers don’t have to be lined up exactly, so it’s good practice for the ones that do.
Here’s what we did:
Stamped with the Painted Harvest stamp set:
first flower layer in Crushed Curry onto the front of the card base
second flower layer in Cajun Craze
flower center in Chocolate Chip
Stamped with the Count My Blessing stamp set:
sentiment in Chocolate Chip
Assembled the card:
used a Bone Folder to burnish the score line in the Note Card
put the card in the envelope
That’s it! Using the pre-cut and pre-scored Note Cards makes this card super easy!
Here are today’s colors:
You can click on each color to see all the products that come in/with that color!


 S
S