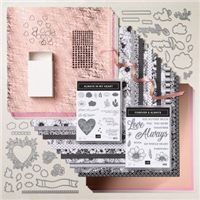
Feb 14, 2022 | Blog Hop, Cards, Gallery, Love |
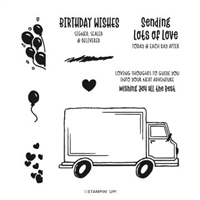
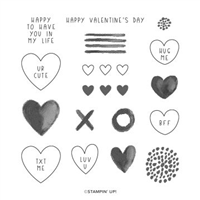
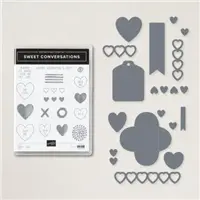
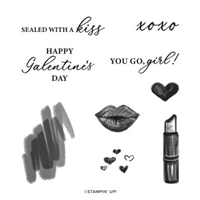
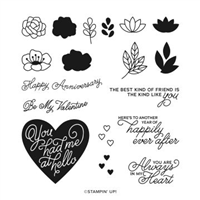
Happy Valentine’s Day! Welcome to the February 2022 Candy Hearts Blog Hop! This month we are featuring Love themed projects. I used the Best Delivery and Sweet Conversations stamp sets with the New Horizons Designer Series Paper to create my Valentine card for today.
After reading my post, I hope you will hop to the next person on the list below. Be sure to hop around to see ALL the great projects the Candy Hearts have created for you today!
If you are reading this in email, some photos may appear blurry, or may not appear at all. Please click here to see the post on my blog.
S February 2022 Candy February 2022 Candy February 2022 Candy February 2022 Candy
Here’s what I made:

S
Here’s what I did:
Cut and scored with my paper trimmer:
- Basic Black card stock (CS) cut to 5-1/2″ x 8-1/2″, then scored in half at 4-1/4″
- New Horizons Designer Series Paper (DSP) layer cut to 5-3/8″ x 4-1/8″
- DSP strip cut to 5-3/8″ x 5/8″ (2 pieces)
- Basic White CS cut to 5-3/8″ x 4-1/8″ for the inside of the card base
Stamped with the Best Delivery stamp set:
- truck in Tuxedo Black Memento ink onto a scrap of Basic White Thick CS
- truck in Tuxedo Black Memento ink onto a scrap of Real Red CS
- sentiment in Tuxedo Black Memento onto the truck
- hearts coming out of the truck in Real Red ink onto the DSP layer
- shadow under the truck in Evening Evergreen ink onto the DSP layer
Stamped with the Sweet Conversations stamp set:
- larger heart in Read Red Ink, stamped off once, over the sentiment
- smaller heart in Tuxedo Black Memento ink onto the door of the cab
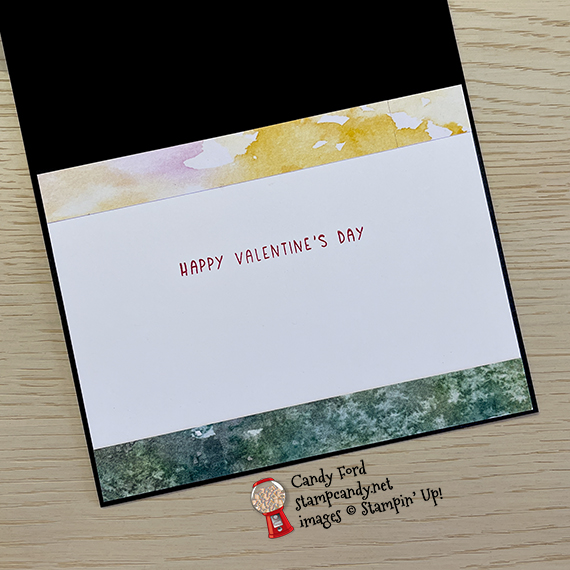
- inner sentiment onto the Basic White CS for the inside
Cut using the Paper Snips:
- truck on Basic White Thick CS
- cab only on Real Red CS, also cutting out the window
- small piece of Window Sheet for the window
Colored using a Light Smoky Slate Stampin’ Blends Marker:
Colored using a Basic Black Stampin’ Write Marker:
- edges of both fussy cut truck pieces
- I didn’t get a good, full stamp of the tires, so I filled them in using the marker
Assembled the card:
- burnished the fold in the card base with a Bone Folder
- Window Sheet adhered onto the back of the Real Red truck cab with Stampin’ Seal
- Real Red truck cab glued onto the white truck cab
- white truck glued onto the DSP layer
- DSP layer glued onto the front of the card base
- two DSP strips glued onto the top and bottom edges of the Basic White CS for the inside
- Basic White CS glued onto the inside of the card base
S
Here’s the February 2022 Candy Hearts Blog Hop:
s
Here are today’s main colors:
You can click on each one to see all the products that come in that color!
S
Here’s what I used:
Click on these images for more details and to purchase. If you are reading this post in email, the product images may not show up. Please click here to see the post on my blog.
Supply List. <— Click for a clickable and printable list of the products!
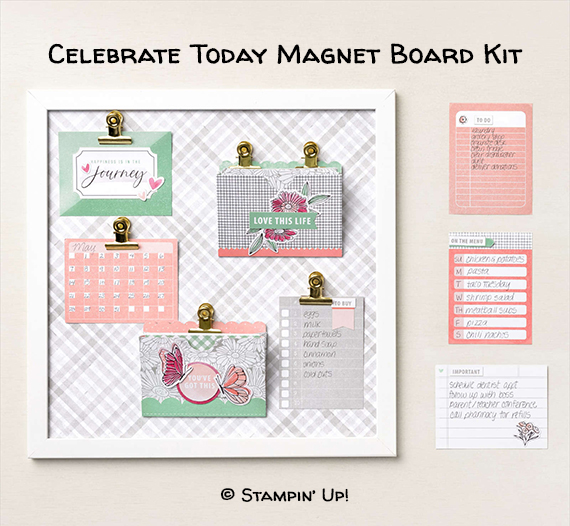
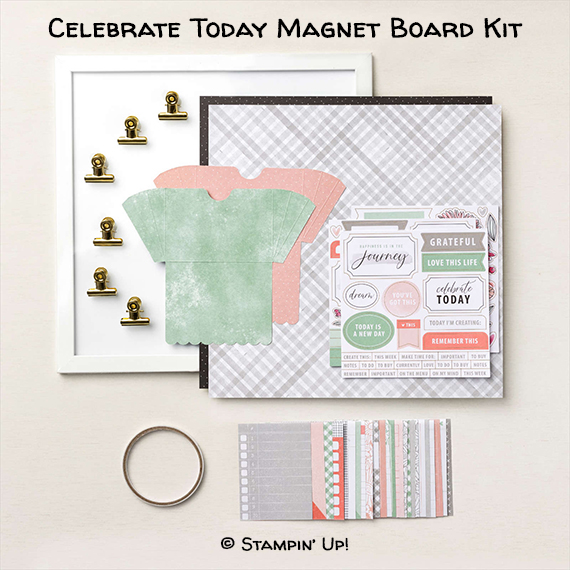
New Celebrate Today Magnet Board Kit:
Click either of the images below to see it in my online store:
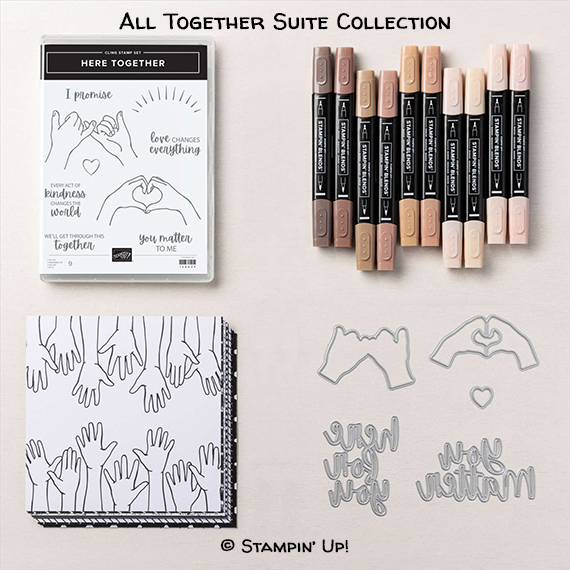
New All Together Suite Collection:
Click any of the images below to see it in my online store. Everything in the collection is also available individually.


S
Here are some helpful links:
S
Thanks for stopping by today, and Sweet Stamping!

Feb 19, 2021 | Cards, Gallery, Love |
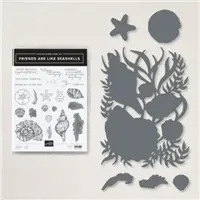
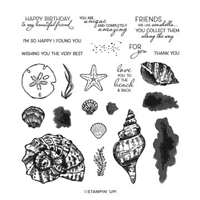
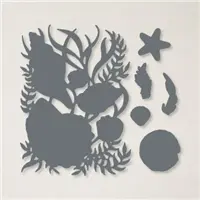
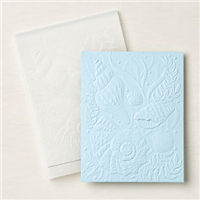
Today’s card is another one from my February Stamp Club gathering on Monday. The Seaside Seashells Dies, Seashells 3D Embossing Folder, and Pearlescent Specialty Paper are the real stars of this card. Just look at the texture on the pearlescent shells. Isn’t it beautiful? I also used the Friends Are Like Seashells stamp set and Sand & Sea Designer Series Paper from the same Sand & Sea Suite Collection.
If you are reading this in email, some photos may appear blurry, or may not appear at all. Please click here to see the post on my blog.
S Seaside Seaside Seaside Seaside
Here’s what I made:


 S
S
Here’s what I did:
Cut and scored with my paper trimmer:
- Sahara Sand card stock (CS) cut to 4-1/4″ x 11″, then scored in half at 5-1/2″
- Sand & Sea Designer Series Paper (DSP) layer cut to 4-1/4″ x 5-1/2″
Stamped with the Friends Are Like Seashells stamp set:
- sand dollar in Crumb Cake ink, stamped off once, onto a scrap of Pearlescent Specialty Paper
- sentiment in Soft Suede ink over the sand dollar
- shell in Crumb Cake ink onto the inside of the card base
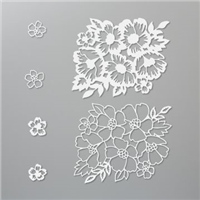
Cut using the Seaside Seashells Dies:
- sand dollar
- a piece of Pearlescent Specialty Paper using the largest die
Embossed using the Seashells 3D Embossing Folder:
- large Pearlescent die cut
Assembled the card:
- burnished the fold in the card base with a Bone Folder
- large pearlescent die cut glued onto the DSP layer
- 3 pieces of linen thread stretched across the layer and adhered on the back using Tear & Tape
- DSP layer adhered onto the front of the card base using Tear & Tape
- sand dollar adhered onto the card front using Stampin’ Dimensionals
S
Here are today’s colors:
You can click on each one to see all the products that come in that color!
S
Here’s what I used:
Click on these images for more details and to purchase. If you are reading this post in email, the product images may not show up. Please click here to see the post on my blog.
Supply List. <— Click for a clickable and printable list of the products!
S
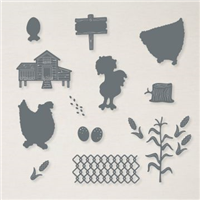
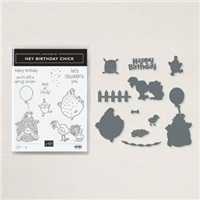
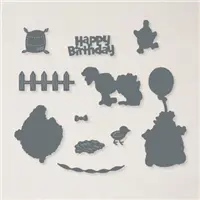
Hey Chick is here!
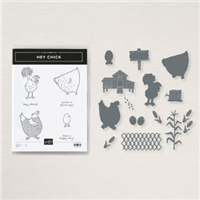
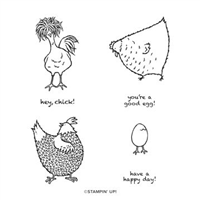
The Hey Chick stamp set from 2017 Sale-a-bration was so popular, Stampin’ Up! has brought it back. But that’s not all! Now there are coordinating dies. AND there’s a second stamp set, Hey Birthday Chick, that also has coordinating dies. CLICK HERE to see them all. One thing though – they’re available for a limited time, so get them while you can!

S
Basic White is here!
The facility that manufactures Whisper White paper is closed due to COVID-19. But don’t fret. The new Basic White products are here!
S
Here are some helpful links:
S
Thanks for stopping by today, and Sweet Stamping!
Feb 8, 2021 | Blog Hop, Gallery, Gift Wrap, Gifts, Love, Treat Holders |
Welcome to the February 2021 Candy Hearts Blog Hop! This month’s theme is Love. Be sure to hop around to all the stops on the hop. You don’t want to miss any of the projects the Candy Hearts have made for you today.
If you are reading this in email, some photos may appear blurry, or may not appear at all. Please click here to see the post on my blog.
S February 2021 Candy February 2021 Candy February 2021 Candy February 2021 Candy
Here’s what I made:
 A dozen chocolate kisses fit perfectly in the box, in three neat rows. Of course, you can add many more if you pack them in.


S
Here’s what I did:
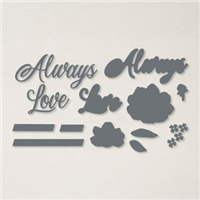
Cut using the Always Dies:
- sentiment from a scrap of Seaside Spray card stock (CS)
- sentiment background from a scrap of Misty Moonlight CS
Cut using the Many Hearts Dies:
- heart from a scrap of Melon Mambo CS
Cut using the Flowering Vine Dies:
- background from a scrap of Blushing Bride CS
Assembled the box:
- burnished the folds in the box and the wrap-around lid with a Bone Folder
- folded the box to assemble it
- Blushing Bride CS die cut glued onto the lid of the box
- Melon Mambo heart die cut glued over the Blushing Bride CS die cut
- Seaside Mist CS sentiment glued onto the Misty Moonlight CS background
- Misty Moonlight CS background glued over the heart
- ribbon adhered onto the bottom of the box using Tear & Tape, so it wraps around the box, and tied it in a bow at one end
- slid the box into the lid
S
Here’s the February 2021 Candy Hearts Blog Hop:
Thank you for hopping with the Hearts today! Be sure to hop around to all the stops. You do not want to miss any of the creativity in this talented group of stampers! If you get lost, use the list below.
Here are today’s colors:
You can click on each one to see all the products that come in that color!
S
Here’s what I used:
Click on these images for more details and to purchase. If you are reading this post in email, the product images may not show up. Please click here to see the post on my blog.
Supply List. <— Click for a clickable and printable list of the products!
S
Hey Chick is here!
The Hey Chick stamp set from 2017 Sale-a-bration was so popular, Stampin’ Up! has brought it back. But that’s not all! Now there are coordinating dies. AND there’s a second stamp set, Hey Birthday Chick, that also has coordinating dies. CLICK HERE to see them all. One thing though – they’re available for a limited time, so get them while you can!
S
Basic White products:
The facility that manufactures Whisper White paper is closed due to COVID-19. But don’t fret. The new Basic White products are here!
S
Here are some helpful links:
S
Thanks for stopping by today, and Sweet Stamping!
Jan 20, 2021 | Blog Hop, Cards, Gallery, Holiday, Love |
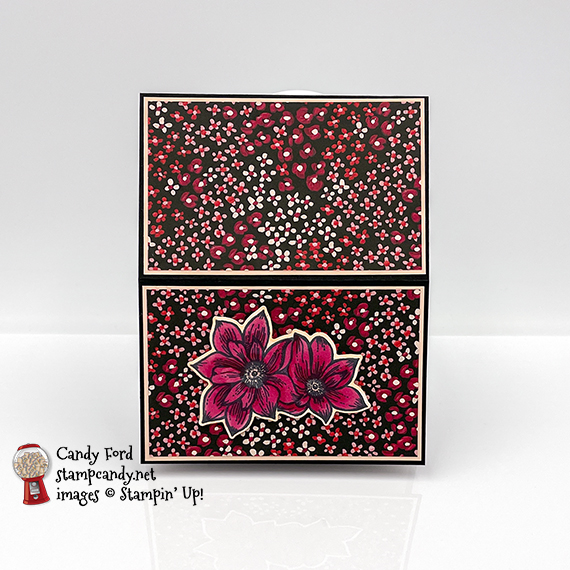
Welcome to the January 2021 IRBH! During this year’s blog hops, we will be having fun with our stamping favorites – our favorite themes for seasonal cards and projects. This month’s projects feature hearts, so prepare yourself for lots and lots of love. We are excited to share our creations with you today! After you read my post, I hope you’ll hop over to the next person on the list at the base of this post.
If you are reading this in email, some photos may appear blurry, or may not appear at all. Please click here to see the post on my blog.
S January 2021 IRBH January 2021 IRBH January 2021 IRBH January 2021 IRBH
Here’s what I made:


S
Here’s what I did:
Cut and scored with my paper trimmer:
- Rococo Rose card stock (CS) cut to 5-1/2″ x 8-1/2″, then scored in half at 4-1/4″
- Basic White CS cut to 5-1/4″ x 4″ for the inside of the card base
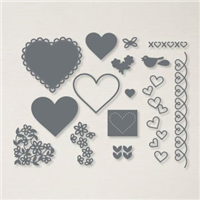
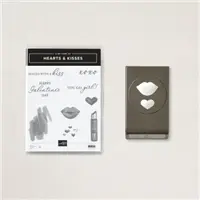
Stamped with the Hearts & Kisses stamp set:
- sentiment in Versamark ink onto a scrap of Vellum, then heat embossed it in white
Cut using the Many Hearts Dies:
Cut using the Stitched So Sweetly Dies:
- a piece of Paper Blooms Designer Series Paper (DSP)
Embossed using the Scripty 3D Embossing Folder:
Assembled the card:
- burnished the fold in the card base with a Bone Folder
- DSP layer glued onto the front of the card base
- sentiment heart glued onto the DSP layer
- white twine run scallop on the left side of the vellum heart, then wrapped around the front of the card base
- 2 Heart charms strung onto the twine
- twine run through a scallop on the right side of the vellum heart, then tied in a bow
- a Mini Glue Dot rolled into a tiny “log” an placed under the bow using my Take Your Pick tool
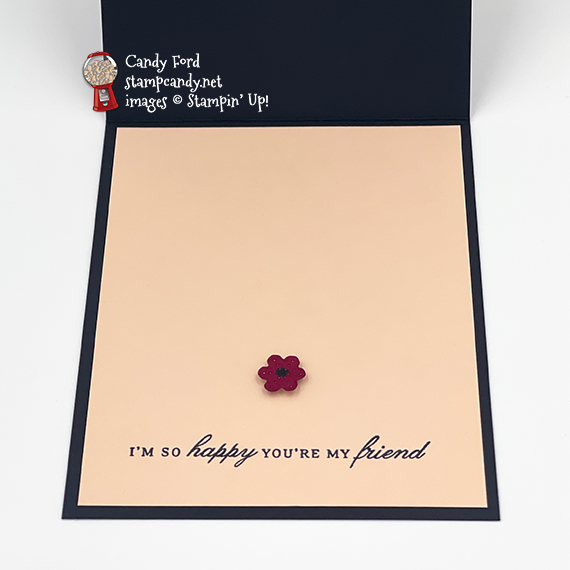
- Basic White CS glued onto the inside of the card base (I took the photos before I did this step.)
If you want , you can use a Mini Glue Dot to secure the Heart Charms, but I found the twine holds them in place nicely:

S
Here’s the January 2021 IRBH:
Thank you for stopping by today. I hope you’ll hop along to the next stop on the blog hop, Julie DiMatteo at The Paper Pixie. There’s a lot of inspiration to be found in this group – and you don’t want to miss it! Thank you for hopping along with us. If you get stuck during the Blog Hop, please use this line-up as a guide:
Thank you for hopping along with us. If you get stuck during the Blog Hop, please use this line-up as a guide:
- Brian King at Stamp with Brian
- Sheryl Sharp at Sharp Notes by Sheryl
- Jackie Beers at Blue Line Stamping
- Ann Murray at Murray Stamps Ink
- Candy Ford at Stamp Candy <— YOU ARE HERE!
- Julie DiMatteo at The Paper Pixie
- Joanne Brown at The Inky Dragon
- Sue Jackson at Just Peachy Stamping
- Sheryl Abernathy at Elegant Sentiments
- Renae Novak at Blessed by Cards
- Shawn de Oliveira at Shawn Stamps
- Pam Morris at Tap Tap Stamp
- Linda Krueger at The Stamp Coach
S
Here are today’s colors:
You can click on each one to see all the products that come in that color!
S
Here’s what I used:
Click on these images for more details and to purchase. If you are reading this post in email, the product images may not show up. Please click here to see the post on my blog. <— <
Supply List. Click for a clickable and printable list of the products!
S
Basic White is here!
The facility that manufactures Whisper White paper is closing due to COVID-19. But don’t fret. The new Basic White products are here!
S
Here are some helpful links:
S
Thanks for stopping by today, and Sweet Stamping!
Jan 8, 2021 | Cards, Friend, Gallery, Love |
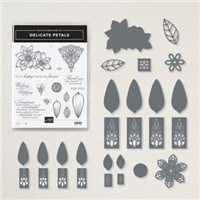
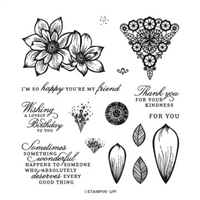
I used some new products for today’s easel card: delicate Petals Bundle (Delicate Petals stamp set and Lacy Petals Dies,) Pierced Blooms Dies (available in a bundle with the In Blooms stamp set,) and Flower & Field Designer Series Paper. The paper is a Sale-a-bration item you can free with a $50 order! The dies are small enough to use with the Mini Stampin’ Cut & Emboss Machine, which is now available to purchase!
If you are reading this in email, some photos may appear blurry, or may not appear at all. Please click here to see the post on my blog.
S Delicate Petals Delicate Petals Delicate Petals Delicate Petals
Here’s what I made:

S
Here’s what I did:
Cut and scored with my paper trimmer:
- Basic Black card stock (CS) cut to 4-1/4″ x 11″, then scored in half at 5-1/2″ and again at 8-1/4″
- Petal Pink card stock (CS) layers cut to 4-1/8″ x 2-5/8″ (2 pieces)
- Flower & Field Designer Series Paper (DSP) layers cut to 4″ x 2-1/2″
- Petal Pink CS cut to 4″ x 5-1/4″ for the inside of the card base
Stamped with the Delicate Petals stamp set:
- large floral image in Tuxedo Black Memento ink onto a scrap of Petal Pink CS
- sentiment in Tuxedo Black Memento ink onto the Petal Pink CS for the inside
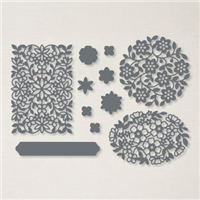
Cut using the Lacy Petals Dies:
Cut using the Pierced Blooms Dies:
- a tiny flower from a scrap of Cherry Cobbler CS
Colored using Stampin’ Blends Markers:
- floral image in Cherry Cobbler
- center of tiny die cut flower in Basic Black (You could use a Basic Black Stampin Write Marker.)
Assembled the card:
- burnished the folds in the card base with a Bone Folder
- 2 DSP layers glued onto the 2 Petal Pink CS layers
- Petal Pink CS layers glued onto the front of the card base, one above the fold and one below the fold
- large floral image adhered onto the bottom DSP layer
- Petal Pink CS glued onto the inside of the card base
- tiny die cut flower adhered just above the sentiment using a Stampin’ Dimensional
S
Here are today’s main colors:
You can click on each one to see all the products that come in that color!
S
Here’s what I used:
Click on these images for more details and to purchase. If you are reading this post in email, the product images may not show up. Please click here to see the post on my blog.
Supply List. <— Click for a clickable and printable list of the products!
S
Basic White is here!
The facility that manufactures Whisper White paper is closing due to COVID-19. But don’t fret. The new Basic White products are here! Click on each one to see it in my online store:
S
Here’s the new catalog:
Click the image below to request your January-June 2021 Mini Catalog AND Sale-a-bration Brochure:


S
Here are some helpful links:
S
Thanks for stopping by today, and Sweet Stamping!
Jan 6, 2021 | Anniversary, Cards, Gallery, Love |
I used the new Always In My Heart bundle (Always in My Heart stamp set and Floral Heart Dies) along with the Many Layered Blossoms Dies, and True Love Designer Series Paper colored with Stampin’ Write Markers to create today’s Happy Anniversary card. I was in the mood to use some fun colors, so I opted for Coastal Cabana, Flirty Flamingo, and Highland Heather.
If you are reading this in email, some photos may appear blurry, or may not appear at all. Please click here to see the post on my blog.
S Always In My Heart Always In My Heart Always In My Heart Always In My Heart
Here’s what I made:

S
Here’s what I did:
Cut and scored with my paper trimmer:
- Coastal Cabana card stock (CS) cut to 4-1/4″ x 11″, then scored in half at 5-1/2″
- True Love Designer Series Paper (DSP) layer cut to 4″ x 5-1/4″
- optional: white CS cut to 4″ x 5-1/4″ for the inside of the card base
Cut using the Floral Heart Dies:
- banner from a scrap of Coastal Cabana CS
Cut using the Many Layered Blossoms Die:
- bottom layer from a scrap of Flirty Flamingo CS
- bottom layer from a scrap of white CS
- top layer from a scrap of Highland Heather CS
Stamped with the Always in My Heart stamp set:
- sentiment in Versamark ink onto the die cut banner, then heat embossed in white
Colored using Stampin’ Write Markers:
- little diamonds of the DSP layer in rows of Highland Heather, Flirty Flamingo, and Coastal Cabana (leaving every fourth row white)
Assembled the card:
- burnished the fold in the card base with a Bone Folder
- DSP layer glued onto the front of the card base
- Flirty Flamingo CS floral die cut glued onto the DSP layer
- inner parts of the white CS floral die cut glued in the empty spaces of the Flirty Flamingo die cut
- Highland Heather CS floral die cut glued onto the bottom floral die cut layer
- folds in the banner burnished with a Bone Folder
- banner adhered over the floral die cuts using glue on the ends and Stampin’ Dimensionals in the middle
- 2 white Resin Hearts applied onto the banner using my Take Your Pick tool
- optional: white CS glued onto the inside of the card base
S
Here are today’s colors:
You can click on each one to see all the products that come in that color!
S
Here’s what I used:
Click on these images for more details and to purchase. If you are reading this post in email, the product images may not show up. Please click here to see the post on my blog.
Supply List. <— Click for a clickable and printable list of the products!
S
Here’s some news: Basic White is here!
The facility that manufactures Whisper White paper is closing due to COVID-19. But don’t fret. The new Basic White products are here!
- Basic White 8-1/2″ X 11″ Cardstock (159276)
- Basic White 8-1/2″ X 11″ Thick Cardstock (159229)
- Basic White 12″ X 12″ (30.5 X 30.5 CM) Cardstock (159231)
- Basic White Medium Envelopes (159236)
- Basic White Note Cards & Envelopes (159232)
- Basic White 3″ X 3″ (7.6 X 7.6 CM) Envelopes (159233)
- Basic White Assorted Memories & More Cards & Envelopes (159234)
S
The Mini Stampin’ Cut & Emboss Machine is now available!
S
Here’s the new catalog:
Click the image below to request your January-June 2021 Mini Catalog AND Sale-a-bration Brochure:
S
Here are some helpful links:
S
Thanks for stopping by today, and Sweet Stamping!