Jun 28, 2018 | Blog Hop, Boxes, Cards, Gallery, Gifts, New Products, Paper Pumpkin |

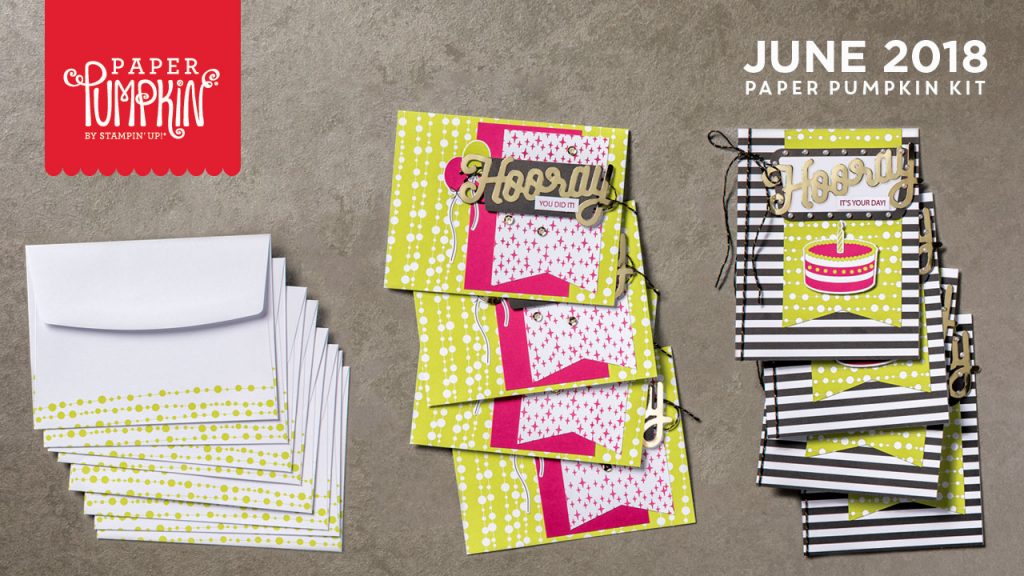
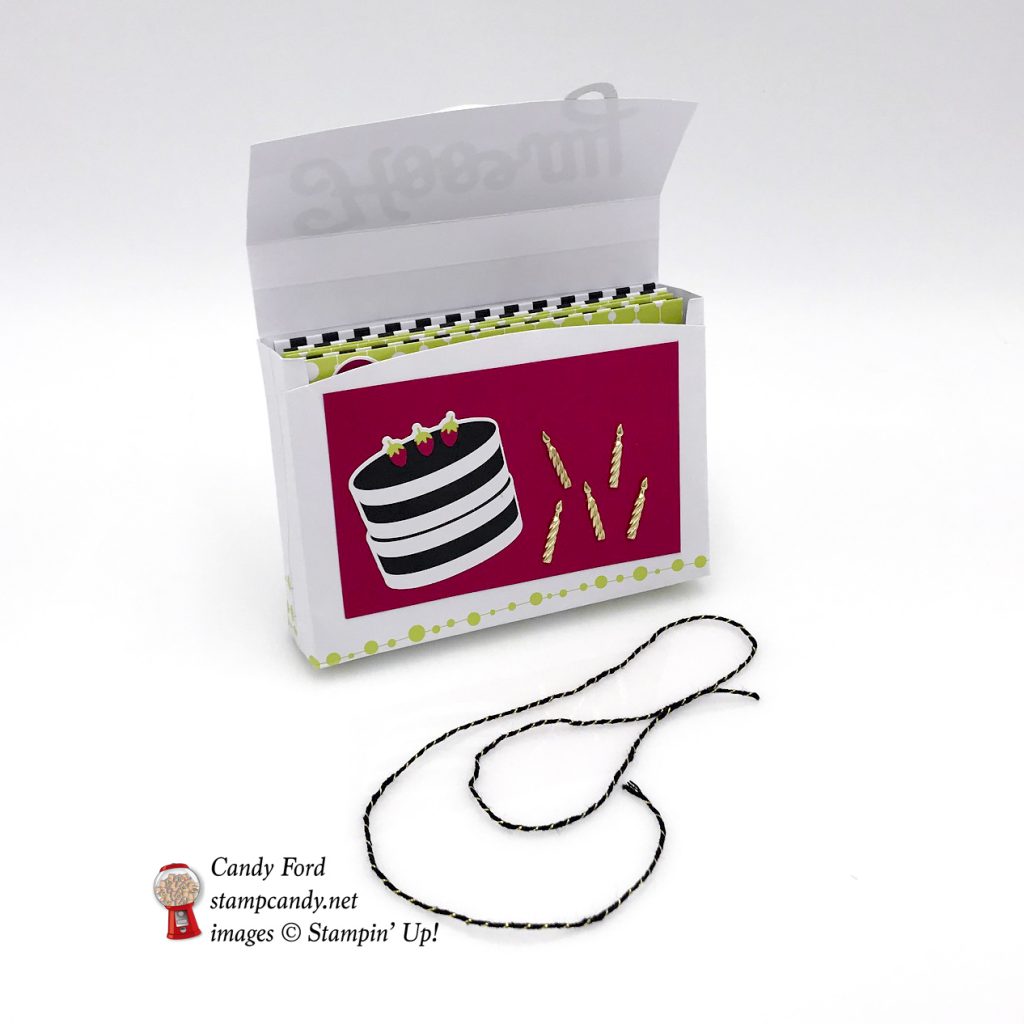
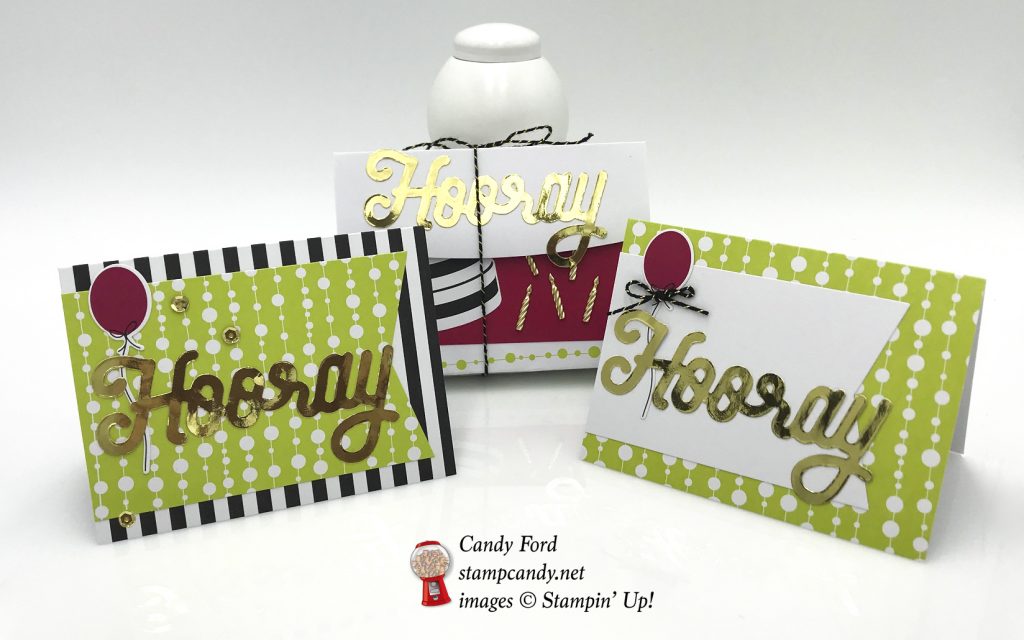
It’s time for the APPT (A Paper Pumpkin Thing) Blog Hop for June. This month’s PP kit, called Broadway Star, coordinates with the new Broadway Bound suite in the annual catalog, and it is a winner winner chicken dinner! It’s all so fun and bright and cheery. You can’t help but smile. For today’s hop I made some small note cards and a holder to store them in.
There are so many different things you can make using this kit, especially when you combine it with the products in the suite. I decided to keep it rather simple. The Candle Embellishments are the only thing from the suite I used on my projects. I didn’t even use a stamp, even though the ones in the PP kit and the ones in the suite are terrific.
This is the Paper Pumpkin kit…
…and this is the suite from the catalog.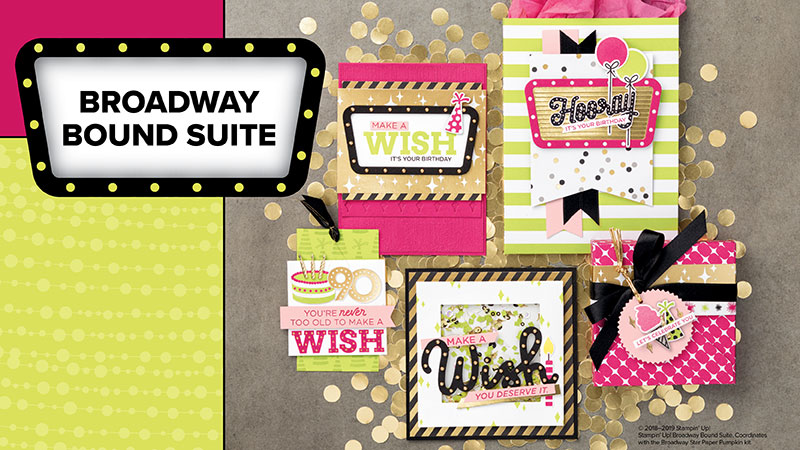
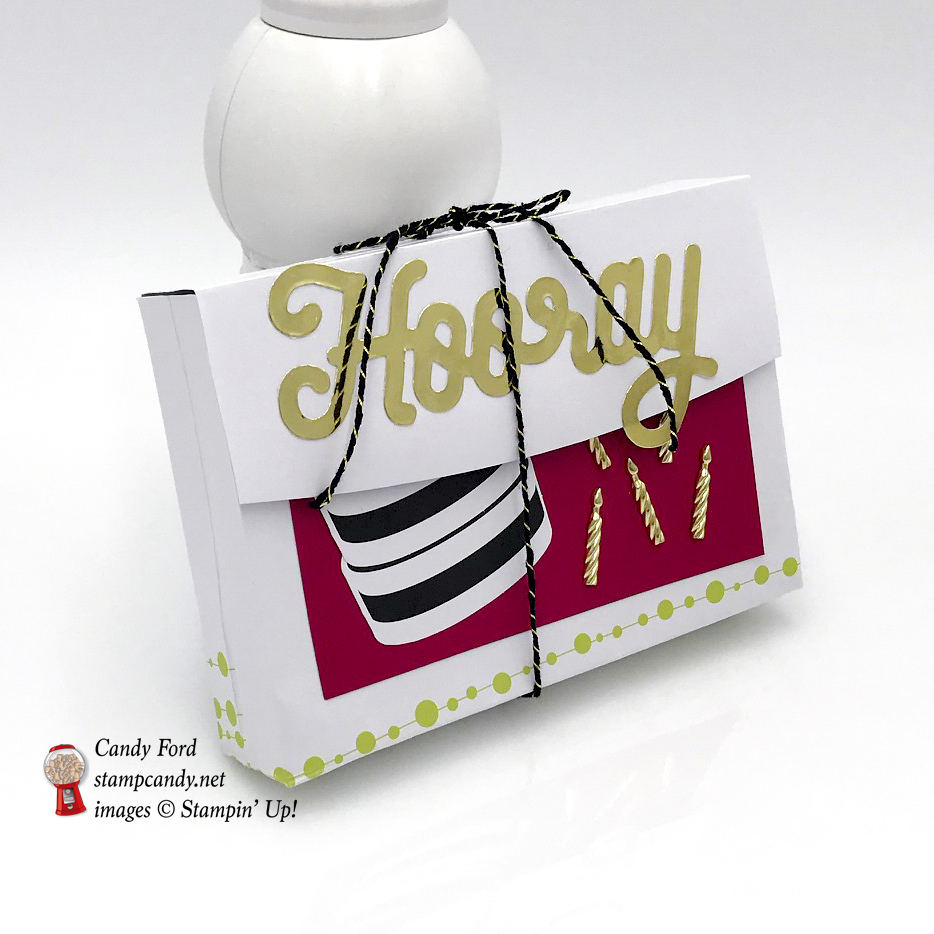
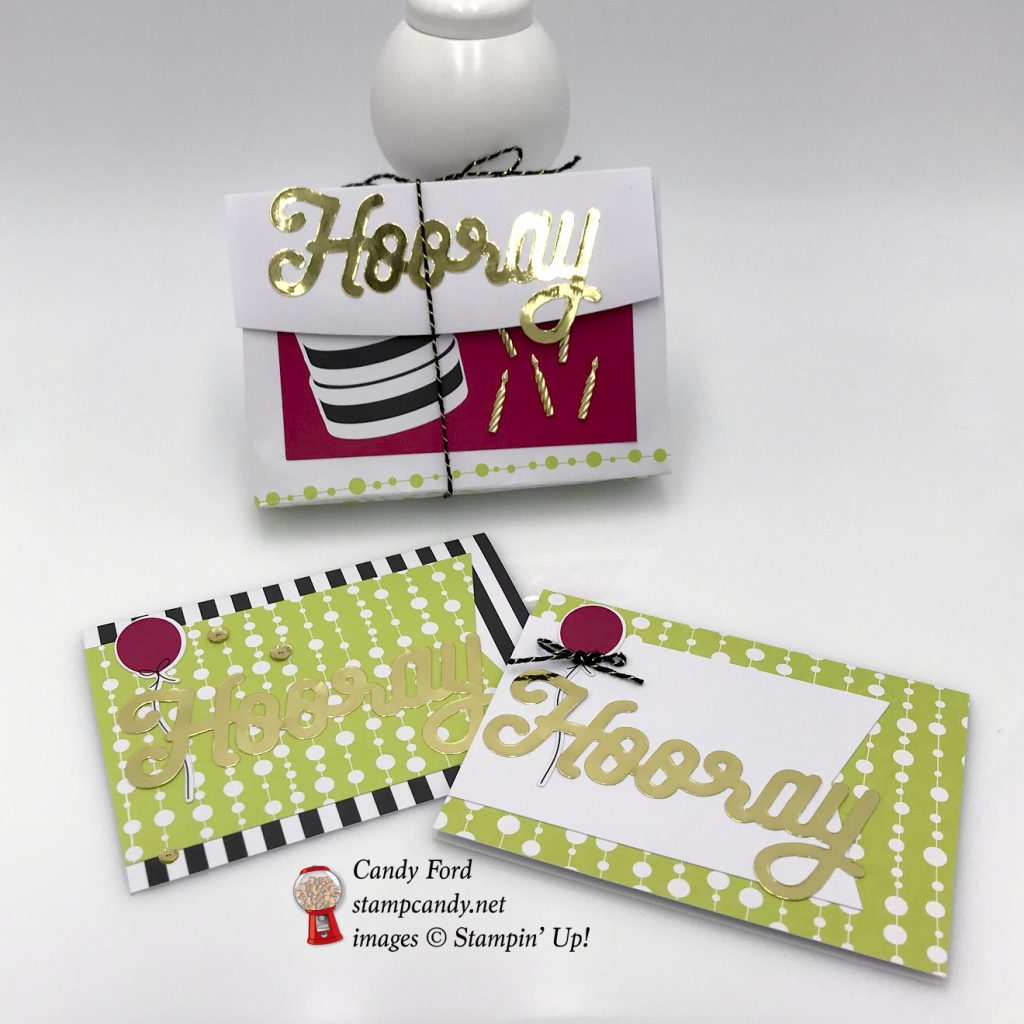
Here’s what I made:

Here’s what I did:
Cut and scored with my Stampin’ Trimmer:
- cut 3 black striped and 3 green cards down to 4-1/2″ x 6-3/4″, making sure to keep the score line centered, so once the cards are folded they measure 4-1/2″ x 3-3/8″ – in other words, cut 1″ x 8-1/2″ strip off the long side, and cut 7/8″ off each end
- scored one of the envelopes 1/2″ in from either side and 1/2″ in from the bottom, then burnished the folds with a bone folder
Cut using Paper Snips:
- cut away the outer edges of the envelope flap, that fall outside the score lines
Assembled the cards:
- burnished the fold in the card bases with a Bone Folder
- banners applied onto the front of the card bases (green onto the black card, and white onto the green card)
- balloon applied to the left side of the card front
- gold Hooray applied to the banner
- tied bows with the black & gold twine from the kit and adhered them to the balloons on the green cards using a rolled up glue dot
- applied self stick sequins to the front of the black & white cards
Assembled the holder:
- applied a self stick red layer onto the front of the envelope
- glued two cakes together to make a taller cake, then glued them onto the red layer
- applied 5 gold candles onto the red layer
- applied a self stick gold Hooray onto the front of the flap
- used an Embossing Buddy to powder the bits of the Hooray that stick out from the flap, so they wouldn’t be sticky
- with one hand inside the envelope and one hand outside, flattened the sides and bottom until they were square
- tucked under the points at the bottom corners and glued them to the bottom of the holder
- put the cards in the holder and tied it closed with a piece of the black & gold twine
Here’s the APPT hop:
You can follow the list, or just click on Next to go to the next stop on the hop!

Here are today’s colors:
You can click on each one to see all the products that come in that color!
Here’s what I used:
Click on these images for more details and to purchase.
Here’s how to get Paper Pumpkin:
The easiest, and least expensive, way to subscribe to Paper Pumpkin is with a 12 month prepaid subscription. There are also 6-month, 3-month, and 1-month prepaid subscriptions. Click on the images below to purchase. Or you can CLICK HERE to subscribe on a month-to-month basis.
Here’s the Broadway Bound Suite:
Here’s some information for you to check out:
Thanks for stopping by today, and Sweet Stamping!
Jun 27, 2018 | Cards, Gallery, New Products |
Today’s card is one I designed for my Stamp Club’s June gathering. We used a Stamparatus to stamp the four potted plant images. Luckily the Stamparatus has four plate sides, so it was super easy for everyone to stamp perfectly lined up images. We used the Seasoned with Kindness host stamp set along with the Stitched Labels Framelits Dies. The colors came from the Garden Impressions Designer Series Paper we used.
Do you like to be thrifty with your consumable supplies? I do. Here’s a tip. You don’t have to use a whole doily on every card. This card uses half a doily (cut in half for two quarters) so I still have the other half for (an)other project(s.)
Here’s what I made:


Here’s what I did:
Cut and scored with my Stampin’ Trimmer:
- Mango Melody card stock (CS) cut to 4-1/4″ x 11″, then scored in half at 5-1/2″
- Garden Impressions Designer Series Paper (DSP) cut to 3″ x 5-1/4″
- Whisper White CS layer cut to 2-1/2″ x 4-1/2″
- Whisper White CS cut to 1-3/4″ x 3/4″ for the label
- a Pearlized Doily cut into fourths (used two of the pieces on this card)
- Optional: Whisper White CS cut to 4″ x 5-1/4″ for the inside of the card base – The So Saffron CS is certainly light enough to write on.
Stamped with the Seasoned With Kindness stamp set:
- sentiment in Night of Navy ink onto the 1-3/4″ x 3/4″ Whisper White CS
- pot and plant in Night of Navy ink onto the 2-1/2″ x 4-1/2″ Whisper White CS
- filled in pot in Gray Granite ink
- filled in the plant in So Saffron ink
Die cut using the Stitched Labels Framelits:
- label from a scrap of So Saffron CS
Colored using a Stampin’ Write Marker:
- leaf shading in Mango Melody
Assembled the card:
- burnished the fold in the card base with a Bone Folder
- DSP glued onto the front of the card base, lined up on the left side
- 2 doily pieces glued onto the back of the stamped layer, showing on the right side
- stamped layer and doilies glued onto the card front
- sentiment glued onto the die cut label
- die cut label adhered to the card front using Stampin’ Dimensionals
- tied a bow with Night of Navy twine and adhered it to the sentiment using a Mini Glue Dot
Here are today’s main colors:
You can click on each one to see all the products that come in that color!
Here’s what I used:
Click on these images for more details and to purchase.
Here’s some information you should check out:
Thanks for stopping by today, and Sweet Stamping!
Jun 26, 2018 | Cards, Gallery, New Products |
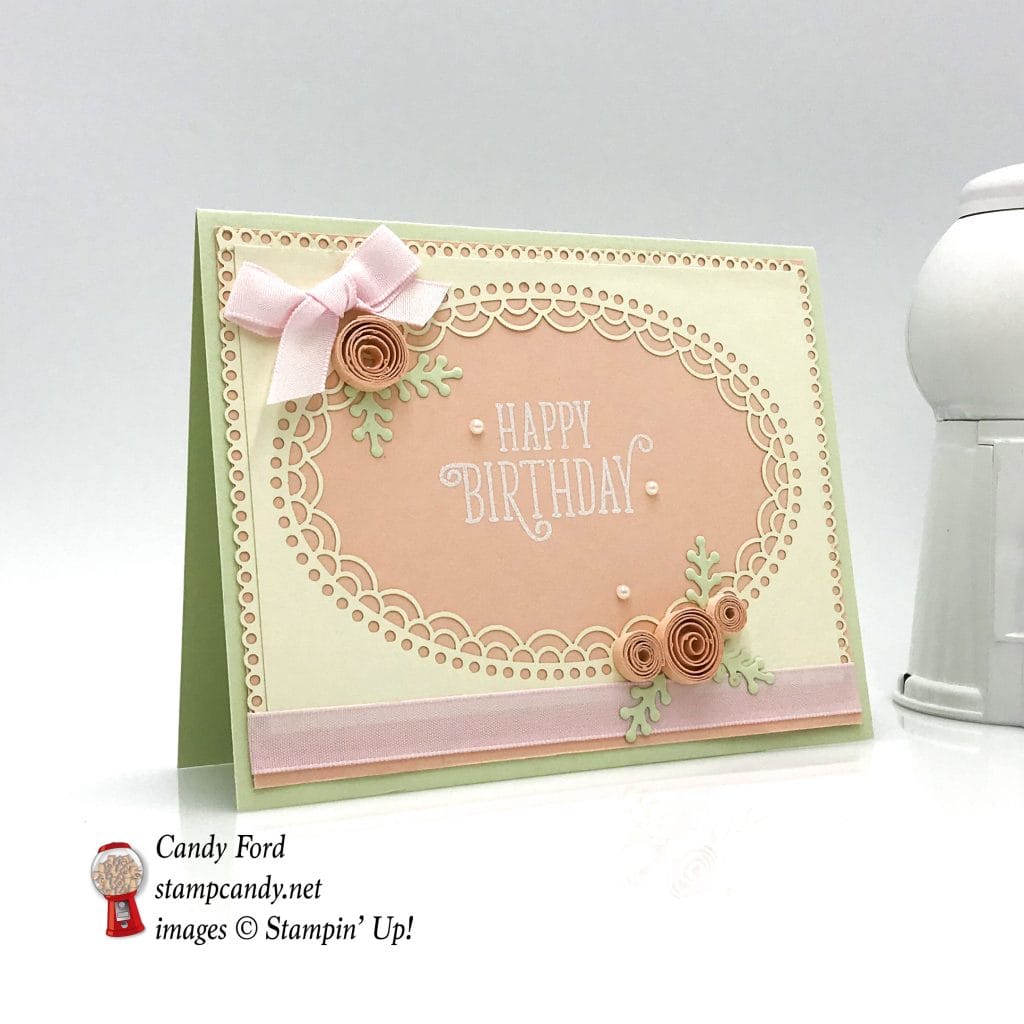
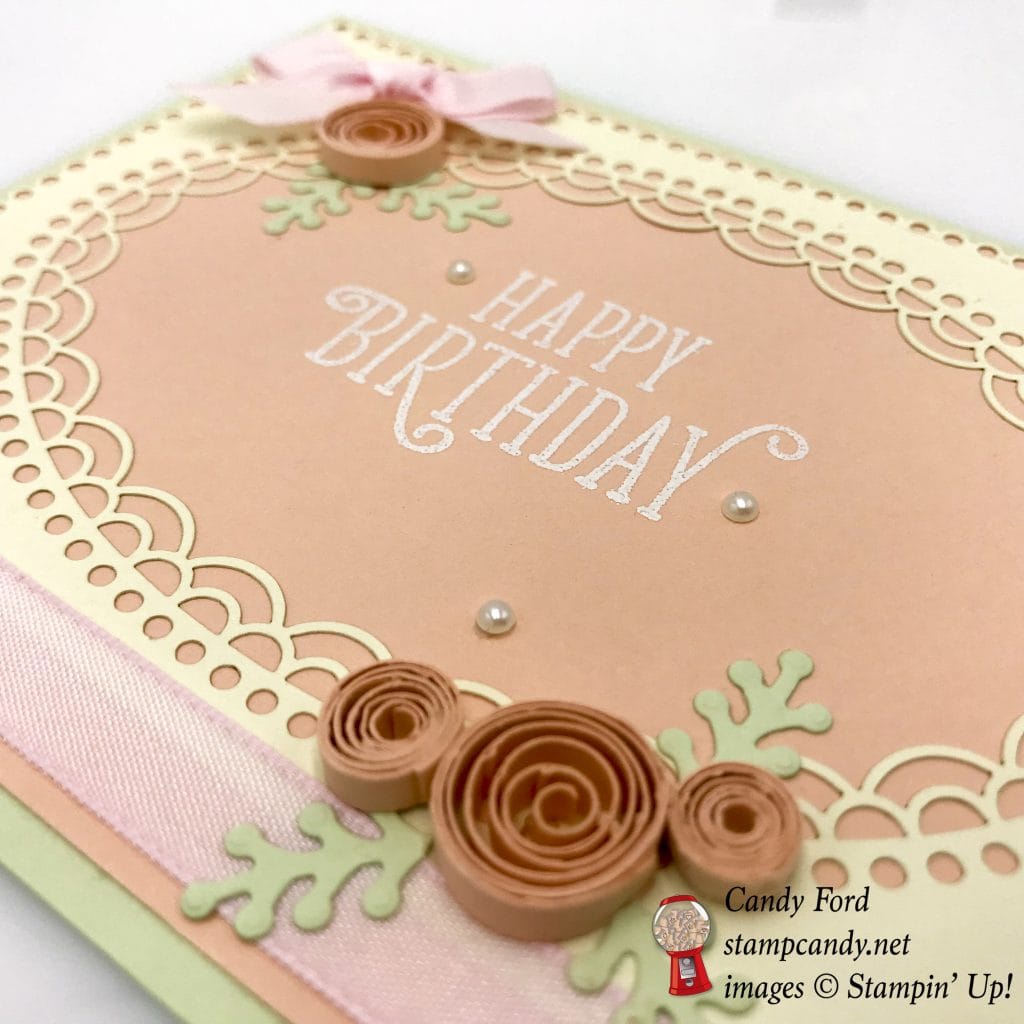
Pastels, lace, bows, and delicate quilled flowers. This dainty birthday card has it all. The sentiment is from the Happy Birthday Gorgeous stamp set, a fave of mine that carried over to the new catalog. Yay! All the lace is from the Delightfully Detailed Laser Cut Specialty Paper – this stuff is exquisite. And it’s Whisper White on one side and Very Vanilla on the other!
Soft Sea Foam and a couple of pinks, Petal Pink and Powder Pink, pair with the Very Vanilla for the soft color palette. It’s interesting to see how similar, or different, the two pinks look in different lighting. In these photos they look really different.
And I’m determined that quilling is coming back! I just wrapped the paper strips around a skewer. Easy!
Here’s what I made:
Here’s what I did:
Cut and scored with my Stampin’ Trimmer:
- Soft Sea Foam card stock (CS) cut to 5-1/2″ x 8-1/2″, then scored in half at 4-1/4″
- Petal Pink CS layer cut to 5-1/4″ x 4″
- Delightfully Detailed Laser Cut Paper (with lacy oval cut out) cut to 5″ x 3-1/2″
- Delightfully Detailed Laser Cut Paper (thin decorative strips) cut to 5-1/4″ (one piece) and 4″ (two pieces)
- Petal Pink CS cut to 1/8″ x 6″ (four pieces)
Stamped with the Happy Birthday Gorgeous stamp set:
- sentiment in Versamark ink onto the Petal Pink CS layer, so it will be centered in the laser cut oval, then heat embossed it in white
Die cut using the Foliage Frame Framelits:
- 5 leaves from a scrap of Soft Sea Foam CS
Assembled the card:
- burnished the fold in the card base with a Bone Folder
- thin decorative strips glued onto the top and side edges of the Petal Pink CS layer
- laser cut oval layer glued onto the Petal Pink CS layer, lined up at the top (There will be some extra space at the bottom.)
- Powder Pink ribbon adhered to the bottom of the Petal Pink CS layer, overlapping the laser cut piece, and wrapping the ends around to the back, using Tear & Tape
- each 1/8″ CS strip tightly rolled (quilled) around a skewer
- glued down the ends of two quilled pieces, keeping them tightly rolled
- glued down the ends of the other two quilled pieces, after letting the roll loosen into a larger circle
- NOTE: You may find that 6″ is too long. Roll the pieces, then snip off any extra that you need to in order to get the quilled circle size you want.
- leaves and quilled flowers glued onto the card font
- bow tied with the Powder Pink Ribbon and adhered to the card front using Mini Glue Dots
- three pearls applied around the sentiment
Here are today’s colors:
You can click on each one to see all the products that come in that color!
Here’s what I used:
Click on these images for more details and to purchase.
Here’s some information you should check out:
Thanks for stopping by today, and Sweet Stamping!
Jun 25, 2018 | Cards, Gallery, New Products |
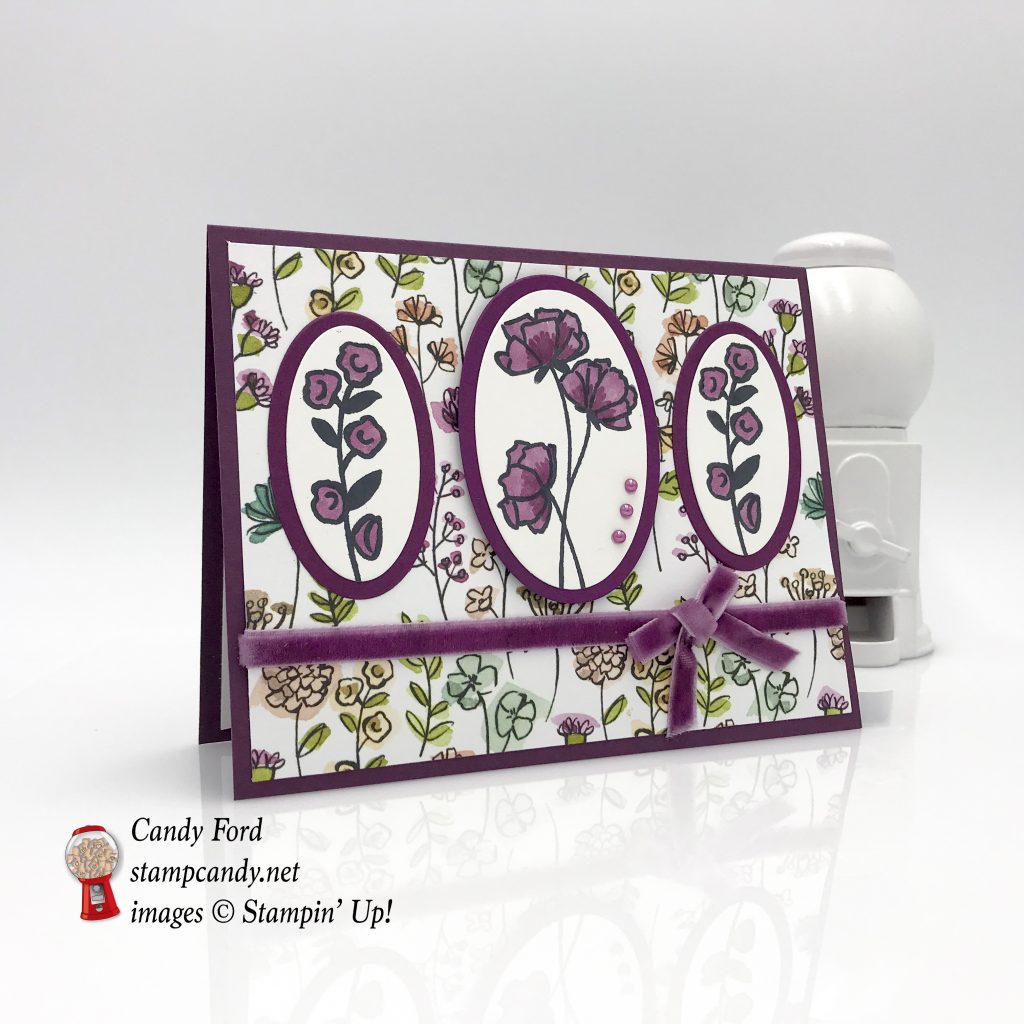
I really like the Share What You Love Designer Series Paper, but the pattern I used today has to be my favorite from the pack. And it isn’t even one of the fancy pearlized ones. I love the colors. Here I combined it with the Love What You Do stamp set, Layering Ovals Framelits Dies, Velvet Ribbon, and Stampin’ Blends Markers to create this lovely floral card. I didn’t add a sentiment to the card front, but you can add whatever you want to the inside of the card.
Here’s what I made:

Here’s what I did:
Cut and scored with my Stampin’ Trimmer:
- Rich Razzleberry card stock (CS) cut to 5-1/2″ x 8-1/2″, then scored in half at 4-1/4″
- Share What You Love Designer Series Paper (DSP) cut to 5-1/4″ x 4″
- Whisper White CS cut to 5-1/4″ x 4″ for the inside of the card base
Stamped with the Love What You Do stamp set:
- 3 floral images in Jet Black Memento ink onto scraps of Whisper White CS
Die cut using the Layering Ovals Framelits:
- the 3 stamped images
- 3 ovals from scraps of Rich Razzleberry CS
Colored using Stampin’ Blends Markers:
- the 3 floral images Rich Razzleberry
Assembled the card:
- burnished the fold in the card base with a Bone Folder
- stamped ovals glued onto the Rich Razzleberry CS ovals
- largest oval adhered to the DSP layer using Stampin’ Dimensionals
- two smaller ovals glued to the DSP layer
- Rich Razzleberry Velvet Ribbon adhered to the DSP layer, and the ends wrapped around to the back, using Tear & Tape
- bow tied with another piece of the same ribbon, then adhered over the first ribbon using Mini Glue Dots
- DSP layer glued onto the front of the card base
- 3 Rich Razzleberry pearls applied to the largest stamped oval
- Whisper White CS glued onto the inside of the card base
Here are today’s main colors:
You can click on each one to see all the products that come in that color!
Here’s what I used:
Click on these images for more details and to purchase.
Here’s some information you should check out:
Thanks for stopping by today, and Sweet Stamping!
Jun 24, 2018 | Cards, Gallery, New Products |
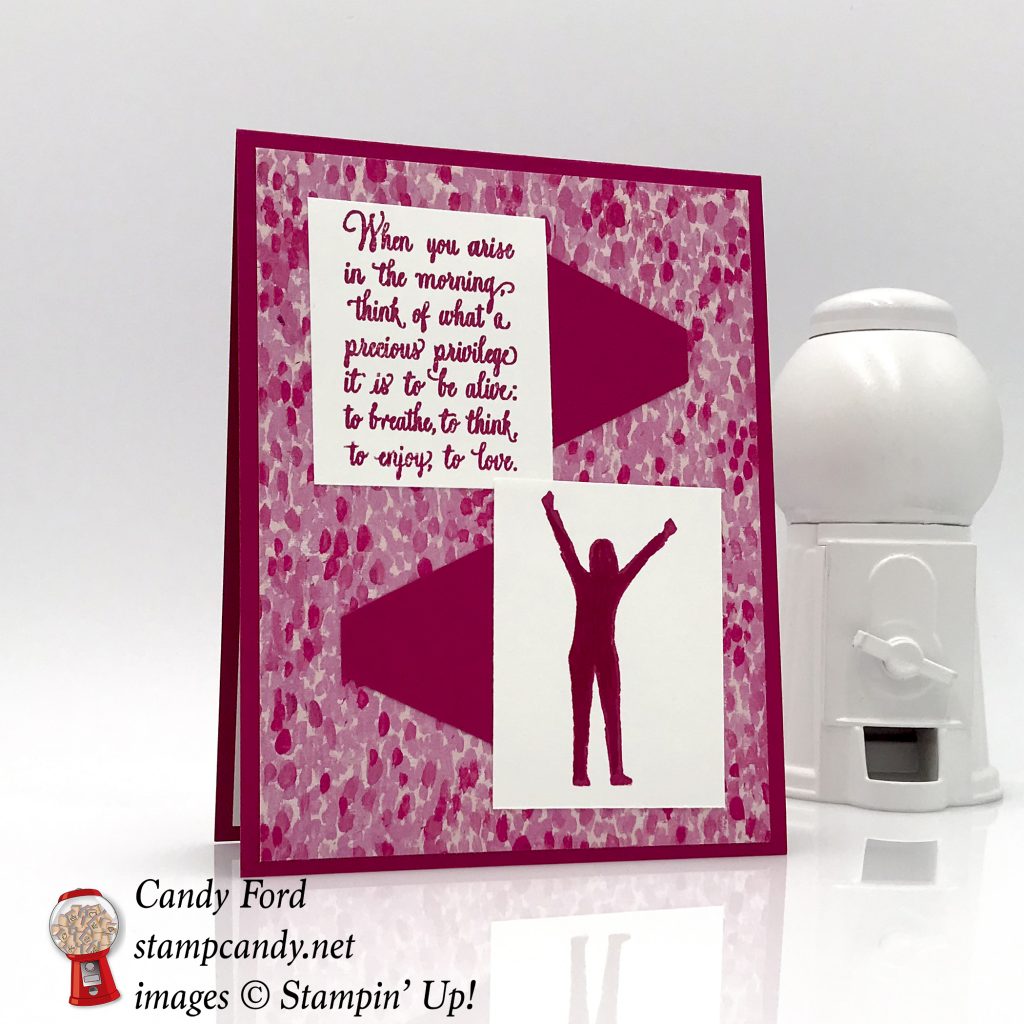
The Enjoy Life stamp set has inspirational quotes and fun, outdoorsy images to create encouraging projects for anyone. I used it, along with the Tailored Tag Punch and Garden Impressions Designer Paper, to make today’s card, with it’s sentiment about how we should all wake up full of gratitude.
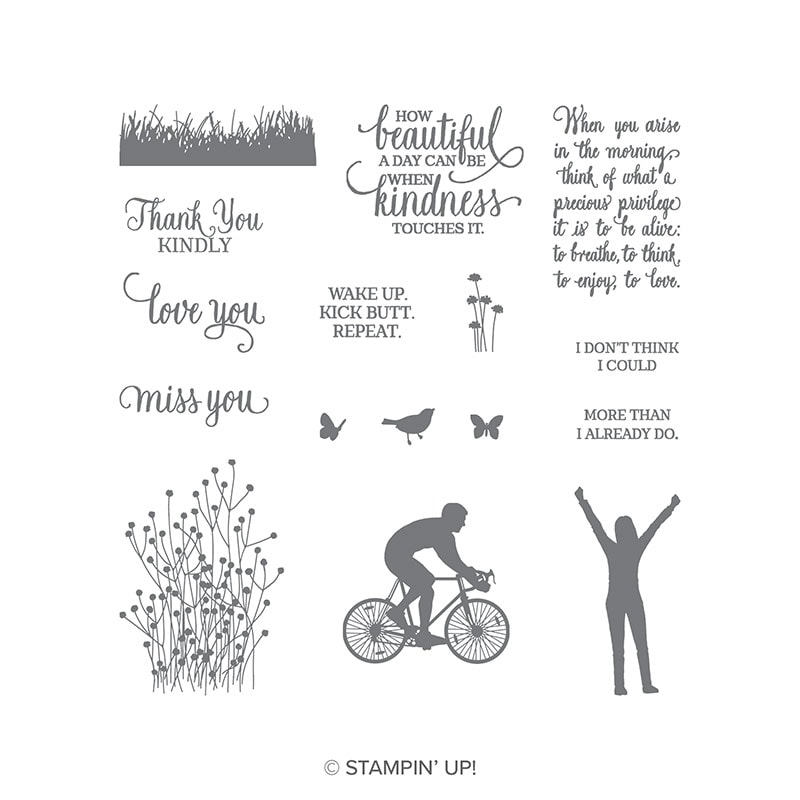
Enjoy Life Stamp Set © Stampin’ Up!
Here’s what I made:
Here’s what I did:
Cut and scored with my Stampin’ Trimmer:
- Lovely Lipstick card stock (CS) cut to 4-1/4″ x 11″, then scored in half at 5-1/2″
- Whisper White CS cut to 4″ x 5-1/4″
- Garden Impressions Designer Series Paper (DSP) cut to 4″ x 5-1/4″
- Whisper White CS cut to 1-7/8″ x 2-1/8″
- Whisper White CS cut to 1-7/8″ x 2-7/8″
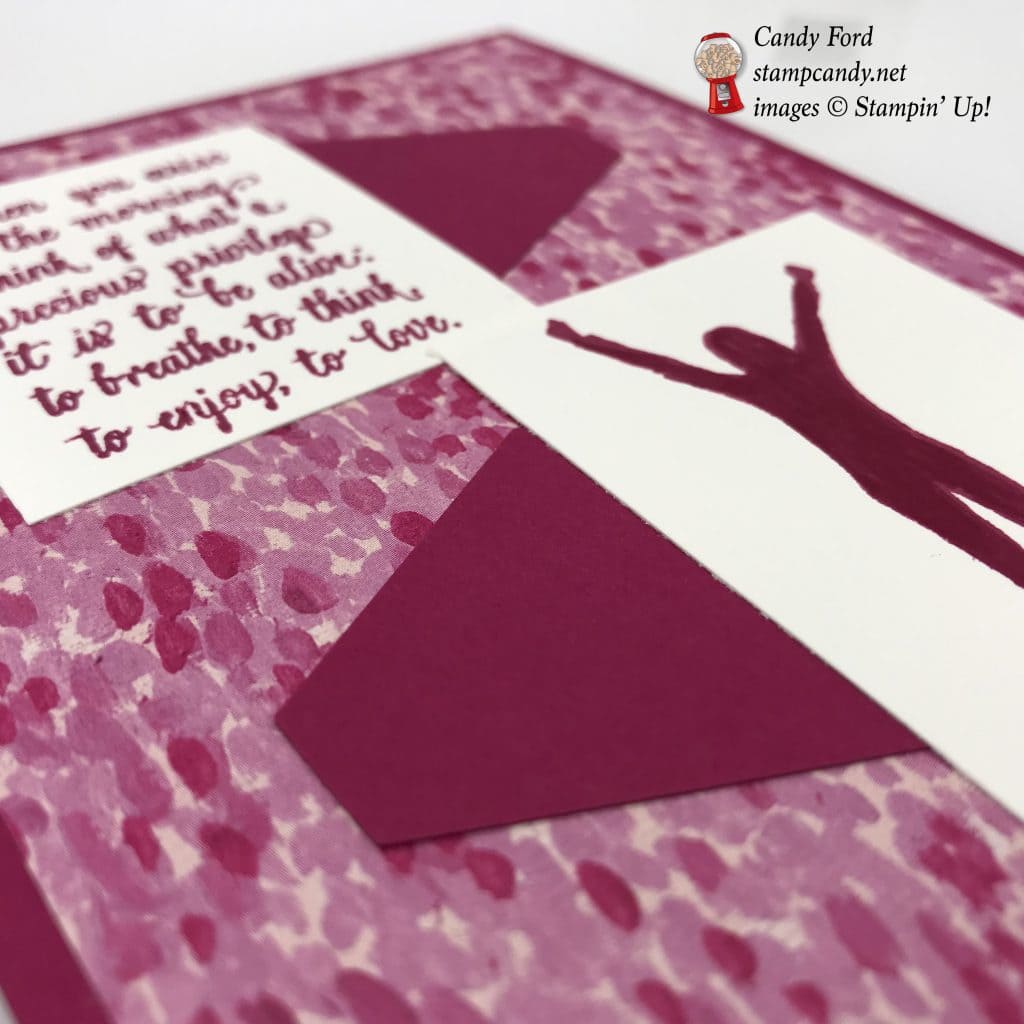
Stamped with the Enjoy Life stamp set:
- sentiment in Lovely Lipstick ink onto the 1-7/8″ x 2-1/8″ Whisper White CS
- person in Lovely Lipstick onto the 1-7/8″ x 2-7/8″ Whisper White CS
Cut using the Tailored Tag Punch:
- a scrap of Lovely Lipstick CS, then cut in half with Paper Snips
Assembled the card:
- burnished the fold in the card base with a Bone Folder
- DSP glued onto the front of the card base
- stamped pieces and punched pieces glued onto the DSP layer as shown
- 4″ x 5-1/4″ Whisper White CS glued onto the inside of the card base
Here are today’s colors:
You can click on each one to see all the products that come in that color!
Here’s what I used:
Click on these images for more details and to purchase.
Here’s some information you should check out:
Thanks for stopping by today, and Sweet Stamping!
Jun 23, 2018 | Cards, Gallery, New Products |
I’ve been wanting to use the new Delightfully Detailed Laser Cut Paper more. It’s Whisper White on one side and Very Vanilla on the other, so you can use it with just about anything. I’ve used it here with the new Sitting Pretty Bundle (Sitting Pretty stamp set and Pretty Park Framelits Dies) to create a quiet garden scene.
Here’s what I made:


Here’s what I did:
Cut and scored with my Stampin’ Trimmer:
- Whisper White Thick card stock (CS) cut to 8-1/2″ x 5-1/2″, then scored in half at 4-1/4″
- Balmy Blue CS cut to 4″ x 5-1/4″
- Delightfully Detailed Laser Cut Paper cut to 3-1/2″ x 5″
Stamped with the Sitting Pretty stamp set:
- sentiment in Balmy Blue ink onto a scrap of Whisper White CS
- bench in Gray Granite ink onto a scrap of Whisper White CS
- bird in Tuxedo Black Memento ink, then filled in with Balmy Blue ink
- potted plant in Tuxedo Black Memento ink, then the pot filled in with Balmy Blue ink, and the plant filled in with Granny Apple Green ink
Die cut using the Pretty Park Framelit Dies:
- bench, bird, and potted plant
Die cut using the Layering Ovals Framelit Dies:
- sentiment
- scalloped oval from a scrap of Balmy Blue CS
Assembled the card:
- burnished the fold in the card base with a Bone Folder
- Balmy Blue CS layer glued onto the front of the card base
- Delightfully Detailed Laser Cut Paper layer glued onto the Balmy Blue CS layer
- bench, bird, and potted plant glued onto the card front
- sentiment glued onto the die cut Balmy Blue CS oval
- die cut Balmy Blue CS oval glued onto the card front
- 3 pearls applied to the sentiment oval
- bow tied with 1/8″ Whisper White ribbon and adhered to the sentiment oval using a Mini Glue Dot
Here are today’s colors:
You can click on each one to see all the products that come in that color!
Here’s what I used:
Click on these images for more details and to purchase.
Here’s some information you should check out:
Thanks for stopping by today, and Sweet Stamping!

