Sep 12, 2019 | Blog Hop, Cards, Christmas, Gallery, Holiday, New Products |
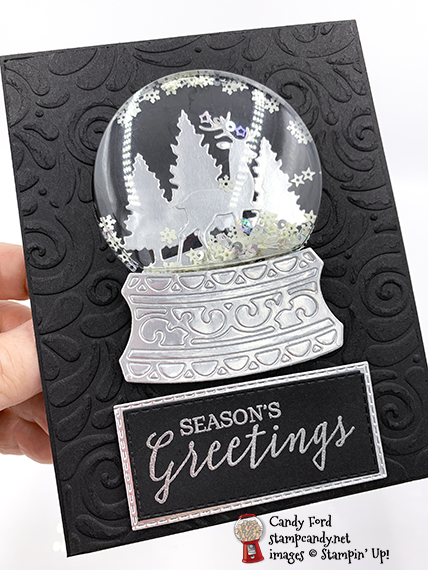
 It’s time for the OSAT Blog Hop for September! This month we’re featuring products from the brand new 2019 Holiday Catalog. I used the Still Scenes Bundle (Still Scenes stamp set and Snow Globe Scenes Dies) on page 43 to make a shaker card. The Snow Globe Shaker Domes make it easy – there is adhesive on both sides of the rims.
S
Here’s what I made:


S
Here’s what I did:
Cut and scored with my paper trimmer:
- Basic Black card stock (CS) cut to 4-1/4″ x 11″, then scored in half at 5-1/2″
- Basic Black CS layer cut to 4-1/8″ x 5-3/8″
- Whisper White CS cut to 3-3/4″ x 5″ for the inside of the card base
Stamped with the Still Scenes stamp set:
- outer sentiment in Versamark ink onto a scrap of Basic Black CS, then heat embossed in silver
- inner sentiment in black ink onto the Whisper White CS for the inside of the card base
Cut using the Snow Globe Scenes Dies:
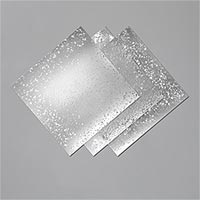
- trees and 2 deer from a scrap of Silver Foil Sheet
- hole for shaker dome from the Basic Black CS layer
- snow globe base from a scrap of Silver Foil Sheet (one detailed and solid)
Cut using the Stitched Rectangle Dies:
- heat embossed sentiment
- slightly larger piece from a scrap of Silver Foil Sheet
- NOTE: There isn’t a die in the set to cut the sentiment as I wanted to, so I used a larger die and cut it twice as shown below. I cut the Silver Foil piece the same way.


Embossed using the Swirls & Curls Embossing Folder:
- Basic Black CS layer (be sure to emboss it after die cutting)
Assembled the card:
- burnished the fold in the card base with a Bone Folder
- trees and one deer adhered onto the front of the card base using Snail, so they will show through the hole in the Basic Black CS layer
- adhesive backing pulled off the top edge of the shaker dome, the dome put through the hole in the Basic Black CS layer, and adhered onto the back side,
- Snowflake Sequins laid over the trees and deer
- adhesive backing pulled off the bottom edge of the shaker dome, and Basic Black CS layer glued onto the front of the card base, so the sequins are trapped under the shaker dome
- NOTE: Be sure you press well to seal around the shaker dome. I left it a bit loose and the sequins stick to the edges.
- detailed base adhered onto the solid base using Snail, then adhered onto the Basic Black CS layer using Black Stampin’ Dimensionals
- front sentiment adhered onto the die cut Silver Foil, then the foil adhered onto the Basic Black CS layer using Black Stampin’ Dimensionals
- second deer adhered onto the Whisper White CS for the inside of the card base using Snail, and any excess trimmed away using Paper Snips
- Whisper White CS glued onto the inside of the card base
S
Here’s the hop:
S
Here are today’s colors:
You can click on each one to see all the products that come in that color!
S
Here’s what I used:
Click on these images for more details and to purchase.
<– Click here for a clickable and printable list!
S
Preorder the Monster Bash Online Treat Holder Class by September 18:
- Make 6 adorable treat holders in the comfort of your own home!
- 2 each of 3 designs
- Features the Monster Bash Suite on pages 52-54 of the 2019 Holiday Catalog
- I’ve done the trimming and scoring for you!
- You’ll receive the stamp set, dies, pre-cut kits, and Black Stampin’ Dimensionals.
- Full detailed instructions
- Limited spots available
Click on the image below for details and class options, or copy and paste this link into your browser: https://stampcandy.net/online-classes/monster-bash-treat-holder-class-preorder/
S
Here are some helpful links:
S
Thanks for stopping by today, and Sweet Stamping!
Sep 8, 2019 | Boxes, Gallery, Gift Wrap, Gifts, Halloween, Holiday, New Products |
Today’s project is a fun little treat box shaped like a coffin. Stampin’ Up!’s new Coffin Boxes come pre-cut and scored, so you only have to glue the corners to assemble them. There’s a window in the coffin lid so you can see its occupant, a vampire from the Monster Bash Designer Series Paper (DSP.) The coffin is lined with more of the DSP, and the spiders on top are cut from a Black Foil Sheet using the Wicked Dies.
S
Here’s what I made:


S
Here’s what I did:
Cut and scored with my paper trimmer:
- first traced around a coffin box onto two pieces of Monster Bash Designer Series Paper (DSP), then…
- cut both pieces along the traced lines
Stamped with the Spooktacular Bash stamp set:
- sentiment in Whisper White Craft Ink onto a scrap of Basic Gray card stock (CS)
- heat set the ink using a Heat Tool
Cut using the Ornate Frames Dies:
- sentiment
- ornate frame from a scrap of Basic Gray CS
Cut using the Wicked Dies:
- 3 spiders from a scrap of Black Foil Sheet
Cut using the Layering Circles Dies:
- hole in the die cut ornate frame, and in the top of the coffin box, using the same small die
- vampire from the Monster Bash DSP, and a scrap of clear Window Sheet, using the same larger die
Assembled the box:
- burnished the folds in the box and lid with a Bone Folder
- clear circle adhered onto the inside of the lid, lining the hole, using Tear & Tape
- vampire adhered onto the clear circle using Tear & Tape, so he shows through the window in the lid
- box and lid folded and glued into shape
- one piece of DSP glued onto the inside of the box (bats)
- the other piece of DSP glued onto the inside of the lid (cobwebs)
- ornate frame glued onto the top of the lid, around the window
- sentiment glued onto the top of the lid
- 3 spiders adhered onto the top of the lid using Mini Glue Dots
- 2 Red Rhinestones applied onto each spider, to resemble a Black Widow’s hourglass pattern (Yes, I know it’s actually on the bottom of a real spider and not up on its back, but I took a little artistic license.)
S
Here are today’s colors:
You can click on each one to see all the products that come in that color!
S
Here’s what I used:
Click on these images for more details and to purchase.
<– Click here for a clickable and printable list!
S
Preorder the Monster Bash Online Treat Holder Class by September 18:
- Make 6 adorable treat holders in the comfort of your own home!
- 2 each of 3 designs
- Features the Monster Bash Suite on pages 52-54 of the 2019 Holiday Catalog
- I’ve done the trimming and scoring for you!
- You’ll receive the stamp set, dies, pre-cut kits, and Black Stampin’ Dimensionals.
- Full detailed instructions
- Limited spots available
Click on the image below for details and class options, or copy and paste this link into your browser: https://stampcandy.net/online-classes/monster-bash-treat-holder-class-preorder/

S
Here are some helpful links:
S
Thanks for stopping by today, and Sweet Stamping!
Sep 7, 2019 | Cards, Christmas, Gallery, Holiday, New Products |
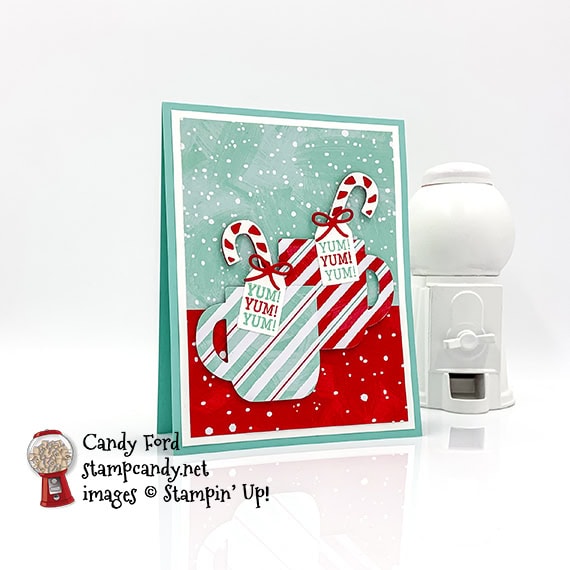
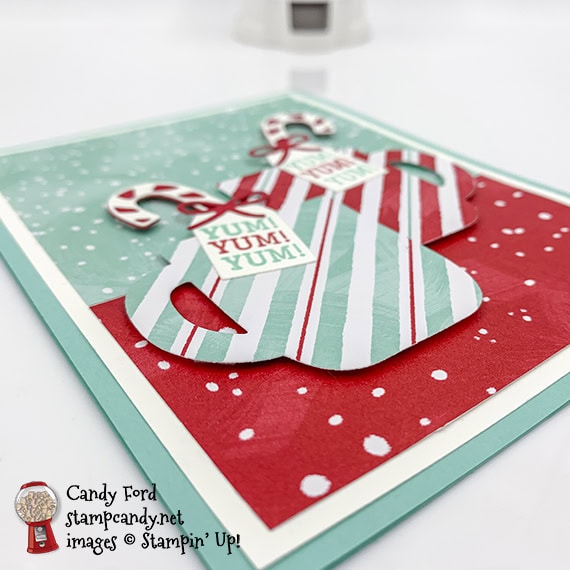
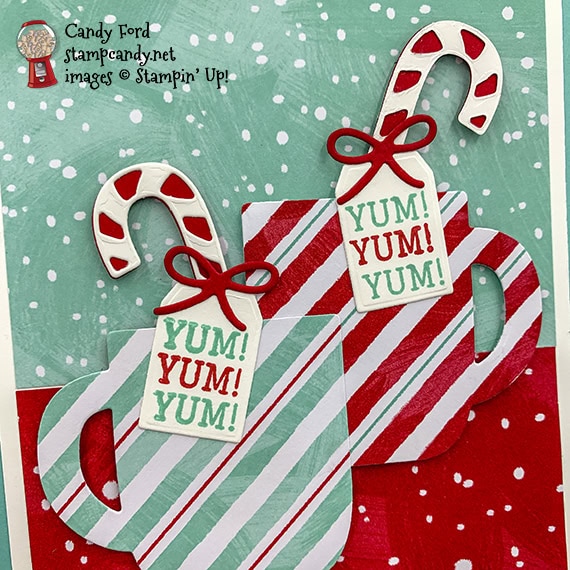
What’s better in winter than a cup of hot cocoa? Today I’m sharing a card I made using the new Cup of Christmas Bundle (Cup of Christmas stamp set and Cup of Cheer Dies) and Let It Snow Specialty Designer Series Paper. You can use it as a Christmas card, but it’s really an all occasion winter themed card.
S
Here’s what I made:
S
Here’s what I did:
Cut and scored with my paper trimmer:
- Coastal Cabana card stock (CS) cut to 4-1/4″ x 11″, then scored in half at 5-1/2″
- Whisper White card stock (CS) layer cut to 4″ x 5-1/4″
- Let It Snow Specialty Designer Series Paper (DSP) layer (blue) cut to 3-3/4″ x 3-1/2″
- Let It Snow Specialty Designer Series Paper (DSP) layer (red) cut to 3-3/4″ x 2-1/2″
- optional: Whisper White CS cut to 4″ x 5-1/4″ for the inside of the card base
Stamped with the Cup of Christmas stamp set:
- YUM in Real Red and Coastal Cabana inks onto a scrap of Whisper White Thick CS – stacked close together – stamped this for 2 tags
Cut using the Cup of Cheer Dies:
- stamped tags (2)
- cups from scraps of DSP (2 different stripe patterns)
- solid candy canes from a scrap of Real Red CS (2)
- striped candy canes from a scrap of Whisper White CS (2)
- bows from a scrap of Real Red CS (2)
Assembled the card:
- burnished the fold in the card base with a Bone Folder
- Whisper White CS layer glued onto the front of the card base
- 2 DSP layers glued onto the Whisper White CS layer
- Whisper White candy canes glued onto the Real Red candy canes
- candy canes glued onto the back of the cups
- tags glued onto the candy canes and cups
- bows glued onto the tags
- top right part of blue cup glued onto the bottom left part of the red cup
- cup assembly adhered onto the DSP layers using Stampin’ Dimensionals
- Whisper White CS glued onto the inside of the card base
S
Here are today’s colors:
You can click on each one to see all the products that come in that color!
S
Here’s what I used:
Click on these images for more details and to purchase.
<– Click here for a clickable and printable list!
S
Preorder the Monster Bash Online Treat Holder Class by September 18:
- Make 6 adorable treat holders in the comfort of your own home!
- 2 each of 3 designs
- Features the Monster Bash Suite on pages 52-54 of the 2019 Holiday Catalog
- I’ve done the trimming and scoring for you!
- You’ll receive the stamp set, dies, pre-cut kits, and Black Stampin’ Dimensionals.
- Full detailed instructions
- Limited spots available
Click on the image below for details and class options, or copy and paste this link into your browser: https://stampcandy.net/online-classes/monster-bash-treat-holder-class-preorder/

S
Here are some helpful links:
S
Thanks for stopping by today, and Sweet Stamping!

Sep 4, 2019 | Blog Hop, Cards, Gallery, New Products |
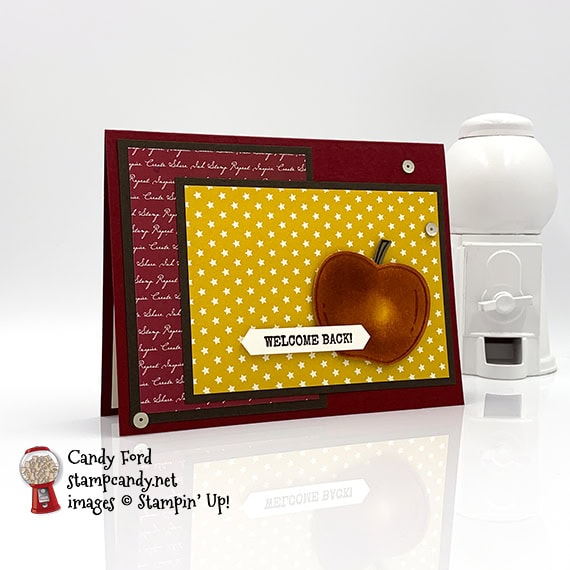
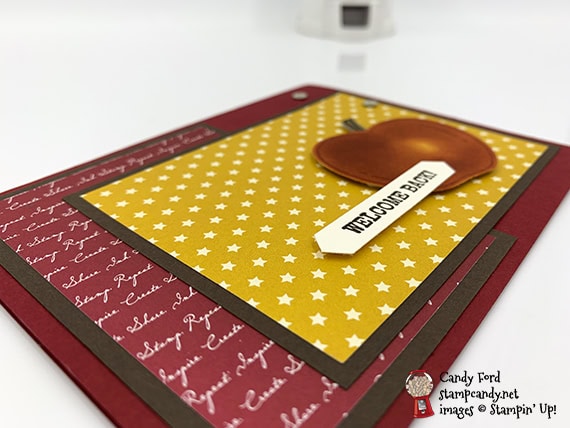
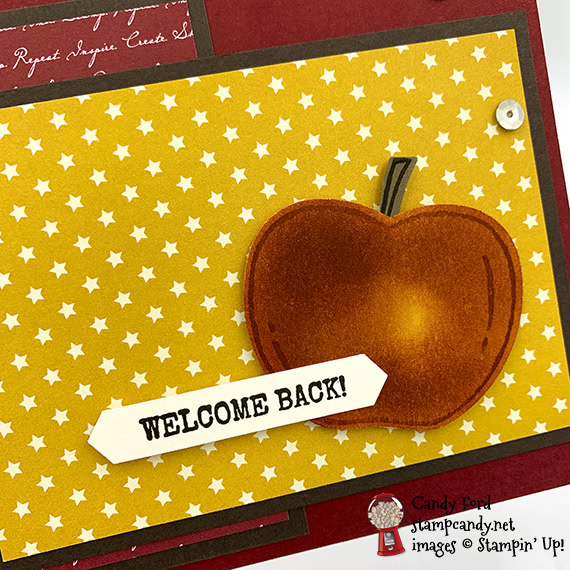
It’s time for the ICS 09-2019 Blog Hop! This month’s theme is Fabulous Fall. What could be more fabulous that going back to school? I know, not everyone feels that way, but when I was a kid, I couldn’t wait to get back to see my friends. I enjoyed school. And the beginning of the school year was special because I got a new notebook, paper, pencils, etc. and some new school clothes. My project for today is a welcome back to school card. I used the Harvest Hellos bundle (Harvest Hellos stamp set and Apple Builder Punch.) I sponged Cherry Cobbler ink onto Crushed Curry cardstock for the apple. The star background is from the Night Before Christmas Designer Series Paper. All the new holiday products are now available to order!

Be sure to hop all the way around to see all the great Autumnal projects made by this talented group of stampers!
S
Here’s what I made:
S
Here’s what I did:
Cut and scored with my paper trimmer:
- Cherry Cobbler card stock (CS) cut to 5-1/2″ x 8-1/2″, then scored in half at 4-1/4″
- smaller Early Espresso CS layer cut to 3″ x 4″
- Cherry Cobbler Designer Series Paper (DSP) layer cut to 2-3/4″ x 3-3/4″
- larger Early Espresso CS layer cut to 4-1/4″ x 3-1/4″
- Night Before Christmas DSP layer cut to 4″ x 3″
- Very Vanilla CS cut to 5-1/4″ x 4″ for the inside of the card base
Stamped with the Harvest Hellos stamp set:
- apple in Cherry Cobbler ink onto a scrap of Crushed Curry CS
- stem in Early Espresso ink onto a scrap of Soft Suede CS
- sentiment in Early Espresso ink onto a scrap of Very Vanilla Thick CS
Cut using the Apple Builder Punch:
Cut using the Classic Label Punch:
Colored using a Sponge Dauber:
- apple in Cherry Cobbler ink
Assembled the card:
- burnished the fold in the card base with a Bone Folder
- Cherry Cobbler DSP layer glued onto the smaller Early Espresso CS layer
- smaller Early Espresso CS layer glued onto the front of the card base
- Night Before Christmas DSP layer glued onto the larger Early Espresso CS layer
- larger Early Espresso CS layer glued onto the front of the card base, over the other DSP layer
- stem glued onto the back of the apple
- sentiment glued onto the front of the apple
- apple/stem/sentiment adhered onto the top DSP layer using Stampin’ Dimensionals
- 3 Sahara Sand Adhesive-Backed Sequins randomly applied onto the card front
- Very Vanilla CS glued onto the inside of the card base
S
Here’s the ICS 09-2019 Fabulous Fall Blog Hop:
Click the Next button to hop to the next stop, Deb Naylor of The Flying Stamper:

S
Here are today’s colors:
You can click on each one to see all the products that come in that color!
S
Here’s what I used:
Contact your demonstrator to place an order. If you don’t have a demonstrator, I’d love to be yours – please click on these images for more product details and to purchase. Thank you!
Click “Supply List” to download a clickable and printable list!
S
Preorder the Pretty Petals Online Class by Thursday, September 5:
- Make 6 cards at home in your PJs!
- 2 each of 3 designs
- Features the Pretty Petals Suite on pages 72-74 of the 2019-2020 Annual Catalog
- I’ve done the trimming and scoring for you!
- You’ll receive all you need to make the cards, including the stamp set, dies, embossing folder, pre-cut card kits, and 6 Very Vanilla envelopes.
- Full detailed instructions
- Limited spots available
Click on the image below for details and class options, or copy and paste this link into your browser: https://stampcandy.net/online-classes/pretty-petals-class-preorder/

S
Here are some helpful links:
S
Thanks for stopping by today, and Sweet Stamping!
Sep 1, 2019 | Boxes, Christmas, Gifts, Holiday, New Products |
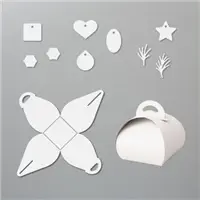
Today I’m sharing another 2019 Holiday Catalog sneak peek, and another Make & Take project I made for our August Candy Hearts team meeting. Not too long ago we had the Curvy Keepsakes Box Dies, which made a larger version of this box. Now we have this adorable mini version. We used the Mini Curvy Keepsakes Box Dies and Mercury Glass Designer Acetate to make this adorable box. It’s perfect for a battery operated tea light, small treats and gifts.
S
Here’s what I made:


S
Here’s what I did:
Cut using the Mini Curvy Keepsake Box Dies:
- box from a Mercury Glass Acetate Sheet
- 3 sprigs from a scrap of Shaded Spruce cardstock (CS)
Assembled the box:
- burnished the score lines using a Bone Folder, then closed the box
- 3 sprigs glued together in a spray, then silver thread wrapped around the stems and tied in a knot
- 3 Red Rhinestones applied onto the spray
- spray adhered onto the outermost flap of the box using Mini Glue Dots
- NOTE: Putting the spray on the outermost flap means you can still open and close the box easily
S
Here are today’s colors:
You can click on each one to see all the products that come in that color!
S
Here’s what I used:
Click on these images for more details and to purchase.
Supply List <– Click here for a clickable and printable list!
S
Preorder the Pretty Petals Online Class by September 5:
- Make 6 cards at home in your PJs!
- 2 each of 3 designs
- Features the Pretty Petals Suite on pages 72-74 of the 2019-2020 Annual Catalog
- I’ve done the trimming and scoring for you!
- You’ll receive the stamp set, dies, embossing folder, pre-cut card kits, and 6 Very Vanilla envelopes.
- Full detailed instructions
- Limited spots available
Click on the image below for details and class options, or copy and paste this link into your browser: https://stampcandy.net/online-classes/pretty-petals-class-preorder/

S
Here are some helpful links:
S
Thanks for stopping by today, and Sweet Stamping!
Aug 31, 2019 | Cards, Gallery, Halloween, New Products |
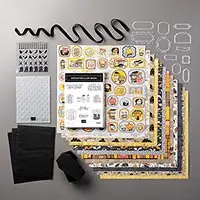
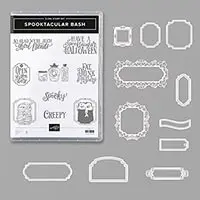
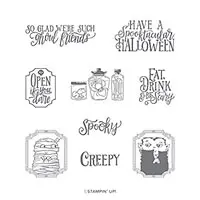
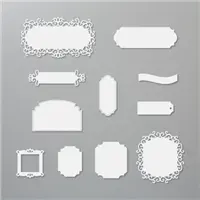
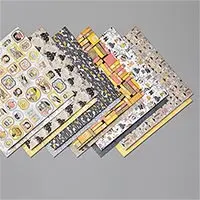
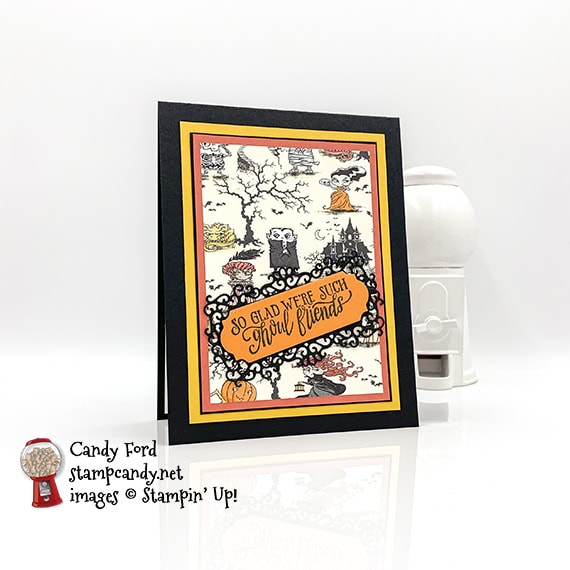
Today’s card is one of the Make & Take projects I made for our August Candy Hearts team meeting. It features some products from the new Monster Bash Suite: the Spooktakular Bash Bundle (Spooktacular Bash stamp set and Ornate Frames Dies) and Monster Bash Designer Series Paper (DSP.) The DSP has some great spooky images, without being too creepy for kids. If you know anything about me, you should know that I’m a Halloween nut. My husband and I host a costume party every year. And I love this suite!
S
Here’s what I made:
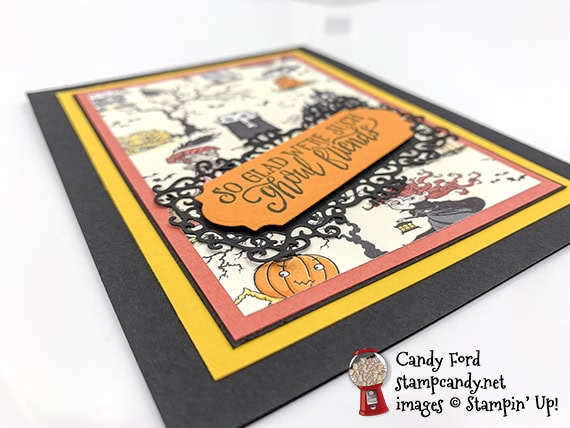
Here’s what I did:
Products in italics will be available beginning September 4, 2019.
Cut and scored with my paper trimmer:
- Basic Black card stock (CS) cut to 4-1/4″ x 11″, then scored in half at 5-1/2″
- Crushed Curry CS layer cut to 3-5/8″ x 4-7/8″
- Basic Black CS layer cut to 3-5/16″ x 4-9/16″
- Terracotta Tile CS layer cut to 3-1/4″ x 4-1/2″
- Monster Bash Designer Series Paper (DSP) layer cut to 3″ x 4-1/4″
- Whisper White CS cut to 4″ x 5-1/4″ for the inside of the card base
Stamped with the Halloween Bash stamp set:
- outer sentiment in black ink onto a scrap of Pumpkin Pie CS
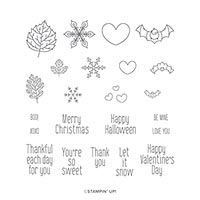
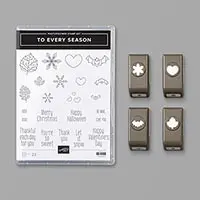
Stamped with the To Every Season stamp set:
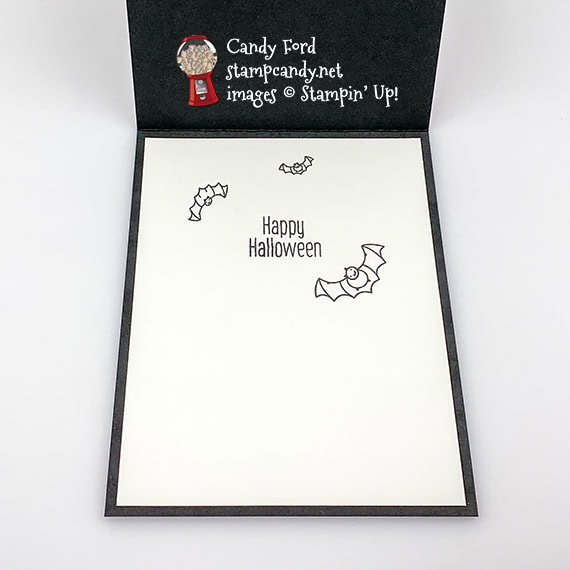
- inner sentiment and 3 bats in black ink onto the Whisper White CS for the inside of the card base
Cut using the Ornate Frames Dies:
- outer sentiment
- ornate piece from a scrap of Basic Black CS
Assembled the card:
- burnished the fold in the card base with a Bone Folder
- Crushed Curry CS layer glued onto the front of the card base
- Basic Black CS layer glued onto the Crushed Curry CS layer
- Terracotta Tile CS layer glued onto the Basic Black CS layer
- DSP layer glued onto the Terracotta Tile CS layer
- outer sentiment adhered onto the Basic Black ornate die cut using Black Stampin’ Dimensionals
- Basic Black ornate die cut glued onto the DSP layer
- Whisper White CS glued onto the inside of the card base
S
Here are today’s colors:
You can click on each one to see all the products that come in that color!
S
Here’s what I used:
Click on these images for more details and to purchase.
Supply List <– Click here for a clickable and printable list!S
Preorder the Pretty Petals Online Class by September 5:
- Make 6 cards at home in your PJs!
- 2 each of 3 designs
- Features the Pretty Petals Suite on pages 72-74 of the 2019-2020 Annual Catalog
- I’ve done the trimming and scoring for you!
- You’ll receive all you need to make the cards, including the stamp set, dies, embossing folder, pre-cut card kits, and 6 Very Vanilla envelopes.
- Full detailed instructions
- Limited spots available
Click on the image below for details and class options, or copy and paste this link into your browser: https://stampcandy.net/online-classes/pretty-petals-class-preorder/

S
Here are some helpful links:
S
Thanks for stopping by today, and Sweet Stamping!
 It’s time for the OSAT Blog Hop for September! This month we’re featuring products from the brand new 2019 Holiday Catalog. I used the Still Scenes Bundle (Still Scenes stamp set and Snow Globe Scenes Dies) on page 43 to make a shaker card. The Snow Globe Shaker Domes make it easy – there is adhesive on both sides of the rims.


