Jan 2, 2018 | Cards, Gallery, New Products, Occasions |
Sale-A-Bration begins tomorrow!
This is Stampin’ Up!’s biggest event of the year! Here’s how you can save big during SAB:
- For every $50 you spend, you get to choose a free item from the SAB catalog. This year there are two extra items that are free with a $100 order.
- If you place an order (either just yourself, or a group order) of $250, you get $25 EXTRA in Stampin’ Rewards! You can even put your Stampin’ Rewards toward the cost of your Starter Kit.
- Talk about the ultimate bundle! When you buy the Starter Kit you get to choose $125 in product, plus 2 additional stamp sets of any price (up to $101 extra!), and you only pay $99. AND you get free shipping! That’s up to a 60% savings! After that you save 20% on everything you buy, and get 20% cash back on everything someone buys from you. There are no penalties and no commitment! And no selling required – you can be your only customer! Or you can sell to a few people and make enough to support your habit or to pay off those Christmas bills! Or you can start your own business. It’s up to you.
And now today’s card:
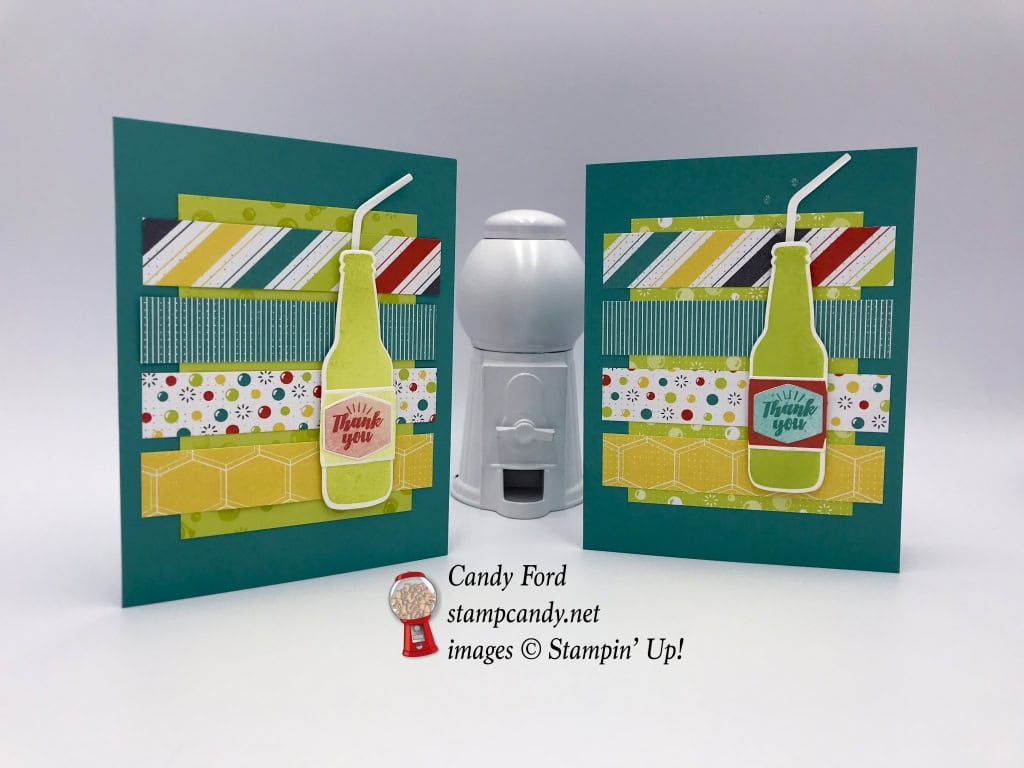
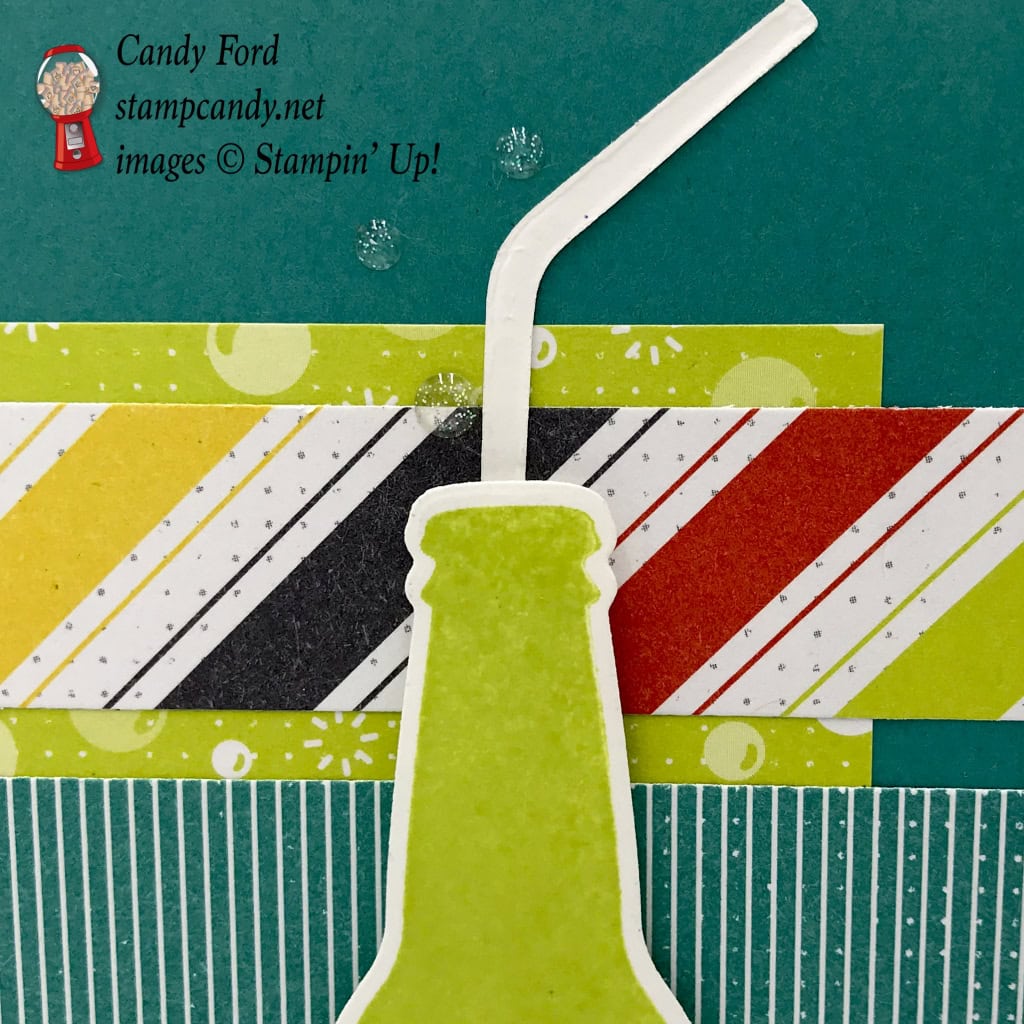
Last month I attended Stampin’ Up!’s huge OnStage event in Salt Lake City. One of the perks of attending was getting the new 2018 Occasions and Sale-A-Bration catalogs and using some of the new products. I am so excited about these! There are some super fun products in the Occasions catalog, and some even have coordinating products in the SAB catalog! Today I’m sharing a card I made at OnStage using some of those coordinating products: the Bubble Over Bundle (Bubble Over stamp set and Bottles & Bubbles Framelits Dies) and the Bubbles & Fizz Designer Series Paper. The new Glitter & Clear Epoxy Shapes near the mouth of the bottle to look like bubbles coming out the top. All these new products will be available for you to order beginning tomorrow!

Bubble Over Bundle © Stampin’ Up!

Bubbles & Fizz Designer Series Paper © Stampin’ Up!
Here’s what I made:
The card on the left is the one I made at OnStage, and the card on the right is one I made after I got home. The few differences are differentiated in the instructions below in red for the left card and blue for the right card.
Here’s what I did:
Cut and scored with my Stampin’ Trimmer:
- Bermuda Bay card stock (CS) cut to 8-1/2″ x 5-1/2″, then scored in half at 4-1/4″
- Lemon Lime Twist CS or Bubbles & Fizz Designer Series Paper (DSP) cut to 3″ x 4″
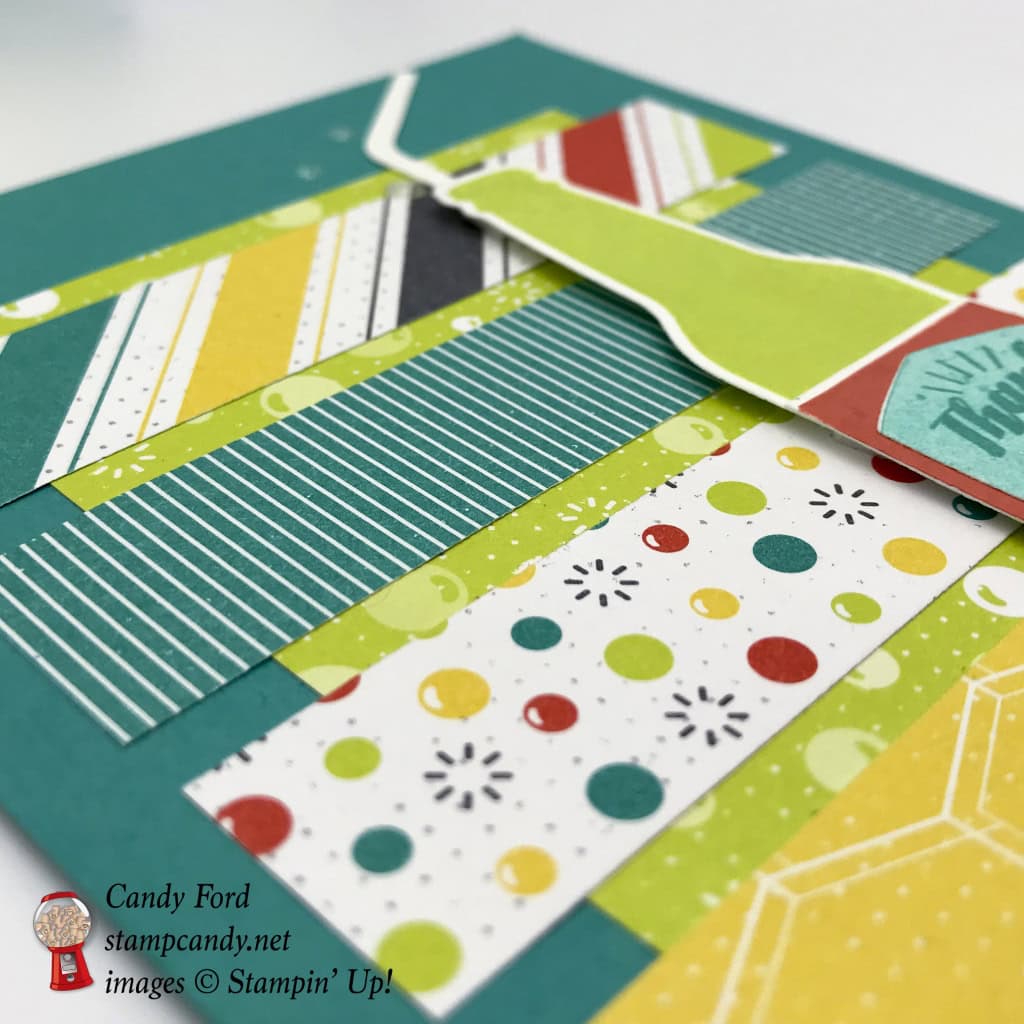
- Bubbles & Fizz DSP cut to 3-3/4″ x 3/4″ (4 different pieces)
- Whisper White CS cut to 4″ x 5-1/2″, for the inside
Stamped with the Bubble Over stamp set:
- bottle in Lemon Lime Twist ink onto a scrap of Whisper White CS
- bottom bottle tag in Lemon Lime Twist ink stamped off once or in Calypso Coral ink onto a scrap of Whisper White CS
- top tag in Calypso Coral ink stamped off or Bermuda Bay ink stamped off onto a scrap of Whisper White CS
- sentiment in Calypso Coral or Bermuda Bay ink onto the top tag
- bubbles in Lemon Lime Twist ink on the 3″ x 4″ piece of Lemon Lime Twist CS
Die cut using the Bottles & Bubbles Framelits:
- stamped images: bottle, bottom tag, top tag
- straw from a scrap of Whisper White CS
Assembled the card:
- burnished score line in card base with a Bone Folder
- Lemon Lime Twist CS or DSP layer glued onto the front of the card base
- 4 DSP strips glued onto the card front
- bottom label glued onto bottle, and excess trimmed off each side with Paper Snips
- top label glued onto bottom label
- straw glued onto the card front
- bottle adhered over the straw with Stampin’ Dimensionals
- 3 clear epoxy dots applied near the top of the bottle
Here are today’s main colors:
You can click on each one to see all the products that come in that color!
Here’s what I used:
Click on the images for more details and to purchase.
Year End Sales Event Ends Today!
Yep, today is the last day of the Year End Sales Event, and to order from the retiring list of products from the 2017 Holiday Catalog. Click here to take advantage of this event in my online store.
Here’s some stuff you should know:
- Newsletter: subscribe for exclusive deals, projects, and more! Enter your email address and click SUBSCRIBE at the top right of this page, just under the picture of my smiling face.
- Swatch Books and Product Shares from the 2018 Occasions and Sale-A-Bration Catalogs – order yours HERE by January 2!
- This is a fabulous time to join my team! Sale-A-Bration is the biggest event of the Stampin’ Up! year and you can save big on the ultimate bundle, the Starter Kit. CLICK HERE for more information. Contact me with any questions: email candy@stampcandy.net or call/text 404-661-5222
- SAB Stamp Fest coming January 20. Details and register HERE by January 13!
- Check out My Events Calendar HERE
- Host Code for the month of January (XNNMNZSZ) Find out more about HOW, WHEN and WHY to use the code HERE.
- January’s FREE gift: Silver Embossing Paste – Find out more HERE.
- Gift Certificates are available in any U.S. dollar amount from me. Contact me – email: candy@stampcandy.net OR call/text: 404-661-5222
- Gumball Rewards for all orders over $50. Find out more HERE.
Thanks for stopping by today, and Sweet Stamping!
Apr 13, 2017 | Boxes, Events, Gallery, Gift Wrap, Gifts, Occasions |
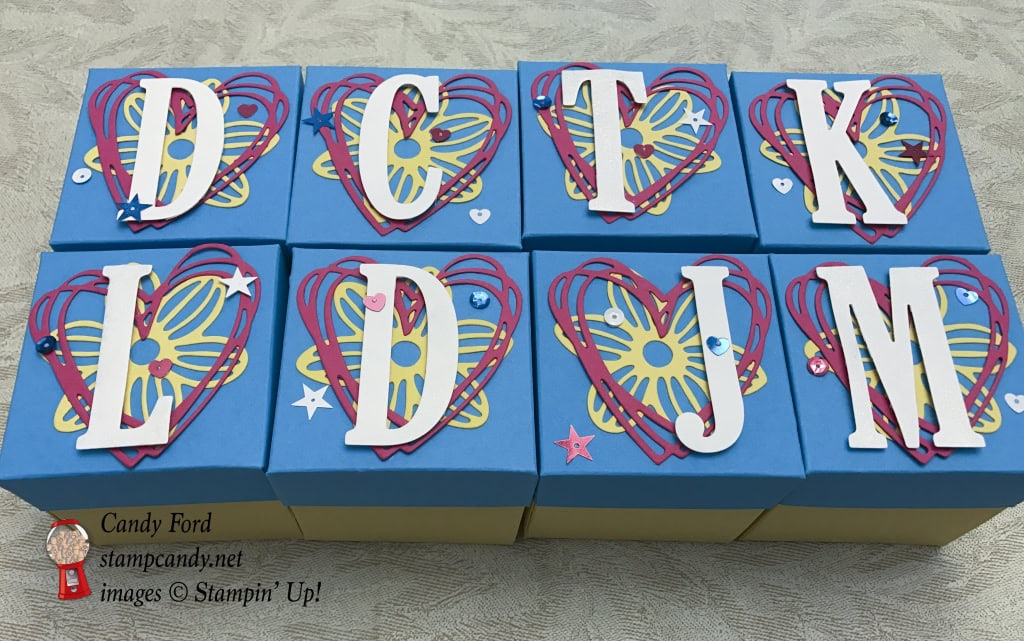
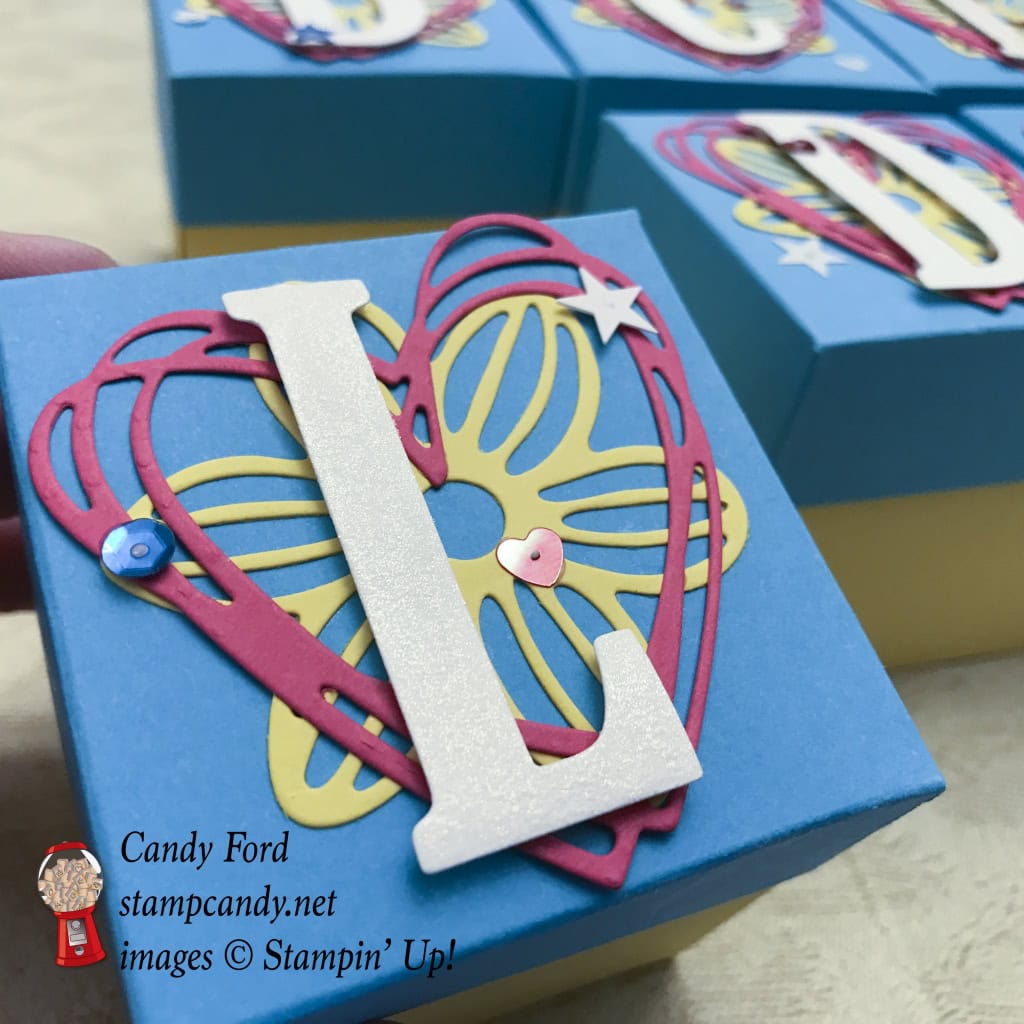
These are by far the fastest and easiest gift boxes I know how to make, and I make them all the time in various sizes. I made these for members of my team, the Candy Hearts, who attended OnStage (Stampin’ Up!’s semiannual convention type event) last weekend. In each box I put a pair of earrings with photos of candy conversation hearts on them. I didn’t use a single stamp on these boxes. Instead I used dies from the May Flowers Framelits, Sunshine Wishes Thinlits, and Large Letters Framelits.
Here’s what I made:
Here’s what I did:
First I determined the size of the box, which was 3″ wide (side to side) x 3″ deep (front to back ) x 3″ high (top to bottom.)
Cut and scored with my Stampin’ Trimmer:
- Daffodil Delight card stock (CS) to 9″ x 9″, then scored 3″ from each side
- Tempting Turquoise CS to 5-1/16″ x 5-1/16″, then scored 1″ from each side
- See diagram below
Die cut using the May Flowers Framelits:
- flowers from Daffodil Delight CS scraps
Die cut using the Sunshine Wishes Thinlits:
- hearts from Melon Mambo CS scraps
Die cut using the Large Letters Framelits:
- each person’s first initial from Whisper White CS scraps, then covered it with Clear Wink of Stella (WOS) – Actually I applied the WOS after the letter was adhered to the box lid, but I recommend doing it beforehand. No matter how careful I was, I still got some WOS on the CS pieces below it.
Cut with Paper Snips:
- along one score line on each side of the Daffodil Delight CS box, only to the the first score line
- along one score line on each side of the Tempting Turquoise CS lid, only to the the first score line
- See diagram below
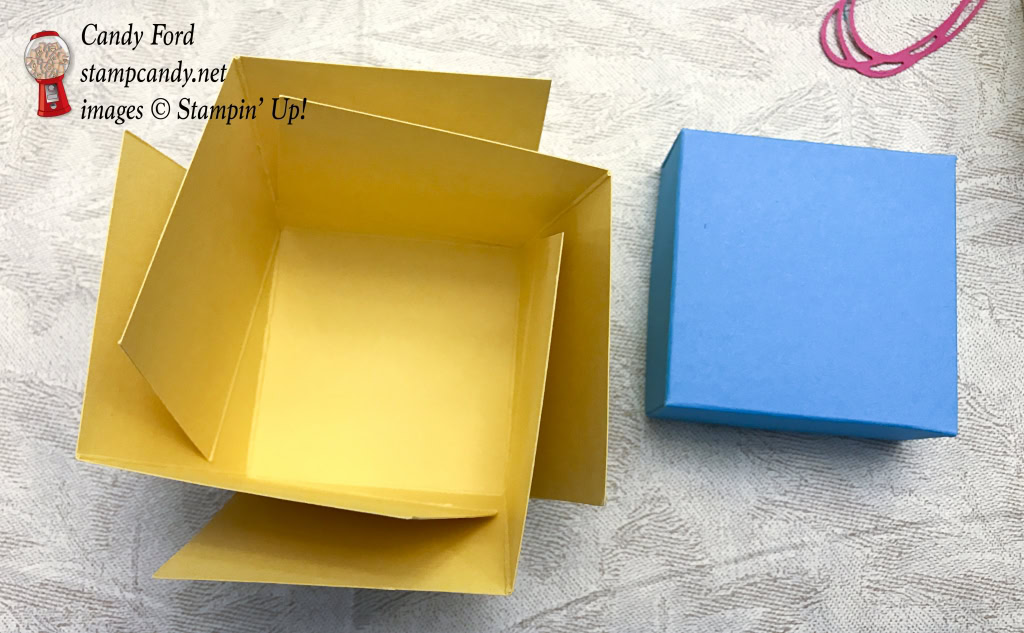
Assembled the gift boxes:
- folded up sides of lid and glued in place, with small tabs inside
- folded up sides of box, inserted earrings, and put lid on top to hold the sides up – You can glue the sides of the box, but I prefer to let them open up when the lid is removed (see photo below)
- Daffodil Delight flower glued onto box lid
- Melon Mambo heart glued over flower
- Whisper White letter adhered over heart and flower with Stampin’ Dimensionals
- sequins glued to lid – I put 3 sequins on each lid, and tried to make the placement look random
Here are the diagrams:
Score along dotted lines. Cut along solid lines.

Box Template

Lid Template
Here’s what I used:
Click on the images for more details and to purchase.
Retiring items are available through May 31, 2017 OR while supplies last. Many items are marked down, up to 50% off. So get them now while you still can. Please go to my online store and use the Host Code below.
Click here for the pdf.
Click here for the sortable Excel spreadsheet.
Click here to see the Retiring List in my online store.
Email me with any questions: candy@stampcandy.net
April Host Code
HV6MJT2X
Use the Host Code on online orders less than $150. See how to use a Host Code here.
Online orders of $75-149.99 placed with the Host Code will receive the gift of the month!
Online orders of $150 or more will automatically receive the gift of the month! Do not use the Host Code.
April’s gift is a pack of Urban Underground Embellishments! Each pack contains 24 brushed silver embellishments – 8 each of 3 designs. (I can ship within US only.)
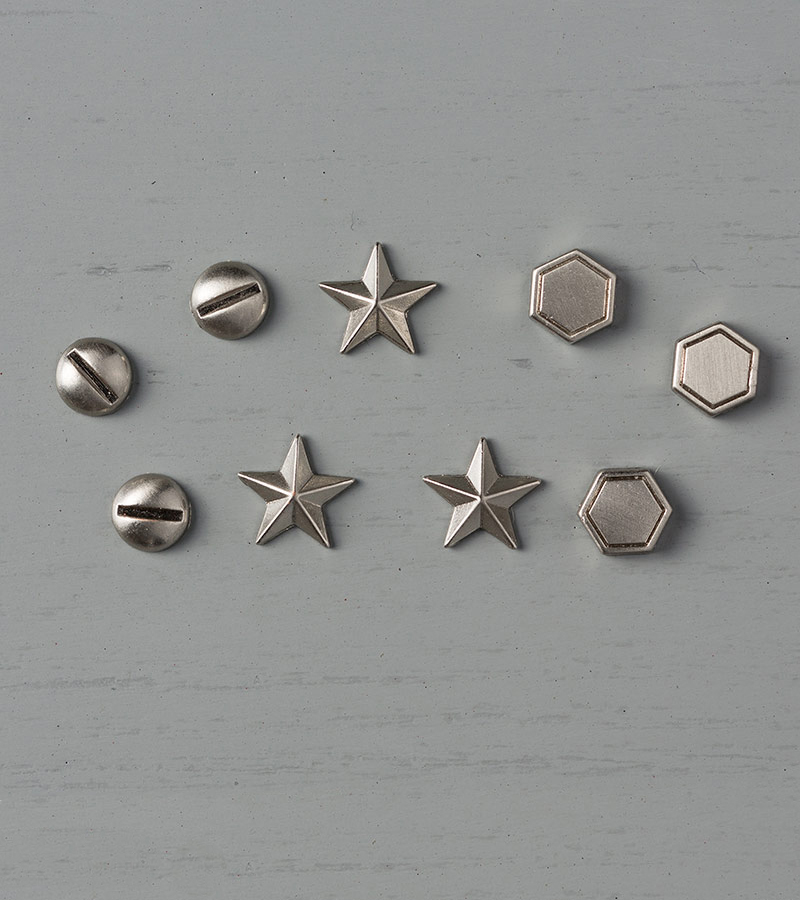
Urban Underground Embellishments © Stampin’ Up!
Click here to shop my online store!

Gum Ball Rewards
 You always earn a Gum Ball for every $50 you spend on an order with me. Earn 10 Gum Balls and I’ll send you a free stamp set of your choice! See the Gum Ball Rewards page for details.
Click here to shop my online store!
Thanks for stopping by today, and Sweet Stamping!

Apr 11, 2017 | Cards, Gallery, Occasions |
I have fallen in love with the Falling In Love Designer Series Paper. (Have I said that before?) Its soft, calming colors and beautiful images just make me feel all warm and fuzzy. I used it, along with the So In Love bundle (So In Love stamp set and So Detailed Thinlits Dies) and the Falling In Love Embellishments, to make today’s Happy Anniversary card.
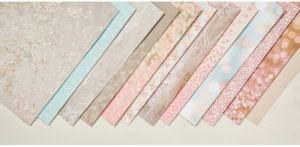
Falling In Love DSP © Stampin’ Up!
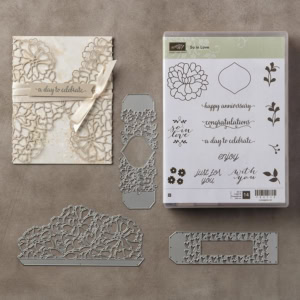
So In Love bundle © Stampin’ Up!
Scroll down to see the new list of retiring products from Stampin’ Up!

Today’s card is also being featured in Kylie Bertucci’s International Blog Highlight today. The theme is All Things Wedding. I would really appreciate it if you would take just a few seconds to click below and vote for my card. The top ten will get to participate in an international blog hop in May!

Here’s what I made:
Here’s what I did:
Cut and scored with my Stampin’ Trimmer:
- Soft Sky card stock (CS) to 8-1/2″ x 5-1/2″, and scored in half at 4-1/4″
- Very Vanilla CS to 4-1/8″ x 5-3/8″
- Falling in Love DSP to 4″ x 5-1/4″
- Very Vanilla CS to 3/4″ x 4-1/4″
- Soft Sky CS to 1″ x 4-1/4″
Die cut using the So Detailed Thinlits:
- lace piece from a piece of Very Vanilla CS
Notched with the Banner Triple Punch:
- one end of the 3/4″ Very Vanilla CS strip
- one end of the 1″ Soft Sky CS strip
Stamped using the So In Love stamp set:
- sentiment in Sahara Sand ink onto the 3/4″ Very Vanilla CS strip
Assembled card:
- lacy die cut glued to the DSP, wrapping the solid part around to the back, and gluing only the lacy part to the front
- Very Vanilla strip glued to the Soft Sky Strip, lining up the notched ends as shown
- notched strips glued to the DSP, over the die cut, and any extra trimmed off the left side with Paper Snips
- DSP glued to Very Vanilla CS
- Very Vanilla CS glued to Soft Sky card base
- Falling In Love Embellishment adhered to the sentiment strip with Mini Glue Dots
Make sure you head over to Kylie’s blog to vote for my project, and to see all the great projects being featured. I would love to be chosen to participate in her international blog hop! Thanks so much!!!
Here’s what I used:
Click on the images for more details and to shop:
Here’s the official Retiring List from Stampin’ Up!:
Items are available through May 31, 2017 OR while supplies last. Many items are marked down, up to 50% off. So get them now while you still can. Please go to my online store and use the Host Code below.
Click here for the pdf.
Click here for the sortable Excel spreadsheet.
Click here to see the Retiring List in my online store.
April Host Code
HV6MJT2X
Use the Host Code on online orders less than $15o. See how to use a Host Code here.
Online orders of $75-149.99 placed with the Host Code will receive the gift of the month!
Online orders of $150 or more will automatically receive the gift of the month! Do not use the Host Code.
April’s gift is a pack of Urban Underground Embellishments! Each pack contains 24 brushed silver embellishments – 8 each of 3 designs. (I can ship within US only.)
Urban Underground Embellishments © Stampin’ Up!
Click here to shop my online store!
Gum Ball Rewards
You always earn a Gum Ball for every $50 you spend on an order with me. Earn 10 Gum Balls and I’ll send you a free stamp set of your choice! See the Gum Ball Rewards page for details.
Click here to shop my online store!
Thanks for stopping by today, and Sweet Stamping!
Apr 5, 2017 | Blog Candy, Blog Hop, Cards, Gallery, Occasions |
The Succulent Garden Designer Series Paper (DSP) has become one of my favorites. The colors are soft and serene, and the designs are just lovely. It’s even featured in the ICS Blog Hop banner below. Today’s card features it, along with the Oh, So Succulent stamp set, AND I’m giving away a pack of precut 4″ x 5-1/4″ pieces of it as Blog Candy! Scroll down for details on how to win.

Oh, So Succulent Bundle © Stampin’ Up!
I’ve probably mentioned this before, but I think it’s worth mentioning again – the Oh So Succulent stamp set is available in a bundle with the Succulent Framelits Dies to save you 10%!

Thank you for joining us for the Inspire, Create, & Share Blog Hop! This month the theme is Free for All! Every stop on the hop will feature a great project of the stamper’s choice. That means a lot of inspiration and fun ideas are in store for you as you hop along. In addition, be sure to check out how to win some blog candy! Every stop on the hop will have blog candy to give away.
Are you wondering how to enter to qualify to win the blog candy? Just subscribe to any of the blogs you want to follow and you will be entered to win that blog’s candy. Each blog on the hop will draw a name from their new subscribers to win their candy. Why subscribe? When you subscribe to a blog’s feed you will be notified every time there is a new post. You never have to miss out on any of the inspiration, fun or news.
Be sure to follow the hop all the way around to try to win as many as you can! And, of course, to see all the wonderful projects being shared by the hoppers.
Here’s what I made for today’s ICS Blog Hop:

The card’s layout is very simple and versatile. I chose to line up all the layers at the top right corner of the card base, but you could line them up at any of the four corners, or you could center them all. The banner could go in either direction as well.
Scroll down to see how I made today’s card and what I used.
To follow the Blog Hop, click on the arrow, and you will be taken to the next stop, Janey Backer at Inspired Stamping.

Here’s what I did:
Cut and scored with my Stampin’ Trimmer:
- Whisper White Thick card stock (CS) to 4-1/4″ x 11″, then scored it in half at 5-1/2″
- Succulent Garden Designer Series Paper (DSP) to 4-1/8″ x 5-3/8″
- Whisper White CS to 3-1/2″ x 4-3/4″
- Succulent Garden Designer Series Paper (DSP) to 3-3/8″ x 4-5/8″
- Whisper White CS to 2-7/8″ x 4-1/8″
- Succulent Garden Designer Series Paper (DSP) to 2-3/4″ x 4″
- Whisper White CS to 5/8″ x 4-1/2″
- Calypso Coral CS to 1/2″ x 4-1/2″
Sentiment from the Oh, So Succulent stamp set:
- dusted Calypso Coral CS strip with the Embossing Buddy
- stamped sentiment in Versamark ink onto the strip
- poured White Stampin’ Emboss Powder over sentiment, then flicked off the excess
- set with the Heat Tool – be sure to hold small pieces like this with a wooden clothes pin or metal tweezers, to prevent burning your fingers
Notched using the Banner Triple Punch:
- the right end of the Calypso Coral CS strip with the sentiment
- one end of the Whisper White CS strip
Assembled the card:
- the five rectangular layers glued together as shown then glued to card base. See the note below the photo about the layout.
- plain end of Calypso Coral CS strip trimmed with Paper Snips so the sentiment feels centered, then glued onto Whisper White CS strip, lining up the notched ends
- sentiment banner glued onto card front then the excess hanging over the edge trimmed away with Paper Snips.
- NOTE: I lined up the left edge of the Calypso Coral strip with the left edge of the largest DSP layer. Then I trimmed away the excess Whisper White with my Paper Snips. In determining how far from the top to put the banner, I aimed for about 1/3 down the length of the smallest DSP layer. I just eyeballed it, but I was shooting for twice as much space beneath the banner as above it (the space on the smallest DSP layer.) I think it’s actually a little higher than that. But it was already glued down. And I was too lazy to redo it. So there.
Here’s what I used:
Click on the images for more details and to purchase.
Here’s how to enter the drawing:
On the right side of this page, just under my photo, you’ll see the Get Notified area. Enter your email address, check the Daily blog email updates/Newsletter options, and click on Subscribe. That’s it!
Be sure to subscribe/comment by midnight, Monday, April 10. I will draw the winning name Tuesday, April 11, and I will announce the winner on my Wednesday, April 12 blog post and mail your blog candy out right away! Thanks for hopping with us and remember to join us on the first Wednesday of the month for the Inspire, Create & Share Blog Hop!
RETIRING IN COLORS
DID YOU KNOW the 2015-2017 In Colors will retire at the end of May? That means that they will no longer be available to order on June 1. Don’t wait until then to order them. At some point before the end of May, they will become available only while supplies last. So get what you need now.
***ALL 5 INK REFILLS ARE ALREADY ON BACKORDER!***
ORDER YOURS TODAY SO YOU CAN GET THEM WHEN THEY COME IN!
SPEAKING OF RETIRING PRODUCTS
The Designer Series Papers always retire, too. So these products won’t be available after May 31. And just like the retiring In Colors above, at some point before the end of May, these items will become available only while supplies last. Don’t wait until the last minute. Get them now!
Gum Ball Rewards
You always earn a Gum Ball for every $50 you spend on an order with me. Earn 10 Gum Balls and I’ll send you a free stamp set of your choice! See the Gum Ball Rewards page for details.
Click here to shop my online store!
April Host Code
HV6MJT2X
Use the Host Code on online orders less than $15o. See how to use a Host Code here.
Online orders of $75-149.99 placed with the Host Code will receive the gift of the month!
Online orders of $150 or more will automatically receive the gift of the month! Do not use the Host Code.
April’s gift is a pack of Urban Underground Embellishments! Each pack contains 24 brushed silver embellishments – 8 each of 3 designs. (I can ship within US only.)
Urban Underground Embellishments © Stampin’ Up!
Thanks for stopping by today, and Sweet Stamping!
Apr 2, 2017 | Blog Hop, Cards, Gallery, Occasions |

I am honored today to help promote Autism Awareness by participating in the Autism Speaks April Blog Hop. The theme of this hop is, appropriately enough, Autism. We have created projects using the Autism Colors: red, blue and/or yellow.

Scroll down for details on this card and how I made it, but first…

…the lifelong cost per individual with Autism is estimated to be $3 – 5 million dollars.
Here’s why Autism Speaks:
Amy Koenders is a wonderfully talented Stampin’ Up! Demonstrator, and mother of a beautiful Autistic child, Emily. Please help Amy’s fund raising efforts by clicking here to go to her Autism Speaks Fundraiser page. It’s very easy, and it takes just a minute. If everyone gave just $1-2, it would make a world of difference.

Here’s the hop:
If you get lost at any time along the hop, refer to this list.
- Brian King
- Julie DiMatteo
- Sandi MacIver
- Mary Deatherage
- Lydia Fiedler
- Kim Vogel
- Amy Koenders
- Linda Geiger
- Lisa Curcio
- Candy Ford <—— YOU ARE HERE
- Lisa Pretto
- Jari Francis
- Jaimie Babarczy
- Beth Hooper
- Sue Prather
Thanks for hopping along with us today. I know you’ll enjoy all the projects from this talented group of stampers.
Please donate whatever you can, even if it’s just a little bit, to the mission of Autism Speaks – enhancing lives today and accelerating a spectrum of solutions for tomorrow. Every dollar helps!
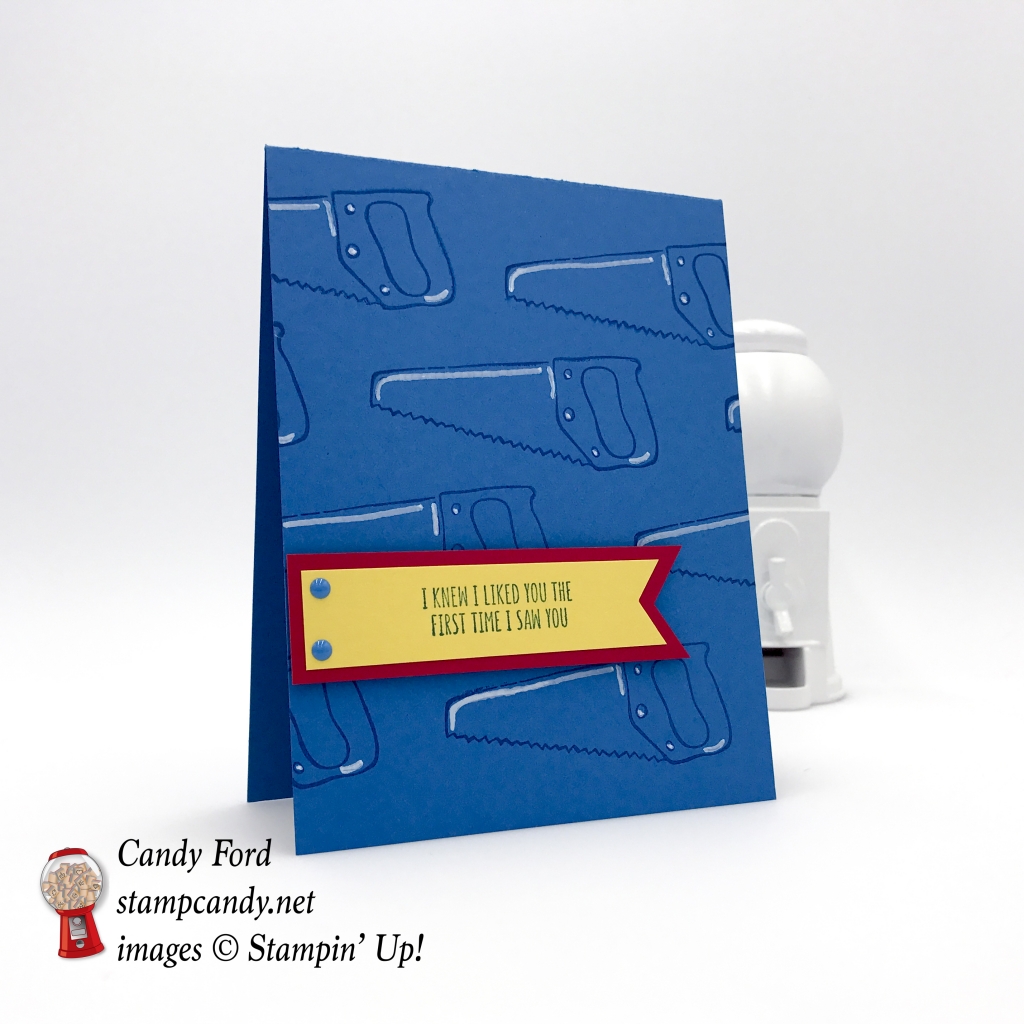
Here’s what I made:
I went to the Stampin’ Up! Brights family to choose three happy colors: Real Red, Pacific Point, and Daffodil Delight. I used the Nailed It stamp set – which is also available in a bundle with the Build It Framelits Dies to save you 10%!
Here’s what I did:
Cut and scored with my Stampin’ Trimmer:
- Pacific Point card stock (CS) to 4-1/4″ x 11″, then scored in half at 5-1/2″
- Real Red CS to 1″ x 4″
- Daffodil Delight CS to 3/4″ x 4″
- Daffodil Delight CS to 3-1/2″ x 4-3/4″ for inside
Stamped with the Nailed It stamp set:
- sentiment in Pacific Point ink onto Daffodil Delight CS strip
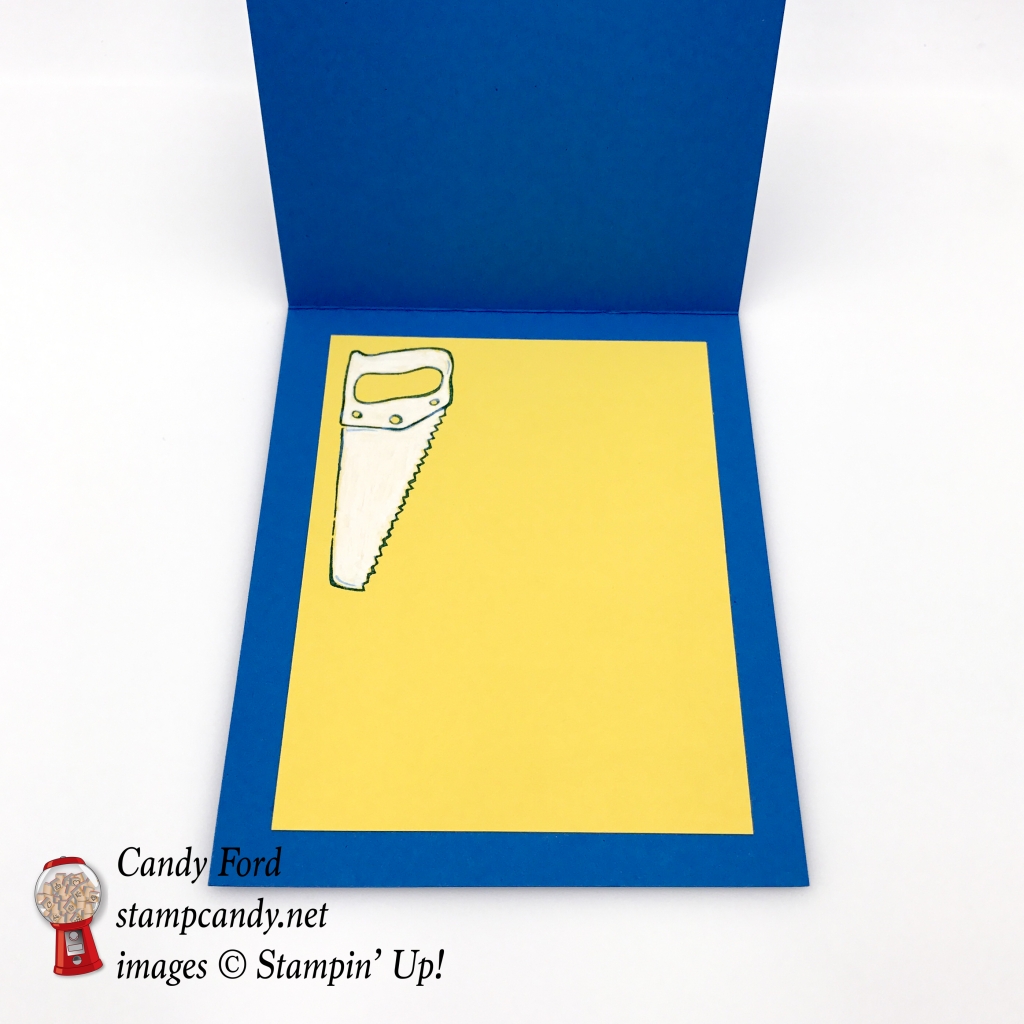
- saw image in Pacific Point ink onto the front of the card base
- saw image in Pacific Point ink onto the Daffodil Delight CS piece for the inside
Colored using the White Stampin’ Chalk Marker:
- highlights on saws on card front
- filled in saw on Daffodil Delight CS
Notched with Banner Triple Punch:
- right end of Daffodil Delight CS strip
- right end of Real Red CS strip
Assembled the card:
- trimmed left ends of Daffodil Delight CS strip and Real Red CS strip to desired length with Paper Snips, then glued them together
- two small Pacific Point dots applied to the sentiment strip
- sentiment strip adhered to card front with Stampin’ Dimensionals
- Daffodil Delight CS glued to inside of card
Here’s what I used:
Click on the images for more details and to purchase.
RETIRING IN COLORS
DID YOU KNOW the 2015-2017 In Colors will retire at the end of May? That means that they will no longer be available to order on June 1. Don’t wait until then to order them. At some point before the end of May, they will become available only while supplies last. So get what you need now.
SPEAKING OF RETIRING PRODUCTS
The Designer Series Papers always retire, too. So these products won’t be available after May 31. And just like the retiring In Colors above, at some point before the end of May, these items will become available only while supplies last. Don’t wait until the last minute. Get them now!
Gum Ball Rewards
You always earn a Gum Ball for every $50 you spend on an order with me. Earn 10 Gum Balls and I’ll send you a free stamp set of your choice! See the Gum Ball Rewards page for details.
Click here to shop my online store!
April Host Code
HV6MJT2X
Use the Host Code on online orders less than $15o. See how to use a Host Code here.
Online orders of $75-149.99 placed with the Host Code will receive the gift of the month!
Online orders of $150 or more will automatically receive the gift of the month! Do not use the Host Code.
April’s gift is a pack of Urban Underground Embellishments! Each pack contains 24 brushed silver embellishments – 8 each of 3 designs. (I can ship within US only.)
Urban Underground Embellishments © Stampin’ Up!
Thanks for stopping by today, and Sweet Stamping!

Mar 28, 2017 | Cards, Deals, Gallery, Occasions, Sale-A-Bration |
I love making cards with layers. But sometimes I try to mix things up a bit by making a card with no extra layers. For today’s card I used the Brushstrokes background stamp, Peekaboo Peach Ombre Ink Pad, and Tasty Treats Designer Washi Tape to create the background directly on the Whisper White Thick card stock (CS) card base.
Here’s what I made:


Here’s what I did:
Cut and scored with my Stampin’ Trimmer:
- Whisper White Thick card stock (CS) to 4-1/4″ x 11″, then scored in half at 5-1/2″
Stamped with the Brushstrokes stamp set:
- stripes, using Peekaboo Peach Ombre ink pad, onto the front of the card base
Stamped with the Suite Sentiments stamp set:
- sentiment in Watermelon Wonder ink onto Whisper White CS
Die cut using the Stitched Shapes Framelits:
Assembled the card:
- applied strips of washi tape on card perpendicular to the stamped stripes, then trimmed along the card edges with Paper Snips
- sentiment glued onto a Watermelon Wonder doily
- trimmed ends of Watermelon Wonder ribbon with Paper Snips, then adhered it to the card front with Fast Fuse
- adhered doily over the ribbon with Stampin’ Dimensionals
Here’s what I used:
Click on the images for more details and to purchase.
ONLY 3 MORE DAYS OF

Now through March 31, you will earn a FREE item from the Sale-a-bration catalog for each $50 you spend on an order. Sale-a-bration items are now available only while supplies last.
Here are the Sale-a-bration items still available:
The 3/8″ Metallic Ribbon Combo Pack photo doesn’t appear correctly below, so here it is:

Paper Pumpkin 3 month prepaid subscription is only $55, but only through March 31! It’s the easiest way to earn a FREE Sale-a-bration item! Get it here.
Take it to the next level with a 12-month prepaid subscription. Save over $2 per month with the everyday awesome price, earn Stampin’ Rewards, and instantly qualify for 4 FREE Sale-A-Bration items! Get it here.
RETIRING IN COLORS
DID YOU KNOW the 2015-2017 In Colors will retire at the end of May? But don’t wait until then to order them. At some point they will become available only while supplies last. So get what you need now.
SPEAKING OF RETIRING PRODUCTS
The Designer Series Papers always retire, too. None of us will know for sure until the retiring list comes out, but here are the DSPs and related products that I believe will be retiring at the end of May:
You always earn a Gum Ball for every $50 you spend on an order with me. Earn 10 Gum Balls and I’ll send you a free stamp set of your choice! See the Gum Ball Rewards page for details.
Click here to shop my online store!
March Host Code
BDF43VHE
Use the Host Code on online orders less than $15o. See how to use a Host Code here.
Online orders of $75-149.99 placed with the Host Code will receive the gift of the month!
Online orders of $150 or more will automatically receive the gift of the month! Do not use the Host Code.
March’s gift is a pack of Metallic Foil Doilies! Each pack contains 24 doilies: 6 each of 2 sizes in 2 colors.

Metallic Foil Doilies © Stampin’ Up!
Click here to shop my online store!
Thanks for stopping by today, and Sweet Stamping!


