May 12, 2018 | Baby, Gallery, Gift Wrap, Occasions, Parties |
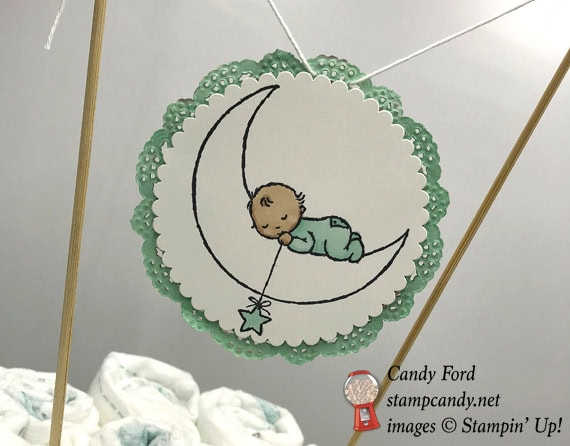
I recently made my very first diaper cake. I know, I know, they’ve been ubiquitous at baby showers for years now, but somehow I just never got around to making one. Until now. It was surprisingly easy. The hardest part was getting all those diapers bundled together without them going every which way. It helps to have an extra pair of hands for that step. Otherwise it was a piece of cake. <wink> I used the Moon Baby stamp set as well and the Pretty Kitty and Bella & Friends stamp sets, and the Whole Lot of Lovely Designer Series Paper (DSP.) I used Powder Pink and Pool Party to create a gender neutral cake, for times when you don’t know the baby’s gender, or for when you know there are a boy AND a girl.
Kittens and puppies seemed like an appropriate baby theme. I mean, they’re babies, too. So Pretty Kitty and Bella & Friends were the perfect stamp sets to use.
Here’s what I made:


Here’s what I did:
Cut and scored with my Stampin’ Trimmer:
- Whole Lot of Lovely Designer Series Paper (DSP) cut to 3″ x 12″, 4 pieces of one pattern for the bottom tier, and 3 pieces of another pattern for the top tier
Stamped with the Pretty Kitty stamp set:
- 6 cats in Memento black ink onto scraps of Whisper White card stock (CS)
Stamped with the Bella & Friends stamp set:
- 6 dogs in Memento black ink onto scraps of Whisper White CS
Stamped with the Moon Baby stamp set:
- 2 of the baby-on-moon images in Memento black ink onto scraps of Whisper White CS
Die cut using the Layering Circles Framelits:
- cats, dogs, and babies
- slightly larger circles from Powder Pink and Pool Party CS, to mat the stamped cat and dog images
Colored using Stampin’ Blends Markers:
- cats & dogs in Pink Pirouette and Pool Party
- babies in Pink Pirouette, Pool Party, Ivory, and Bronze
- one white doily in Pink Pirouette
- one white doily in Pool Party
- NOTE: I only colored the outer edges of the doilies, since most of the center would be covered up. I also learned – the hard way – to be sure to color the front side of the doily. The back side is too rough and will tear up the brush tip of your marker. Also, you can just use an ink pad to color the doilies.
Assembled the cake:
- rolled individual diapers and held them with rubber bands
- gathered enough diaper rolls together to create the bottom tier of the cake, and tied ribbon around to keep them together
- did the same thing to create the smaller top tier of the cake
- NOTE: I think I used about 50 diapers or so. It will depend on the diapers you use and on the size of your cake platter.
- glued together the lengths of DSP and wrapped around each cake tier
- glue the stamped images onto the larger die cut circles, then glued them onto the DSP strips
- glued the two doilies together, lining up the holes around the edges
- adhered a baby image to each side of the doilies using Stampin’ Dimensionals
- threaded a length of Solid Whisper White twine through the holes in the doilies at the top, and tied the ends to two wooden skewers
- poked the skewers down into the cake, careful not to puncture the diapers
Here are today’s colors:
You can click on each one to see all the products that come in that color!
Here’s what I used:
Click on these images for more details and to purchase.
Here’s some information you should check out:
Thanks for stopping by today, and Sweet Stamping!
May 7, 2018 | Decor, Food, Gallery, Gifts, Occasions, Parties, Retiring Products |
Today I’m sharing a super easy way to decorate a container for a party. I used the Picture Perfect Party Designer Series Paper, Bermuda Bay card stock, and Lemon Lime Twist ribbon. The colors in the paper look great with the multicolor gumballs in the jar.
I’ve had this jar for years, and I decorate it in different ways for different events. This is perfect for a fun birthday party, maybe for a child. I think I bought the jar at Target, or maybe T.J.Maxx or Home Goods.
I recommend using a small plastic scoop, so there aren’t a bunch of sticky little hands all over the gumballs. Don’t ask me how I learned that lesson.
Here’s what I made:


Here’s what I did:
Cut and scored with my Stampin’ Trimmer:
- Bermuda Bay card stock (CS) cut to 12″ x 4″ (2 pieces)
- Picture Perfect Party Designer Series Paper (DSP) cut to 6″ x 3-1/2″ (4 pieces)
- NOTE: I cut the top and bottom off the DSP pieces to have as much of the candles as possible.
Assembled the project:
- Bermuda Bay CS pieces wrapped around the jar and adhered with Tear & Tape, to each other and to the jar
- DSP pieces glued onto the CS, all the way around the jar
- tied a piece of Lemon Lime Twist Finely Woven Ribbon around the lid handle and tied it in a bow
Here are today’s main colors:
You can click on each one to see all the products that come in that color!
Here’s what I used:
Click on these images for more details and to purchase.
Here’s some stuff you should check out:
Thanks for stopping by today, and Sweet Stamping!
May 4, 2018 | Catalogs, Deals, Events, New Products, Open House, Parties, Retiring Products, Sales |
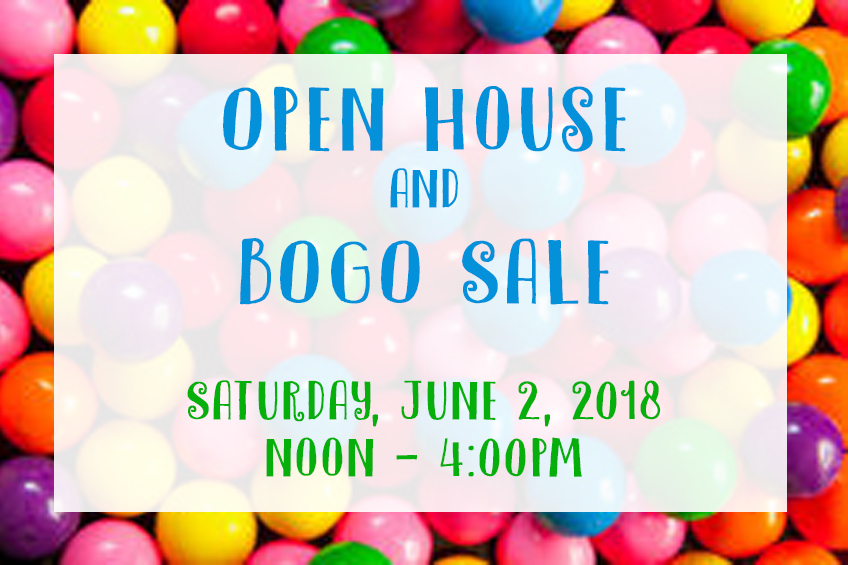
If you’ll be in the Atlanta area Saturday, June 2, 2018, you must stop by for my BOGO Yard Sale and Open House. The door opens at noon. You can drop in anytime between noon and 4pm. Of course, the closer to noon you arrive, the better your chances of getting all the BOGO sale goodies you want!
It’s free to attend, but please RSVP here so I’ll have enough of everything prepared.
VERY IMPORTANT: Park along the street (Woodcliff) behind our building. DO NOT part next to any of the units in the complex, or you will be towed and I will be fined. Thanks!
BOGO Yard Sale:
Why am I calling it a BOGO Yard Sale? Because you pay yard sale prices, plus you still get the Buy One Get One deal!
Usually at a BOGO Sale of this type, the BOGO Sale items are marked full retail price, then whatever you spend gets applied to an order from the catalog. This time I’m doing it a little differently.
I’m reclaiming my room upstairs, so I must make space. I have a LOT of great craft supplies that must go. So I’ve marked them down drastically – most items are at least 50% off, many even more than that. So you’ll save a ton of money on the yard sale items PLUS whatever you spend still gets applied to an order from the brand new 2018-2019 Stampin’ Up! Annual Catalog!
- shop my craft yard sale
- whatever you spend gets applied to an order of new items from the new catalog
- you only pay shipping and tax on the new items
- lots of retired Stampin’ Up! products, even the ones I’ve been holding onto because I love them so much!
- other brands are included in the BOGO Yard Sale including Martha Stewart, Tim Holtz, Anna Griffin, Sizzix, Cuttlebug, Darice, McGill, Creative Memories, and many more!
- have your new catalog order ready to save time ordering
- If you’ve ordered from me in the past year, I will send you a catalog in May. If not, you can get your catalog at the event. I’ll have the pdf version of the full catalog posted HERE on June 1.
A sea of stamps, still to be marked down to 50% or more off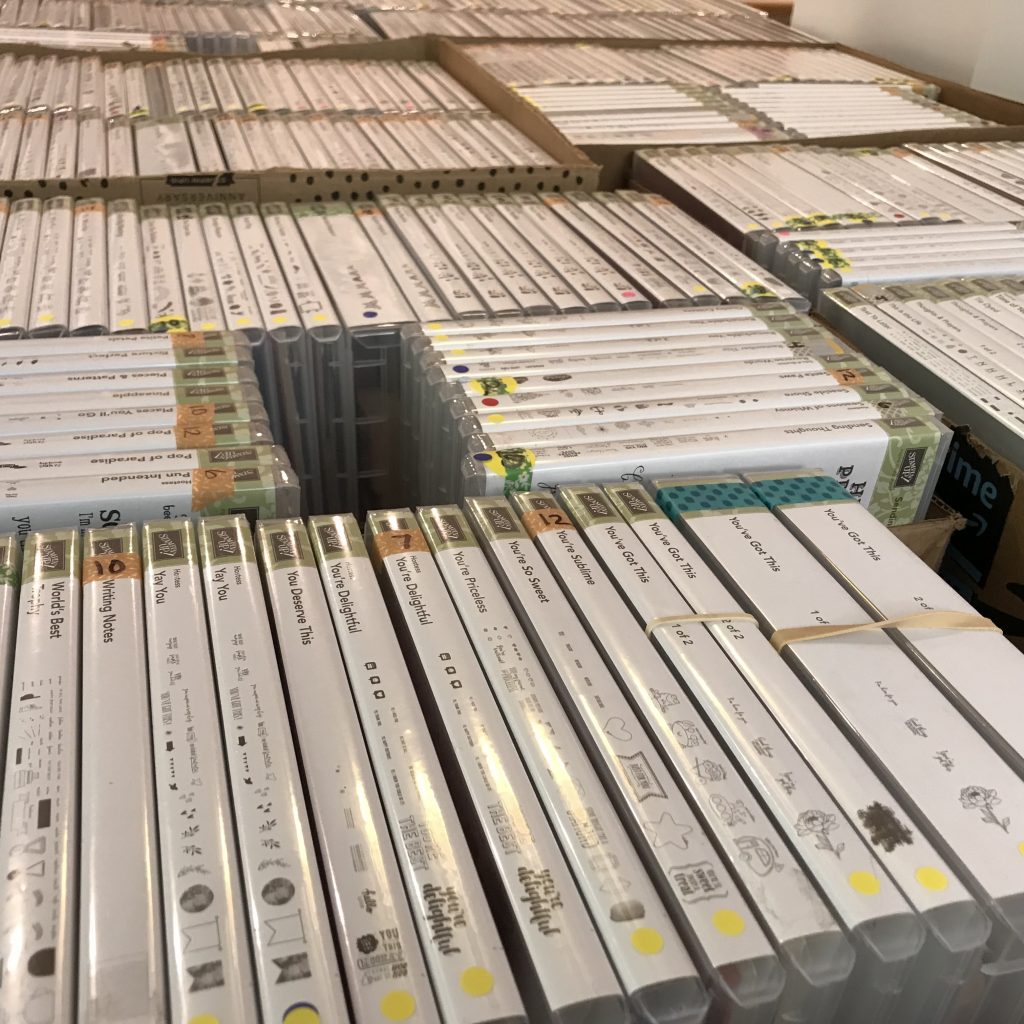
Open House:
- free Make & Take using new products
- see the new products, and lots of project ideas for inspiration
- get your free new catalog
- order from the brand new catalog
- sign up for live classes
- preorder online classes
- join my monthly stamp club and receive a free gift
- schedule a private class and receive a gift
- bring me a new customer and receive a gift
- subscribe to Paper Pumpkin and receive a gift
- get the starter kit – the ULTIMATE DEAL – and receive my welcome kit
- earn Gumball Rewards for a free stamp set of your choice!
- light refreshments
Here’s some other stuff you should check out:
Thanks for stopping by today, and Sweet Stamping!
Apr 27, 2018 | Boxes, Food, Gallery, Gifts, Parties |
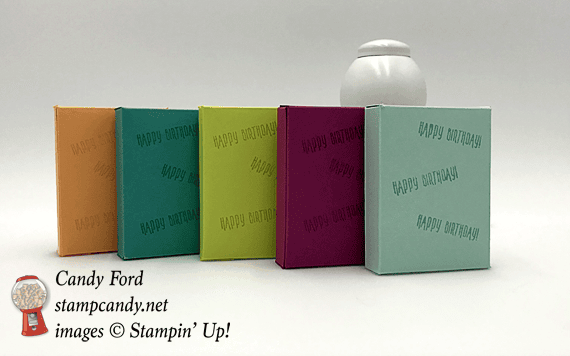
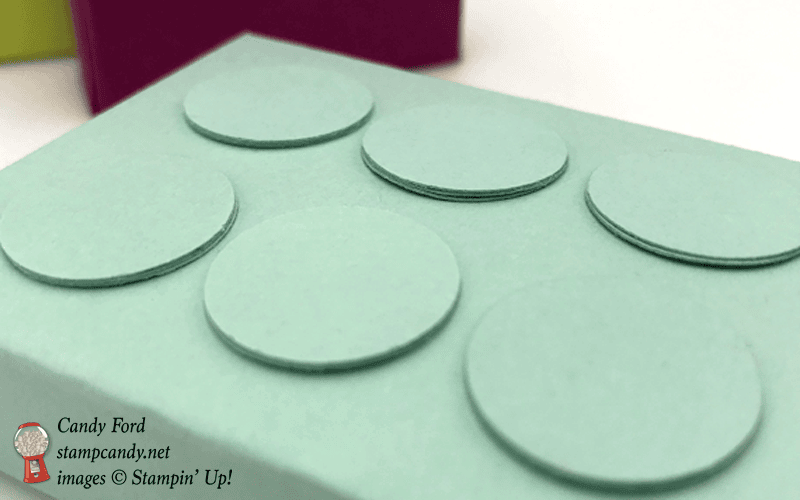
These cute little party favors for a child’s birthday party are really easy to make. It’s a simple box with some punched circles glued onto the front to resemble Lego blocks. The colors are from the Picture Perfect Party Designer Series Paper: Berry Burst, Lemon Lime Twist, Peekaboo Peach, Bermuda Bay, and Pool Party. I made them to coordinate with some other things I made for a presentation of projects for a child’s birthday party.
Here’s what I made:


Here’s what I did:
Cut and scored with my Stampin’ Trimmer:
- card stock (CS) cut to 6-3/8″ x 4-3/4″, then scored according to the diagram below
- along the 6-3/8″ side, scored at 5/8″, 2-7/8″ 3-1/2″, 5-3/4″, and 6-3/8″
- along the 4-3/4″ side, scored at 1/2″, 1-1/8″, and 4-1/8″
Cut using Paper Snips:
- the cardstock according to the diagram below (after burnishing all the score lines with a Bone Folder)
- cut away the green areas
- cut solid lines

Stamped with the Picture Perfect Birthday stamp set:
- Happy Birthday onto the back of the boxes in the same color ink
Cut using the 3/4″ Circle Punch:
- 18 circles from the same color CS for each box
Assembled the boxes:
- burnished the folds in the card stock with a Bone Folder, before cutting with Paper Snips
- 3 punched circles glued together – make 6 of these
- box glued together up one side (flap at far right glued to the inside of the flap at far left)
- bottom flaps of box glued together
- 6 circle stacks glued onto the front of the box
- inserted raisins and closed box
Here are today’s colors:
You can click on each one to see all the products that come in that color!
Here’s what I used:
Click on these images for more details and to purchase.
Here’s some stuff you should know:
Thanks for stopping by today, and Sweet Stamping!
Apr 16, 2018 | Boxes, Gallery, Gift Wrap, Gifts, Parties, Retiring Products |
It’s a party! My presentation at the Spring Stamp-Along last week was all about party favors, food, and decor for five different types of party. One type was a birthday party for an adult. I haven’t seen the Over the Hill birthday theme used in a long time, so I decided to go with that. I used black and silver for all the projects. The Five For All stamp set has funny birthday sentiments perfect for this theme.
Today I’m sharing a box that could hold a small gift or a party favor. Don’t you just love the Mini Pizza Boxes? And they’re carrying over to the new catalog! Unfortunately, the Five For All stamp set is not. It’s one of the products that will be retiring, so it will be available through May 31, or while supplies last. See all the retiring products HERE.
Here’s what I made:


Here’s what I did:
Cut and scored with my Stampin’ Trimmer:
- Silver Foil Sheet cut to 3″ x 3″
- Basic Black card stock (CS) cut to 2-1/2″ x 2-1/2″
Stamped with the Five For All stamp set:
- sentiment in Versamark ink onto the Basic Black CS square, then heat embossed in silver
Painted using Archival Basic Black ink refill:
- the outside of the box – let it dry completely before adhering anything to it
- NOTE: I used an old paintbrush. The ink did stain it, but did not hurt it at all.
- NOTE: I used an alcohol pad to remove any ink from the inside of the box.
Assembled the project:
- folded the box together
- adhered the sentiment onto the Silver Foil Sheet piece using Tear & Tape
- adhered the Silver Foil Sheet to the top of the box using Stampin’ Dimensionals, being sure to leave a “tunnel” for the ribbon
- ran ribbon under the Silver Foil Sheet, wrapped it around the box, and tied it on the side
- applied Metallic Enamel Shapes (silver dots) to the top of the box around the Silver Foil Sheet, to resemble a marquis
Here are today’s colors:
You can click on each one to see all the products that come in that color!
Here’s what I used:
Click on these images for more details and to purchase.
Here’s some stuff you should know:
Thanks for stopping by today, and Sweet Stamping!
Apr 15, 2018 | Baby, Food, Gallery, Gifts, Parties, Promotions, Retiring Products |
Today’s project is made with several retiring products: World’s Best Trophy stamp set, Archival Basic Black ink pad, and card stock in Chocolate Chip, Pink Pirouette, and Soft Sky. Chocolate Chip is the perfect reddish brown color for a cigar. I wrapped it around large rolls of Sweetarts candies. The cigar bands are strips of card stock with 1″ punched circles. I didn’t have a stamp set that included “boy,” although there are a few that have the word “girl.” So I used the “son” and “daughter” from the World’s Best Trophy stamp set. These make great party favors for a baby shower. You can change the band color and sentiment for any occasion.
You can see everything that is retiring HERE. Everything is available through May 31, or while supplies last.
Here’s what I made:


Here’s what I did:
Cut and scored with my Stampin’ Trimmer:
- Chocolate Chip card stock (CS) cut to 3″ x 7-1/4″ (one for each cigar)
- Pink Pirouette CS cut to 3″ x 3/4″
- Soft Sky CS cut to 3″ x 3/4″
Stamped with the World’s Best Trophy stamp set:
- son in Basic Black ink onto a scrap of Soft Sky CS
- daughter in Basic Black ink onto a scrap of Pink Pirouette CS
Cut using the 1″ Circle Punch:
Assembled the cigars:
- burnished the Chocolate Chip CS pieces, and both of the CS strips, with a Bone Folder to soften and curl them
- wrapped the Chocolate Chip CS pieces around rolls of SweetTarts candy and secured using Tear & Tape
- wrapped the CS strips around the cigars and secured using Tear & Tape
- adhered the punched sentiments onto the cigar bands using Tear & Tape
Here are today’s colors:
You can click on each one to see all the products that come in that color!
Here’s what I used:
Click on these images for more details and to purchase.
Here’s some stuff you should know:
Thanks for stopping by today, and Sweet Stamping!