Feb 23, 2019 | Cards, Gallery, Occasions, Sale-A-Bration |
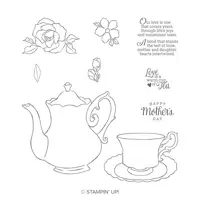
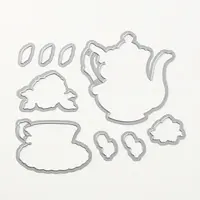
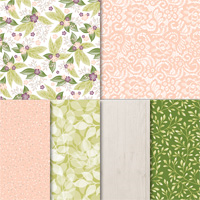
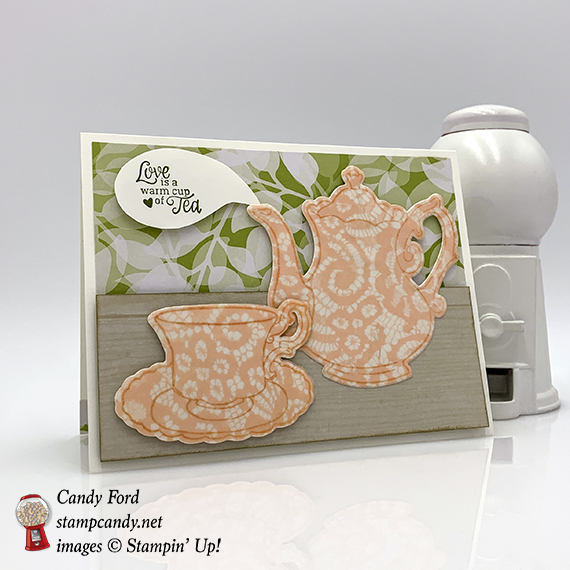
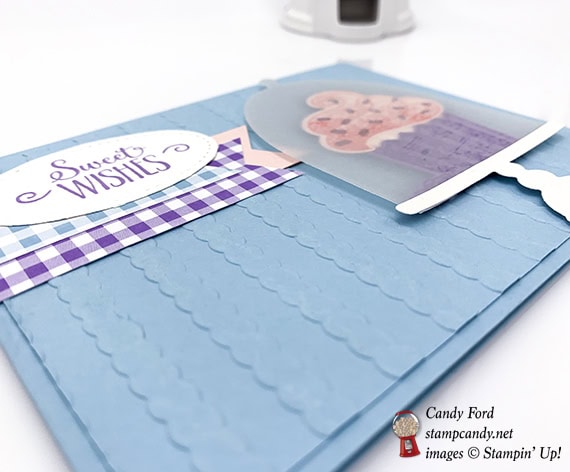
For today’s card I tried to create a scene of a teapot and cup & saucer on a wooden table. I thought the lacy pink vellum from the Floral Romance Designer Series Paper was a perfect pattern for a china tea set. The china pieces and sentiment are from the Tea Together stamp set from the Occasions catalog, and the coordinating Tea Time Framelits Dies. The dies are a Sale-a-bration item and are available for free with a $100 order, but only through March 31 or while supplies last, so don’t wait.
Here’s what I made:
Very often I put nothing on the inside of my cards, leaving plenty of room for a handwritten note. But lately I’ve been more in the mood to adorn the inside, even if it’s just with a strip of paper, like this one: 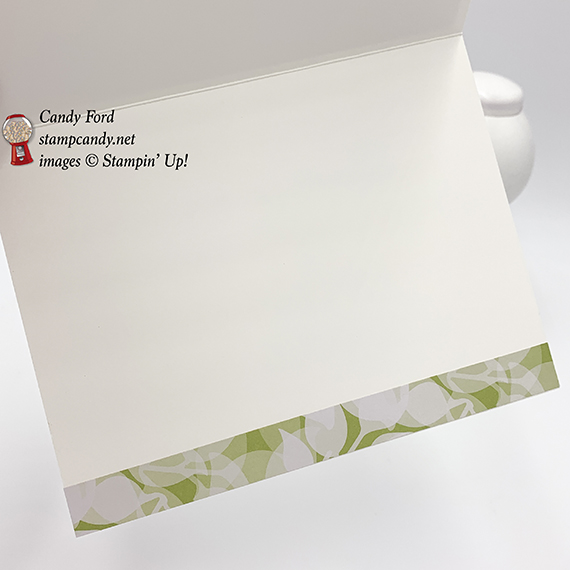 S
S
Here’s what I did:
Cut and scored with my Stampin’ Trimmer:
- Whisper White Thick card stock (CS) cut to 5-1/2″ x 8-1/2″, then scored in half at 4-1/4″
- Floral Romance Designer Series Paper (DSP) cut to 5-1/4″ x 2-1/2″ (leaves)
- DSP (leaves) cut to 5-1/2″ x 1/2″
- DSP (wood) cut to 5-1/4″ x 2″
Stamped with the Tea Together stamp set:
- teapot and cup images in Petal Pink ink onto the lacy vellum DSP
- NOTE: the Stamparatus makes this much easier since the stamps tends to slide around on the vellum
- sentiment in Mossy Meadow ink onto a scrap of Whisper White Thick CS
Die cut using the Tea Time Framelits:
- the stamped vellum teapot and cup
- teapot and cup shapes from a scrap of Whisper White Thick CS, to back the vellum ones
Colored using a Sponge Dauber:
- the edges of the wood DSP layer in Sahara Sand ink, to give the “table” some dimension
Cut using Paper Snips:
- the stamped sentiment so look like steam coming out of the teapot
- I first laid the scrap of CS with the sentiment under the teapot and drew the shape with a pencil
Assembled the card:
- burnished the fold in the card base with a Bone Folder
- small DSP strip glued onto the inside bottom edge of the card base
- larger leaves DSP layer glued onto the front of the card base
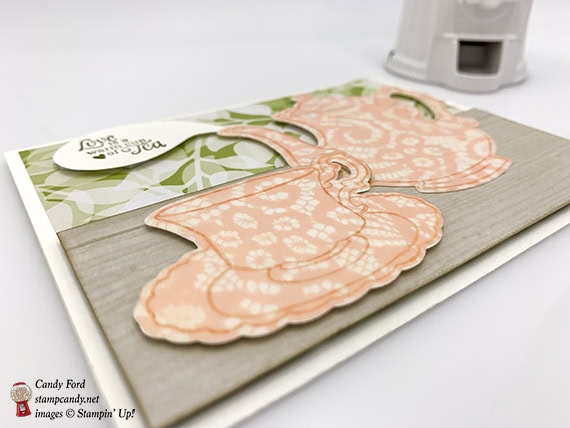
- vellum teapot and cup glued onto the Whisper White CS versions of the same shapes
- NOTE: I applied glue to the entire front of the Whisper White die cut shapes, then applied the vellum on top. If the glue is everywhere, you don’t notice it through the vellum. Be very careful when doing this step. I accidentally got a cat hair between two of the layers, which luckily doesn’t show in the photos.
- teapot glued onto the wood DSP layer
- cup adhered onto the wood DSP layer using Stampin’ Dimensionals (if you think this makes the card too thick, you can glue the cup onto the layer)
- wood DSP/teapot adhered onto the front of the card base using Stampin’ Dimensionals
- sentiment adhered onto the leaves DSP layer using Stampin’ Dimensionals, with the tip tucked under the teapot spout.
S
Here are today’s colors:
You can click on each one to see all the products that come in that color!
S
Here’s what I used:
Click on these images for more details and to purchase.
The Tea Time Framelits Dies are free with a $100 purchase, through March 31 or while supplies last.
S
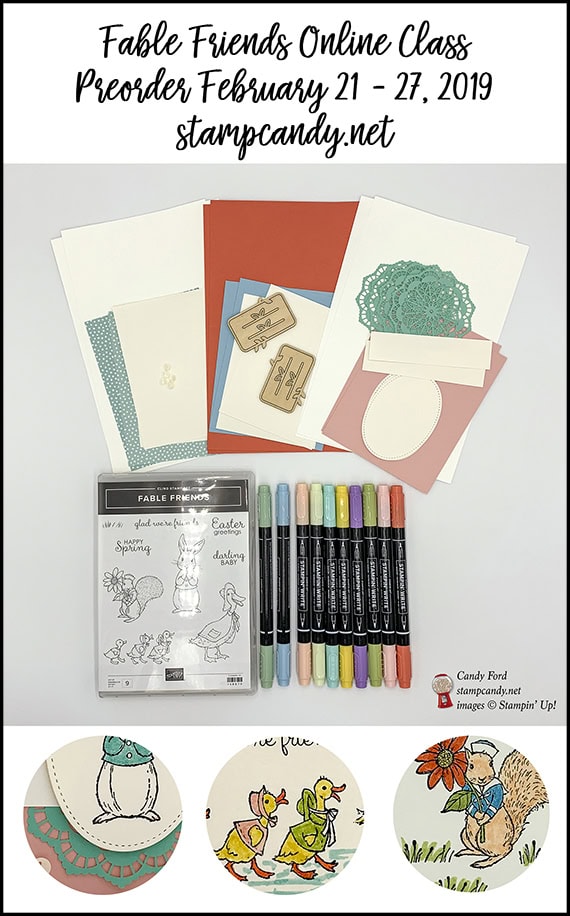
Preorder the Fable Friends Online Class by February 27!
- Make 6 adorable cards at home in your PJs!
- 2 each of 3 designs
- Perfect for Spring occasions
- Limited spots available!
Click on the image below for details:
S
Here are some helpful links to check out:

S
Thanks for stopping by today, and Sweet Stamping!

Feb 19, 2019 | Cards, Gallery, Sale-A-Bration |
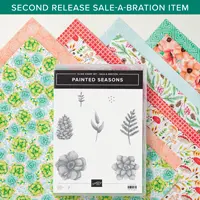
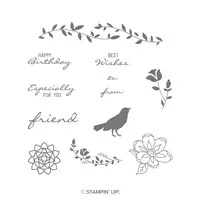
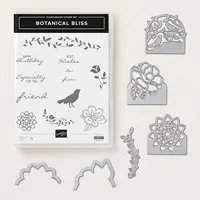
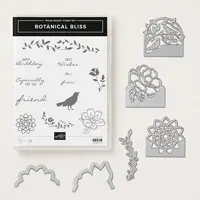
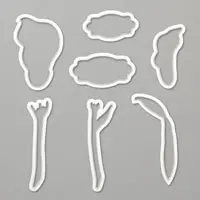
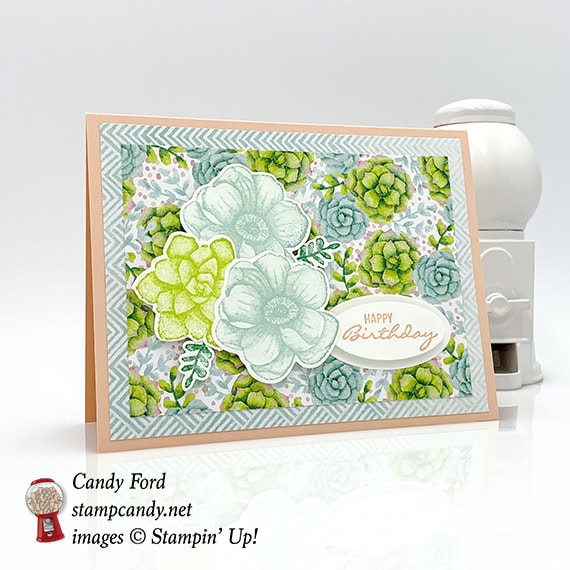
On March 1 some new products will become available to purchase, and they all coordinate with Sale-a-bration products. Today’s card is made with some of those items: the Painted Seasons stamp set and Designer Series Paper (a new SAB item) and the coordinating Four Seasons Framelits Dies. This gorgeous group of products is good year round, hence the name. The paper has designs for all four seasons, and so does the stamp set. The one thing the stamp set doesn’t have is sentiments, but it pairs beautifully with sentiment stamps you may already have. I used one from the Botanical Bliss stamp set (which is another beautiful stamp set that is available in a bundle with the coordinating dies to save 10%.)
S
Here’s what I made:
 S
S
Here’s what I did:
Cut and scored with my Stampin’ Trimmer:
- Petal Pink card stock (CS) cut to 5-1/2″ x 8-1/2″, then scored in half at 4-1/4″
- Painted Seasons Designer Series Paper (DSP) cut to 5-1/4″ x 4″
- DSP (floral pattern) cut to 4-3/4″ x 3-1/2″
- Whisper White CS cut to 5-1/4″ x 4″ for the inside of the card base
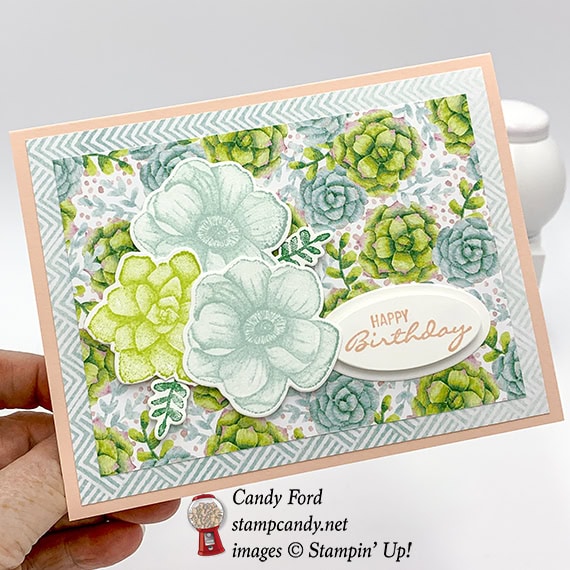
Stamped with the Painted Seasons stamp set:
- 2 larger flower in Pool Party ink onto a scrap of Whisper White Thick CS
- 1 succulent in Lemon Lime Twist ink onto a scrap of Whisper White Thick CS
- 2 small leaves in Call Me Clover ink onto a scrap of Whisper White Thick CS
Stamped with the Botanical Bliss stamp set:
- sentiment in Petal Pink ink onto a scrap of Whisper White Thick CS
Die cut using the Four Seasons Framelits:
- flowers, succulent, and leaves
Die cut using the Layering Ovals Framelits:
- sentiment
- a slightly larger oval from a scrap of Whisper White CS
Assembled the card:
- burnished the fold in the card base with a Bone Folder
- larger DSP layer glued onto the front of the card base
- floral DSP layer glued onto the larger DSP layer
- sentiment adhered onto the larger oval using Stampin’ Dimensionals
- sentiment stack glued onto the floral DSP layer
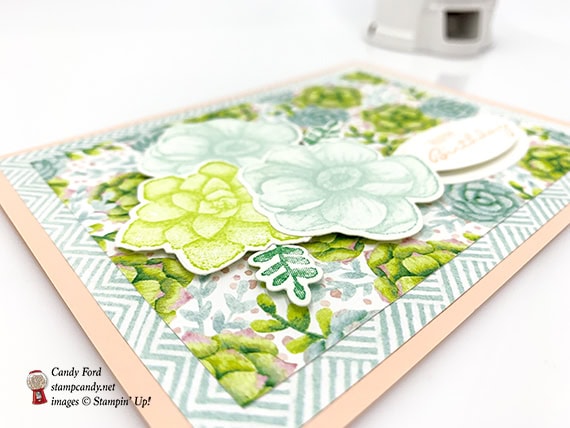
- die cut pieces glued together in a cluster, then adhered onto the floral DSP layer using Stampin’ Dimensionals, both regular and mini
- Whisper White CS glued onto the inside of the card base
S
Here are today’s colors:
You can click on each one to see all the products that come in that color!
S
Here’s what I used:
Click on these images for more details and to purchase.
S
Here is this week’s online class! Only 1 day left to order!
Happiness Blooms Online Class
- make 26 colorful cards at home in your PJs!
- 2 each of 10 designs, plus 6 individual card designs
- Preorder February 14-20, 2019
- limited spots available
Click on the image below for details:

S
Here are some helpful links to check out:
S
Thanks for stopping by today, and Sweet Stamping!
Feb 17, 2019 | Cards, Gallery, Sale-A-Bration |
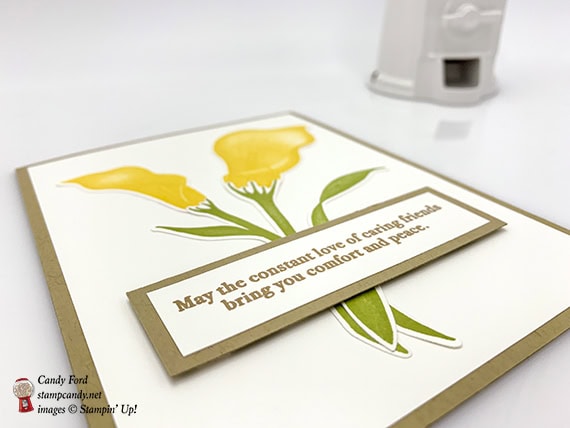
The Lily Framelits Dies will be available in March. They coordinate with the Lasting Lily stamp set, which has been very popular. It’s really gorgeous and has lots of sentiments for times when you just don’t know what to say. And with the dies, you can do so much more with the stamps! I made a pretty simple card for today. I wanted it to be calm and soothing.
S
Here’s what I made:

 S
S
Here’s what I did:
Cut and scored with my Stampin’ Trimmer:
- Crumb Cake card stock (CS) cut to 4-1/4″ x 11″, then scored in half at 5-1/2″
- Whisper White CS cut to 4″ x 5-1/4″ (2 pieces)
- Crumb Cake CS cut to 3-1/4″ x 1″
- Whisper White CS cut to 3″ x 3/4″
Stamped with the Lasting Lily stamp set:
- 2 flowers in Daffodil Delight ink onto a scrap of Whisper White CS
- 2 stems and 1 leaf in Pear Pizzazz ink onto a scrap of Whisper White CS
- sentiment in Crumb Cake ink onto the 3″ x 3/4″ Whisper White CS
Die cut using the Lily Framelits:
- 2 flowers, 2 stems, and 1 leaf
Assembled the card:
- burnished the fold in the card base with a Bone Folder
- one 4″ x 5-1/4″ Whisper White CS glued onto the front of the card base, and the other one glued onto the inside of the card base
- each stem glued onto a flower
- flowers and leaf glued onto the Whisper White CS layer
- sentiment glued onto the 3-1/4″ x 1″ Crumb Cake CS layer
- Crumb Cake CS layer adhered over the stems using Stampin’ Dimensionals

S
Here are today’s colors:
You can click on each one to see all the products that come in that color!
S
Here’s what I used:
Click on these images for more details and to purchase.
The Lily Framelits will be available to purchase March 1 – 31, 2019, or while supplies last.
S
Here is this week’s online class!
Happiness Blooms Online Class
- make 26 colorful cards at home in your PJs!
- 2 each of 10 designs, plus 6 individual card designs
- Preorder February 14-20
- limited spots available
Click on the image below for details:
S
Here are some helpful links to check out:
S
Thanks for stopping by today, and Sweet Stamping!
Feb 16, 2019 | Cards, Gallery, Sale-A-Bration |
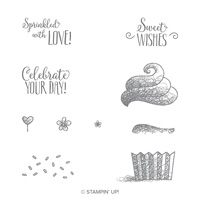
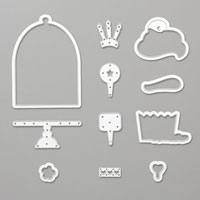
The Hello Cupcake stamp set is free with a $50 purchase through Sale-a-bration. On March 1, a coordinating set of dies, the Call Me Cupcake Framelits Dies, will be available to purchase. The dies make the stamp set so much more versatile! Check out the card I made for today in pastels hues, Balmy Blue, Highland Heather, Powder Pink, and Flirty Flamingo. Isn’t it just the sweetest?


S
Here’s what I made:

 S
S
Here’s what I did:
Cut and scored with my Stampin’ Trimmer:
- Balmy Blue card stock (CS) cut to 11″ x 4-1/4″, then scored in half at 5-1/2″
- Balmy Blue CS cut to 5-1/4″ x 4″
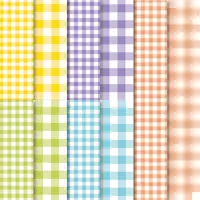
- Gingham Gala Designer Series Paper (DSP) cut to 4″ x 1″ (Highland Heather)
- DSP cut to 4″ x 3/4″ (Balmy Blue)
- Powder Pink CS cut to 4″ x 1″
- Whisper White CS cut to 5-1/4″ x 4″ for the inside of the card
Stamped with the Hello Cupcake stamp set:
- sentiment in Highland Heather ink onto a scrap of Whisper White CS
- cupcake top in Flirty Flamingo ink onto a scrap of Powder Pink CS
- sprinkles in Highland Heather ink onto the cupcake top
- cupcake middle in Powder Pink ink onto a scrap of Powder Pink CS
- cupcake base in Highland Heather ink onto a scrap of Highland Heather CS
Die cut using the Call Me Cupcake Framelits:
- cupcake top, cupcake middle, and cupcake base images
- dome from a scrap of Vellum (I trimmed about 1/8″ off the bottom of the dome so it would fit better onto the layer.)
- cake stand from a scrap of Glossy White CS
Die cut using the Stitched Shapes Framelits:
Embossed using the Striped Scallops embossing folder:
Cut using the Banner Triple Punch:
- one end of the Powder Pink CS strip and the 2 DSP strips
Assembled the card:
- burnished the fold in the card base with a Bone Folder
- embossed Balmy Blue CS layer glued onto the front of the card base
- 3 punched strips glued together, then glued over the Balmy Blue CS layer, then any extra trimmed off the edge of the card base
- sentiment glued over the strips
- cupcake top, middle, and base pieces glued together
- glue spread all over the top of the cupcake pieces using a sponge dauber, then adhered the dome over the top. If the glue is on the entire piece it won’t be noticeable through the vellum, like it would if there were just a few dots of glue.
- cake stand glued onto the bottom of the dome
- cupcake & cake stand adhered onto the Balmy Blue CS layer using Stampin’ Dimensionals, putting dimensionals only on the back of the cupcake and cake stand, so they won’t be seen through the vellum
- Whisper White CS glued onto the inside of the card base
S
Here are today’s colors:
You can click on each one to see all the products that come in that color!
S
Here’s what I used:
Click on these images for more details and to purchase.
The Call Me Cupcake Framelits will be available to purchase March 1 – 31, 2019, or while supplies last.
Here is this week’s online class!
Happiness Blooms Online Class
- make 26 colorful cards at home in your PJs!
- 2 each of 10 designs, plus 6 individual card designs
- Preorder February 14-20
- limited spots available
Click on the image below for details:
S
Here are some helpful links to check out:
Thanks for stopping by today, and Sweet Stamping!
Feb 13, 2019 | Cards, Gallery, Sale-A-Bration |
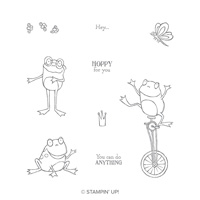
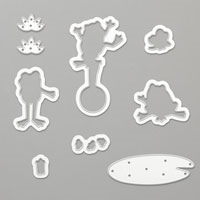
The So Hoppy Together stamp set has been a very popular Sale-a-bration item. I mean, those frogs are a hoot, but they aren’t the only cute and funny critters in the set. Check out that dragonfly in the upper right corner – pretty funny, huh? I’m thrilled that Stampin’ Up! is coming out with the coordinating Hop Along Framelits Dies. You can do so much more with the stamp set when the images are so easy to cut out. The dies will be available in March, so be sure to get the stamp set now, if you haven’t already. It’s free with a $50 order.

By the way, today is the last day to preorder this week’s Happy Tails online class.
Scroll down to the bottom of this post for more info.
S
Here’s what I made:
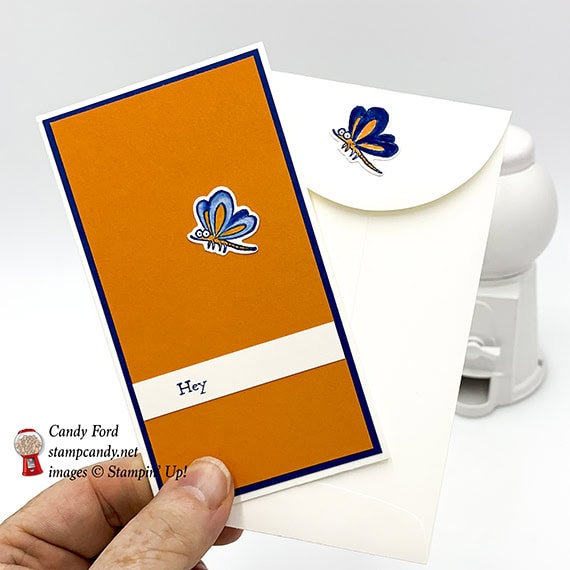
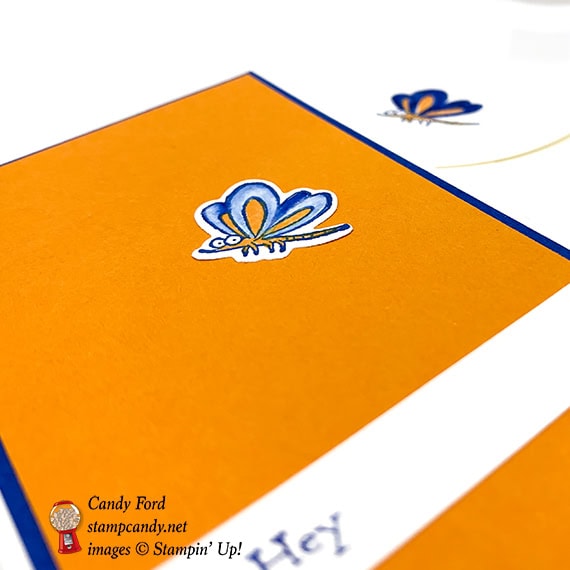
I colored two dragonflies in Blueberry Bushel and Pumpkin Pie: one of then directly with the markers, and the other one with a Blender Pen. I like the way both of them came out, but not necessarily side by side. So I opted to put one on the card and one on the envelope. 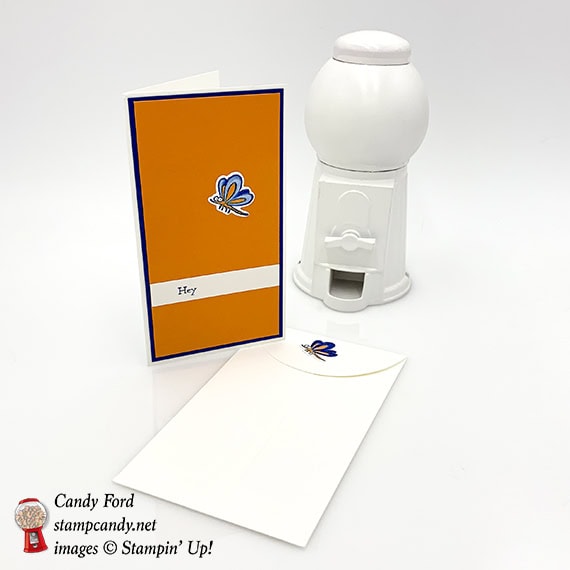
S
Here’s what I did:
Cut and scored with my Stampin’ Trimmer:
- Blueberry Bushel card stock (CS) cut to 2-3/8″ x 4-3/8″
- Pumpkin Pie CS cut to 2-1/4″ x 4-1/4″
- Whisper White CS cut to 2-1/4″ x 1/2″
Stamped with the So Hoppy Together stamp set:
- two dragonflies in Blueberry Bushel ink onto a scrap of Whisper White CS
- sentiment onto the Whisper White CS strip in Blueberry Bushel ink
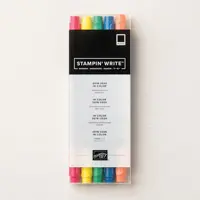
Colored using markers:
- one dragonfly colored using Stampin’ Write Markers in Blueberry Bushel and Pumpkin Pie
- one dragonfly colored using a Blender Pen in the same colors
Die cut using the Hop Along Framelits:
Assembled the card:
- burnished the fold in the card base with a Bone Folder
- Blueberry Bushel CS layer glued onto the front of the card base
- Pumpkin Pie CS layer glued onto the Blueberry CS layer
- sentiment strip glued onto the Pumpkin Pie CS layer
- Blender Pen colored dragonfly glued onto the Pumpkin Pie CS layer
- marker colored dragonfly glued onto the flap of the envelope
S
Here are today’s colors:
You can click on each one to see all the products that come in that color!
S
Here’s what I used:
Click on these images for more details and to purchase.
The dies will be available to purchase March 1 – 31, 2019.
Today is the last day to preorder this week’s online class!
If you or someone you know loves dogs, this class is for you! Click on the image below for details and to order.
S
Here are some helpful links to check out:
Thanks for stopping by today, and Sweet Stamping!
Feb 11, 2019 | Cards, Gallery, Sale-A-Bration |
My card today is made with a Sale-a-bration item – the So Hoppy Together stamp set – and a coordinating item that will be available in March – the Hop Along Framelits Dies. I’m so excited that Stampin’ Up! is bringing out die sets to go with the Sale-a-bration stamp sets! This set has been so popular, and I know you’ll want the dies to go along with it. Coordinating dies or punches make any stamp set so much more versatile.
S
Here’s what I made:

…and here it is open. Notice anything?

Unfortunately, this wasn’t on purpose. I finished the card and took it upstairs to photograph it, when I realized I had adhered the card front upside down. Oops! If I had glued the Whisper White cardstock piece onto the inside before going upstairs, I would have noticed it, and may have fixed it then. But once I walked allllll the way upstairs, well, you know.
I may send it to someone as is (with the white cardstock inside) or I may cut off the front and adhere it to another card base. I’ll decide that when the times comes.

S
Here’s what I did:
Cut and scored with my Stampin’ Trimmer:
- Granny Apple Green card stock (CS) cut to 5-1/2″ x 8-1/2″, then scored in half at 4-1/4″
- Soft Sea Foam CS cut to 5-1/4″ x 4″
- Whisper White CS cut to 5-1/4″ x 4″ for the inside of the card base
Stamped with the So Hoppy Together stamp set:
- sentiment and three frogs in Memento black ink onto a scrap of Whisper White Thick CS
Die cut using the Hop Along Framelits:
- three frogs
- two lily pads from a scrap of Granny Apple Green CS
Cut using Paper Snips:
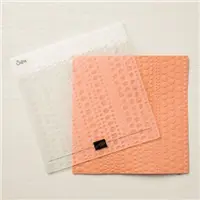
Embossed using the Dot to Dot embossing folder:
Colored using Stampin’ Blends Markers:
- frogs in Granny Apple Green light and dark
- unicycle in Smoky Slate light and dark
Assembled the card:
- burnished the fold in the card base with a Bone Folder
- Soft Sea Foam CS layer glued onto the front of the card base
- lily pads glued onto the Soft Sea Foam CS layer
- frog on unicycle adhered over the top using Stampin’ Dimensionals
- two other frogs glued onto the lily pads and embossed layer
- sentiment adhered onto embossed layer using Stampin’ Dimensionals
- Whisper White CS glued onto the inside of the card base (at least, I should have done that)

S
Here are today’s colors:
You can click on each one to see all the products that come in that color!
S
Here’s what I used:
Click on these images for more details and to purchase.
The stamp set is available free with a $50 purchase now through March 31. The dies will be available to purchase March 1 – 31. Everything else listed below you can buy now.
Here is this week’s online class!
If you or someone you know loves dogs, this class is for you! Click on the image below for details and to order. Only through Wednesday, February 13! Limited kits available!
S
Here are some helpful links to check out:
Thanks for stopping by today, and Sweet Stamping!