Nov 20, 2020 | Cards, Challenges, Christmas, Gallery, Holiday, Sketches |
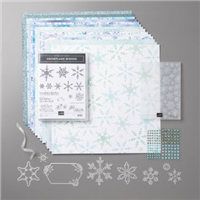
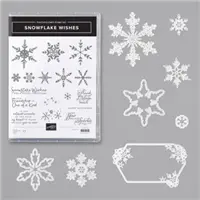
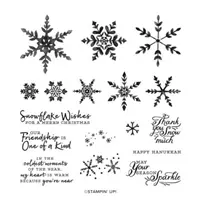
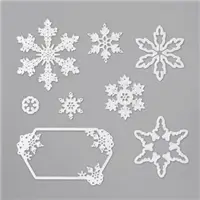
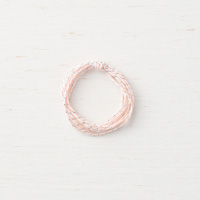
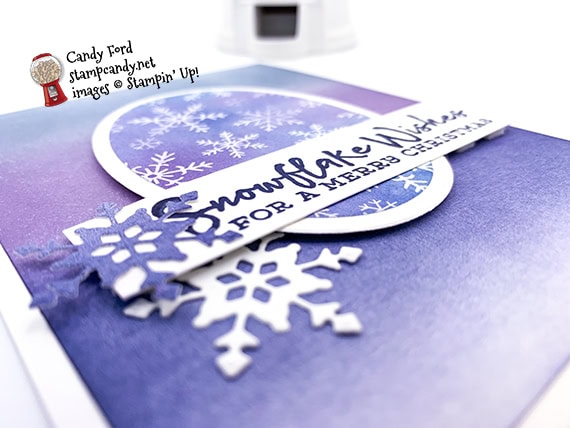
I used the Snowflake Wishes Bundle (Snowflake Wishes stamp set & So Many Snowflakes Dies) along with the Snowflake Splendor Designer Series Paper – all of which are part of the Snowflake Splendor Suite Collection – to create today’s Christmas card. I’m also providing a sneak peek at an upcoming product, that will be available in the January – June 2021 Mini Catalog: Blending Brushes. I am very excited that Stampin’ Up! will be offering this amazing blending tool! I used one in a side to side motion to blend the three stripes of background color onto a layer of Whisper White card stock.
If you are reading this in email, some photos may appear blurry, or may not appear at all. Please click here to see the post on my blog.
S wishes wishes wishes wishes
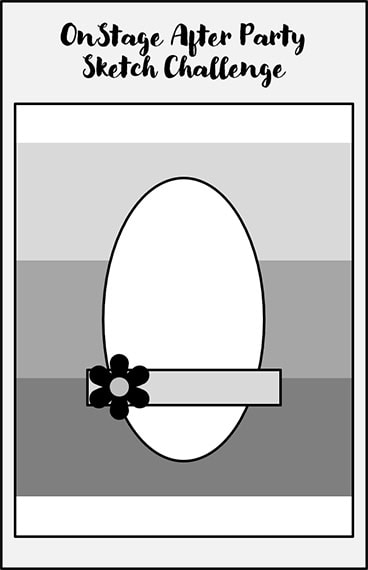
Here’s the sketch:
I recently attended Stampin’ Up!’s OnStage@Home virtual event for Demonstrators, where we got to see the new catalog and lots of new products. After the last day, my upline, Brian King, hosted a virtual After Party for his team members. He had given us a sketch challenge for the event, and we all got to show off what we made. Today’s card is the one I made for that challenge.
S
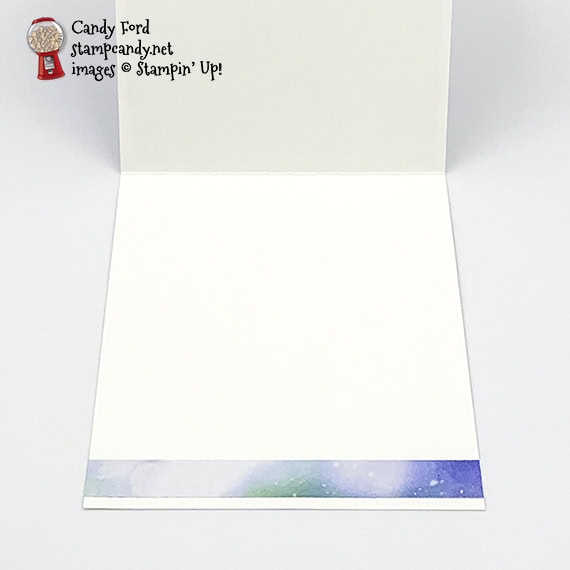
Here’s what I made:

S
Here’s what I did:
Cut and scored with my paper trimmer:
- Whisper White Thick card stock (CS) cut to 4-1/4″ x 11″, then scored in half at 5-1/2″
- Whisper White CS layer cut to 4″ x 5-1/4″
- Snowflake Splendor Designer Series Paper strip cut to 4-1/4″ x 1/2″
- Whisper White Thick CS cut to 3-1/2″ x 7/8″ for the sentiment
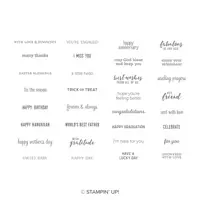
Stamped with the Snowflake Wishes stamp set:
- sentiment in Night of Navy ink onto the 3-1/2″ x 7/8″ Whisper White Thick CS
Colored using a Blender Brush:
- Whisper White CS layer in Balmy Blue, Highland Heather, and Night of Navy inks (top to bottom)
- a scrap of Whisper White Thick CS in Night of Navy
Cut using the Layering Ovals Dies:
- DSP oval
- Whisper White Thick CS slightly larger than the DSP ovalx
Cut using the So Many Snowflakes Dies:
- one snowflake from the brushed scrap
- one snowflake from a scrap of Whisper White Thick CS
Assembled the card:
- burnished the fold in the card base with a Bone Folder
- blended Whisper White CS layer glued onto the front of the card base
- DSP oval glued onto the Whisper White Thick CS oval
- Whisper White Thick CS oval adhered onto the blended layer using Stampin’ Dimensionals
- sentiment glued across the ovals, and adhered on the ends onto the blended layer using Stampin’ Dimensionals
- blended snowflake glued onto the end of the sentiment
- Whisper White snowflake glued onto the blended layer
- DSP strip glued onto the inside of the card base
- NOTE: There were some thin strips of DSP from previous projects lying around my craft table. After I had this one glued onto my card, I realized I had used one from the Feels Like Frost DSP instead of the Snowflake Splendor DSP. But, hey, it works!
S
Here are today’s colors:
You can click on each one to see all the products that come in that color!
S
Here’s what I used:
Click on these images for more details and to purchase. If you are reading this post in email, the product images may not show up. Please click here to see the post on my blog.
Supply List. <— Click for a clickable and printable list of the products!
S
Here’s the new Curvy Celebrations offering:
Click the image to see it in my online store.

S
Here are some helpful links:
S
Thanks for stopping by today, and Sweet Stamping!
Oct 4, 2018 | Cards, Challenges, Christmas, Gallery, Holiday, Sketches |
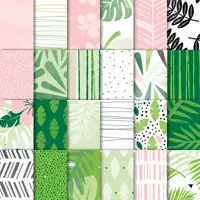
I created today’s card for this week’s Global Design Project sketch challenge GDP158. I used the Itty Bitty Greetings stamp set and the Candy Cane Builder Punch along with the Tropical Escape Designer Series Paper to make a Christmas card in pink and green – one of my favorite holiday color combos.
Here’s the GDP158 sketch challenge:

Here’s what I made:


Here’s what I did:
Cut and scored with my Stampin’ Trimmer:
- Lemon Lime Twist card stock (CS) cut to 5-1/2″ x 8-1/2″, then scored in half at 4-1/4″
- Tropical Escape Designer Series Paper (DSP) cut to 5″ x 3-3/4″ (dot pattern)
- Granny Apple Green CS cut to 5-1/4″ x 2-1/2″
- Whisper White CS cut to 4″ x 1/2″
- Optional: Whisper White CS cut to 5-1/4″ x 4″ for the inside of the card
Stamped with the Itty Bitty Greetings stamp set:
- sentiment in Lemon Lime Twist ink onto the Whisper White CS strip
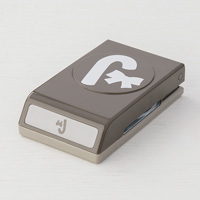
Cut using the 3/4″ Circle Punch:
- both ends of the sentiment strip
- NOTE: stick each end into the back of the punch down through the circle and punch
Cut using the Candy Cane Builder Punch:
- 3 candy canes from a scrap of DSP (herringbone striped pattern)
Assembled the card:
- burnished the fold in the card base with a Bone Folder
- DSP layer glued onto the front of the card base
- candy canes glued onto the Granny Apple Green CS layer
- twine wrapped around the Granny Apple Green CS layer, and secured on the back using Tear & Tape
- another piece of twine tied in a bow aroun the first piece of twine, and secured to the Granny Apple Green CS layer using a rolled up Mini Glue Dot
- Granny Apple Green CS layer glued over the DSP layer
- sentiment adhered over the twine using Mini Stampin’ Dimensionals
- Optional: Whisper White CS glued onto the inside of the card base

Here are today’s colors:
You can click on each one to see all the products that come in that color!
Here’s what I used:
Click on these images for more details and to purchase.
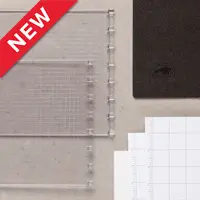
Here are the new Stamparatus Accessories!
You can now order individual accessories for your Stamparatus! (Be sure to keep an eye out for more in the future.)
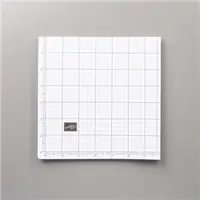
Grid paper perfectly sized to fit the Stamparatus, for precision stamp alignment every time. (50 sheets)
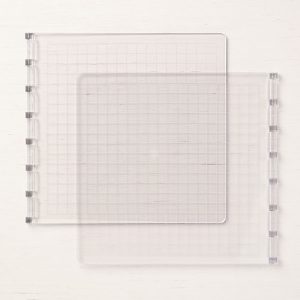
Additional plates allow you to have multiple stamp arrangements ready to go! (2 plates)
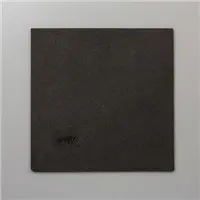
Extra foam mat for photopolymer stamping. (1 mat)
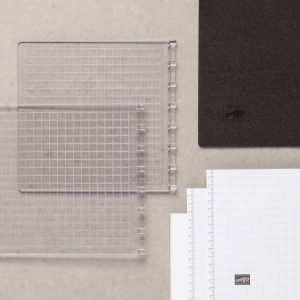
Stamparatus Accessories Pack includes 2 Stamparatus plates, a foam mat, and grid paper.
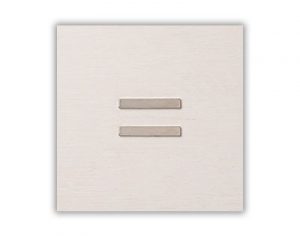
Stamparatus Magnets. These rare earth magnets are strong! They’re also brittle by nature, so be careful not to let them slam together. (2 magnets)
Here’s the New World Card Making Day Sale:
Select products are 10% off!
Only through October 7, 2018!
Click here to see all the sale items.
Here’s some cool stuff you should check out:
Thanks for stopping by today, and Sweet Stamping!
Mar 27, 2017 | Boxes, Deals, Decor, Events, Food, Gallery, Gift Wrap, Gifts, Holiday, Occasions, Parties, Sale-A-Bration, Sketches |
I made these little Easter Baskets as favors for each place setting at the March Candy Hearts team meeting. You can read about the gathering here. I used Cupcakes & Carousels Designer Series Paper and the blue bows from the coordinating Embellishment Kit. These go together super fast.
Here’s what I made:


Here’s what I did:
Cut and scored with my Stampin’ Trimmer:
- Cupcakes & Carousels Designer Series Paper (DSP) to 3-3/4″ x 3-3/4″, then scored at 1-1/4″ and 2-1/2″ on one side, then rotated it 90 and scored again at 1-1/4″ and 2-1/2″
- DSP to 3/4″ x 4″ strip
Cut with Paper Snips:
- two score lines on each of two opposite sides
- Diagram: solid lines = cut, and dotted lines = fold

Assembled the basket:
- folded up the three sections along one of the cut sides
- angled in the two outer pieces and glued to the center piece
- repeated on the other side
- glued handle to inside of basket on each side
- adhered a bow to the basket with Mini Glue Dots
- filled with crinkly gift bag filler and Easter candies by Cadbury and Lindt
Here’s what I used:
Click on the images for more details and to purchase.
MORE SALE-A-BRATION ITEMS!
ONLY UNTIL MARCH 31!!!

Now through March 31, you will earn a FREE item from the Sale-a-bration catalog for each $50 you spend on an order. Sale-a-bration items are now available only while supplies last. So don’t wait if there’s anything you still want!
Here are the Sale-a-bration items still available:


Paper Pumpkin 3 month prepaid subscription is only $55, but only through March 31! It’s the easiest way to earn a FREE Sale-a-bration item! Get it here.
Take it to the next level with a 12-month prepaid subscription. Save over $2 per month with the everyday awesome price, earn Stampin’ Rewards, and instantly qualify for 4 FREE Sale-A-Bration items! Get it here.
RETIRING IN COLORS
DID YOU KNOW the 2015-2017 In Colors will retire at the end of May? But don’t wait until then to order them. At some point they will become available only while supplies last. So get what you need now.
SPEAKING OF RETIRING PRODUCTS
The Designer Series Papers always retire, too. None of us will know for sure until the retiring list comes out, but here are the DSPs and related products that I believe will be retiring at the end of May:
 You always earn a Gum Ball for every $50 you spend on an order with me. Earn 10 Gum Balls and I’ll send you a free stamp set of your choice! See the Gum Ball Rewards page for details.
Click here to shop my online store!
March Host Code
BDF43VHE
Use the Host Code on online orders less than $15o. See how to use a Host Code here.
Online orders of $75-149.99 placed with the Host Code will receive the gift of the month!
Online orders of $150 or more will automatically receive the gift of the month! Do not use the Host Code.
March’s gift is a pack of Metallic Foil Doilies! Each pack contains 24 doilies: 6 each of 2 sizes in 2 colors.

Metallic Foil Doilies © Stampin’ Up!
Click here to shop my online store!
April’s gift is a pack of Urban Underground Embellishments! Each pack contains 24 brushed silver embellishments – 8 each of 3 designs.

Urban Underground Embellishments © Stampin’ Up!
Click here to shop my online store!
Thanks for stopping by today, and Sweet Stamping!

May 29, 2016 | Cards, Challenges, CYCI, Gallery, New Products, Sketches |

It’s time for another sketch challenge at canyoucaseit.com:

Here’s what I made:

The card base is Crushed Curry card stock and the card front is a piece of the brand new Pop of Pink Designer Series Paper. This paper is black and white on one side, with Melon Mambo on the other side.
I used the Banners Framelits to cut the Watermelon Wonder card stock banner.
I used the Greetings Thinlits to cut the sentiment and the new Swirly Scribbles Thinlits to cut the wreath, both from Cucumber Crush card stock.
I used the Pansy Punch to cut two Blushing Bride flowers, and the Petite Petals Punch to cut two Cherry Cobbler flowers. I used my Piecing Mat the the round bottom of an Aqua Painter to curve the flowers, then stacked them up with glue. I used the 1/4″ Circle Punch to cut the flower’s center from Crushed Curry card stock.
Here’s what I used:
Be sure to check out all the great projects at canyoucaseit.com, and play along by uploading your own project!
 There are only 2 days left to shop from the 2015-2016 Annual Catalog’s Retiring List!
Click here to shop what is still available!
Thanks for stopping by today, and Sweet Stamping!

May 15, 2016 | Cards, Challenges, CYCI, Sketches |

It’s Sketch Challenge time over at canyoucaseit.com. Here is this week’s sketch:

With such a simple sketch, I went back and forth between a simple card design and really dressing it up. What to do, what to do? This is what I settled on:

It’s a simple card design, but it’s dressed up by the English Garden Designer Series Paper and the Night of Navy Seam Binding ribbon.
I put a line of Fast Fuse Adhesive across the front of the card, then added the ribbon, gathering it in one section. I used Fast Fuse to adhere the sentiment as well.
Here’s what I used:
There are only 16 days left to shop from the 2015-2016 Annual Catalog’s Retiring List! Click here to see what is still available.
Thanks for stopping by today, and Sweet Stamping!
May 1, 2016 | Cards, Challenges, CYCI, Sketches |

I love Sundays, because I get to play along with a new CYCI challenge. Here is this week’s sketch challenge…

…and here’s my card.

I’ve used some old products and some new, some retiring and some not out yet. (That’s just one perk of being a Stampin’ Up! Demonstrator – you get the new stuff before anyone else!)
The card base is Sweet Sugarplum card stock – one of the 2016-2018 In-Colors.
The squares are cut with the new Layering Squares Framelits Dies from four different colors of card stock: Blackberry Bliss (retiring,) Wisteria Wonder, Perfect Plum, and Elegant Eggplant.
The striped piece is Playful Palettes Washi Tape. It was just translucent enough to see the squares underneath, so I put it on a strip of Whisper White card stock before adhering it to the card.
The button is from the Regals Designer Buttons, and is attached with Glue Dots. The twine is Whisper White Baker’s Twine that I dyed with a couple drops from the Sweet Sugarplum Re-inker and a few drops of water.
The sentiment from the Sweet Stack stamp set is stamped in Elegant Eggplant directly onto the Sweet Sugarplum card base. This stamp set is being carried over to the new catalog!

Paper Pumpkin is a great way to spend 30-60 minutes each month relaxing, crafting, and hanging out with friends. Each month you receive a box full of goodies in the mail. It contains everything you need to complete that month’s project including ink pad(s) and an exclusive stamp set (you might need scissors and adhesive.) A clear acrylic block comes in your first kit to use with all your Paper Pumpkin stamps in the future.

When you subscribe month-to-month, the kits are $19.95 per month, which includes shipping. When you buy a prepaid subscription of 6- or 12-months, you save money! See the options here.

Be sure to check out the retiring products here, many of which are discounted up to 50%. Most items are only available while current supplies last, and none of them will be available after May 31. Some things have already sold out, so don’t wait!
Thanks for stopping by today, and Sweet Stamping!