Today I’m sharing one of the projects my stamp club members made at our July gathering, a copper tea tin decorated with the Tea Room Suite of products.
Here’s what we made:
Here’s what I did:
Cut and scored with my Stampin’ Trimmer:
Tea Room Specialty Designer Series Paper (DSP) cut to 12″ x ___
Stamped with the Time For Tea stamp set:
sentiment in Calypso Coral ink onto a scrap of Very Vanilla card stock (CS)
cup in Calypso Coral ink onto a scrap of Calypso Coral CS
Die cut using the Spot of Tea Framelit Dies:
sentiment and cup
Applied Tea Room Copper Vinyl Stickers:
small design on cup
long design onto the front of the tin lid (I cut the sticker to the correct length.)
Decorated the tin:
DSP wrapped around the tin and adhered using Tear & Tape (I put some at each end and a tiny piece in the very middle
cup glued onto the sentiment piece
cup/sentiment adhered to the DSP (covering the seam where the two DSP ends met) using Stampin’ Dimensionals
laced Coastal Cabana ribbon through the hole on the left side of the sentiment, ran both ends around the back, laces one end through the hole on the right side, and tied a bow
Here are today’s colors:
You can click on each one to see all the products that come in that color!
15% OFF Select Storage Solutions at Stamp-n-Storage
June 8 -18, 2018
Save 15% OFF popular Stamp-n-Storage products like the Standard Ink Pad Holder, Magnet Cards, Lock-Down Punch Holder and more. Your discount will be applied automatically during the checkout process now through June 18, 2018. No coupon code needed.
Please note that shipping times during SnS sales may be extended 2-3 weeks. Thank you for understanding.
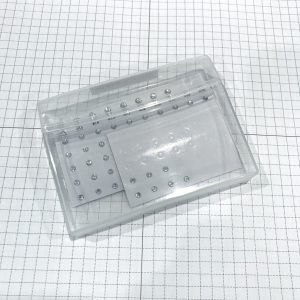
Today I’m sharing a craft organization/storage trick I came across a while back. I wish I remembered where I first heard about it. I’ve seen it in multiple places, so I don’t know whose idea it was originally. Anyway, I think it’s awesome, so I wanted to share it with you. It’s a way to organize the tiny embellishments that come on sheets. They usually come in blister packs (I think that’s what they’re called) that can’t be reclosed once opened.
Here’s how to store your embellishments:
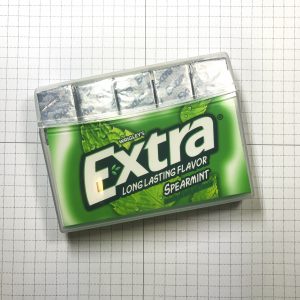
Get the Extra gum packs that come in a plastic box.
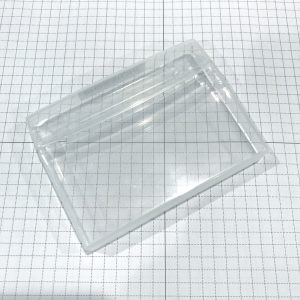
Once the gum is all gone, pull out the label. You’ll have a nice, clear box with a lid that snaps closed.
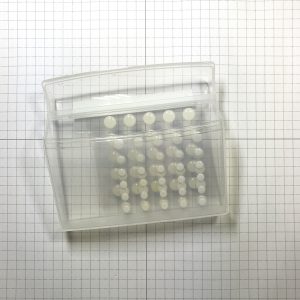
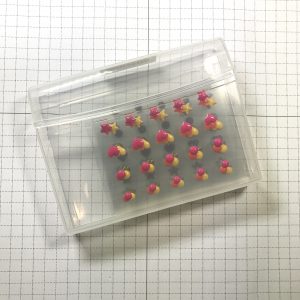
Put your embellishments inside…
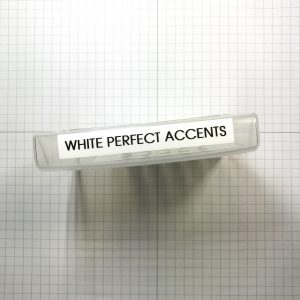
…and label the top.
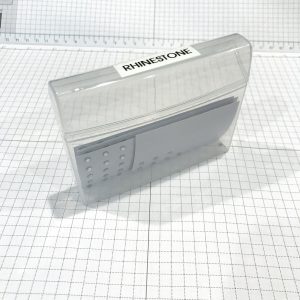
The Enamel Shapes fit beautifully inside the boxes.
Some things, like Pearl Basic Jewels and Rhinestone Basic Jewels, that come on larger sheets, need to be cut to fit. I usually cut them between the different sizes of embellishments on the sheet.
I keep mine in alphabetical order, so I can find them quickly.
Here are some things you can store in these gum boxes:
Here’s where I got the gum:
I’m sure you can find it in many places, but I ordered minehere.
Ever wonder what to do with those great boxes your Paper Pumpkin kits come in? They’re too nice to get rid of – you know we crafters want to use everything! But the orange doesn’t always go with our decor, and the shipping labels take away from the overall aesthetic. Watch this video for a quick tip.
Monika Davis was the first one to show me how to do this, so most of the credit goes to her. I just wanted to be sure you knew about it.
If you haven’t tried Paper Pumpkin, now is a great time to sign up.
For new subscribers only. Use the code HALFOFF to join Paper Pumpkin before September 10, 2015, and get 50% off the first two months!
After that, keep the creativity coming for only $19.95 + tax per month (includes shipping!) Or purchase a prepaid subscription HERE. Save $1 per month with a 6 month subscription, or $2 per month with a one year subscription.
This is just one example of a past Paper Pumpkin kit. Each month is a surprise, but they are always wonderful, and include everything you need except scissors and adhesive. I took this “pie” to my family’s Thanksgiving gathering last year with each “slice” full of nuts, candies, and other goodies.
Current subscribers – and ONLY current subscribers – can purchase past kits and refills.
All stamp sets in Paper Pumpkin kits are exclusive to Paper Pumpkin and will never be seen elsewhere.
Here’s the skinny:
For new subscribers only.
Available for month-to-month subscriptions, not prepaid subscriptions.
Discount applied to one kit per month for the first two months of a new subscription. After the first two months, the price for each month’s kit will renew at the regular price: $19.95.
A Paper Pumpkin membership is $19.95 per month (and shipping is included!)
There’s no commitment. You can cancel your monthly Paper Pumpkin or skip a month by logging into your Paper Pumpkin account and changing your preference at “manage my account” on or before the 10th of the month.
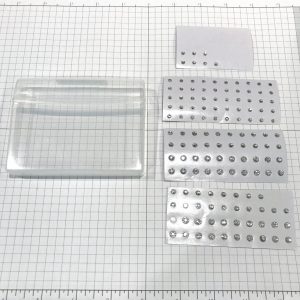
When you receive your new photopolymer stamp sets, the stamps themselves are sandwiched between two clear plastic sheets, one of which has the images printed on it. This sandwich is loose inside the case.
Not too long ago I started inserting the image sheet into the outer case on the back (like the label is on the front) then sticking the stamps directly to the inside of the case over the images. This works great, except that the image sheets can slide around so the stamps are no longer lined up over the images.
Enter the ever marvelous and inspiring Mary Fish, who showed this storage technique on her blog, but with an extra tip: use mini glue dots to make the image sheet stay in place. Brilliant! I put one glue dot at each corner and the sheet stayed put. I’m gonna do this with all my photopolymers! Thanks, Mary!
Stamps stuck to inside of case
How it looks from outside of stamp case
A few of the photopolymer sets come in a plastic bag instead of a case. But not to worry, the cases are available for purchase.
There are lots of methods people use to clean their photopolymer stamps. This seems to work for me. I keep some unscented, alcohol free baby wipes on hand and wipe the ink off the photopolymers immediately after using them.
Then when I’m done with my project, I take them all to the kitchen sink and wash them in soap and water, using my fingers to rub them. A mild dish detergent works well.
I pat them dry with a lint free cloth.
Then I stick them back in the case.
This method doesn’t prevent all staining, especially if you’ve used an ink with any red in it (orange, red, purple, pink.) But it does cut way down on the amount and severity of staining. I can still use my photopolymer stamps with no problem seeing through them.
Do you have any tips about photopolymer stamps? Please share them below in the comments section!
In just three days the new Occasions and Sale-A-Bration Catalogs go live! I am really excited for you to be able to order these products for your very own. There are so many fantastic new products, you’ll want them all!
Here’s a sneak peak at two of the free products in the Sale-A-Bration Catalog. Wait, did she say Free? Yes, indeed! For every $50 you spend, before tax & shipping, you get to choose any product from the Sale-A-Bration Catalog for FREE! And there are some definite must haves, let me tell you.
For this card I used the Lotus Blossom stamp set and the Best Year Ever Designer Series Paper. The stamp set is sure to be one of the most popular items in the catalog. The Lotus Blossom is a three step stamp, meaning that you layer three stamps to create a multicolor image. Funny thing is, I only used one color of ink for these flowers: Calypso Coral. How did I get these results with just one color?
I used stamp #1 (yes, they’re even numbered for you!) to stamp in Calypso Coral. I inked up stamp #2 and stamped off once before stamping over the first stamped image. I inked up stamp #3 and stamped off twice before stamping again. The results are spectacular. You don’t even have to get the images lined up exactly; this gives each flower a slightly different look.
As great as the flowers look, I wanted to experiment with giving them even more oomph. So after using all three stamps to create the flowers, I inked up stamp #1 with Versamark and stamped over the images a fourth time. I then used Calypso Coral Embossing powder to give more texture.
The stems are inked in Sahara Sand and Soft Suede. The sentiment, from the same stamp set, is inked in Coastal Cabana on the card front and heat embossed in white inside the card.
The Coastal Cabana bokeh paper is from the (FREE!) Best Year Ever DSP. The Sahara Sand lace is in the Occasions Catalog, and I must say these photos do not do it justice.
Here are the current Stampin’ Up! products I used: