Nov 27, 2020 | Cards, Christmas, Gallery, Holiday, Swaps |
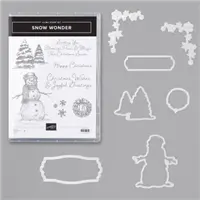
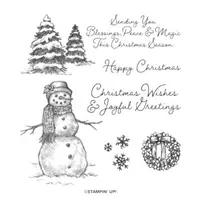
Today I’m sharing my swap card for the November Candy Hearts team meeting. I used the Snow Wonder stamp set and Stampin’ Blends Markers to create this sweet scene.
If you are reading this in email, some photos may appear blurry, or may not appear at all. Please click here to see the post on my blog.
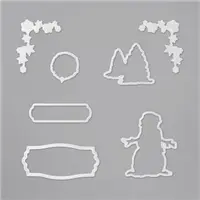
S Snow Wonder Snow Wonder Snow Wonder Snow Wonder
Here’s what I made:

S
Here’s what I did:
Cut and scored with my paper trimmer:
- Shaded Spruce card stock (CS) cut to 5-1/2″ x 8-1/2″, then scored in half at 4-1/4″
- Real Red CS layer cut to 5-1/4″ x 4″
- Whisper White CS layer cut to 5″ x 3-3/4″
- Whisper White CS cut to 5-1/4″ x 4″ for the inside of the card base (I accidentally used a piece cut to 5-3/8″x 4-1/8″)
Stamped with the Snow Wonder stamp set:
- snowman in Tuxedo Black Memento ink onto the Whisper White CS layer
- sentiment in Real Red ink onto the Whisper White CS layer
- trees in Shaded Spruce ink onto the Whisper White CS layer
- wreath in Tuxedo Black Memento ink onto a scrap of Whisper White Thick CS
- snowflakes in Pool Party ink onto the Whisper White CS for the inside
Colored using Stampin’ Blends Markers:
- snowman in Smoky Slate, Real Red, Pumpkin Pie, Granny Apple Green, and Pool Party
- wreath in Shaded Spruce and Real Red
- trees in Shaded Spruce and Pool Party
Cut using the Snow Time Dies:
Assembled the card:
- burnished the fold in the card base with a Bone Folder
- Real Red CS layer glued onto the front of the card base
- Whisper White CS layer glued onto the Real Red CS layer
- wreath adhered onto the Whisper White CS layer using Stampin’ Dimensionals
- Whisper White CS glued onto the inside of the card base
S
Here are today’s main colors:
You can click on each one to see all the products that come in that color!
S
Here’s what I used:
Click on these images for more details and to purchase. If you are reading this post in email, the product images may not show up. Please click here to see the post on my blog.
Supply List. <— Click for a clickable and printable list of the products!
S
Here’s the new Curvy Celebrations offering:
Click the image to see it in my online store. Some of these products are available only through January 4, or while supplies last!

S
Request a new catalog:
I will be mailing them out in early December. Click the image below to request yours:

S
Here are some helpful links:
S
Thanks for stopping by today, and Sweet Stamping!

Aug 21, 2020 | Cards, Christmas, Gallery, Holiday, Swaps |
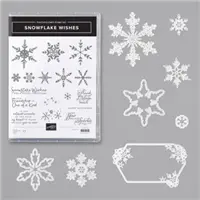
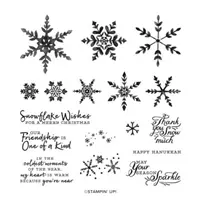
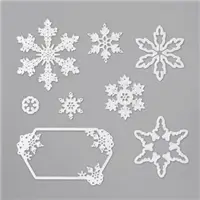
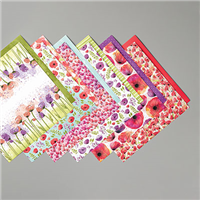
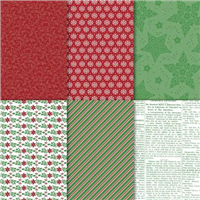
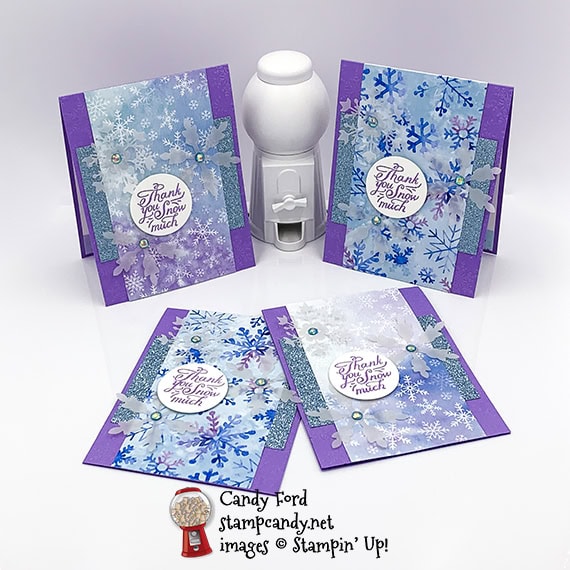
Today I’m sharing the cards I made for our Candy Hearts August 2020 Team Meeting swap. I used products from the Snowflake Splendor Suite Collection: Snowflake Wishes Bundle (Snowflake Wishes stamp set and So Many Snowflakes Dies,) Winter Snow Embossing Folder, Snowflake Splendor Designer Series Paper (DSP,) Balmy Blue Glimmer Paper, and Blue Adhesive-Backed Gems – basically everything in the suite except the ribbon!
There were some pieces of the DSP left from another project, which dictated the size of the pieces on today’s cards. I used two different patterns on the card fronts, because didn’t have enough of the same pattern for all the cards, and I used a third pattern for the strip on the inside.
If you are reading this in email, some photos may appear blurry, or may not appear at all. Please click here to see the post on my blog.
S Snowflake Wishes Snowflake Wishes Snowflake Wishes Snowflake Wishes
Here’s what I made:
S
Here’s what I did:
Cut and scored with my paper trimmer:
- Highland Heather card stock (CS) cut to 4-1/4″ x 11″, then scored in half at 5-1/2″
- Balmy Blue Glimmer Paper cut to 4″ x 3″
- Snowflake Splendor Designer Series Paper (DSP) layer cut to 3″ x 5-1/2″
- DSP cut to 4″ x 3/4″
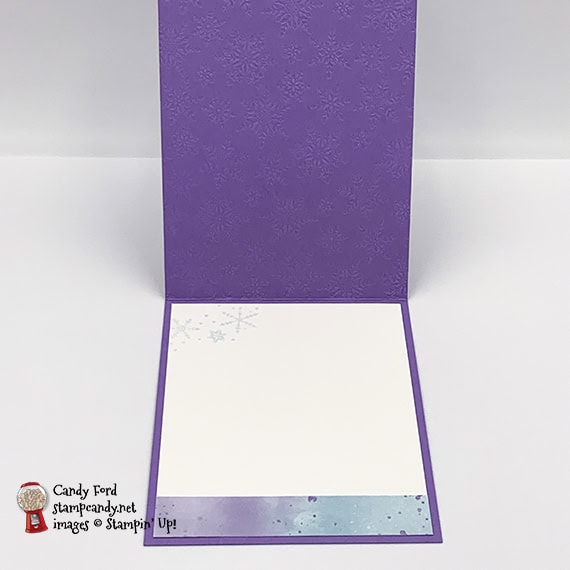
- Whisper White CS cut to 4″ x 5-1/4″ for the inside of the card base
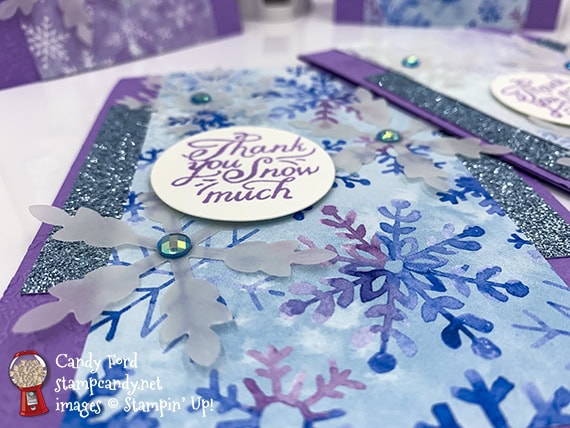
Stamped with the Snowflake Wishes stamp set:
- sentiment in Highland Heather ink onto a scrap of Whisper White Thick CS
- snowflakes in Balmy Blue ink, stamped off once, onto the upper left of the Whisper White CS for the inside of the card
Embossed using the Winter Snow Embossing Folder:
Cut using the So Many Snowflakes Dies:
- 3 snowflakes from a scrap of Vellum CS
Cut using the Layering Circles Dies:
Assembled the card:
- burnished the fold in the card base with a Bone Folder
- Balmy Blue Glimmer Paper layer adhered onto the front of the card base using Stampin’ Seal
- DSP layer glued onto the front of the card base, over the Glimmer Paper layer
- vellum snowflakes adhered onto the DSP layer using Mini Glue Dots
- a blue gem applied onto the center of each snowflake using the pointy end of my Take Your Pick tool
- sentiment adhered onto the DSP layer, over the snowflakes, using Stampin’ Dimensionals
- DSP strip glued onto the bottom of the Whisper White CS for the inside
- Whisper White CS glued onto the inside of the card base
S
Here are today’s colors:
You can click on each one to see all the products that come in that color!
S
Here’s what I used:
Click on these images for more details and to purchase. If you are reading this post in email, the product images may not show up. Please click here to see the post on my blog.
Supply List. <— Click for a clickable and printable list of the products!
S
Use your Bonus Days coupons by August 31!
Click the image below to shop now and use your Bonus Days coupons!

S
Here are some helpful links:
S
Thanks for stopping by today, and Sweet Stamping!
Jul 6, 2020 | Cards, Gallery, Swaps |
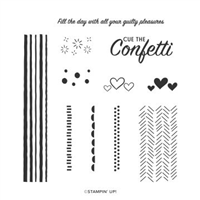
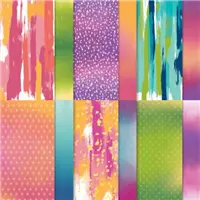
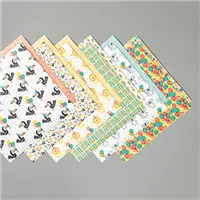
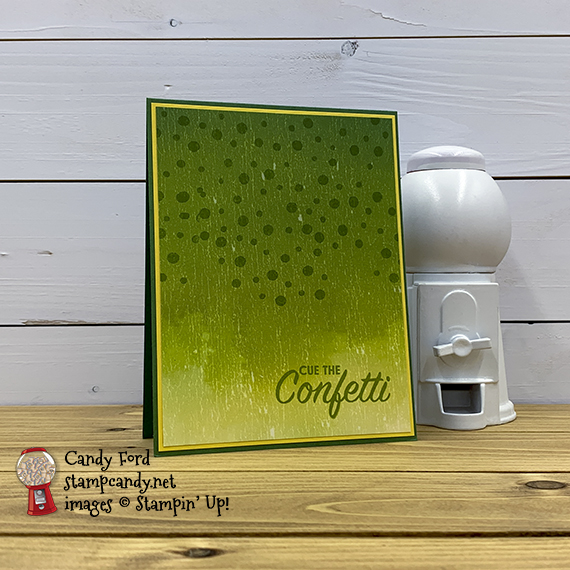
Today I’m sharing the card I made for the June 2020 Candy Hearts team card swap. I used the Pattern Play stamp set and Artistry Blooms Designer Series Paper to create these simple and fun birthday cards. I love the cute stamped confetti over the scuffed up pattern of the DSP. Even though all the cards I made came from the same pattern of DSP, they all look a little different because some have more yellow than others, and because I stamped the confetti differently on each one. I posted a photo of two of the cards side by side below so you can see the difference between them.
By the way, this #simplestamping card is just stamps, ink, and paper! (Plus adhesive, of course.)
If you are reading this in email, some photos may appear blurry, or may not appear at all. Please click here to see the post on my blog.
S Pattern Play stamp Pattern Play stamp Pattern Play stamp
Here’s what I made:
See the difference:

S
Here’s the Artistry Blooms DSP I used:

S
Here’s what I did:
Cut and scored with my paper trimmer:
- Garden Green card stock (CS) cut to 5-1/2″ x 8-1/2″, then scored in half at 4-1/4″
- Daffodil Delight CS layer cut to 4″ x 5-1/4″
- Artistry Blooms Designer Series Paper (DSP) layer cut to 4-1/8″ x 5-3/8″
- Whisper White CS cut to 5-1/4″ x 4″ for the inside of the card base
Stamped with the Pattern Play stamp set:
- confetti in Granny Apple Green ink onto the top of the DSP layer
- sentiment in Granny Apple Green ink onto the bottom right of the DSP layer
Assembled the card:
- burnished the fold in the card base with a Bone Folder
- Daffodil Delight CS layer glued onto the front of the card base
- DSP layer glued onto the Daffodil Delight CS layer
- Whisper White CS glued onto the inside of the card base
S
Bonus Days are here!
Click the image below to shop now and earn Bonus Days coupons to use next month!

Here are today’s colors:
You can click on each one to see all the products that come in that color!
S
Here’s what I used:
Click on these images for more details and to purchase. If you are reading this post in email, the product images may not show up. Please click here to see the post on my blog.
Supply List <— Click for a clickable and printable list of the products!
S
Here are some helpful links:
S
Thank you for reading all the way to the end of my blog post! Today is my 60th birthday! (How in the world did that happen? It seems like I turned 30 just a couple years ago!) Comment below with birthday greetings for a chance to win a special gift from me! Comment by Wednesday, July 8.
S
Thanks for stopping by today, and Sweet Stamping!
May 12, 2020 | Cards, Gallery, Swaps |
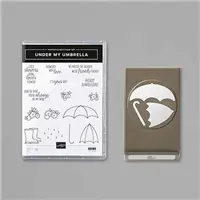
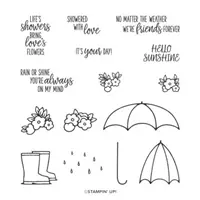
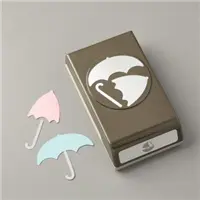
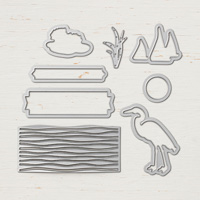
Today I’m sharing my swap card for the Candy Hearts April team meeting. The theme was weather. I used the Under My Umbrella bundle (Under My Umbrella stamp set and Umbrella Builder Punch – available at 10% off only for another month!) the Beads & Baubles Embossing Folder, and the Pretty Label Punch along with three different Designer Series Papers: Peaceful Poppies, Bird Ballad, and Birthday Bonanza. I think the Beads & Baubles Embossing Folder looks like big rain drops. And the Pretty Label Punch looks very much like a cloud. The splotchy Pool Party background with vertical lines also adds to the gloomy, rainy feel – it’s from the Peaceful Poppies DSP.
If you are reading this in email, some photos may appear blurry, or may not appear at all. Please click here to see the post on my blog.

These products will be retiring soon. Get them while you can, because they will start to sell out quickly.
See all the products in my online store here.
S beads beads beads
Here’s what I made:
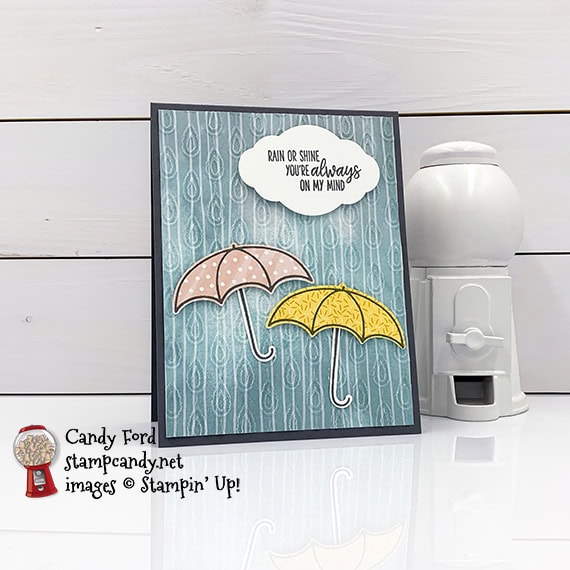

S
Here’s what I did:
Cut and scored with my paper trimmer:
- Basic Gray card stock (CS) cut to 4-1/4″ x 11″, then scored in half at 5-1/2″
- Peaceful Poppies Designer Series Paper (DSP) layer cut to 4″ x 5-1/4″ (blue)
- Whisper White CS cut to 4″ x 5-1/4″ for the inside of the card base
Stamped with the Under My Umbrella stamp set:
- sentiment in Basic Gray ink onto a scrap of Whisper White Thick CS
- 2 umbrella handles in Basic Gray ink onto a scrap of Whisper White Thick CS
- one umbrella in Basic Gray ink onto a scrap of Bird Ballad DSP (pink)
- one umbrella in Basic Gray ink onto a scrap of Birthday Bonanza DSP (yellow)
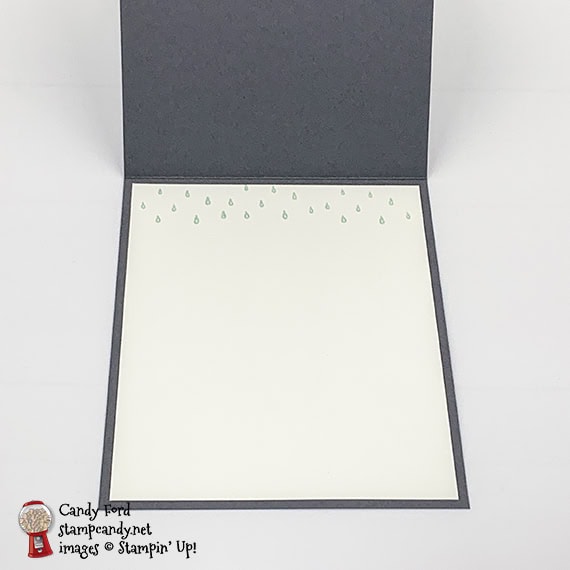
- rain drops in Pool Party ink along the top edge of the 4″ x 5-1/4″ Whisper White CS
Cut using the Umbrella Builder Punch:
- the 2 umbrellas and the 2 umbrella handles
Cut using the Pretty Label Punch:
Embossed using the Beads & Baubles Embossing Folder:
Assembled the card:
- burnished the fold in the card base with a Bone Folder
- DSP layer glued onto the front of the card base
- sentiment and 2 umbrellas adhered onto the DSP layer using Stampin’ Dimensionals
- 2 umbrella handles glued onto the DSP layer
- Whisper White CS glued onto the inside of the card base
S
Here are today’s colors:
You can click on each one to see all the products that come in that color!
S
Here’s what I used:
Click on these images for more details and to purchase. If you are reading this post in email, the product images may not show up. Click here to see the post on my blog.
Supply ListClick “Supply List” for a clickable and printable list of the products!
S
Here are some helpful links:
Thanks for stopping by today, and Sweet Stamping!
Feb 14, 2020 | Cards, Gallery, Guest Stamper, Sale-A-Bration, Swaps |

A couple days ago I shared my January swap card made with the Lily Impressions Designer Series Paper. You can see that post here. The swap theme was Sale-A-Bration. Coincidentally, Judy Newsome used the very same pattern from the same Lily Impressions Designer Series Paper for her swap cards, and out layouts are even very similar. You know what they say: great minds think alike! Judy, a member of my Candy Hearts team, lives in LaFayette, GA.
Lily Impressions Lily Impressions
Here’s what she made:
S
S
Here’s what she did:
Cut and scored with her paper trimmer:
- Gorgeous Grape card stock (CS) cut to 5-1/2″ x 8-1/2″, then scored in half at 4-1/4″
- Pool Party CS layer cut to 5-3/8″ x 4-1/8″
- Lily Impressions Designer Series Paper (DSP) layer cut to 5-1/4″ x 4″
- Whisper White CS layer cut to 4-1/2″ x 1″
- Pool Party CS layer cut to 3″ x 1/2″
- Whisper White CS cut to 5-1/4″ x 4: for the inside of the card base
Stamped with the Thoughtful Blooms stamp set:
- 3 flowers in Gorgeous Grape ink onto a scrap of Pool Party CS
- 3 leaves in Gorgeous Grape ink onto a scrap of Garden Green CS
Stamped with the Happy Birthday to You stamp set:
- sentiment in Gorgeous Grape ink onto the Whisper White CS layer
Cut using the Small Blossom Punch:
- 3 stamped flowers
- 3 flowers from a scrap of Gorgeous Grape CS
Cut using the Banner Triple Punch:
- both ends of the sentiment layer
Cut using Paper Snips:
Colored using a Stampin’ Write Marker:
- a piece of Linen Thread in Gorgeous Grape
Assembled the card:
- burnished the fold in the card base with a Bone Folder
- large Pool Party CS layer glued onto the front of the card base
- DSP layer glued onto the Pool Party CS layer
- small Pool Party CS layer glued onto the back of the sentiment layer, then both glued onto the DSP layer
- all 6 punched flowers burnished, using the bottom round end of an Aqua Painter and a Stampin’ Pierce Mat, so the petals curl up
- 3 stamped flower glued onto the 3 Gorgeous Grape CS flowers
- Gorgeous Grape Glitter Enamel Dot applied onto the center of each flower
- flowers and leaves glued onto the DSP layer
- thread tied into a bow and adhered onto the DSP layer using a Mini Glue Dot
- Whisper White CS glued onto the inside of the card base
S
Here are today’s main colors:
You can click on each one to see all the products that come in that color!
S
Here’s what she used:
Click on these images for more details and to purchase.
Click “Supply List” for a clickable and printable list of the products!
S
Here are some helpful links:
Thanks for stopping by today, and Sweet Stamping!
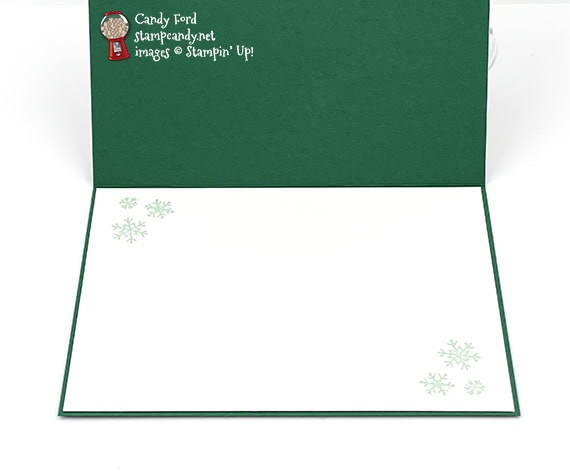
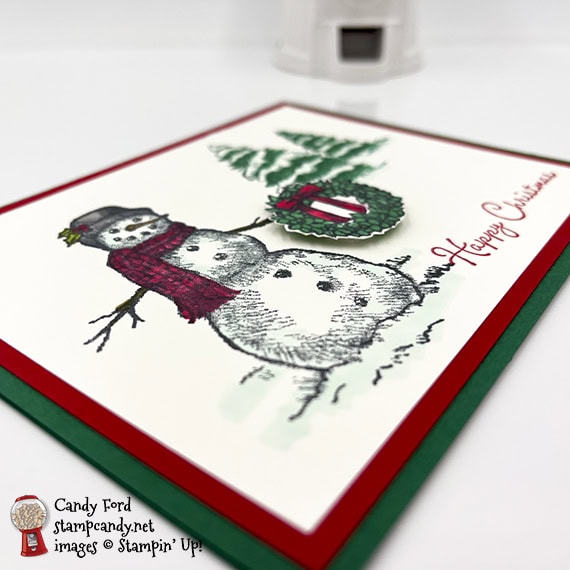
Dec 15, 2018 | Cards, Christmas, Gallery, Holiday, Swaps |
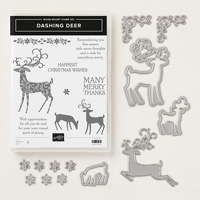
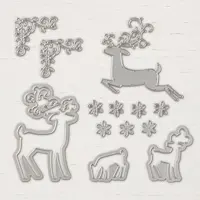
Today I’m sharing the card I made for the Candy Hearts card swap for November. I used the Dashing Deer Bundle and Dashing Along Designer Series Paper to create this card with multiple layers. I cut some of the pieces using the Layering Circles Framelits Dies and the Lakeside Framelits Dies.
Here’s what I made:


Here’s what I did:
Cut and scored with my Stampin’ Trimmer:
- Cherry Cobbler card stock (CS) cut to 4-1/4″ x 11″, then scored in half at 5-1/2″
- Garden Green CS cut to 4-1/8″ x 5-3/8″
- Dashing Along Designer Series Paper (DSP) cut to 4″ x 5-1/4″
- DSP cut to 4″ x 1-1/2″
- Whisper White CS cut to 4″ x 5-1/4″ for the inside of the card base
Stamped with the Dashing Deer stamp set:
- 2 deer and the sentiment in Garden Green ink onto a scrap of Whisper White CS
- flourish in Cherry Cobbler and Garden Green inks onto the Whisper White CS for the inside of the card base
- NOTE: I colored the flourish stamp using Stampin’ Write Markers
Die cut using the Detailed Deer Thinlits:
Die cut using the Lakeside Framelits:
Die cut using the Layering Circles Framelits:
- a scrap of vellum CS into a circle
- a scrap of Cherry Cobbler CS into the same size circle, then the center cut out using a smaller die, to create a frame
Assembled the card:
- burnished the fold in the card base with a Bone Folder
- Garden Green CS layer glued onto the front of the card base
- larger DSP layer glued onto the Garden Green CS layer
- Cherry Cobbler CS frame glued onto the vellum circle
- vellum circle glued onto the larger DSP layer (put glue only where it would be hidden under the Cherry Cobbler frame)
- smaller DSP layer glued onto the larger DSP layer, covering the bottom part of the circles
- deer glued onto the vellum
- sentiment adhered onto the smaller DSP layer using Stampin’ Dimensionals
- 2 Red Rhinestones applied to the sentiment
- Whisper White CS glued onto the inside of the card base
Here are today’s colors:
You can click on each one to see all the products that come in that color!
Here’s what I used:
Click on these images for more details and to purchase.
Here’s the Year-End Closeout!
The Year-End Closeout has officially begun! During this promotion, you will be able to save on a selection of retiring and surplus items—while supplies last. Definitely place your orders sooner rather than later, because supplies are limited and the Year-End Closeout ends on January 2. After that, some of your favorite retiring items may be gone for good!
CLICK HERE to see all the Year-End Closeout items. Here’s how to get your copy of the new catalogs:
Just click on this button and I’ll send you the new catalogs, along with a list of the bundles, the Designer Series Paper coordinating colors, and a handmade card!
Here’s how to shop 2019 Occasions/Sale-a-bration items now!
- Become a Candy Heart!
- Join my team and you can order the new products right now, instead of having to wait another month!
- No selling required! I welcome Hobby Demos! (Hobby Demos join to get the discount for themselves.)
- CLICK HERE for the details!
Here’s more stuff to check out:
Thanks for stopping by today, and Sweet Stamping!