Jan 22, 2015 | Cards, New Products, Occasions, Sale-A-Bration, Techniques |
Okay, yes, I know I start a lot of my posts with the words “I love…” but it’s only because it’s true. I love Stampin’ Up! Products. Today I’m showing my love for two new products from the Sale-a-bration catalog: Irresistibly Yours Specialty DSP and Best Day Ever stamp set (which is available in wood, clear, and photopolymer). You can get either of them FREE with any $50 purchase, or BOTH FREE with a $100 purchase, before tax & shipping. I think FREE is a pretty good deal, don’t you?

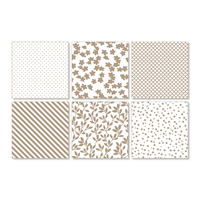
This Specialty DSP is white with glossy white designs. When you ink up the paper, then wipe with a cloth or paper towel, the designs show through as white. For this card I used Stampin’ Sponges to swirl ink on the paper. The sponge actually did a great job of both applying the ink to the background paper and wiping it off the glossy parts at the same time. In the photo, you can see the uninked version of the same floral pattern behind the card and the striped pattern underneath.
Using 1/8 of a sponge for each color, I swirled on Crushed Curry, Calypso Coral, and Bermuda Bay inks, in that order, to create the card front. To see how I organize my sponges and daubers for the different colors see my previous post here.
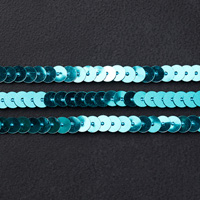
The card base is Bermuda Bay and the horizontal strip is Calypso Coral. The sentiment was stamped in Bermuda Bay on Whisper White, then cut with the Label Bracket Punch. I used a sponge dauber to ink the edges in Crushed Curry, then used Stampin’ Dimensionals to attach it. The Whisper White leaves were cut with the Bird Builder Punch. Don’t they match the leaves of the DSP really well? Lastly I added a few sequins from the new Bermuda Bay Sequin Trim, which is in the Occasions Catalog. I think they add just a little sumthin sumthin.
Here’s the recipe. Click on the images to buy. Remember the Sale-a-bration items ($0.00) are free with a $50 purchase.
Thanks for stopping by today and Sweet Stamping!
Jan 15, 2015 | Cards, Techniques |
Yesterday I showed you an Infinity card I made for the January 2015 Pals Blog Hop. If you missed it, you can see that post here.
Today I’d like to show you how you can make your own Infinity card. It’s really quite simple, but looks terribly complicated to the recipients. Although you can make this card in any size, for this example, I made a 5″ x 7″ card.
Cut two pieces of card stock to 5″ x 7″. Then cut one of them in half vertically and the other one in half horizontally. Score the tall pieces at 1-3/4″ and 5-1/4″ (1-3/4″ from each end.) Score the wide pieces at 1-1/4″ and 3-3/4″ (1-1/4″ from each end.)

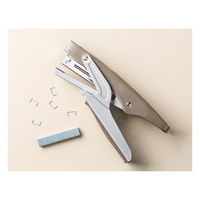
Lay the tall pieces side by side to form a 5″ x 7″ rectangle. Lay the horizontal pieces on top, also forming a 5″ x 7″ rectangle. Now attach at all four corners. You can use staples, brads, or your favorite adhesive. I used staples in the Bermuda Bay/Calypso Coral example, but I used Sticky Strip on yesterday’s card, so there wouldn’t be any lumps in the card:


Now fold from the center out four times until you get back to the front of the card. Make sure all score lines are nicely creased – I use my bone folder for this.
The first will open horizontally, the second vertically,


the third horizontally, and the fourth vertically.


Now that you have the base of the card completed, it’s time to decorate it. If you want to cover each panel with paper, you will need to cut the following pieces:
Four pieces at 2-1/4″ x 1-1/2″ (# 1, 2, 5, 6.)
Six pieces at 2-1/4″ x 3-1/4″ (# 3, 4, 10, 11, 25, 26.)
Sixteen at 1″ x 1-1/2″ (# 7, 9, 12, 14, 17, 18, 19, 20, 21, 22, 23, 24, 27, 28, 29, 30.)
Four at 1″ x 3-1/4″ (# 8, 13, 15, 16.)


Even though I love using Stampin’ Dimensionals and other 3D elements on my cards, this is not the time to use them. Anything that sticks up or out can interfere with all the flipping and folding. This is the time to use DSP, card stock, and stamps.
If you have any questions about making this card, please don’t hesitate to ask. Leave a comment below or email me (candy@stampcandy.net.)
Tools used:
I hope you have fun making your own Infinity cards.
Thanks for stopping by today, and Sweet Stamping!
Jan 14, 2015 | Blog Hop, Cards, New Products, Occasions, Techniques |

Welcome to the first Pals Blog Hop of 2015. We hope your new year is off to a great creative start. To celebrate the start of a new Stampin’ Up! year, we are showcasing products from our newest catalog this month – the Occasions catalog. You may also see new Sale-a-bration products too. If you don’t know how to earn free Sale-a-bration products – contact your Stampin’ Up! demonstrator to learn more.
You may just be starting the blog hop or may have come from Lisa Ann Bernard at Queen B Creations. Use the full lineup below to move along from blog to blog so you see all of the new projects.
Have I mentioned how much I love the new Occasions Catalog? I have? Well, let me say it again. I love this new stuff!!! And the fact that you get something FREE from the Sale-A-Bration catalog for every $50 you spend just makes it that much better!
Today’s card uses several of the new products – see the complete product list at the bottom of this post. It’s called an Infinity Card because it just goes on and on in an unending cycle as you keep unfolding it.
This is the card front:

Open it from the center to get this:

Open it from the center again to get this:

Open it from the center a third time to get this:

Open it from the center a fourth time to get back to the front.
( I tried to make the card lie flat to photograph it, but it’s an interactive card that definitely looks better in your hands. If I’d had a hand model available, I would’ve photographed it that way. But with one hand holding the camera, this was all I could do.)
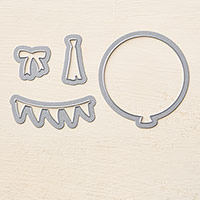
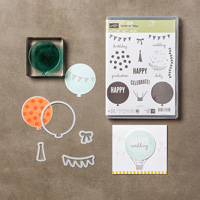
TIP: For the sentiment on the back of the card, I masked off most of a stamp from the Balloon Bash photopolymer stamp set, revealing only HAPPYBIRTHDAY. I cut a piece of scratch paper to fit around the sentiment I wanted, and to cover the rest of the stamp. I inked the stamp, then removed the paper to stamp the image onto the card.

Come back tomorrow for the pattern and directions for this fun Infinity Card!
The next stop on the Pals Blog Hop is Dawn Tidd at Tiddbits From Dawn!
Thanks for stopping by today, and Sweet Stamping!


- Amy Whelan at Amy’s Inklings
- Maggie Mata at Maggie Made Cards
- Becky Gifford at The Social Stamper
- Kerry Willard Bray at Peonies and Paper Chains
- Debbie Crowley at expressivelydeb…
- Amy Williams at Stamps and Spice
- Rae Harper at WildWestPaperArts.com
- Sherrie Gross at Stampin’ Sunshine
- Wendy Klein at Doggone Delightful Stampin’
- Becky Volpp at InkBlossomwithBecky
- Nancy Gleason at My Stampin Space
- Jane Knudsen at www.seejanestamp.com
- Debbie Mageed at Secret Stamper
- Michelle Quinno at Shell’s Life
- Susan Lankford at Stamp and Create With Susan
- Karen Hallam at Karen’s Blog
- Kelly DeTommaso at Kelly’s Creative Corner
- Mary Fish at Stampin’ Pretty
- Laurie Chilton at Stampin’ Ink
- Brian King at Stamp with Brian
- Peggy Noe at prettypapercards.com
- Martie Pollard at The Crafty Bandit
- Kim Jolley at Stampin’ Artfully
- Beth Beard at My little craft blog
- Michelle Gleeson at StampinMojo
- Sue Becker at RnR Stamping
- Jackie Diediker at Stampin’ Jackie
- Natalie Bradley at Natalie Bradley Events
- Lisa Ann Bernard at Queen B Creations
- Candy Ford at Stamp Candy
- Dawn Tidd at Tiddbits From Dawn
- Angie Valle-Peters at Paperluxuries
- Amy Hoptay at Inking of You!
- Lynn Kolcun at Stamping with Avery’s Owlery
- Shannon K Jaramillo at Shannon Kay Paperie
- Liz Gautreaux at Kind Deeds Stampin
- Beth McCullough at Stamping Mom
- Nicole Watt at Pixel Maven’s Retreat
- Pamela Sadller at Stampin Pink Rose
- Jennifer Michalski at Stamping Serenity
- Shannon Hokanson at Paper Works by Shannon
Here’s what I used to make this card:
Jan 4, 2015 | Storage, Techniques |
STORING
When you receive your new photopolymer stamp sets, the stamps themselves are sandwiched between two clear plastic sheets, one of which has the images printed on it. This sandwich is loose inside the case.
Not too long ago I started inserting the image sheet into the outer case on the back (like the label is on the front) then sticking the stamps directly to the inside of the case over the images. This works great, except that the image sheets can slide around so the stamps are no longer lined up over the images.

Enter the ever marvelous and inspiring Mary Fish, who showed this storage technique on her blog, but with an extra tip: use mini glue dots to make the image sheet stay in place. Brilliant! I put one glue dot at each corner and the sheet stayed put. I’m gonna do this with all my photopolymers! Thanks, Mary!

Stamps stuck to inside of case 
How it looks from outside of stamp case
A few of the photopolymer sets come in a plastic bag instead of a case. But not to worry, the cases are available for purchase.
CLEANING
There are lots of methods people use to clean their photopolymer stamps. This seems to work for me. I keep some unscented, alcohol free baby wipes on hand and wipe the ink off the photopolymers immediately after using them.

Then when I’m done with my project, I take them all to the kitchen sink and wash them in soap and water, using my fingers to rub them. A mild dish detergent works well.

I pat them dry with a lint free cloth.

Then I stick them back in the case.
This method doesn’t prevent all staining, especially if you’ve used an ink with any red in it (orange, red, purple, pink.) But it does cut way down on the amount and severity of staining. I can still use my photopolymer stamps with no problem seeing through them.
Do you have any tips about photopolymer stamps? Please share them below in the comments section!
Thanks for stopping by today, and Sweet Stamping!
Jan 3, 2015 | Cards, New Products, Occasions, Sale-A-Bration, Storage, Techniques |
In just three days the new Occasions and Sale-A-Bration Catalogs go live! I am really excited for you to be able to order these products for your very own. There are so many fantastic new products, you’ll want them all!
Here’s a sneak peak at two of the free products in the Sale-A-Bration Catalog. Wait, did she say Free? Yes, indeed! For every $50 you spend, before tax & shipping, you get to choose any product from the Sale-A-Bration Catalog for FREE! And there are some definite must haves, let me tell you.
For this card I used the Lotus Blossom stamp set and the Best Year Ever Designer Series Paper. The stamp set is sure to be one of the most popular items in the catalog. The Lotus Blossom is a three step stamp, meaning that you layer three stamps to create a multicolor image. Funny thing is, I only used one color of ink for these flowers: Calypso Coral. How did I get these results with just one color?

I used stamp #1 (yes, they’re even numbered for you!) to stamp in Calypso Coral. I inked up stamp #2 and stamped off once before stamping over the first stamped image. I inked up stamp #3 and stamped off twice before stamping again. The results are spectacular. You don’t even have to get the images lined up exactly; this gives each flower a slightly different look.
As great as the flowers look, I wanted to experiment with giving them even more oomph. So after using all three stamps to create the flowers, I inked up stamp #1 with Versamark and stamped over the images a fourth time. I then used Calypso Coral Embossing powder to give more texture.
The stems are inked in Sahara Sand and Soft Suede. The sentiment, from the same stamp set, is inked in Coastal Cabana on the card front and heat embossed in white inside the card.

The Coastal Cabana bokeh paper is from the (FREE!) Best Year Ever DSP. The Sahara Sand lace is in the Occasions Catalog, and I must say these photos do not do it justice.
Here are the current Stampin’ Up! products I used:
Be sure to come back tomorrow for some tips on storing and caring for your photopolymer stamps.
Thanks for stopping by today, and Sweet Stamping!
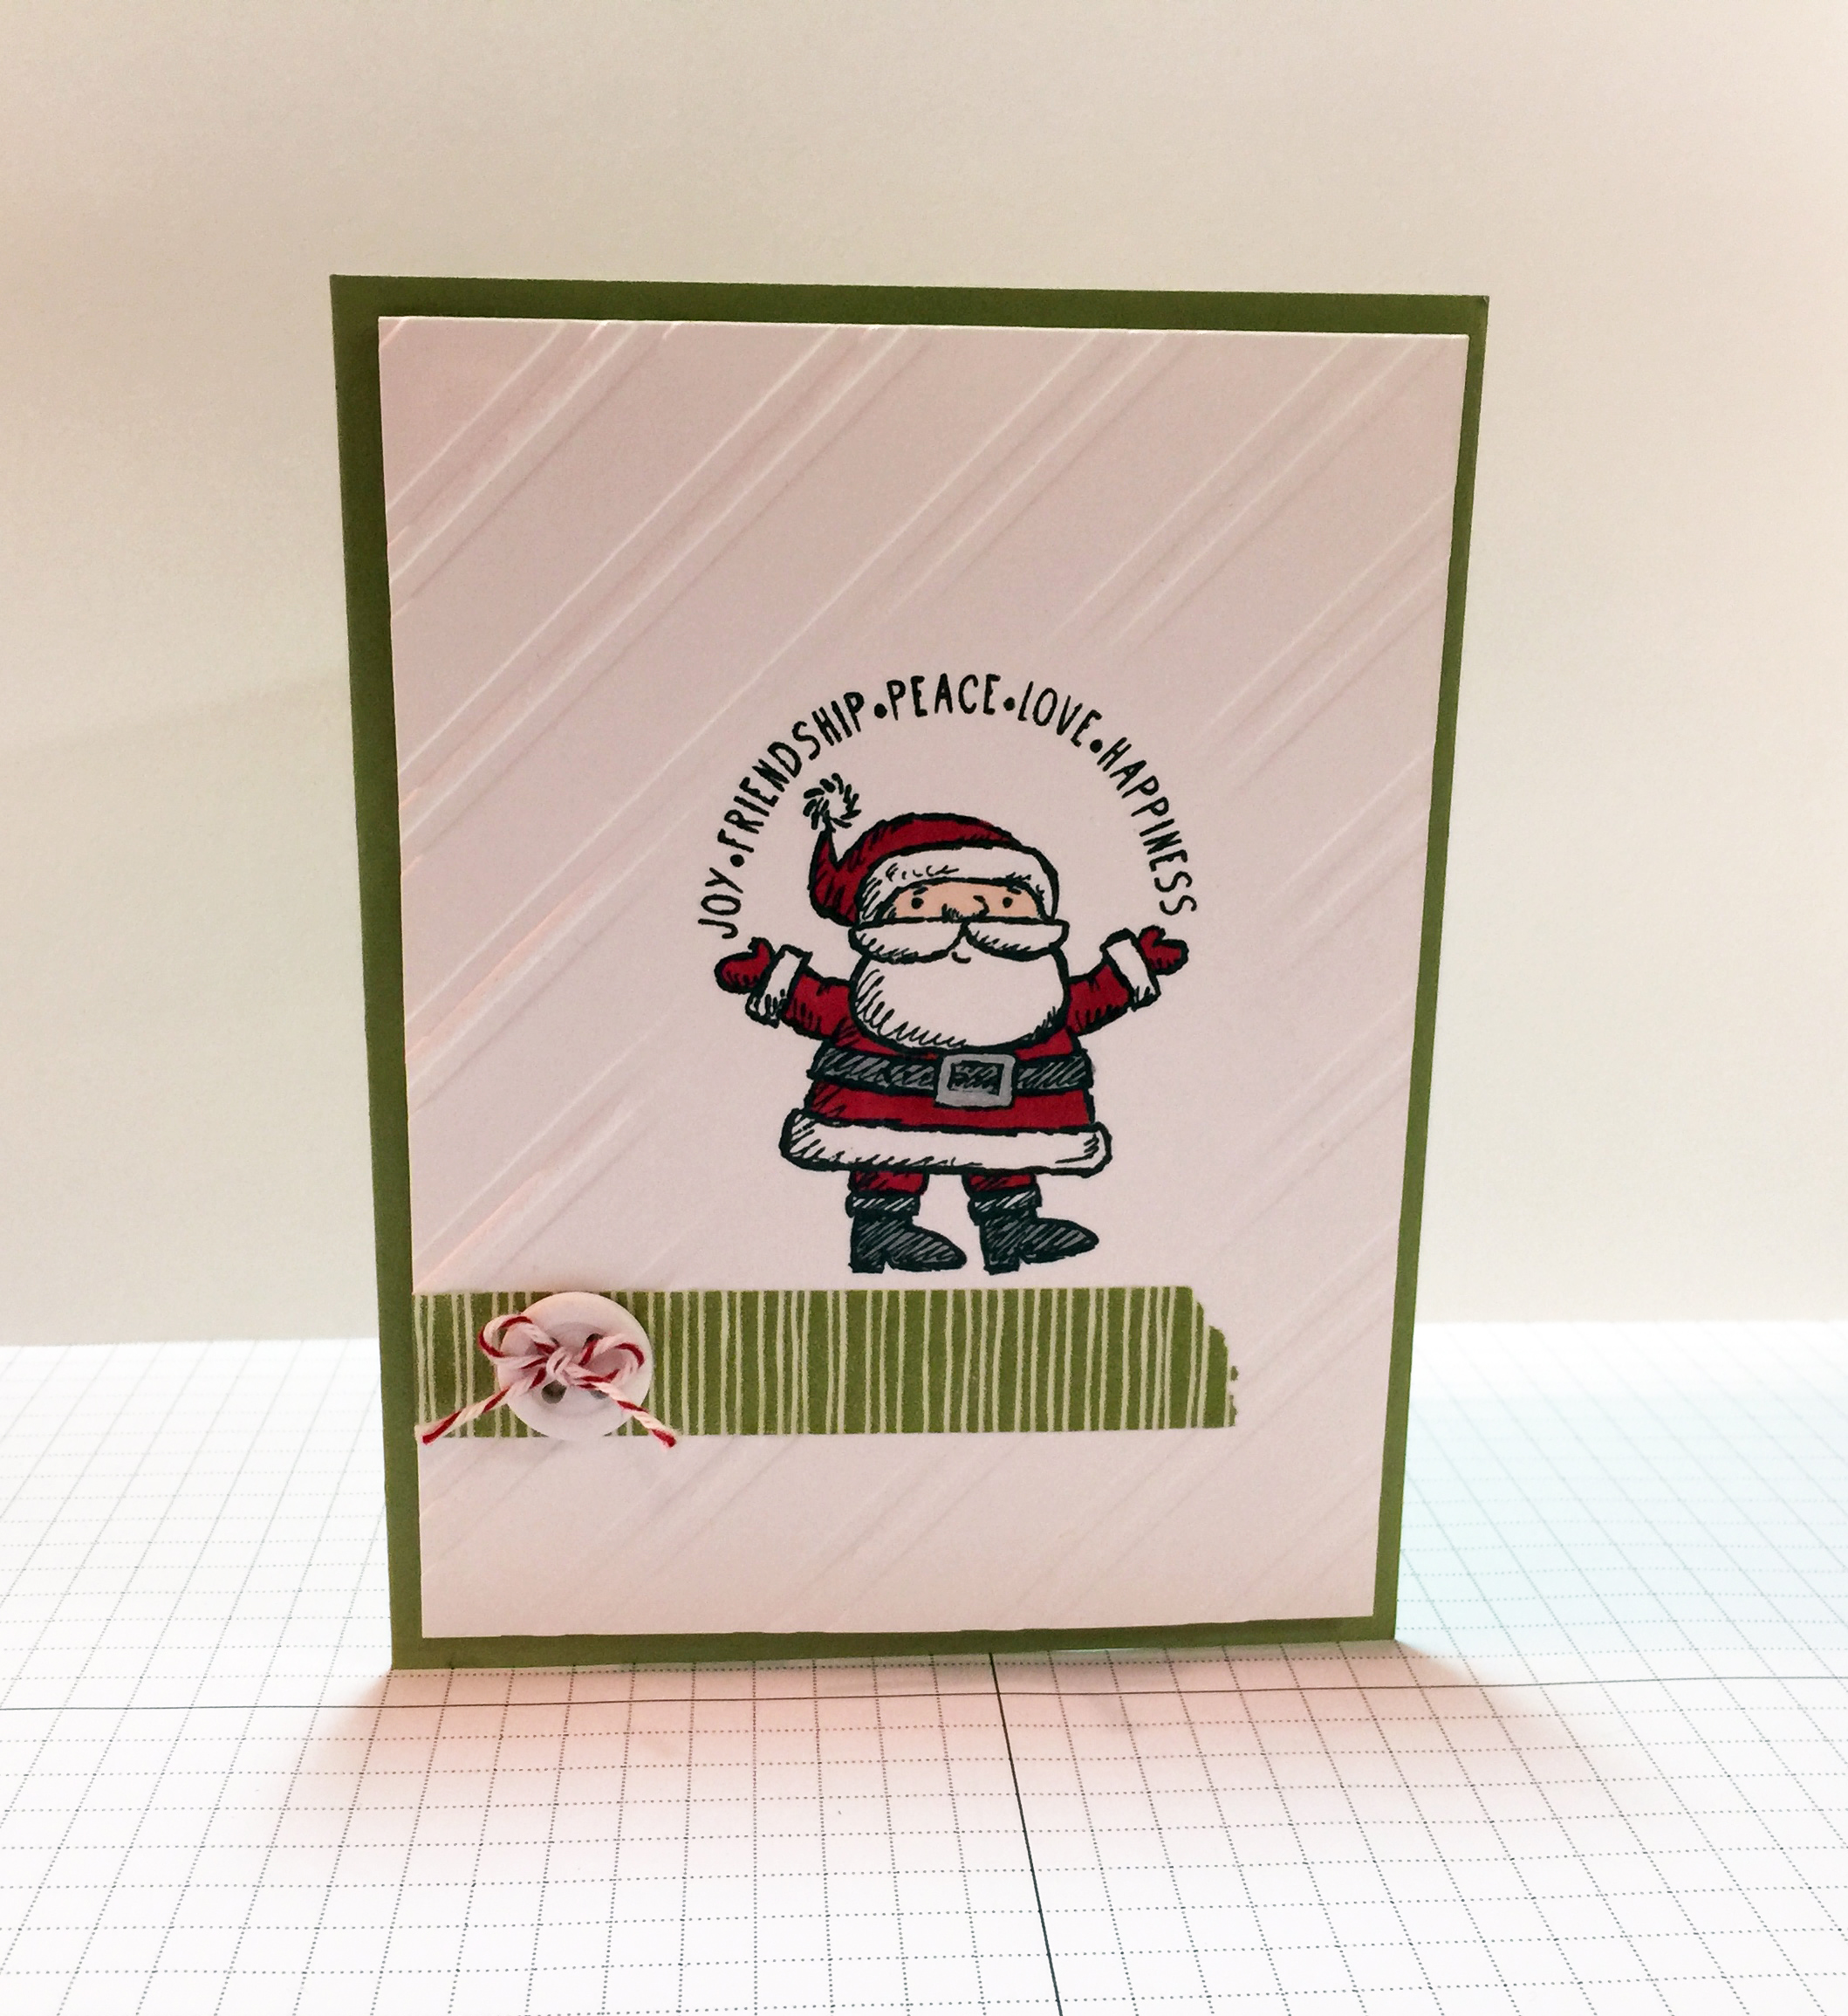
Dec 16, 2014 | Cards, Christmas, Club, Gifts, Techniques, Tools |
This is the first of three projects we made at December’s Stamp Club meeting. This card uses the emboss resist technique. See how the embossed diagonal stripes are around the sides but not in the center where the stamped image is? While this is a Christmas card, of course this technique can be used year round for any project theme.

I thought this Santa from the Get Your Santa On stamp set looked great in the oval. I grounded him with a base of washi tape. A button with a baker’s twine bow completes the look.
Here’s how to do the embossing resist technique. First of all you need a template. I used three layers of the cardboard that comes in the DSP packs. (I find a use for everything.)

I cut them down to to 6″ x 7″.
I decided on an oval shape, so I used one of the Ovals Framelits dies to cut a hole in the center of each piece of cardboard. Since the die isn’t very think, cut only one piece at a time.
TIP: Cut the first piece, then lay it on top of the next piece and mark the oval with a pencil. Then you know where to put the Framelits die on the next piece.

Once all three are cut, glue them together with Multipurpose Liquid Glue, lining up the oval cutout, instead of the outer edges of the cardboard.

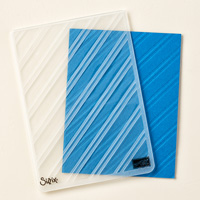
Set the template aside and place your paper in the embossing folder.

Now it’s time to make your Big Shot sandwich. Normally when embossing you would use two of the clear plates and the platform with the top tab off.

Since the template is so thick, this sandwich will be a bit different. Use the platform with all tabs in place.

Hold your embossing folder and template up to the light. In the day time a sunny window works great. At night just use a lamp, or a light box if you have one. Line up the opening wherever you want it on your card. I tried to center mine.

Now place the template and embossing folder on the platform, and place just one clear plate on top. Run the whole sandwich through the Big Shot. When you open the folder, you’ll have a piece of paper that is embossed everywhere except where the template opening is.

The hardest part is deciding on the shape of the template opening. I prefer to keep them to simple shapes, like ovals, circles, etc.
Here’s what I used for this card:
Here are a few action shots of club members working on their cards.
Margie


Judy


Linda & Caitlin


Martha

It’s not too late to get a Big Shot for Christmas! It comes with the platform used here and two clear plates. Tell your loved ones to go here to get yours. Or they can contact me to buy you a gift certificate for any amount: email: candy@stampcandy or call/text: 404-661-5222.
Thanks for stopping by today, and Sweet Stamping!