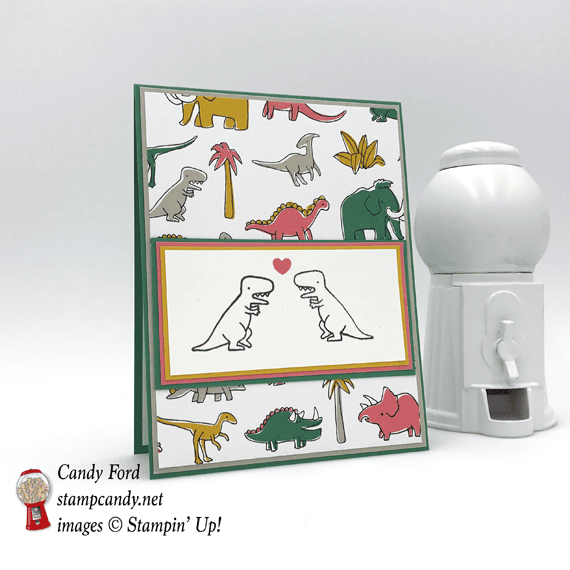
Want to tell someone you’re wild about them? What could be wilder that dinosaurs? The dinosaur on today’s card is from the Pieces & Patterns stamp set, and the coordinating Pick a Pattern Designer Series Paper is just adorable.
I used the Mirror Stamping Technique to get two different dinosaurs from the same stamp, which sounds more complicated than it is. You simply stamp your image onto a piece of clear Window Sheet, flip it over, and rub the back to transfer the ink to the paper.
Here’s what I made:
Here’s what I did:
Cut and scored with my Stampin’ Trimmer:
Emerald Envy card stock (CS) cut to 4-1/4″ x 11″, then scored in half at 5-1/2″
Sahara Sand CS cut to 4-1/8″ x 5-3/8″
Pick a Pattern Designer Series Paper (DSP) cut to 4″ x 5-1/4″
Emerald Envy CS cut to 4″ x 2-1/8″
Flirty Flamingo CS cut to 3-7/8″ x 2″
Crushed Curry CS cut to 3-3/4″ x 1-7/8″
Whisper White CS cut to 3-5/8″ x 1-3/4″
Whisper White CS cut to 4″ x 5-1/2″ for the inside
Stamped with the Pieces & Patterns stamp set:
dinosaur in black ink onto the small Whisper White CS
dinosaur in black ink onto a piece of Window Sheet
quickly turned the Window Sheet over and pressed it to the Whisper White CS piece, rubbing the back to transfer the ink from the Window Sheet to the CS
NOTE: if you don’t get as good a transfer as you would like, you can go over the image with the fine point of a Basic Black Stampin’ Write Marker
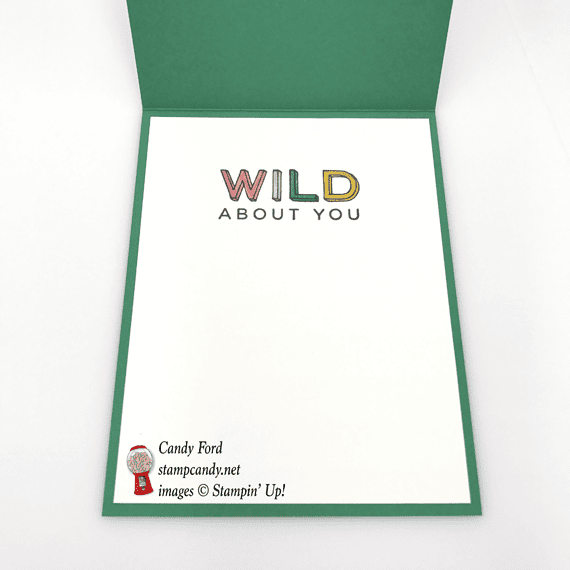
sentiment in black ink onto the 4″ x 5-1/2″ Whisper White CS
Cut using the Cookie Cutter Builder Punch:
tiny heart from a scrap of Flirty Flamingo CS
Colored using Stampin’ Write Markers:
inside sentiment in Flirty Flamingo, Sahara Sand, Emerald Envy, and Crushed Curry
Assembled the card:
burnished the fold in the card base with a Bone Folder
tiny heart glued onto the Whisper White CS with the dinosaurs
Whisper White CS with dinosaurs glued onto the Crushed Curry CS
Crushed Curry CS glued onto the Flirty Flamingo CS
Flirty Flamingo CS glued onto the Emerald Envy CS
Emerald Envy CS glued onto the DSP layer
DSP layer glued onto the Sahara Sand CS layer
Sahara Sand CS layer glued onto the front of the card base
4″ x 5-1/2″ Whisper White CS glued to the inside of the card base
Questions? Comment below or email me: candy@stampcandy.net
Here are today’s main colors:
You can click on each one to see all the products that come in that color!
Click on these images for more details and to purchase.
Here’s some stuff you should know:
This is a fabulous time to join my team! Sale-A-Bration is the biggest event of the Stampin’ Up! year and you can save big on the ultimate bundle, the Starter Kit. CLICK HERE for more information. Contact me with any questions: email candy@stampcandy.net or call/text 404-661-5222
Newsletter: subscribe for exclusive deals, projects, and more! Enter your email address and click SUBSCRIBE at the top right of this page, just under the picture of my smiling face. You can also choose to receive an email every day that I have a blog post.
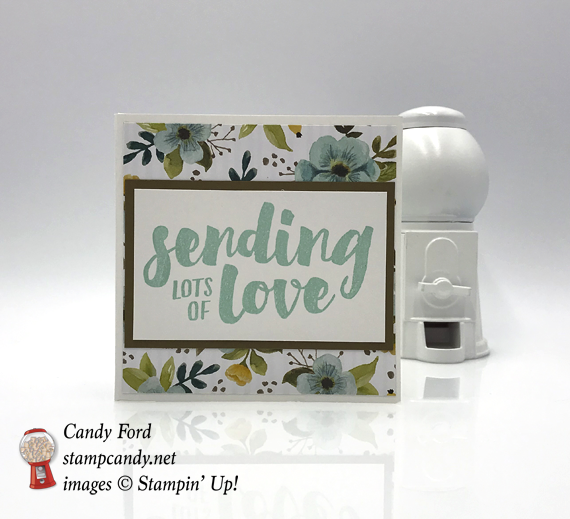
Have you sent all your Thank You cards for Christmas gifts yet? If not here’s a quick and easy card with a little something extra. When it’s open, it stands up – how cool is that? The Lots of Love stamp set and the coordinating Whole Lot of Love Designer Series Paper are the stars of this card. That’s really all I used except basics: card stock, ink, and glue.
Whisper White Thick card stock (CS) cut to 8-1/2″ x 8-1/2″, then scored in half at 4-1/4″ in both directions
Whole Lot of Lovely Designer Series Paper (DSP) cut to 4″ x 4″ (3 pieces)
Soft Suede CS cut to 4″ x 2-1/2″
Whisper White CS cut to 3-3/4″ x 2-1/4″
Whisper White CS cut to 3″ x 3″ (2 pieces)
Stamped with the Lots of Love stamp set:
front sentiments in Pool Party ink onto the 3-3/4″ x 2-1/4″ Whisper White CS
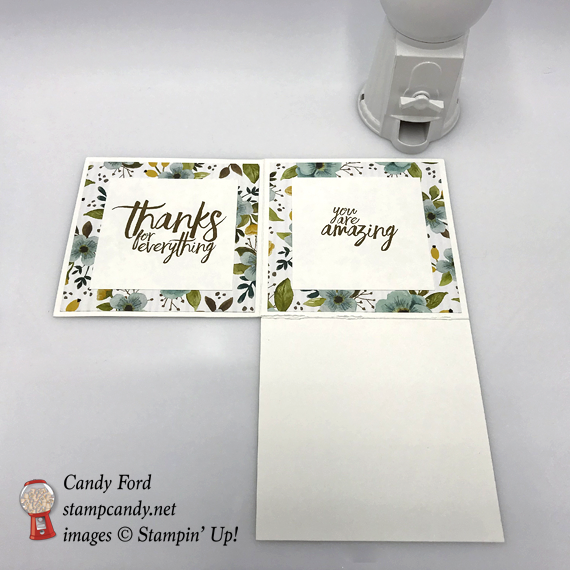
inside sentiments in Soft Suede ink onto the two 3″ x 3″ Whisper White CS
Cut using Paper Snips:
one of the 4-1/4″ square sections from the scored 8-1/2″ square Whisper White CS
Assembled the card:
front sentiment glued onto the Soft Suede CS
Soft Suede CS glued onto one of the three DSP pieces
other two sentiments glued onto the other two DSP pieces
DSP pieces glued to the card base as shown: one on the front, and two inside
The extra section of the card base at the bottom, where you will put your handwritten note, will fold up inside the card to put into an envelope. When open, it lays flat for the two vertical sections to stand up against.
Here are today’s main colors:
You can click on each one to see all the products that come in that color!
Click on these images for more details and to purchase.
Here’s some stuff you should know:
TOMORROW IS THE LAST DAY TO REGISTER FOR SAB STAMP FEST! CLICK HERE FOR THE DETAILS AND TO REGISTER. Register by January 13. Stamp Fest is January 20.
Newsletter: subscribe for exclusive deals, projects, and more! Enter your email address and click SUBSCRIBE at the top right of this page, just under the picture of my smiling face.
Swatch Books and Product Shares from the 2018 Occasions and Sale-A-Bration Catalogs – order yours HEREby January 2!
This is a fabulous time to join my team! Sale-A-Bration is the biggest event of the Stampin’ Up! year and you can save big on the ultimate bundle, the Starter Kit. CLICK HERE for more information. Contact me with any questions: email candy@stampcandy.net or call/text 404-661-5222
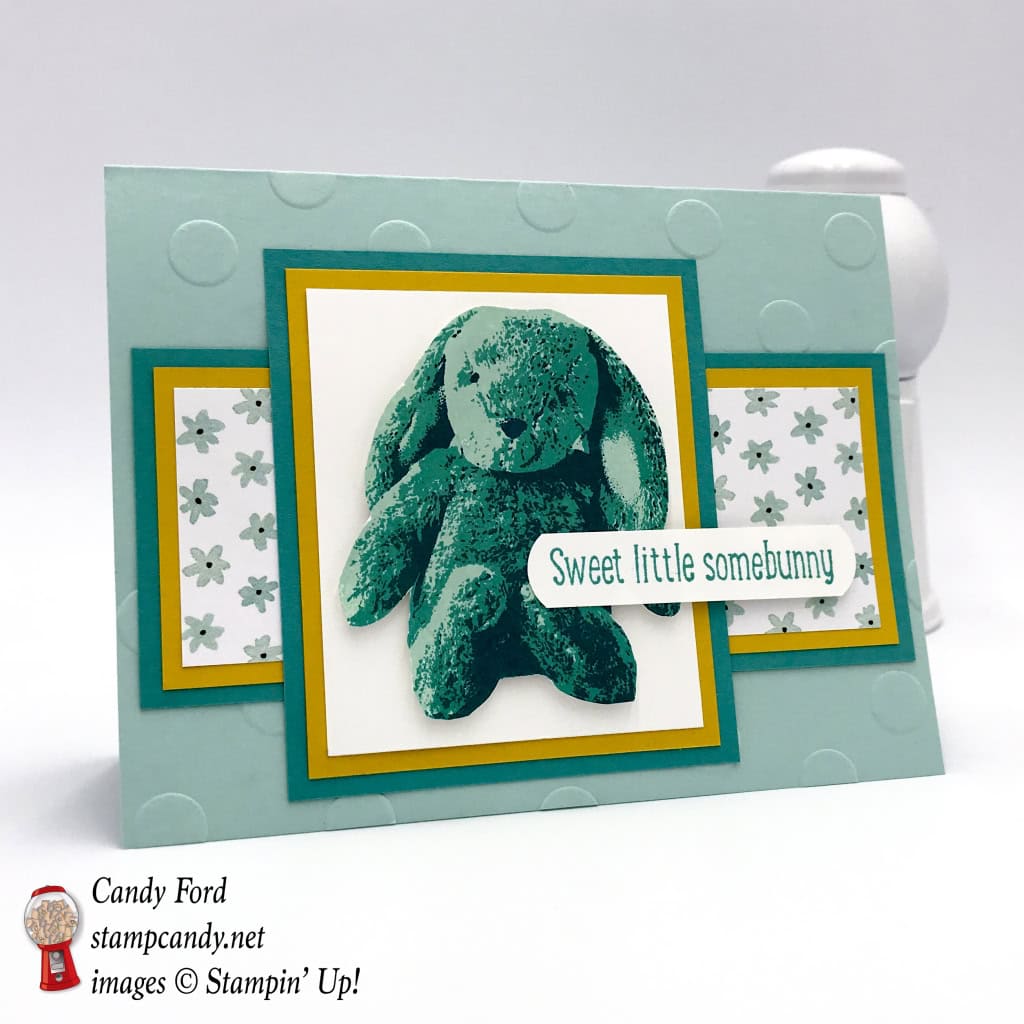
The Sweet Little Something stamp set was one of the first I wanted to try from the new 2018 Occasions Catalog. I used it to make today’s card, which could be used for a baby or young child or even for a baby shower. Make the same card in different colors for a different feel. Maybe Pink Pirouette, Flirty Flamingo, and Berry Burst for a girl? The see through photopolymer stamps make it easy as pie to line up the three stamps to create the photorealistic image.
It’s National Cuddle Up Day! Wouldn’t you love to cuddle up with this sweet little cuddly bunny?
Here’s what I made:
Here’s what I did:
Cut and scored with my Stampin’ Trimmer:
Pool Party card stock (CS) cut to 5-1/2″ x 8-1/2″, then scored in half at 4-1/4″
Whole Lot of Lovely Designer Series Paper (DSP) cut to 4-3/4″ x 1-3/4″
Crushed Curry CS cut to 5″ x 2″
Bermuda Bay CS cut to 5-1/4″ x 2-1/4″
Whisper White CS cut to 2-1/2″ x 3″
Crushed Curry CS cut to 2-3/4″ x 3-1/4″
Bermuda Bay CS cut to 3″ x 3-1/2″
Whisper White CS cut to 5″ x 1/2″
Embossed with the Polka Dot Basics Embossing Folder:
front of card base
Stamped with the Sweet Little Something stamp set:
bunny in Pool Party, then Bermuda Bay, then Island Indigo inks
sentiment in Bermuda Bay ink
Cut using the Pretty Label Punch:
sentiment, to round the ends
Cut using Paper Snips:
bunny
Assembled the card:
DSP glued onto the long piece of Crushed Curry CS
long piece of Crushed Curry CS glued onto the long piece of Bermuda Bay CS
long piece of Bermuda Bay CS glued onto the front of the card base
bunny adhered to the Whisper White CS with Stampin’ Dimensionals
Whisper White CS glued to the remaining piece of Crushed Curry CS
this Crushed Curry CS glued onto the remaining piece of Bermuda Bay CS
this Bermuda Bay CS glued onto the front of the card over the DSP and other layers
sentiment adhered using Stampin’ Dimensionals on the right end and glue on the left end
Here are today’s colors:
You can click on each one to see all the products that come in that color!
Click on these images for more details and to purchase.
Here’s some stuff you should know:
Sale-A-Bration! It’s Stampin’ Up!’s biggest event of the year! You get MORE FREE STUFF when you shop or join my team. Click HERE for the details.
Newsletter: subscribe for exclusive deals, projects, and more! Enter your email address and click SUBSCRIBE at the top right of this page, just under the picture of my smiling face.
This is a fabulous time to join my team! Sale-A-Bration is the biggest event of the Stampin’ Up! year and you can save big on the ultimate bundle, the Starter Kit. CLICK HERE for more information. Contact me with any questions: email candy@stampcandy.net or call/text 404-661-5222
SAB Stamp Fest – ONLY 7 DAYS LEFT TO REGISTER! It happens January 20. Details and register HERE by January 13!
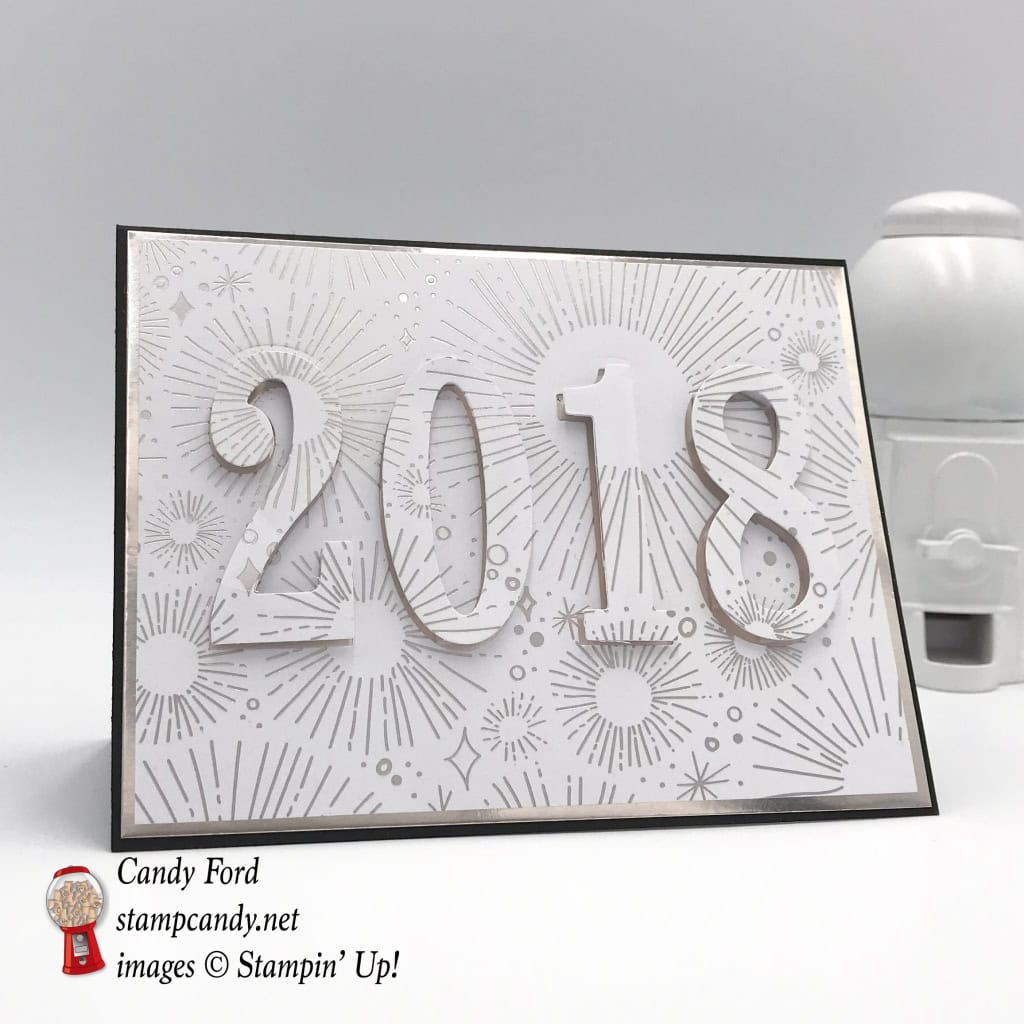
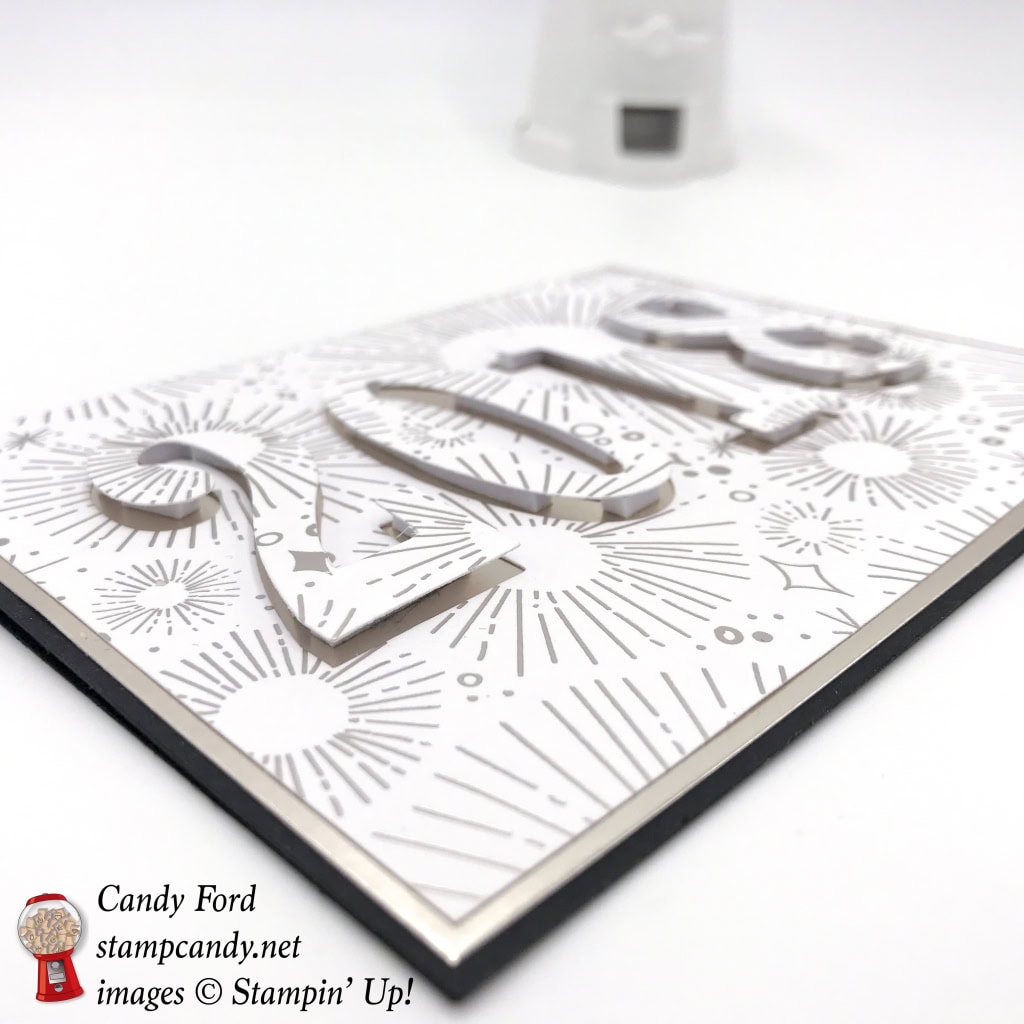
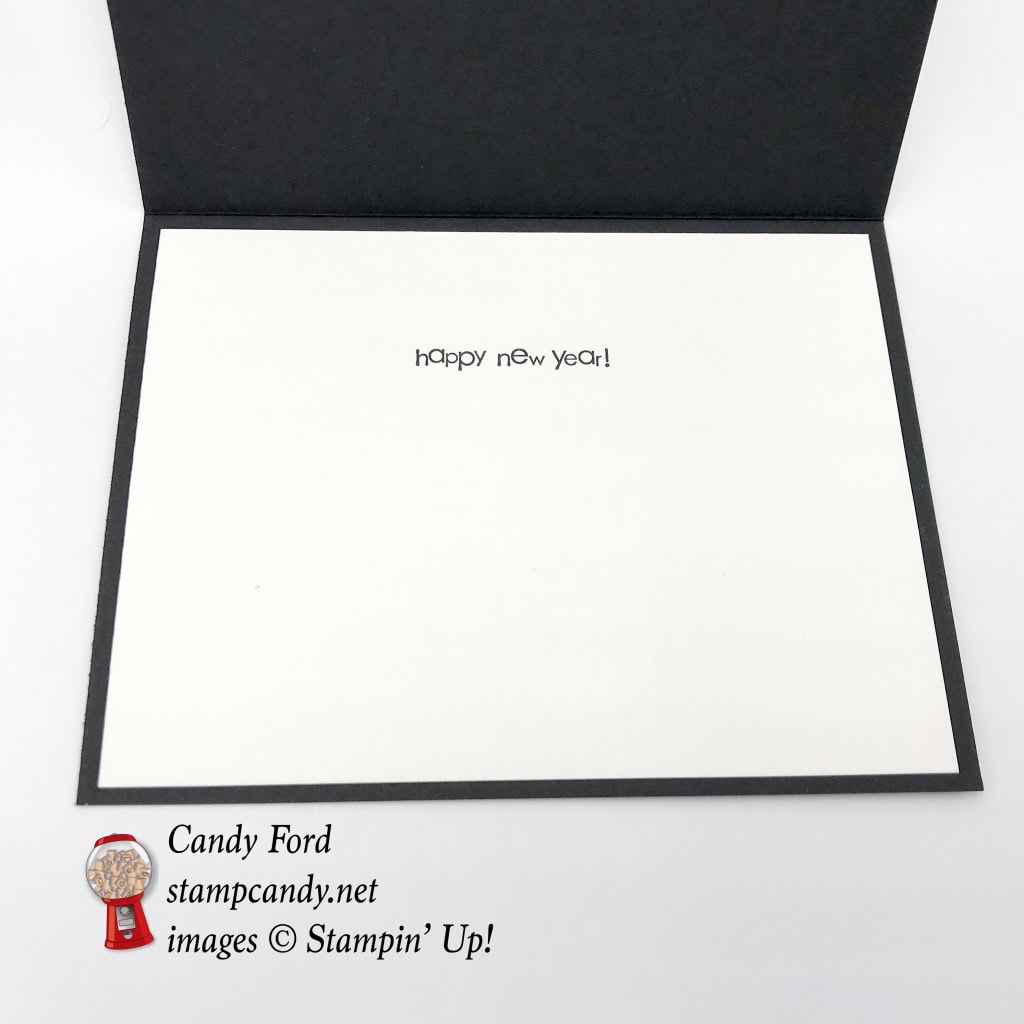
Happy New Year! Today’s card should look familiar. It’s very much like my team’s swap cards that I posted yesterday. I did make mine several weeks ago, but was saving it for today. The Large Numbers Framelits Dies make the Eclipse Technique super quick and easy (the magic words.) I also used the Year of Cheer Designer Series Paper (DSP) and a Silver Foil Sheet. The sentiment inside the card is from the Teeny Tiny Wishes stamp set, which in my opinion, should be in everyones’ stamp collection. There’s a sentiment for almost any occasion, and all the different fonts are great. Check out the cute font on the one I used on today’s card.
Click on the images for more details and to purchase.
Here’s some stuff you should know:
Newsletter: subscribe for exclusive deals, projects, and more! Enter your email address and click SUBSCRIBE at the top right of this page, just under the picture of my smiling face.
Swatch Books and Product Shares from the 2018 Occasions and Sale-A-Bration Catalogs – order yours HEREby January 2!
This is a fabulous time to join my team! Sale-A-Bration is the biggest event of the Stampin’ Up! year and you can save big on the ultimate bundle, the Starter Kit. CLICK HERE for more information. Contact me with any questions: email candy@stampcandy.net or call/text 404-661-5222
SAB Stamp Fest coming January 20. Details and register HERE by January 13!
Whether you go out partying all night or just run around the corner for a minute, please be careful out there. I hope you all have a very happy – and safe – New Year’s Eve.
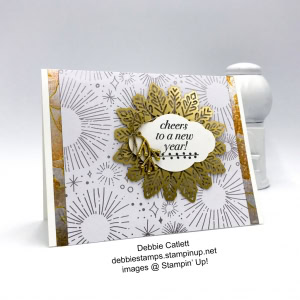
On December 17, I hosted the December Candy Hearts Team Meeting and Christmas Shindig. We had a lot of fun with demonstrations, Make & Takes, yummy food, and talking – and yes there was a whole lot of laughing. Our swap theme was New Year’s, so today I’m sharing the Hearts’ swap cards. I know you’ll agree with me when I say that these are some very talented card makers.
Here’s what they made:
Debbie’s card has a Whisper White card base and a layer of Year of Cheer Designer Series Paper. It includes Year of Cheer Washi Tape & Embellishments, a Foil Snowflake, and a sentiment from the Cheer to the Year stamp set cut with the Pretty Label Punch.
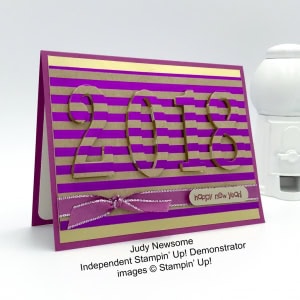
Judy’s card has a Berry Burst card base with a layer of Foil Frenzy Designer Series Paper. 2018 has been cut from the DSP layer with the Large Numbers Framelits Dies, then adhered with Foam Adhesive Strips. This is the Eclipse Technique. Metallic Edged Berry Burst Ribbon (a sneak peek from the upcoming 2018 Occasions Catalog) and a sentiment from the Teeny Tiny Wishes stamp set are the final touches.
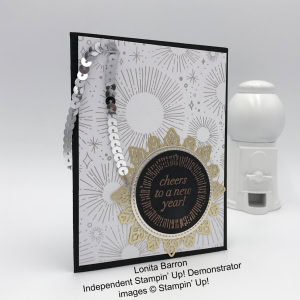
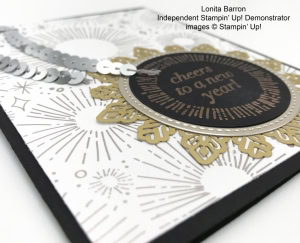
Great minds think alike! Lonita also used the Year of Cheer Designer Series Paper and a Foil Snowflake, but her card has a Basic Black card base. The sentiment is heat embossed on a piece of Basic Black card stock, and layered with a circle cut with the Stitched Shapes Framelits Dies and the snowflake. A piece of Silver Sequin Trim finishes off the design.
Here are today’s colors:
You can click on each one to see all the products that come in that color!
Swatch Books and Product Shares from the 2018 Occasions and Sale-A-Bration Catalogs – order yours by January 2 HERE.
Newsletter: subscribe for exclusive deals, projects, and more! Enter your email address and click SUBSCRIBE at the top right of this page, just under the picture of my smiling face.
Gift Certificates are available in any U.S. dollar amount from me. Contact me – email: candy@stampcandy.net OR call/text: 404-661-5222
Year End Sales Event ends January 2, 2018 – CLICK HERE for details. Order soon so you don’t miss your favorite retiring items!
This is a great time to join my team! With the demonstrator discount of at least 20%, you can get Christmas gifts for all the stampers on your list! Plus you can order from the 2018 Occasions and Sale-A-Bration catalogs now! CLICK HERE for more information. Contact me with any questions: email candy@stampcandy.net or call/text 404-661-5222
Sale-a-bration Stamp Fest coming January 20. Details and register HERE
Stampin’ Blends alcohol markers are now available! Click HERE for more info.
Host Code for the month of December (HS67FXTS) Find out more about HOW, WHEN and WHY to use the code HERE.
December’s FREE gift: Year of Cheer Specialty Washi Tape – Find out more HERE.
Gumball Rewards for all orders over $50. Find out more HERE.
This is a treat for those of you who read my entire blog post! Comment below whether you are staying IN or going OUT for New Year’s Eve, to be entered in a drawing to win these three beautiful cards! I’ll draw a winner tomorrow, so comment today!!!
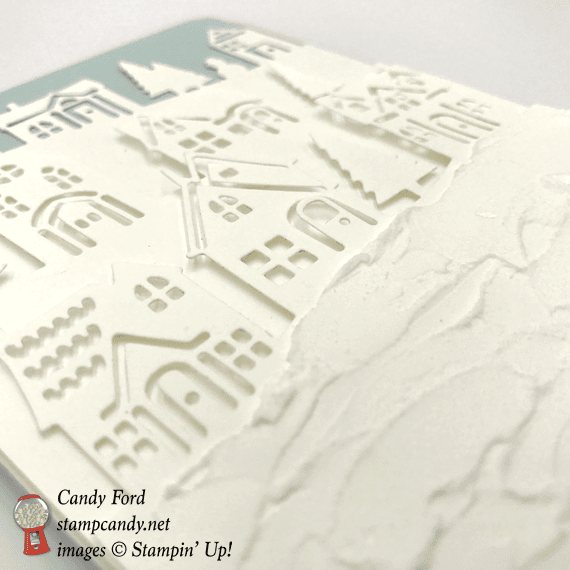
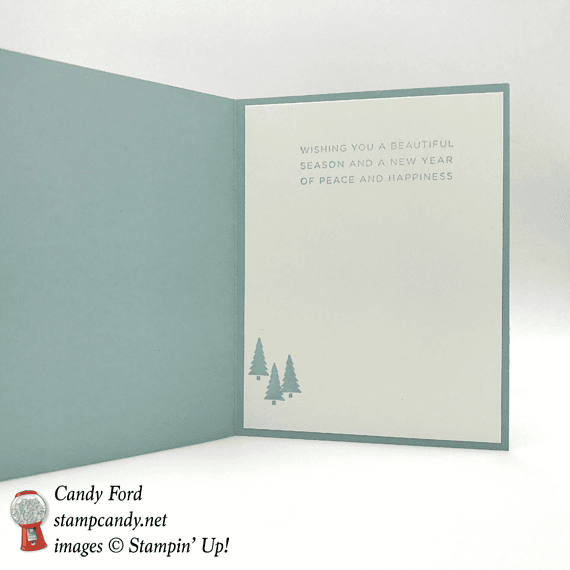
Hearts come home at Christmas, and for many people, home at Christmas includes SNOW! Today’s card features Stampin’ Up! Embossing Paste being used as snow. This simple technique gives the card a little added texture, and the Palette Knives made it super easy.
Click on the images for more details and to purchase.
Here are some key points to remember:
This is a great time to join my team! With the demonstrator discount of at least 20%, you can get Christmas gifts for all the stampers on your list! CLICK HERE for more information. Contact me with any questions: email candy@stampcandy.net or call/text 404-661-5222
Sale-a-bration Stamp Fest coming January 20. Details and register HERE