Aug 16, 2021 | Blog Hop, Boxes, Christmas, Gallery, Gift Wrap, Gifts, Holiday, Tags, Treat Holders |

Welcome to the August 2021 CHBH! This month we are featuring 3D projects. I’m sharing a treat box I made using some new holiday products from the July-December 2021 Mini Catalog: the Pretty Pillowbox Dies and Painted Christmas Designer Series Paper.
After reading my post, be sure to hop around to all the stops to see the wonderful 3D projects this creative group has in store for you.
If you are reading this in email, some photos may appear blurry, or may not appear at all. Please click here to see the post on my blog.
S August 2021 CHBH August 2021 CHBH August 2021 CHBH August 2021 CHBH
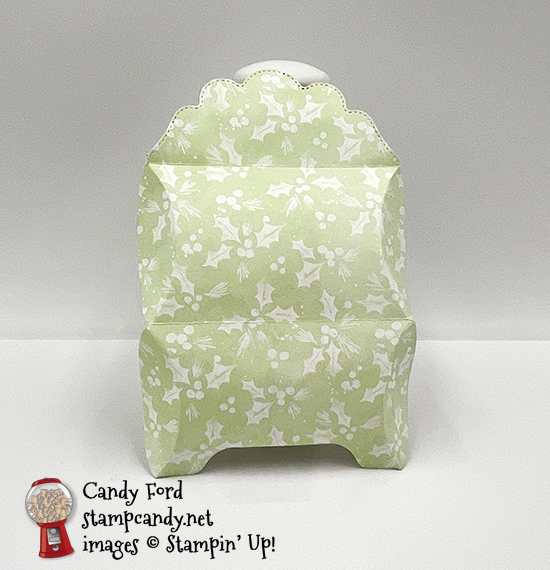
Here’s what I made:
You can fold in the ends as I’ve done here, or you can glue the ends shut, since it opens at the flap.
A couple of Burt’s Bees lip balms fit inside for a small and functional gift.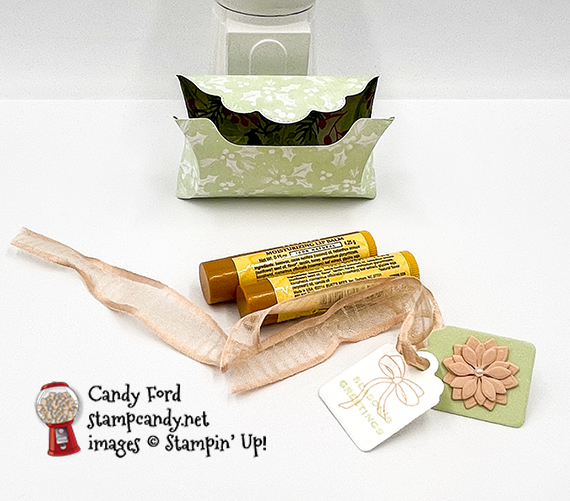


S
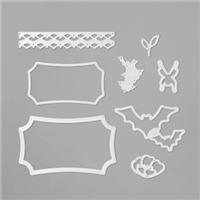
Here’s what I did:
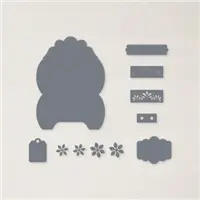
Cut using the Pretty Pillowbox Dies:
- box from a 4-1/2″ x 6″ piece of Painted Christmas DSP
- 2 large and 2 small flower pieces from a scrap of Petal Pink CS
- tags from scraps of Soft Sea Foam and Basic White Thick CS
Stamped with the Tidings & Trimmings stamp set:
- bow in Petal Pink ink onto the Basic White Thick CS tag
- sentiment in Soft Sea Foam ink over the bow
Assembled the box:
- burnished the folds in the box with a Bone Folder
- 4 flower pieces stacked and glued together, then glued onto the Soft Sea Foam CS tag
- pearl applied onto the center of the flower using a Take Your Pick tool
- box folded closed, and 2 lip balms put inside
- tags strung onto ribbon, then the ribbon tied around the box and tied in a bow
S
Here’s the August 2021 CHBH:
Thank you for hopping with the Hearts today! Be sure to hop around to all the stops. You do not want to miss any of the creativity in this talented group of stampers! If you get lost, use the list below.
s
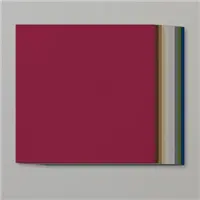
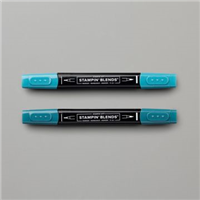
Here are today’s colors:
You can click on each one to see all the products that come in that color!
S
Here’s what I used:
Click on these images for more details and to purchase. If you are reading this post in email, the product images may not show up. Please click here to see the post on my blog.
Supply List. <— Click for a clickable and printable list of the products!
S
It’s Sale-a-bration time…AGAIN!
Stampin’ Up! is having the second Sale-a-bration of this year! Through 30 September 2021, you can choose a free Level 1 Sale-a-bration item for every $50 on an order, and a free Level 2 item for every $100 on an order (before tax & shipping.)
When you join my Candy Hearts team of stampers during Sale-a-bration, you get to choose $125 in product and FREE shipping and pay only $99 (plus tax) PLUS you get to choose one of a dozen new bundles! for free! You can click on each bundle below to see all the details in my online store.
S
Here are some helpful links:
S
Thanks for stopping by today, and Sweet Stamping!

Mar 17, 2021 | Blog Hop, Cards, Fun Folds, Gallery |

Welcome to the March 2021 IRBH – InKing Royalty Blog Hop! This month’s theme is Flowers & Fauna. For my project, I used the new Butterfly Brilliance collection for the fauna (butterflies) and the Ornate Floral 3D Embossing Folder for the Flowers, to make a W-fold card. After reading my post, be sure to hop to the next stop, Rachel Brumley at Artistic Designs by Rachel. Scroll down to see the full hop list if you get lost.
If you are reading this in email, some photos may appear blurry, or may not appear at all. Please click here to see the post on my blog.
S March 2021 IRBH March 2021 IRBH March 2021 IRBH March 2021 IRBH
Here’s what I made:
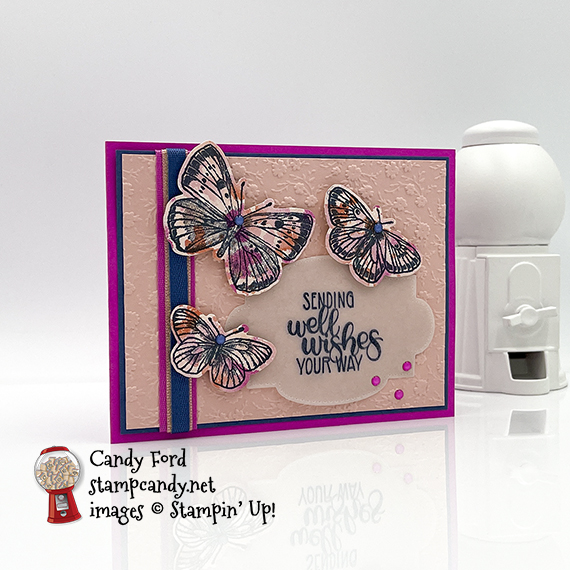

The butterflies are adhered with Stampin’ Dimensionals so they look like they’re flying right off the card.
The embossing shows up better in this photo.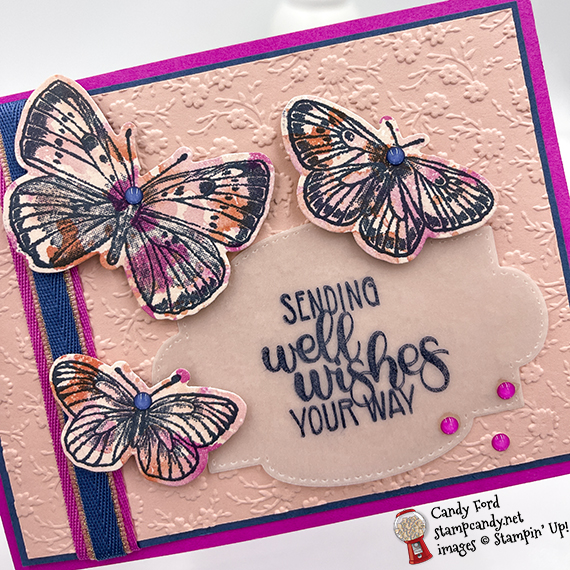
S
Here’s what I did:
Cut and scored with my paper trimmer:
- Magenta Madness card stock (CS) cut to 11″ x 4-1/4″ , then scored in half at 5-1/2″
- Magenta Madness CS cut to 11″ x 1-1/2″, and scored at 2-3/4″, 5-1/2″, and 8-1/4″
- Misty Moonlight CS layer cut to 5-1/4″ x 4″
- Blushing Bride CS layer cut to 5-1/8″ x 3-7/8″
- Basic White CS cut to 5-1/4″ x 4″ for the inside of the card base
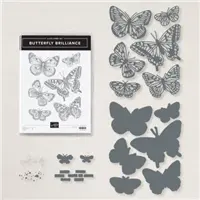
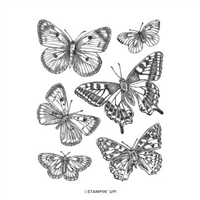
Stamped with the Butterfly Brilliance stamp set:
- butterflies in Misty Moonlight ink onto a piece of the Butterfly Bijou Designer Series Paper (DSP)
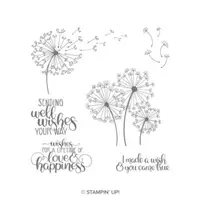
Stamped with the Dandelion Wishes stamp set:
- sentiment in Night of Navy ink onto a scrap of Vellum
- NOTE: I used the Stamparatus so the stamp wouldn’t slide around on the Vellum. I allowed the ink to dry completely before handling any more.
Cut using the Brilliant Wings Dies:
- the butterflies using the largest die that cuts out all 6 at once
Cut using the Stitched So Sweetly Dies:
Embossed using the Ornate Floral 3D Embossing Folder:
Assembled the card:
- burnished the fold in the card base, and the folds in the long CS strip, with a Bone Folder
- Blushing Bride CS layer glued onto the Misty Moonlight CS layer
- 2 pieces of Magenta Madness ribbon adhered side by side onto the top of the Blushing Bride CS layer, and wrapped around to the back of the Misty Moonlight CS layer, using Tear & Tape
- Blushing Bride ribbon adhered over the Magenta Madness ribbon using Tear & Tape
- Misty Moonlight ribbon adhered over the Blushing Bride ribbon using Tear & Tape
- Misty Moonlight CS layer glued onto the front of the card base
- sentiment laid in place on the Blushing Bride CS layer
- 3 smallest butterflies adhered onto the Blushing Bride CS layer using Stampin’ Dimensionals, overlapping the edges of the sentiment to hold it in place
- 3 Magenta Madness enamel dots applied onto the lower right of the sentiment using my Take Your Pick tool
- Mini Glue Dots placed on the underside of the vellum, under the enamel dots so they won’t show
- 1 Misty Moonlight enamel dot applied onto each butterfly head, using my Take Your Pick tool
- Basic White CS glued onto the inside of the card base
- the 2 end sections of the Magenta Madness CS strip glued onto the inside of the card base, just a hair away from the edges, as shown below
- 3 largest butterflies glued onto the CS strip at varying heights

S
Here’s the March 2021 IRBH:
Thank you for hopping along with us. If you get stuck during the Blog Hop, please use this line-up as a guide:
- Brian King at Stamp with Brian
- Candy Ford at Stamp Candy <——- YOU ARE HERE!
- Rachel Brumley at Artistic Designs by Rachel
- Sheryl Sharp at Sharp Notes by Sheryl
- Jackie Beers at Blue Line Stamping
- Renae Novak at Blessed by Cards
- Joanne Brown at The Inky Dragon
- Julie DiMatteo at The Paper Pixie
- Sue Jackson at Just Peachy Stamping
- Lynn Kolcun at Avery’s Owlery
- Pam Morris at Tap Tap Stamp
- Linda Krueger at The Stamp Coach
s
Here are today’s main colors:
You can click on each one to see all the products that come in that color!
S
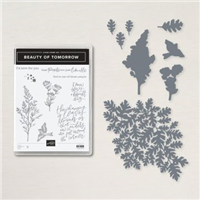
Here’s what I used:
Click on these images for more details and to purchase. If you are reading this post in email, the product images may not show up. Please click here to see the post on my blog.
Supply List. <— Click for a clickable and printable list of the products!
S
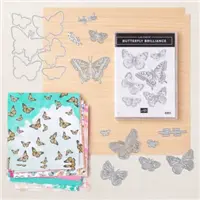
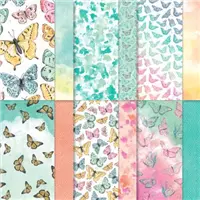
Butterfly Brilliance is here for a limited time!
These new products are out of this world gorgeous. And they’re only available for a couple months, so definitely get them as soon as you can in case they sell out! Click on the images below to see them in my online store. Or CLICK HERE to see them all.
s
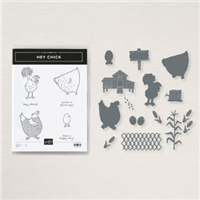
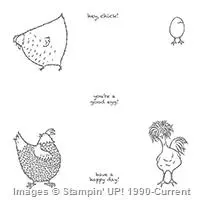
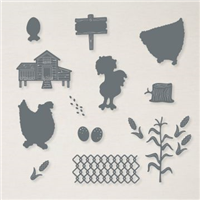
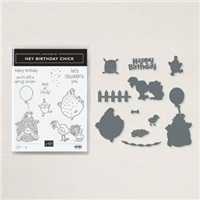
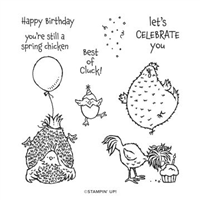
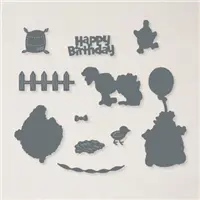
Hey Chick & Hey Birthday Chick!
The Hey Chick stamp set from 2017 Sale-a-bration was so popular, Stampin’ Up! has brought it back. But that’s not all! Now there are coordinating dies. AND there’s a second stamp set, Hey Birthday Chick, that also has coordinating dies. One thing though – they’re available for a limited time, so get them while you can! Click on the images below to see them in my online store. Or CLICK HERE to see them all.
S
Here are some helpful links:
S
Thanks for stopping by today, and Sweet Stamping!
Mar 2, 2021 | Birthday, Cards, Gallery |
Today I’m sharing a card I didn’t get around to posting before Sale-a-bration ended on Sunday. I used the Approaching Perfection stamp set, which was a free Sale-a-bration item. I hope you were able to get your own. Don’t worry, everything else I used is still available. This was one of our February Candy Hearts Team Meeting cards.
If you are reading this in email, some photos may appear blurry, or may not appear at all. Please click here to see the post on my blog.
S Approaching Approaching Approaching Approaching
Here’s what I made:


S
Here’s what I did:
Cut and scored with my paper trimmer:
- Gorgeous Grape card stock (CS) cut to 4-1/4″ x 8-1/2″, then scored in half at 4-1/4″
- Gorgeous Grape card stock (CS) cut to 5-1/2″ x 8-1/2″, then scored in half at 4-1/4″
- Hydrangea Hill Designer Series Paper (DSP) layer cut to 4″ x 4″ (flowers)
- DSP layer cut to 4″ x 5-1/4″ (stripe)
- DSP layers cut to 4″ x 3/4″ (stripe)
- Basic White CS layer cut to 4″ x 4″
- Gorgeous Grape CS layer cut to fit around the outer sentiment (about 2-3/4″x 3/4″)
Stamped with the Approaching Perfection stamp set:
- candles in Highland Heather ink onto the Basic White CS layer
- sentiment in Misty Moonlight ink onto a scrap of Basic White CS, then cut the sentiment into two parts and trimmed each piece to look uniform all around
- NOTE: the front piece is about 2″ x 1/2″ and the inner piece is about 1-1/2″ x 1/2
Cut using the Hydrangea Dies:
- 9 small flowers from a scrap of Gorgeous Grape CS
Assembled the card:
- burnished the folds in the card bases with a Bone Folder
- two DSP strips glued onto the inside of the larger card base, at the top and at the bottom
- left side of smaller card base glued onto the inside of the larger card base, centered so equal amounts of the DSP strips show

- largest DSP layer glued onto the front of the larger card base
- inner sentiment glued onto the DSP layer
- die cut flowers glued around the sentiment

- ribbon tied in a bow and the ends adhered onto the back of the layer using Tear & Tape, the held the bow in place using a Mini Glue Dot
- 4″ x 4″ DSP layer adhered onto the front of the smaller card base using Stampin’ Dimensionals
- outer sentiment glued onto the approx. 2-3/4″x 3/4″ Gorgeous Grape CS piece, then glued onto the DSP layer
- 3 Gorgeous Grape pearls applied onto the card fronts using a Take Your Pick tool

S
Here are today’s colors:
You can click on each one to see all the products that come in that color!
S
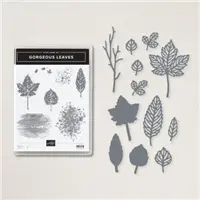
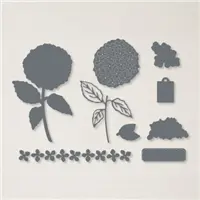
Here’s what I used:
Click on these images for more details and to purchase. If you are reading this post in email, the product images may not show up. Please click here to see the post on my blog.
Supply List. <— Click for a clickable and printable list of the products!
S
Butterfly Brilliance Today!
There are four new products available today that are out of this world gorgeous. And they’re only available for a couple months, so definitely get them as soon as you can, in case they sell out!
Item #155092
Brilliant Wings Dies, Item #155523
Item #156824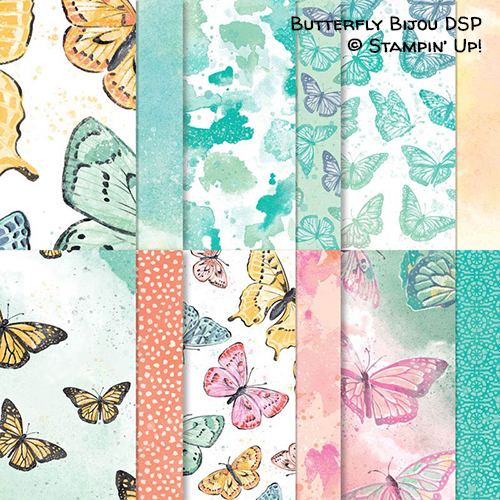
Natural Touch Specialty Paper, Item# 156825
Butterfly Brilliance Bundle, Item #155821
Item #159408
Hey Chick & Hey Birthday Chick!
The Hey Chick stamp set from 2017 Sale-a-bration was so popular, Stampin’ Up! has brought it back. But that’s not all! Now there are coordinating dies. AND there’s a second stamp set, Hey Birthday Chick, that also has coordinating dies. CLICK HERE to see them all. One thing though – they’re available for a limited time, so get them while you can!

S
Here are some helpful links:
S
Thanks for stopping by today, and Sweet Stamping!
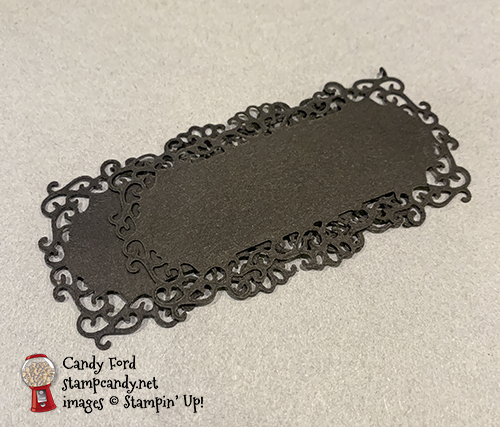
Oct 27, 2020 | Blog Hop, Decor, Frames, Gallery, Halloween, Holiday |

Welcome to the Home Decor SU Style Blog Hop October 2020! This month we’re featuring home decor items you can give as a gift. I made a framed Halloween sampler featuring the Ghoulish Goodies stamp set and the Magic in This Night Designer Series Paper, along with Everything Essential stamp set, Hallows Night Magic stamp set, Ornate Frames Dies, and Halloween Magic Dies. While I thought I ordered a black 12×12 frame, a white one came instead. I didn’t have time to get another one, so please try to imagine this in a black frame. Thanks!
Please be sure to hop around to all the stops, to see all the projects this group has made for you today. You will find the list below.
If you are reading this in email, some photos may appear blurry, or may not appear at all. Please click here to see the post on my blog.
S Style Blog Hop October 2020 Style Blog Hop October 2020 Style Blog Hop October 2020 Style Blog Hop October 2020
Here’s what I made:
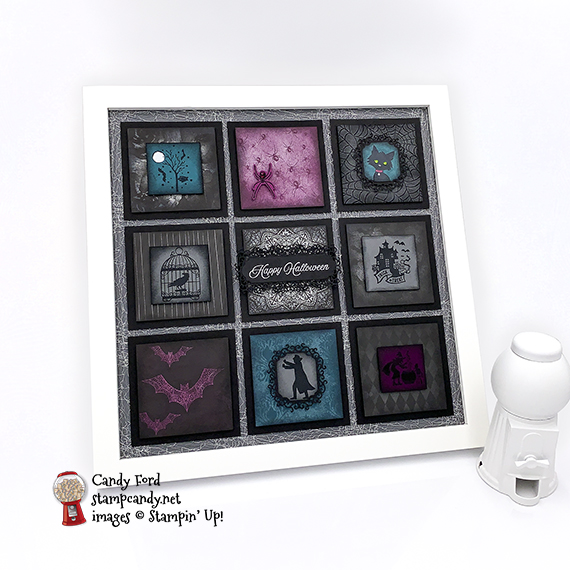
I don’t know why I thought this was a tree, when it is clearly a branch with a bat hanging from it. I’m going to try to pull this piece off and rotate it 90 degrees, but I was afraid to try it before I took the photos. By the way, I love how the metallic Mesh Ribbon over the Basic Gray background looks like cobwebs.
I might redo this panel on Rich Razzleberry cardstock instead of Blackberry Bliss, so it would be easier to see. What do you think?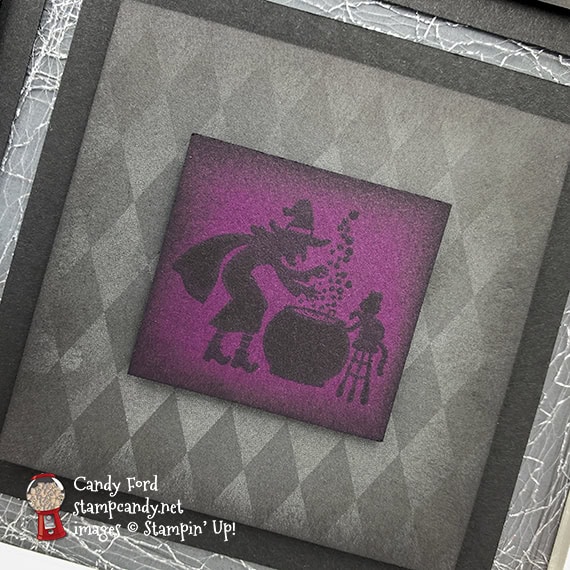
I sponged black ink very lightly all over this embossed layer, which really made the cobwebs show up.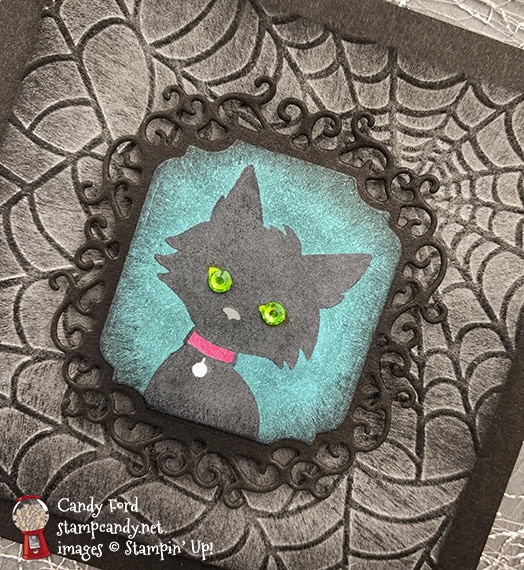
 S
S
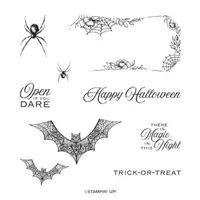
Here’s what I did:
Cut and scored with my paper trimmer:
- Basic Black card stock (CS) layers cut 3-1/2″ x 3-1/2″ (9 pieces)
- Magic in This Night Designer Series Paper (DSP) layers cut to 3″ x 3″ (8 different patterns)
- Basic Gray CS layer cut to 3-1/2″ x 3-1/2″
- Pretty Peacock CS layer cut to 1-7/8″ x 1-7/8″
- Basic Gray CS layer cut to 2″ x 2″ (2 pieces)
- Blackberry Bliss CS layer cut to 1-5/8″ x 1-5/8″
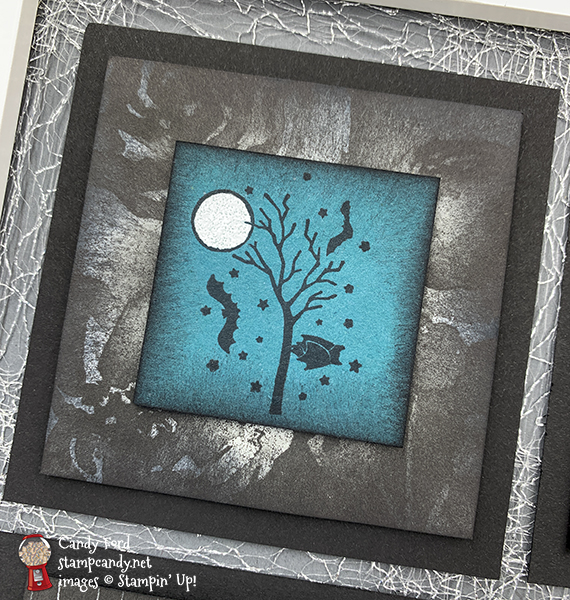
Stamped with the Ghoulish Goodies stamp set in black Memento ink *:
- branch onto the Pretty Peacock CS layer
- cat onto a scrap of Whisper White CS
- raven in cage onto a 2″ Basic Gray CS layer
- vampire onto a scrap of Basic Gray CS
- witch onto the Blackberry Bliss CS layer
Stamped using the Everything Essential stamp set *:
- house in black Memento ink onto the other 2″ Basic Gray CS layer
* For all the images with solid areas, I used the Stamparatus so I could stamp multiple times, to make sure I got good solid coverage.
Stamped using the Hallows Night Magic stamp set:
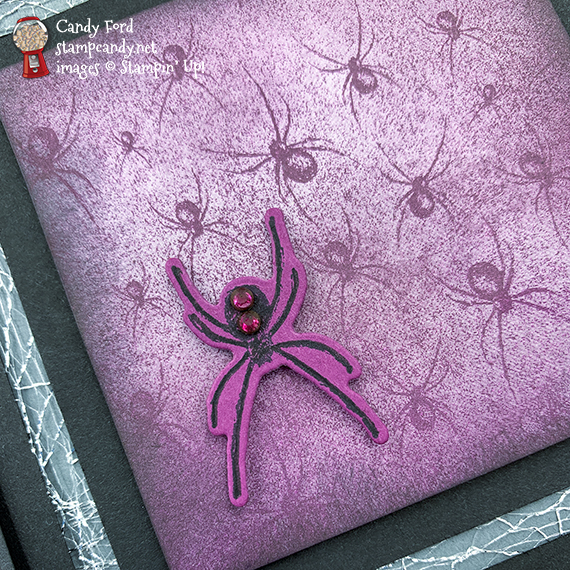
- spider in black Memento ink onto a scrap of Rich Razzleberry CS
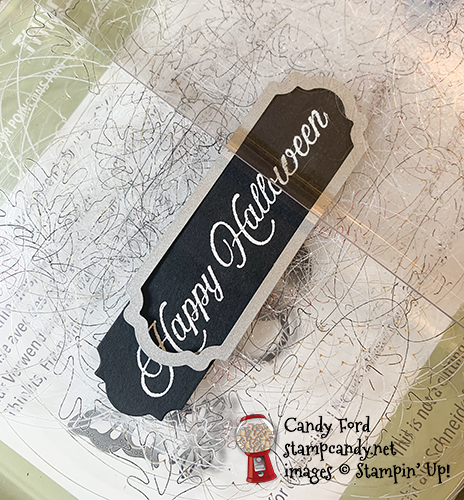
- sentiment in Versamark onto a scrap of Basic Black CS, then heat embossed in white
Cut using the Ornate Frames Dies:
- cat and vampire using the same die
- two frames from a scrap of Basic Black CS for the cat and vampire
- two frames from a scrap of Basic Black CS for the sentiment
- sentiment – The sentiment is longer than the die, so I cut the strip to 7/8″, then die cut one end at a time. I lined up the die with one end of the sentiment and covered only that end with the top cutting plate. Then did the same thing on the other end.
Cut using the Halloween Magic Dies:
Colored using Stampin’ Blends Markers:
- eyes of cat in Granny Apple Green
- cat’s nose in Smoky Slate
- cat’s collar in Blackberry Bliss
- background of cat in Pretty Peacock
- 2 rhinestones in Granny Apple Green
- 2 rhinestones in Blackberry Bliss
- the DSP layer with bats in Blackberry Bliss (I started by coloring just the bats, but I could see where the ink got on the black background, so I colored the entire layer.)
Embossed the moon:
- colored the moon using a Stampin’ Blends Marker dipped in Versamark ink, then heat embossed it in white
- NOTE: this moon is on the top left layer
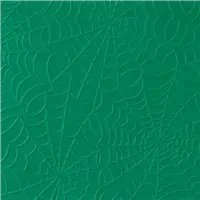
Embossed using the Cobweb 3D Embossing Folder:
Inked using a Stampin’ Sponge:
- edges of all layers (except the Basic Black CS ones) in black Memento ink
- front of Basic Gray CS layer in black Memento ink, very lightly just to accentuate the embossed cobweb
- NOTE: I cut each sponge into 8 wedges, so they go much farther
Assembled the card:
- cat and vampire glued onto their die cut frames
- sentiment glued onto one frame, lining up one end
- second frame glued onto the back of the sentiment, lining it up with the other end
- Here it is from the back:
- Metallic Mesh Ribbon adhered onto a 12″ x 12″ piece of Basic Gray CS, so it will show between the layers and around the edges, using Tear & Tape
- 3-1/2″ Basic Black CS layers adhered onto the Basic Gray background, over the ribbon, using Stampin’ Seal
- 3″ layers adhered onto the Basic Black CS layers using Black Stampin’ Dimensionals
- all remaining pieces adhered onto their respective 3″ layers using Black Stampin’ Dimensionals
- Granny Apple Green rhinestones applied onto the cat’s eyes using my Take Your Pick tool
- Blackberry Bliss rhinestones applied onto the spider (to approximate an hourglass, like a black widow spider) using my Take Your Pick tool
S
Here’s the Home Decor SU Style Blog Hop October 2020:
S
Here are today’s main colors:
You can click on each one to see all the products that come in that color!
S
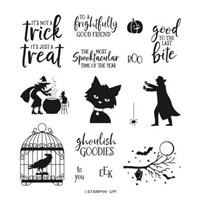
Here’s what I used:
Click on these images for more details and to purchase. If you are reading this post in email, the product images may not show up. Please click here to see the post on my blog.
Supply List. <— Click for a clickable and printable list of the products!
S
S
Only 4 Day Left to Take Advantage of the Designer Series Paper Sale!
Click the image to see the sale:
S
Here are some helpful links:
S
Thanks for stopping by today, and Sweet Stamping!
Oct 22, 2020 | Cards, Gallery |
Today’s card is for someone who is one in a million, at least to you. I used the Quite Curvy Bundle (Quite Curvy stamp set and Curvy Dies) and the Classic Christmas Designer Series Paper from the upcoming Quite Curvy Variety Bundle. It will be available November 3.
If you are reading this in email, some photos may appear blurry, or may not appear at all. Please click here to see the post on my blog.
S One in a Million One in a Million One in a Million One in a Million
Here’s my One in a Million card:


S
Here’s what I did:
Cut and scored with my paper trimmer:
- Sahara Sand card stock (CS) cut to 5-1/2″ x 8-1/2″, then scored in half at 4-1/4″
- Classic Christmas Designer Series Paper (DSP) layer cut to 5-3/8″ x 3″
- Whisper White CS cut to 5-1/4″ x 4″ for the inside of the card base
Stamped with the Quite Curvy stamp set:
- large ivy image in Memento ink onto a scrap of Whisper White Thick CS
- large ivy image in Sahara Sand ink (stamped off) onto a scrap of Whisper White Thick CS
- sentiment in Shaded Spruce ink over the Sahara Sand ivy
Cut using the Curvy Dies:
- both stamped ivy images
- small vine from the Whisper White CS for the inside
Colored using Stampin’ Blends Markers:
- black ivy in Shaded Spruce
- Petal Pink Striped Organdy Ribbon in Dark Cherry Cobbler
Assembled the card:
- burnished the fold in the card base with a Bone Folder
- DSP layer glued onto the front of the card base
- Shaded Spruce ribbon, Whisper White Ribbon, and colored Striped Organdy Ribbon pieces cut to about 5 to 5-1/2″ long and the ends tapered
- the ribbons adhered around the bottom of the DSP layer using Stampin’ Seal+
- Shaded Spruce vine adhered over the ribbon using Stampin’ Seal+
- sentiment vine adhered over Shaded Spruce vine using Stampin’ Dimensionals
- 3 Cherry Cobbler rhinestones applied onto the sentiment using my Take Your Pick tool
- Whisper White CS glued onto the inside of the card base
S
Here are today’s colors:
You can click on each one to see all the products that come in that color!
S
Here’s what I used:
These items will be available to order 3 November 2020:
- Quite Curvy Bundle, Item 156228
- Quite Curvy Stamp Set, Item 154430
- Curvy Dies, Item 154319
- Classic Christmas Designer Series Paper, Item 155969
- Quite Curvy Variety Bundle, Item 158396
Click on these images for more details and to purchase. If you are reading this post in email, the product images may not show up. Please click here to see the post on my blog.
Supply List. <— Click for a clickable and printable list of the products!
S
Designer Series Paper Sale!
Click the image to see the sale:
S
Here are some helpful links:
S
Thanks for stopping by today, and Sweet Stamping!