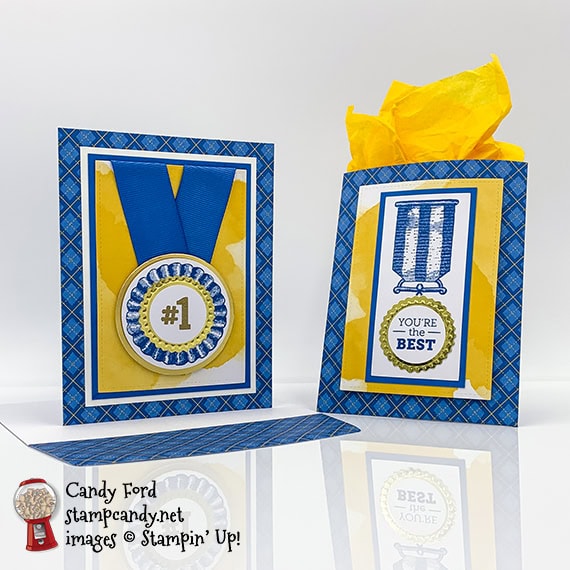
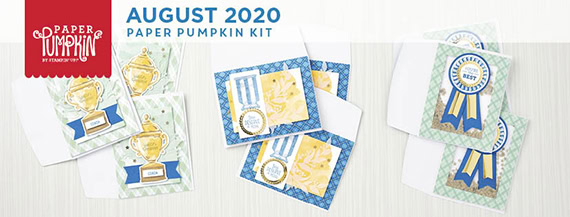
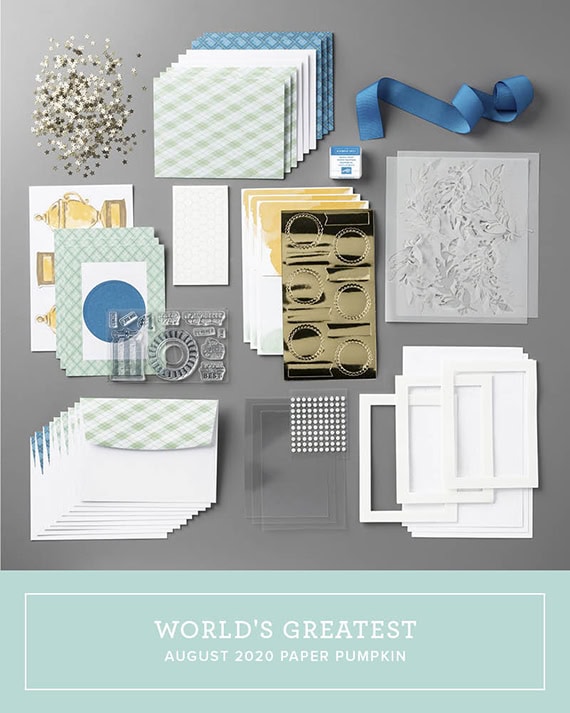
Welcome to the August 2020 PPP Blog Hop! This month’s kit is called World’s Greatest, and it’s all about celebrating the heroes in our lives. You can celebrate a teacher, friend, coach, kid, or anyone else you think is the greatest. For my projects, I used the kit along with some extra card stock to create a card and gift bag. I used the ribbon on the card to make it look more like a race medal than a blue ribbon prize. My husband used to be a runner and triathlete, so there’s quite a collection of these medals in our house. I used glue and Stampin’ Seal for my projects, but you can absolutely use the glue dots that come with the kit. You could also use Stampin’ Seal+ or Tear & Tape.
Be sure to hop all the way around to all the stops so you can see all the great alternative projects made with this fun kit by this talented group.
If you are reading this in email, some photos may appear blurry, or may not appear at all. Please click here to see the post on my blog.
S August 2020 PPP August 2020 PPP August 2020 PPP August 2020 PPP
Here’s what I made:
S
Here’s what I did:
Cut and scored with my paper trimmer:
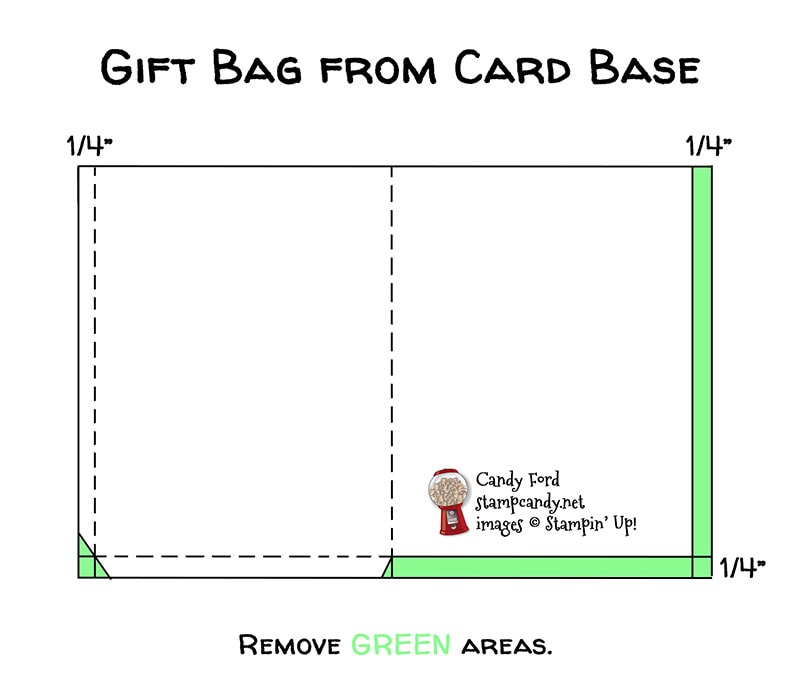
blue card from the kit scored 1/4″ from one end and cut 1/4″ from the other end
same blue card scored 1/4″ from the bottom, then trimmed according to the diagram below
Whisper White CS layer cut to 3-1/2″ x 4-7/8″
Pacific Point CS layer cut to 3-1/4″ x 4-5/8″
Pacific Point CS layer cut to 2″ x 4″
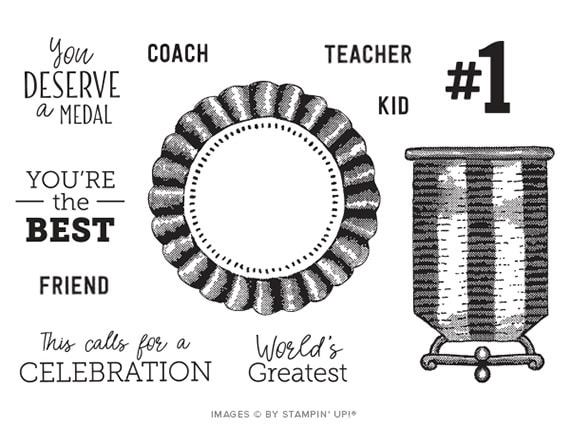
Stamped with the World’s Greatest stamp set:
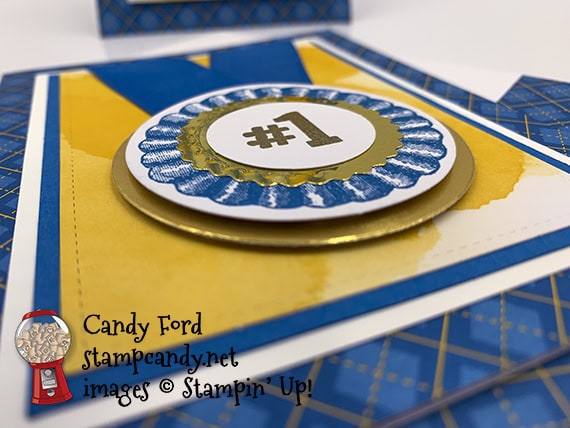
round ribbon in Pacific Point ink onto one of the larger white die cut circles
long ribbon in Pacific Point ink onto one of the larger white die cut rectangles
“You’re the BEST” in Pacific Point ink onto one of the smaller white die cut circles
“#1” in Versamark ink onto one of the smaller white die cut circles, then heat embossed in gold
Cut using the Layering Circle Dies:
a scrap of Gold Foil Sheet
OR you could ink the edges of one of the large blue round die cuts from the kit in Versamark ink and heat emboss in gold
Assembled the card:
burnished the fold in the card base with a Bone Folder
Whisper White CS layer glued onto the front of the card base
larger Pacific Point CS layer glued onto the Whisper White CS layer
piece of ribbon folded in half and adhered onto a yellow die cut layer, folding the ends over the top of the layer, using Stampin’ Seal
heat embossed small circle adhered onto a gold circle using Stampin’ Seal
gold circle adhered onto the large round white die cut, centered on the stamped ribbon, using Stampin’ Seal
large round white die cut adhered onto the gold die cut circle using Stampin’ Dimensionals
gold circle adhered onto the yellow die cut layer, over the fold in the ribbon, using Stampin’ Dimensionals
Assembled the bag:
burnished the folds in the card base with a Bone Folder
1/4″ tabs folded in and glued onto the inside of the opposite side of the card base, to form the bag
small stamped circle adhered onto a gold circle using Stampin’ Seal
gold circle adhered onto the large white rectangle, just under the stamped ribbon, using Stampin’ Seal
white rectangle glued onto the smaller Pacific Point CS layer
Pacific Point CS layer glued onto a yellow die cut layer
yellow die cut layer adhered onto the front of the bag using Stampin’ Dimensionals
The yellow tissue paper I used is from the June 2020 Paper Pumpkin kit, called Box of Sunshine.
S
Here’s the August 2020 PPP Blog Hop:
Click the Next button below to hop to the next stop, Sharon Hashimoto Burkert of As The Ink Dries:
S
Here are today’s colors:
You can click on each one to see all the products that come in that color!
Here’s what I used, other than what came in the kit:
Click on these images for more details and to purchase. If you are reading this post in email, the product images may not show up. Please click hereto see the post on my blog.
Gift Certificates are available in any U.S. dollar amount from me. Contact mefor details.
Have you shopped from me within the past year? Join my private VIP Facebook groupfor exclusive project tutorials and more!
Join my team and enjoy a 20% discount (or more) on all your purchases! You choose $125 in products and pay only $99, and get free shipping! No obligation! No selling required!
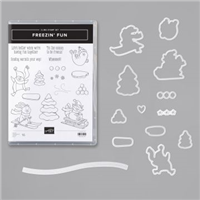
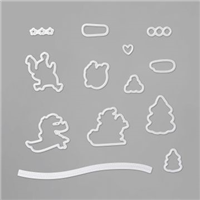
Welcome to the August 2020 InKing Royalty Blog Hop! This month’s theme is Autumn Weather. To make my card, I used the Freezin’ Fun Bundle (Freezin’ Fun and Freezin’ Friends Dies,) Snow Time Dies, Autumn Punch Pack, Plaid Tidings Designer Series Paper, and lots of colors of card stock.
To set the scene, imagine, this cute little bunny just minding his own business, hanging out in a big pile of leaves. And then all of a sudden, a big gust of wind threatens to move the pile right out from under him. Poor little guy. He doesn’t seem to mind though. As a matter of fact, he seems to be enjoying having his ears flapping in the wind.
Since I wanted the leaves to look like they’re blowing off the card, I made the card base 5-1/4″ x 4″ (just a tad smaller than the usual 5-1/2″ x 4-1/4″.)
If you are reading this in email, some photos may appear blurry, or may not appear at all. Please click hereto see the post on my blog.
S August 2020 InKing Royalty August 2020 InKing Royalty August 2020 InKing Royalty August 2020 InKing Royalty
Here’s the bundle:
S
Here’s what I made:
S
Here’s what I did:
Cut and scored with my paper trimmer:
Crumb Cake card stock (CS) cut to 5-1/4″ x 8″, then scored in half at 4″
Plaid Tidings Designer Series Paper (DSP) layer cut to 5-1/8″ x 3-7/8″ (Crumb Cake pattern)
Whisper White CS cut to 5″ x 3-3/4″ for the inside of the card base
Stamped with the Freezin’ Fun stamp set:
skiing bunny in Early Espresso ink onto a scrap of Whisper White Thick CS
skiing bunny in Early Espresso ink onto a scrap of the DSP (Pretty Peacock pattern)
sentiment in Pretty Peacock ink onto a scrap of Whisper White Thick CS
“wind” in Early Espresso ink onto the DSP layer, on the right
Cut using the Freezin’ Friends Dies:
both stamped bunnies
Cut using the Snow Time Dies:
sentiment (then cut off the right end straight)
Cut using the Autumn Punch Pack:
both leaf shapes from scraps of various colors of card stock: Crushed Curry, Pumpkin Pie, Cajun Craze, Real Red, Cherry Cobbler, Rich Razzleberry, Cinnamon Cider, Soft Suede, Pear Pizzazz, Old Olive, and Mossy Meadow
I didn’t count the leaves, but I started out with at least four of each color (2 of each shape,) then punched more to add in here and there. I would guess I used about 50 or so.
Cut using Paper Snips:
scarf from the DSP bunny
excess skis from the Whisper White CS bunny (although I could have gotten away without doing this because I used enough leaves to cover them)
Colored using a Stampin’ Blends Marker:
bunny nose in Light Flirty Flamingo
Assembled the card:
burnished the fold in the card base with a Bone Folder
DSP layer glued onto the front of the card base
DSP scarf glued over the Whisper White bunny’s scarf
bunny glued onto the DSP layer using Stampin’ Dimensionals
adhered leaves on and around the bunny using Mini Stampin’ Dimensionals and glue, to create a 3D pile of leaves
more leaves glued onto the DSP layer to look blown over to the left
sentiment adhered over the leaves at the far right of the card using Stampin’ Dimensionals
Whisper White CS glued onto the inside of the card base
S
Here’s the August 2020 InKing Royalty Blog Hop:
Thank you for hopping along with us. If you get stuck during the Blog Hop, please use this line-up as a guide:
Click on these images for more details and to purchase. If you are reading this post in email, the product images may not show up. Please click hereto see the post on my blog.
There are a lot of card stock colors on this card. I’ve included the individual card stock packs, as well at the color family packs which contain 2 sheets of each color.
Gift Certificates are available in any U.S. dollar amount from me. Contact mefor details.
Have you shopped from me within the past year? Join my private VIP Facebook groupfor exclusive project tutorials and more!
Join my team and enjoy a 20% discount (or more) on all your purchases! You choose $125 in products and pay only $99, and get free shipping! No obligation! No selling required!
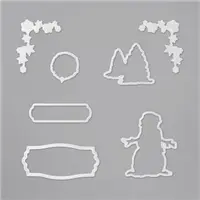
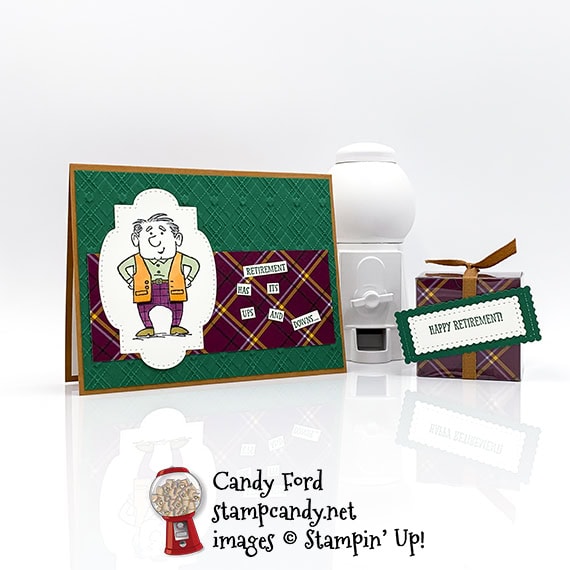
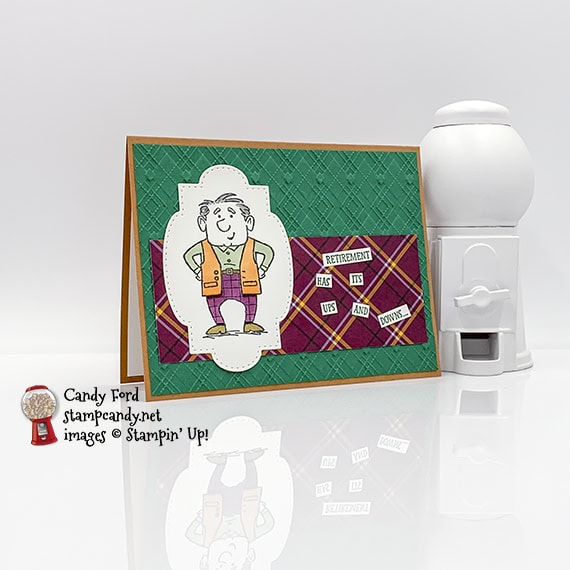
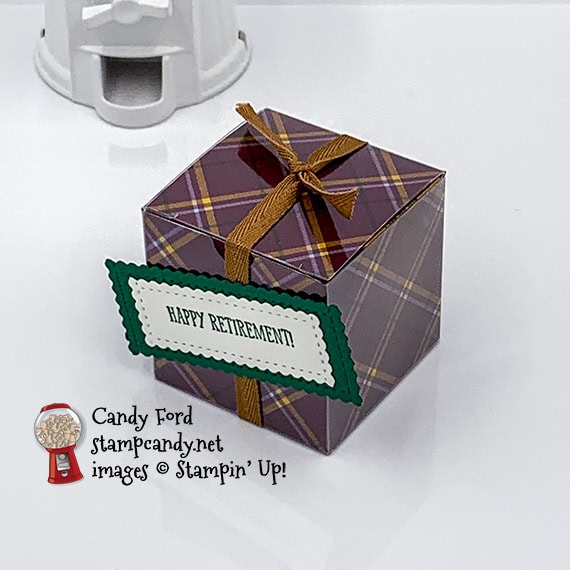
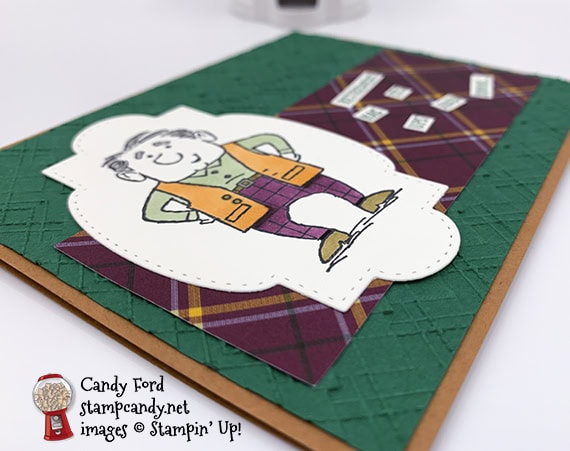
Welcome to the August 2020 OSAT Blog Hop! This month’s theme is New Beginnings, so we’re featuring projects celebrating new job, new marriage, new school year, etc. I used the Senior Years stamp set to make a happy retirement card and gift box. You may think of retirement as the end of a career, but I think of it as the beginning of a new life without the day to day worries of a job. I used the Plaid Tidings Designer Series Paper and Absolutely Argyle 3D Embossing Folder to echo the plaid pants the man is wearing. When I think of a retired man, the first thing that pops into my head is a man wearing mismatched patterns to play golf. And this guy seems very happy with his wardrobe choice, from the Pumpkin Pie vest to the Blackberry Bliss plaid pants.
If you are reading this in email, some photos may appear blurry, or may not appear at all. Please click here to see the post on my blog.
SAugust 2020 OSAT August 2020 OSAT August 2020 OSAT
Here’s what I made:
S
Here’s what I did:
Cut and scored with my paper trimmer:
Cinnamon Cider card stock (CS) cut to 5-1/2″ x 8-1/2″, then scored in half at 4-1/4″
Shaded Spruce CS layer cut to 5-1/4″ x 4″
Plaid Tidings Designer Series Paper (DSP) layer cut to 5″ x 2″
Whisper White CS cut to 5-1/4″ x 4″ for the inside of the card base
Plaid Tidings Designer Series Paper (DSP) cut to 6″ x 2″ (2 pieces)
Stamped with the Senior Years stamp set:
man in Tuxedo Black Memento ink onto a scrap of Whisper White Thick CS
front sentiments in Shaded Spruce ink onto a scrap of Whisper White Thick CS
inner sentiment in Shaded Spruce ink onto the Whisper White CS for the inside of the card base
box sentiment in Shaded Spruce ink onto a scrap of Whisper White Thick CS
Cut using the Stitched So Sweetly Dies:
man
box sentiment
scrap of Shaded Spruce CS to mat the box sentiment
Embossed using the Absolutely Argyle 3D Embossing Folder:
Shaded Spruce CS layer
Colored using Stampin’ Blends Markers:
man in Pumpkin Pie, Soft Sea Foam, Blackberry Bliss, and Soft Suede
Cut using Paper Snips:
words of front sentiments cut apart
Assembled the card:
burnished the fold in the card base with a Bone Folder
embossed Shaded Spruce CS layer glued onto the front of the card base
DSP layer glued onto the Shaded Spruce CS layer
man and front sentiments glued onto the card front
Whisper White CS glued onto the inside of the card base
Assembled the box:
burnished the folds in the Tiny Treat box and folded it to assemble
burnished the folds in the two DSP pieces
Inserted one DSP piece into the box around the front and two sides
inserted the second DSP piece into the box around the bottom, back, and top
put treats inside the box and closed the lid
Cinnamon Cider ribbon tied around the box and tied in a simple knot on top
die cut sentiment glued onto the die cut Shaded Spruce CS mat
Shaded Spruce CS mat adhered onto the front of the box using Mini Glue Dots
S
Here’s the August 2020 OSAT Blog Hop:
Here are today’s colors:
You can click on each one to see all the products that come in that color!
Click on these images for more details and to purchase. If you are reading this post in email, the product images may not show up. Please click hereto see the post on my blog.
Gift Certificates are available in any U.S. dollar amount from me. Contact mefor details.
Have you shopped from me within the past year? Join my private VIP Facebook groupfor exclusive project tutorials and more!
Join my team and enjoy a 20% discount (or more) on all your purchases! You choose $125 in products and pay only $99, and get free shipping! No obligation! No selling required!
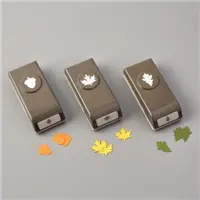
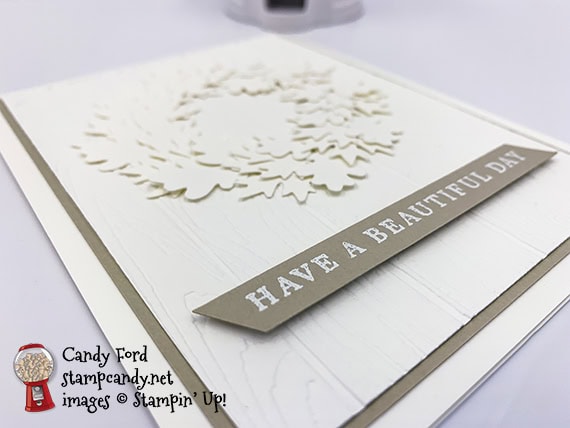
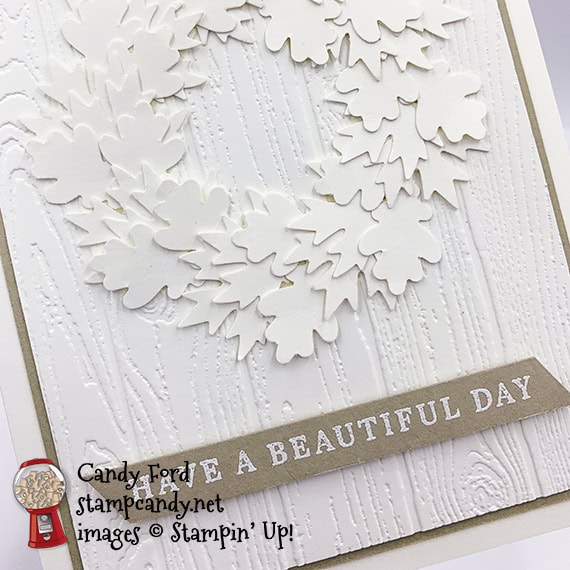
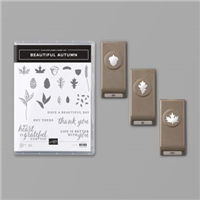
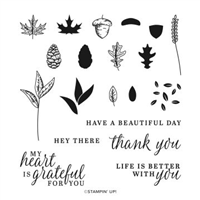
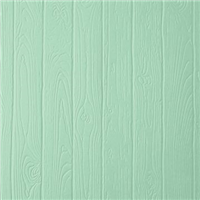
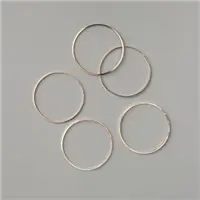
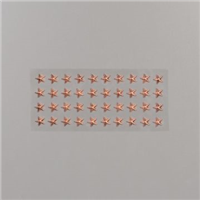
Welcome to the August 2020 ICS Blog Hop! This month’s theme is Punch Me Out, and we’re featuring Stampin’ Up!’s amazing punches. I used the Autumn Punch Pack and coordinating Beautiful Autumn stamp set for my project today, as well as the Pinewood Plank 3D Embossing Folder. The embossing folder creates the background for the wreath, which is one color (white) but made of two different leaf types. To make sure the wreath turned out round, I drew a circle on the background layer by tracing a Gold Hoop Embellishment with a pencil, and glued the leaves around that.
Be sure to hop around to all the stops to see all the projects from this great group of stampers!
If you are reading this in email, some photos may appear blurry, or may not appear at all. Please click hereto see the post on my blog.
S August 2020 ICS Blog Hop August 2020 ICS Blog Hop August 2020 ICS Blog Hop August 2020 ICS Blog Hop
Here’s what I made:
S
Here’s what I did:
Cut and scored with my paper trimmer:
Whisper White Thick card stock (CS) cut to 4-1/4″ x 11″, then scored in half at 5-1/2″
Sahara Sand CS layer cut to 3-7/8″ x 5-1/8″
Whisper White Thick CS layer cut to 3-3/4″ x 5″
Sahara Sand CS cut to 3/8″ x 3-1/2″ for the sentiment
Stamped with the Beautiful Autumn stamp set:
sentiment in Versamark ink onto the Sahara Sand CS strip, then heat embossed in white
Cut using the Autumn Punch Pack:
16 each of the 2 leaves from a scrap of Whisper White Thick CS
Cut using Paper Snips:
both ends of the sentiment strip
Embossed using the Pinewood Planks 3D Embossing Folder:
Whisper White Thick CS layer
Assembled the card:
burnished the fold in the card base with a Bone Folder
Sahara Sand CS layer glued onto the front of the card base
embossed Whisper White Thick CS layer glued onto the Sahara Sand CS layer
circle drawn onto the Whisper White CS layer using a pencil and a Gold Hoop Embellishment, as a guide for the wreath
leaves glued onto the White White CS layer around the circle
sentiment strip adhered onto the Whisper White CS layer using Mini Stampin’ Dimensionals
S
Here’s the August 2020 ICS Blog Hop:
Click the next button to hop to the next stop, Sandra Roberts of Sandra’s Stamp & Craft Studio in the UK.
SS
Here are today’s colors:
You can click on each one to see all the products that come in that color!
Click on these images for more details and to purchase. If you are reading this post in email, the product images may not show up. Please click hereto see the post on my blog.
Gift Certificates are available in any U.S. dollar amount from me. Contact mefor details.
Have you shopped from me within the past year? Join my private VIP Facebook groupfor exclusive project tutorials and more!
Join my team and enjoy a 20% discount (or more) on all your purchases! You choose $125 in products and pay only $99, and get free shipping! No obligation! No selling required!
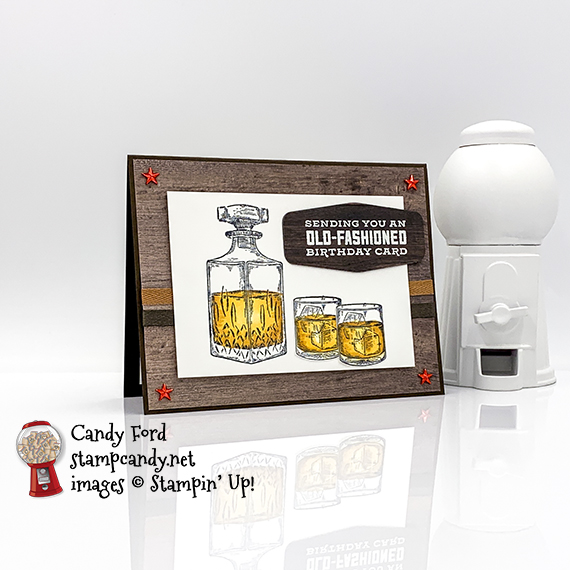
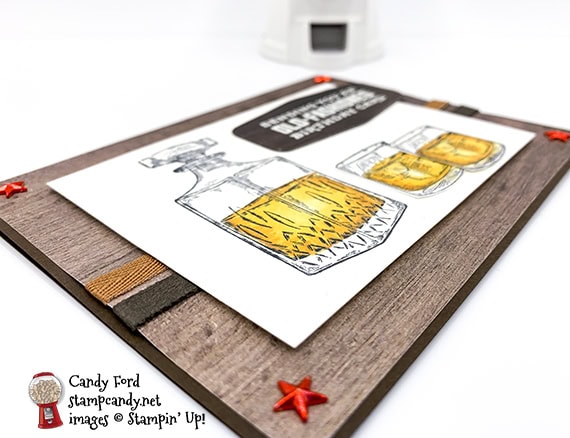
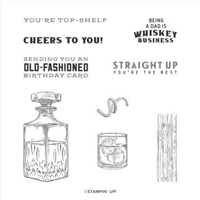
Welcome to the August 2020 Candy Hearts Blog Hop! This month’s theme is Birthday. I used the Whiskey Business stamp set, the Tasteful Labels Dies, and In Good Taste Designer Series paper to create my card. The main colors are browns, yellows, and white. I added a few Real Red touches because the person I made this card for really likes red. If you don’t want the red, you can leave the Star Designer Elements copper, and use Early Espresso ink on the inside of the card.
Be sure to hop around to all the stops to see all the great projects this talented group has for you! The amazing Lisa Ann Bernard of Queen B Creations is joining us, and I’m sure she has made something wonderful to share.
If you are reading this in email, some photos may appear blurry, or may not appear at all. Please click hereto see the post on my blog.
S August 2020 Candy Hearts August 2020 Candy Hearts August 2020 Candy Hearts August 2020 Candy Hearts
Here’s what I made:
S
Here’s what I did:
Cut and scored with my paper trimmer:
Early Espresso card stock (CS) cut to 5-1/2″ x 8-1/2″, then scored in half at 4-1/4″
In Good Taste Designer Series Paper (DSP) layer cut to 5-3/8″ x 4-1/8″
Whisper White Thick CS layer cut to 4-3/8″ x 3-1/8″
Whisper White CS cut to 5-1/4″ x 4″ for the inside of the card base
Stamped with the Whiskey Business stamp set:
decanter in Tuxedo Black Memento ink onto the Whisper White Thick CS layer
2 glasses in Tuxedo Black Memento ink onto a scrap of Whisper White Thick CS
sentiment in Versamark ink onto a scrap of DSP (darker wood) then heat embossed in white
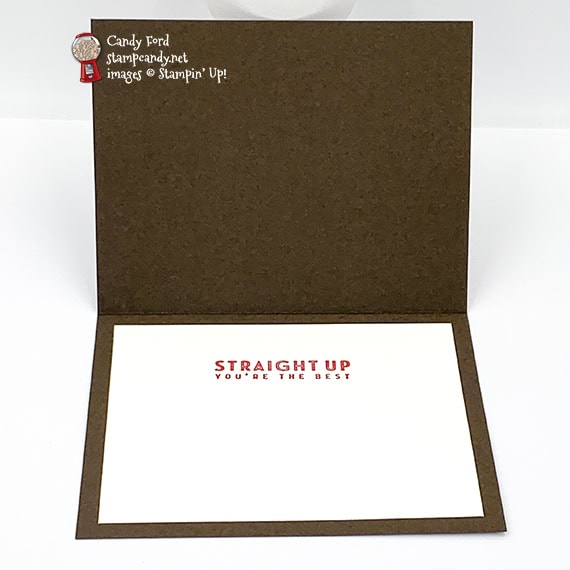
inside sentiment in Real Red ink onto the Whisper White CS for the inside
Cut using the Tasteful Labels Dies:
embossed sentiment
Cut using Paper Snips:
the 2 glasses
Colored using Stampin’ Blends Markers:
“whiskey” in the decanter and glasses in Light So Saffron, Dark So Saffron, and Light Cinnamon Cider
4 Star Designer Elements in Dark Real Red
Assembled the card:
burnished the fold in the card base with a Bone Folder
Early Espresso Faux Suede Ribbon and Cinnamon Cider Ribbon adhered onto the larger DSP using Tear & Tape
NOTE: I folded the Tear & Tape in half so it wouldn’t be too wide for the ribbon.
larger DSP layer glued onto the front of the card base
2 glasses glued onto the Whisper White Thick CS layer
die cut sentiment glued onto the die cut Early Espresso CS
die cut Early Espresso CS glued onto the Whisper White Thick CS layer
Whisper White Thick CS layer adhered onto the larger DSP layer using Stampin’ Dimensionals
star elements applied onto the 4 corners of the large DSP layer
Whisper White CS glued onto the inside of the card base
Click on these images for more details and to purchase. If you are reading this post in email, the product images may not show up. Please click hereto see the post on my blog.
Gift Certificates are available in any U.S. dollar amount from me. Contact mefor details.
Have you shopped from me within the past year? Join my private VIP Facebook groupfor exclusive project tutorials and more!
Join my team and enjoy a 20% discount (or more) on all your purchases! You choose $125 in products and pay only $99, and get free shipping! No obligation! No selling required!
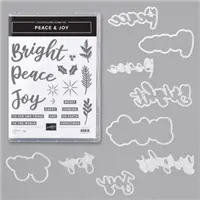
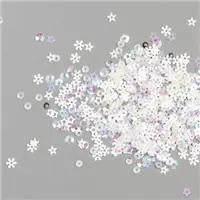
Welcome to the July 2020 Inking Royalty Blog Hop! This month’s theme is Christmas in July! This is the perfect time to start planning your holiday cards and invitations, especially since so many folks are staying home and have more time. My card for today can be used for Christmas or really any winter occasion. I used the Peace & Joy Bundle (Peace & Joy stamp set and Joy Dies,) Trimming the Town Designer Series Paper, and Snowflake Sequins from the upcoming August – December 2020 Mini Catalog, which goes live August 4. If you’d like to order from the new Mini Catalog now instead of having to wait, click here to join.
After reading my post today, I hope you’ll hop around to all the stops. There’s so much talent in this group and you don’t want to miss any of it!
If you are reading this in email, some photos may appear blurry, or may not appear at all. Please click here to see the post on my blog.
S July 2020 Inking Royalty Blog Hop July 2020 Inking Royalty Blog Hop
Here are the Sneak Peek products I used:
S
Here’s what I made:
S
Here’s what I did:
Cut and scored with my paper trimmer:
Misty Moonlight card stock (CS) cut to 5-1/2″ x 8-1/2″, then scored in half at 4-1/4″
Whisper White CS layer cut to 5-3/8″ x 4-1/8″
Trimming the Town Designer Series Paper (DSP) layer cut to 5-1/4″ x 4″ (stripes)
Whisper White CS layer cut to 4-1/8″ x 2-7/8″
DSP layer cut to 4″ x 2-3/4″ (snow)
Whisper White CS cut to 5-1/4″ x 4″ for the inside of the card base
Stamped with the Peace & Joy stamp set:
HAPPY and AND in Misty Moonlight ink onto a scrap of Whisper White Thick CS
BRIGHT in Misty Moonlight ink, stamped off three times, onto the 5-1/4″ x 4″ Whisper White CS (I wanted it to be very light, like a watermark, so I could write over it.)
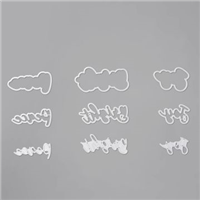
Cut using the Joy Dies:
BRIGHT using all three dies, the middle one from a scrap of Misty Moonlight CS, and the other two from a scrap of Whisper White Thick CS
Cut using Paper Snips:
HAPPY and AND
Assembled the card:
burnished the fold in the card base with a Bone Folder
the 3 BRIGHT die cuts glued together
BRIGHT die cut stack, HAPPY, and AND adhered onto the smaller DSP layer using Stampin’ Dimensionals
smaller DSP layer glued onto the smaller Whisper White CS layer
smaller Whisper White CS layer glued onto the larger DSP layer
larger DSP layer glued onto the larger Whisper White CS layer
larger Whisper White CS layer glued onto the front of the card base
3 Snowflake Sequins glued onto the larger DSP layer
5-1/4″ x 4″ Whisper White CS glued onto the inside of the card base
What I would do differently:
I’m not yet used to having the new adhesives, so I forget to use them. For today’s card, I would have put the card stock for the top two BRIGHT die cuts on an Adhesive Sheet before die cutting. Then I could have just peeled off the backing to adhere the pieces, instead of gluing them. I would have put the card stock for the bottom (largest) BRIGHT die cut on a Foam Adhesive Sheet before die cutting. I also would have put the stamped sentiments on a Foam Adhesive Sheet before cutting them with Paper Snips.
S
Here’s the July 2020 Inking Royalty Blog Hop:
Thank you for hopping along with us. Please hop to the next stop, Linda Krueger at The Stamp Coach. If you get stuck during the Blog Hop, please use this line-up as a guide:
Click on the images for more details and to purchase. If you are reading this post in email, the product images may not show up. Please click here to see the post on my blog.
These products will be available to purchase 4 August 2020:
Peace & Joy Bundle (155167) $45.00
Peace & Joy stamp set (153430) $18.00
Joy Dies (153530) $32.00
Trimming the Town Designer Series Paper (153491) $11.50
Gift Certificates are available in any U.S. dollar amount from me. Contact mefor details.
Have you shopped from me within the past year? Join my private VIP Facebook groupfor exclusive project tutorials and more!
Join my team and enjoy a 20% discount (or more) on all your purchases! You choose $125 in products and pay only $99, and get free shipping! No obligation! No selling required! If you don’t want to wait until August 4 to order from the new August – December Mini Catalog, join now! You can even add the new products to your Starter Kit!