May 6, 2020 | Blog Hop, Cards, Gallery |

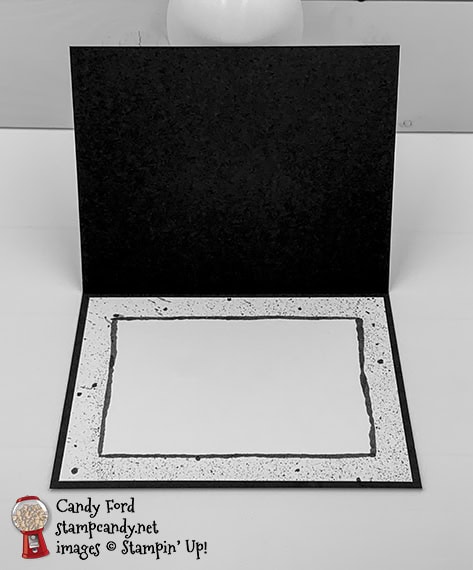
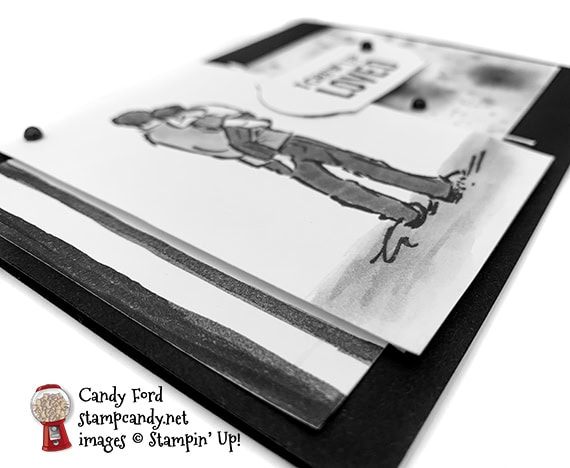
It’s time for the May ICS Blog Hop! This month’s theme is “It’s A Guy Thing In Black & White.” We are featuring masculine projects using only black and white products. I used the A Good Man stamp set and the Timeless Label Punch, and watercolored with an Aqua Painter and Memento ink refill on Shimmery White cardstock.
If you are reading this in email, some photos may appear blurry, or may not appear at all. Please click here to see the post on my blog.
S It’s A Guy Thing In Black & White It’s A Guy Thing In Black & White It’s A Guy Thing In Black & White https://bit.ly/2VSPkpK
Last Chance Products:
These products will be retiring soon. Get them while you can, because they will sell out quickly. See all the products in my online store here.
S
Here’s what I made:

S
Here’s what I did:
Cut and scored with my paper trimmer:
- Basic Black card stock (CS) cut to 5-1/2″ x 8-1/2″, then scored in half at 4-1/4″
- Shimmery White CS layer cut to 3-3/8″ x 3-1/2″
- Shimmery White CS layer cut to 3″ x 3″
- Shimmery White CS layer cut to 2-1/2″ x 4″
- Shimmery White CS cut to 5-1/4″ x 4″ for the inside of the card base
- any scrap paper cut to 4-1/4″ x 3″
Stamped with the A Good Man stamp set:
- image in Tuxedo Black Memento ink onto the 2-1/2″ x 4″
- sentiment in Tuxedo Black Memento ink onto a scrap of Shimmery White CS
Cut using the Timeless Label Punch:
Colored using an Aqua Painter and Tuxedo Black Memento ink:
- stripes onto the 3-3/8″ x 3-1/2″ piece of Shimmery White CS
- splotches onto the 3″ x 3″ piece of Shimmery White CS
- stamped image
- edges of the punched sentiment
- 4-1/4″ x 3″ scrap paper laid on the 5-1/4″ x 4″ Shimmery White CS, then used the Aqua Painter to splatter all around the edges
- removed scrap paper and painted a frame on the inner edge of the splattered area
- Note: I used a large clear block as a palette for the Memento ink refill.
Colored using a Stampin’ Blends Marker:
- 3 small frosted epoxy droplets in Dark Basic Black
Assembled the card:
- burnished the fold in the card base with a Bone Folder
- striped layer glued onto the front of the card base
- splotchy layer glued onto the front of the card base, over the striped layer
- image layer adhered over the first two layers using Stampin’ Dimensionals
- sentiment glued to the image layer on the left and adhered onto the splotchy layer with Stampin’ Dimensionals on the right
- 3 droplets applied onto the layers
- 5-1/4″ x 4″ piece of Shimmery White CS glued onto the inside of the card base
S
Here’s the “It’s a Guy Thing in Black & White” Blog Hop:
Click the Next button to hop to the next stop: Joni Metras of Joni in the Spotlight Stamping

S
Here are today’s colors:
You can click on each one to see all the products that come in that color!
S
Here’s what I used:
Click on these images for more details and to purchase. If you are reading this post in email, the product images may not show up. Click here to see the post on my blog.
Supply List <— Click for a clickable and printable list of the products!
S
Here are some helpful links:
Thanks for stopping by today, and Sweet Stamping!
Apr 30, 2020 | Bags, Blog Hop, Cards, Gallery |

Welcome to the April 2020 APPT Blog Hop! This month’s kit is called My Wonderful Family and it makes 8 cards great to send to your kinfolk. I used the kit to make an alternate card and a gift bag of cookies. Be sure to hop around to all the stops on the and see all the great alternate projects made with this kit.
If you are reading this in email, some photos may appear blurry, or may not appear at all. Please click here to see the post on my blog.
S 2020 APPT Blog Hop April 2020 APPT Blog Hop April 2020 APPT Blog Hop
Here’s what I made:

S
Here’s what I did:
Cut and scored with my paper trimmer:
- Soft Sea Foam card stock (CS) cut to 4-1/4″ x 11″, then scored in half at 5-1/2″
- 4-1/4″ x 1-1/2″ cut from the printed end of a card base from the kit
- optional: Whisper White CS cut to 4″ x 5-1/4″ for the inside of the card base
Stamped with the My Wonderful Family stamp set:
- leaves of the tree in Mint Macaron ink onto the front of the card base, to the left
- sentiment in Versamark ink onto a Soft Sea Foam banner from the kit, then heat embossed in copper
Assembled the card:
- burnished the fold in the card base with a Bone Folder
- 4-1/4″ x 1-1/2″ patterned piece glued onto the front of the card base
- piece of ribbon from the kit notched at one end using Paper Snips, then adhered onto the back of the sentiment at the end
- sentiment glued onto the patterned piece
- tree die cut glued over the stamped leaves and the sentiment
- optional: Whisper White CS glued onto the inside of the card base
Assembled the bag:
- folded over the top of the bag and burnished the fold with a Bone Folder
- text piece from the kit clipped onto the top of the bag with a Mini Library Clip
- ribbon from the kit tied in a bow, then adhered onto the text piece with a Mini Glue Dot
S
Here’s the April 2020 APPT Blog Hop:
S
Here are today’s colors:
You can click on each one to see all the products that come in that color!
S
Here’s what I used:
Click on these images for more details and to purchase. If you are reading this post in email, the product images may not show up. Click here to see the post on my blog.
Supply List Click “Supply List” for a clickable and printable list of the products!
S
Here are some helpful links:
Thanks for stopping by today, and Sweet Stamping!
Apr 28, 2020 | Blog Hop, Boxes, Cards, Gallery |

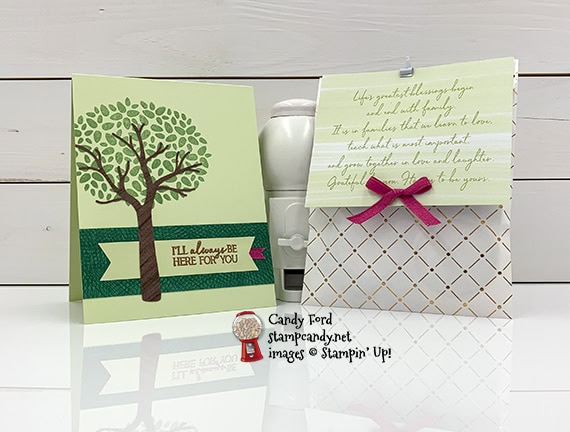
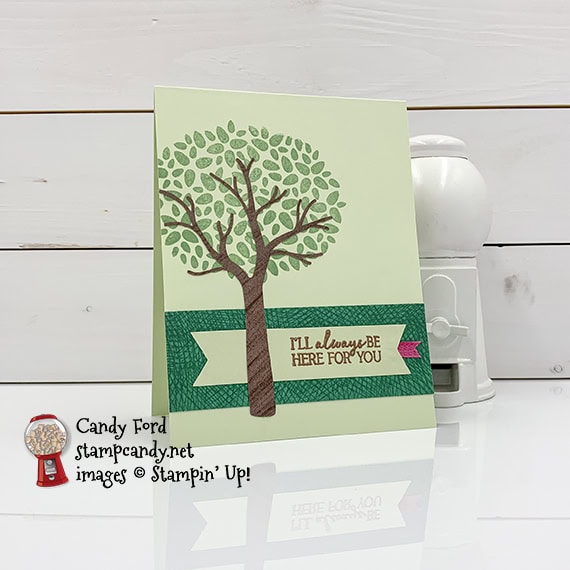
It’s time for the April 2020 PPP Blog Hop – My Wonderful Family. This month’s kit is all about family. It’s designed to make 8 cards. I’ve made an alternate card and a matching Mini Pizza Box for Mother’s Day. Be sure to hop around to all the stops and see all the great alternate projects made with the My Wonderful Family kit! https://bit.ly/34OqoUo
If you are reading this in email, some photos may appear blurry, or may not appear at all. Please click here to see the post on my blog.
S PPP Blog Hop – My Wonderful Family PPP Blog Hop – My Wonderful Family PPP Blog Hop – My Wonderful Family PPP Blog Hop – My Wonderful Family
Here’s what I made:


S
Here’s what I did:
Cut and scored with my paper trimmer:
- Crushed Curry card stock (CS) cut to 4-1/4″ x 11″, then scored in half at 5-1/2″
- Whisper White CS layer cut to 4-1/8″ x 5-3/8″
- 2″ x 4-1/8″ cut off the printed end of a card base from the kit
- 2-1/4″ x 4-1/4″ cut off the printed end of another card base from the kit
- optional: Whisper White CS cut to 4″ x 5-1/4″ for the inside of the card base
Stamped with the My Wonderful Family stamp set:
- sentiment in Shaded Spruce ink onto a die cut label from the kit
Cut using Paper Snips:
- each end of a Crushed Curry die cut strip to match the ends of the white label
Colored using a Stampin’ Blends Marker:
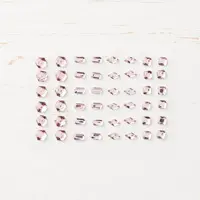
- 4 Petal Pink Rhinestones in Dark Mango Melody
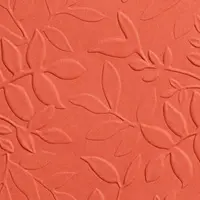
Embossed using the Layered Leaves 3D Embossing Folder:
Assembled the card:
- burnished the fold in the Crushed Curry CS card base with a Bone Folder
- embossed layer glued onto the front of the card base
- 2″ x 4-1/8″ patterned piece glued onto the embossed layer
- large die cut leaf glued over the patterned piece and embossed layer
- sentiment glued onto the Crushed Curry strip
- Crushed Curry strip adhered over the leaf using Stampin’ Dimensionals
- colored rhinestone applied onto the body of a die cut butterfly
- butterfly adhered onto the embossed layer using Mini Stampin’ Dimensionals
- optional: Whisper White CS glued onto the inside of the card base
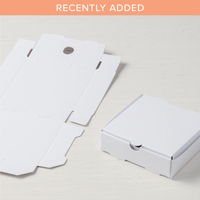
Assembled the box:
- burnished the folds in the pizza box with a Bone Folder and folded to assemble
- 2-1/4″ x 4-1/4″ patterned piece glued onto the lid of the box, going part way down the two sides
- large die cut leaf glued over the patterned piece and the box lid
- 3 remaining colored rhinestones applied onto the bodies of 3 more butterflies
- butterflies adhered onto the box using Mini Stampin’ Dimensionals
S
Here’s the PPP Blog Hop – My Wonderful Family:
Click the pumpkin to hop to the next stop, Lisa Ann Bernard of Queen B Creations.
S
Here are today’s main colors:
You can click on each one to see all the products that come in that color!
S
Here’s what I used:
Click on these images for more details and to purchase. If you are reading this post in email, the product images may not show up. Click hereto see the post on my blog.
Supply List Click “Supply List” for a clickable and printable list of the products!
S
Here are some helpful links:
Thanks for stopping by today, and Sweet Stamping!
Apr 22, 2020 | Blog Hop, Cards, Gallery |

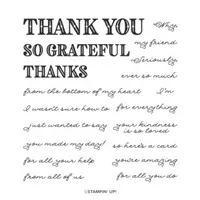
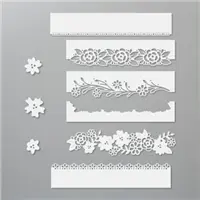
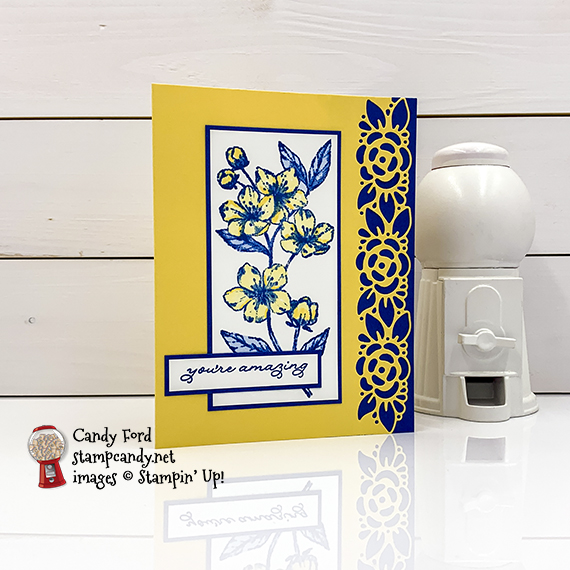
It’s time for the April 2020 Inking Royalty Blog Hop! This month’s theme is Springtime. We are excited to share our creations with you today! After you read my post, I hope you’ll hop over to the next person on the list below. I used the Ornate Thanks stamp set and Ornate Borders Dies from the upcoming 2020-2021 Annual Catalog (but you can buy it now!) along with the Forever Blossoms stamp set from the January – June 2020 Mini Catalog.
If you are reading this in email, some photos may appear blurry, or may not appear at all. Please CLICK HERE to see the post on my blog.
S April 2020 Inking April 2020 Inking Royalty Blog Hop April 2020 Inking Royalty Blog Hop April 2020 Inking Royalty Blog Hop Royalty Blog Hop April 2020 Inking Royalty Blog Hop
Here’s what I made:
S
Here’s what I did:
Cut and scored with my paper trimmer:
- So Saffron card stock (CS) cut to 5-1/2″ x 8-1/2″, then scored in half at 4-1/4″
- Blueberry Bushel CS cut to 1-1/2″ x 5-1/2″
- Blueberry Bushel CS layer cut to 2-3/16″ x 4-3/8″
- Whisper White CS layer cut to 2-1/16″ x 4-1/4″
- Blueberry Bushel CS cut to 2-1/2″ x 5/8″
- Whisper White CS cut to 2-3/8″ x 1/2″
- optional: Whisper White CS cut to 4″ x 5-1/4″ for the inside of the card base
Stamped with the Ornate Thanks stamp set:
- sentiment in Blueberry Bushel ink onto the small strip of Whisper White CS
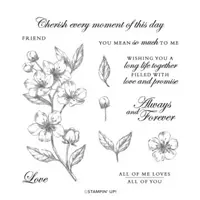
Stamped with the Forever Blossoms Stamp Set:
- floral image in Blueberry Bushel ink onto the Whisper White CS layer
Cut using the Ornate Borders Dies:
Colored using Stampin’ Blends Markers:
- flowers in Dark and Light So Saffron
- leaves and stems in Light Seaside Spray
Assembled the card:
- burnished the fold in the card base with a Bone Folder
- 1-1/2″ x 5-1/2″ Blueberry Bushel CS glued onto the inside of the card base so it shows through the die cut edge
- floral layer glued onto the Blueberry Bushel CS layer
- Blueberry Bushel CS layer glued onto the front of the card base
- sentiment glued onto the Blueberry Bushel CS strip
- Blueberry Bushel CS strip glued over the floral layer
- optional: Whisper White CS glued onto the inside of the card base
S
Here’s the April 2020 Inking Royalty Blog Hop:
Thank you for hopping along with us. If you get stuck during the Blog Hop, please use this line-up as a guide:
- Brian King at Stamp with Brian
- Pam Morris at Tap Tap Stamp
- Ann Murray at Murray Stamps Ink
- Sue Jackson at Just Peachy Stamping
- Sheryl Sharp at Sharp Notes by Sheryl
- Julie DiMatteo at The Paper Pixie
- Peggy Noe at Pretty Paper Cards
- Robin Myren at Songbird Designs by Robin
- Lynn Kolcun at Avery’s Owlery
- Shawn de Oliveira at Shawn Stamps
- Linda Krueger at The Stamp Coach
- Joanne Brown at Stamping with JoJo
- Sheryl Abernathy at Elegant Sentiments
- Jackie Beers at Blue Line Stamping
- Jennifer Spiller at Westside Paper Creations
- Candy Ford at Stamp Candy <———– YOU ARE HERE
Here are today’s colors:
You can click on each one to see all the products that come in that color!
S
Here’s what I used:
Click on these images for more details and to purchase. If you are reading this post in email, the product images may not show up. CLICK HERE to see the post on my blog.
Supply List Click “Supply List” for a clickable and printable list of the products!
S
Here are some helpful links:
Thanks for stopping by today, and Sweet Stamping!
Apr 13, 2020 | Blog Hop, Cards, Gallery, Holiday |

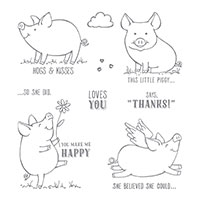
Welcome to the Candy Hearts Blog Hop for April 2020! This month we are featuring projects for Mother’s Day. I wanted to make something that reflects this particular Mother’s Day, during the COVID 19 pandemic. That’s when I decided on the sweet little pig from the This Little Piggy stamp set, because I had seen someone else put a mask on her/him, and I thought it was just adorable. I took the colors from the Bird Ballad Designer Series Paper I used for the background layer: Petal Pink, Pool Party, and Whisper White. Be sure to hop around to all the stops, because you don’t want to miss any of the great projects from the Candy Hearts! I can’t wait to see what they share!
If you are reading this in email, some photos may appear blurry, or may not appear at all. Please click here to see the post on my blog.
S
Here’s what I made:


S
Here’s what I did:
Cut and scored with my paper trimmer:
- Pool Party card stock (CS) cut to 4-1/4″ x 11″, then scored in half at 5-1/2″
- Bird Ballad Designer Series Paper (DSP) layer cut to 4-1/8″ x 5-3/8″
- Whisper White CS cut to 3/4″ x 1/2″
- Whisper White CS cut to 1/8″ x 1/2″ (2 pieces)
- optional: Whisper White CS cut to 4″ x 5-1/4″ for the inside of the card base
Scored using the Simply Scored tool:
- 3/4″ x 1/2″ Whisper White CS piece every 1/8″
Stamped with the This Little Piggy stamp set:
- pig in Petal Pink ink onto a scrap of Whisper White CS (masking the sentiment on the bottom, and only inking up the pig)
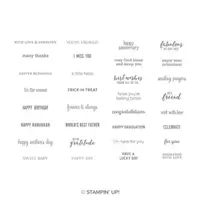
Stamped with the Itty Bitty Greetings stamp set:
- sentiment in Pool Party ink just below the pig
Cut using the Stitched So Sweetly Dies:
- pig using the second largest scalloped rectangular die
- a scrap of Pool Party CS using the largest scalloped rectangular die
Colored using Stampin’ Blends Markers:
- pig in both Dark and Light Petal Pink
- pig’s feet in Light Crumb Cake
Assembled the card:
- burnished the fold in the card base with a Bone Folder
- DSP layer glued onto the front of the card base
- 1/8″ strips glued onto the pig’s face, then the scored piece glued over that to create the mask
- pig layer glued onto the Pool Party die cut layer at an angle
- Pool Party die cut layer glued onto the DSP layer at an angle
- Petal Pink ribbon tied in a bow and adhered onto the pig layer using Mini Glue Dots
- optional: Whisper White CS glued onto the inside of the card base
S
Here’s the Mother’s Day hop:
Thank you for hopping with the Hearts today! Be sure to hop all the way around. You don’t want to miss any of the creativity in this talented group of stampers!
S
Here are today’s main colors:
You can click on each one to see all the products that come in that color!
S
Here’s what I used:
Click on these images for more details and to purchase. If you are reading this post in email, the product images may not show up. Click here to see the post on my blog.
Supply List Click “Supply List” for a clickable and printable list of the products!
S
Here are some helpful links:
Thanks for stopping by today, and Sweet Stamping!
Mar 26, 2020 | Blog Hop, Boxes, Cards, Gallery, Gift Wrap, Gifts, Paper Pumpkin |
 It’s time for the March APPT Blog Hop! This month’s kit is called No Matter the Weather and it’s designed to make 12 sweet weather themed cards. It also came with an extra stamp set called Spring Splash. Today we are sharing alternate projects made with this kit. I can’t wait to see what everyone on the hop has created!
I decided to make a card and an open top gift box for a friend. The current situation in the world makes almost all of us need a little boost. I want my friend to know I’m there for her…with a bottle of hand soap (you can barely see the top of the pump bottle amongst the tissue paper.)
If you are reading this post in email, the images may appear blurry or not show up at all. Click here to read this post on my blog.
S https://stampcandy.net/blog-hop/no-matter-the-weather-appt-blog-hop-03-2020/ the weather the weather the weather
Here’s what I made:


S
Here’s what I did:
Cut and scored with my paper trimmer:
- 1-3/4″ cut from the bottom of one of the blue/gray cards from the kit, cutting away the gray area and leaving the blue
- Two more of the same cards scored 1-3/4″ from the bottom, and 1/4″ from the printed end
- 1/4″ cut from the plain end of these same two cards
- You should now have two cards 6-1/2″ x 5″ and one card 7″x 3-1/2″
Stamped with the No Matter the Weather stamp set:
- sentiment in Basic Gray ink onto a whit did cut circle
- clouds and raindrops in Basic Gray ink along the top of the front of the 3-1/2″ tall card
- clouds and raindrops in Basic Gray ink along the top of the front of one the other two cards
Cut using Paper Snips:
- one pair of boots cut off the end of a boot line-up die cut
- two pairs of boots cut off the end of a boot line-up die cut, and one of the cut away pairs cut apart into individual boots
- cut along the four score lines, only up to the horizontal score line, of the two 5″ tall cards
Assembled the card:
- burnished the fold in the card base with a Bone Folder
- a plain white circle die cut glued onto the front of the 3-1/2″ tall card
- 3 pink heart die cuts adhered the white circle die cut using Mini Stampin’ Dimensionals
- die cut of 3 pairs of boots and 2 individual boots glued together, then adhered onto the front of the card using Stampin’ Dimensionals
Assembled the box:
- burnished all the folds in the two remaining card bases with a Bone Folder
- glued the 1/4″ flaps to the inside of the opposite end of the other card base
- folded up the four bottom flaps and glued them together to create the bottom of the box
- sentiment glued onto the blue side with clouds and raindrops
- die cut of 4 pairs of boots adhered, overlapping the sentiment, using Stampin’ Dimensionals
- gift and tissue paper put in the box
S
Here’s the No Matter the Weather hop:
S
Here are today’s colors:
You can click on each one to see all the products that come in that color!
S
Here’s what I used, other than the No Matter the Weather kit:
Click on these images for more details and to purchase. If you are reading this post in email, the product images may not show up. Click here to see the post on my blog.
Supply List <— Click here for a clickable and printable list of the products!
S
Here are some helpful links:
Thanks for stopping by today, and Sweet Stamping!