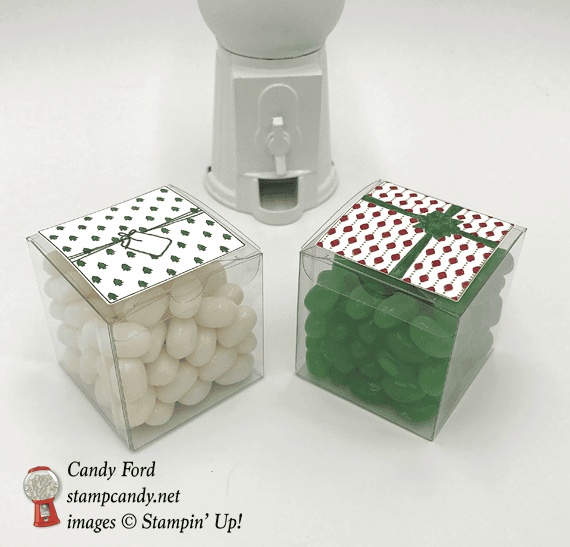
Are you looking for a quick and easy give that won’t break the bank? How about these adorable clear tiny acetate boxes filled with jelly beans? The box decorations are made with the Add a Little Glitz stamp set.
Click on the images for more details and to purchase.
Here are some key points to remember:
This is a great time to join my team! With the demonstrator discount of at least 20%, you can get Christmas gifts for all the stampers on your list! CLICK HERE for more information. Contact me with any questions: email candy@stampcandy.net or call/text 404-661-5222
Sale-a-bration Stamp Fest coming January 20. Details and register HERE
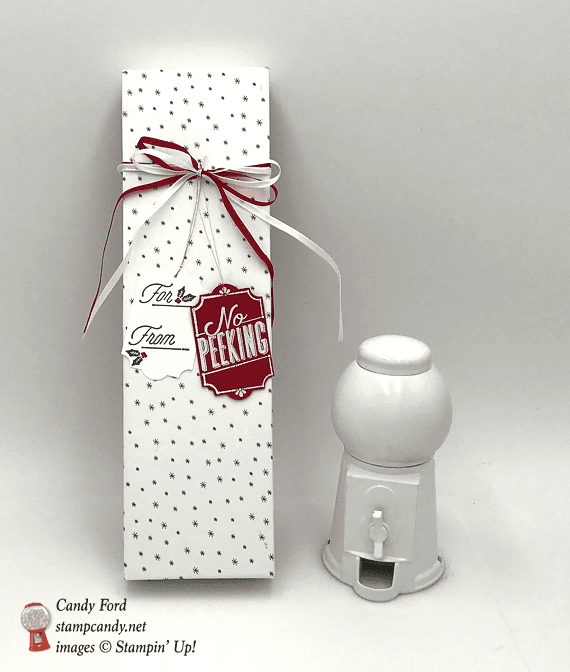
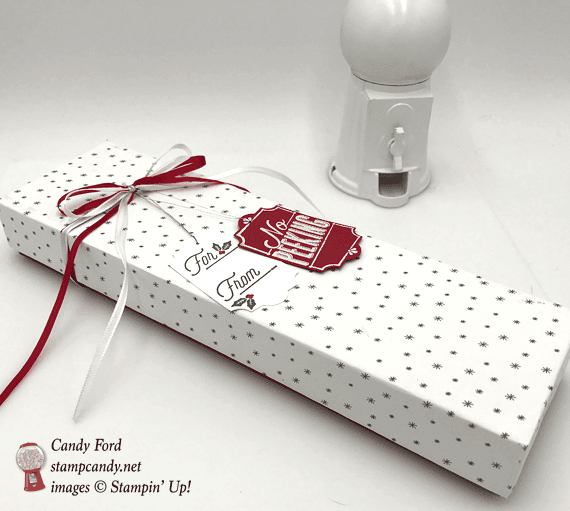
I love orangettes. I mean I LOOOOVE them. Little strips of candied orange peel dipped in high quality dark chocolate have to be one of my favorite treats ever! I recently finished off a box of them from Maison du Chocolat and thought the heavy red box was way too nice to just through out. So I pulled out all the inserts that held the orangettes, covered the lid with Be Merry Designer Series Paper, and added a couple tags made with the Merry Little Labels bundle. Voila! A nice box that still has just a hint of a chocolate scent.
Here’s what I made:
Here’s what I did:
Cut and scored with my Stampin’ Trimmer:
measured the box lid across the top in both directions (3″ x 10-1/2″), down the side (1-1/8″), and around to the inside 1″, and came up with 7-1/4″ x 14-1/4″
Be Merry Designer Series Paper (DSP) cut to 7-1/4″ x 14-1/4″
NOTE: You have to cut the paper on the diagonal to get the long measurement. Don’t worry if the corners are clipped a little bit – that part will be inside the box.
scored the DSP along the short side at 1 “, 2-1/8″, 5-1/8″ and 6-1/4”
scored the DSP along the long side at 1 “, 2-1/8″, 12-1/8″ and 13-1/4”
cut along the score lines at each short end to the second score line
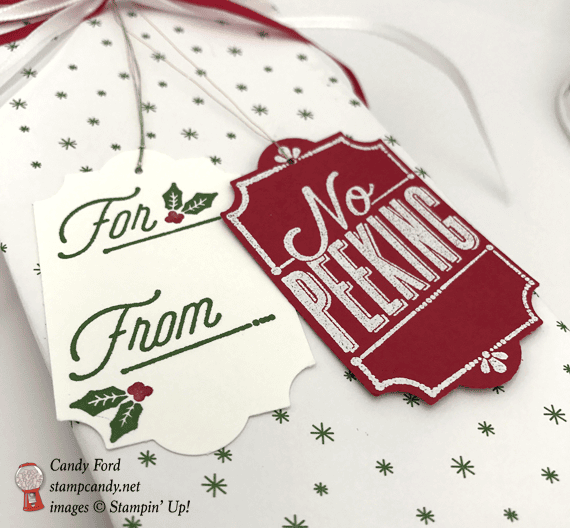
Stamped with the Merry Little Tags stamp set:
For/From tag in Garden Green ink onto a scrap of Whisper White card stock (CS)
Note: before stamping onto the CS, I wiped the green ink off of the berry parts of the stamp and colored them with a Real Red Stampin’ Write Marker
No Peeking tag onto a scrap of Real Red CS in Versamark ink, then heat embossed in white
Cut using the Everyday Label Punch:
both tags
Cut using the 1/16″ Circle Punch:
one hole at the top of each tag, to hang it by
Assembled the box:
DSP glued onto the box lid, on top first, then down the long sides, then down the ends, and then around and up the inside of all 4 sides
two pieces of 1/8″ ribbon (about 20″) wrapped around the box and tied a bow
the two tags attached to the ribbon with Gold Thread
Here are today’s colors:
You can click on each one to see all the products that come in that color!
You know how much I like making cute boxes, right? Well, today I’m sharing a great one. It’s all gold and silver and shiny, and it’s the perfect gift box to give something special to someone special. And it’s really quick and easy. I made it with Year of Cheer Suite and the Labels to Love stamp set.
Here’s what I made:
Here’s what I did:
Cut and scored with my Stampin’ Trimmer:
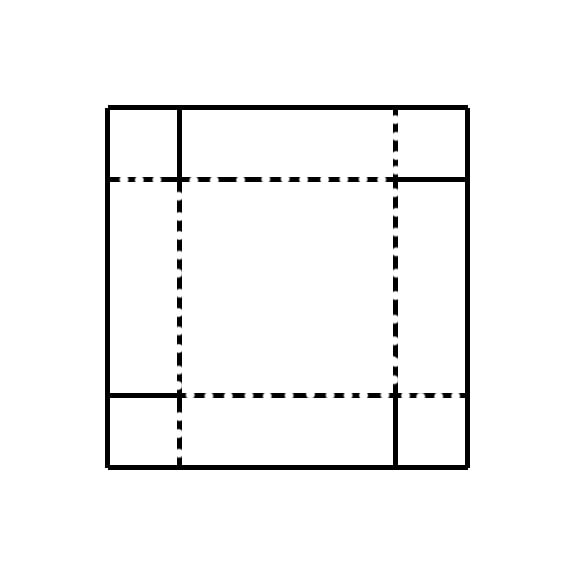
Whisper White Thick card stock (CS) cut to 8-1/2″ x 8-1/2″, then scored 1-3/4″ from each of the four edges
Year of Cheer Specialty Designer Series Paper (DSP) cut to 7-1/16″ x 7-1/16″, then scored 1″ from each of the four edges
These two pieces should look something like this. Dotted lines are folded and solid lines are cut.
Stamped with the Labels to Love stamp set:
tag border and To/From in Versamark ink onto the back of a piece of Gold Foil Sheet, then heat embossed in gold
Punched using the Everyday Label punch:
heat embossed tag
a piece of Gold Foil Sheet
Punched using the 1/16″ Circle Punch:
the top end of each of the tags
Punched using the 1″ Circle Punch:
a piece of Gold Foil Sheet
Punched using the 2″ Circle Punch:
piece of Whisper White CS
Assembled the box:
for the box and the lid: cut one score line at each corner, fold up each side, and adhere the tab inside the adjacent side
wrapped box once in Silver Edged Ribbon, then adhered ends of ribbon together with Tear & Tape (not adhered to the box)
adhered the 2″ circle to the bottom side of the the overlapping part of the ribbon with Tear & Tape
adhered a Silver Foil Snowflake to top of the 2″ circle and ribbon with Tear & Tape
adhered the 1″ gold foil circle to the center of the snowflake with Tear & Tape
Metal Rimmed Pearl adhered to the center of the 1″ gold foil circle
tied tags to the ribbon using Gold Thread
Since the ribbon isn’t adhered to the box, you can slide it off to fill the box, then slide it back on.
Here are today’s colors:
You can click on each one to see all the products that come in that color!
Click on the images for more details and to purchase.
Here are some key points to remember:
Designer Series Paper Sale October 1-31, Buy 3 Get 1 FREE! See details HERE.
Hostess Code for the month of October (HGB2HGXK) Find out more about HOW, WHEN and WHY to use that HERE.
October’s FREE gift Mini Pizza Boxes Find out more HERE.
New Merry Patterns Hostess Stamp Set – added to your Host Rewards There’s a brand new stamp set that isn’t in any catalog. You can’t buy it, but you can get if for free with a qualifying order! You can host a party, or place your own order, or join under me and get a 20% discount on your demonstrator order. Find out more HERE.
Gumball Rewards for all orders over $50 Find out more HERE.
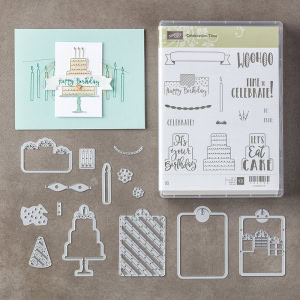
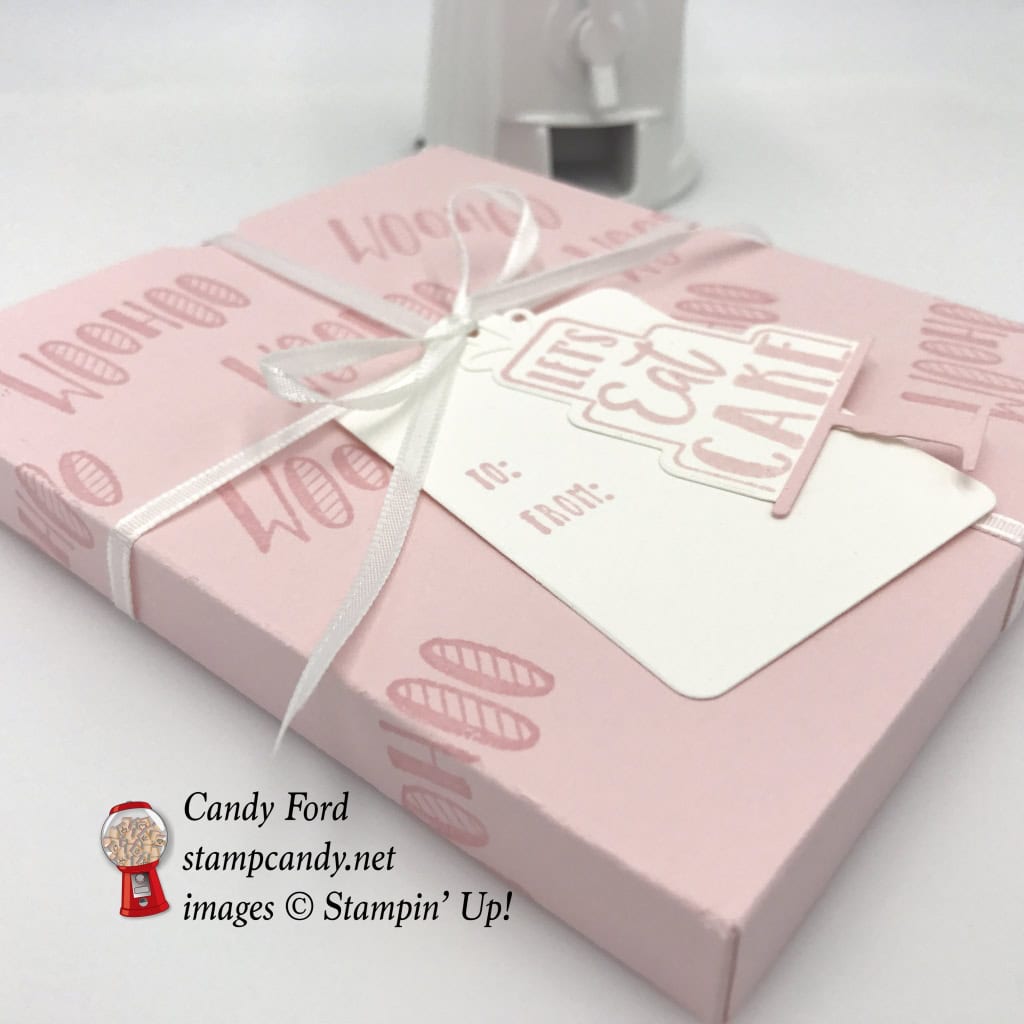
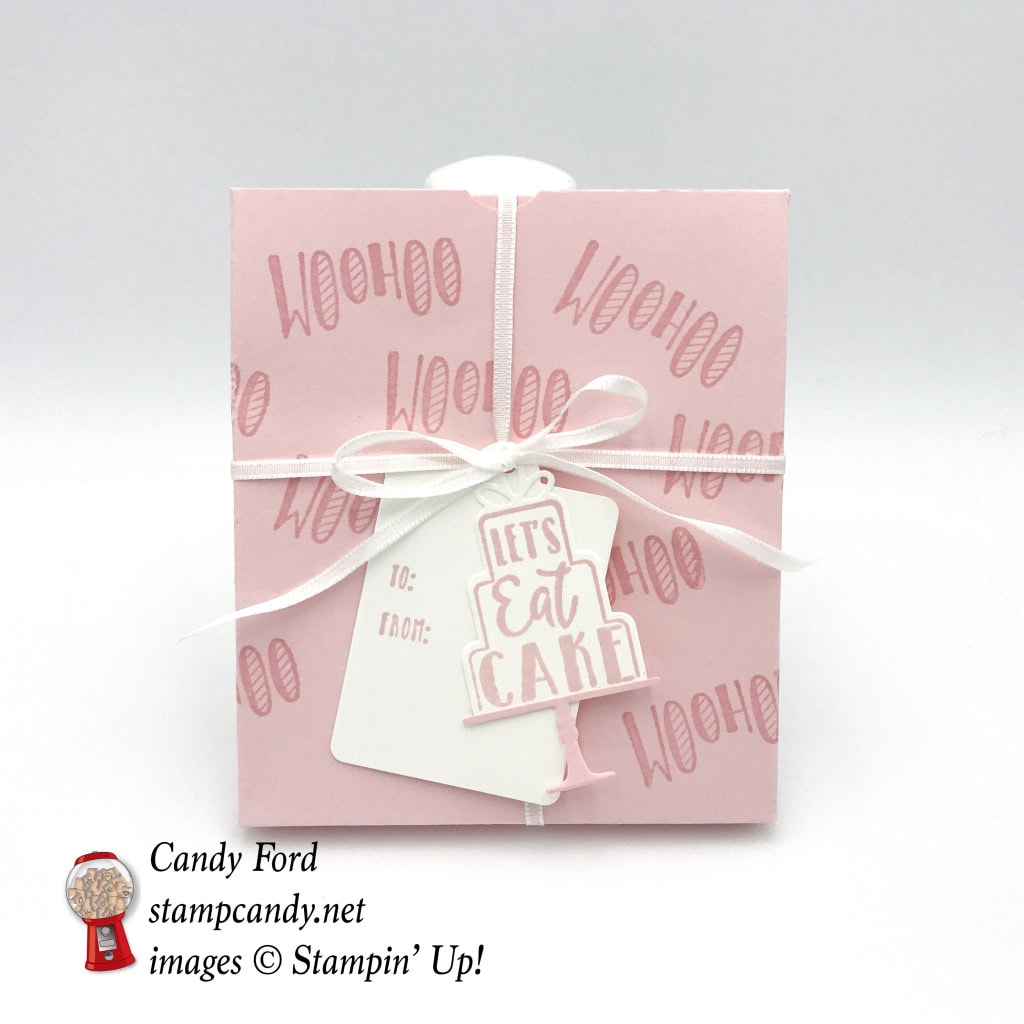
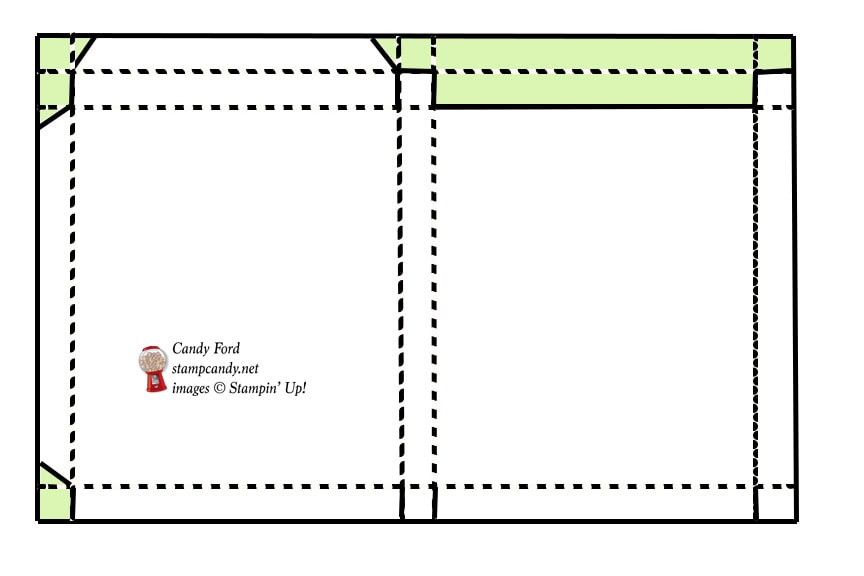
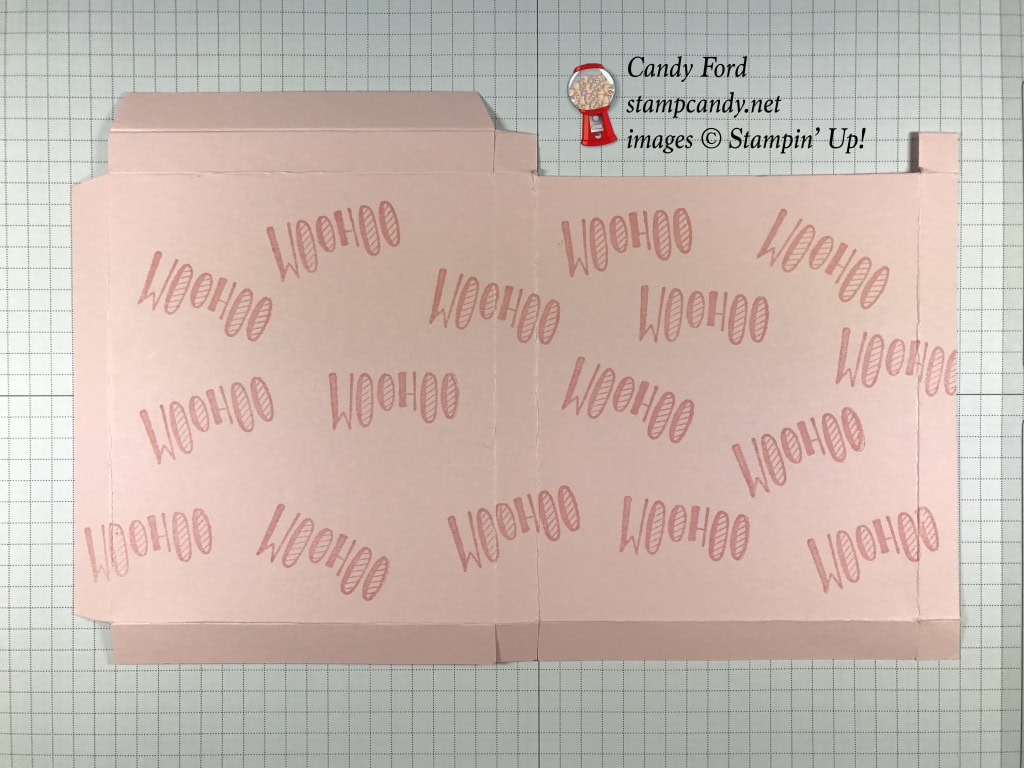
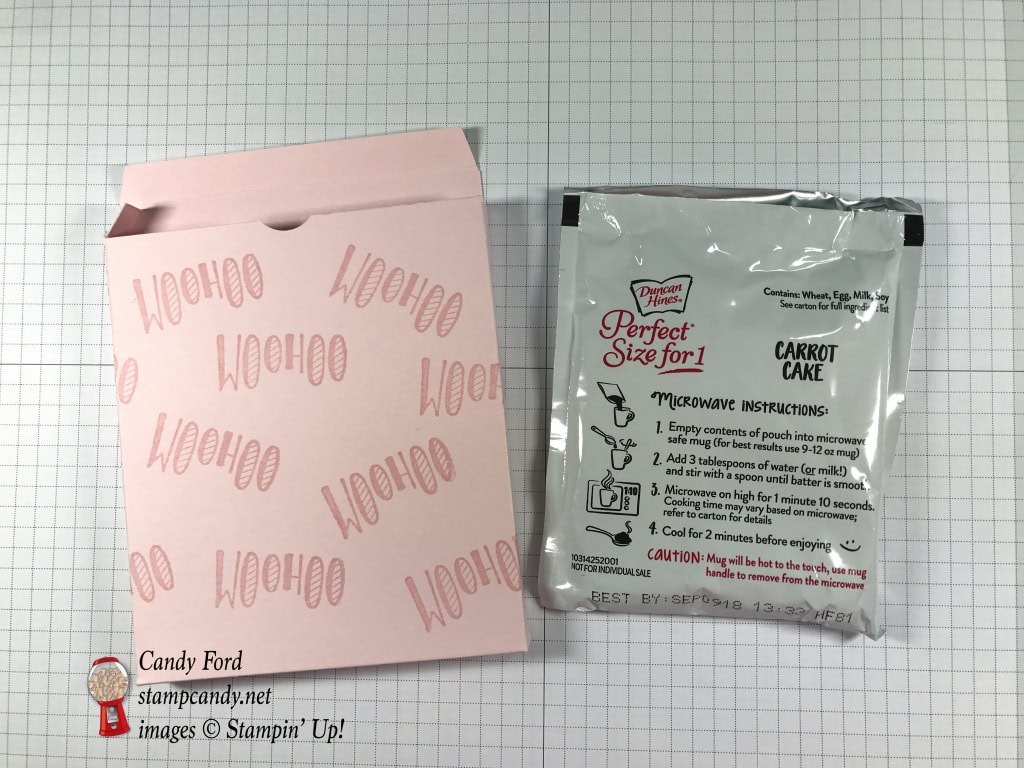
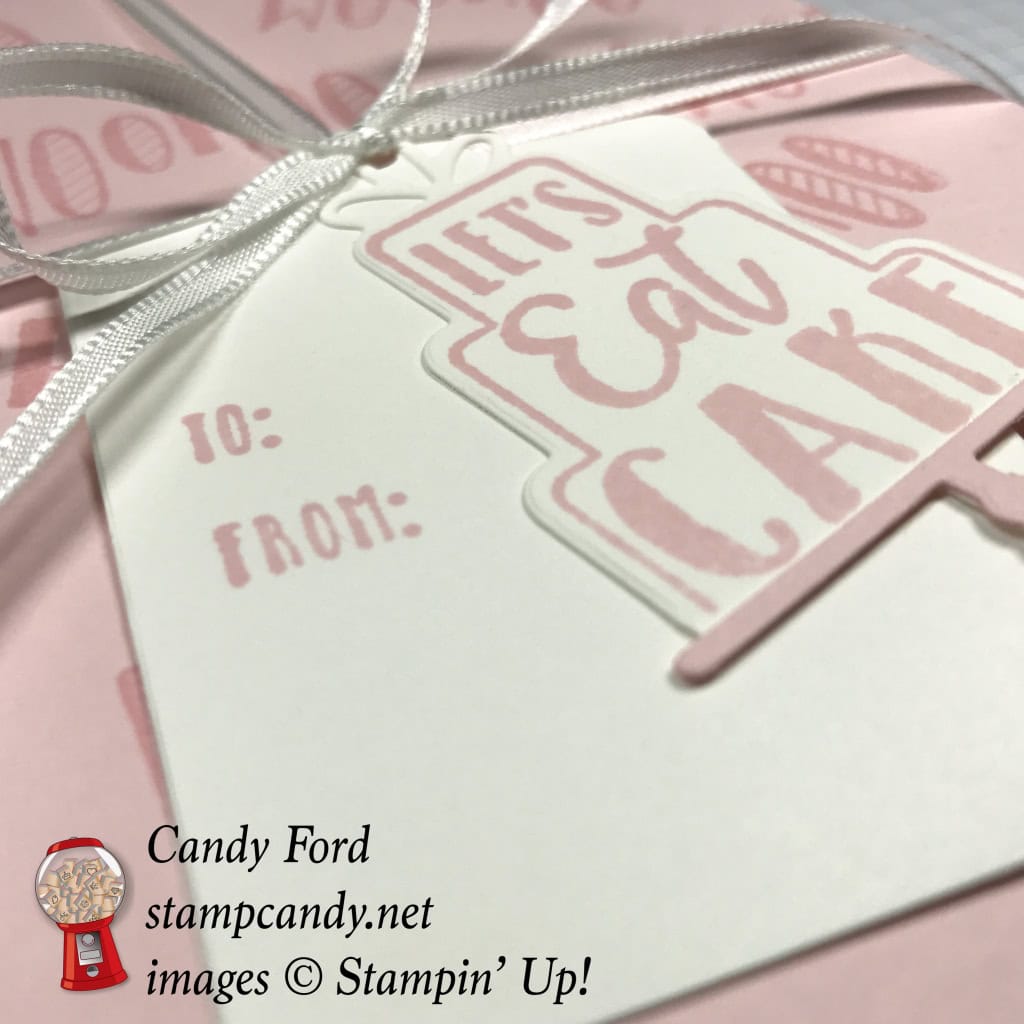
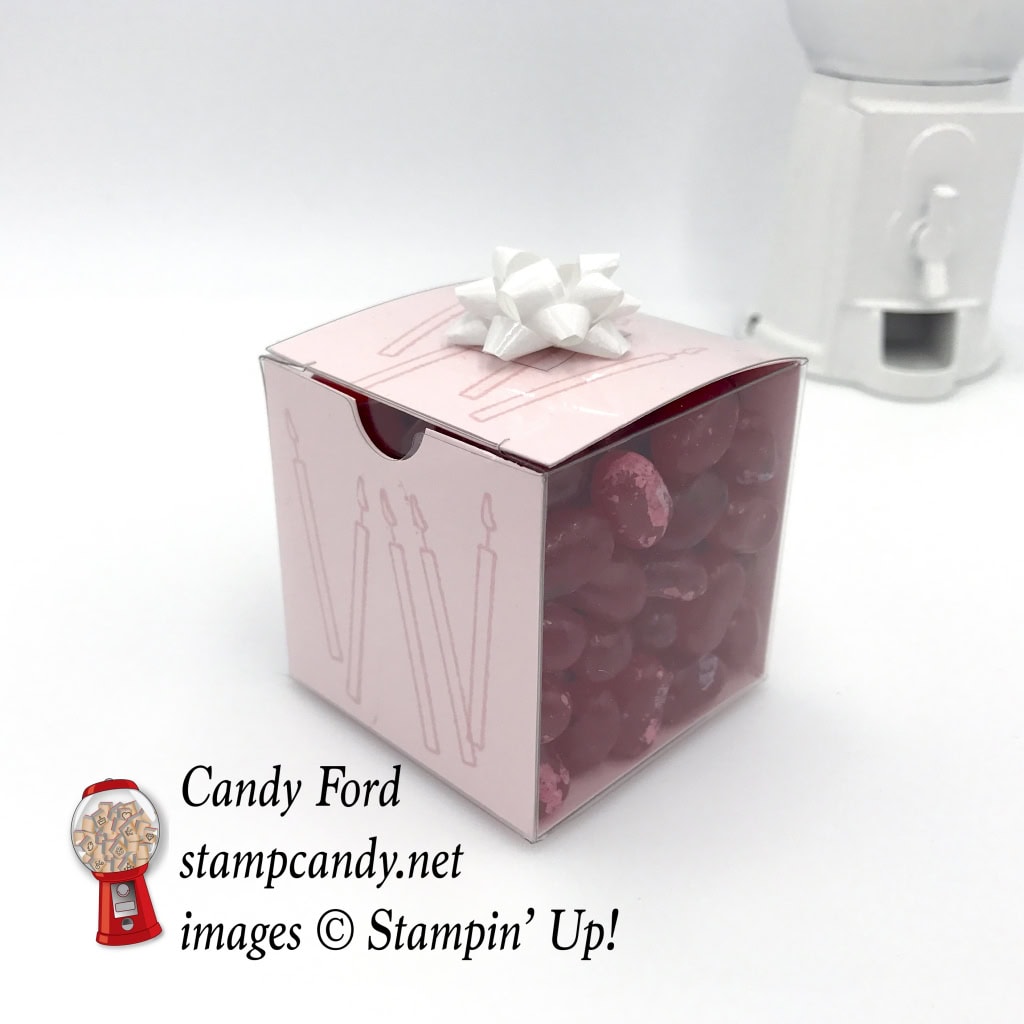
Mug Cakes are very popular now. I mean, what’s not to love? You pour the mix in a mug, stir in water or milk, and microwave it. Let it cool a couple minutes and you’ve got cake! Today I’m sharing packaging I made to hold one of these yummy pre-made cake mix pouches. I used the Celebration Time Bundle (Celebration Time stamp set and Celebration Thinlits Dies) to make this Powder Pink gift box and tags.
Click on the images for more details and to purchase.
Here’s a Bonus Project:
This little coordinating box of jelly beans:
It’s very simple. Cut a piece of Powder Pink CS to 2″ x 8″. Score it at 2″, 4″, and 6″. Stamp candles on each 2″ x 2″ section. Put it in the Clear Tiny Treat box so it lines the front, bottom, back and top. Add your goodies (I used pomegranate jelly bellies) and close the lid. Apply a tiny Whisper White Bow to the top. Done!
Here’s what I used for the tiny box:
Here are some key points to remember:
Hostess Code for the month of October (HGB2HGXK)
Find out more about HOW, WHEN and WHY to use that HERE.
October’s FREE gift
Mini Pizza Boxes
Find out more HERE.
New Merry Patterns Hostess Stamp Set – added to your Host Rewards There’s a brand new stamp set that isn’t in any catalog. You can’t buy it, but you can get if for free with a qualifying order! You can host a party, or place your own order, or join under me and get a 20% discount on your demonstrator order. Find out more HERE.
Gumball Rewards for all orders over $50 Find out more HERE.
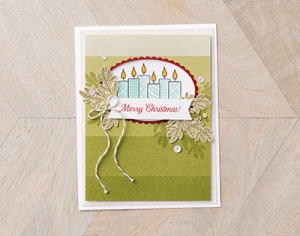
On the TA September Blog Hop, we are sharing some of our favorite products from the 2017 Holiday Catalog. It’s impossible for me to narrow it down to just one…or two…or three… But for today I decided to go with the Merry Little Christmas Mega Suite.
There are so many wonderfully coordinated products in this suite, for card making AND gift wrapping! It includes the Merry Little Labels Bundle (Merry Little Labels stamp set and Everyday Label Punch,) the Carols of Christmas Bundle (Carols of Christmas stamp set and Card Front Builder Thinlits Dies,) Merry Little Christmas Designer Series Paper (DSP) and coordinating 12″ x 12″ card stock (CS) pack, Merry Music Specialty DSP, 7/8″ Striped Ribbon, Acetate Card Boxes, Green Sprigs, Jute Twine, and Mini Ornaments. Holy cow, that’s a lot of cool stuff!
Here’s what I made:
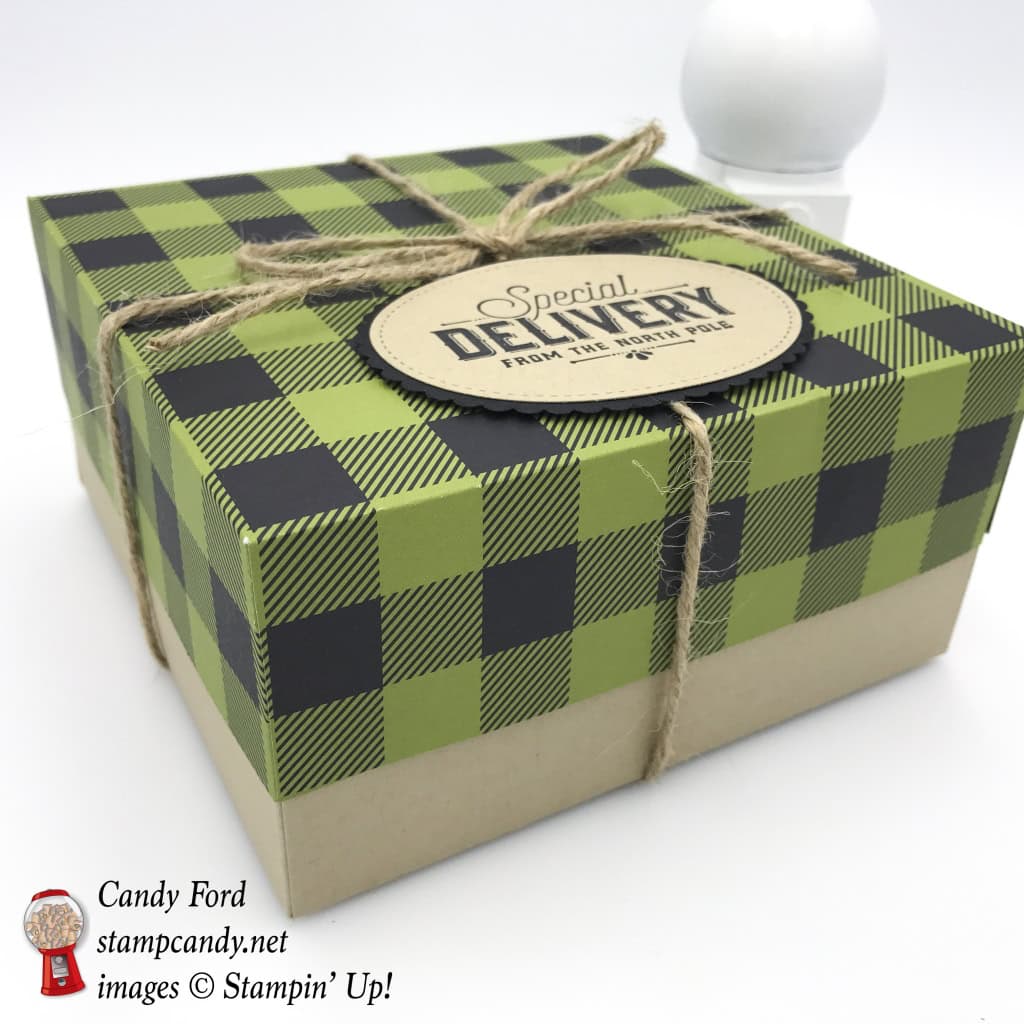
I used some of the products from the Mega Suite to make this gift box
Here’s what I did:
Cut and scored with my Stampin’ Trimmer:
12″ x 12″ Kraft card stock (CS) scored 3″ from each side, then one score line at each corner cut (the center section should be 6″ x 6″)
Merry Little Christmas Designer Series Paper (DSP) cut to 9-9/16″ x 9-9/16″, then scored 1-3/4″ from each side, then one score line at each corner cut (the center section should be 6-1/16″ x 6-1/16″)
This is the same basic diagram for both pieces. Cut solid lines and score dotted lines.
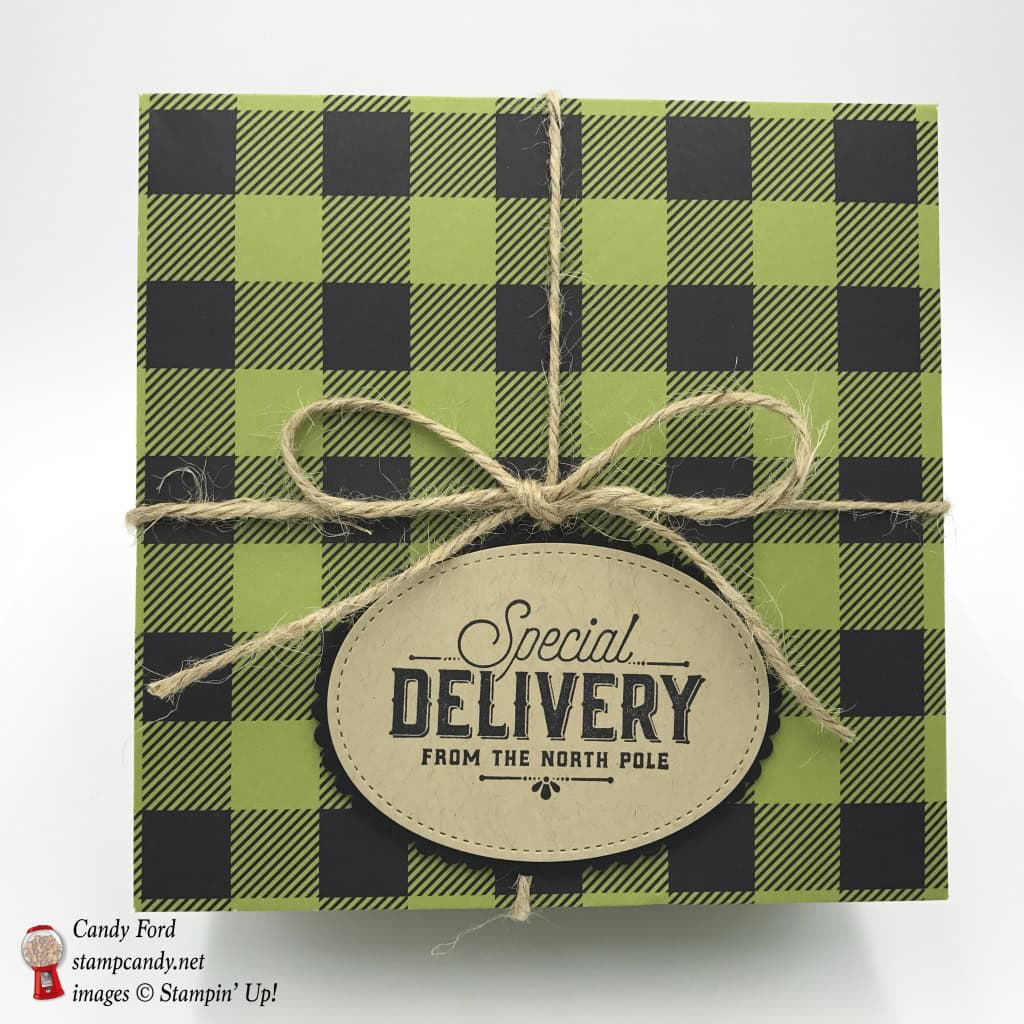
Stamped with the Merry Little Labels stamp set:
sentiment in Basic Black ink onto a scrap of Kraft CS
Die cut using the Stitched Shapes Framelits:
sentiment with an oval die
Die cut using the Layering Ovals Framelits:
scalloped oval from Basic Black CS, just a little bigger than the sentiment oval
Assembled the box:
folded all score lines on both pieces of paper and burnished with a Bone Folder
glued the tab at each corner to the inside of the adjacent side – do this for all four corner and for both pieces of paper
put the lid on the box, then wrapped Jute Twine around it and tied a bow
glued the sentiment oval onto the Basic Black CS scalloped oval
adhered the sentiment to the top of the box using Stampin’ Dimensionals, being careful not to put any along the center, so the twine can slide underneath
Here’s the hop:
Here are today’s colors:
Click on each one to see all the products that come in that color!
Click on the images for more details and to purchase.
Here’s the Merry Little Christmas Mega Suite:
Do you have a long wish list?
How would you like to get a 20% (or more) discount on all the great Stampin’ Up! products you want, with no obligation and no risk? Join my group of Candy Hearts. Click on the candy machine for more information.
I like to decorate my whole house for Halloween. I even want the tissue boxes to be Halloweeny. The Spooky Night Designer Series Paper with witch hats on it seemed perfect for a cute and festive, yet spooky tissue box cover. And it’s so easy, you just won’t believe it. It’s almost like wrapping a gift. This is one of the vertical cube-like tissue boxes (about 4-1/2″ on each side and 5″ tall) but you can certainly apply the same method to the long, horizontal boxes.
Here’s what I made:
Here’s what I did:
Cut and scored with my Stampin’ Trimmer:
Spooky Night Designer Series Paper (DSP) cut to 12″ x 4-1/2″
DSP cut to 6-1/2″ x 4-1/2″
DSP cut to 8-1/2″ x 8-1/2″ for the top
Die cut using the Layering Ovals Framelits:
Selected three sized of oval dies, the smallest of which was almost as big at the hole in the top of the box
Pumpkin Pie card stock (CS) cut with the middle sized die, then the center cut out with the smallest die
Basic Black CS cut with the largest die, then the center cut out with the smallest die
cut a hole in the center of the 8-1/2″ x 8-1/2″ piece of DSP with the smallest of the three dies
Assembled the cover:
Be sure not to make the cover too tight, or it will be too difficult to remove it and put it on a new box
the two 4-1/2″ strips of DSP wrapped around the box and glued together at both ends – be careful not to glue the DSP to the box itself, unless you want it to be permanent, instead of a removable box cover
the 8-1/2″ x 8-1/2″ piece of DSP centered on top of the box and folded down the sides, then burnished the creases with a bone folder
cut one crease line at each corner with Paper Snips, then put it back on top of the box with the first DSP pieces wrapped around the sides of the box – be sure the sides pieces go all the way down to the bottom of the box
top piece of tissue box cover, fold dotted lines and cut solid lines
glue the folded over bits of DSP to the sides, tucking the corner pieces under the adjacent side.
adhered ribbon with Tear & Tape, being sure to cover the seam where the two pieces of DSP meet.
Pumpkin Pie CS oval glued onto the Basic Black CS oval, lining up the center holes
Basic Black CS oval glued onto the top of the DSP box cover, lining up the center holes
Here are today’s colors:
You can click on each one to see all the products that come in that color!
Click on the images for more details and to purchase.
Shop and help those affected by
Hurricanes Harvey & Irma
I will donate 20% of my September sales to the American Red Cross for Hurricane Harvey & Irma Relief.
Please help make a difference. CLICK HERE to shop now.
There’s a brand new stamp set that isn’t in any catalog. You can’t buy it, but you can get if for free with a qualifying order! You can host a party, or place your own order, or join under me and get a 20% discount on your demonstrator order.
Here’s a video from Stampin’ Up!:
Here are the details:
Promotion period: September 1–October 31
The Merry Patterns Stamp Set is exclusive to this promotion and will not be available after October 31
In order to qualify, the event merchandise total must reach $300 (before tax and shipping)
There is no limit to the number of times the Merry Patterns Stamp Set may be earned, but only one set can be redeemed per qualifying order
Demonstrator, Customer, Workshop, and online orders qualify
Orders must be closed by:
October 31 at 10:50 PM (PT)
October 31 at 11:50 PM (MT)
November 1 at 12:50 AM (CT)
November 1 at 1:50 AM (ET)
The Merry Patterns Stamp Set is in addition to Stampin’ Rewards
The Merry Patterns Stamp Set may not be exchanged for another stamp set
Here are the samples from the video:
September Host Code
N4ZFHXK9
September’s FREE gift is the brand new Quilt Top Textured Impressions Embossing Folder: Create a beautiful quilt pattern background with this Embossing Folder.It’s easy to make a great impression! Just place flat cardstock in this embossing folder, run it through the Big Shot, and out comes cardstock with a bold textured design.* 1 folder * 6″ x 6″ (15.2 x 15.2 cm) * Use with Big Shot
Watch this video on the Quilted Christmas Suite in the new Holiday Catalog
Use the Host Code on your online orders under $150. You can see how to use a Host Code here.
Orders between $75 and $149.99, using the Host Code, will receive my FREE Gift of the Month. Orders of $150 and above will automatically receive the gift – do no use the Host Code.
I can ship only within the United States. “No contact” orders are not eligible.
You always earn a Gum Ball for every $50 you spend on an order with me. Earn 10 Gum Balls and I’ll send you a free stamp set of your choice! See the Gum Ball Rewards page for details.