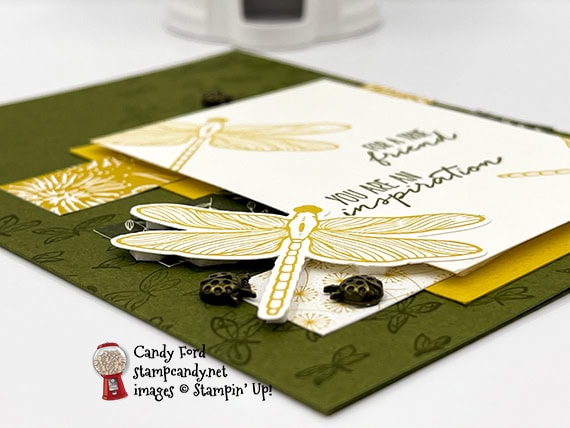
Nov 24, 2020 | Cards, Gallery |
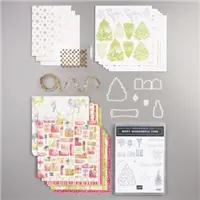
Recently Stampin’ Up! had their convention type event called OnStage, only this time it was virtual, so it was called OnStage@Home. Today I’m sharing one of the cards we made with some items we were able to order early. It’s a Dandy Garden friend card made with the Dragonfly Garden Bundle (Dragonfly Garden stamp set and Dragonflies Punch) and Dandy Garden Designer Series Paper. They are part of the Dandy Garden Suite Collection that will be in the January-June 2021 Mini Catalog. If you want me to send you a free catalog, request one here.
S Dandy Garden Friend Dandy Garden Friend Dandy Garden Friend Dandy Garden Friend
24 Hour Flash Sale TODAY ONLY!
Shop HERE today to get 10% off almost everything from the 2020-2021 Annual Catalog! Here‘s the list of excluded items.

S
If you are reading this in email, some photos may appear blurry, or may not appear at all. Please click here to see the post on my blog.
S OnStage@Home OnStage@Home OnStage@Home OnStage@Home
Here’s my Dandy Garden Friend Card:

S
Here’s what I did:
Cut and scored with my paper trimmer:
- Mossy Meadow card stock (CS) cut to 8-1/2″ x 5-1/2″, then scored in half at 4-1/4″
- Bumblebee CS layer cut to 2-3/4″ x 3-3/4″
- Whisper White Thick CS layer cut to 2-1/2″ x 3-1/2″
- Dandy Garden Designer Series Paper (DSP) layer cut to 3-3/4″ x 3/4″ (3 pieces, each a different pattern)
- Whisper White CS cut to 4″ x 5-1/4″ for the inside of the card base
Stamped with the Dragonfly Garden stamp set:
- swarm of butterflies in Mossy Meadow ink diagonally onto the front of the card base
- 2 large dragonflies in Bumblebee ink onto the Whisper White CS layer, one at top left and one at bottom right
- sentiments in Mossy Meadow ink onto the Whisper White CS layer
- 1 large dragonfly in Bumblebee ink onto a scrap of Whisper White Thick CS
Cut using the Dragonflies Punch:
- large dragonfly stamped on scrap of CS
Assembled the card:
- burnished the fold in the card base with a Bone Folder
- Bumblebee CS layer glued onto the front of the card base
- 3 DSP strips glued horizontally across the Bumblebee CS layer
- Whisper White CS layer adhered over the DSP strips using Stampin’ Dimensionals
- punched dragonfly adhered: front glued onto the Whisper White CS layer and the rest adhered using Stampin’ Dimensionals
- 3 Ladybug Trinkets adhered using Mini Glue Dots
- Whisper White CS glued onto the inside of the card base
S
Here are today’s main colors:
You can click on each one to see all the products that come in that color!
SS
Here’s what I used:
These products will be available January 5, 2021:
- Dandy Garden Suite Collection, Item 155981
- Dragonfly Garden Bundle, Item 156224
- Dragonfly Garden stamp set, Item 154411
- Dragonflies Punch, Item 154240
- Dandy Garden Designer Series Paper, Item 154297
- Ladybug Trinkets, Item 154299
Click on these images for more details and to purchase. If you are reading this post in email, the product images may not show up. Please click here to see the post on my blog.
Supply List. <— Click for a clickable and printable list of the products!
S
Here’s the Curvy Celebrations offering:
Click the image to see it in my online store. Some of these products are available only through January 4!

S
Request a new catalog:
I will be mailing them out in early December. Click the image below to request yours:

S
Here are some helpful links:
S
Thanks for stopping by today, and Sweet Stamping!

Nov 23, 2020 | Cards, Gallery |
Recently Stampin’ Up! had their convention type event called OnStage, only this time it was virtual, so it was called OnStage@Home. Today I’m sharing one of the cards we made with some items we were able to order early. It’s made with the Dragonfly Garden Bundle (Dragonfly Garden stamp set and Dragonflies Punch) and Dandy Garden Designer Series Paper. They are part of the Dandy Garden Suite Collection that will be in the January-June 2021 Mini Catalog. If you want me to send you a free catalog, request one here.
S
24 Hour Flash Sale Tomorrow Only!
Shop HERE tomorrow to get 10% off almost everything from the 2020-2021 Annual Catalog! Here‘s the list of excluded items.
S
If you are reading this in email, some photos may appear blurry, or may not appear at all. Please click here to see the post on my blog.
S OnStage@Home OnStage@Home OnStage@Home OnStage@Home
Here’s what I made at OnStage@Home:


S
Here’s what I did:
Cut and scored with my paper trimmer:
- Misty Moonlight card stock (CS) cut to 8-1/2″ x 5-1/2″, then scored in half at 4-1/4″
- Whisper White CS cut to 4″ x 5-1/4″
- Dandy Garden Designer Series Paper (DSP) layer cut to 4″ x 1″ (first pattern)
- second pattern DSP layer cut to 3-1/4″ x 1-1/4″
- third pattern DSP layer cut to 3-1/4″ x 1-1/4″
- Bumblebee CS layer cut to 2″ x 2-3/4″
- Whisper White CS cut to 4″ x 5-1/4″ for the inside of the card base
Stamped with the Dragonfly Garden stamp set:
- butterfly swarm in Bumblebee ink repeatedly onto the left side of the Whisper White CS layer
- sentiment in Misty Moonlight ink onto the bottom right of the same layer
- shadow (wing fill-in image) in Bumblebee ink onto the Bumblebee CS layer
Cut using the Dragonflies Punch:
- large dragonfly from a scrap of DSP
- small dragonfly from a scrap of DSP
Assembled the card:
- burnished the fold in the card base with a Bone Folder
- Whisper White CS layer glued onto the front of the card base
- 4″ DSP strip glued horizontally onto the Whisper White CS layer
- remaining two DSP pieces adhered over the first DSP strip using Stampin’ Dimensionals
- Bumblebee CS layer glued onto the two DSP pieces
- large dragonfly adhered onto the Bumblebee CS layer using Stampin’ Dimensionals
- small butterfly glued onto the Whisper White CS layer
- Whisper White CS glued onto the inside of the card base
S
Here are today’s main colors:
You can click on each one to see all the products that come in that color!
S
Here’s what I used:
These products will be available January 5, 2021:
- Dandy Garden Suite Collection, Item 155981
- Dragonfly Garden Bundle, Item 156224
- Dragonfly Garden stamp set, Item 154411
- Dragonflies Punch, Item 154240
- Dandy Garden Designer Series Paper, Item 154297
Click on these images for more details and to purchase. If you are reading this post in email, the product images may not show up. Please click here to see the post on my blog.
Supply Listvv<— Click for a clickable and printable list of the products!
S
Here’s the Curvy Celebrations offering:
Click the image to see it in my online store. Some of these products are available only through January 4!
S
Request a new catalog:
I will be mailing them out in early December. Click the image below to request yours:
S
Here are some helpful links:
S
Thanks for stopping by today, and Sweet Stamping!
Nov 20, 2020 | Cards, Challenges, Christmas, Gallery, Holiday, Sketches |
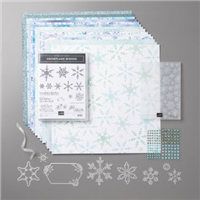
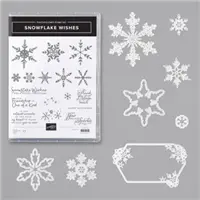
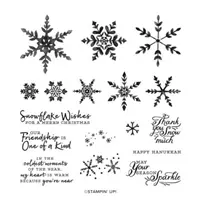
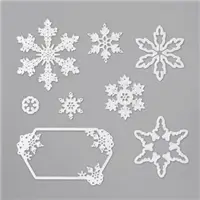
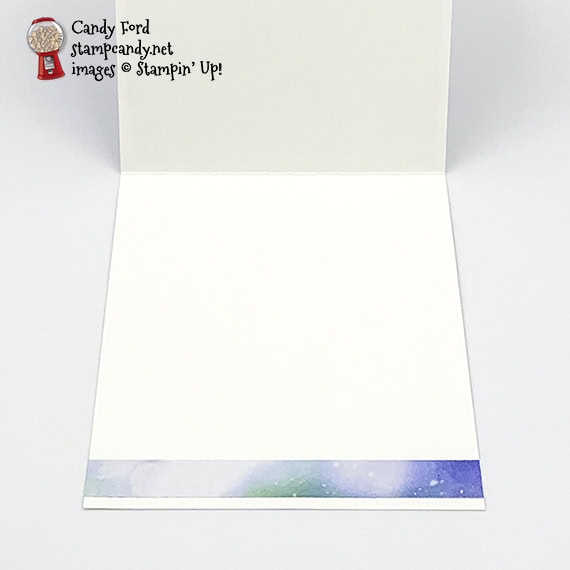
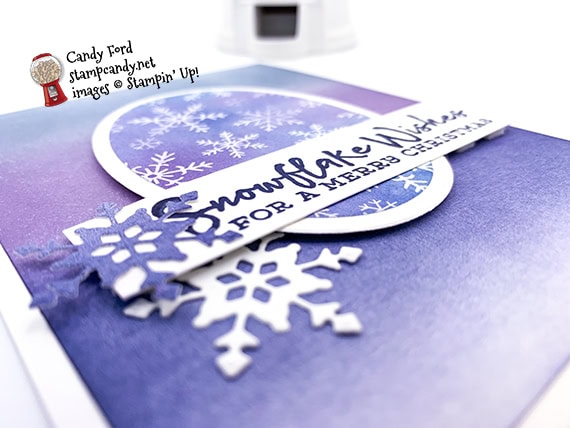
I used the Snowflake Wishes Bundle (Snowflake Wishes stamp set & So Many Snowflakes Dies) along with the Snowflake Splendor Designer Series Paper – all of which are part of the Snowflake Splendor Suite Collection – to create today’s Christmas card. I’m also providing a sneak peek at an upcoming product, that will be available in the January – June 2021 Mini Catalog: Blending Brushes. I am very excited that Stampin’ Up! will be offering this amazing blending tool! I used one in a side to side motion to blend the three stripes of background color onto a layer of Whisper White card stock.
If you are reading this in email, some photos may appear blurry, or may not appear at all. Please click here to see the post on my blog.
S wishes wishes wishes wishes
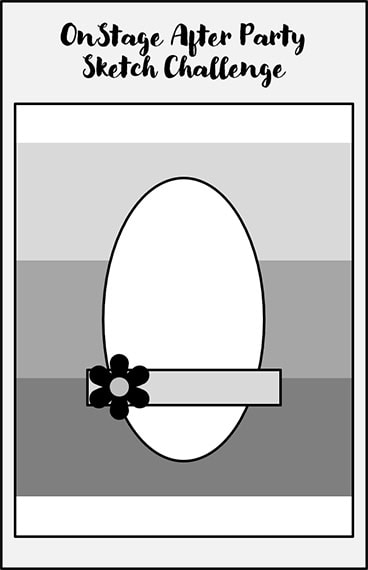
Here’s the sketch:
I recently attended Stampin’ Up!’s OnStage@Home virtual event for Demonstrators, where we got to see the new catalog and lots of new products. After the last day, my upline, Brian King, hosted a virtual After Party for his team members. He had given us a sketch challenge for the event, and we all got to show off what we made. Today’s card is the one I made for that challenge.
S
Here’s what I made:

S
Here’s what I did:
Cut and scored with my paper trimmer:
- Whisper White Thick card stock (CS) cut to 4-1/4″ x 11″, then scored in half at 5-1/2″
- Whisper White CS layer cut to 4″ x 5-1/4″
- Snowflake Splendor Designer Series Paper strip cut to 4-1/4″ x 1/2″
- Whisper White Thick CS cut to 3-1/2″ x 7/8″ for the sentiment
Stamped with the Snowflake Wishes stamp set:
- sentiment in Night of Navy ink onto the 3-1/2″ x 7/8″ Whisper White Thick CS
Colored using a Blender Brush:
- Whisper White CS layer in Balmy Blue, Highland Heather, and Night of Navy inks (top to bottom)
- a scrap of Whisper White Thick CS in Night of Navy
Cut using the Layering Ovals Dies:
- DSP oval
- Whisper White Thick CS slightly larger than the DSP ovalx
Cut using the So Many Snowflakes Dies:
- one snowflake from the brushed scrap
- one snowflake from a scrap of Whisper White Thick CS
Assembled the card:
- burnished the fold in the card base with a Bone Folder
- blended Whisper White CS layer glued onto the front of the card base
- DSP oval glued onto the Whisper White Thick CS oval
- Whisper White Thick CS oval adhered onto the blended layer using Stampin’ Dimensionals
- sentiment glued across the ovals, and adhered on the ends onto the blended layer using Stampin’ Dimensionals
- blended snowflake glued onto the end of the sentiment
- Whisper White snowflake glued onto the blended layer
- DSP strip glued onto the inside of the card base
- NOTE: There were some thin strips of DSP from previous projects lying around my craft table. After I had this one glued onto my card, I realized I had used one from the Feels Like Frost DSP instead of the Snowflake Splendor DSP. But, hey, it works!
S
Here are today’s colors:
You can click on each one to see all the products that come in that color!
S
Here’s what I used:
Click on these images for more details and to purchase. If you are reading this post in email, the product images may not show up. Please click here to see the post on my blog.
Supply List. <— Click for a clickable and printable list of the products!
S
Here’s the new Curvy Celebrations offering:
Click the image to see it in my online store.
S
Here are some helpful links:
S
Thanks for stopping by today, and Sweet Stamping!
Nov 19, 2020 | Cards, Christmas, Gallery, Holiday |
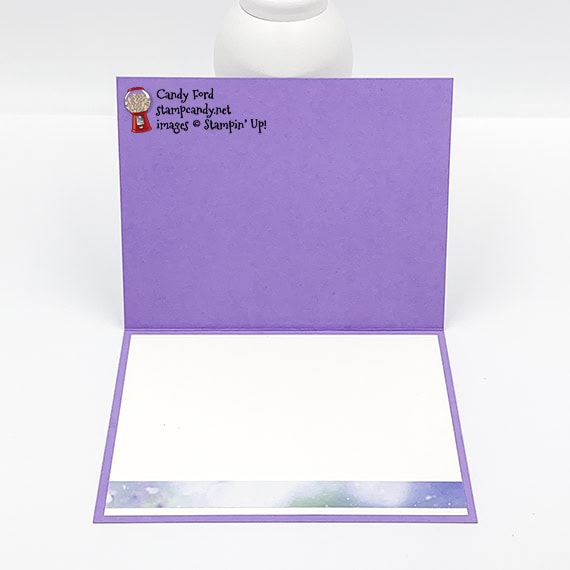
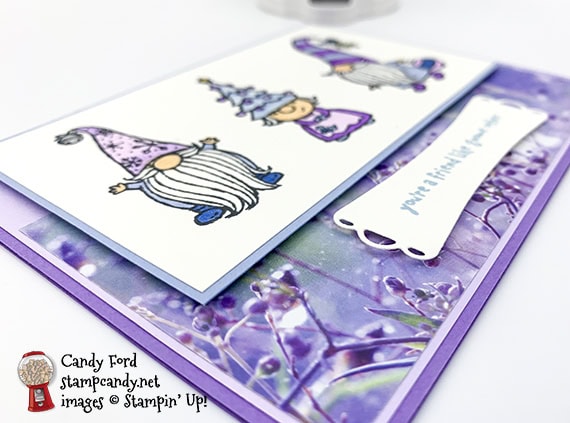
I used the Gnome for the Holidays stamp set, Most Wonderful Time Dies, Feels Like Frost Designer Series Paper, and Stampin’ Blends Markers to make today’s card. I love frosty hues of blue and purple in the paper, and those are the color I used to color the gnomes.
If you are reading this in email, some photos may appear blurry, or may not appear at all. Please click here to see the post on my blog.
S Gnome Gnome Gnome Gnome
Here’s what I made:
S
Here’s what I did:
Cut and scored with my paper trimmer:
- Highland Heather card stock (CS) cut to 5-1/2″ x 8-1/2″, then scored in half at 4-1/4″
- Purple Posy CS layer cut to 5-3/8″ x 4-1/8″
- Feels Like Frost Designer Series Paper (DSP) layer cut to 5-1/4″ x 2-3/4″
- Seaside Spray CS layer cut to 4-7/8” x 2-7/8”
- Whisper White CS layer cut to 4-3/4″ x 2-3/4″
- Whisper White CS cut to 5-1/4″ x 4″ for the inside of the card base
- DSP strip cut to 5-1/4″ x 1/2″
Stamped with the Gnome for the Holidays stamp set:
- three gnomes in Memento Tuxedo Black ink onto the Whisper White CS layer
- sentiment in Seaside Spray ink onto a scrap of Whisper White Thick CS
Cut using the Most Wonderful Time Dies:
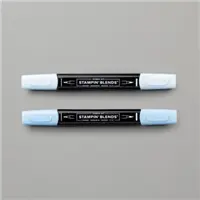
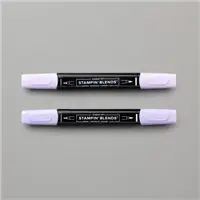
Colored using Stampin’ Blends Markers:
- gnomes in Purple Posy, Highland Heather, Night of Navy, Seaside Spray, Ivory, Granny Apple Green (mistletoe,) Smoky Slate (bell,) and Daffodil Delight (star)
Assembled the card:
- burnished the fold in the card base with a Bone Folder
- Purple Posy CS layer glued onto the front of the card base
- DSP layer glued onto the Purple Posy CS layer, lined up at the bottom
- Whisper White CS layer with gnomes glued onto the Seaside Spray CS layer
- Seaside Spray CS layer adhered over the DSP/Purple Posy layers using Stampin’ Dimensionals
- sentiment adhered onto the DSP layer using Stampin’ Dimensionals
- DSP strip glued onto the Whisper White CS for the inside, then the Whisper White CS glued onto the inside of the card base
S
Here are today’s main colors:
You can click on each one to see all the products that come in that color!
S
Here’s what I used:
Click on these images for more details and to purchase. If you are reading this post in email, the product images may not show up. Please click here to see the post on my blog.
Supply List. <— Click for a clickable and printable list of the products!
S
Here’s the new Curvy Celebrations offering:
Click the image to see it in my online store.
S
Here are some helpful links:
S
Thanks for stopping by today, and Sweet Stamping!
Nov 18, 2020 | Blog Hop, Cards, Christmas, Gallery, Holiday |

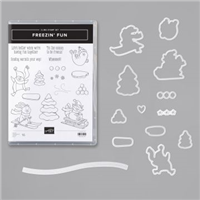
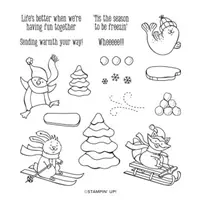
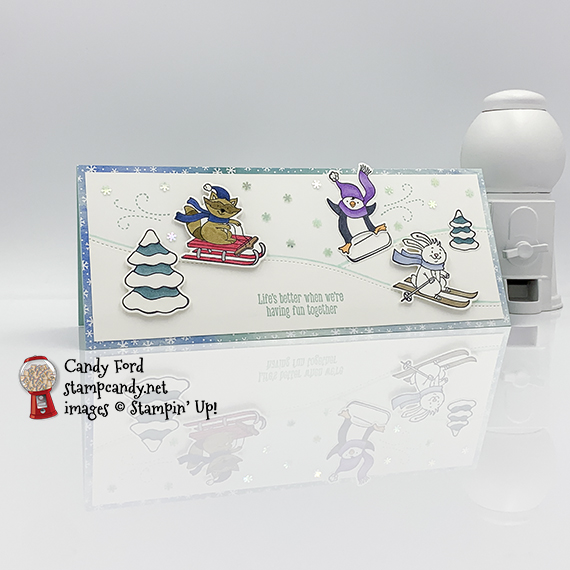
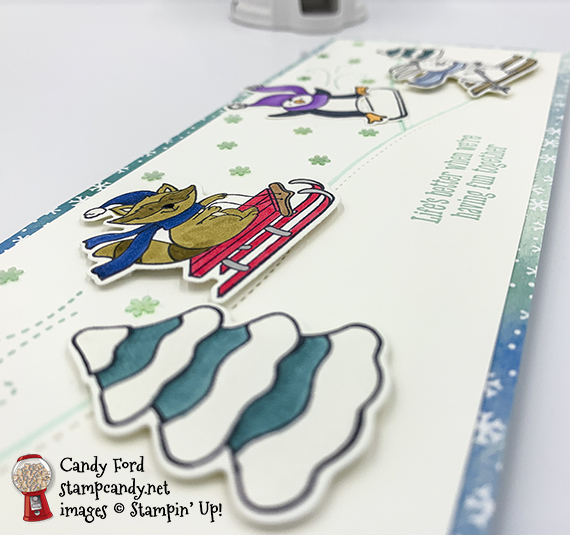
It’s time for the November 2020 IRBH! This month’s theme is Christmas. What could be more fun than playing in the snow with friends during the holidays? I used the Freezin’ Fun Bundle (Freezin’ Fun stamp set and Freezin’ Friends Dies) to create a fun scene on today’s Slimline card.
Be sure to hop around to all the stops. There’s a whole lot of talent in this group, and you don’t want to miss any of the great projects they’ve created for you today!
If you are reading this in email, some photos may appear blurry, or may not appear at all. Please click here to see the post on my blog.
S November 2020 IRBH November 2020 IRBH November 2020 IRBH November 2020 IRBH
Here’s what I made:
S
Here’s what I did:
Cut and scored with my paper trimmer:
- Pool Party card stock (CS) cut to 8-1/2″ x 7″, then scored in half at 3-1/2″
- Snowflake Splendor Designer Series Paper (DSP) layer cut to 8-1/2″ x 3-1/2″
- Whisper White CS layer cut to 8-1/4″ x 3-1/4″ (3 pieces)
- DSP strip cut to 8-1/4″ x 3/4″
Stamped with the Freezin’ Fun stamp set:
- large tree, small tree, rabbit, raccoon, penguin, and snowboard in Tuxedo Black Memento ink onto a scrap of Whisper White Thick CS
- sentiment in Pool Party ink onto the Whisper White CS at the bottom of the front of the card (after it’s die cut)
- “swooshes” in Pool Party ink behind the raccoon and penguin, to indicate motion
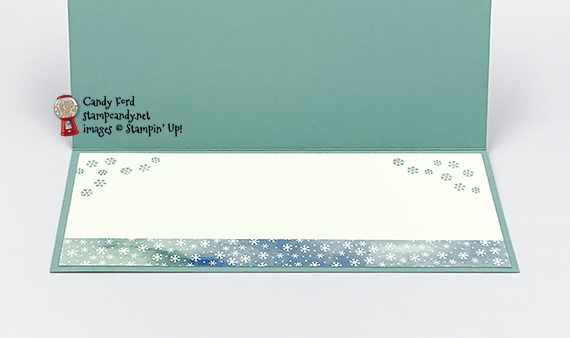
- snowflakes in Pool Party ink onto the Whisper White CS for the inside
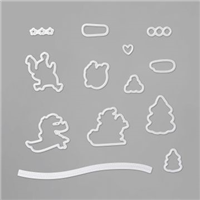
Cut using the Freezin’ Friends Dies:
- the 6 stamped images for the card front
- one of the Whisper White CS layers cut in half diagonally using the long, curved stitched die – it took two passes to cut the full length
Colored using Stampin’ Blends Markers:
- trees in Pretty Peacock (I covered the white parts of the trees in Clear Wink of Stella.)
- raccoon in Soft Suede, Crumb Cake, Bronze, Real Red, Night of Navy, Smoky Slate, and Basic Black
- rabbit in Seaside Spray, Flirty Flamingo, and Crumb Cake
- penguin in Basic Black, Highland Heather, and Pumpkin Pie
- drew a line along the top of the two “hills” in Pool Party, after gluing them down
Assembled the card:
- burnished the fold in the card base with a Bone Folder
- DSP layer glued onto the front of the card base
- a Whisper White CS layer glued onto the DSP layer
- the two die cut Whisper White CS pieces (hills) layered and glued onto the Whisper White CS layer (flipped one of the pieces over backwards, to have the higher ends of each piece at each end of the card (this is when I drew the Pool Party lines along the tops)
- large tree, raccoon, and rabbit adhered onto the card front using Stampin’ Dimensionals
- snowboard, penguin, and small tree glued onto the card front
- Adhesive Snowflakes applied onto the “sky” area using a Take Your Pick tool
- DSP strip glued along the bottom of the Whisper White CS for the inside
- Whisper White CS glued onto the inside of the card base
S
Here’s the November 2020 IRBH:
Thank you for hopping along with us. If you get stuck during the Blog Hop, please use this line-up as a guide:
- Brian King at Stamp with Brian
- Ann Murray at Murray Stamps Ink
- Candy Ford at Stamp Candy ——-> YOU ARE HERE!
- Sheryl Sharp at Sharp Notes by Sheryl
- Julie DiMatteo at The Paper Pixie
- Rachel Brumley at Artistic Designs by Rachel
- Jackie Beers at Blue Line Stamping
- Sue Jackson at Just Peachy Stamping
- Joanne Brown at The Inky Dragon
- Lynn Kolcun at Avery’s Owlery
- Pam Morris at Tap Tap Stamp
- Renae Novak at Blessed by Cards
- Linda Krueger at The Stamp Coach
- Shawn de Oliveira at Shawn Stamps
- Robin Myren at Songbird Designs by Robin
S
Here are today’s colors:
You can click on each one to see all the products that come in that color!
S
Here’s what I used:
Click on these images for more details and to purchase. If you are reading this post in email, the product images may not show up. Please click here to see the post on my blog.
Supply List. <— Click for a clickable and printable list of the products!
S
S
Here’s the new Curvy Celebrations offering:
Click the image to see it in my online store. The Curvy Christmas stamp set and Classic Christmas Designer Series Paper are available only through January 4, or while supplies last.
S
Here are some helpful links:
S
Thanks for stopping by today, and Sweet Stamping!
Nov 16, 2020 | Cards, Christmas, Gallery, Holiday |
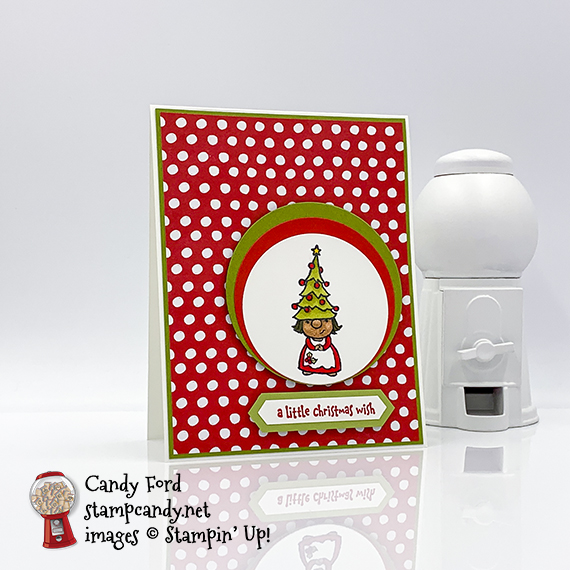
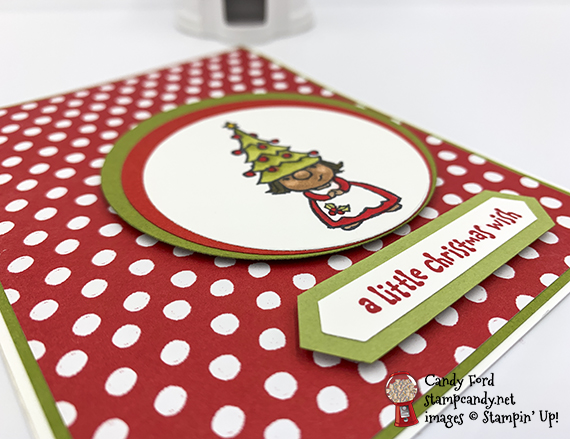
I used the Gnome for the Holidays stamp set, Layering Circle Dies, Classic Label Punch, and Trimming the Town Designer Series Paper to make today’s fun Christmas card. I have really fallen in love with this stamp set. The gnomes are just so adorable. And how fun is that polka dot background?
If you are reading this in email, some photos may appear blurry, or may not appear at all. Please click here to see the post on my blog.
S Gnome for the Holidays Gnome for the Holidays Gnome for the Holidays Gnome for the Holidays
Here’s what I made:
S
Here’s what I did:
Cut and scored with my paper trimmer:
- Whisper White Thick card stock (CS) cut to 4-1/4″ x 11″, then scored in half at 5-1/2″
- Old Olive CS layer cut to 4-1/8″ x 5-3/8″
- Trimming the Town Designer Series Paper (DSP) layer cut to 4″ x 5-1/4″
- Old Olive CS strip cut to 4″ x 5/8″
Stamped with the Gnome for the Holidays stamp set:
- gnome in Memento Tuxedo Black ink onto a scrap of Whisper White CS
- outer sentiment in Real Red ink onto a scrap of Whisper White CS
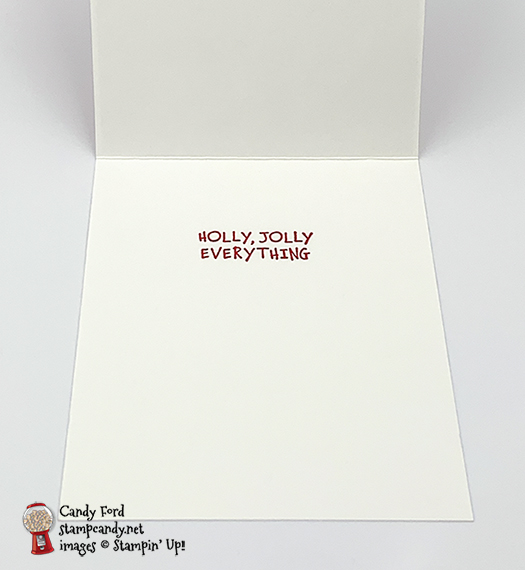
- inner sentiment in Real Red ink onto the inside of the card base
Cut using the Layering Circles Dies:
- gnome
- 2 larger circles from scraps of Real Red and Old Olive CS
Cut using the Classic Label Punch:
Colored using Stampin’ Blends Markers:
- gnome in Old Olive, Real Red, Bronze, Ivory, and Soft Suede
Cut using Paper Snips:
- both ends of the Old Olive CS strip, to match the outer sentiment
Assembled the card:
- burnished the fold in the card base with a Bone Folder
- Old Olive CS layer glued onto the front of the card base
- DSP layer glued onto the Old Olive CS layer
- gnome and two other circles lined up at the bottom and glued together, then adhered onto the DSP layer using Stampin’ Dimensionals
- outer sentiment glued onto the Old Olive CS strip, then adhered onto the DSP layer using Stampin’ Dimensionals
S
Here are today’s main colors:
You can click on each one to see all the products that come in that color!
S
Here’s what I used:
Click on these images for more details and to purchase. If you are reading this post in email, the product images may not show up. Please click here to see the post on my blog.
Supply List. <— Click for a clickable and printable list of the products!
S
S
Here’s the new Curvy Celebrations offering:
Click the image to see it in my online store.
S
Here are some helpful links:
S
Thanks for stopping by today, and Sweet Stamping!