Jul 20, 2020 | Cards, Gallery, Kits |
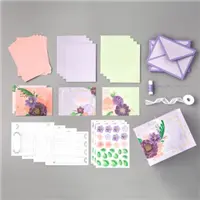
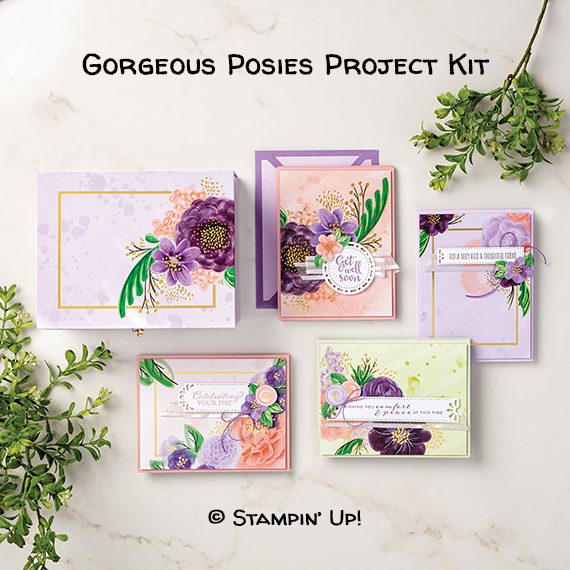
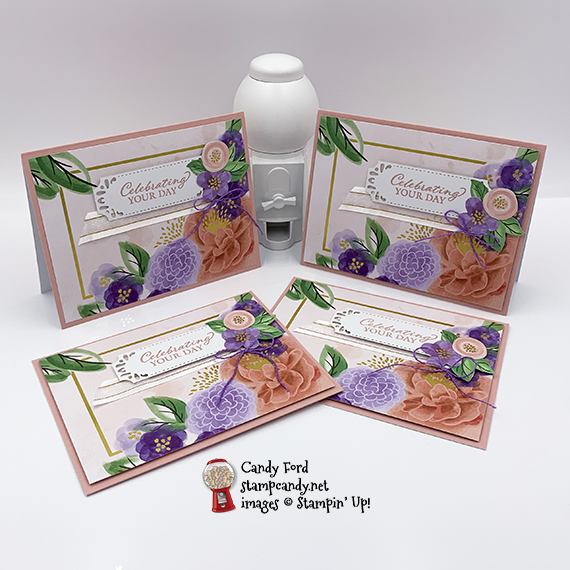
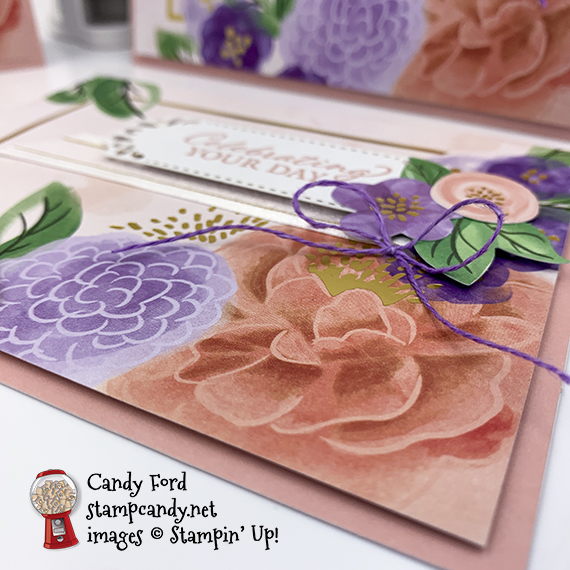
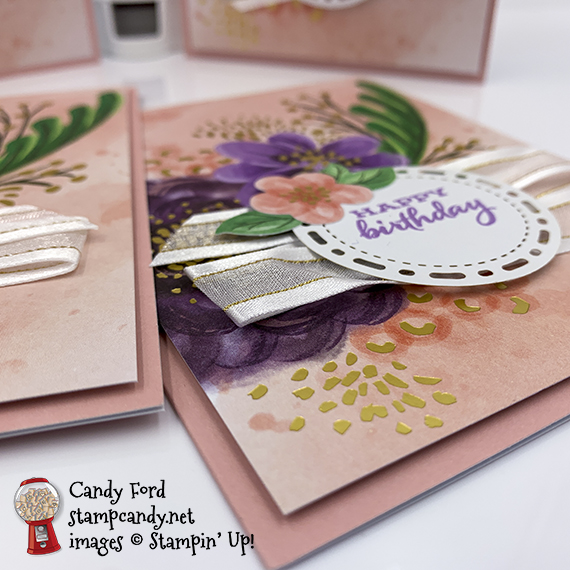
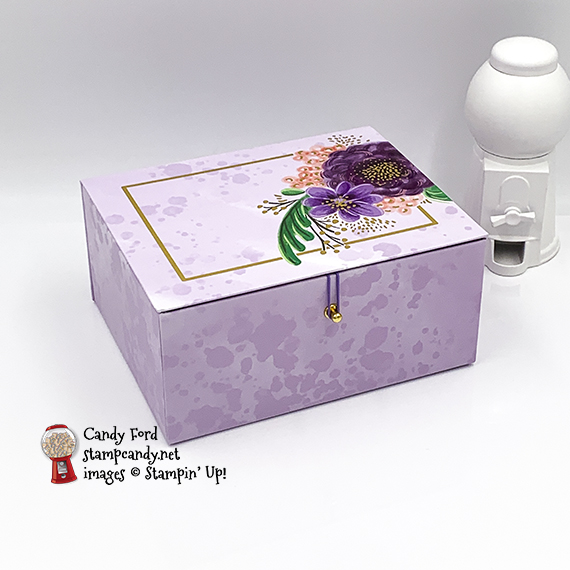
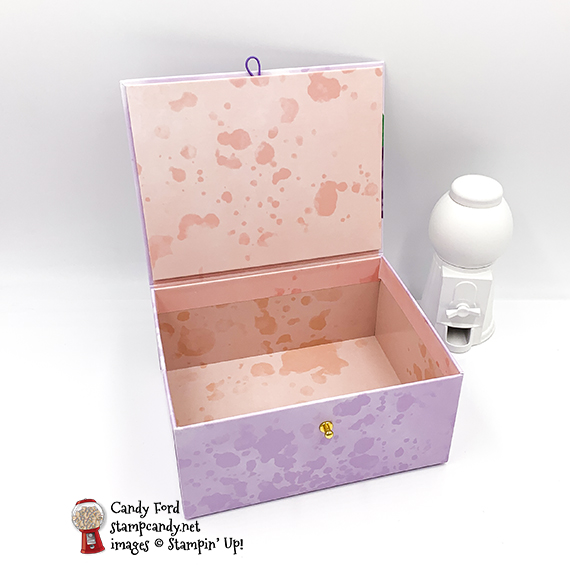
Today’s I’m sharing the Gorgeous Posies Project Kit. It makes 16 cards, 4 each of 4 designs, and they really are, well, gorgeous. I followed the kit instructions mostly. On some of the cards, I did use different sentiments from the Timeless Tulips and the Four Season Floral stamp sets. One of my favorite things about this kit is the box it comes in. I will definitely keep it in my office to hold assorted little items.
If you are reading this in email, some photos may appear blurry, or may not appear at all. Please click here to see the post on my blog.
S Gorgeous Posies Gorgeous Posies Gorgeous Posies Gorgeous Posies
Here’s the Gorgeous Posies Project Kit:

Here’s what I made:
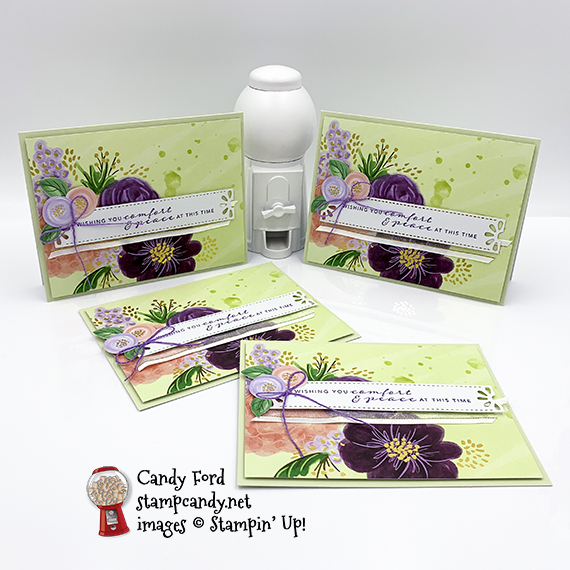
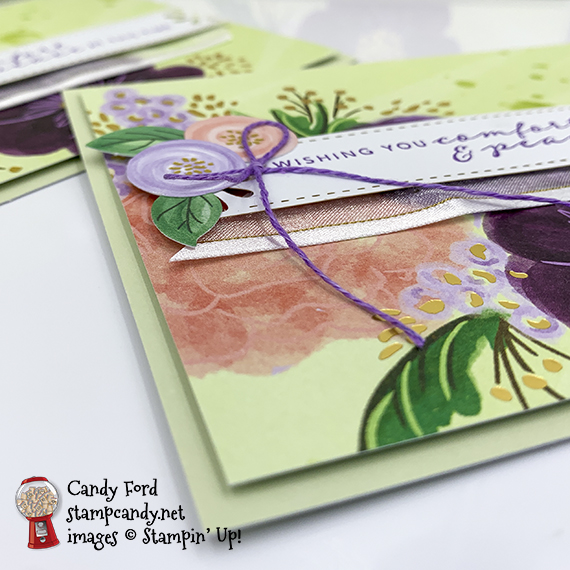
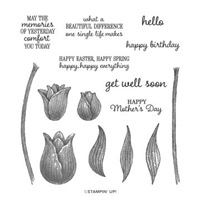
I used the Timeless Tulips stamp set to stamp the happy birthday sentiments in Blackberry Bliss ink.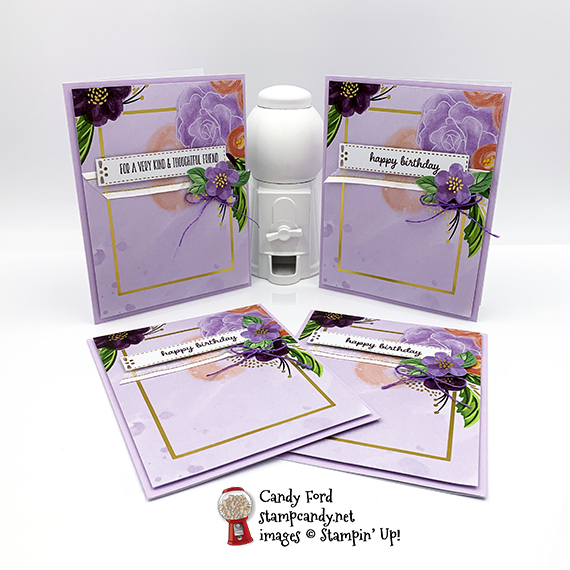

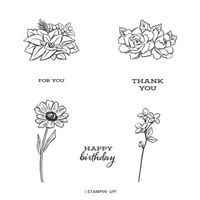
I used the Four Season Floral stamp set to stamp the happy birthday sentiments in Highland Heather ink.
This box is so pretty!
And how great are these envelopes?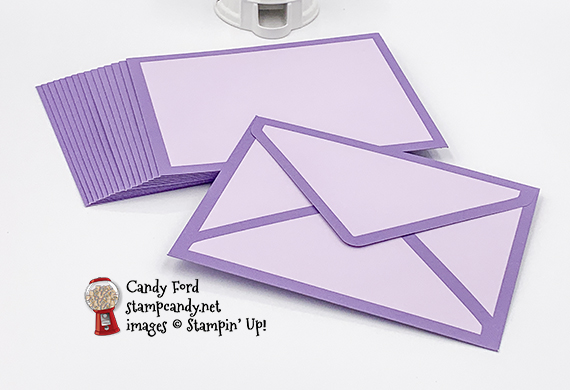
S
2 weeks left to earn Bonus Days coupons!
For each $50 you spend on an order now through Monday, August 3, 2020, you will receive a $5 coupon code to use in August! Click the image below to shop now!
 S
S
Here are the colors in the kit:
You can click on each one to see all the products that come in that color!
S
Here’s what I used:
Click on these images for more details and to purchase. If you are reading this post in email, the product images may not show up. Please click here to see the post on my blog.
Supply List. <— Click for a clickable and printable list of the products!
S
S
Here are some helpful links:
S
Thanks for stopping by today, and Sweet Stamping!
Jul 17, 2020 | Cards, Gallery |
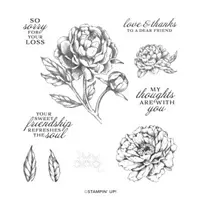
For today’s sympathy card I used the Prized Peony stamp set and Peony Garden Designer Series Paper from the Peony Garden Suite. I used two blues (Misty Moonlight and Seaside Spray) along with Gray Granite and Whisper White. I colored some Pearl Basic Jewels with a Misty Moonlight Stampin’ Blends Marker; and I colored the stamped image in Seaside Spray, So Saffron, and Gray Granite. The white ribbon is from the Flowers for Every Season Ribbon Combo Pack, and the blue ribbon is Misty Moonlight 1/4″ twill ribbon.
If you are reading this in email, some photos may appear blurry, or may not appear at all. Please click here to see the post on my blog.
S Peony Peony Peony Peony
Here’s what I made:


S
Here’s what I did:
Cut and scored with my paper trimmer:
- Gray Granite card stock (CS) cut to 4-1/4″ x 11″, then scored in half at 5-1/2″
- Misty Moonlight CS layer cut to 4-1/8″ x 5-3/8″
- Seaside Spray CS layer cut to 3-7/8″ x 5-1/8″
- Peony Garden Designer Series Paper (DSP) layer cut to 3-3/4″ x 5″
- Misty Moonlight CS layer cut to 2-3/4″ x 4″
- Whisper White CS layer cut to 2-5/8″ x 3-7/8″
- Whisper White CS cut to 4″ x 5-1/4″ for the inside of the card base
Stamped with the Prized Peony stamp set:
- peony, leaves, and sentiment in Misty moonlight ink onto the Whisper White CS layer
- peony in Seaside Spray ink onto the Whisper White CS for the inside of the card base
Colored using Stampin’ Blends Markers:
- peony in Light Seaside Spray and Light So Saffron
- leaves in Light Gray Granite
- 3 pearls in Light Misty Moonlightx
Assembled the card:
- burnished the fold in the card base with a Bone Folder
- DSP layer glued onto the Seaside Spray CS layer
- Seaside Spray CS layer glued onto the larger Misty Moonlight CS layer
- white ribbon adhered across the layers with Stampin’ Seal, and the ends wrapped around to the back
- Misty Moonlight CS layer glued onto the front of the card base
- Whisper White CS layer glued onto the smaller Misty Moonlight CS layer
- Misty Moonlight CS layer adhered onto the DSP layer using Stampin’ Dimensionals
- 3 pearls scattered around the card front
- Whisper White CS glued onto the inside of the card base

S
Bonus Days are here!
Click the image below to shop now and earn Bonus Days coupons to use next month!
S
Here are today’s colors:
You can click on each one to see all the products that come in that color!
S
Here’s what I used:
Click on these images for more details and to purchase. If you are reading this post in email, the product images may not show up. Please click here to see the post on my blog.
Supply List. <— Click for a clickable and printable list of the products!
S
Here are some helpful links:
S
Thanks for stopping by today, and Sweet Stamping!
Jul 16, 2020 | Cards, Gallery |
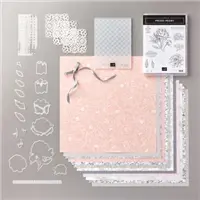
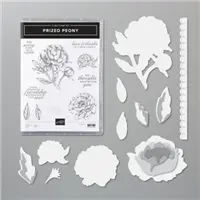
I made today’s card using products from the Peony Garden Suite: Prized Peony Bundle (Prized Peony stamp set and Peony Dies,) Dainty Diamonds 3D Embossing Folder, Peony Garden Designer Series Paper, and Gray Granite 1/4″ Shimmer Ribbon. I wanted the flower to pop, so I made it in Melon Mambo instead of the Petal Pink in the paper. And I colored 3 pearls with a Dark Black Stampin’ Blends Marker to scatter around the flower.
If you are reading this in email, some photos may appear blurry, or may not appear at all. Please click here to see the post on my blog.
S Prized Prized Prized Prized
Here’s what I made:


Here’s a better shot of the Dainty Diamonds 3D embossed layer:
S
Here’s what I did:
Cut and scored with my paper trimmer:
- Basic Black card stock (CS) cut to 4-1/4″ x 11″, then scored in half at 5-1/2″
- Peony Garden Designer Series Paper (DSP) layer cut to 4-1/8″ x 5-3/8″
- Basic Black CS layer cut to 3-5/8″ x 4-7/8″
- Gray Granite CS layer cut to 3-1/2″ x 4-3/4″
- Whisper White CS layer cut to 4-1/8″ x 1-3/8″
- DSP strip cut to 4″ x 1/2″
- Whisper White CS cut to 4″ x 5-1/4″ for the inside of the card base
Stamped with the Prized Peony stamp set:
- large floral image in Memento ink onto a scrap of Gray Granite CS
- sentiment in Memento ink onto the Whisper White CS layer
- large floral image in Gray Granite ink, stamped off twice, onto the 4″ x 5-1/4″ Whisper White CS (I wanted it to be very light, like a watermark, so I can write over it.)
Cut using the Peony Dies:
- bottom of sentiment strip with scalloped die
- stamped floral image
- 4 peony layers from a scrap of Melon Mambo CS
- flower center from a scrap of Basic Black CS
Embossed using the Dainty Diamonds Embossing Folder:
Colored using Stampin’ Blends Markers:
- die cut floral image in Gray Granite and Melon Mambo
- 3 pearls in Dark Basic Black
Assembled the card:
- burnished the fold in the card base with a Bone Folder
- DSP layer glued onto the front of the card base
- embossed Gray Granite CS layer glued onto the Basic Black CS layer
- Basic Black CS layer glued onto the DSP layer
- die cut floral image glued onto the Gray Granite CS layer
- four peony pieces assembled and glued together
- flower center stuck down into the middle of the flower and glued in place
- peony glued over the large flower of the stamped image
- ribbon adhered along the top of the sentiment strip with Tear & Tape and wrapped around to the back
- sentiment strip glued over the other layers
- 3 black pearls applied onto the Gray Granite CS layer using the pointy end of my Take Your Pick tool
- DSP strip glued onto the bottom of the 4″ x 5-1/4″ Whisper White CS
- 4″ x 5-1/4″ Whisper White CS glued onto the inside of the card base
S
Bonus Days are here!
Click the image below to shop now and earn Bonus Days coupons to use next month!
S
Here are today’s colors:
You can click on each one to see all the products that come in that color!
S
Here’s what I used:
Click on these images for more details and to purchase. If you are reading this post in email, the product images may not show up. Please click here to see the post on my blog.
Supply List <— Click for a clickable and printable list of the products!
S
S
Here are some helpful links:
S
Thanks for stopping by today, and Sweet Stamping!
Jul 15, 2020 | Blog Hop, Cards, Christmas, Gallery, Holiday |

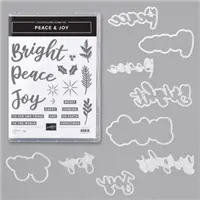
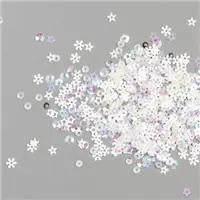
Welcome to the July 2020 Inking Royalty Blog Hop! This month’s theme is Christmas in July! This is the perfect time to start planning your holiday cards and invitations, especially since so many folks are staying home and have more time. My card for today can be used for Christmas or really any winter occasion. I used the Peace & Joy Bundle (Peace & Joy stamp set and Joy Dies,) Trimming the Town Designer Series Paper, and Snowflake Sequins from the upcoming August – December 2020 Mini Catalog, which goes live August 4. If you’d like to order from the new Mini Catalog now instead of having to wait, click here to join.
After reading my post today, I hope you’ll hop around to all the stops. There’s so much talent in this group and you don’t want to miss any of it!
If you are reading this in email, some photos may appear blurry, or may not appear at all. Please click here to see the post on my blog.
S July 2020 Inking Royalty Blog Hop July 2020 Inking Royalty Blog Hop
Here are the Sneak Peek products I used:


S
Here’s what I made:


S
Here’s what I did:
Cut and scored with my paper trimmer:
- Misty Moonlight card stock (CS) cut to 5-1/2″ x 8-1/2″, then scored in half at 4-1/4″
- Whisper White CS layer cut to 5-3/8″ x 4-1/8″
- Trimming the Town Designer Series Paper (DSP) layer cut to 5-1/4″ x 4″ (stripes)
- Whisper White CS layer cut to 4-1/8″ x 2-7/8″
- DSP layer cut to 4″ x 2-3/4″ (snow)
- Whisper White CS cut to 5-1/4″ x 4″ for the inside of the card base
Stamped with the Peace & Joy stamp set:
- HAPPY and AND in Misty Moonlight ink onto a scrap of Whisper White Thick CS
- BRIGHT in Misty Moonlight ink, stamped off three times, onto the 5-1/4″ x 4″ Whisper White CS (I wanted it to be very light, like a watermark, so I could write over it.)
Cut using the Joy Dies:
- BRIGHT using all three dies, the middle one from a scrap of Misty Moonlight CS, and the other two from a scrap of Whisper White Thick CS
Cut using Paper Snips:
Assembled the card:
- burnished the fold in the card base with a Bone Folder
- the 3 BRIGHT die cuts glued together
- BRIGHT die cut stack, HAPPY, and AND adhered onto the smaller DSP layer using Stampin’ Dimensionals
- smaller DSP layer glued onto the smaller Whisper White CS layer
- smaller Whisper White CS layer glued onto the larger DSP layer
- larger DSP layer glued onto the larger Whisper White CS layer
- larger Whisper White CS layer glued onto the front of the card base
- 3 Snowflake Sequins glued onto the larger DSP layer
- 5-1/4″ x 4″ Whisper White CS glued onto the inside of the card base
What I would do differently:
I’m not yet used to having the new adhesives, so I forget to use them. For today’s card, I would have put the card stock for the top two BRIGHT die cuts on an Adhesive Sheet before die cutting. Then I could have just peeled off the backing to adhere the pieces, instead of gluing them. I would have put the card stock for the bottom (largest) BRIGHT die cut on a Foam Adhesive Sheet before die cutting. I also would have put the stamped sentiments on a Foam Adhesive Sheet before cutting them with Paper Snips.
S
Here’s the July 2020 Inking Royalty Blog Hop:
Thank you for hopping along with us. Please hop to the next stop, Linda Krueger at The Stamp Coach. If you get stuck during the Blog Hop, please use this line-up as a guide:
- Brian King at Stamp with Brian
- Ann Murray at Murray Stamps Ink
- Janneke Dijkstra-de Jong at Happy Stampin
- Candy Ford at Stamp Candy <—————YOU ARE HERE!
- Linda Krueger at The Stamp Coach
- Shawn de Oliveira at Shawn Stamps
- Pam Morris at Tap Tap Stamp
- Julie DiMatteo at The Paper Pixie
- Joanne Brown at Stamping with JoJo
- Lynn Kolcun at Avery’s Owlery
- Jennifer Spiller at Westside Paper Creations
- Jackie Beers at Blue Line Stamping
- Sheryl Sharp at Sharp Notes by Sheryl
- Sue Jackson at Just Peachy Stamping
S
Bonus Days are here!
Click the image below to shop now and earn Bonus Days coupons to use next month!
Here are today’s colors:
You can click on each one to see all the products that come in that color!
I S
Here’s what I used:
Click on the images for more details and to purchase. If you are reading this post in email, the product images may not show up. Please click here to see the post on my blog.
These products will be available to purchase 4 August 2020:
- Peace & Joy Bundle (155167) $45.00
- Peace & Joy stamp set (153430) $18.00
- Joy Dies (153530) $32.00
- Trimming the Town Designer Series Paper (153491) $11.50
- Snowflake Sequins (150443) $6.00
Supply List. <— Click for a clickable and printable list of the products!
S
S
Here are some helpful links:
S
Thanks for stopping by today, and Sweet Stamping!

Jul 14, 2020 | Cards, Catalogs, New Products |

The new holiday mini catalog goes live August 4! I will be selling Designer Series Paper Swatch Books as well as Paper Shares, Ribbon Shares, and Embellishment Shares. This is a great way to get a little bit of everything without having to buy a whole package of everything. CLICK HERE to see all the details and to order.
If you complete the order form before July 27, I will send you an invoice on July 27, which must be paid by August 3.
If you complete the order form between July 27 and August 3, you will pay when you place the order.
I use PayPal for my ordering. You do not have to have a PayPal account. You can pay with a credit card.
If you have ordered from me, or requested a catalog, in the last year, I have mailed you a free catalog. Otherwise, you can request one HERE. If you already have a demonstrator, please get your catalog from them. Thank you!
S swatch shares swatch shares swatch shares swatch shares
Bonus Days are here!
Click the image below to shop now and earn Bonus Days coupons to use next month!
S
Here are some helpful links:
Thanks for stopping by today, and Sweet Stamping!
Jul 14, 2020 | Cards, Gallery |
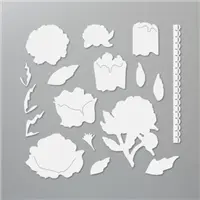
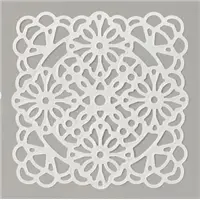
Today I’m sharing one of this month’s Stamp Club cards. I used the Prized Peony bundle (Prized Peony stamp set and Peony Dies,) Peony Garden Designer Series Paper, Square Vellum Doilies, and Elegant Faceted Gems. When I first saw the Peony Dies, I thought it must be complicated to assemble the pieces into a flower. Holy cow, was I ever wrong! The flower has four pieces. Each piece has a slit that you slip the next smaller piece into, and they all line up at the bottom. It couldn’t be easier. And what a spectacular result!
If you are reading this in email, some photos may appear blurry, or may not appear at all. Please click here to see the post on my blog.
S Prized Peony Prized Peony Prized Peony Prized Peony
Here’s what I made:
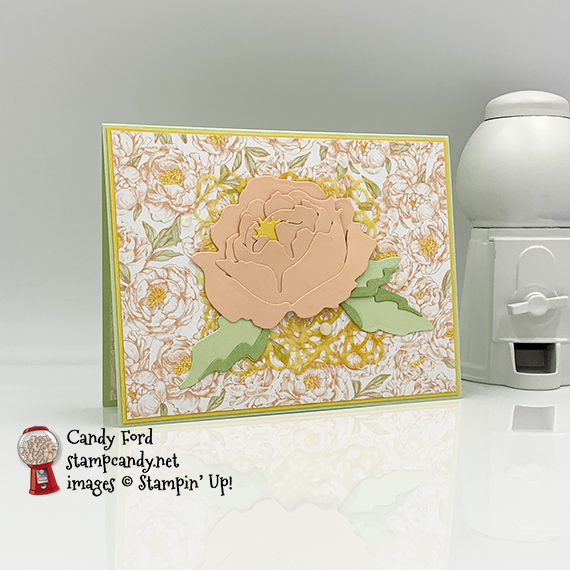

I had to go into a different room to get the Elegant Faceted Gems to show up in a photo. They show up much better in person.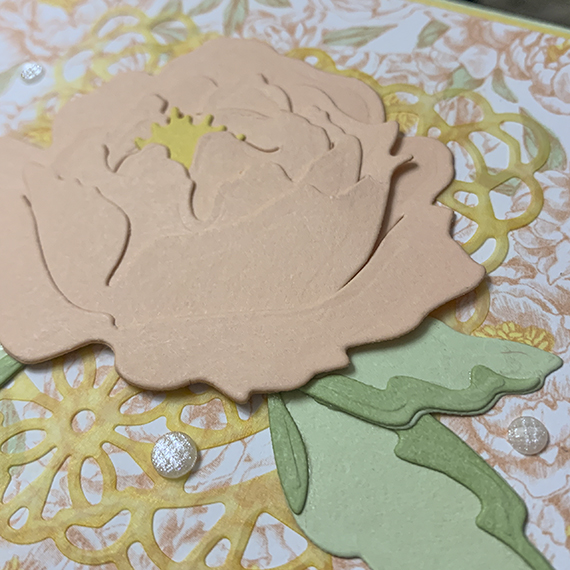
S
Here’s what I did:
Cut and scored with my paper trimmer:
- Soft Sea Foam card stock (CS) cut to 5-1/2″ x 8-1/2″, then scored in half at 4-1/4″
- So Saffron CS layer cut to 5-3/8″ x 4-1/8″
- Peony Garden Designer Series Paper (DSP) layer cut to 5-1/4″ x 4″
- Whisper White CS cut to 5-1/4″ x 4″ for the inside of the card base
Stamped with the Prized Peony stamp set:
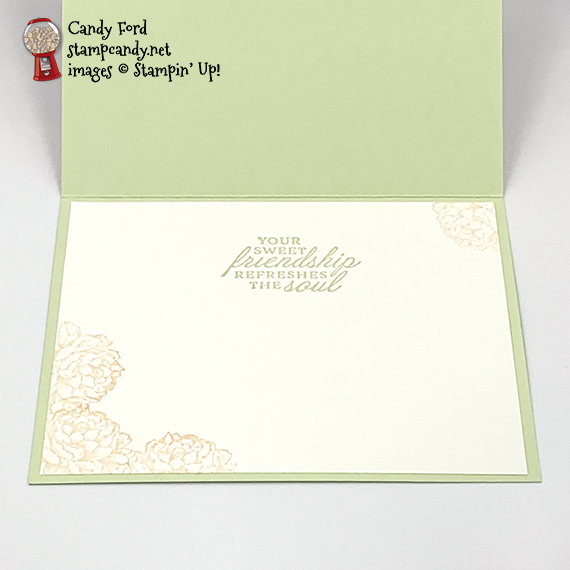
- sentiment in Soft Sea Foam ink onto the Whisper White CS
- small peony in Petal Pink ink onto the Whisper White CS
Cut using the Peony Dies:
- the four pieces of the peony from scraps of Petal Pink CS
- center of the flower from a scrap of So Saffron CS
- both pieces of the three leaves from a scrap of Soft Sea Foam CS
Colored using Stampin’ Blends Markers:
- doily in Dark So Saffron
- flower centers on DSP layer in Light So Saffron
- leaves on DSP layer in Light Soft Sea Foam
- top pieces of the leaf die cuts in Light Soft Sea Foam, to make them just a little darker
Assembled the card:
- burnished the fold in the card base with a Bone Folder
- So Saffron CS layer glued onto the front of the card base
- DSP layer glued onto the So Saffron CS layer
- doily adhered onto the DSP layer using Stampin’ Seal in the center, where it will be covered by the flower
- four die cut pieces of peony put together, slipping one into the slit in next larger piece, and glued together
- flower center inserted into middle of the flower and glued in place
- leaf layers glued together, then glued onto the back of the flower
- flower and leaves adhered onto the DSP layer, over the doily, using Stampin’ Seal
- 3 Elegant Faceted Gems applied around the flower (The Take Your Pick tool makes this so easy! You can use the sticky end or the pointy end, whichever you prefer.)
- Whisper White CS glued onto the inside of the card base
S
Bonus Days are here!
Click the image below to shop now and earn Bonus Days coupons to use next month!
S
Here are today’s colors:
You can click on each one to see all the products that come in that color!
S
Here’s what I used:
Click on these images for more details and to purchase. If you are reading this post in email, the product images may not show up. Please click here to see the post on my blog.
Supply List. <— Click for a clickable and printable list of the products!
S
Here are some helpful links:
S
Thanks for stopping by today, and Sweet Stamping!