May 16, 2022 | Blog Hop, Cards, Gallery, New Products |

Welcome to the May 2022 Candy Hearts Blog Hop! This month we are featuring projects made using the new 2022-2024 In Colors: Parakeet Party, Sweet Sorbet, Tahitian Tide, Starry Sky, and Orchid Oasis.
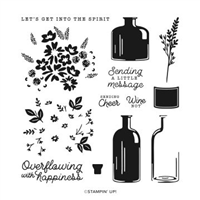
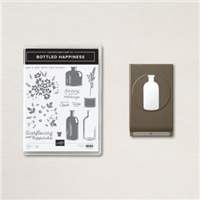
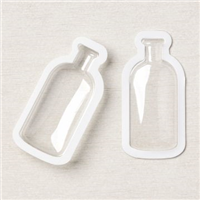
I used two of the new In Colors – Orchid Oasis and Starry Sky – to create this simple card. I think it would qualify as “simple stamping” if it weren’t for the punch. Otherwise it’s just stamps, ink, and paper. I used the Bottled Happiness stamp set, which is available in a bundle (save 10%!) with the Vintage Bottle Punch. You can also get Vintage Bottle Shaker Domes to make shaker cards. I’ll link them in my supply list near the bottom of this post.
If you are reading this in email, some photos may appear blurry, or may not appear at all. Please click here to see the post on my blog.
S May 2022 Candy Hearts May 2022 Candy Hearts May 2022 Candy Hearts May 2022 Candy Hearts
Here’s what I made:
S
Here’s what I did:
Cut and scored with my paper trimmer:
- Orchid Oasis card stock (CS) cut to 5-1/2″ x 8-1/2″, then scored in half at 4-1/4″
- Basic White CS layer cut to 5-1/4″ x 4″
- Basic White CS cut to 5-1/4″ x 4″ for the inside of the card base
Stamped with the Bottles Happiness stamp set:
- sentiment in Orchid Oasis ink onto a scrap of Basic White Thick CS
- large flower image in Orchid Oasis ink onto the Basic White CS layer, once in the top right corner and once in the bottom left
- overlay flower image in Starry Sky ink (I found it easiest to line up the flower centers.)
- sprig stamp in Starry Sky ink from the center of the flowers toward the top left and bottom right. I inked the stamp only once per side and stamped off three times for the varied darkness
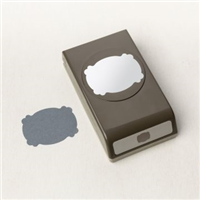
Cut using the Lasting Label Punch:
- sentiment
- a blank piece of Basic White Thick CS
Colored using a Stampin’ Write Marker:
- filled in the flower center in Starry Sky ink, where I didn’t get the two-step stamping lined up just right
Assembled the card:
- burnished the fold in the card base with a Bone Folder
- stamped Basic White CS layer glued onto the front of the card base
- the two punched pieces glued together, perpendicular to each other
- sentiment stack adhered onto the card front using a piece of Foam Adhesive Sheet
- remaining 5-1/4″ x 4″ Basic White CS glued onto the inside of the card base
S
Here’s the May 2022 Candy Hearts Blog Hop:
s
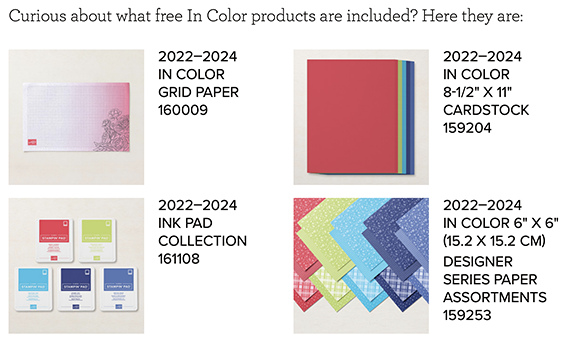
How would you like to get $66.50 in new 2022-2024 In Color products FREE?
All you have to do is join my Candy Hearts group. The In Color Starter Kit costs you $99 plus tax. You get to choose $125 in product, AND you’ll receive the products below free, AND you get free shipping, AND you’ll get a free Paper Pumpkin kit. Now that’s a deal. But this promotion only lasts through 31 May, so click here for more details today!
Here are today’s colors:
You can click on each one to see all the products that come in that color!
S
Here’s what I used:
Click on these images for more details and to purchase. If you are reading this post in email, the product images may not show up. Please click here to see the post on my blog.
Supply List. <— Click for a clickable and printable list of the products!
Here are some helpful links:
S
Thanks for stopping by today, and Sweet Stamping!
Apr 20, 2022 | Blog Hop, Cards, Gallery |

s
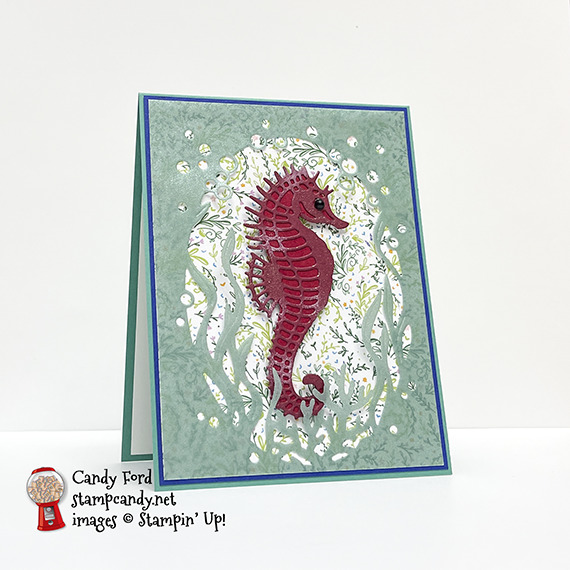
Welcome to the April 2022 IRBH (InKing Royalty Blog Hop!) As the weather gets warmer, it’s time to start planning our trips to the beach, the lake or the in-town aquarium. Today we’re sharing projects inspired by the ocean and sea. We are excited to share our creations and hope you love them! After you read my post, I hope you’ll hop over to the next person on the list at the base of this post: Brian King at Stamp with Brian.
For my card, I used retiring products, carrying-over products, and new products together to create a calm underwater scene. The background is from the new Tea Boutique Designer Series Paper. It’s tiny flowers and greenery, but I thought it had kind of a swirly underwater feel.
If you are reading this in email, some photos may appear blurry, or may not appear at all. Please click here to see the post on my blog.
S April 2022 IRBH April 2022 IRBH April 2022 IRBH April 2022 IRBH
Here’s what I made:

S
Here’s what I did:
Cut and scored with my paper trimmer:
- Just Jade card stock (CS) cut to 4-1/4″ x 11″, then scored in half at 5-1/2″
- Starry Sky CS layer cut to 4-1/8″ x 5-3/8″
- Tea Boutique Designer Series Paper (DSP) layer cut to 4″ x 5-1/4″
- Shimmer Vellum layer cut to 4″ x 5-1/4″
- Basic White CS cut to 4″ x 5-1/4″ for the inside of the card base
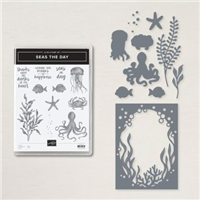
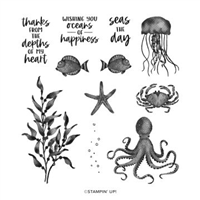
Stamped with the Seas the Day stamp set:
- sentiment in Starry Sky ink onto the Basic White CS for the inside
- starfish in Calypso Coral ink onto the Basic White CS for the inside
Cut using the Sea Dies:
- underwater “frame” from the Shimmer Vellum layer
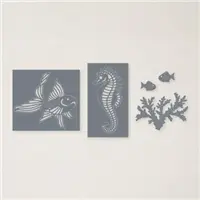
Cut using the Sea Life Dies:
- seahorse from a scrap of Merry Merlot CS
- traced around the die cut onto a scrap of Cherry Cobbler CS, then cut using Paper Snips
Used a Sponge Dauber:
- to apply dots of white ink onto the die cut seahorse
- to spread glue around the perimeter of the vellum layer, leaving the kelp, etc. at the bottom loose
Assembled the card:
- burnished the fold in the card base with a Bone Folder
- Basic White CS glued onto the inside of the card base
- Starry Sky CS layer glued onto the front of the card base
- DSP layer (with vellum attached) glued onto the Starry Sky CS layer
- die cut seahorse glued onto the fussy cut seahorse
- Wink of Stella applied over seahorse
- Black Matte Dot applied as the eye
- seahorse adhered onto the DSP layer (and under the vellum kelp) using Mini Black Stampin’ Dimensionals
S
Here’s the April 2022 IRBH:
Thank you for hopping along with us. If you get stuck during the Blog Hop, please use this line-up as a guide:
- Brian King at Stamp with Brian
- Sheryl Abernathy at Elegant Sentiments
- Renae Novak at Blessed by Cards
- Jan Dufour at Stamp Me Silly
- Jackie Beers at Blue Line Stamping
- Lisa Graham at Lisa’s Little Ink Spot
- Pam Morris at Tap Tap Stamp
- Marilyn Jones at Stamp with MJ
- Sue Jackson at Just Peachy Stamping
- Candy Ford at Stamp Candy <—– YOU ARE HERE!!!
s
Here’s my inspiration for the sea horse:

s
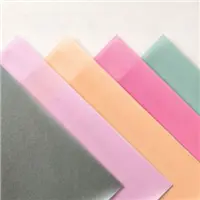
Here are today’s colors:
You can click on each one to see all the products that come in that color!
S
Here’s what I used:
These products will be available 3 May 2022:
- Tea Boutique Designer Series Paper (158659)
- Starry Sky 8-1/2″ x 11″ Card Stock (159263)
- Starry Sky Classic Stampin’ Pad (159212)
s
Click on these images for more details and to purchase. If you are reading this post in email, the product images may not show up – please click here to see the post on my blog.
Sale: $23.20
Price: $29.00
Supply List. <— Click for a clickable and printable list of the products!
s
Reserve Your Swatch Books and Product Shares Now!
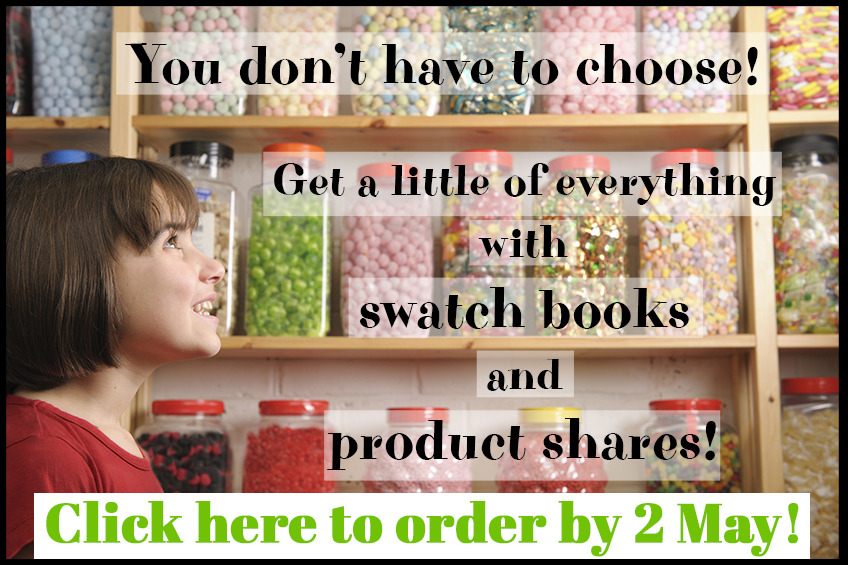
I will be selling Designer Series Paper Swatch Books as well as Paper Shares, Ribbon Shares, and Embellishment Shares from the new 2022-2023 Annual Catalog. You must order by 2 May 2022. Click here for all the details!
S
Here are some helpful links:
S
Thanks for stopping by today, and Sweet Stamping!

Apr 18, 2022 | Blog Hop, Cards, Fun Folds, Gallery |
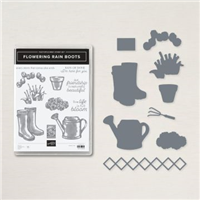
Welcome to the April 2022 Candy Hearts Blog Hop! This month we are featuring Fancy Folds, or Fun Folds. I used the Flowering Rain Boots Bundle and Flowering Fields Designer Series Paper to create an easel card. After you read my post, I hope you’ll hop around to all the stops on the hop. You don’t want to miss any of the great projects this talented group has created for you today.
If you are reading this in email, some photos may appear blurry, or may not appear at all. Please click here to see the post on my blog.
S April 2022 Candy Hearts Blog Hop April 2022 Candy Hearts Blog Hop April 2022 Candy Hearts Blog Hop April 2022 Candy Hearts Blog Ho
Here’s what I made:

S
Here’s what I did:
Cut and scored with my paper trimmer:
- Pool Party card stock (CS) cut to 4-1/4″ x 11″, then scored at 2-3/4″ and 5-1/2″
- Pool Party CS cut to 4-1/4″ x 5-1/2″
- Blushing Bride CS layer cut to 3-3/4” x 5”
- Flowering Fields Designer Series Paper (DSP) layer cut to 3-5/8” x 4-7/8”
- Pool Party CS layer cut to 2-5/8” x 3-3/4”
- Basic White CS layer cut to 2-1/2” x 3-5/8”
- Blushing Bride CS cut to 3-3/4” x 1-3/4”
- DSP layer cut to 3-5/8” x 1-5/8”
- Basic White CS cut to 4″ x 5-1/4″ for the inside of the card base
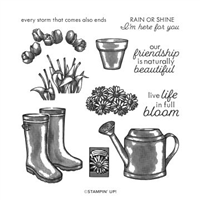
Stamped with the Flowering Rain Boots stamp set:
- sentiment and flowers in Flirty Flamingo ink onto a scrap of Basic White Thick CS
- watering can in Pool Party ink onto a scrap of Basic White Thick CS
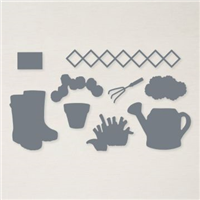
Cut using the Rain Boots Dies:
- watering can and flowers
- tool from a scrap of Smoky Slate CS and from a scrap of Pool Party CS
Cut using Stitched Rectangle Dies:
Cut using Stitched So Sweetly Dies:
- a piece of Blushing Bride CS
Embossed with the Brick & Mortar 3D Embossing Folder:
- 2-1/2” x 3-5/8” Basic White CS layer
Assembled the card:
- burnished the folds in the card base with a Bone Folder, so that the one at 5-1/2″ is a mountain fold, and the one at 2-3/4″ is a valley fold
- glued the top half of the 4-1/4″ x 5-1/2″ Pool Party CS onto the top half of the card front (which is really the bottom of the card front that has been flipped up)
- 3-3/4” x 5” Blushing Bride CS glued onto the 4-1/4″ x 5-1/2″ Pool Party CS
- 3-5/8” x 4-7/8” DSP glued onto the 3-3/4” x 5” Blushing Bride CS
- the die cut Blushing Bride CS glued onto the 3-5/8” x 4-7/8” DSP
- 2-5/8” x 3-3/4” Pool Party CS glued onto the die cut Blushing Bride CS
- 2-1/2” x 3-5/8” Basic White CS glued onto the 2-5/8” x 3-3/4” Pool Party CS
- watering can and flowers glued onto the 2-1/2” x 3-5/8” Basic White CS
- cut the handle from the Pool Party tool using scissors, and glue it onto the handle of the Smoky Slate tool
- tool glued over watering can
- 3 Artistry Blooms Sequins applied onto the 2-1/2” x 3-5/8” Basic White CS layer, using a Take Your Pick tool
- 3-5/8” x 1-5/8” DSP glued onto the 3-3/4” x 1-3/4” Blushing Bride CS
- sentiment glued onto the 3-5/8” x 1-5/8” DSP
- 4″ x 5-1/4″ Basic White CS glued onto the inside of the card base
- sentiment stack adhered onto the bottom of the 4″ x 5-1/4″ Basic White CS using a piece of Foam Adhesive Sheet, making sure to leave an even border around the bottom and two sides
- prop the card front behind the raised sentiment stack
S
Here’s the April 2022 Candy Hearts Blog Hop:
Thank you for hopping with the Candy Hearts today! Be sure to hop around to all the stops. You do not want to miss any of the creativity in this talented group of stampers! If you get lost, use the list below.
s
Here are today’s colors:
You can click on each one to see all the products that come in that color!
S
Here’s what I used:
Click on these images for more details and to purchase. If you are reading this post in email, the product images may not show up. Please click here to see the post on my blog.
Supply List. <— Click for a clickable and printable list of the products!
Reserve Your Swatch Books and Product Shares Now!
I will be selling Designer Series Paper Swatch Books as well as Paper Shares, Ribbon Shares, and Embellishment Shares from the new 2022-2023 Annual Catalog. You must order by 2 May 2022. Click here for all the details!
Here are some helpful links:
S
Thanks for stopping by today, and Sweet Stamping!
Mar 16, 2022 | Blog Hop, Cards, Gallery |
Welcome to the March 2022 InKing Royalty Blog Hop! As we prepare for Spring, flowers are always on our minds. We are sharing flower-themed projects with you today and hope you love them! After you read my post, I hope you’ll hop along to the next stop on the blog hop, Joanne Whittington at The Inky Dragon. There’s a lot of inspiration to be found in this group and you don’t want to miss it!I Thank you for stopping by today.
If you are reading this in email, some photos may appear blurry, or may not appear at all. Please click here to see the post on my blog.
S March 2022 InKing Royalty Blog Hop March 2022 InKing Royalty Blog Hop March 2022 InKing Royalty Blog Hop March 2022 InKing Royalty Blog Hop
Here’s what I made:

S
Here’s what I did:
Cut and scored with my paper trimmer:
- Polished Pink card stock (CS) cut to 4-1/4″ x 11″, then scored in half at 5-1/2″
- Granny Apple Green CS layer cut to 4″ x 5-1/4″
- Basic White CS cut to 4″ x 5-1/4″ for the inside of the card base
Stamped with the Easter Friends stamp set:
- sentiment in Granny Apple Green ink onto a scrap of Basic White Thick CS
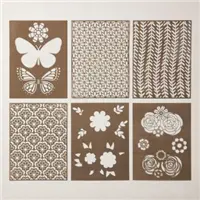
Colored using the Butterflies & Flowers Layering Decorative Masks:
- vines onto the Granny Apple Green CS layer in Granny Apple Green ink using a Sponge Dauber
- flowers onto a scrap of Basic White Thick CS in Polished Pink and Melon Mambo inks using a Blending Brush
- leaves around the flowers in Granny Apple Green ink using a Sponge Dauber
Cut using the Everyday Label Punch:
Cut using Paper Snips Scissors:
- fussy cut the flowers & leaves
Assembled the card:
- burnished the fold in the card base with a Bone Folder
- white ribbon wrapped around the Granny Apple Green CS layer and adhered on the back with Tear & Tape
- Granny Apple Green CS layer glued onto the front of the card base
- sentiment adhered over the ribbon using Stampin’ Dimensionals
- flowers adhered using Stampin’ Dimensionals
- pearls applied onto two of the flower centers and onto the Granny Apple Green CS layer
- Basic White CS glued onto the inside of the card base
S
Here’s the March 2022 InKing Royalty Blog Hop:
Thank you for hopping along with us. If you get stuck during the Blog Hop, please use this line-up as a guide:
- Brian King at Stamp with Brian
- Marilyn Jones at Stamp with MJ
- Sue Jackson at Just Peachy Stamping
- Candy Ford at Stamp Candy <— YOU ARE HERE!
- Joanne Whittington at The Inky Dragon
- Jan Dufour at Stamp Me Silly
- Jackie Beers at Blue Line Stamping
- Lynn Kolcun at Avery’s Owlery
- Renae Novak at Blessed by Cards
- Sheryl Abernathy at Elegant Sentiments
- Pam Morris at Tap Tap Stamp
- Lisa Graham at Lisa’s Little Ink Spots
s
Here are today’s colors:
You can click on each one to see all the products that come in that color!
S
Here’s what I used:
Click on these images for more details and to purchase. If you are reading this post in email, the product images may not show up. Please click here to see the post on my blog.
Supply List. <— Click for a clickable and printable list of the products!
Here are some helpful links:
S
Thanks for stopping by today, and Sweet Stamping!
Mar 14, 2022 | Blog Hop, Cards, Gallery |
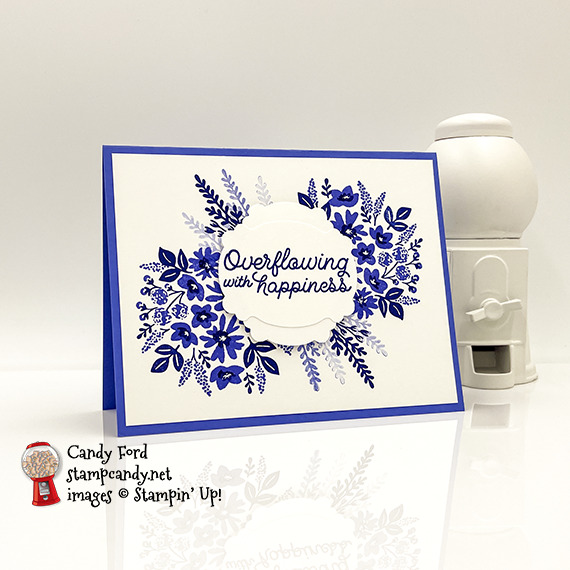
Welcome to the March 2020 Candy Hearts Blog Hop! Today we are sharing projects with a Spring theme. I used products from the lovely Hand-Penned Suite Collection to create a Spring floral thank you card.
After reading my post, I hope you will hop to the next person on the list below. Be sure to hop around to see ALL the great projects the Candy Hearts have created for you!
If you are reading this in email, some photos may appear blurry, or may not appear at all. Please click here to see the post on my blog.
S March 2020 Candy Hearts Blog Hop March 2020 Candy Hearts Blog Hop March 2020 Candy Hearts Blog Hop March 2020 Candy Hearts Blog Hop
Here’s what I made:

S
Here’s what I did:
Cut and scored with my paper trimmer:
- Basic White Thick card stock (CS) cut to 4-1/4″ x 11″, then scored in half at 5-1/2″
- Garden Green CS layer cut to 4″ x 5-1/4″
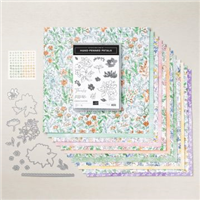
- Hand-Penned Designer Series Paper (DSP) layer cut to 3-3/4″ x 5″
- Garden Green CS layer cut to 3-3/4″ x 5″
- Basic White CS layer cut to 3-3/4″ x 5″
- Diagonal layers (see below)
Diagonal Layers:
- using a pencil and ruler, made tiny marks on the edges of the 3-3/4″ x 5″ Basic White CS layer:
- on the left side, 1/4″ and 2-1/2″ from the top
- on the right side, 3-1/2″ and 4-1/4″ from the top
- Basic White layer laid on top of the same size Garden Green layer, lining them up so I could cut them at the same time to keep them exactly alike
- cut the layers from the top left pencil mark to the top right mark
- cut the layers from the bottom left mark to the bottom right mark
- didn’t use the middle pieces, only the top and bottom
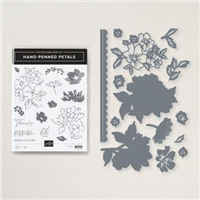
Stamped with the Hand-Penned Petals stamp set:
- flower cluster in black Memento ink onto a scrap of Basic White Thick CS
- smaller flower stem in Garden Green ink, and flowers in Misty Moonlight ink, onto a scrap of Basic White Thick CS
- sentiment in Pale Papaya ink onto the upper Basic white CS diagonal layer
- sentiment in Misty Moonlight ink over the Pale Papaya sentiment, just slightly offset
Colored using Stampin’ Blends Markers:
- flower cluster in Pale Papaya, Shaded Spruce, and Misty Moonlight
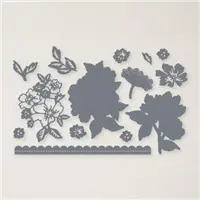
Cut using the Penned Flowers Dies:
- stamped and colored flowers
Cut using Paper Snips:
- separated the two flowers in the cluster, then glued them back together so they overlapped
Assembled the card:
- burnished the fold in the card base with a Bone Folder
- top Basic White CS layer laid on the Garden Green CS layer, then slid up so 1/8″ of the Garden Green showed along the diagonal; glued them together
- did the same thing with the bottom diagonal layers
- adhered the diagonal layers onto the DSP layer using Foam Adhesive Sheet cut to size
- adhered the flowers onto the diagonal layers with glue, and between the layers using Stampin’ Dimensionals
- DSP layer glued onto the 4″ x 5-1/4″ Garden Green CS layer
- 4″ x 5-1/4″ Garden Green CS layer glued onto the front of the card base
- flower flourishes adhered onto the diagonal layers – larger one with a Glue Dot and smaller ones with glue
S
Here’s the March 2020 Candy Hearts Blog Hop:
s
Here are today’s main colors:
You can click on each one to see all the products that come in that color!
S
Here’s what I used:
Click on these images for more details and to purchase. If you are reading this post in email, the product images may not show up. Please click here to see the post on my blog.
Supply List. <— Click for a clickable and printable list of the products!
Here are some helpful links:
S
Thanks for stopping by today, and Sweet Stamping!
Feb 16, 2022 | Birthday, Blog Hop, Cards, Gallery |

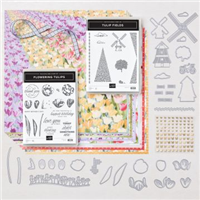
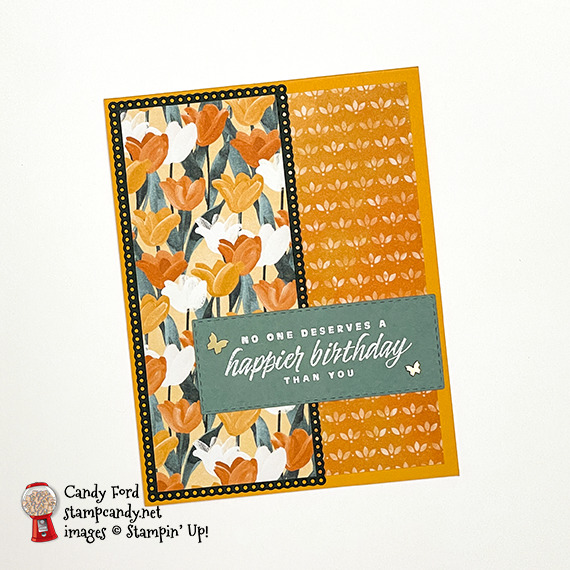
Welcome to the February 2022 InKing Royalty Blog Hop! The theme this month is Happy Birthday, and we’re featuring projects to help celebrate another trip around the sun. I used products from the Flowering Fields Suite Collection to create a tulip themed birthday card for you today.
Be sure to hop around to all the stops. Scroll down to see the list.
If you are reading this in email, some photos may appear blurry, or may not appear at all. Please click here to see the post on my blog.
S February 2022 InKing February 2022 InKing February 2022 InKing February 2022 InKing
Here’s what I made:
I CASEd a card by Amy Koenders of stampwithamy.com. CASE = copy and share everything OR copy and selectively edit
S
Here’s what I did:
Cut and scored with my paper trimmer:
- Mango Melody card stock (CS) cut to 4-1/4″ x 11″, then scored in half at 5-1/2″
- Flowering Fields Designer Series Paper (DSP) layer cut to 2-1/8” x 5-1/8”
- DSP layer cut to 1-7/8” x 5-1/8”
- Basic White CS cut to 4″ x 5-1/4″ for the inside of the card base
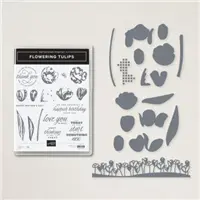
Stamped with the Flowering Tulips stamp set:
- sentiment in Versamark ink onto a scrap of Soft Succulent CS, then heat embossed in white
Cut using the Stitched Rectangle Dies:
Cut using the Ornate Layers Dies:
- a scrap of Evening Evergreen CS
Assembled the card:
- burnished the fold in the card base with a Bone Folder
- 2-1/8” x 5-1/8” DSP layer glued onto the Evening Evergreen CS die cut
- 1-7/8” x 5-1/8” DSP layer glued onto the right side of the card front
- Evening Evergreen CS die cut glued onto the left side of the card front, overlapping the first DSP layer
- sentiment glued over the DSP layers
- 2 Brushed Brass Butterflies applied onto the sentiment using a Take Your Pick tool
- Basic White CS glued onto the inside of the card base
S
Here’s the February 2022 InKing Royalty Blog Hop:
Thank you for hopping along with us. If you get stuck during the Blog Hop, please use this line-up as a guide:
- Brian King at Stamp with Brian
- Lynn Kolcun at Avery’s Owlery
- Pam Morris at Tap Tap Stamp
- Jan Dufour at Stamp Me Silly
- Sheryl Abernathy at Elegant Sentiments
- Renae Novak at Blessed by Cards
- Sue Jackson at Just Peachy Stamping
- Jackie Beers at Blue Line Stamping
- Lisa Graham at Lisa’s Little Ink Spots
- Joanne Wittington at The Inky Dragon
- Robin Myren at Songbird Designs by Robin
- Candy Ford at Stamp Candy <— YOU ARE HERE!
- Marilyn Jones at Stamp with MJ
s
Here are today’s main colors:
You can click on each one to see all the products that come in that color!
S
Here’s what I used:
Click on these images for more details and to purchase. If you are reading this post in email, the product images may not show up. Please click here to see the post on my blog.
Supply List. <— Click for a clickable and printable list of the products!
Here are some helpful links:
S
Thanks for stopping by today, and Sweet Stamping!