Feb 9, 2021 | Blog Hop, Cards, Fun Folds, Gallery, Sale-A-Bration |

Welcome to the February 2021 ICS Blog Hop! This month we are featuring projects made with products from the Sale-a-bration brochure. I used the Oh So Ombre Designer Series Paper, which you can get free with a $50 order, but only through 28 February!
Click the NEXT button farther down this post to hop to the next stop. Be sure to hop all the way around to see all the great projects from this group!
If you are reading this in email, some photos may appear blurry, or may not appear at all. Please click here to see the post on my blog.
S February 2021 ICS Blog Hop February 2021 ICS Blog Hop February 2021 ICS Blog Hop February 2021 ICS Blog Hop
Here’s what I made:


S
Here’s what I did:
Cut and scored with my paper trimmer:
- Misty Moonlight card stock (CS) cut to 5-1/2″ x 8-1/2″, then scored in half at 4-1/4″
- Misty Moonlight CS layer cut to 5″ x 3-3/4″
- Oh So Ombre Designer Series Paper (DSP) layer cut to 1-1/4″ x 3-3/4″ (4 pieces)
- Misty Moonlight CS strip cut to 3″ x 1/2″
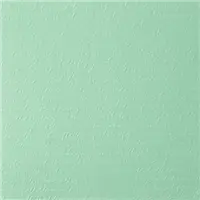
- Granny Apple Green strip cut to 2-3/4″ x 1/2″
- Basic White CS cut to 5″ x 3-3/4″ for the inside of the card base
Stamped with the Valentine Keepsake stamp set:
- sentiment in Misty Moonlight ink onto a scrap of Basic White CS
- heart flowers in Granny Apple Green ink onto the Basic White CS for the inside
- tiny hearts in Misty Moonlight ink onto the 4 DSP pieces
Cut using the Layering Circle Dies:
- sentiment
- one size larger circle from a scrap of Blackberry Bliss CS
Cut using Paper Snips:
- one end of each CS strip at an angle
Assembled the card:
- burnished the fold in the card base with a Bone Folder
- DSP pieces glued onto the Misty Moonlight CS layer (you can trim away any ugly edges)
- Misty Moonlight CS layer glued onto the front of the card base
- Misty Moonlight CS strip glued onto the DSP layer
- Granny Apple Green CS strip glued over the Misty Moonlight CS strip
- sentiment glued onto the Blackberry Bliss CS circle
- Blackberry Bliss circle glued over the ends of the CS strips
- Basic White CS glued onto the inside of the card baseS
S
Here’s the February 2021 ICS Blog Hop:
Click the Next button to hop to the next stop, Sharon Hashimoto Burkert of As the Ink Dries:

S
Here are today’s main colors:
You can click on each one to see all the products that come in that color!
S
Here’s what I used:
Click on these images for more details and to purchase. If you are reading this post in email, the product images may not show up. Please click here to see the post on my blog.
Supply List. <— Click for a clickable and printable list of the products!
S
Sale-a-bration ends 28 February
Don’t miss out on all these FREE products! See them all here. You can choose one free Level 1 item for every $50 on an order. You can choose one free Level 2 item for every $100 on an order. The Punch Party host stamp set is included free with any $300 order, in addition to the Level 1 & Level 2 items you earn.
When you join my team during Sale-a-bration, you will pay $99 (plus tax) and you will receive $125 in your choice of product, free shipping, AND 5 packs of Designer Series Paper that no one else can get until May! Get all the details here.
S
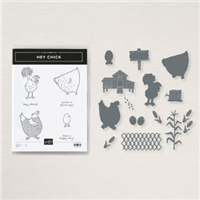
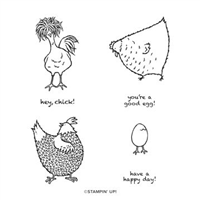
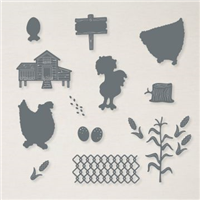
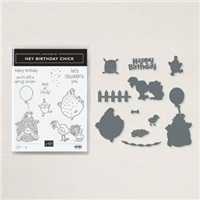
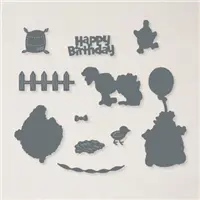
Hey Chick is here!
The Hey Chick stamp set from 2017 Sale-a-bration was so popular, Stampin’ Up! has brought it back. But that’s not all! Now there are coordinating dies. AND there’s a second stamp set, Hey Birthday Chick, that also has coordinating dies. CLICK HERE to see them all, or click on the images below to see them one at a time.
One thing though – they’re only available for a limited time, so get them while you can!
S
Basic White is here!
The facility that manufactures Whisper White paper is closed due to COVID-19. But don’t fret. The new Basic White products are here!
S
Here are some helpful links:
S
Thanks for stopping by today, and Sweet Stamping!

Jan 20, 2021 | Blog Hop, Cards, Gallery, Holiday, Love |
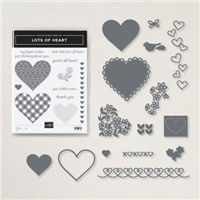
Welcome to the January 2021 IRBH! During this year’s blog hops, we will be having fun with our stamping favorites – our favorite themes for seasonal cards and projects. This month’s projects feature hearts, so prepare yourself for lots and lots of love. We are excited to share our creations with you today! After you read my post, I hope you’ll hop over to the next person on the list at the base of this post.
If you are reading this in email, some photos may appear blurry, or may not appear at all. Please click here to see the post on my blog.
S January 2021 IRBH January 2021 IRBH January 2021 IRBH January 2021 IRBH
Here’s what I made:


S
Here’s what I did:
Cut and scored with my paper trimmer:
- Rococo Rose card stock (CS) cut to 5-1/2″ x 8-1/2″, then scored in half at 4-1/4″
- Basic White CS cut to 5-1/4″ x 4″ for the inside of the card base
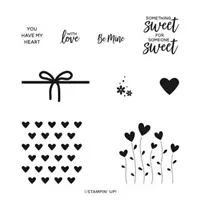
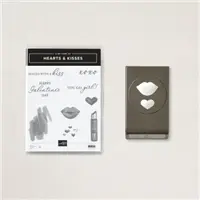
Stamped with the Hearts & Kisses stamp set:
- sentiment in Versamark ink onto a scrap of Vellum, then heat embossed it in white
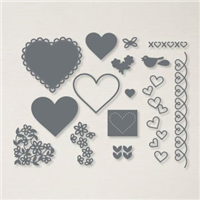
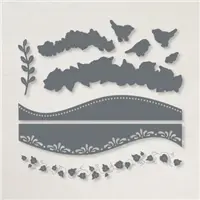
Cut using the Many Hearts Dies:
Cut using the Stitched So Sweetly Dies:
- a piece of Paper Blooms Designer Series Paper (DSP)
Embossed using the Scripty 3D Embossing Folder:
Assembled the card:
- burnished the fold in the card base with a Bone Folder
- DSP layer glued onto the front of the card base
- sentiment heart glued onto the DSP layer
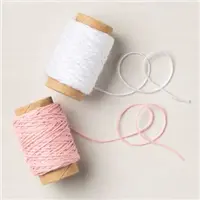
- white twine run scallop on the left side of the vellum heart, then wrapped around the front of the card base
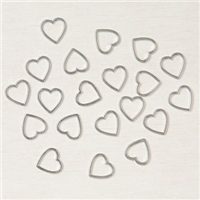
- 2 Heart charms strung onto the twine
- twine run through a scallop on the right side of the vellum heart, then tied in a bow
- a Mini Glue Dot rolled into a tiny “log” an placed under the bow using my Take Your Pick tool
- Basic White CS glued onto the inside of the card base (I took the photos before I did this step.)
If you want , you can use a Mini Glue Dot to secure the Heart Charms, but I found the twine holds them in place nicely:

S
Here’s the January 2021 IRBH:
Thank you for stopping by today. I hope you’ll hop along to the next stop on the blog hop, Julie DiMatteo at The Paper Pixie. There’s a lot of inspiration to be found in this group – and you don’t want to miss it! Thank you for hopping along with us. If you get stuck during the Blog Hop, please use this line-up as a guide:
Thank you for hopping along with us. If you get stuck during the Blog Hop, please use this line-up as a guide:
- Brian King at Stamp with Brian
- Sheryl Sharp at Sharp Notes by Sheryl
- Jackie Beers at Blue Line Stamping
- Ann Murray at Murray Stamps Ink
- Candy Ford at Stamp Candy <— YOU ARE HERE!
- Julie DiMatteo at The Paper Pixie
- Joanne Brown at The Inky Dragon
- Sue Jackson at Just Peachy Stamping
- Sheryl Abernathy at Elegant Sentiments
- Renae Novak at Blessed by Cards
- Shawn de Oliveira at Shawn Stamps
- Pam Morris at Tap Tap Stamp
- Linda Krueger at The Stamp Coach
S
Here are today’s colors:
You can click on each one to see all the products that come in that color!
S
Here’s what I used:
Click on these images for more details and to purchase. If you are reading this post in email, the product images may not show up. Please click here to see the post on my blog. <— <
Supply List. Click for a clickable and printable list of the products!
S
Basic White is here!
The facility that manufactures Whisper White paper is closing due to COVID-19. But don’t fret. The new Basic White products are here!
S
Here are some helpful links:
S
Thanks for stopping by today, and Sweet Stamping!
Jan 18, 2021 | Birthday, Cards, Fun Folds, Gallery |
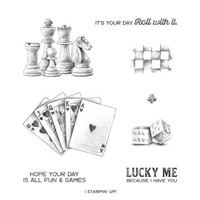
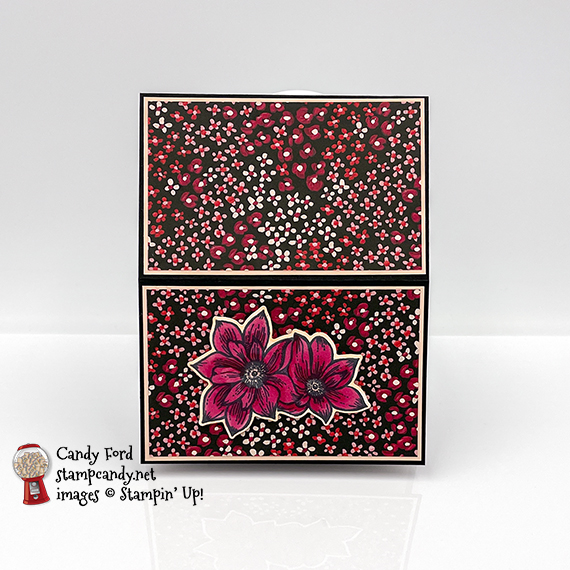
I used the Game On stamp set along with the new Well Suited Designer Series Paper and Matte Black Dots to make today’s card. It’s meant to be a birthday card, but could be used to celebrate any special day, like graduation, promotion, etc.
If you are reading this in email, some photos may appear blurry, or may not appear at all. Please click here to see the post on my blog.
S On On On On
Here’s what I made:


S
Here’s what I did:
Cut and scored with my paper trimmer:
- Basic Gray card stock (CS) cut to 4-1/4″ x 7″, then scored at 5-1/2″
- Basic Gray CS cut to 4-1/4″ x 1-1/2″ (2 pieces)
- Well Suited Designer Series Paper (DSP) layers cut to 4″ x 1-1/4″ (2 pieces)
- Basic Black CS layers cut to 4-1/8″ x 1-3/8″ (2 pieces)
- Well Suited Designer Series Paper (DSP) layer cut to 1-1/4″ x 2-1/4″
- Basic Black CS layer cut to 1-3/8″ x 2-2/3″
- strip of Basic White CS cut to 3-1/4″ x 1/2″ for the sentiment
- Basic White CS cut to 4″ x 5-1/4″ for the inside of the card base
Stamped with the Game On stamp set:
- sentiment in Tuxedo Black Memento ink onto the Basic White CS strip
- dice in Tuxedo Black Memento ink onto the Basic White CS for the inside, so they would show through the empty space in the card front (I found the easiest thing to do was to assemble the card front, then lightly trace the open area with a pencil, so I could tell exactly where to stamp the dice. Then I erased the pencil lines.)
Assembled the card:
- burnished the fold in the card base with a Bone Folder
- one end of a Basic Gray CS piece glued onto the front of the 1-1/2″ section of the card base, and the other end glued onto the front of the other Basic Gray CS piece, so that the second piece is even with the card base along the bottom – the ends of the vertical piece should overlap the other pieces by about 7/8″
- Basic Black CS layers glued onto the card front as shown below, with the smallest piece on the exposed part of the vertical piece
- 3 DSP layers glued onto the corresponding Basic Black CS layers
- sentiment glued onto the bottom DSP layer
- 3 Matte Black Dots applied onto the card front near the sentiment using my Take Your Pick tool
- Whisper White CS glued onto the inside of the card base, so the dice show through the opening in the card front

S
Here are today’s colors:
You can click on each one to see all the products that come in that color!
S
Here’s what I used:
Click on these images for more details and to purchase. If you are reading this post in email, the product images may not show up. Please click here to see the post on my blog.
Supply List. <— Click for a clickable and printable list of the products!
S
Basic White is here!
The facility that manufactures Whisper White paper is closing due to COVID-19. But don’t fret. The new Basic White products are here!
S
Here are some helpful links:
S
Thanks for stopping by today, and Sweet Stamping!
Jan 14, 2021 | Cards, Fun Folds, Gallery |
I used the Game On stamp set, Many Hearts Dies, and Well Suited Designer Series Paper to make today’s easel card. Easel cards are often made to display a small calendar. I chose to make one that the recipient can use to remind his/herself, not of the date, but of how much someone cares for them.
If you are reading this in email, some photos may appear blurry, or may not appear at all. Please click here to see the post on my blog.
S Game Game Game Game
Here’s what I made:
This is what it looks like closed: S
S
Here’s what I did:
Cut and scored with my paper trimmer:
- Pacific Point card stock (CS) cut to 4-1/4″ x 11″, then scored in half at 5-1/2″, and at 8-1/4′
- Well Suited Designer Series Paper (DSP) layers cut to 4″ x 2-1/2″ (2 pieces)
- Basic White CS cut to 4″ x 5-1/4″ for the inside of the card base
Stamped with the Game On stamp set:
- playing cards in Tuxedo Black Memento ink onto a scrap of Basic White CS
- sentiment in Pacific Point onto the Basic White CS for the inside, near the bottom
Cut using the Many Hearts Dies:
- small heart from a scrap of Poppy Parade CS
Cut using Paper Snips:
Assembled the card:
- burnished the folds in the card base with a Bone Folder
- DSP layers glued onto the front of the card base, one on the top half and one on the bottom half
- playing cards glued onto the bottom DSP layer
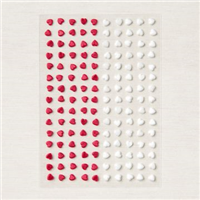
- 5 red Resin Hearts applied onto the playing cards using my Take Your Pick tool
- Basic White CS glued onto the inside of the card base
- die cut heart adhered onto the Basic White CS, just above the sentiment, using a Mini Stampin’ Dimensional

S
Here are today’s colors:
You can click on each one to see all the products that come in that color!
S
Here’s what I used:
Click on these images for more details and to purchase. If you are reading this post in email, the product images may not show up. Please click here to see the post on my blog.
Supply List. <— Click for a clickable and printable list of the products!
S
Here’s some news: Basic White is here!
The facility that manufactures Whisper White paper is closing due to COVID-19. But don’t fret. The new Basic White products are here!
S
Here’s the new catalog:
Click the image below to request your January-June 2021 Mini Catalog and Sale-a-bration Brochure:


S
Here are some helpful links:
S
Thanks for stopping by today, and Sweet Stamping!
Jan 11, 2021 | Birthday, Blog Hop, Cards, Gallery, Sale-A-Bration |

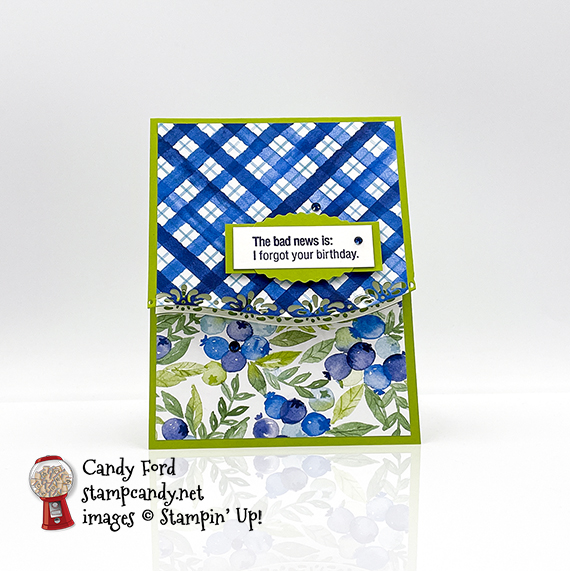
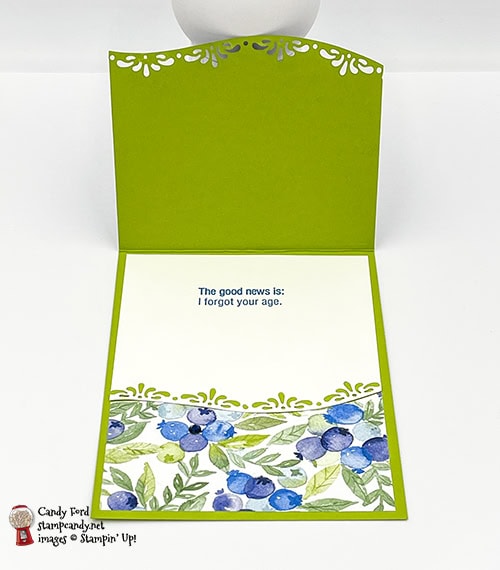
Welcome to the January 2021 Candy Hearts Blog Hop! This month we’re featuring products from the new Sale-a-bration Brochure. During Sale-a-bration you can get free products with your order: one Level 1 item for each $50 and one Level 2 item for each $100. I used the Berry Blessings Bundle (Berry Blessings stamp set and Berry Delightful Designer Series Paper) and Approaching Perfection stamp set to make a belated birthday card. I also used the Curvy Dies and Double Oval Punch.
Be sure to hop around to all the stops, because you don’t want to miss any of the projects created for you today by this talented group.
If you are reading this in email, some photos may appear blurry, or may not appear at all. Please click here to see the post on my blog.
S January 2021 Candy January 2021 Candy January 2021 Candy January 2021 Candy
Here’s what I made:
S
Here’s what I did:
Cut and scored with my paper trimmer:
- Granny Apple Green card stock (CS) cut to 4-1/4″ x 11″, then scored in half at 5-1/2″
- Berry Delightful Designer Series Paper (DSP) layer cut to 4″ x 4″ (top pattern)
- DSP layer cut to 4″ x 2-1/2″ (bottom pattern)
- Basic White CS cut to 4″ x 4″
- Granny Apple Green CS strip cut to 2-1/2″ x 7/8″
- Basic White CS strip cut to 2-1/4″ x 3/4″
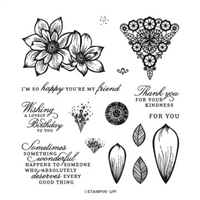
Stamped with the Berry Blessings stamp set:
- front sentiment in Night of Navy ink onto the strip of Basic White CS
- inside sentiment in Pacific Point ink onto the 4″ x 4″ Basic White CS
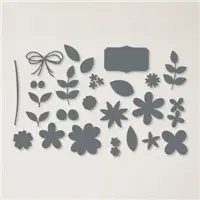
Cut using the Double Oval Punch:
- a scrap of Granny Apple Green CS
Cut using the Curvy Dies:
- bottom of 4″ x 4″ DSP layer, 4″ x 4″ Basic White CS, and front of the card base
- top of the 4″ x 2-1/2″ DSP layer
Assembled the card:
- burnished the fold in the card base with a Bone Folder
- top DSP layer glued onto the front of the card base, lining up the die cut at the bottom
- Basic White CS glued onto the inside of the card base, lining up the die cut at the bottom with the front of the card
- bottom DSP layer glued onto the inside of the card base, lining up the top curve with the bottom of the Basic White CS
- Granny Apple Green CS oval glued onto the Granny Apple Green CD strip
- front sentiment glued onto the Granny Apple Green CS pieces
- Granny Apple Green CS pieces adhered onto the top DSP layer using Stampin’ Dimensionals
- 3 Night of Navy rhinestones applied onto the card front using my Take Your Pick Tool

S
Here’s the January 2021 Candy Hearts Blog Hop:
Thank you for hopping with the Hearts today! Be sure to hop around to all the stops. You do not want to miss any of the creativity in this talented group of stampers! If you get lost, use the list below.
S
Here are today’s main colors:
You can click on each one to see all the products that come in that color!
S
Here’s what I used:
Click on these images for more details and to purchase. If you are reading this post in email, the product images may not show up. Pleaseclick here to see the post on my blog.
Supply List. <— Click for a clickable and printable list of the products!
S
Basic White is here!
The facility that manufactures Whisper White paper is closing due to COVID-19. But don’t fret. The new Basic White products are here!
S
Here’s the new catalog:
Click the image below to request your January-June 2021 Mini Catalog AND Sale-a-bration Brochure:
S
Here are some helpful links:
S
Thanks for stopping by today, and Sweet Stamping!
Jan 8, 2021 | Cards, Friend, Gallery, Love |
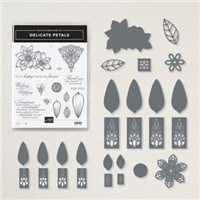
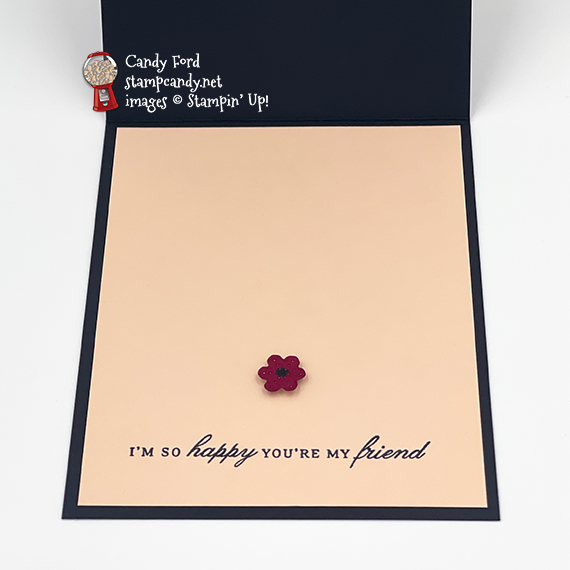
I used some new products for today’s easel card: delicate Petals Bundle (Delicate Petals stamp set and Lacy Petals Dies,) Pierced Blooms Dies (available in a bundle with the In Blooms stamp set,) and Flower & Field Designer Series Paper. The paper is a Sale-a-bration item you can free with a $50 order! The dies are small enough to use with the Mini Stampin’ Cut & Emboss Machine, which is now available to purchase!
If you are reading this in email, some photos may appear blurry, or may not appear at all. Please click here to see the post on my blog.
S Delicate Petals Delicate Petals Delicate Petals Delicate Petals
Here’s what I made:

S
Here’s what I did:
Cut and scored with my paper trimmer:
- Basic Black card stock (CS) cut to 4-1/4″ x 11″, then scored in half at 5-1/2″ and again at 8-1/4″
- Petal Pink card stock (CS) layers cut to 4-1/8″ x 2-5/8″ (2 pieces)
- Flower & Field Designer Series Paper (DSP) layers cut to 4″ x 2-1/2″
- Petal Pink CS cut to 4″ x 5-1/4″ for the inside of the card base
Stamped with the Delicate Petals stamp set:
- large floral image in Tuxedo Black Memento ink onto a scrap of Petal Pink CS
- sentiment in Tuxedo Black Memento ink onto the Petal Pink CS for the inside
Cut using the Lacy Petals Dies:
Cut using the Pierced Blooms Dies:
- a tiny flower from a scrap of Cherry Cobbler CS
Colored using Stampin’ Blends Markers:
- floral image in Cherry Cobbler
- center of tiny die cut flower in Basic Black (You could use a Basic Black Stampin Write Marker.)
Assembled the card:
- burnished the folds in the card base with a Bone Folder
- 2 DSP layers glued onto the 2 Petal Pink CS layers
- Petal Pink CS layers glued onto the front of the card base, one above the fold and one below the fold
- large floral image adhered onto the bottom DSP layer
- Petal Pink CS glued onto the inside of the card base
- tiny die cut flower adhered just above the sentiment using a Stampin’ Dimensional
S
Here are today’s main colors:
You can click on each one to see all the products that come in that color!
S
Here’s what I used:
Click on these images for more details and to purchase. If you are reading this post in email, the product images may not show up. Please click here to see the post on my blog.
Supply List. <— Click for a clickable and printable list of the products!
S
Basic White is here!
The facility that manufactures Whisper White paper is closing due to COVID-19. But don’t fret. The new Basic White products are here! Click on each one to see it in my online store:
S
Here’s the new catalog:
Click the image below to request your January-June 2021 Mini Catalog AND Sale-a-bration Brochure:
S
Here are some helpful links:
S
Thanks for stopping by today, and Sweet Stamping!