Aug 24, 2020 | Cards, Christmas, Gallery, Holiday |
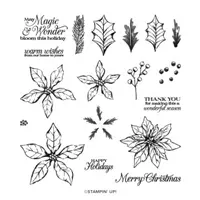
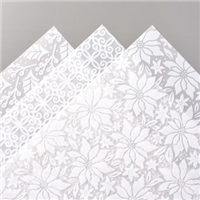
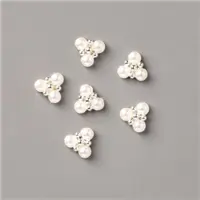
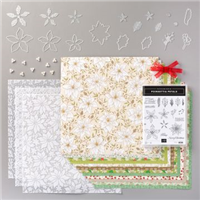
The elegant new Plush Poinsettia Specialty Paper has three flocked patterns on vellum. The flocked bits provide perfect cover for glue so you can’t see how it’s adhered onto the layer underneath. I cut three leaves using the Poinsettia Dies, and embossed two of them and stamped the sentiment onto the third one. I added a double bow and Beaded Pearl embellishment to create a cluster on the bottom right of the card front. x
If you are reading this in email, some photos may appear blurry, or may not appear at all. Please click here to see the post on my blog.
S Plush Poinsettia Plush Poinsettia Plush Poinsettia Plush Poinsettia
Here’s what I made:

S
Here’s what I did:
Cut and scored with my paper trimmer:
- Night of Navy card stock (CS) cut to 4-1/4″ x 11″, then scored in half at 5-1/2″
- Plush Poinsettia Specialty Paper (SP) layer cut to4″ x 5-1/4″
- Whisper White CS cut to 4″ x 5-1/4″ for the inside of the card base
Stamped with the Poinsettia Petals stamp set:
- sentiment in Night of Navy ink onto a scrap of Whisper White Thick CS
- holly leaves and berries in Night of Navy ink onto the Whisper White CS for the inside of the card base
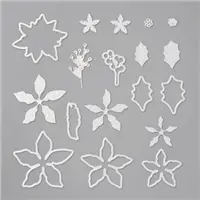
Cut using the Poinsettia Dies:
- sentiment using the larger leaf diex
- cut and embossed 2 holly leaves from a scrap of Night of Navy CS
Assembled the card:
- burnished the fold in the card base with a Bone Folder
- SP layer glued onto the front of the card base
- NOTE: I put glue only under the flocked areas around the edges
- 3 leaves glued together
- Beaded Pearl embellishment adhered onto the leaves using Mini Glue Dots
- ribbon tied into a double bow and adhered onto the SP layer using a Mini Glue Dot
- leaves adhered onto the SP layer using Stampin’ Dimensionals, over the knot in the ribbon
- Whisper White CS glued onto the inside of the card base
S
Here are today’s colors:
You can click on each one to see all the products that come in that color!
S
Here’s what I used:
Click on these images for more details and to purchase. If you are reading this post in email, the product images may not show up. Please click here to see the post on my blog.
Supply List. <— Click for a clickable and printable list of the products!
S
Use your Bonus Days coupons by August 31!
Click the image below to shop now and use your Bonus Days coupons!

S
Here are some helpful links:
S
Thanks for stopping by today, and Sweet Stamping!
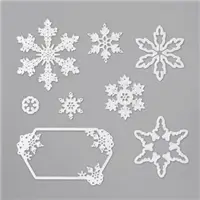
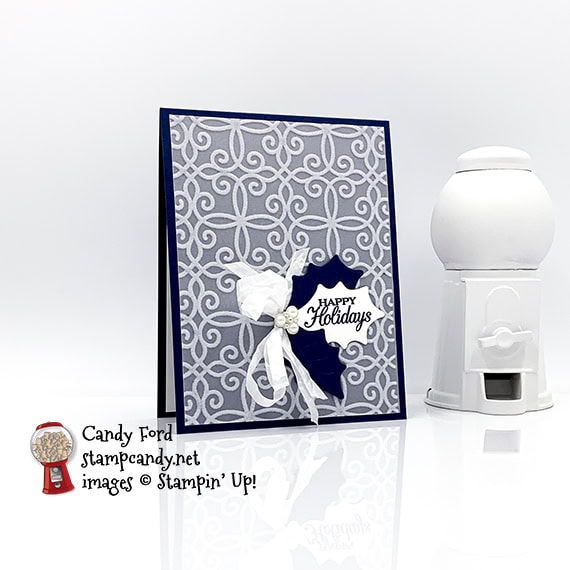
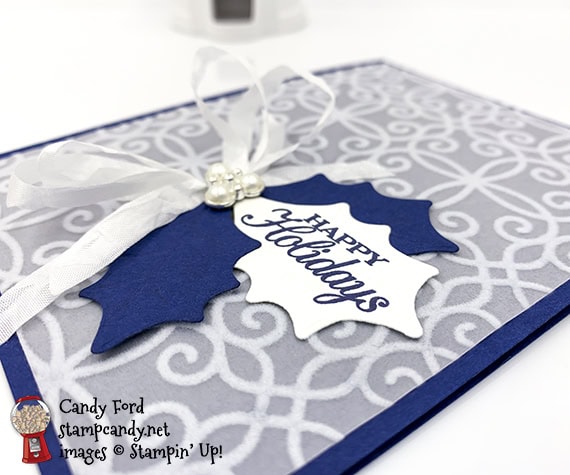
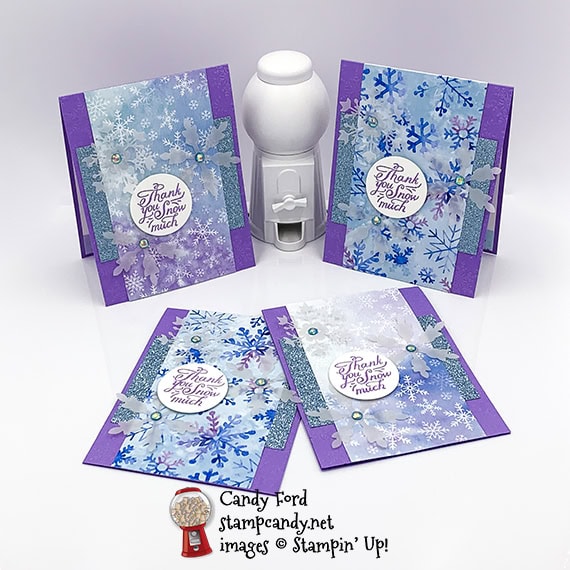
Aug 21, 2020 | Cards, Christmas, Gallery, Holiday, Swaps |
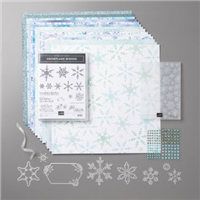
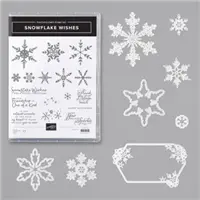
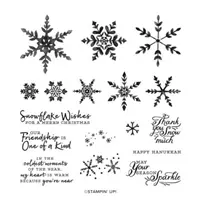
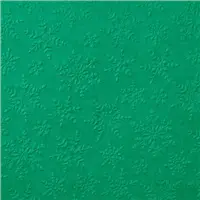
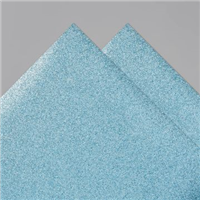
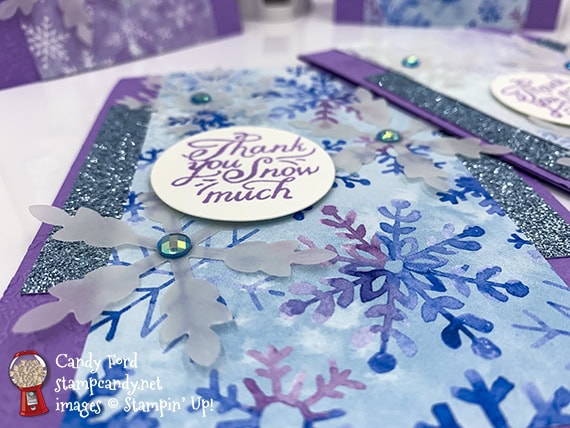
Today I’m sharing the cards I made for our Candy Hearts August 2020 Team Meeting swap. I used products from the Snowflake Splendor Suite Collection: Snowflake Wishes Bundle (Snowflake Wishes stamp set and So Many Snowflakes Dies,) Winter Snow Embossing Folder, Snowflake Splendor Designer Series Paper (DSP,) Balmy Blue Glimmer Paper, and Blue Adhesive-Backed Gems – basically everything in the suite except the ribbon!
There were some pieces of the DSP left from another project, which dictated the size of the pieces on today’s cards. I used two different patterns on the card fronts, because didn’t have enough of the same pattern for all the cards, and I used a third pattern for the strip on the inside.
If you are reading this in email, some photos may appear blurry, or may not appear at all. Please click here to see the post on my blog.
S Snowflake Wishes Snowflake Wishes Snowflake Wishes Snowflake Wishes
Here’s what I made:
S
Here’s what I did:
Cut and scored with my paper trimmer:
- Highland Heather card stock (CS) cut to 4-1/4″ x 11″, then scored in half at 5-1/2″
- Balmy Blue Glimmer Paper cut to 4″ x 3″
- Snowflake Splendor Designer Series Paper (DSP) layer cut to 3″ x 5-1/2″
- DSP cut to 4″ x 3/4″
- Whisper White CS cut to 4″ x 5-1/4″ for the inside of the card base
Stamped with the Snowflake Wishes stamp set:
- sentiment in Highland Heather ink onto a scrap of Whisper White Thick CS
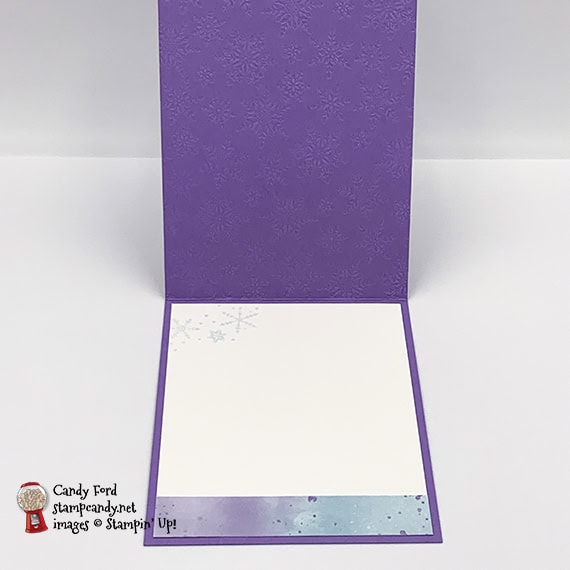
- snowflakes in Balmy Blue ink, stamped off once, onto the upper left of the Whisper White CS for the inside of the card
Embossed using the Winter Snow Embossing Folder:
Cut using the So Many Snowflakes Dies:
- 3 snowflakes from a scrap of Vellum CS
Cut using the Layering Circles Dies:
Assembled the card:
- burnished the fold in the card base with a Bone Folder
- Balmy Blue Glimmer Paper layer adhered onto the front of the card base using Stampin’ Seal
- DSP layer glued onto the front of the card base, over the Glimmer Paper layer
- vellum snowflakes adhered onto the DSP layer using Mini Glue Dots
- a blue gem applied onto the center of each snowflake using the pointy end of my Take Your Pick tool
- sentiment adhered onto the DSP layer, over the snowflakes, using Stampin’ Dimensionals
- DSP strip glued onto the bottom of the Whisper White CS for the inside
- Whisper White CS glued onto the inside of the card base
S
Here are today’s colors:
You can click on each one to see all the products that come in that color!
S
Here’s what I used:
Click on these images for more details and to purchase. If you are reading this post in email, the product images may not show up. Please click here to see the post on my blog.
Supply List. <— Click for a clickable and printable list of the products!
S
Use your Bonus Days coupons by August 31!
Click the image below to shop now and use your Bonus Days coupons!
S
Here are some helpful links:
S
Thanks for stopping by today, and Sweet Stamping!
Aug 18, 2020 | Cards, Christmas, Gallery, Holiday |
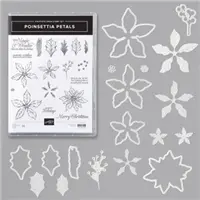
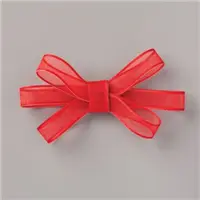
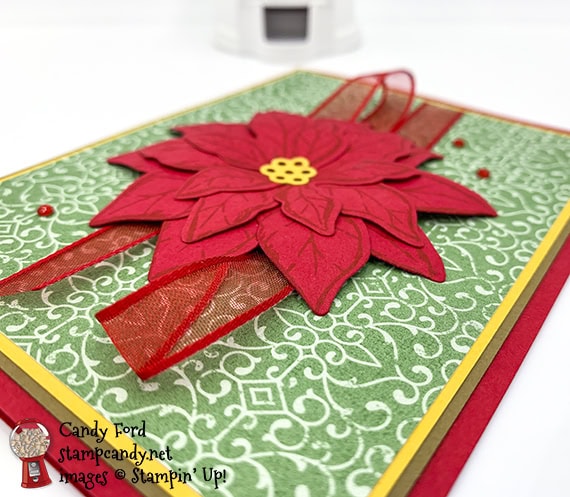
I used the Poinsettia Petals bundle (Poinsettia Petals stamp set and Poinsettia Dies) to make today’s Christmas card. I also used the Poinsettia Place Designer Series Paper and Real Red Sheer Ribbon, all from the Poinsettia Place Suite Collection. A few Red Rhinestone Basic Jewels add a sparkly little touch.
If you are reading this in email, some photos may appear blurry, or may not appear at all. Please click here to see the post on my blog.
S Poinsettia Petals Poinsettia Petals Poinsettia Petals Poinsettia Petals
Here’s what I made:

S
Here’s what I did:
Cut and scored with my paper trimmer:
- Real Red card stock (CS) cut to 5-1/2″ x 8-1/2″, then scored in half at 4-1/4″
- Soft Suede CS layer cut to 5-1/4″ x 4″
- Bumblebee CS layer cut to 5-1/8″ x 3-7/8″
- Poinsettia Place Designer Series Paper (DSP) layer cut to 5″ x 3-3/4″
- Whisper White CS cut to 5-1/4″ x 4″ for the inside of the card base
Stamped with the Poinsettia Petals stamp set:
- 1 small, 1 medium, and 2 large poinsettias in Real Red ink onto a scrap of Real Red CS
- sentiment in Garden Green ink onto the Whisper White CS for the inside of the card base
Cut using the Poinsettia Dies:
- the 4 stamped poinsettias
- flower center from a scrap of Bumblebee CS
Colored using a Stampin’ Write Marker:
- center of smallest flower in Soft Suede, so it will show through the holes in the die cut flower center
Assembled the card:
- burnished the fold in the card base with a Bone Folder
- Soft Suede CS layer glued onto the front of the card base
- Bumblebee CS layer glued onto the Soft Suede CS layer
- DSP layer glued onto the Bumblebee CS layer
- Real Red Sheer Ribbon cut to about 15″, folded into thirds, and adhered onto the DSP layer using Stampin’ Seal +
- poinsettia petals curled down using a Bone Folder
- poinsettias layered and glued together in the center
- die cut flower center glued onto the center of the top poinsettia
- Mini Stampin’ Dimensionals applied onto the underside of the bottom poinsettia petals, where they are curved
- poinsettia stack adhered over the ribbon using the Mini Stampin’ Dimensionals under the petals and Stampin’ Seal + in the center
- 3 Red Rhinestones applied onto the DSP layer
- Whisper White CS glued onto the inside of the card base
S
Here are today’s colors:
You can click on each one to see all the products that come in that color!
S
Here’s what I used:
Click on these images for more details and to purchase. If you are reading this post in email, the product images may not show up. Please click here to see the post on my blog.
Supply List <— Click for a clickable and printable list of the products!
S
Use your Bonus Days coupons by August 31!
Click the image below to shop now and use your Bonus Days coupons!
S
Here are some helpful links:
S
Thanks for stopping by today, and Sweet Stamping!
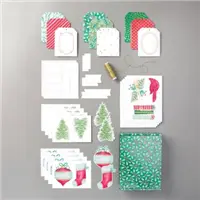
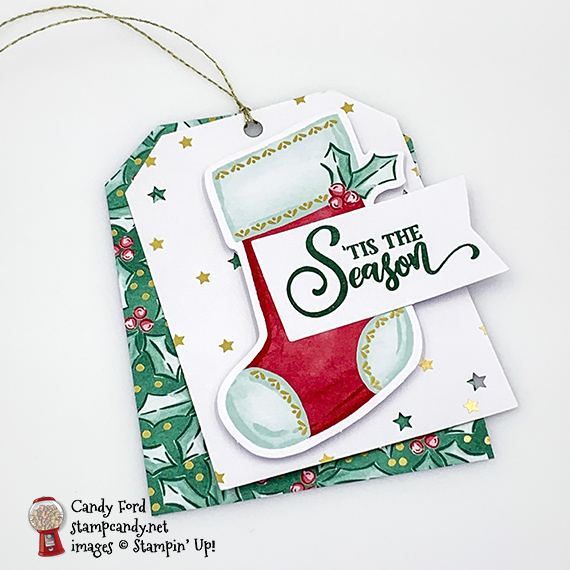
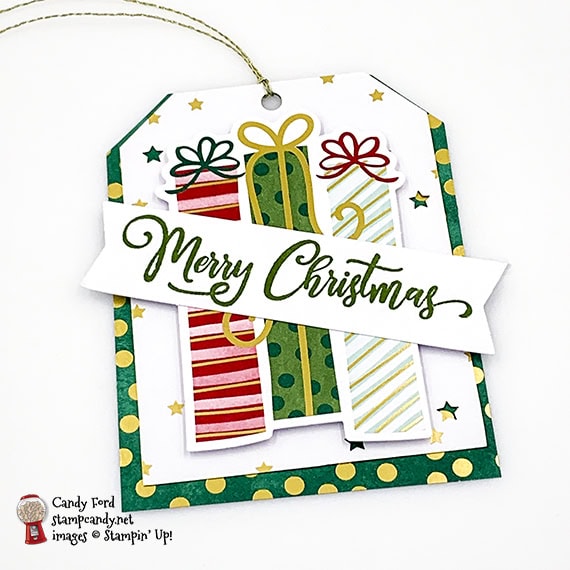
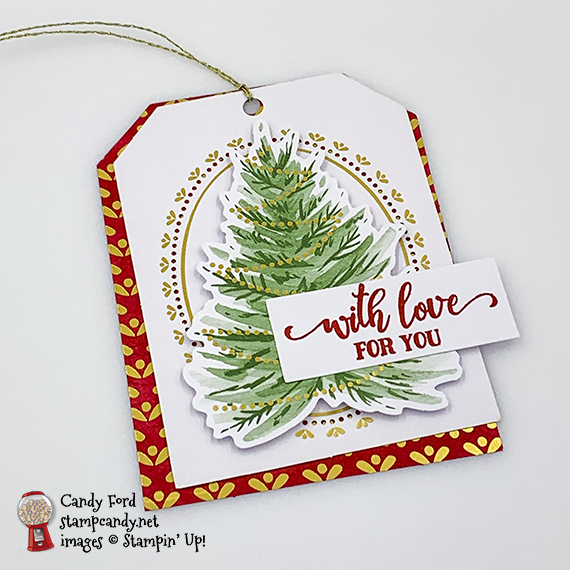
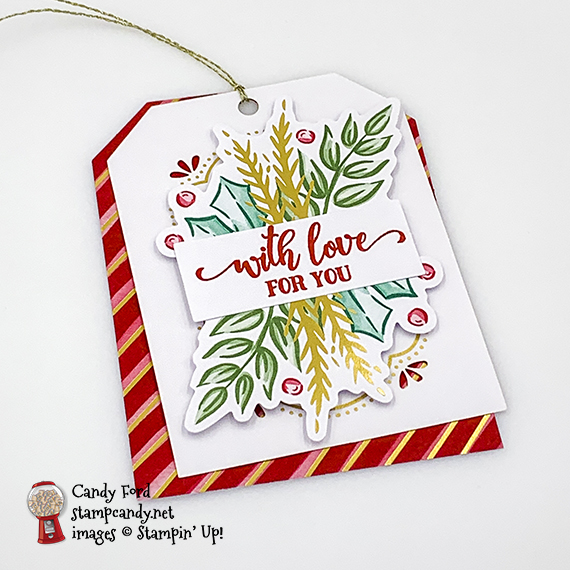
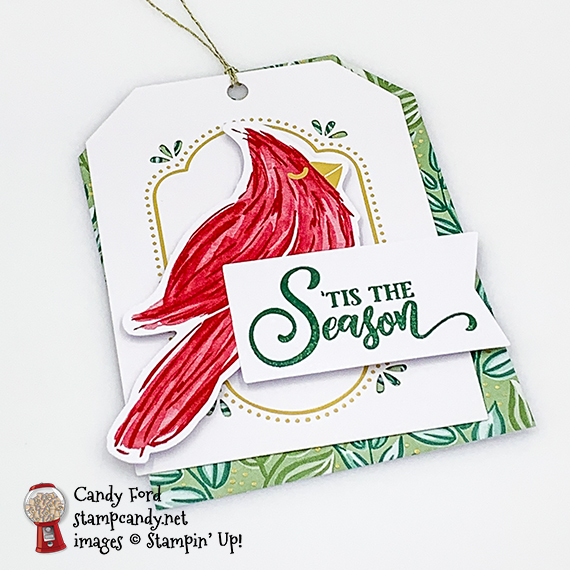
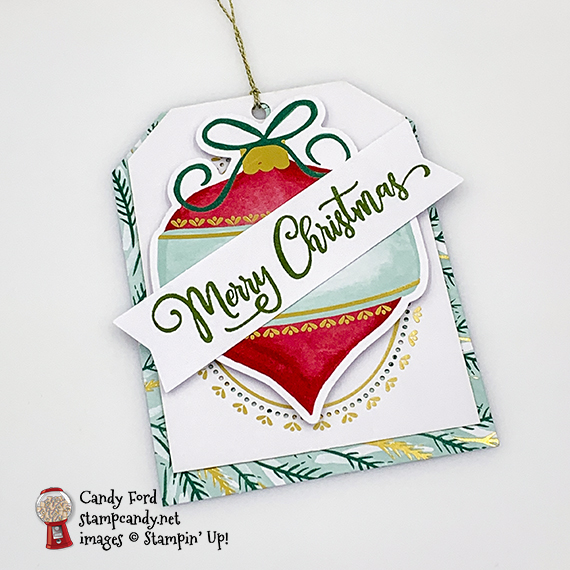
Aug 11, 2020 | Christmas, Gallery, Gifts, Holiday, Kits, New Products, Tags |
Today I’m sharing the Tag Buffet Project Kit. It makes 30 large tags. Each one is 3-1/4″ x 4-1/4″, and they also make great additions to card fronts. I don’t think any photos do these tags justice. They have gold accents, and delicate laser-cut features. Everything is pre-die cut. All you have to do is stamp the sentiments and layer the pieces together.
If you are reading this in email, some photos may appear blurry, or may not appear at all. Please click here to see the post on my blog.
S tag buffet tag buffet tag buffet tag buffet
Here are the Tag Buffet Kit and Stamp Set:
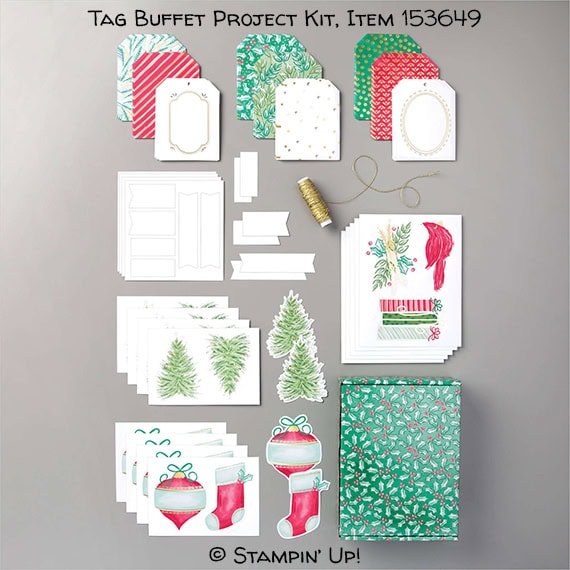
Tag Buffet Stamp Set, Item # 153612
Here’s what I made:
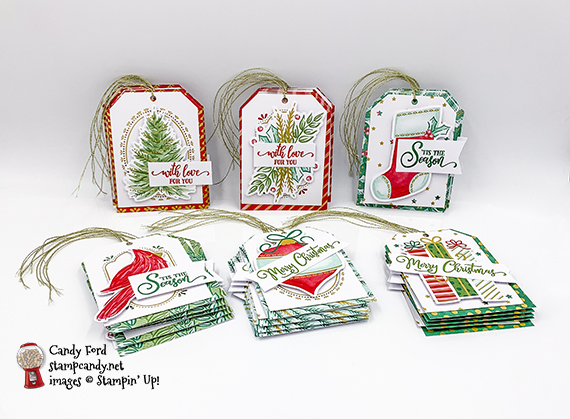
And look at this great box it comes in!
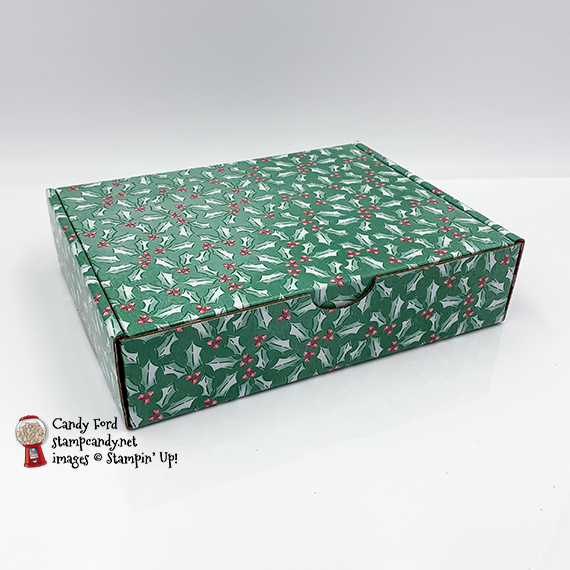
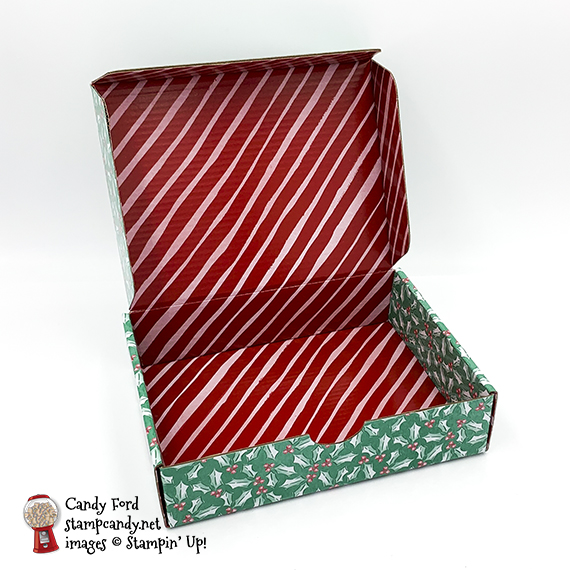
This would make a great gift!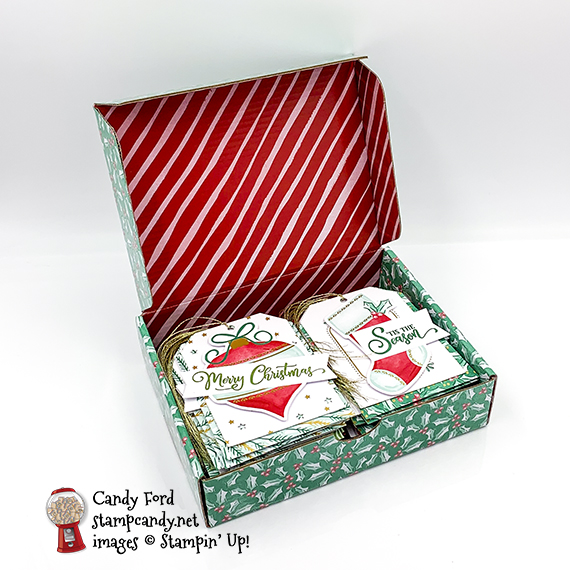
S
Here’s what I did:
Stamped with the Tag Buffet stamp set:
- sentiments in Garden Green, Real Red, and Shaded Spruce inks onto the included labels
Assembled the tags:
- sentiments glued onto the die cut images
- die cut images adhered onto the top tags using Stampin’ Dimensionals
- top and bottom tags tied together with the included gold twine
- That’s it!oS
S
Here are the kit’s colors:
You can click on each one to see all the products that come in that color!
S
Here’s what I used:
Click on these images for more details and to purchase. If you are reading this post in email, the product images may not show up. Please click here to see the post on my blog.
Supply List. <— Click for a clickable and printable list of the products!
S
The new catalog AND the new online store are live!
Click the image to check it out now!
S
Use your Bonus Days coupons by August 31!
Click the image below to shop now and use your Bonus Days coupons!
S
Here are some helpful links:
S
Thanks for stopping by today, and Sweet Stamping!
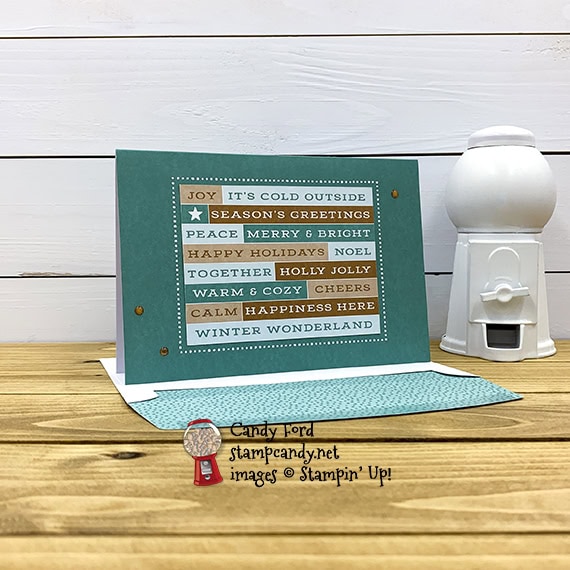
Jul 30, 2020 | Cards, Christmas, Gallery, Holiday |
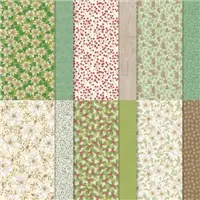
Today’s card is another quick and easy one I made using the Flowers for Every Season Memories & More Cards & Envelopes, Flowers for Every Season Memories & More Card Pack, and 2020-2022 In Color Enamel Dots. The card base and matching envelope are Just Jade, and the M&M card on the front has a winter/Christmas theme.
If you are reading this in email, some photos may appear blurry, or may not appear at all. Please click here to see the post on my blog.
S more more more more
Here’s the Memories & More Christmas card I made:
S
Here’s what I did:
- burnished the fold in the card base with a Bone Folder
- 3″ x 4″ M&M card glued onto the front of the card base, inside the dotted frame
- 3 Cinnamon Cider enamel dots applied onto the front of the card base
- Easy peasy lemon squeezy!
S
Bonus Days are here!
Click the image below to shop now and earn Bonus Days coupons to use next month!

S
Here are today’s colors:
You can click on each one to see all the products that come in that color!
S
Here’s what I used:
Click on these images for more details and to purchase. If you are reading this post in email, the product images may not show up. Please click here to see the post on my blog.
Supply List<— Click for a clickable and printable list of the products!
S
Here are some helpful links:
S
Thanks for stopping by today, and Sweet Stamping!
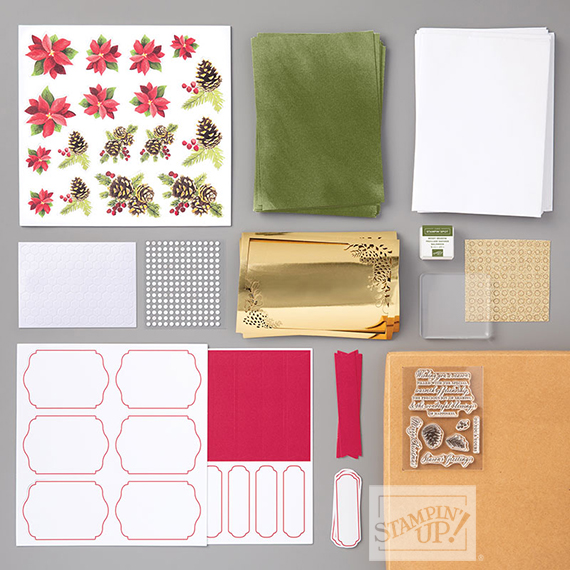
Jul 27, 2020 | Cards, Christmas, Gallery, Holiday, Kits |
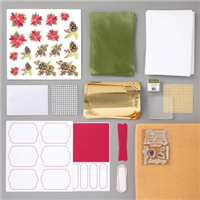
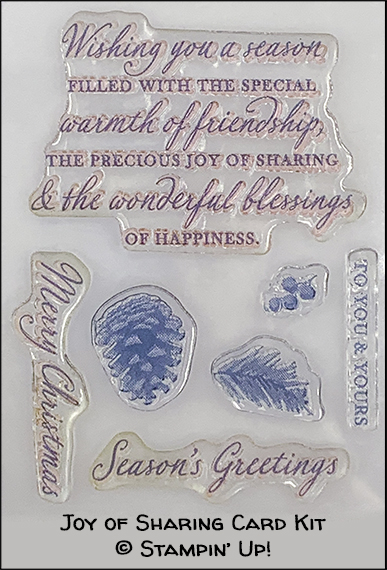
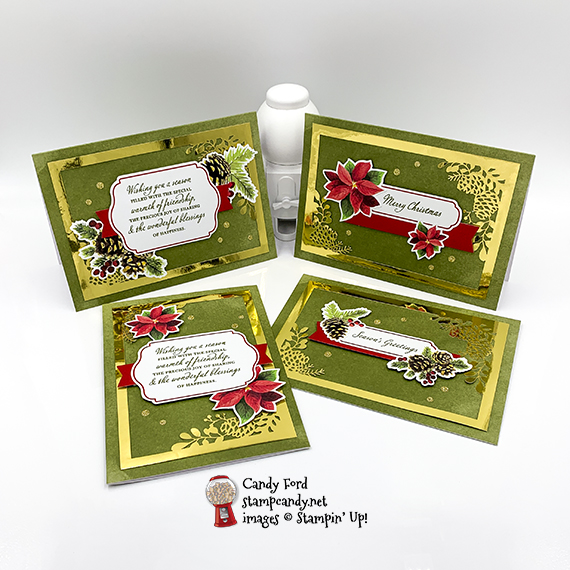
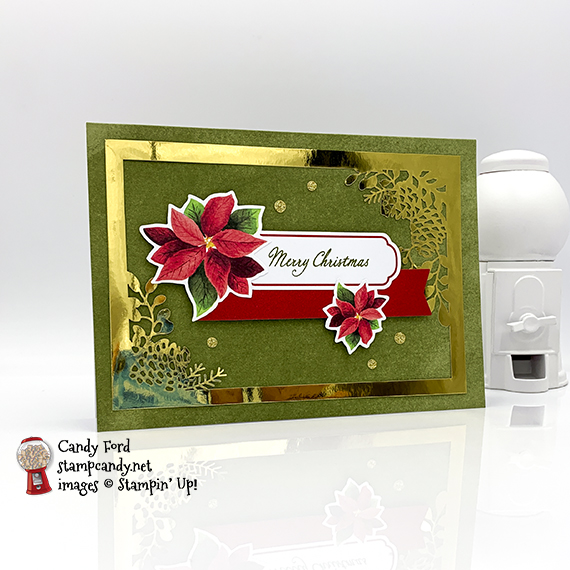
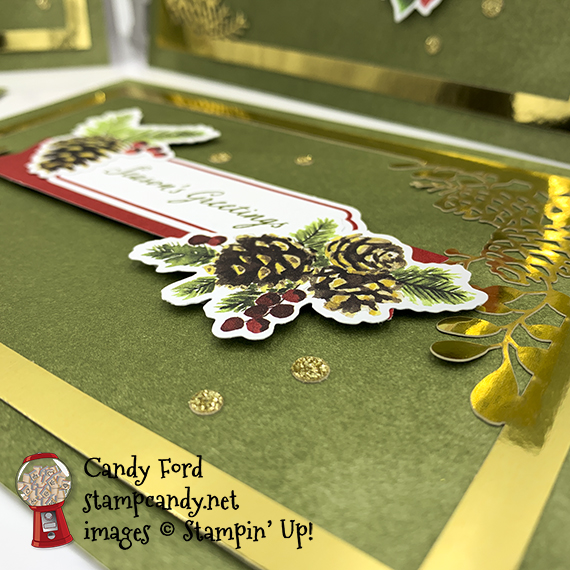
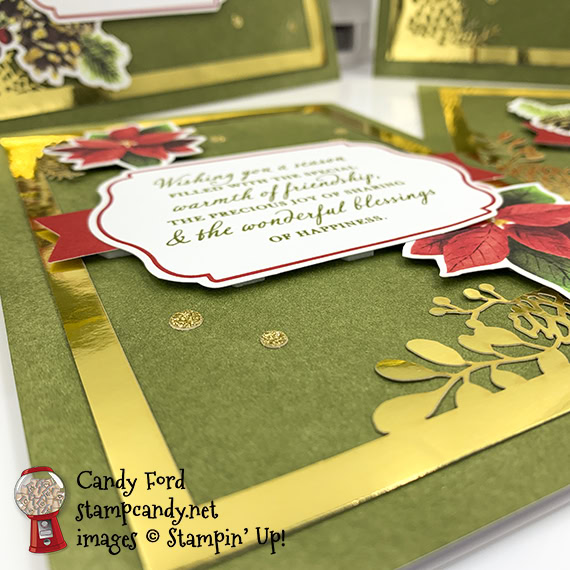
Today I’m sharing a sneak peek of the Joy of Sharing Card Kit from the August – December 2020 Mini Catalog. It’s an All-Inclusive kit, which means it contains everything you need to make the cards. The kraft box contains 15 card bases (5″ x 7″,) 15 envelopes, gold foil die cuts, printed die cuts and labels, stamp set, clear acrylic block, Mossy Meadow ink pad, gold glitter dots, and adhesives. You get way more of the die cuts than you need, so you can use them on even more projects, and really spread your Joy of Sharing this holiday season!
If you are reading this in email, some photos may appear blurry, or may not appear at all. Please click here to see the post on my blog.
S Joy of Sharing Joy of Sharing Joy of Sharing
Here’s the Joy of Sharing Card Kit:
You can add your own photos to the cards. I didn’t have any handy, so I made them without. 
Here’s what I made:

S
Only one week left to earn Bonus Days coupons!
For each $50 you spend on an order now through Monday, August 3, 2020, you will receive a $5 coupon code to use in August! Click the image below to shop now!
S
Here are the kit’s coordinating colors:
You can click on each one to see all the products that come in that color!
S
Here’s what I used:
Joy of Sharing Card Kit (Item #153650) will be available August 4, 2020.
S
Here are some helpful links:
S
Thanks for stopping by today, and Sweet Stamping!