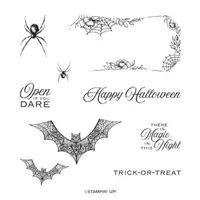
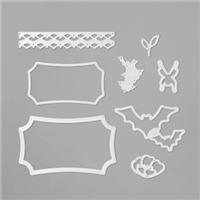
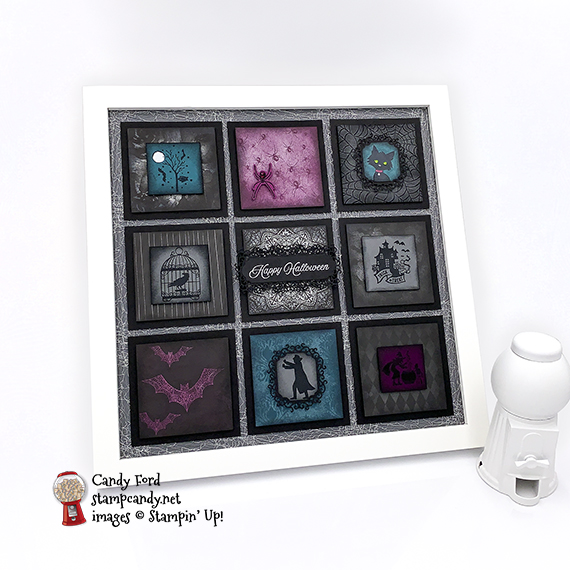
Welcome to the Home Decor SU Style Blog Hop October 2020! This month we’re featuring home decor items you can give as a gift. I made a framed Halloween sampler featuring the Ghoulish Goodies stamp set and the Magic in This Night Designer Series Paper, along with Everything Essential stamp set, Hallows Night Magic stamp set, Ornate Frames Dies, and Halloween Magic Dies. While I thought I ordered a black 12×12 frame, a white one came instead. I didn’t have time to get another one, so please try to imagine this in a black frame. Thanks!
Please be sure to hop around to all the stops, to see all the projects this group has made for you today. You will find the list below.
If you are reading this in email, some photos may appear blurry, or may not appear at all. Please click here to see the post on my blog.
S Style Blog Hop October 2020 Style Blog Hop October 2020 Style Blog Hop October 2020 Style Blog Hop October 2020
Here’s what I made:
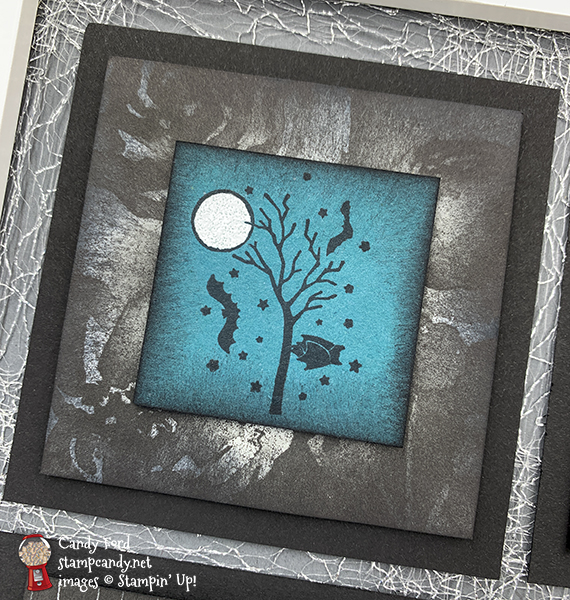
I don’t know why I thought this was a tree, when it is clearly a branch with a bat hanging from it. I’m going to try to pull this piece off and rotate it 90 degrees, but I was afraid to try it before I took the photos. By the way, I love how the metallic Mesh Ribbon over the Basic Gray background looks like cobwebs.
I might redo this panel on Rich Razzleberry cardstock instead of Blackberry Bliss, so it would be easier to see. What do you think?
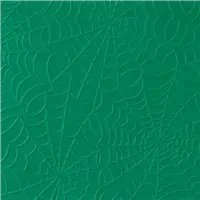
I sponged black ink very lightly all over this embossed layer, which really made the cobwebs show up.
S
Here’s what I did:
Cut and scored with my paper trimmer:
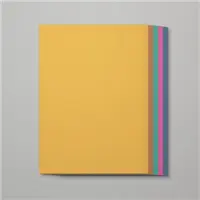
Basic Black card stock (CS) layers cut 3-1/2″ x 3-1/2″ (9 pieces)
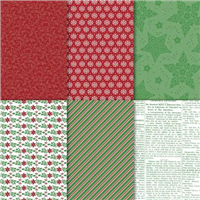
Magic in This Night Designer Series Paper (DSP) layers cut to 3″ x 3″ (8 different patterns)
Basic Gray CS layer cut to 3-1/2″ x 3-1/2″
Pretty Peacock CS layer cut to 1-7/8″ x 1-7/8″
Basic Gray CS layer cut to 2″ x 2″ (2 pieces)
Blackberry Bliss CS layer cut to 1-5/8″ x 1-5/8″
Stamped with the Ghoulish Goodies stamp set in black Memento ink *:
branch onto the Pretty Peacock CS layer
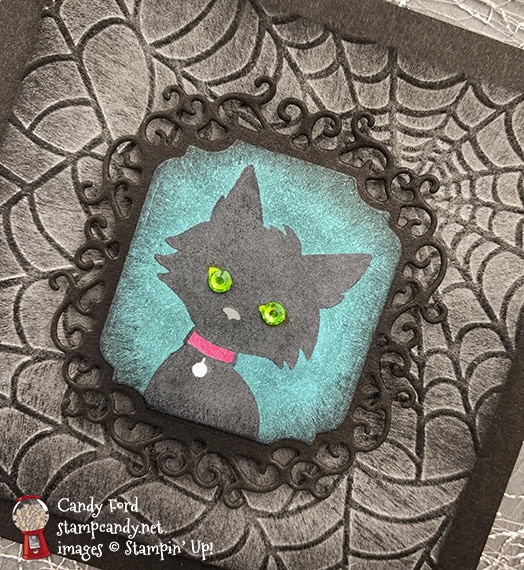
cat onto a scrap of Whisper White CS
raven in cage onto a 2″ Basic Gray CS layer
vampire onto a scrap of Basic Gray CS
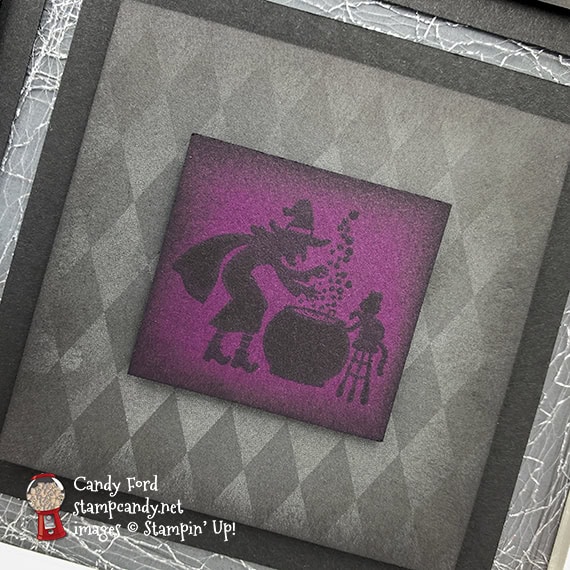
witch onto the Blackberry Bliss CS layer
Stamped using the Everything Essential stamp set *:
house in black Memento ink onto the other 2″ Basic Gray CS layer
* For all the images with solid areas, I used the Stamparatus so I could stamp multiple times, to make sure I got good solid coverage.
Stamped using the Hallows Night Magic stamp set:
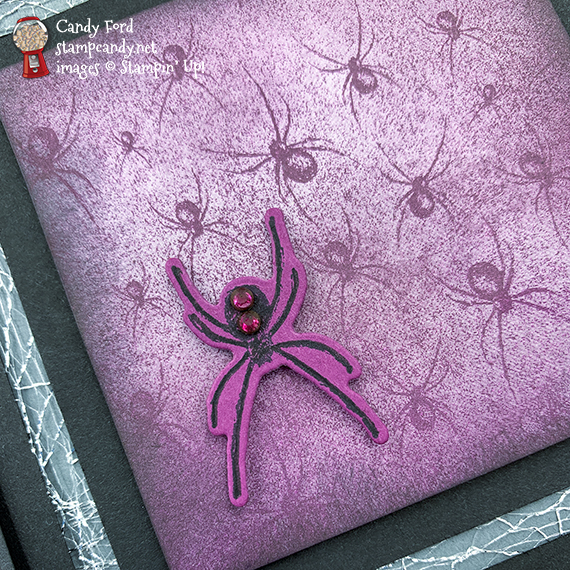
spider in black Memento ink onto a scrap of Rich Razzleberry CS
sentiment in Versamark onto a scrap of Basic Black CS, then heat embossed in white
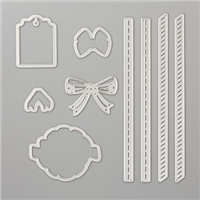
Cut using the Ornate Frames Dies:
cat and vampire using the same die
two frames from a scrap of Basic Black CS for the cat and vampire
two frames from a scrap of Basic Black CS for the sentiment
sentiment – The sentiment is longer than the die, so I cut the strip to 7/8″, then die cut one end at a time. I lined up the die with one end of the sentiment and covered only that end with the top cutting plate. Then did the same thing on the other end.
Cut using the Halloween Magic Dies:
spider
Colored using Stampin’ Blends Markers:
eyes of cat in Granny Apple Green
cat’s nose in Smoky Slate
cat’s collar in Blackberry Bliss
background of cat in Pretty Peacock
2 rhinestones in Granny Apple Green
2 rhinestones in Blackberry Bliss
the DSP layer with bats in Blackberry Bliss (I started by coloring just the bats, but I could see where the ink got on the black background, so I colored the entire layer.)
Embossed the moon:
colored the moon using a Stampin’ Blends Marker dipped in Versamark ink, then heat embossed it in white
NOTE: this moon is on the top left layer
Embossed using the Cobweb 3D Embossing Folder:
3″ Basic Gray CS layer
Inked using a Stampin’ Sponge:
edges of all layers (except the Basic Black CS ones) in black Memento ink
front of Basic Gray CS layer in black Memento ink, very lightly just to accentuate the embossed cobweb
NOTE: I cut each sponge into 8 wedges, so they go much farther
Assembled the card:
cat and vampire glued onto their die cut frames
sentiment glued onto one frame, lining up one end
second frame glued onto the back of the sentiment, lining it up with the other end
Here it is from the back:
Metallic Mesh Ribbon adhered onto a 12″ x 12″ piece of Basic Gray CS, so it will show between the layers and around the edges, using Tear & Tape
3-1/2″ Basic Black CS layers adhered onto the Basic Gray background, over the ribbon, using Stampin’ Seal
3″ layers adhered onto the Basic Black CS layers using Black Stampin’ Dimensionals
all remaining pieces adhered onto their respective 3″ layers using Black Stampin’ Dimensionals
Granny Apple Green rhinestones applied onto the cat’s eyes using my Take Your Pick tool
Blackberry Bliss rhinestones applied onto the spider (to approximate an hourglass, like a black widow spider) using my Take Your Pick tool
S
Here’s the Home Decor SU Style Blog Hop October 2020:
S
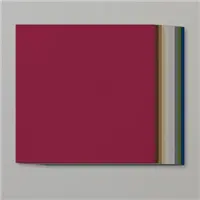
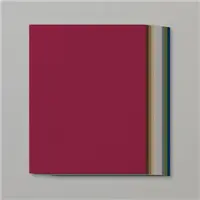
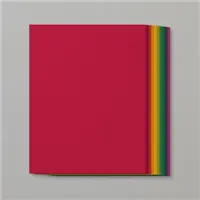
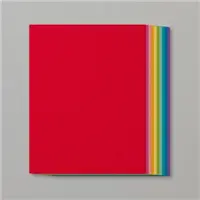
Here are today’s main colors:
You can click on each one to see all the products that come in that color!
Click on these images for more details and to purchase. If you are reading this post in email, the product images may not show up. Please click hereto see the post on my blog.
Gift Certificates are available in any U.S. dollar amount from me. Contact mefor details.
Have you shopped from me within the past year? Join my private VIP Facebook groupfor exclusive project tutorials and more!
Join my team and enjoy a 20% discount (or more) on all your purchases! You choose $125 in products and pay only $99, and get free shipping! No obligation! No selling required!
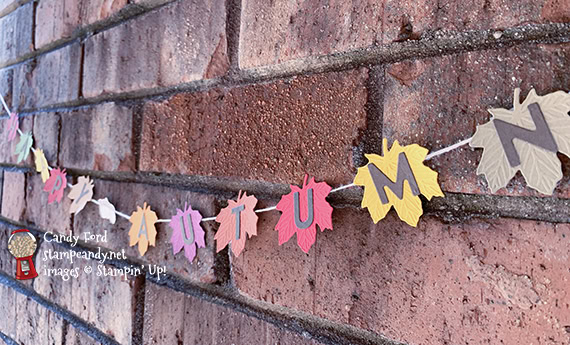
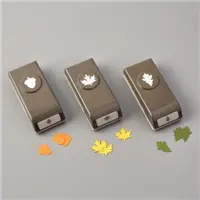
Welcome to the September 2020 Home Decor Stampin’ Up! Style Blog Hop! We are sharing ideas for seasonal home decor. Today is the first day of Autumn here in the United States. As we say here in the South, Happy Fall, Y’all! I made a little banner out of a bunch of scraps of card stock in Autumnal colors. I used the Gathered Leaves Dies to cut AND emboss the leaves, and the Playful Alphabet Dies for the lettering. And it’s strung on Linen Thread. The acorns in the middle are punched from a scrap of Gilded Autumn Designer Series Paper using the Autumn Punch Pack. This is a no-stamping project. Easy Peasy!
If you are reading this in email, some photos may appear blurry, or may not appear at all. Please click here to see the post on my blog.
S September 2020 Home Decor September 2020 Home Decor September 2020 Home Decor September 2020 Home Decor
Here’s what I made:
S
Here’s what I did:
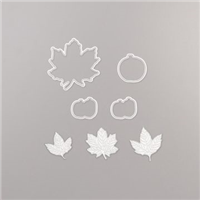
Cut using the Gathered Leaves Dies:
one leaf in each color card stock: Rich Razzleberry, Merry Merlot, Cherry Cobbler, Real Red, Cajun Craze, Pumpkin Pies, Mango Melody, Crushed Curry, Mossy Meadow, Soft Suede, and Cinnamon Cider
Cut using the Playful Alphabet Dies:
H A P P Y A U T U M N from a scrap of Early Espresso card stock
Cut using the Autumn Punch Pack:
3 acorns from a scrap of Gilded Autumn Designer Series Paper
Assembled the banner:
each letter glued onto a leaf
3 acorns glued together
leaves and acorns attached to a length of Linen Thread using tape about every 2″ (I had Scotch Tape at hand, so that’s what I used.
S
Here’s the September 2020 Home Decor Stampin’ Up! Style Blog Hop:
Thank you for hopping with us today! Be sure to check out all the great projects along the hop:
S
Here are today’s colors:
You can click on each one to see all the products that come in that color!
Click on these images for more details and to purchase. If you are reading this post in email, the product images may not show up. Please click hereto see the post on my blog.
Supply List. <— Click for a clickable and printable list of the products!
S
3 THINGS FOR TODAY ONLY!!!
Flash Sale
24 hours only! Midnight to midnight MT / 2am to 2am ET / 1am to 1am CT / 11pm to 11pm PT
CLICK HERE to down load the list of stamp sets on sale. CLICK HERE to shop.
S
Mystery Stamping Party is today!
Go ahead and click the image above to join the Facebook group now. A few days before the party I will post what you will need to complete the mystery card. On September 23 at 8:00pm ET, I will begin posting clues you can follow to create the card. We’ll also have games and prizes! And it’s all FREE!
S
World Card Making Day 2020 – Register TODAY:
Join me for an afternoon of Bingo, cardmaking, prizes, and fun!
Tell your friends! The more people who register, the bigger the prizes!
S
TWO WAYS TO SAVE IN SEPTEMBER – THEY BOTH END ON THE 30TH!
Buy the Starter Kit and receive even more! It’s already the best deal: $99 for $125 in product of your choice plus Free shipping! In September you will also receive the Queen Anne’s Lace stamp set, the So Much Love stamp set, Rhinestone Basic Jewels, and 16 precut card kits! Wow! This is the perfect time to work on your wish list of Stampin’ Up! products! CLICK HERE for more details.
Buy the new Stampin’ Cut & Emboss Machine (standard size) from me by September 30 and I will give you a Magnetic Cutting Plate FREE! You’ll save almost $30! CLICK HERE for more details and to order.
Gift Certificates are available in any U.S. dollar amount from me. Contact mefor details.
Have you shopped from me within the past year? Join my private VIP Facebook groupfor exclusive project tutorials and more!
Join my team and enjoy a 20% discount (or more) on all your purchases! You choose $125 in products and pay only $99, and get free shipping! No obligation! No selling required!
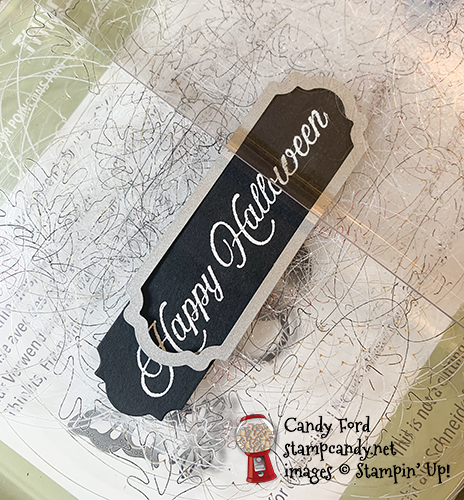
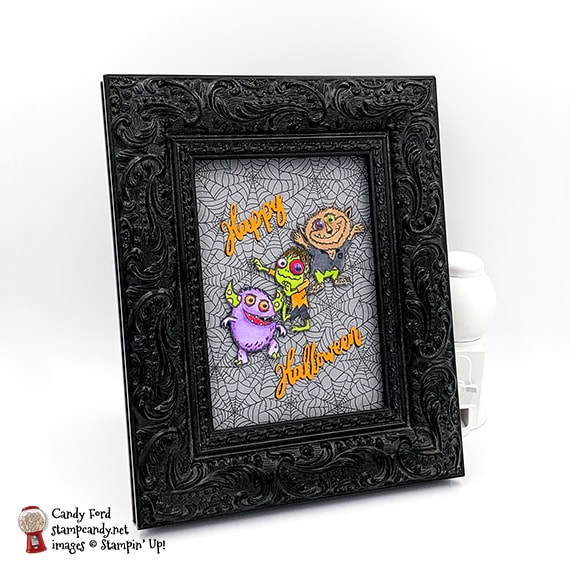
Today is my first time participating in the Home Decor SU Style Blog Hop. I used the Boo to You stamp set, Word Wishes Dies, and Monster Bash Designer Series Paper to create this greeting for my foyer table. I just love the Boo to You stamp set’s three adorable little monsters. Now I realize that “adorable monsters” might seem like an oxymoron, but these guys really are cute.
S
Here’s what I made:
S
Here’s what I did:
Cut and scored with my paper trimmer:
Monster Bash Designer Series Paper (DSP) background cut to 5″ x 7″
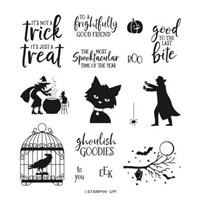
Stamped with the Boo to You stamp set:
3 monsters in Tuxedo Black Memento ink onto Whisper White cardstock (CS)
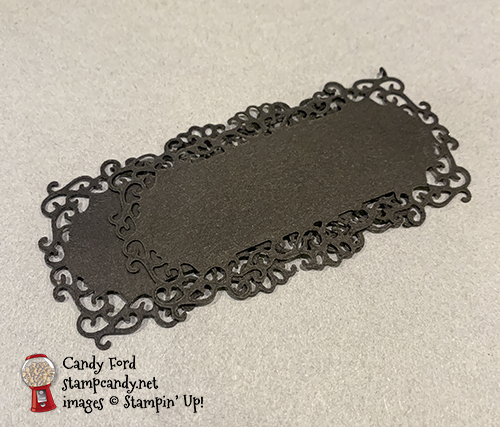
Cut using the Word Wishes Dies:
“Happy” and “Halloween” from scraps of Pumpkin Pie and Basic Black CS
Colored using Stampin’ Blends Markers:
monsters in Granny Apple Green, Highland Heather, Pumpkin Pie, Real Red, Bronze, and Basic Black
I also added some shading using an Early Espresso Stampin’ Write Marker.
Cut using Paper Snips:
3 colored monsters
Assembled the project:
googly eyes glued onto the monsters (purple monster has two small orange eyes; zombie had a small white eye and a large purple eye; werewolf has a large purple eye and a small green eye.)
Pumpkin Pie CS words glued on top of the Basic Black CS words, just slightly askew to make a shadow
monsters adhered onto the DSP using Black Stampin’ Dimensionals
die cut words glued onto the DSP
the whole thing popped into a 5″ x 7″ frame
S
Here’s the hop:
Here are today’s colors:
You can click on each one to see all the products that come in that color!
Click on these images for more details and to purchase.
<– Click here for a clickable and printable list!
S
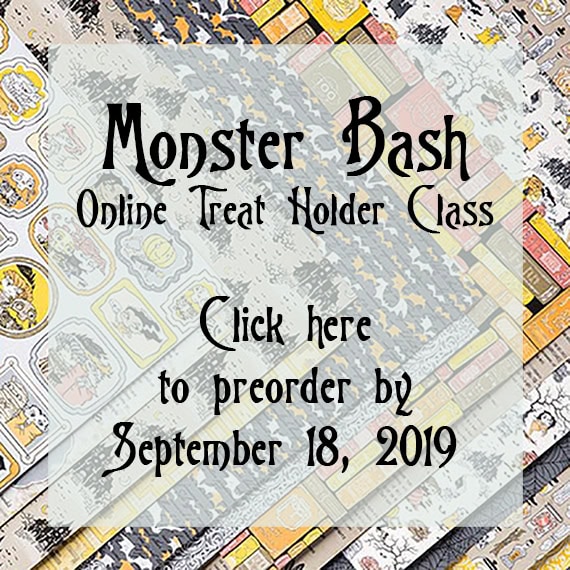
Preorder the Monster Bash Online Treat Holder Class by TOMORROW, September 18:
Make 6 adorable treat holders in the comfort of your own home!
2 each of 3 designs
Features the Monster Bash Suite on pages 52-54 of the 2019 Holiday Catalog
I’ve done the trimming and scoring for you!
You’ll receive the stamp set, dies, pre-cut kits, and Black Stampin’ Dimensionals.
Full detailed instructions
Limited spots available
Click on the image below for details and class options, or copy and paste this link into your browser: https://stampcandy.net/online-classes/monster-bash-treat-holder-class-preorder/
Gift Certificates are available in any U.S. dollar amount from me. Contact mefor details.
Have you shopped from me within the past year? Join my private VIP Facebook groupfor exclusive project tutorials and more!
Join my team and enjoy a 20% discount (or more) on all your purchases! You choose $125 in products and pay only $99, and get free shipping! No obligation! No selling required!
It’s time for the APPT April 2019 Blog Hop! This month’s kit is called Sentimental Rose, and includes all you need to make 9 beautiful cards AND a box to put them in. Be sure to hop around to all the stops. You don’t want to miss any of the great alternative projects you can make with this month’s kit.
S
Here’s what I made:
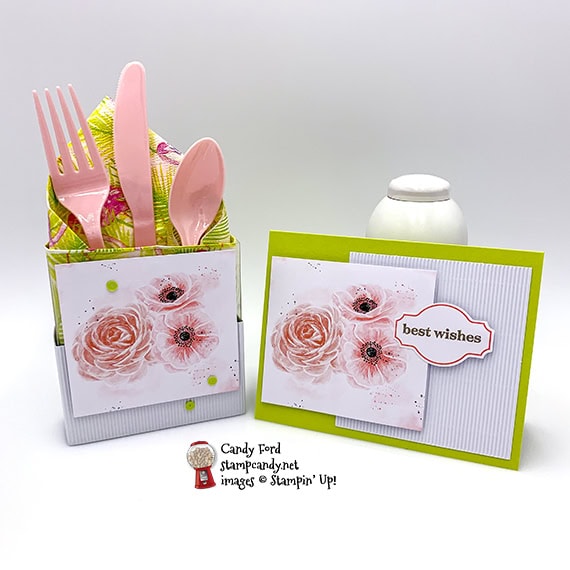
A flatware/napkin holder and a card for a wedding shower. Since these were the only napkins I had with pink in them, I took the color (Lemon Lime Twist) from them for the projects. The Lemon Lime Twist card base and the Gingham Gala Adhesive Backed sequins are the only things you see that didn’t come in the kit. (I put the sequins on the box, but forgot to put them on the card before I took the photo. Oops!)
S
Here’s what I did:
Cut and scored with my Stampin’ Trimmer:
Lemon Lime Twist card stock (CS) cut to 5-12″ x 8-1/2″, then scored in half at 4-1/4″
acrylic box from the kit cut down from 5-1/4″ long to 4″ long – just cut off one end of the box
Stamped with the Sentimental Rose stamp set:
sentiment in Gray Granite ink onto a die cut tag from the kit
Assembled the card:
burnished the fold in the card base with a Bone Folder
corrugated piece glued onto the front of the card base
printed piece from the kit adhered over the corrugated piece using Stampin’ Dimensionals
left half of sentiment glued onto the printed piece, and the right half adhered onto the corrugated piece using Stampin’ Dimensionals
3 Lemon Lime Twist sequins applied onto the card front (Oops! I forgot to put these on the card before I took the photos.)
Assembled the flatware holder:
burnished the folds in the cut down acrylic box with a Bone Folder
folded in the flaps on the bottom end to form the holder
long corrugated piece wrapped around the bottom of the holder and adhered the ends together with the attached peel and stick adhesive (This helps the holder stand up.) If you feel the need, you can put a couple of glue dots under the back of the corrugated piece to hold it to the acrylic box.
adhered a printed piece onto the corrugated piece and the acrylic holder using Stampin’ Dimensionals
3 Lemon Lime Twist sequins applied onto the front of the holder
napkin and flatware inserted into holder
S
Here’s the APPT April 2019 hop:
Here are today’s colors:
You can click on each one to see all the products that come in that color!
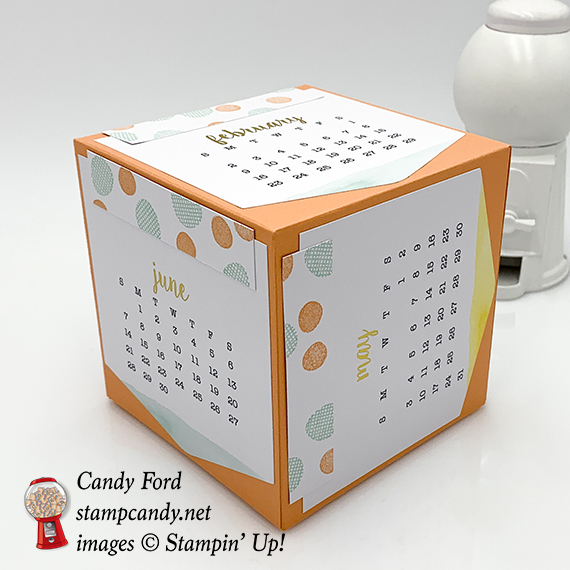
It’s time for the last A Paper Pumpkin Thing Blog Hop of the year! The December kit is called Day By Day and if featured a cute little calendar and a gift box it fits in. For my alternate projects I used some of the calendars to make birthday cards and some to make a calendar cube. I’ll send the cards to someone with a birthday or anniversary that month, and I’ll circle the date on the calendar – there’s a handy little circle stamp in the set just for this purpose! I’ve left the insides blank for now so I can stamp the appropriate sentiment in them later. I haven’t lined these yet either, but I’ll glue a piece of Whisper White card stock inside each one for the sentiment and handwritten note.
The kit makes an 18 month calendar: January 2019 – June 2020. You can make 3 cubes, 6 months each, or you can use some for cards. Get two kits and you can do both!
Here’s what I made:
I only got 3 cards made so far. For the first two I used only kit components on a card base. For the third one I also used a Gold Foil Sheet and some ribbon not in the kit.
The cube is 4″ x 4″ x 4″. I glued on the calendars going in all different directions.
Here you can see where the two boxes go together to make the cube.
Here’s what I did:
Cut and scored with my Stampin’ Trimmer:
12″ x 12″ Grapefruit Grove card stock (CS) scored at 4″ and 8″ in both directions
Grapefruit Grove CS cut to 11-7/8″ x 11-7/8″, then scored at 3-15/16″ from all four sides
Pool Party, Grapefruit Grove, and Gray Granite CS cut to 4-1/4″ x 11″, then scored in half at 5-1/2″
Gold Foil Sheet cut to 4″ x 5-1/4″
trimmed the sides off the sheets of white rectangular stickers (see below) – this gave me more stickers of the same length but different widths, some 1-1/8″ tall and some 3/4″ tall
trimmed some of the 1-1/8″ tall stickers to 3/4″ tall
trimmed the tops off the calendars for the cube and for one of the cards
Stamped with the Day By Day stamp set:
dots in Pool Party, Grapefruit Grove, and Gray Granite inks onto some of the stickers
Assembled the cards:
burnished the folds in the card bases with a Bone Folder
applied a stamped sticker onto two of the calendars, then glued them onto the front of the card bases
ran a 4″ piece of ribbon through the two holes and adhered the ends on the back
tied a 4″ piece of ribbon around the first piece of ribbon and trimmed the ends
adhered the first two calendars onto the fronts of the card bases using Stampin’ Dimensionals
gold foil layer glued onto the front of the third card base
calendar with the top trimmed away (to remove the holes) adhered onto the gold layer
a piece of Gray Granite ribbon adhered onto the calendar
a piece of gold ribbon adhered onto the Gray Granite ribbon
glued (or will glue) a 4″ x 5-1/4″ piece of Whisper White CS to the inside of each card base
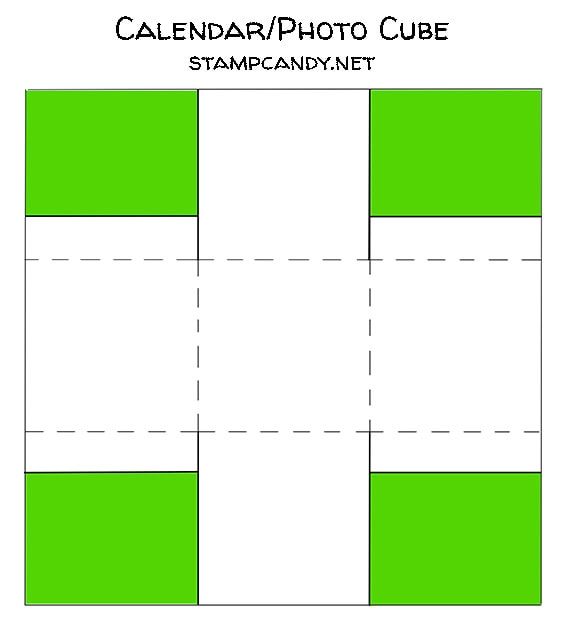
Assembled the cube:
burnished the folds in the two large Grapefruit Grove CS pieces with a Bone Folder
cut down one score line on each corner, only to the first score line it crosses
cut away most of the 4 corner panels (the green areas below) leaving a little for a tab
glued each tab to the inside of the adjacent side – this gave me two topless boxes
inserted the smaller box inside the larger box, open side first, and put a little adhesive just inside the seam where they met
glued the 6 calendars (I used January – June 2020) onto the 6 sides of the cube
applied a 3/4″ tall stamped sticker to each calendar
Here’s the hop:
Here are today’s colors:
You can click on each one to see all the products that come in that color!
Click on these images for more details and to purchase.
Oops! I realized the 1/8″ gold ribbon I used on the third card is retired. I substituted the 1/8″ gold cord below. Looks like I need to recheck my current products!
During the Year-End Closeout promotion, you can save on a selection of retiring and surplus items—while supplies last. Definitely place your orders sooner rather than later, because supplies are limited and the Year-End Closeout ends on January 2. After that, some of your favorite retiring items may be gone for good!
CLICK HERE to see all the Year-End Closeout items.
Here’s how to get your copy of the new catalogs:
Just click on this button and I’ll send you the new catalogs, along with a list of the bundles, the Designer Series Paper coordinating colors, and a handmade card!
Here’s how to shop 2019 Occasions/Sale-a-bration items now!
Become a Candy Heart!
Join my team and you can order the new products right now, instead of having to wait another month!
No selling required! I welcome Hobby Demos! (Hobby Demos join to get the discount for themselves.)
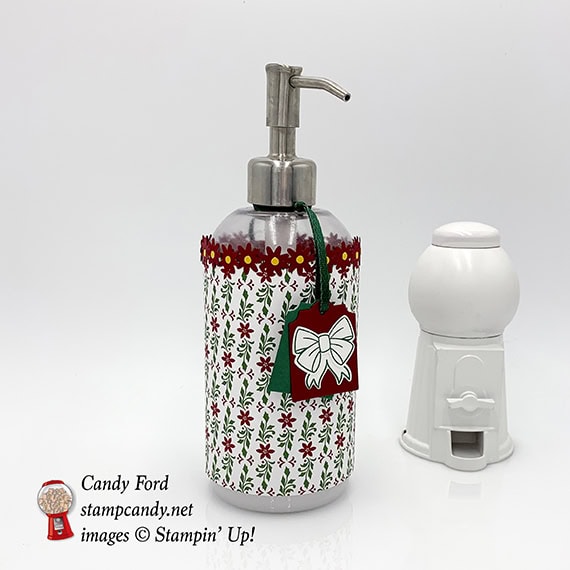
Need a really last minute gift? Wrap something ordinary, like a plain soap / lotion dispenser, in decorative paper and add a few embellishments, and you have a lovely and sensible gift that anyone can use. I used Dashing Along Designer Series Paper to wrap the dispenser. I used a new punch from the 2019 Occasions catalog (Bitty Blooms Punch Pack sneak peek!) for the little flowers around the top. The bow on the tag is from the Bring on the Presents bundle.
Here’s what I made:
Here’s what I did:
Cut and scored with my Stampin’ Trimmer:
Dashing Along Designer Series Paper (DSP) cut to 10″ x 4-1/2″
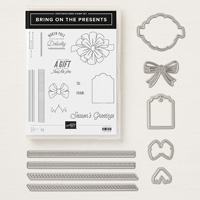
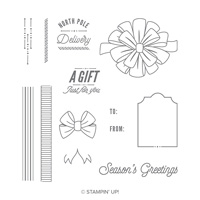
Stamped with the Bring on the Presents stamp set:
bow and ribbon ends in Shaded Spruce ink onto a scrap of Whisper White card stock (CS)
Die cut using the All the Presents Thinlits:
bow and ribbon ends
tags from a scrap of Shaded Spruce CS and a scrap of Cherry Cobbler CS
Cut using a punch from the Bitty Blooms Punch Pack:
20 flowers from a scrap of Cherry Cobbler CS
Cut using the 1/8″ Circle Punch:
20 pieces from a scrap of Crushed Curry CS
Assembled the card:
DSP adhered to the dispenser with Tear & Tape
Crushed Curry dots glued onto the Cherry Cobbler flowers
Cherry Cobbler flowers glued onto the top edge of the DSP
bow glued onto the Cherry Cobbler tag
both tags strung onto a piece of Shaded Spruce ribbon and tied onto the dispenser
Here are today’s colors:
You can click on each one to see all the products that come in that color!
The Year-End Closeout has officially begun! During this promotion, you will be able to save on a selection of retiring and surplus items—while supplies last. Definitely place your orders sooner rather than later, because supplies are limited and the Year-End Closeout ends on January 2. After that, some of your favorite retiring items may be gone for good!
CLICK HERE to see all the Year-End Closeout items.
Here’s how to get your copy of the new catalogs:
Just click on this button and I’ll send you the new catalogs, along with a list of the bundles, the Designer Series Paper coordinating colors, and a handmade card!
Here’s how to shop 2019 Occasions/Sale-a-bration items now!
Become a Candy Heart!
Join my team and you can order the new products right now, instead of having to wait another month!
No selling required! I welcome Hobby Demos! (Hobby Demos join to get the discount for themselves.)

 S
S