Jan 18, 2021 | Birthday, Cards, Fun Folds, Gallery |
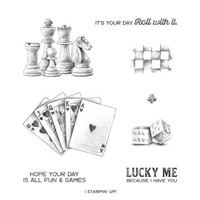
I used the Game On stamp set along with the new Well Suited Designer Series Paper and Matte Black Dots to make today’s card. It’s meant to be a birthday card, but could be used to celebrate any special day, like graduation, promotion, etc.
If you are reading this in email, some photos may appear blurry, or may not appear at all. Please click here to see the post on my blog.
S On On On On
Here’s what I made:


S
Here’s what I did:
Cut and scored with my paper trimmer:
- Basic Gray card stock (CS) cut to 4-1/4″ x 7″, then scored at 5-1/2″
- Basic Gray CS cut to 4-1/4″ x 1-1/2″ (2 pieces)
- Well Suited Designer Series Paper (DSP) layers cut to 4″ x 1-1/4″ (2 pieces)
- Basic Black CS layers cut to 4-1/8″ x 1-3/8″ (2 pieces)
- Well Suited Designer Series Paper (DSP) layer cut to 1-1/4″ x 2-1/4″
- Basic Black CS layer cut to 1-3/8″ x 2-2/3″
- strip of Basic White CS cut to 3-1/4″ x 1/2″ for the sentiment
- Basic White CS cut to 4″ x 5-1/4″ for the inside of the card base
Stamped with the Game On stamp set:
- sentiment in Tuxedo Black Memento ink onto the Basic White CS strip
- dice in Tuxedo Black Memento ink onto the Basic White CS for the inside, so they would show through the empty space in the card front (I found the easiest thing to do was to assemble the card front, then lightly trace the open area with a pencil, so I could tell exactly where to stamp the dice. Then I erased the pencil lines.)
Assembled the card:
- burnished the fold in the card base with a Bone Folder
- one end of a Basic Gray CS piece glued onto the front of the 1-1/2″ section of the card base, and the other end glued onto the front of the other Basic Gray CS piece, so that the second piece is even with the card base along the bottom – the ends of the vertical piece should overlap the other pieces by about 7/8″
- Basic Black CS layers glued onto the card front as shown below, with the smallest piece on the exposed part of the vertical piece
- 3 DSP layers glued onto the corresponding Basic Black CS layers
- sentiment glued onto the bottom DSP layer
- 3 Matte Black Dots applied onto the card front near the sentiment using my Take Your Pick tool
- Whisper White CS glued onto the inside of the card base, so the dice show through the opening in the card front

S
Here are today’s colors:
You can click on each one to see all the products that come in that color!
S
Here’s what I used:
Click on these images for more details and to purchase. If you are reading this post in email, the product images may not show up. Please click here to see the post on my blog.
Supply List. <— Click for a clickable and printable list of the products!
S
Basic White is here!
The facility that manufactures Whisper White paper is closing due to COVID-19. But don’t fret. The new Basic White products are here!
S
Here are some helpful links:
S
Thanks for stopping by today, and Sweet Stamping!

Jan 14, 2021 | Cards, Fun Folds, Gallery |
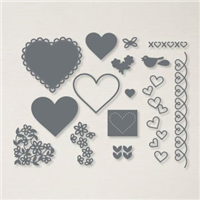
I used the Game On stamp set, Many Hearts Dies, and Well Suited Designer Series Paper to make today’s easel card. Easel cards are often made to display a small calendar. I chose to make one that the recipient can use to remind his/herself, not of the date, but of how much someone cares for them.
If you are reading this in email, some photos may appear blurry, or may not appear at all. Please click here to see the post on my blog.
S Game Game Game Game
Here’s what I made:
This is what it looks like closed: S
S
Here’s what I did:
Cut and scored with my paper trimmer:
- Pacific Point card stock (CS) cut to 4-1/4″ x 11″, then scored in half at 5-1/2″, and at 8-1/4′
- Well Suited Designer Series Paper (DSP) layers cut to 4″ x 2-1/2″ (2 pieces)
- Basic White CS cut to 4″ x 5-1/4″ for the inside of the card base
Stamped with the Game On stamp set:
- playing cards in Tuxedo Black Memento ink onto a scrap of Basic White CS
- sentiment in Pacific Point onto the Basic White CS for the inside, near the bottom
Cut using the Many Hearts Dies:
- small heart from a scrap of Poppy Parade CS
Cut using Paper Snips:
Assembled the card:
- burnished the folds in the card base with a Bone Folder
- DSP layers glued onto the front of the card base, one on the top half and one on the bottom half
- playing cards glued onto the bottom DSP layer
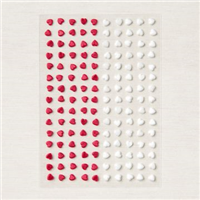
- 5 red Resin Hearts applied onto the playing cards using my Take Your Pick tool
- Basic White CS glued onto the inside of the card base
- die cut heart adhered onto the Basic White CS, just above the sentiment, using a Mini Stampin’ Dimensional

S
Here are today’s colors:
You can click on each one to see all the products that come in that color!
S
Here’s what I used:
Click on these images for more details and to purchase. If you are reading this post in email, the product images may not show up. Please click here to see the post on my blog.
Supply List. <— Click for a clickable and printable list of the products!
S
Here’s some news: Basic White is here!
The facility that manufactures Whisper White paper is closing due to COVID-19. But don’t fret. The new Basic White products are here!
S
Here’s the new catalog:
Click the image below to request your January-June 2021 Mini Catalog and Sale-a-bration Brochure:


S
Here are some helpful links:
S
Thanks for stopping by today, and Sweet Stamping!
Oct 20, 2020 | Cards, Christmas, Fun Folds, Gallery |
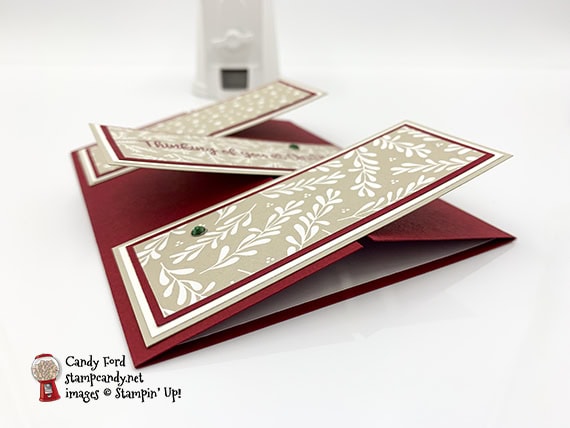
Classic Christmas card, anyone? Today’s card offers another sneak peek of the some of the products in the Quite Curvy Variety Bundle that will be available to purchase 3 November – 4 January. I used the Classic Christmas Designer Series Paper and Curvy Christmas stamp set to create a fancy gate-fold card.
If you are reading this in email, some photos may appear blurry, or may not appear at all. Please click here to see the post on my blog.
S Classic Christmas Classic Christmas Classic Christmas Classic Christmas
Here’s my Curvy Classic Christmas Card:


 S
S
Here’s what I did:
Cut and scored with my paper trimmer:
- Cherry Cobbler card stock (CS) cut to 8-1/2″ x 5-1/2″, then scored at 2-1/8″ and 6-3/8″
- Classic Christmas Designer Series Paper (DSP) layers cut to 3-5/8″ x 1-5/16″ (3 pieces)
- Cherry Cobbler CS layer cut to 3-3/4″ x 1-7/16″ (3 pieces)
- Whisper White CS layer cut to 3-7/8″ x 1-9/16″ (3 pieces)
- Sahara Sand CS layer cut to 4” x 1-11/16” (3 pieces)
- Whisper White CS cut to 4″ x 5-1/4″ for the inside of the card base
Stamped with the Curvy Christmas stamp set:
- sentiment in Cherry Cobbler ink onto one of the DSP layers
- twigs in Shaded Spruce ink, and stars in Cherry Cobbler ink, onto the Whisper White CS for the inside
Assembled the card:
- burnished the folds in the card base with a Bone Folder
- DSP layers glued onto the Cherry Cobbler CS layers
- Cherry Cobbler CS layers glued onto the Whisper White CS layers
- Whisper White CS layers glued onto the Sahara Sand CS layers
- the three layer stacks lined up evenly onto the front of the card base – there should be 1/8″ around the edges and 1/8″ between the stacks
- top and bottom stacks glued (left side only) onto the left side of the card front
- center stack glued (right side only) onto the right side of the card front
- 3 Shaded Spruce rhinestones applied onto the DSP layers using my Take Your Pick tool
- Whisper White CS glued onto the inside of the card base
S
Here are today’s colors:
You can click on each one to see all the products that come in that color!
S
Here’s what I used:
Click on these images for more details and to purchase. If you are reading this post in email, the product images may not show up. Please click here to see the post on my blog.
Supply List. <— Click for a clickable and printable list of the products!
S
Designer Series Paper Sale!
Click the image to see the sale:
S
Here are some helpful links:
S
Thanks for stopping by today, and Sweet Stamping!
Oct 2, 2020 | Cards, Fun Folds, Gallery |
I used some products from the Playing With Patterns Suite Collection along with the Happiest of Birthdays stamp set and the Stitched So Sweetly Dies to create today’s fun pop up birthday card.
If you are reading this in email, some photos may appear blurry, or may not appear at all. Please click here to see the post on my blog.
S playing with patterns playing with patterns playing with patterns playing with patterns
Here’s what I made:
The Night of Navy card stock and ink look almost black in these photos, but they’re much bluer in person.

S
Here’s what I did:
Cut and scored with my paper trimmer:
- Night of Navy card stock (CS) cut to 5-1/2″ x 8-1/2″, then scored in half at 4-1/4″
- Purple Posy CS layer cut to 3-3/4″ x 5″
- Playing With Patterns Designer Series Paper (DSP) layer cut to 3-1/2″ x 4-3/4″
- Whisper White Thick CS cut to 8-1/4″ x 5-1/4″ for the insert, then cut and scored according to the diagram below
- first DSP pattern for the inside cut to 3″ x 1-1/2″, and scored in half at 1-1/2″
- second DSP pattern for the inside cut to 2-1/2″ x 1-1/4″, and scored in half at 1-1/4″
- third DSP pattern for the inside cut to 2″ x 1″, and scored in half at 1″
- Click on the diagram to see it larger:

Stamped with the Happiest of Birthdays stamp set:
- outer sentiment in Night of Navy ink onto a scrap of Whisper White Thick CS
Stamped with the Pattern Play stamp set:
- inner sentiment in Night of Navy ink onto the Whisper White Thick insert
- stars in Coastal Cabana and Highland Heather inks onto the Whisper White Thick insert (I stamped off the Highland Heather to make it lighter.)
Cut using the Stitched So Sweetly Dies:
Assembled the card:
- burnished the fold in the card base with a Bone Folder
- burnished all the folds in the insert with a Bone Folder
- die cut sentiment glued onto the DSP layer
- DSP layer glued onto the Purple Posy CS layer
- Purple Posy CS layer glued onto the front of the card base
- remaining DSP pieces glued onto their corresponding “boxes” on the insert
- ribbon adhered onto each side of each box as shown, using Stampin’ Seal +, and wrapped around to the back
- ribbon tied into a small bow and adhered above the top box using a Mini Glue Dot
- insert glued onto the inside of the card base, applying glue everywhere except to the boxes that will fold out
S
Here are today’s main colors:
You can click on each one to see all the products that come in that color!
S
Here’s what I used:
Click on these images for more details and to purchase. If you are reading this post in email, the product images may not show up. Please click here to see the post on my blog.
Supply List. <— Click for a clickable and printable list of the products!
S
Designer Series Paper Sale!
S
Here are some helpful links:
S
Thanks for stopping by today, and Sweet Stamping!
Sep 25, 2020 | Autumn, Cards, Fun Folds, Gallery, Halloween |
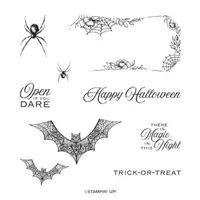
A couple days ago I hosted a Mystery Stamping Party on Facebook. Today I’m sharing the card that we made. I used products from the Magic in This Night Suite Collection to make this spooky by elegant fancy gate fold card.
If you’re interested in participating in my Mystery Stamping Parties, you can join the Facebook group HERE. I usually host one per month. They are FREE!
If you are reading this in email, some photos may appear blurry, or may not appear at all. Please click here to see the post on my blog.
S mystery mystery mystery mystery
Today is the Deadline to sign up for my World Card Making Day Bingo Party!

- Join me for an afternoon of Bingo, cardmaking, prizes, and fun!
- October 3 at 2:00 pm ET
- See details and register HERE by September 25
- $25 (extra Bingo cards available for $5 each)
- Tell your friends! The more people who register, the bigger the prizes!
S
Here’s my Mystery card:


S
Here’s what I did:
Cut and scored with my paper trimmer:
- Basic Gray card stock (CS) cut to 11″ x 4-1/4″, then scored at 2-3/4″ and 8-1/4″
- Basic Black CS layers cut to 5-1/4″ x 1-7/8″ (2 pieces)
- Magic in This Night Designer Series Paper (DSP) layers cut to 5″ x 1-5/8″ (2 pieces)
- Basic Black CS cut to 3-1/8″ x 3/4″ for the sentiment
- Smoky Slate cut to 5-1/4″ x 4″ for the inside of the card base
Stamped with the Hallows Night Magic stamp set:
- sentiment in Versamark ink onto the small piece of Basic Black CS, then heat embossed in white
- bat in Tuxedo Black Memento ink onto the Smoky Slate CS
Assembled the card:
- burnished the folds in the card base with a Bone Folder
- DSP layer glued onto the Basic Black CS layers
- Basic Black CS layers glued onto the front of the card base: left half of the bottom one glued onto the left side of the card base, and the right half of the top one glued onto the right side of the card base
- sentiment glued onto the bottom DSP layer
- 3 Rhinestone Basic Jewels applied around the sentiment using the pointy end of my Take Your Pick tool
- Smoky Slate CS glued onto the inside of the card base
S
Here are today’s colors:
You can click on each one to see all the products that come in that color!
S
Here’s what I used:
Click on these images for more details and to purchase. If you are reading this post in email, the product images may not show up. Please click here to see the post on my blog.
Supply List. <— Click for a clickable and printable list of the products!
S
Two ways to save in September!
Buy the Starter Kit and receive even more! It’s already the best deal: $99 for $125 in product of your choice plus Free shipping! In September you will also receive the Queen Anne’s Lace stamp set, the So Much Love stamp set, Rhinestone Basic Jewels, and 16 precut card kits! Wow! This is the perfect time to work on your wish list of Stampin’ Up! products! CLICK HERE for more details.

Buy the new Stampin’ Cut & Emboss Machine (standard size) from me by September 30 and I will give you a Magnetic Cutting Plate FREE! You’ll save almost $30! CLICK HERE for more details and to order.

S
Here are some helpful links:
S
Thanks for stopping by today, and Sweet Stamping!
Sep 21, 2020 | Cards, Christmas, Fun Folds, Gallery, Holiday |
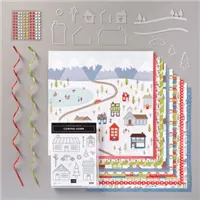
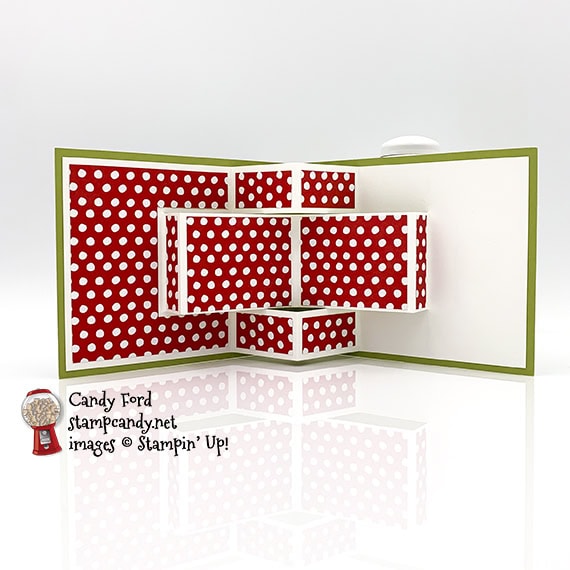
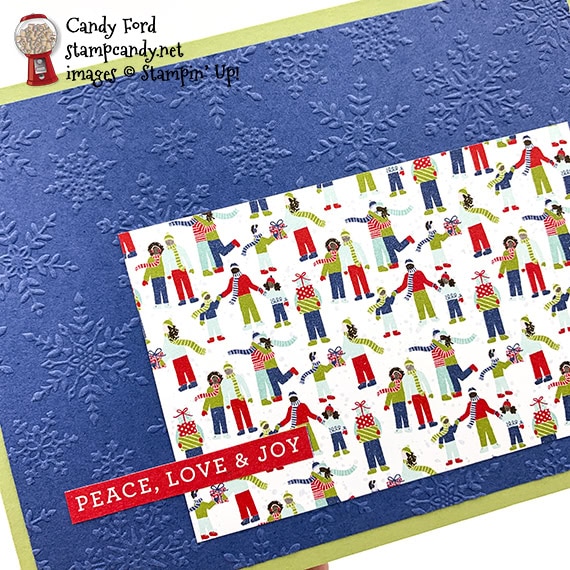
Today I’m sharing another 3D Pop Up Card. When my some members of my Candy Hearts team saw the one I posted last week, which you can see here, they requested we make one at our next team meeting, which was yesterday. For today’s card, we used products from the Trimming the Town Suite: Trimming the Town Designer Series Paper and Winter Snow Embossing Folder.
If you are reading this in email, some photos may appear blurry, or may not appear at all. Please click here to see the post on my blog.
S 3D Pop Up Card 3D Pop Up Card 3D Pop Up Card 3D Pop Up Card
Here’s what I made:
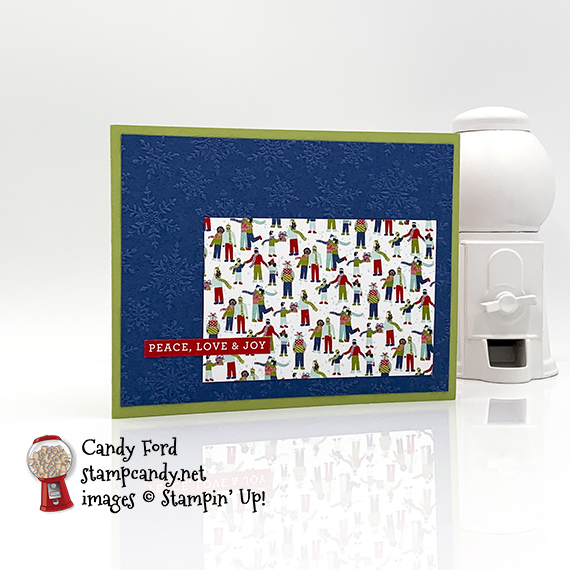
Here you can really see the beautiful and dainty embossed snowflakes:
S
Here’s what I did:
Cut and scored with my paper trimmer:
- Pear Pizzazz card stock (CS) cut to 11″ x 4-1/4″, then scored in half at 5-1/2″
- Misty Moonlight CS layer cut to 5-1/4″ x 4″
- Trimming The Town Designer Series Paper (DSP) layer cut to 3-3/4″ x 2-1/2″ (people)
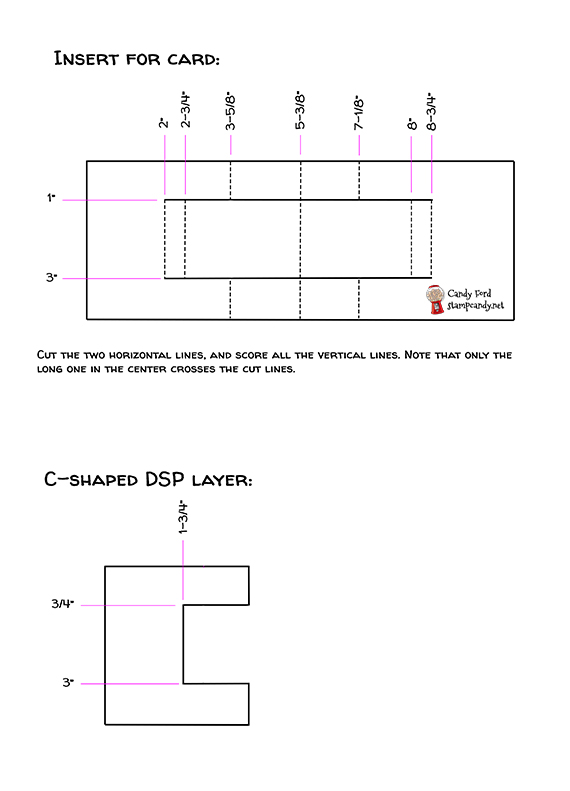
- Whisper White Thick CS cut to 10-3/4″ x 4″, then cut and scored according to the diagram below
- DSP (polka dots) cut to 2-3/8″ x 1-3/4″ (2 pieces), to 1-1/2″ x 3/4″ (4 pieces), and to 1/2″ x 1-3/4″ (2 pieces)
- DSP (polka dots) cut to 3-3/8″ x 3-3/4″ (1 piece) then cut into a C shape according to the diagram below
Cut using Paper Snips:
- sentiment from a piece of DSP
Embossed using the Winter Snow Embossing Folder:
Assembled the 3D Pop Up Card:
- burnished the fold in the card base with a Bone Folder
- embossed Misty Moonlight CS layer glued onto the front of the card base
- DSP layer (people) glued onto the Misty Moonlight CS layer
- sentiment glued onto the card front
- burnished all the score lines in the Whisper White Thick CS insert with a Bone Folder
- center score line of the Whisper White Thick CS lined up with the score line in the card base, then the C-shaped areas at both ends glued onto the inside of the card base
- polka dot DSP pieces glued onto their corresponding scored areas of the Whisper White Thick CS
S
Here are today’s main colors:
You can click on each one to see all the products that come in that color!
S
Here’s what I used:
Click on these images for more details and to purchase. If you are reading this post in email, the product images may not show up. Please click here to see the post on my blog.
Supply List. <— Click for a clickable and printable list of the products!
S
Two ways to save in September!
Buy the Starter Kit and receive even more! It’s already the best deal: $99 for $125 in product of your choice plus Free shipping! In September you will also receive the Queen Anne’s Lace stamp set, the So Much Love stamp set, Rhinestone Basic Jewels, and 16 precut card kits! Wow! This is the perfect time to work on your wish list of Stampin’ Up! products! CLICK HERE for more details.
Buy the new Stampin’ Cut & Emboss Machine (standard size) from me by September 30 and I will give you a Magnetic Cutting Plate FREE! You’ll save almost $30! CLICK HERE for more details and to order.
S
Mystery Stamping Party!

Go ahead and click the image above to join the Facebook group now. A few days before the party I will post what you will need to complete the mystery card. On September 23 at 8:00pm ET, I will begin posting clues you can follow to create the card. We’ll also have games and prizes! And it’s all FREE!
S
World Card Making Day 2020:
- Join me for an afternoon of Bingo, cardmaking, prizes, and fun!
- October 3 at 2:00 pm ET
- See details and register HERE by September 25
- $25 (extra Bingo cards available for $5 each)
- Tell your friends! The more people who register, the bigger the prizes!
S
Here are some helpful links:
S
Thanks for stopping by today, and Sweet Stamping!